Menu
Joe, June and Mae
  • Home
    • Retail Partners
  • Shop
    • All Patterns
    • Animals
    • #BLM support
    • Beach/ Boats/ Nautical
    • Baby
    • Chinese New Year
    • Christmas
    • Fairytale
    • Flowers and Trees
    • Food/ Bakery/ Drinks
    • Halloween
    • Let the good times roll
    • Oktoberfest
    • Quilted items
    • Spring and Easter
    • Viva la Frida/ Dia de los Muertos
    • Valentine's Day
    • Mixed pattern
  • About
  • Blog
  • Publications
  • Etsy
  • News

How to sew the cutest dish towels ever... free pattern!

19/12/2020

2 Comments

 
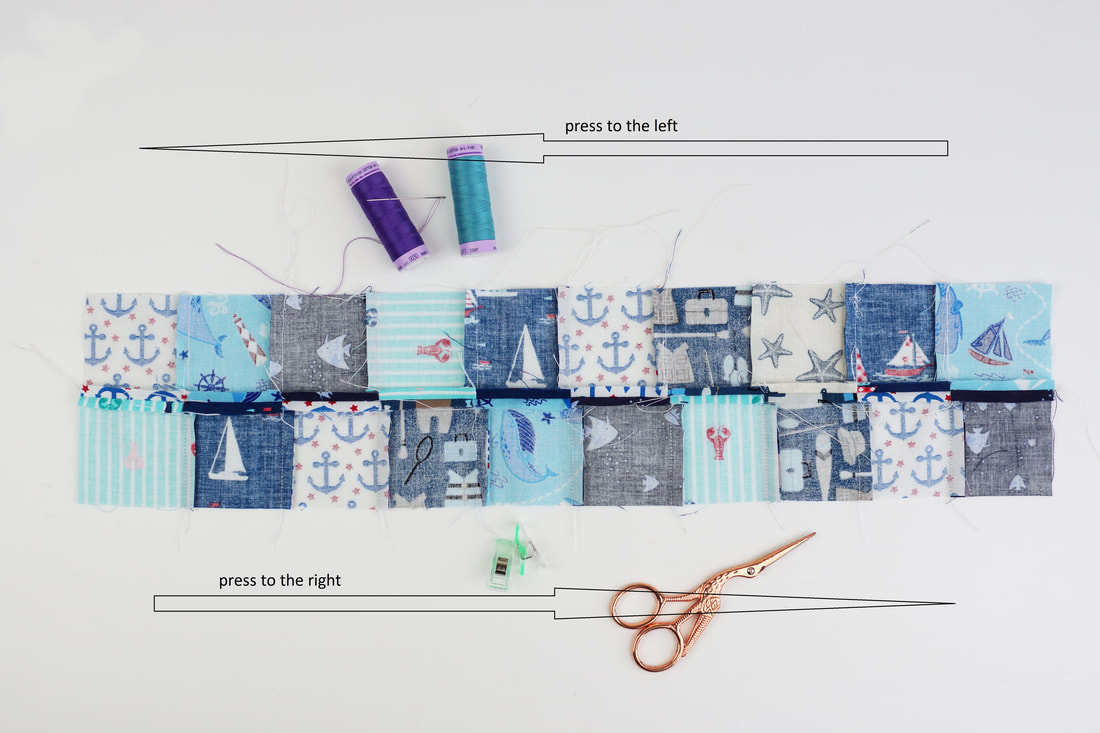
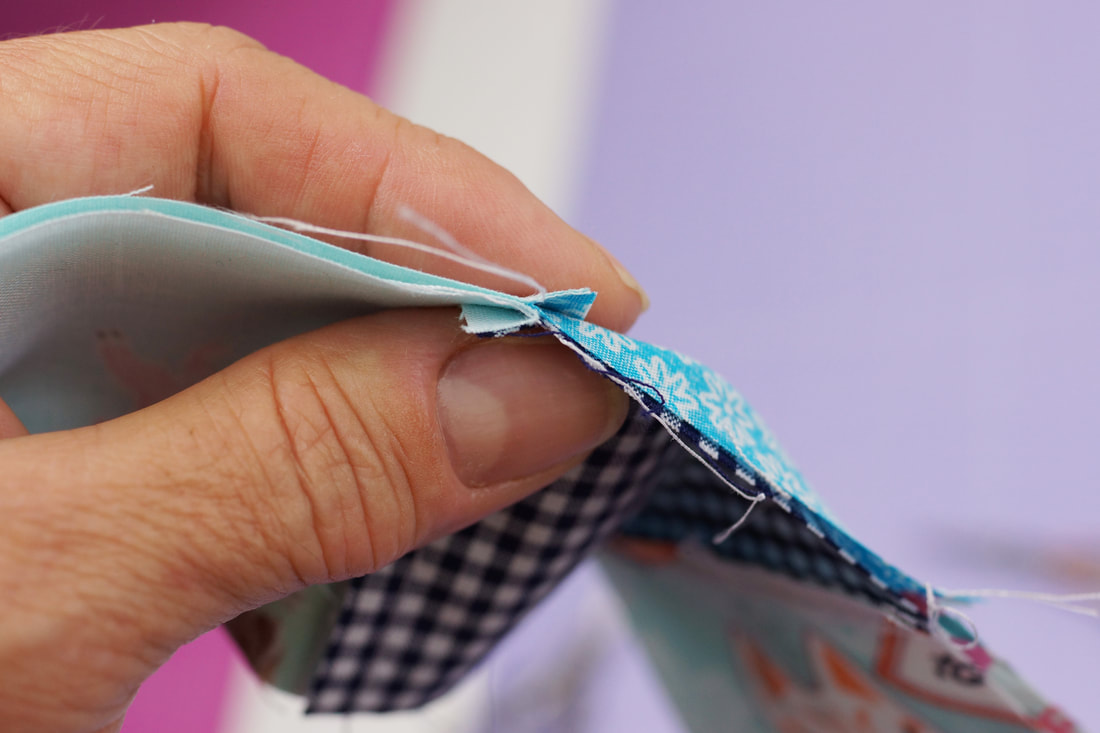
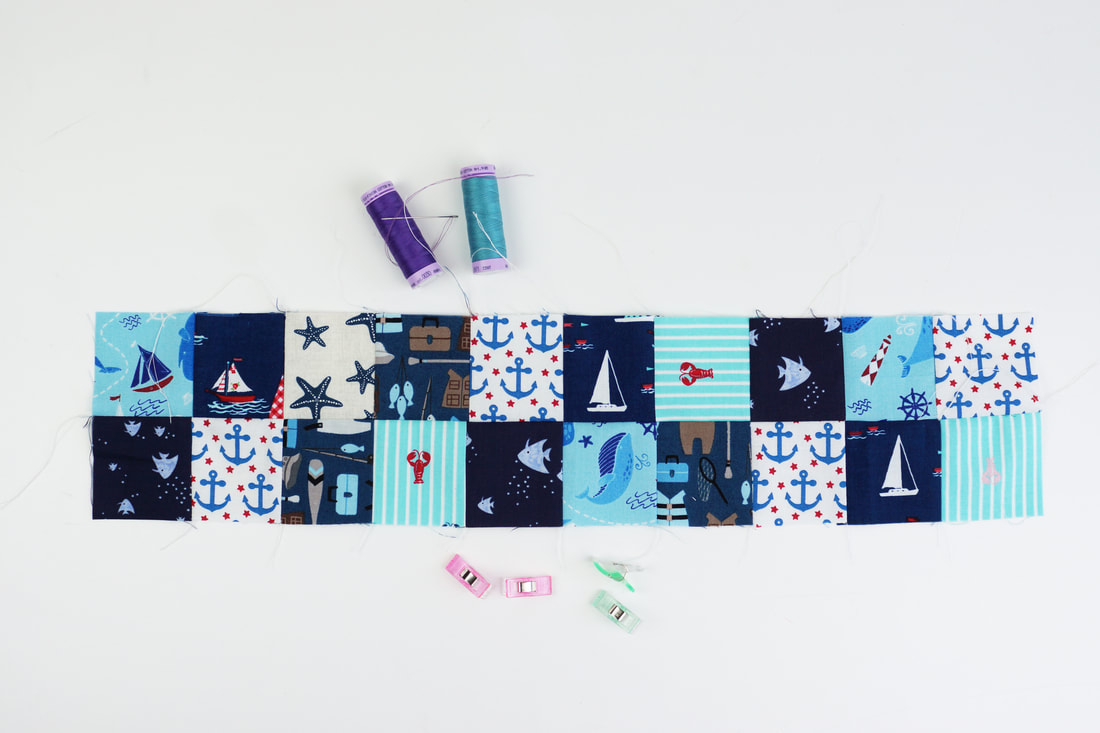
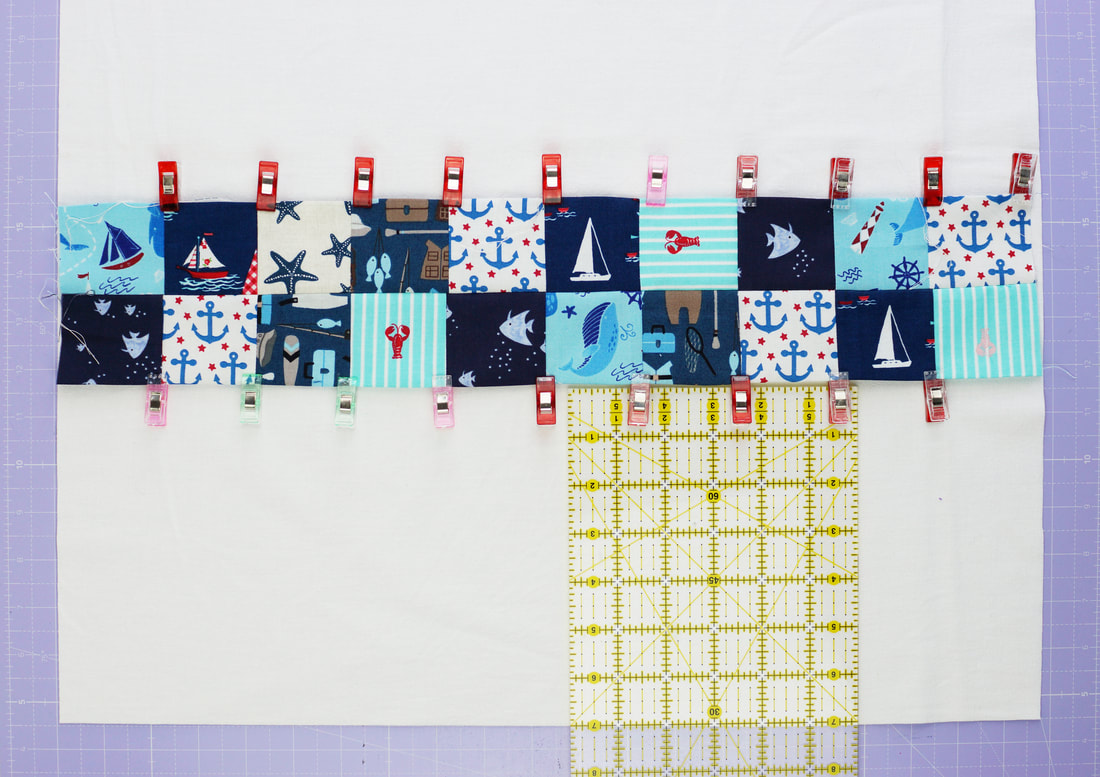
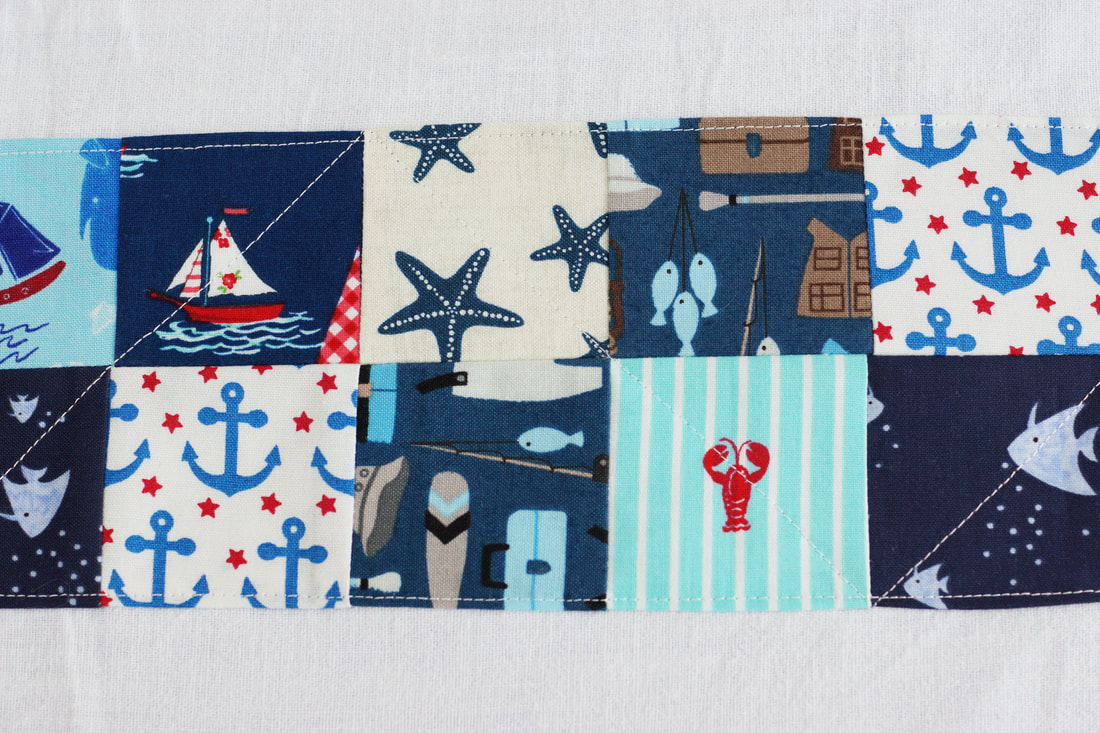
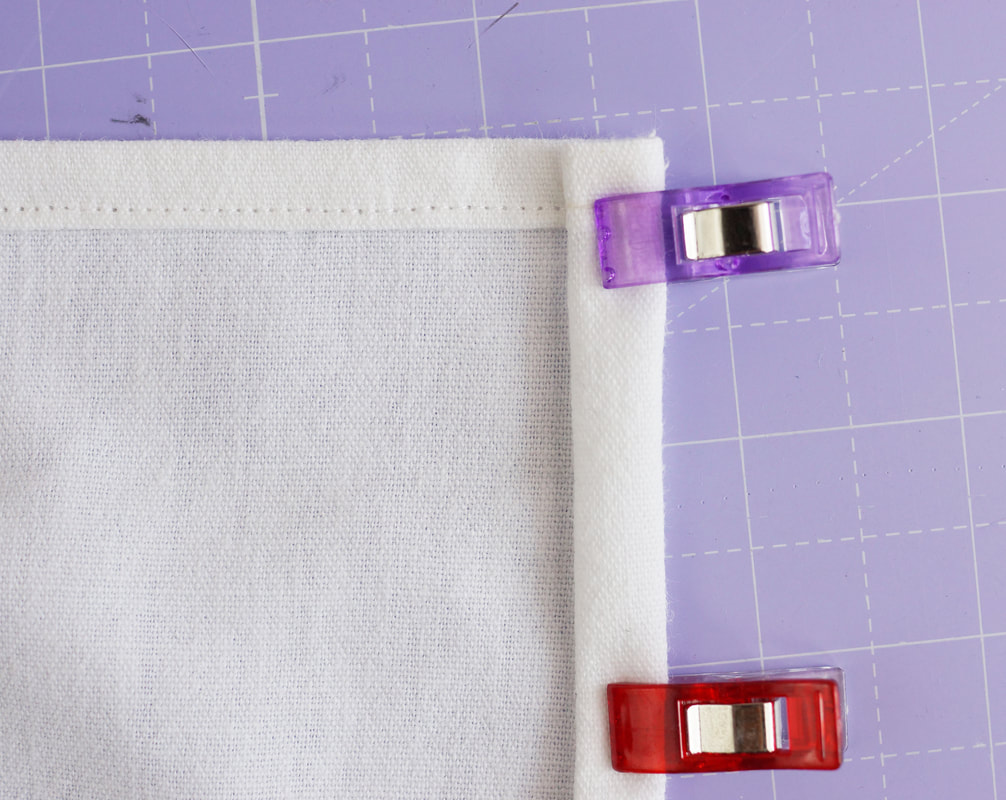
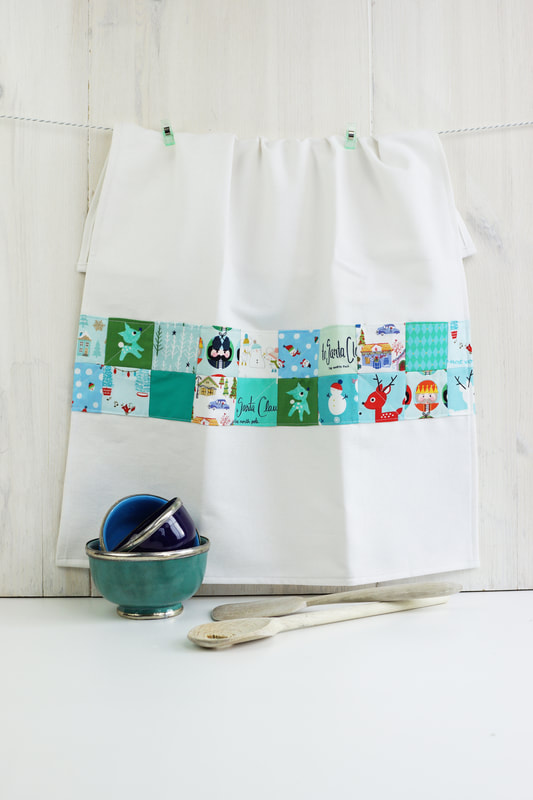
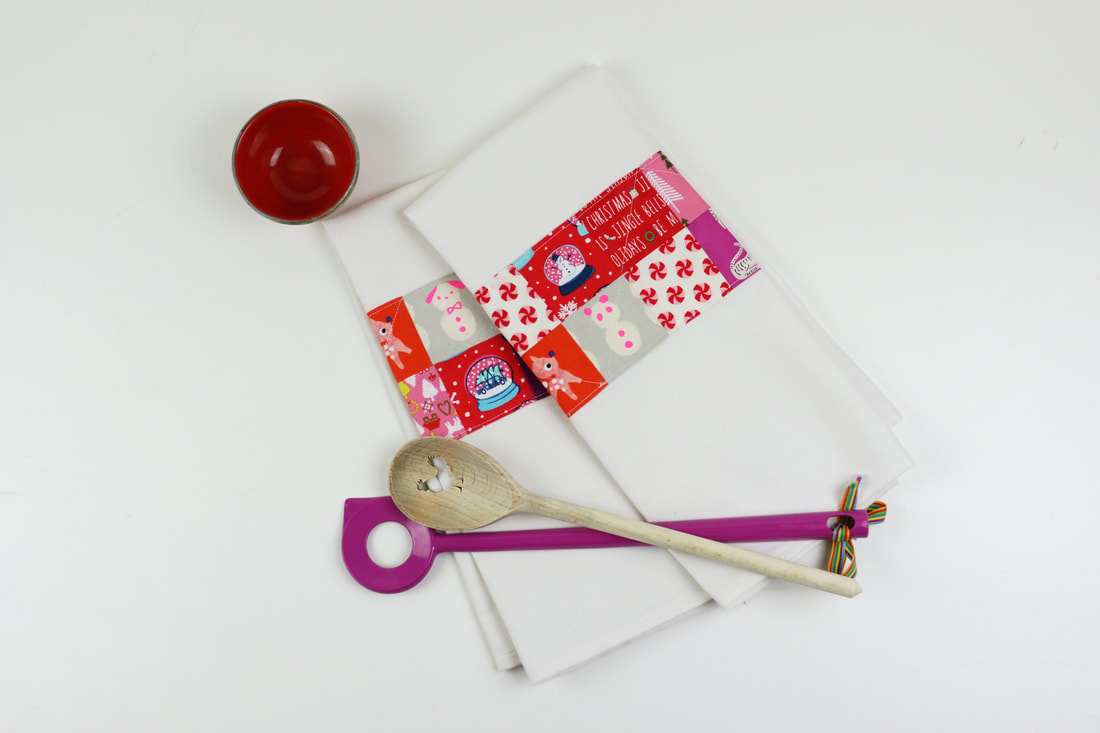
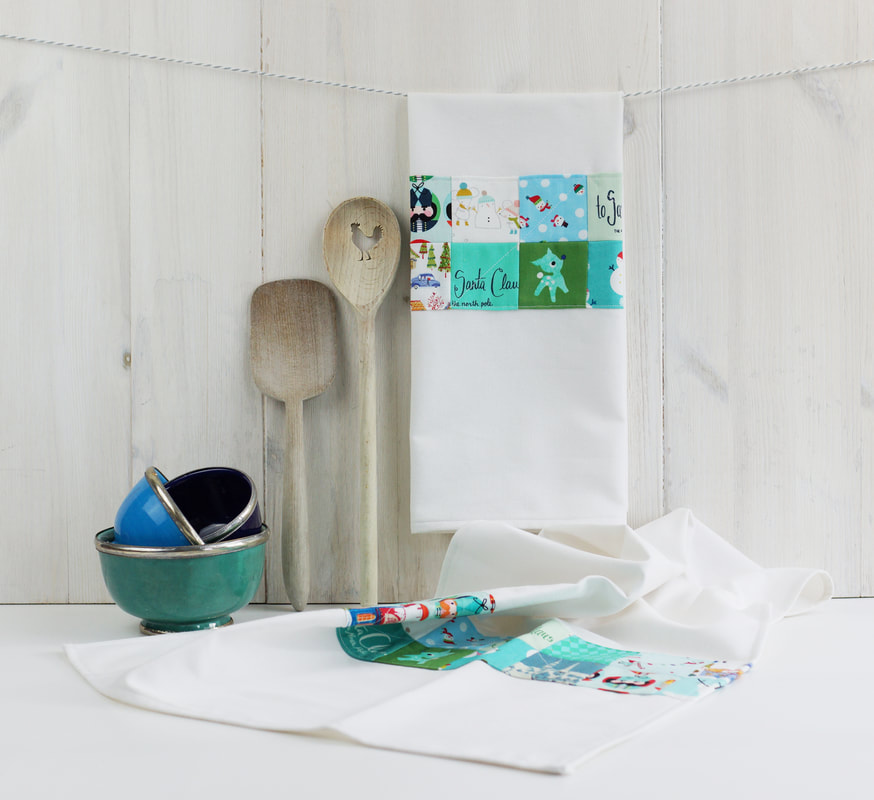
You know I love recycling and reusing. And you know I looove recycling and reusing fabric.
I roam through flea markets, garage sales, second hand and thrift stores and almost always find some pre-loved piece of fabric.
fabric scrap dish towel
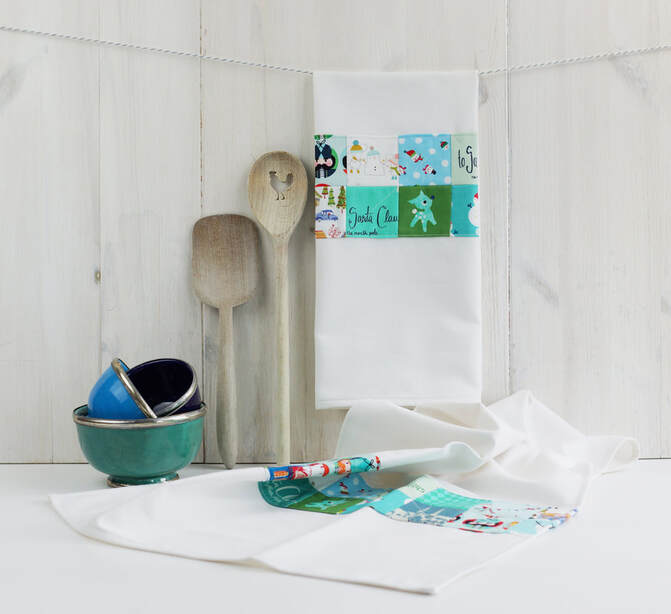
#dryinstyletowel
And I always buy old fashioned flat sheets, they're most often made of really thick cotton, or a cotton/linen mix, which is absolutely perfect for all sorts of sewing projects.
Especially dish cloths or napkins, but I also use them in quilts, key fobs, pouches and much more.
I wrote a whole blog on fabric recycling in case you want to know more.

Today I want to show you how to make the cutest dish towels with recycled cotton sheets and left over fabric scraps.

Materials/fabrics needed for 2 dish towels:
- 2 pieces of white fabric ( I use cotton table cloth or flat sheets for this, they're pre-washed so many times, that they work perfectly as dish cloths as they dry dishes very nicely) 20.5"x 27".
- 40 pieces of 2.5"x 2.5" fabric squares.
- 2 strips of fabric 2"x 5" for the hanging tab
materials for sewing dishtowel
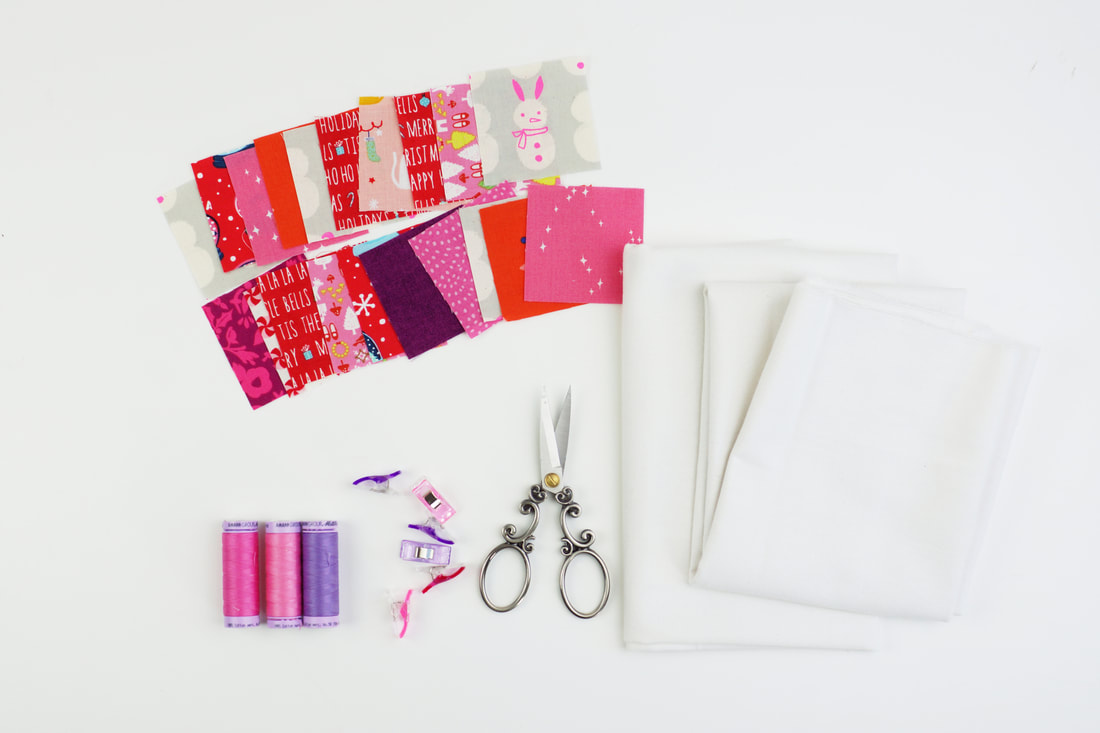
materials needed for #dryinstyletowel
Sewing the dish towels:
1.
Cut your fabrics as mentioned above.
2. Sew your fabric squares into 4 strips of 10 squares each ( two strips per towel)
3. Press your seam allowances.
You can either seperate your seam allowances and press them each seperatly,
or press the seam allowances in opposite directions before joining your
fabric square strips. This is really easy and quick. (photo 1)
You press one strip in one direction and the other in the opposite direction,
this will help with nesting your seams and having accurate corners and matching points.
The seams sort of fit together automatically ( photo 2).
You end up with a perfectly flat fabric square panel. ( photo 3)

press seam allowance in opposite directions
nesting seam allowances
nice and flat 'square panel'
4. Fold over the long raw edges of your square panel 1/4" and press again
then pin or clip in place.
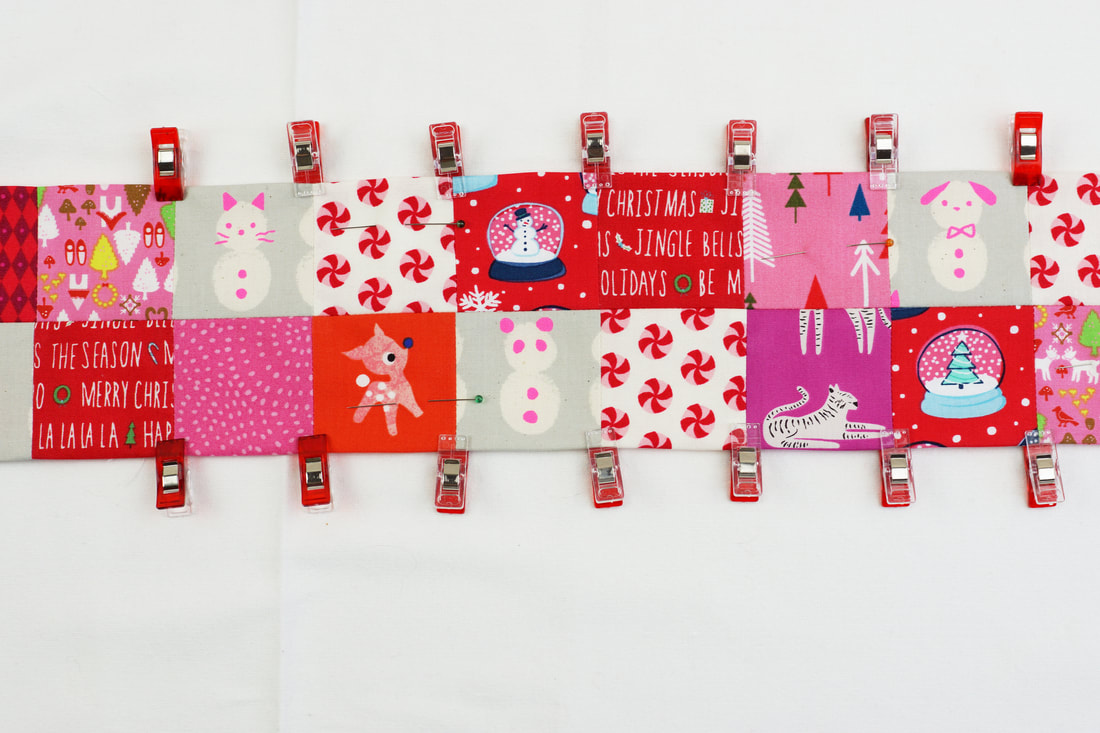
pin 'square panel' in place
5. Place this panel on one of your white fabric pieces at 7", mesured from the bottom raw edge of your kitchen towel and pin in place.
6. Stich this panel in place with a small seam allowance. I also added some diagonal seams.
position square panel at 7" from bottom edge
squares stiched in place
7. Sewing the hanging tab for the tea towel:
- Fold the 2"x 5" strip in half lengthwise and press. Fold in 1/2" seam allowance on each long raw edge and press again.
- Stitch with small seam allowance.
- Fold the tab in half and clip in place at the center of the back of your kitchen towel top edge.

8. Fold over the raw edges of your dish towel 3/8" twice and pin or clip in place.
I did just simple corners on these tea towels, but if you want to get really fancy you could do mitered corners as well.
hanging tab at the center of top edge
regular corners
regular corners
9. To finish stitch all the way around your kitchen towel.
What do you think about these kitchen towels? Don't you agree they're ...... :-)?
Picture
Now I cant wait to see all of your tea towel versions...
use #dryinstyletowel on social media, so I can find your makes .... happy sewing.

Ingrid xx

2 Comments

How to use small fabric scraps?

14/12/2020

0 Comments

 
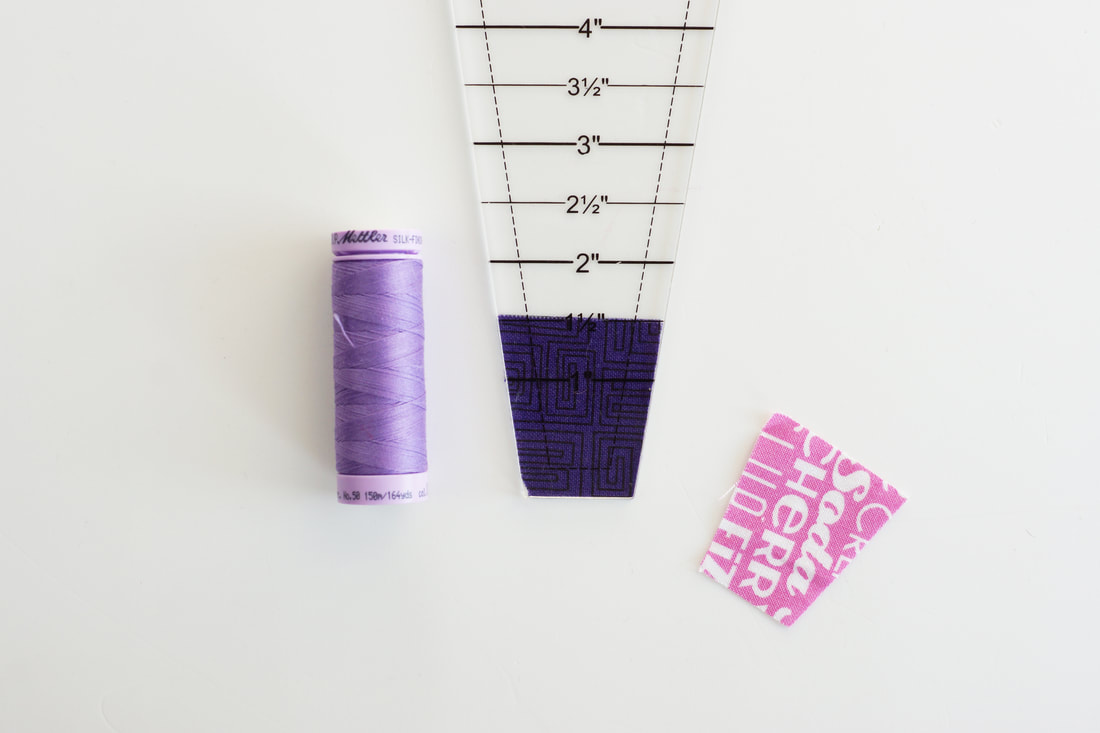
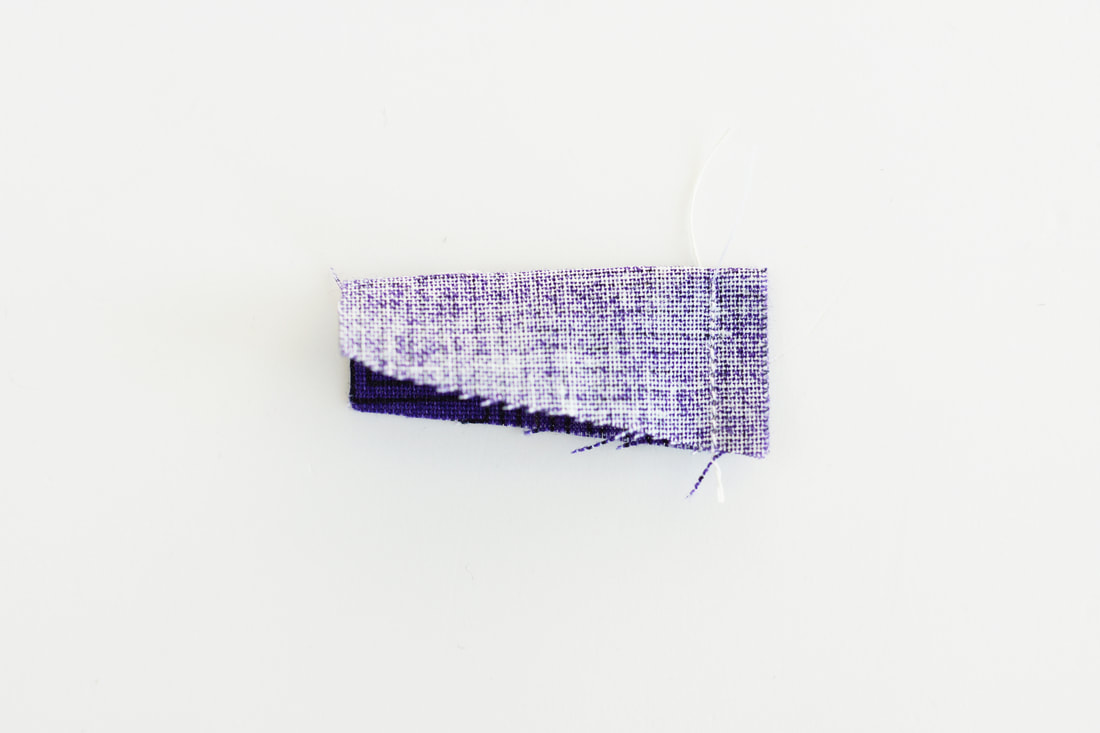
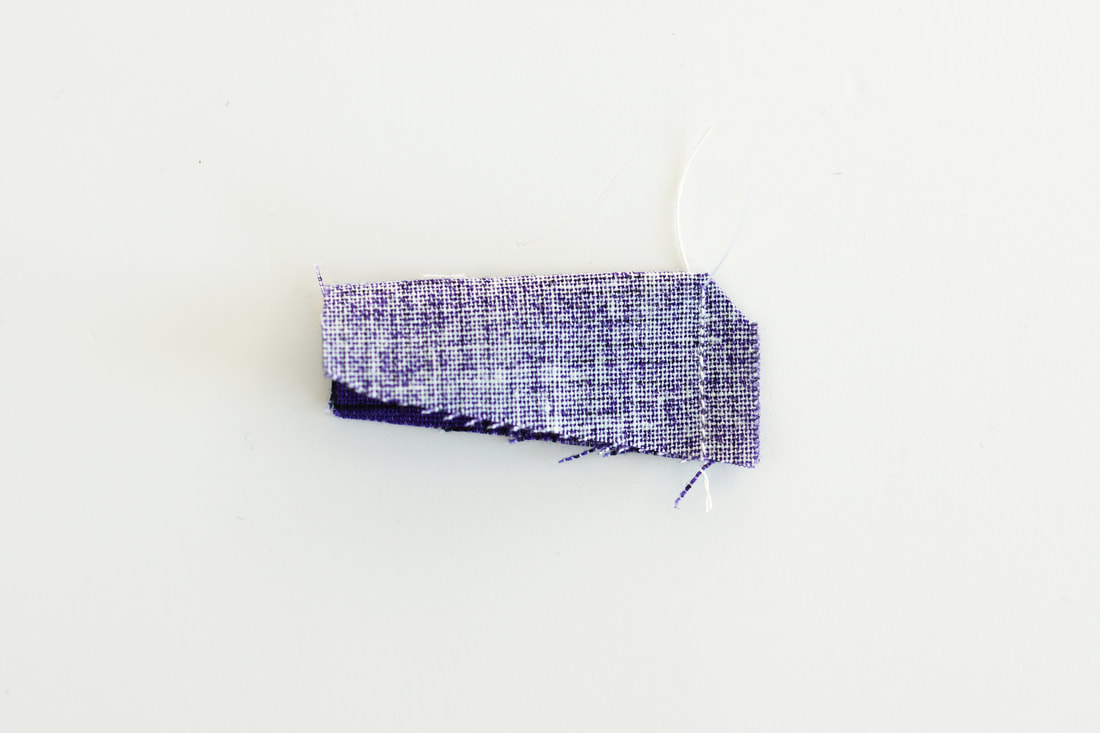
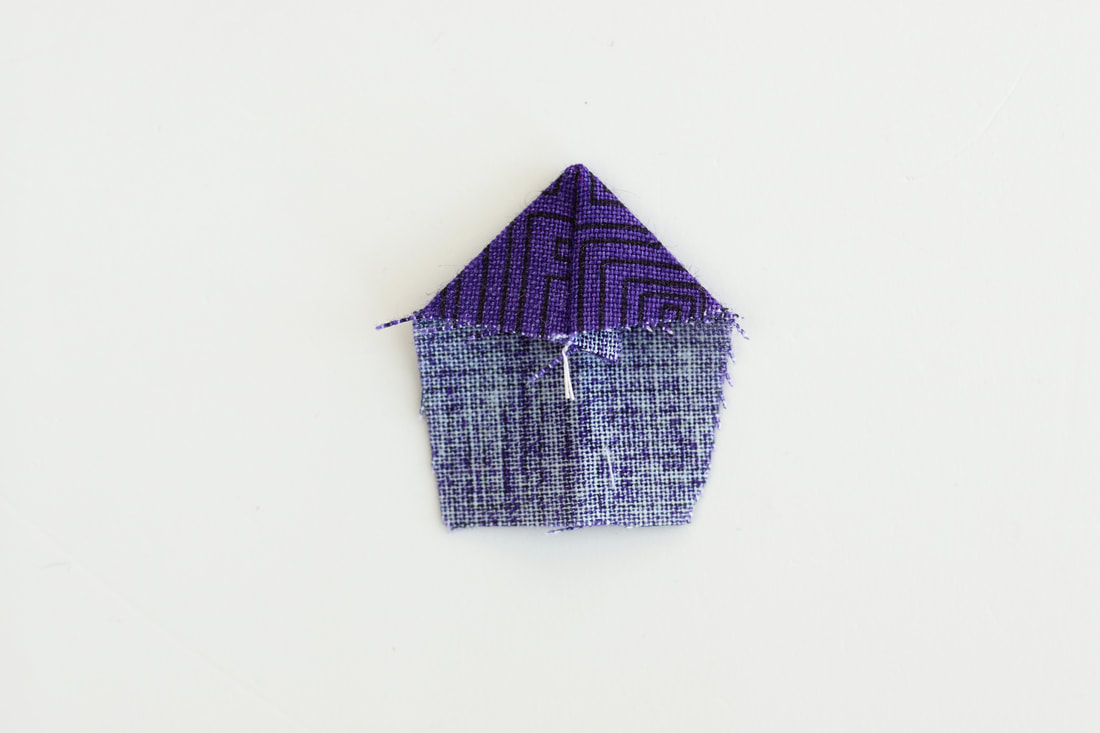
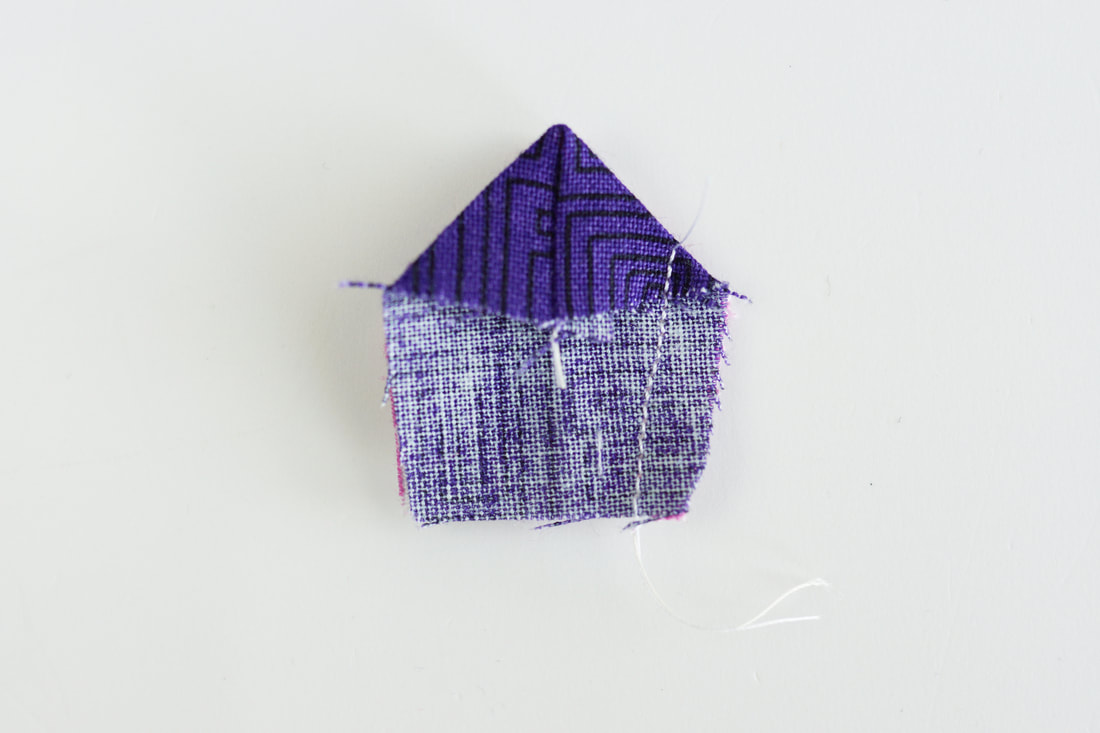
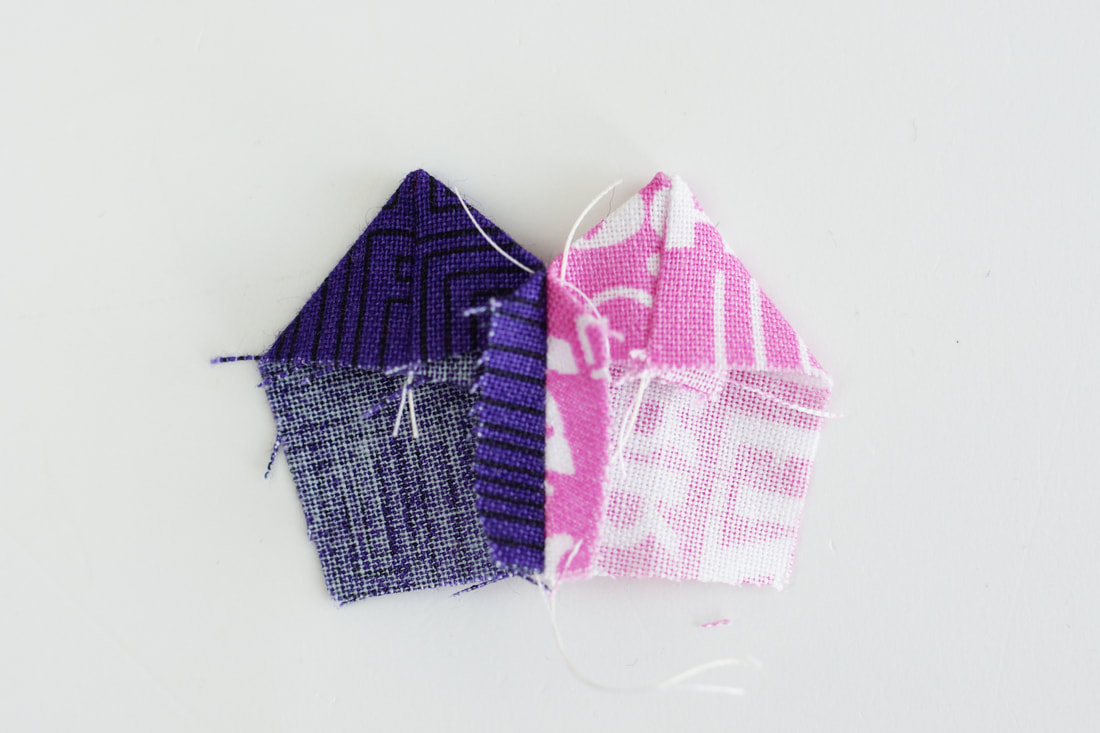
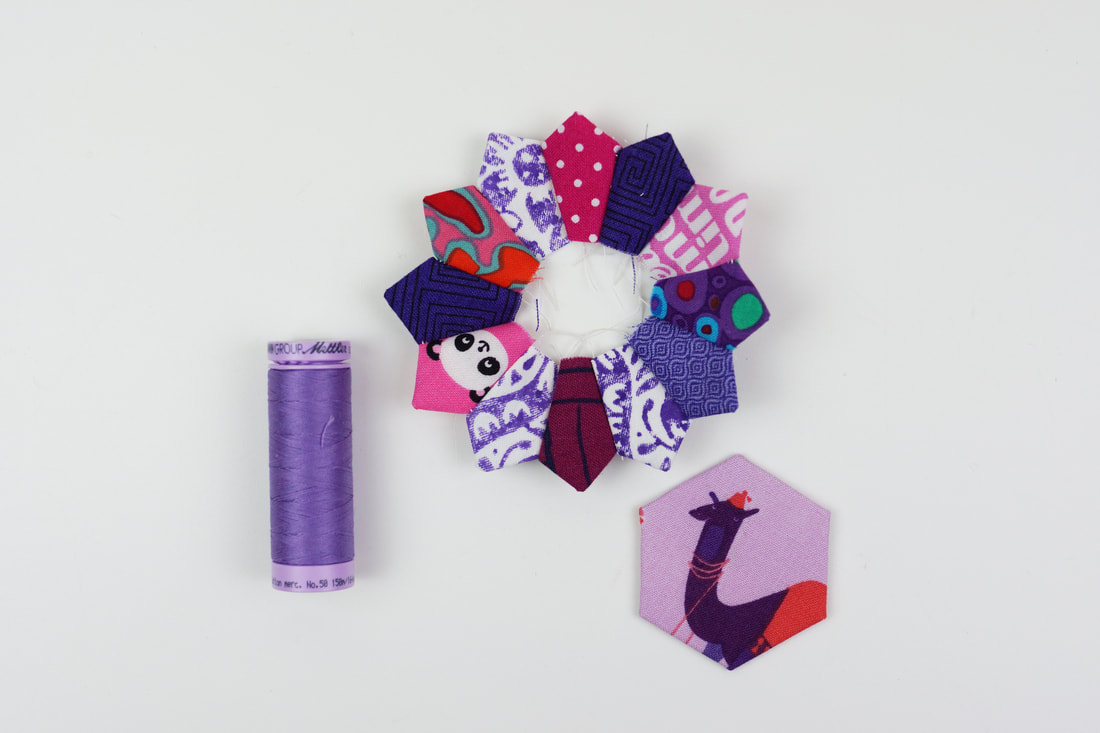
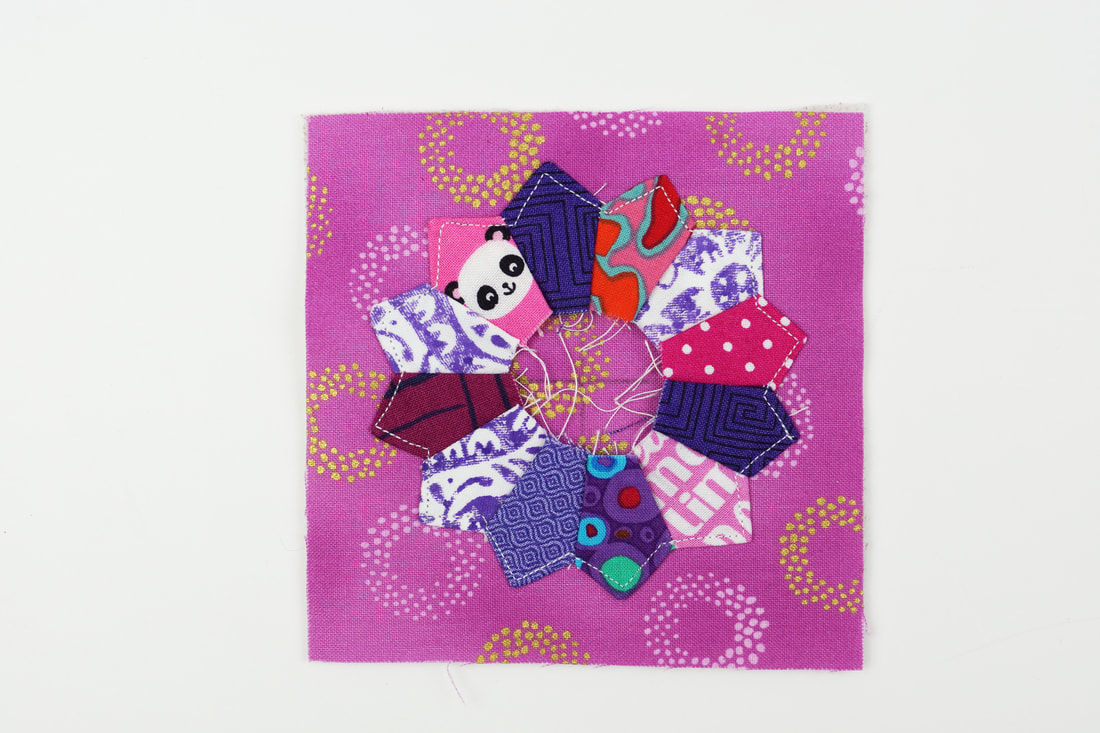
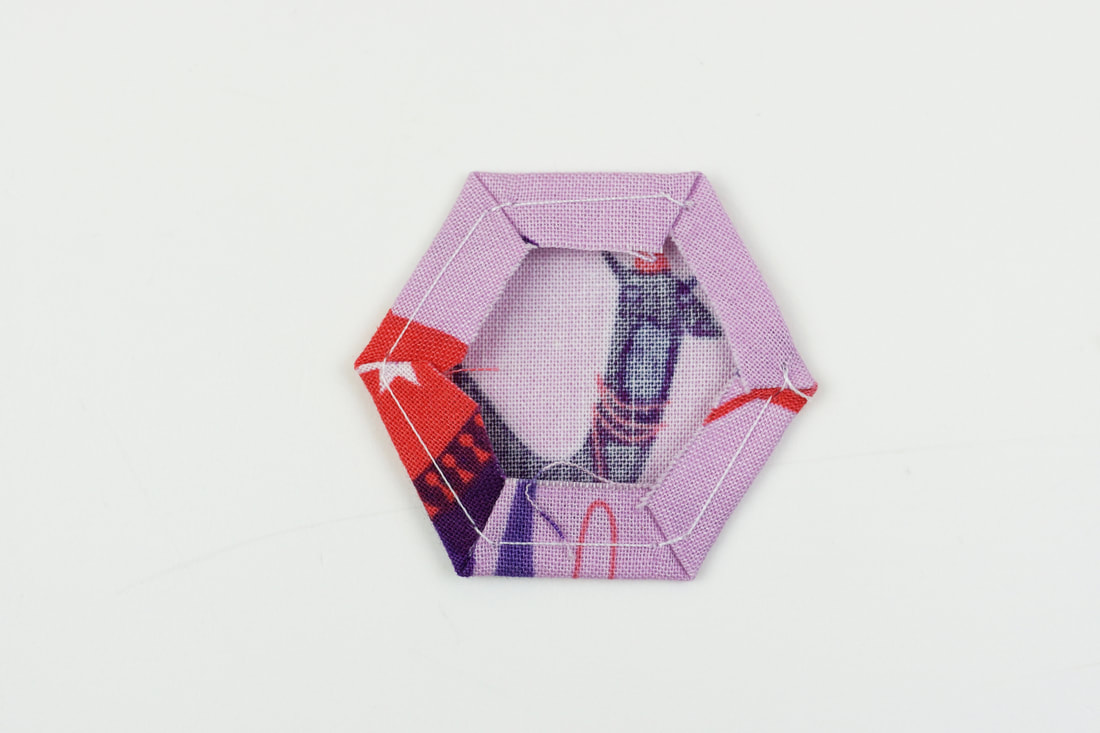
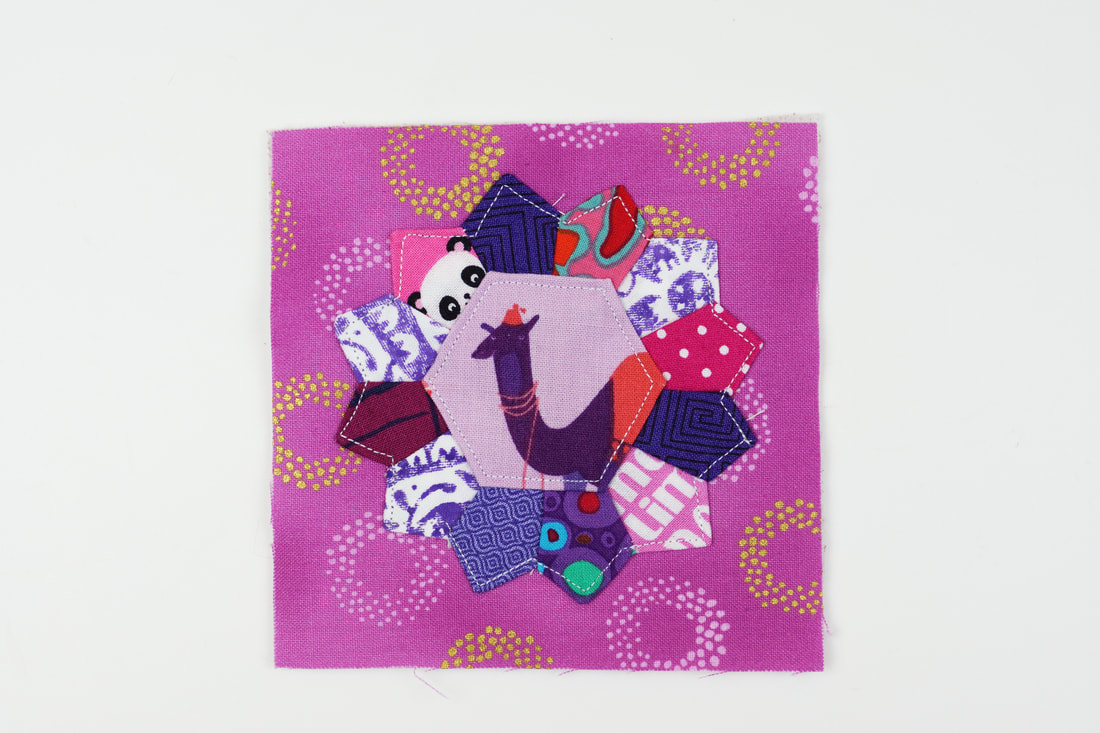
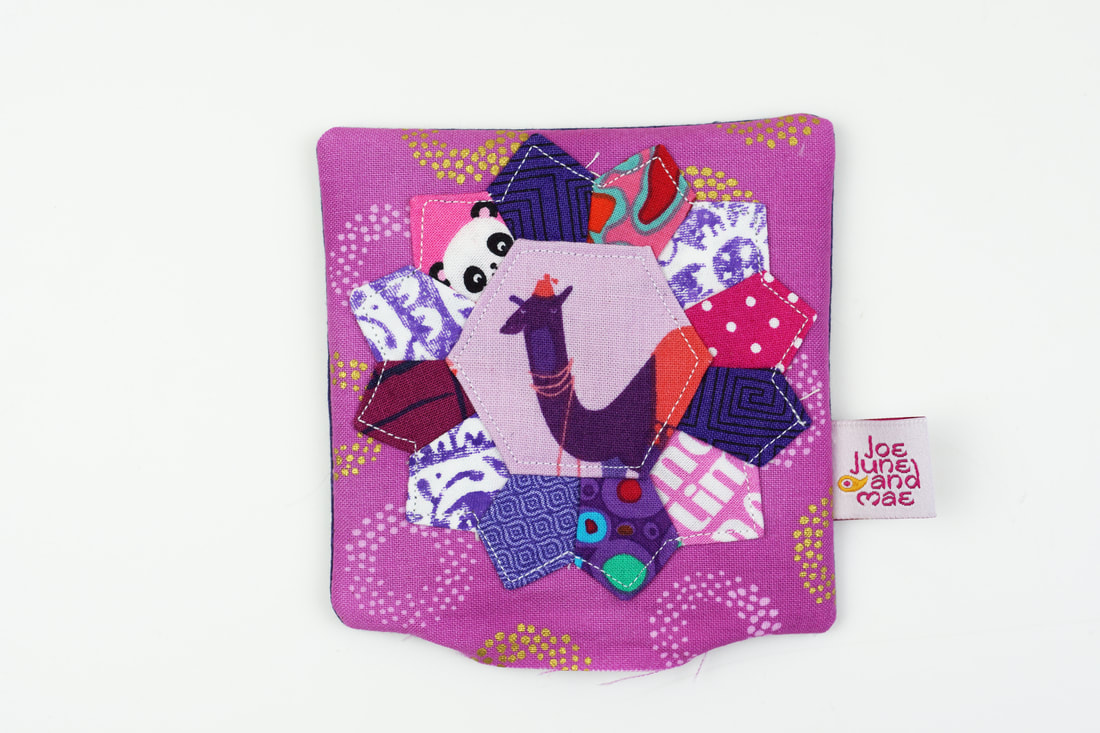
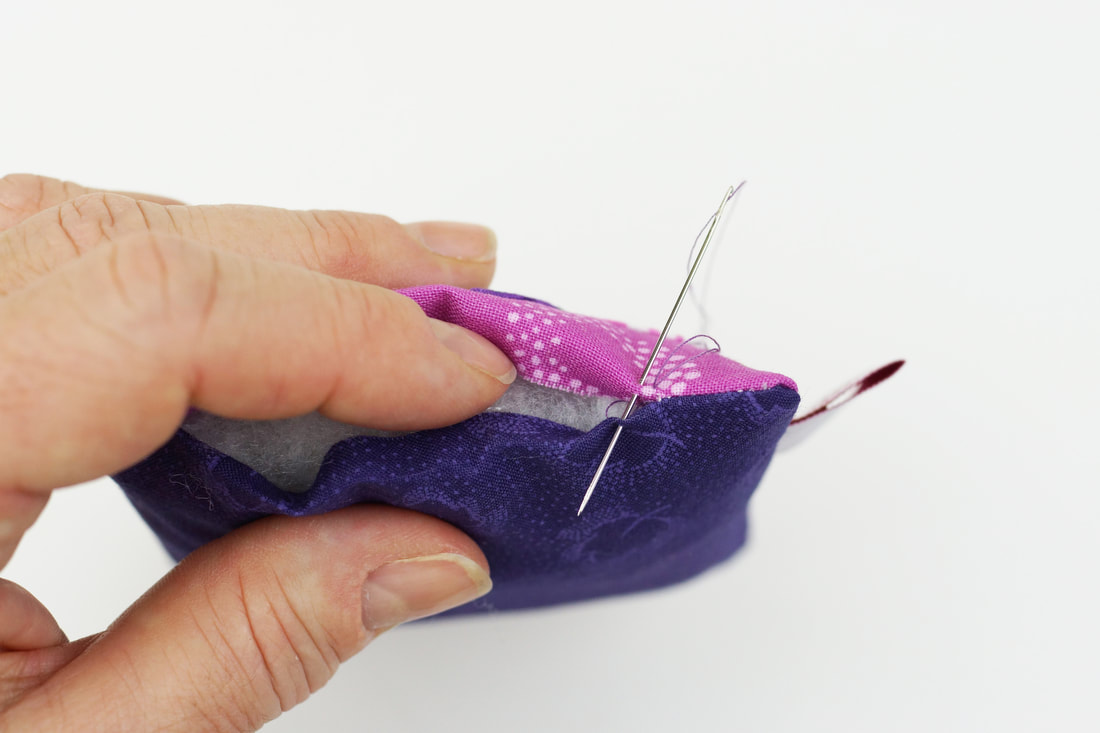
Do you ever wonder what to do with all those super cute fabric scraps that are left over from your sewing projects?
Well, here are a couple of pincushion ideas for you to sew up with the smallest fabric pieces.
several different pincushions
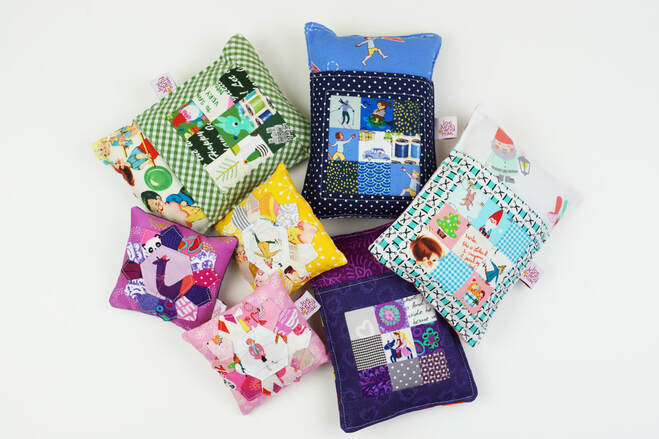
pincushion party
Now you might wonder how I get those fabric scraps color coordinated, and how I will find them when I need them. Here's a simple trick, I make it a habit to cut up the cutest scraps right away into 1.5" squares and sort them by color into a simple acrylic organizer box.
That way, I have them handy when I need them for fabric stamps, hang tags or smaller sewing projects like these pincushions. Plus that box is really pretty to look at, don't you think?
1 1/2
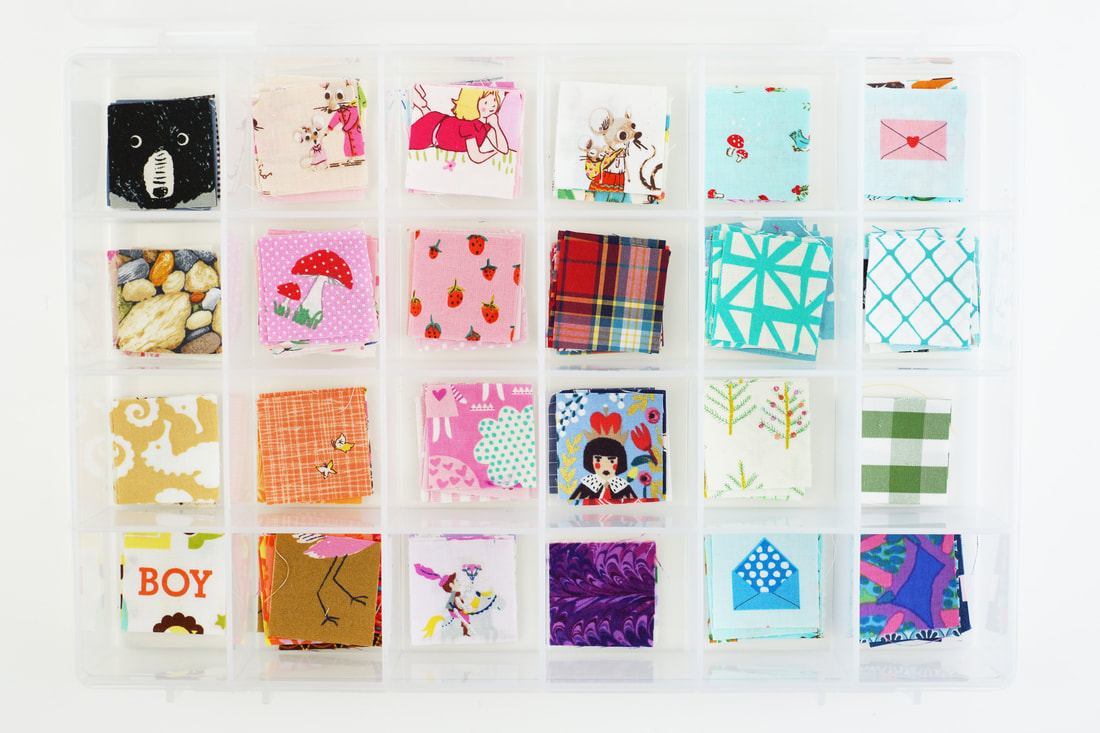
1 1/2" squares sorted by color
I also cut up some Dresden plate pieces every once in a while and keep them in another box sorted the same way. I like making these tiny Dresden plates, just because they're so super cute, and I can really make use of the smallest fabric pieces. For cutting Dresden plate pieces I use the Darlene Zimmerman Dresden Acrylic Ruler.
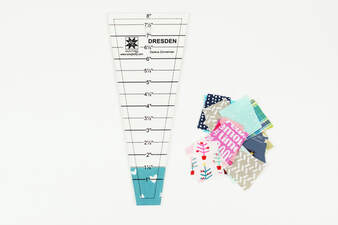
Darlene Zimmerman Dresden Ruler
This awesome pincushion is also called Deluxe pincushion and is a super cute pattern from the book Sew organized for the Busy girl by Heidi Staples.
It's a great pattern and a quick and easy make.
This is an absolutely perfect pattern for all kinds of fabric scraps.
You can use them color coordinated or by theme, make a little fairytale pincushion, or one with just flowers, a Christmas themed one or use very modern little scraps.
I'm sure you will find tons of inspiration when you go through you fabric.
9 patch pincushion with pocket
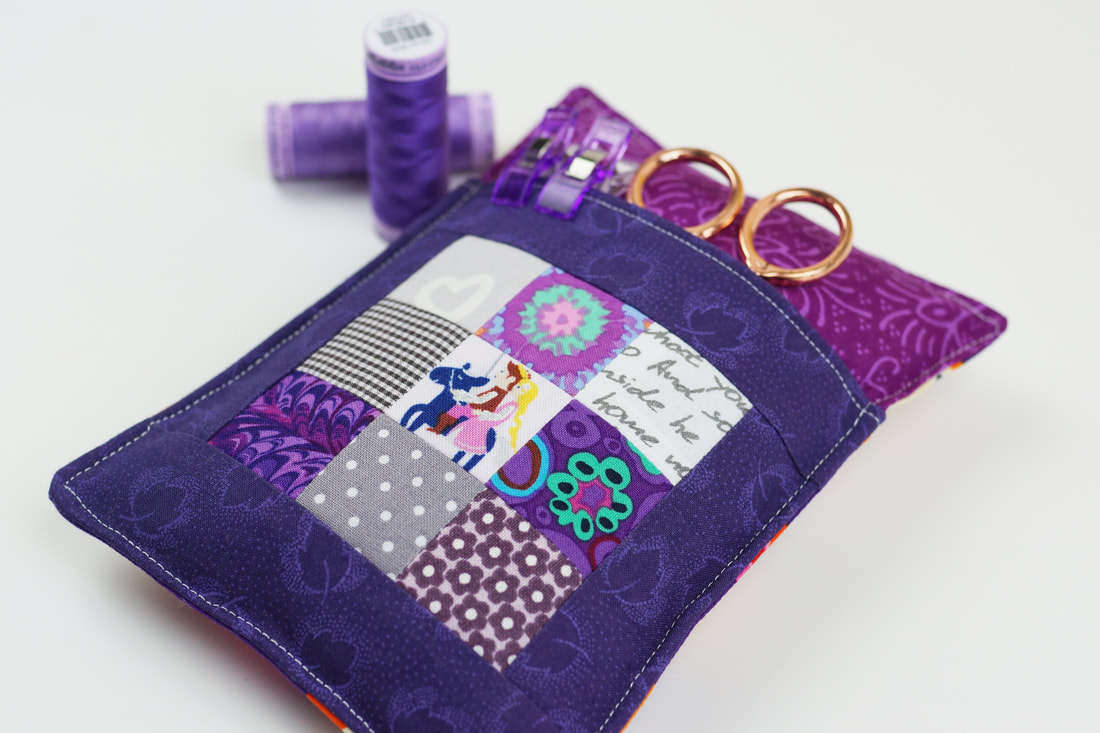
Deluxe pincushion with pocket
Mini Dresden plate pincushion:
finished size aprox 4"x 4"

Fabrics/ materials needed:
- 12  1.5" Dresden plate pieces
- 2 pieces of fabric 4.5"x 4.5"
- 1 basted 1" hexie, paper taken out.
- 1 piece 4.5"x 4.5" fusible interfacing
-a hand full of fiberfill, or your prefered pincushion stuffing material

Sewing the pincushion:
1. Cut all the fabrics as mentioned above. Cut 12 1.5" Dresden plate pieces. (photo 1)
2. Fold the Dresden plate pieces in half , lengwise , right sides together
 and stitch along the top edge ( wider part of blade) with a 1/4" seam allowance. (photo 2)
Chain piecing these blades makes this step super easy.
3. Cut off the corners (as shown in photo 3) at a 45° angle, this gives you nice, sharp points.
4. Turn each blade's sewn end right sides out. It usually just takes a finger to create a sharp point as you make that turn, but if necessary use a pencil to push the point outward. Be careful not to push too hard or cut through the fabric. Then press these.
Cut 12 Dresden plate pieces
Fold in half lenthwise, right sides together and stitch along top edge
Cut the corner with a 45° angle
Turn each blade right sides out
5. Sew the Dresden Plate blades together by aligning the side edges right sides together with a 1/4" seam allowance from top to bottom, then press seam allowance open.
After sewing the full circle, press the entire Dresden plate.
Note: Most Dresden Plates are made with a 18° wedge ruler ( like the one I used), this means technically to form a full circle it would require 20 blades ( 18 x 20 = 360), but I use only 12 for this pincushion. Otherwise the full Dresden Plate would be too big and wouldn't fit on a small 4.5" square. The Dresden plate is so small, that it works just fine after pressing the full circle with 12 blades . And there will be a hexie placed on top anyways.
Or you could  us a 30° wedge ruler ( 30 x 12 = 360)
stitch two blades together with a 1/4" seam allowance
press seam allowance open
sew a full circle of blades
6. Stitch the Dresden plate onto one of the 4.5" x 4.5" pieces of fabric. Mark a cross in the center of the square to make placing  the Dresden plate easier.
Mark a cross in the centre of the square fabric
Mark a cross in the center of the square fabric
Stich Dresden plate in place
 7. Place basted hexie ( paper taken out! ) on top and stitch in place.
basted hexie
Stitch hexie in place
8. Iron on fusible interfacing and place back 4.5"x 4.5" piece of fabric on top, right sides together and stitch around along the raw edges leaving a 2" opening for turning the pincushion.
Cut the corners at a 45° angle, this gives you nice and sharp corners after turning.
9. Turn your pincushion right side out, and fill the pincushion with fiberfill or your preferred pincushion stuffing material. Press the opening under 1/4" and stitch closed by hand.
stitch along the edge, leaving a 2" opening
turn right sides out and fill with fiberfill
stitch closed
The cutest little pincushions made entirely from fabric scraps, are all done .....
Aren't they just darling? 
Picture
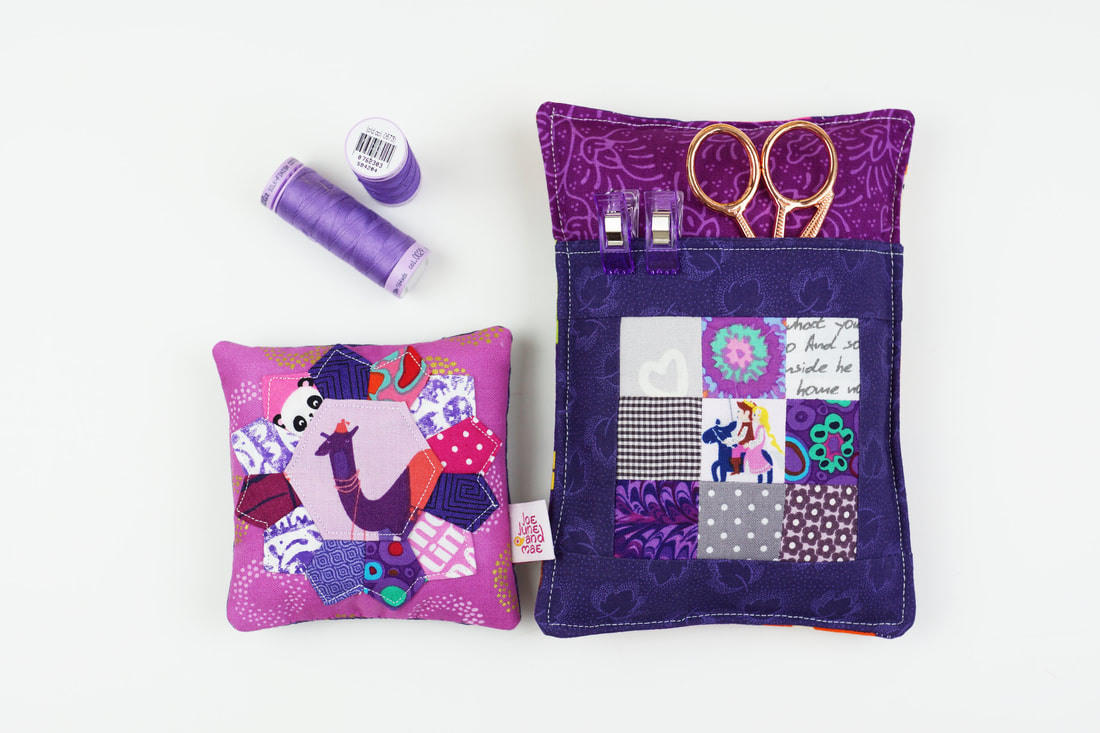
Have lots of fun sewing up all your fabric scraps.

Ingrid x

0 Comments

How to sew Quilted Christmas stockings:

5/12/2020

3 Comments

 
Do you ever wonder where certain Christmas traditions come from?
Well if you do and want to know more about Christmas stockings here is the story:
The Christmas stocking tradition started in Europe, I have to add, a lot of Christmas traditions have, not sure why though, I have to get into that some other time.
Christmas stockings traditionally have the owners name written on them, makes sence, otherwise Santa wouldn't know where to put the presents, right?

                                 " The stockings were hung by the chimney with care,
                                    in hopes that St.Nicholas soon would be there."
                                                       - a visit from St. Nicolas
Picture
Quilted Christmas stockings
The Christmas stocking tradition is said to have started with the good deeds of a king noble man named Nicholas, who was born 280 AD, in Patara a city on the Mediterranean coast of Turkey. ( If you ever visit Turkey , you have to visit that coast, it's beyond beautiful).
Nicholas became a priest and used all his money to help the poor, the needy, sick or suffering. He was very religious and was made Bishop of Myra at a young age.
He never married or had children. But he loved children and gave gifts often, this is why he also became known as the gift giver of Myra.
He was a rich man and traveled all over the country and gave his gifts generously.
He didn't want his identity to be known, so he gave his presents late at night.
Children were told to sleep early, otherwise Nicholas wouldn't come.
He became known as Saint Nicholas the patron saint of children and sailors.

The most popular legend about why stockings are hung on Christmas is this:
A very poor widowed father of three girls was worried his daughters weren't able to get married because of their impoverished status.
St. Nicholas heard the story of the man and wanted to help, but he knew the father wouldn't accept any charity. So he slid down the chimney of the family's house and filled the girls' recently washed stockings, which were drying by the fire, with gold coins.
When the girls woke up in the mornig, overjoyed with the generous gift, they were now eligible to marry and they all were happy ever after...

And there you have it, the Chrismas stocking tradition was born.
Picture
Now lets make some great Cristmas stockings ourselves:

Fabrics
needed for a Hexie stocking:

- fabric scraps for about 42 - 1" hexies
- 2 pieces of fusible interfacicing 16"x 9"
- 2 pieces of fabric 16"x 9" for front and back lining
- 1 piece of fabric 16"x 9" for the back
- 1 strip of fabric 2"x 28" for binding
- optional: tassels, fabric hangtag
Picture
Sewing the hexie Christmas stocking:

1. Print the stocking template and glue the two pages together and cut out the template.
Find the PDF to the template here .
2. Baste about 42 - 1" sized hexies and place them on your stocking template. Depending on how you place them, you'll only need half hexies on the sides.
This is a perfect way to use up all your adorable Christmas fabric scaps and do some
fussy cutting.
Picture
3. Sew togther your hexies.
Add the fusible interfacing to your 'hexie fabric' piece and add the lining as well, wrong sides together  and quilt as desired.
I quilted diamonds.
Repeat the same for the back of the stocking. Add the fusible interfacing to the back fabric, add the lining fabric wrong sides together and quilt as desired.
Quilted hexies
Quilted hexies
4. Now cut your quilted pieces into stocking shapes , use the stocking template.
5. Place front and back of your Christmas stocking right sides together and stitch along the outside edge using a 1/4" seam allowance.
stitch along the outside edge
6. Turn your stocking inside out.
Attach the binding strip to the top edge of your stocking right sides together and raw edges aligned. Add a little hanging tab to the back of your stocking made out of the same binding strip. Clip or pin in place and stitch along the top edge with a 1/4" seam allowance.
Fold over to the inside and stitch in place by hand.

7. optional:
Add pompoms and/or tassels.
Picture
8. Make a little name tag.
I used white fabric and embroidered the name on it. I added some fusible interfacing, to give it a little volume and topped it off with another piece of white fabric.
I stitched the 'sandwhich' in place with a small piece of fussy cut motif and cut the outer edge of the white fabric with zig zag shears.
Add a metal eyelet, or just use a hole punch and thread a little ribbon.
Attach your name tag to your stocking.

Et Voila .... all done!

Now let your phantasie go wild and create stockings with all sorts of different patchwork techniques and styles. Whether you're using clamshells, triangles, hexies or just simple squares, these Christmas stockings will definitely make a lasting impression.

If you are celebrating Christmas, What's your choice of Christmas stocking?
Are you making one yourself? let me know in the comments.

happy sewing

Ingrid x

c

3 Comments
    Picture

    Author

    Ingrid Alteneder

    Archive

    January 2021
    December 2020
    November 2020
    October 2020
    September 2020
    July 2020
    June 2020
    May 2020
    April 2020
    March 2020
    January 2020

    Categories

    All
    #blacklivesmatter
    Design Collab
    Dia De Los Muertos
    Fabric Recycling
    Foundation Paper Piecing
    Free Stuff
    Halloween
    My Book
    Projects With My Blocks
    Tips And Tricks
    Tutorials

    RSS Feed

Picture
Visit us at
Newsletter
Contact
Retail Partners
Imprint
Privacy Policy
Terms and Conditions
Joe, June and Mae
Ingrid Alteneder
Germany
mail@joejuneandmae.com