
|
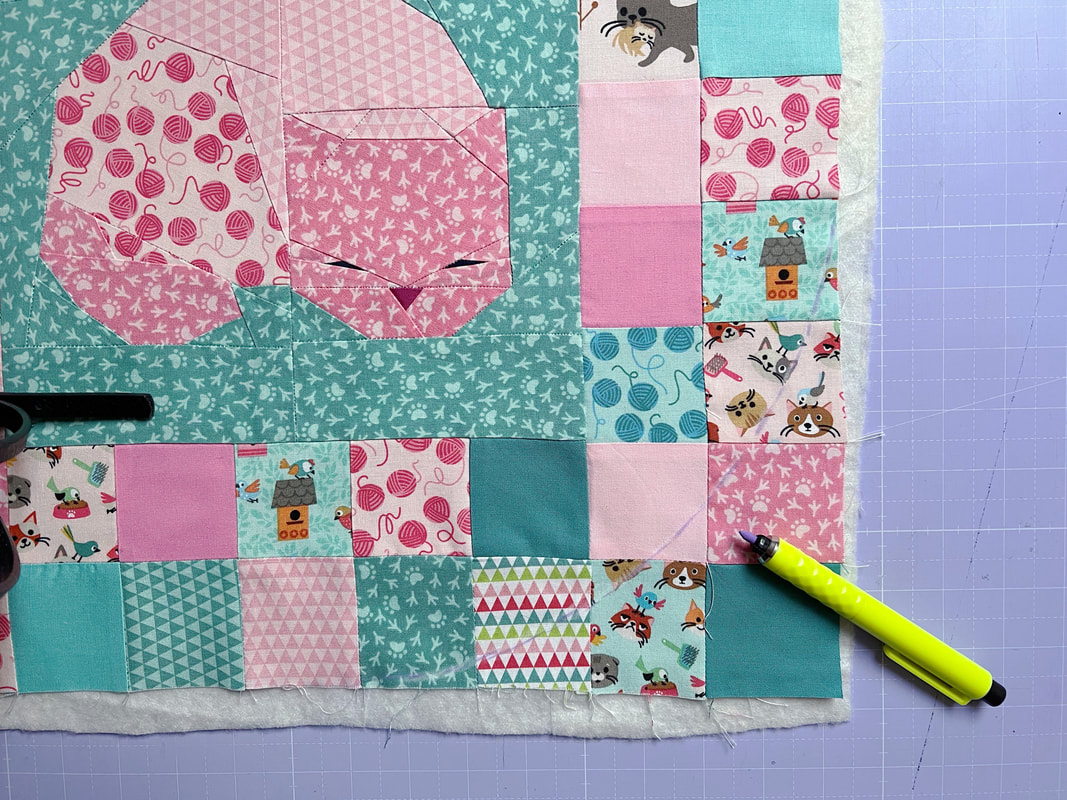
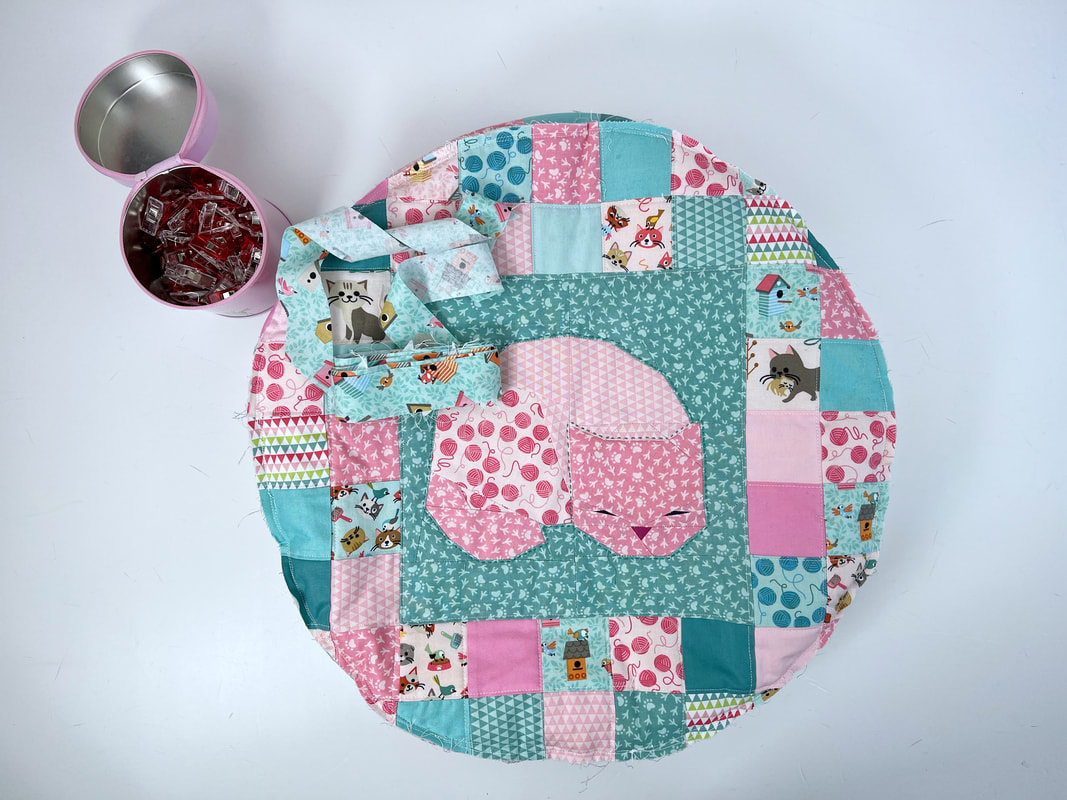
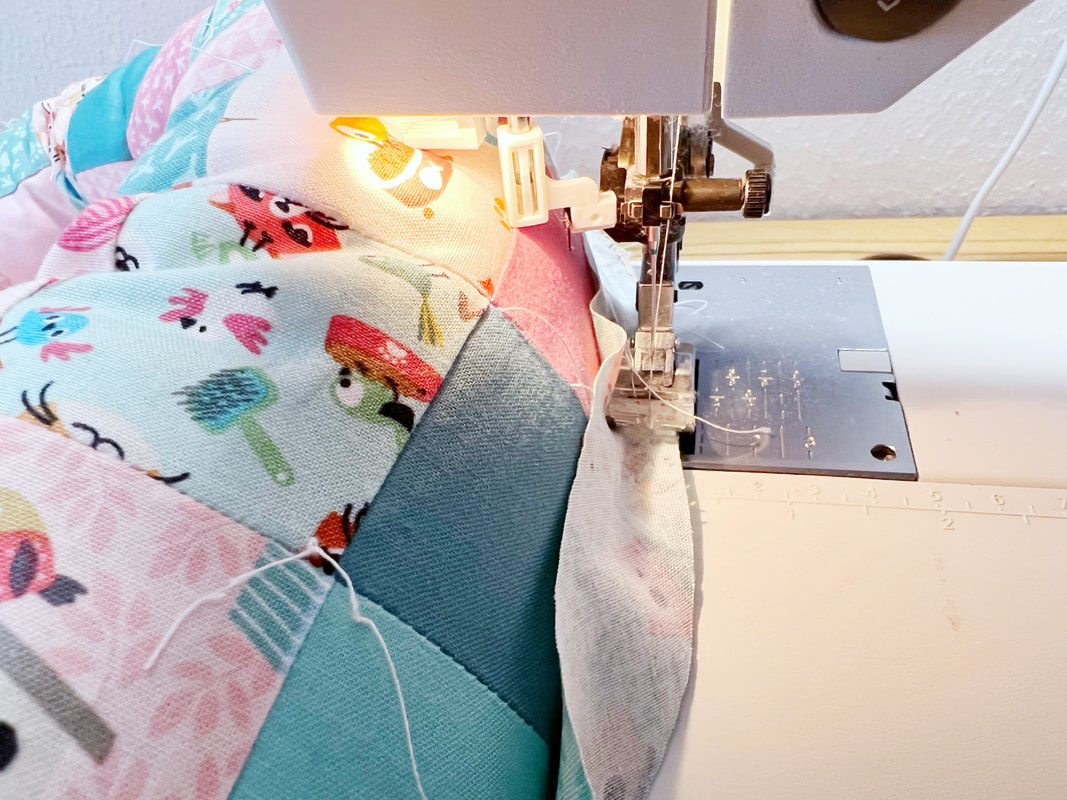
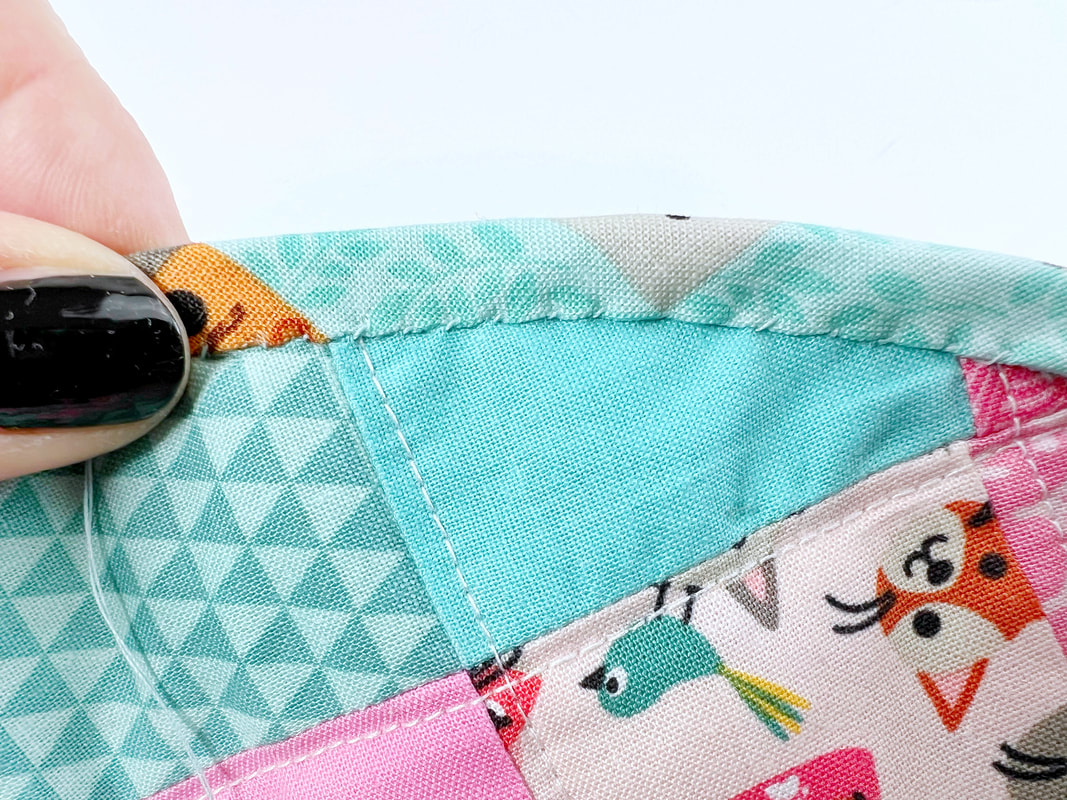
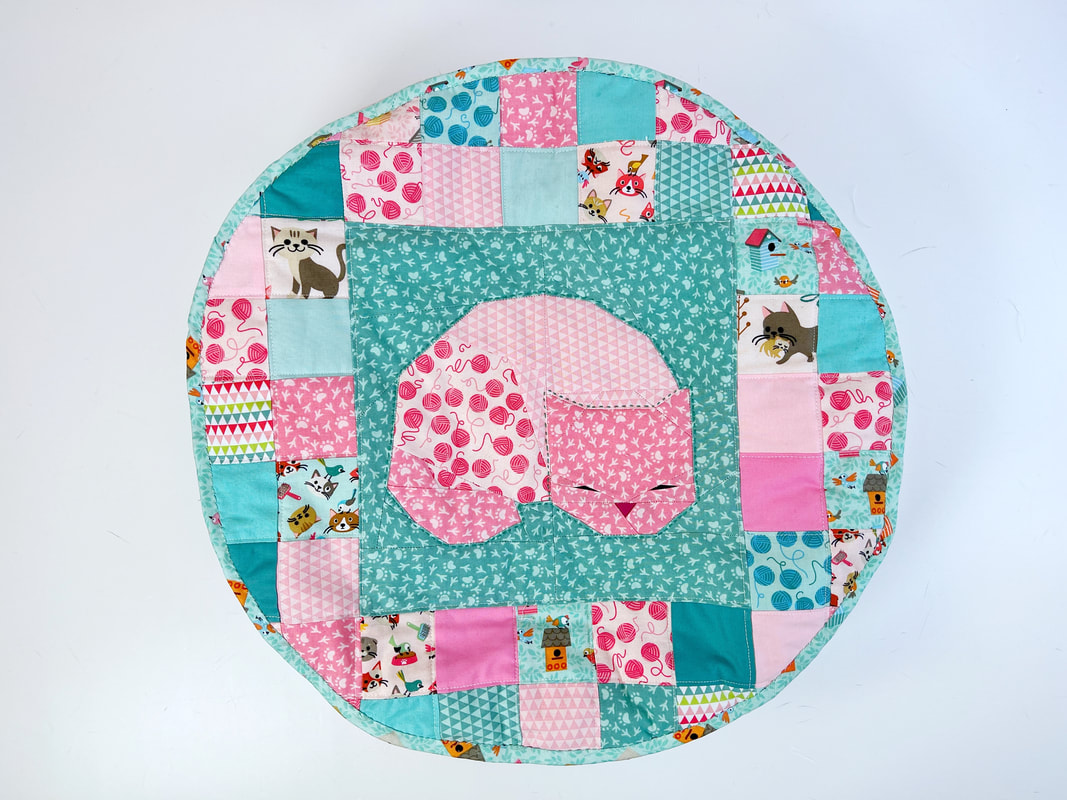
There is something to be said about quilters and cats, right? At least it seems like every quilter has a cat, or is it just me? This super adorable fabric line called 'Cats Meow' from Riley Blake Designs had me thinking about my cats immediately. I mean doesn't a quilter's cat , deserve a quilted cat bed? I sure would think so. So here we go, I made the cutest quilted cat bed pattern... 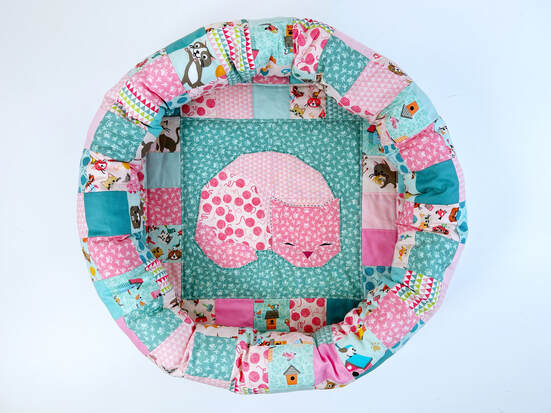 quilted cat bed How to sew a quilted cat bed? Quilted Cat Bed: please read through the instructions first ( finished size aprox. 18" diameter and 4" high) Tools needed: -sewing machine -cutting mat/ rotary cutter and acrylic ruler -pins or clips and iron optional tools to make your life easier: -spray baste -fabric glue pen for your foundation paper piecing Materials needed: - the sleeping cat quilt block in size 10"x 10" (will be 10 1/2" square when sewn together) or the Cat's Back or Yarn Ball quilt block or any other quilt block of your choice. - 56x 2.5" squares for the bottom of the cat bed to surround the quilt block (note, you will cut off 4 of the corner squares when cutting the bottom of the cat bed into a circle, but it's easier to sew with these 4 corner squares in place) - 135x 2.5" squares for the edge of the cat bed. - a piece of fabric about 18"x 18" for the bottom backing of the cat bed - a piece of batting about 18"x 18" (I used a thicker wool batting I had left over from a quilt) - stuffing for the edge of the cat bed - a 56" bias binding strip 1 1/4" wide Instructions: 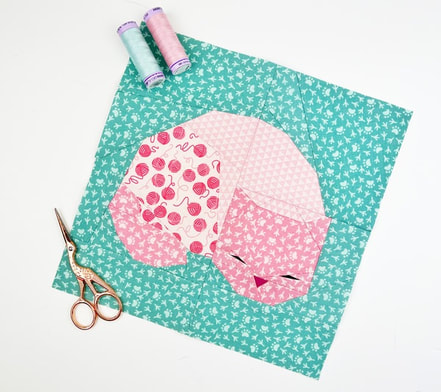 sleeping cat quilt block 10"x 10" Step 1: Sew the sleeping cat quilt block in size 10"x 10". The quilt block will be 10.5"x 10.5" when sewn together, this includes the 1/4" seam allowance. 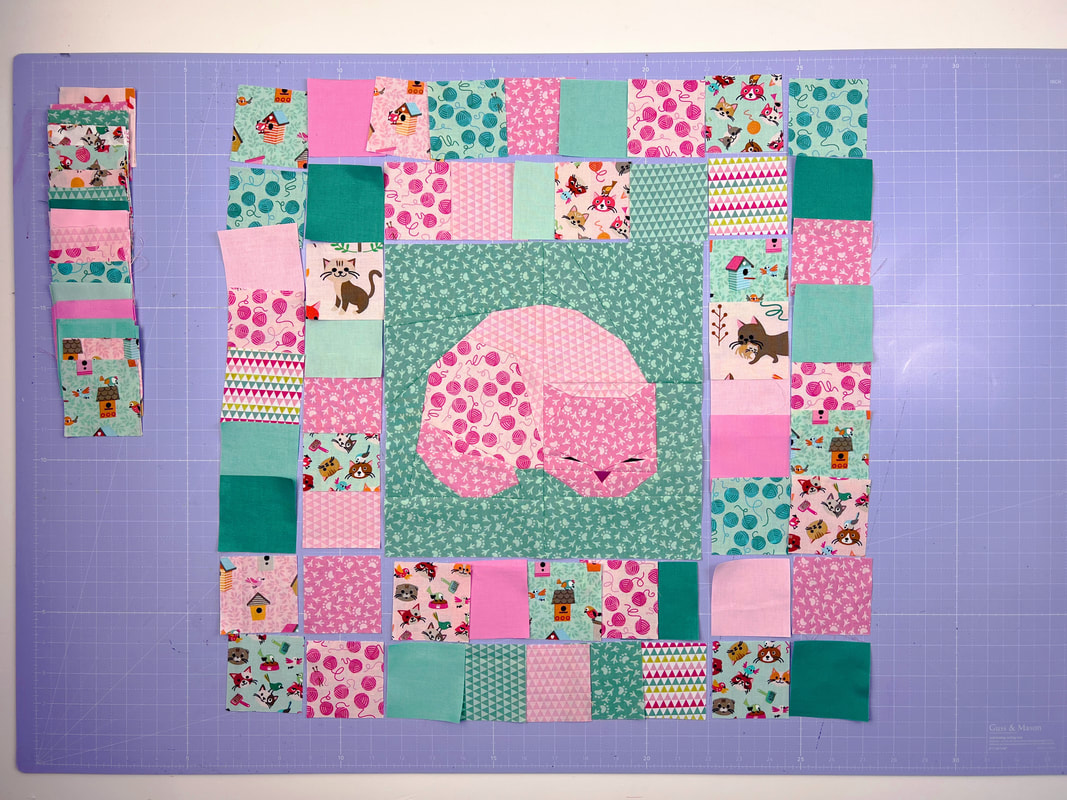 Step 2: Cut all the fabric squares. There are 56 fabric squares around the sleeping cat quilt block for the bottom of the cat bed and another 135 fabric squares for the edge of the cat bed. (which we will get to later) Place the squares around the quilt block to your liking, I like to place them totally random, and as you can see, I love fussy cutting. So as with some of my other sewing projects I used parts of these super adorable prints to highlight my fabric squares. Start by sewing the squares together into rows. Begin with the inner squares and then do the outer squares. I like to sew the squares at the top and bottom of the quilt block together first and attach them to the quilt block, that's 5 blocks at the top and 5 at the bottom. Then sew the squares at the sides together into a row, that's 7 squares on each side and attach them to the quilt block. Repeat for the blocks of the outer row. 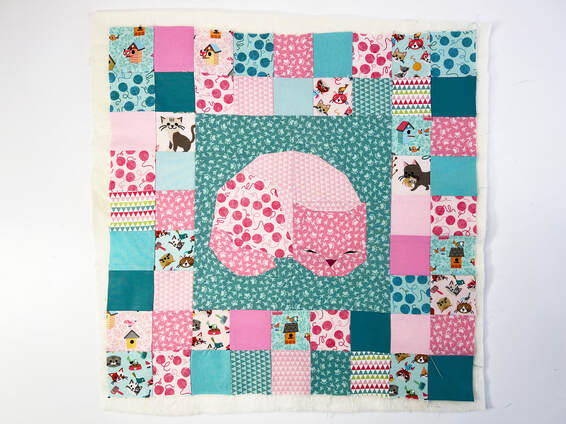 'quilt sandwich' for the bottom of the cat bed Step 3: Place the piece of fabric for the bottom backing in from of you, with the wrong side facing you. Place the batting on top of the back piece of fabric then add the patchwork top of the cat bed bottom on top of the batting, the right side facing you. Essentially you have a 'quilt sandwich', backing, batting and quilt top. I like to use spray baste (ex: Odif Temporary Adhesive Spray) to keep the layers together. But you can just as easily use safety pins or use basting stitches. Step 4: Draw a circle on the square. I measured 9" from the center of the square ( as shown in photo 1) and drew a circle on the square for the bottom of the cat bed. Sew along that circle for extra support. Now quilt the bottom of the cat bed to your liking. I did some hand quilting around the shape of the cat in the sleeping cat quilt block, and added some straight line quilting to the squares. Then cut the bottom of the cat bed along the circle line that you drew/sewed onto the square. My circle ended up being a little less than 18" diameter through the quilting. 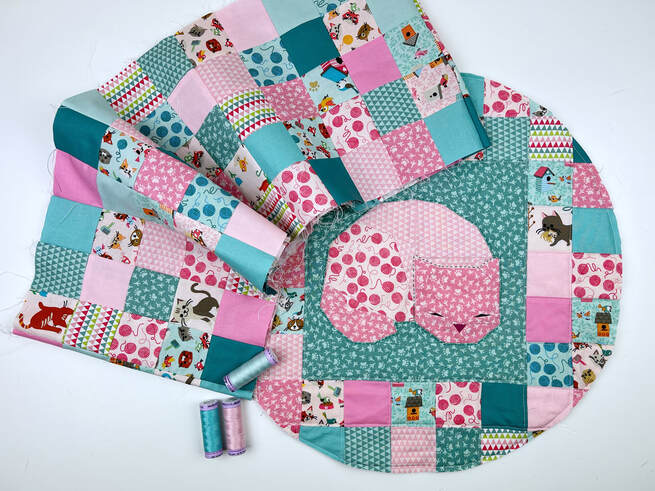 bottom and edge of the cat bed Step 5: Sew the squares for the cat bed edge into one long rectangle of 5 squares high and 27 squares long. (it should now be 10" high and 54" long) Again I placed the squares totally random, it's up to you, just let your creativity run wild. Then fold the rectangle for the edge in half, right sides together so the two short ends align and stitch them together. You now have a circle for the edge of the cat bed. Then fold the rectangle in half lengthwise, wrong sides together. This will be the edge 'tube' of your cat bed. 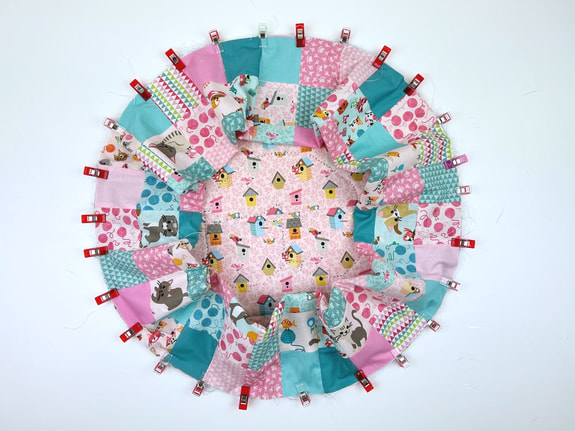 clip the tube for the edge of the cat bed to the bottom of the cat bed Step 6: Clip the 'tube' rectangle of your cat bed edge to the bottom of the cat bed. Right sides together to the right side of the bottom of the cat bed. (as shown in the photo, not the quilted top!) Stitch in place with a 1/4" seam allowance but leave two 3" openings for stuffing your 'tube'. If your 'tube' rectangle and base are not 100% the same length, it's not a problem at all. Let the fabric gather a little bit as you sew. This will not be visible at all after you stuffed the edge of the cat bed. Leave the two 3" openings on opposite sides of the tube. This makes stuffing the tube easier. Stuff your tube pretty full, as stuffing tends to settle with use. Then sew the two gaps closed. Step 7: I like to finish the inside seam of the cat bed with a bias binding. If you want, you could also just use pinking shears and cut along the edge. This seam or edge won't be visible, since it's under the edge tube. I personally think a bias binding just gives your cat bed the deserved finishing touch. Clip or pin the bias binding, right sides together, in place. I did this from the 'tube' side. So when you fold the binding over, you have more room to sew it in place. Fold over the beginning of your binding for a 1/4". Then stitch the binding all around with 1/4 " seam allowance, when you get to the end, just let it overlap. Step 8: Fold over the binding towards the 'cat' side and clip or pin in place. Then hand stitch the binding to the bottom of the cat bed. It's very tight to machine stitch here, since the 'tube' is already stuffed. It's much easier to sew the binding by hand. Once you're done turn the cat bed, so the binding edge is tucked in on the inside of the cat bed. The clean finish is now on the outside of the cat bed. 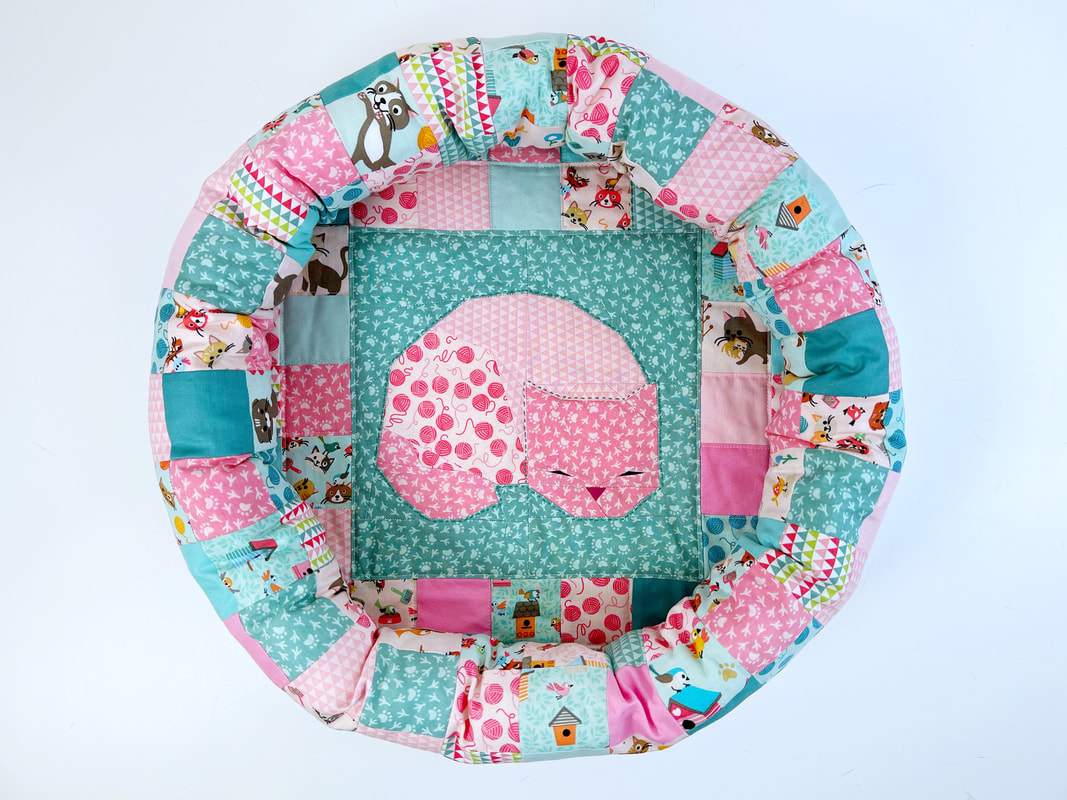 the cutest quilted cat bed And there we go, it's all done. And I think you have to agree, this is the cutest quilters cat bed ever, right? Thank you so much Riley Blake Designs for the opportunity to design this cat bed pattern and this small quilt block pattern series to match it. Thank you for supplying the super pretty fabric series 'Cat's Meow' designed by Shawn Wallace, that I used in this quilt pattern series.  Isn't this cat bed an absolute jewel? I'm sure any cat would just love to cuddle up inside this beauty. Ohh hey, go figure, my cat just did... :-) 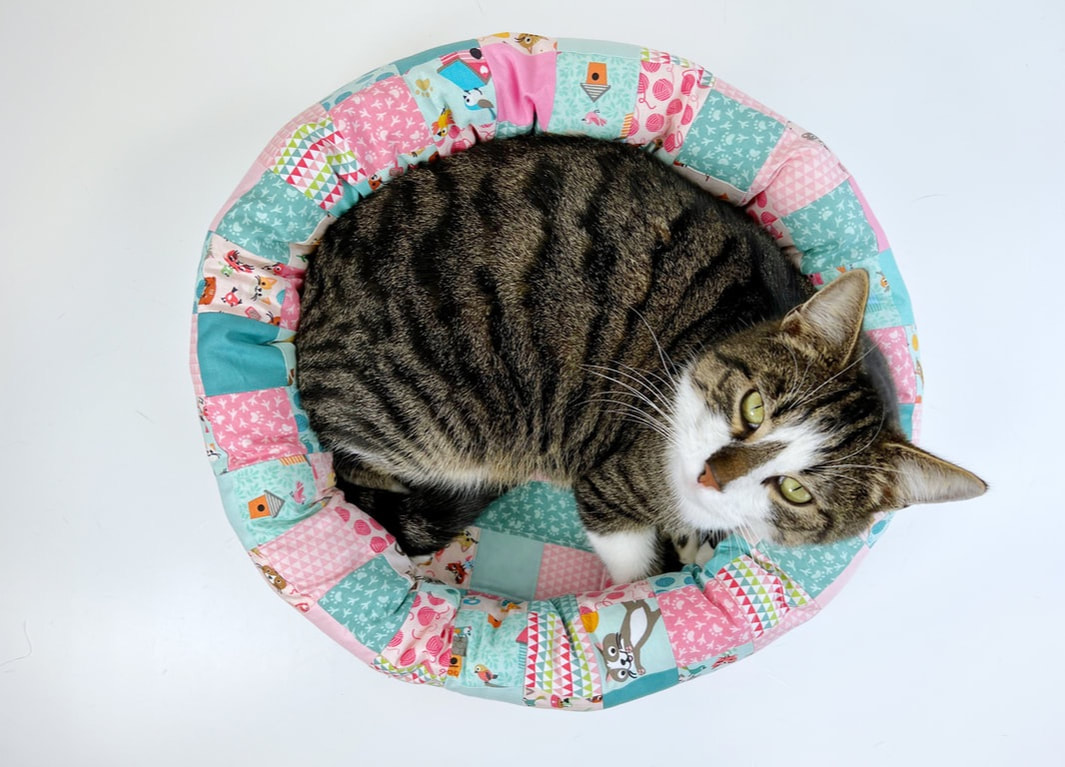 Happy sewing.... Ingrid xx
10 Comments
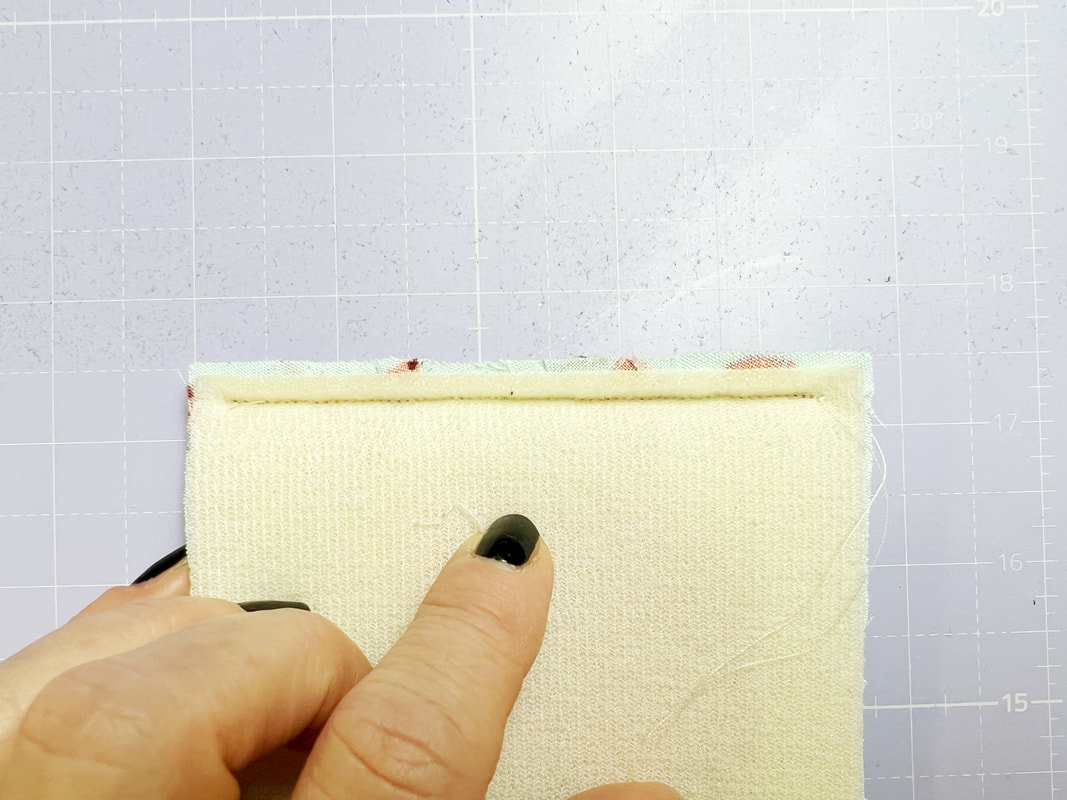
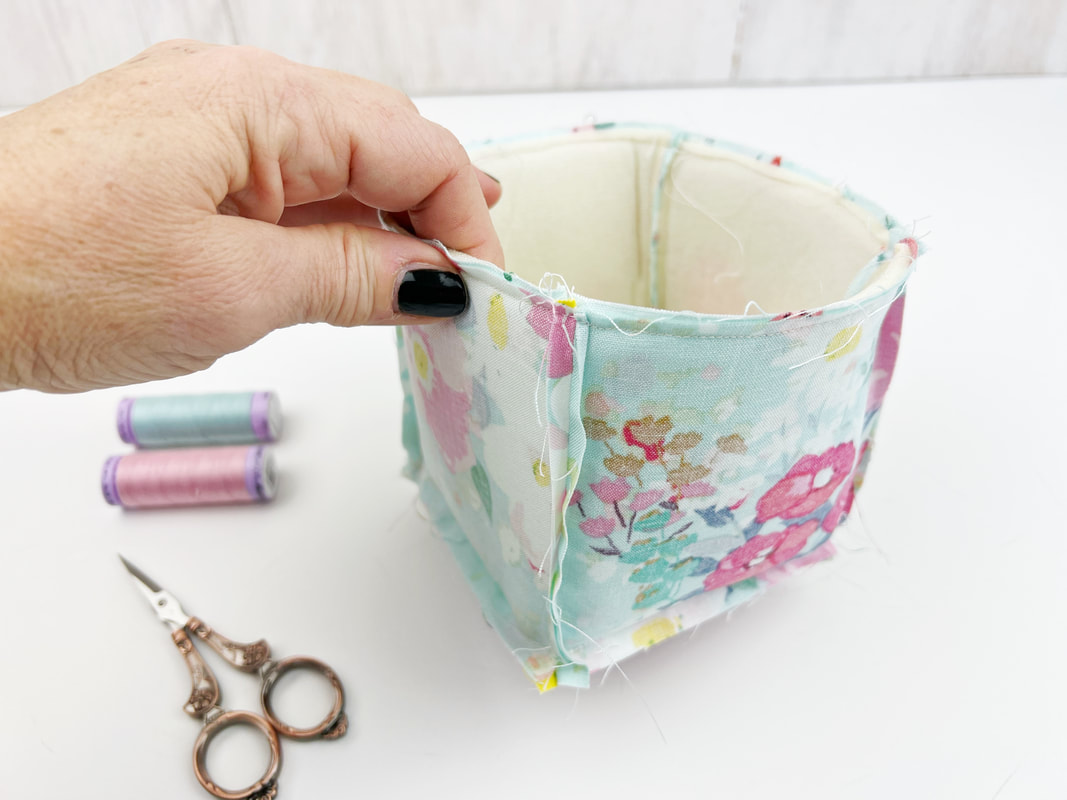
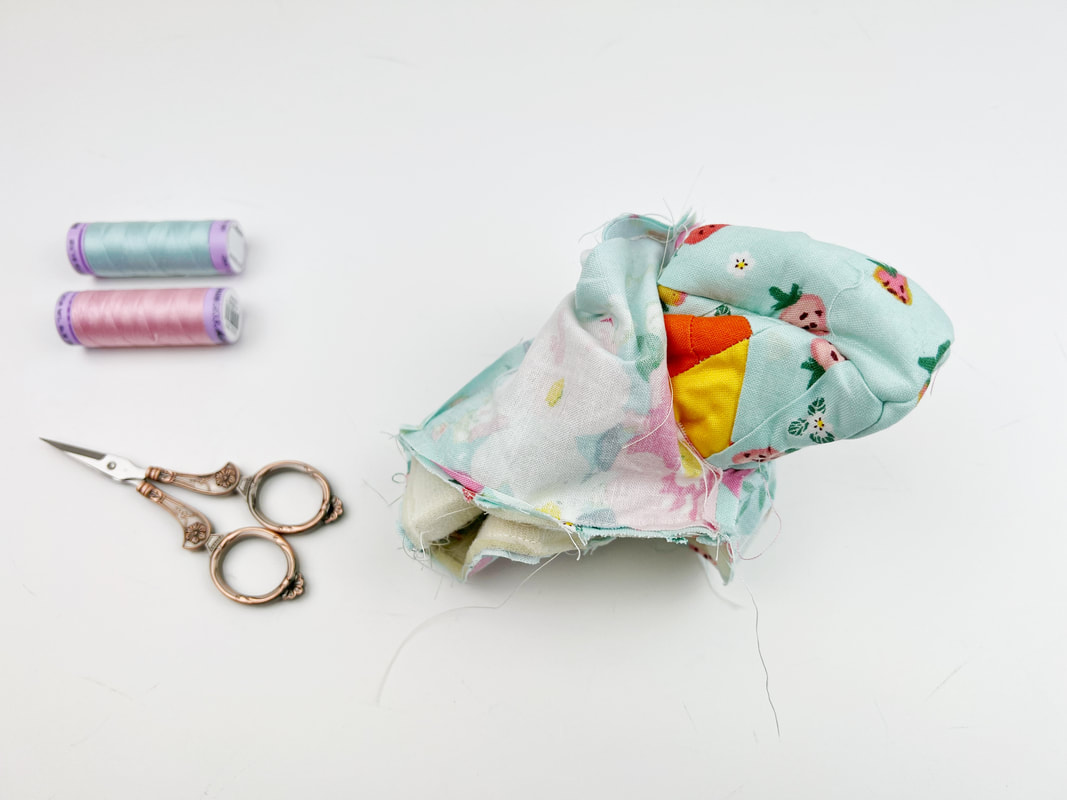
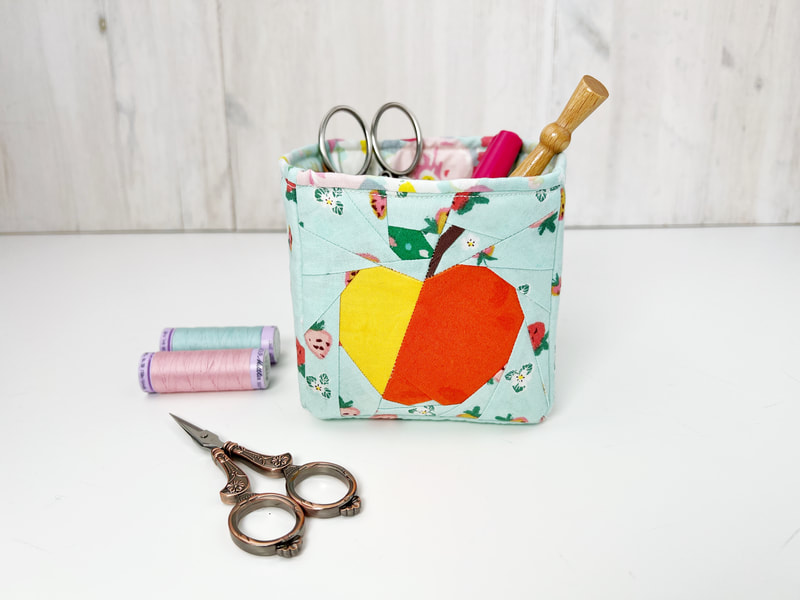
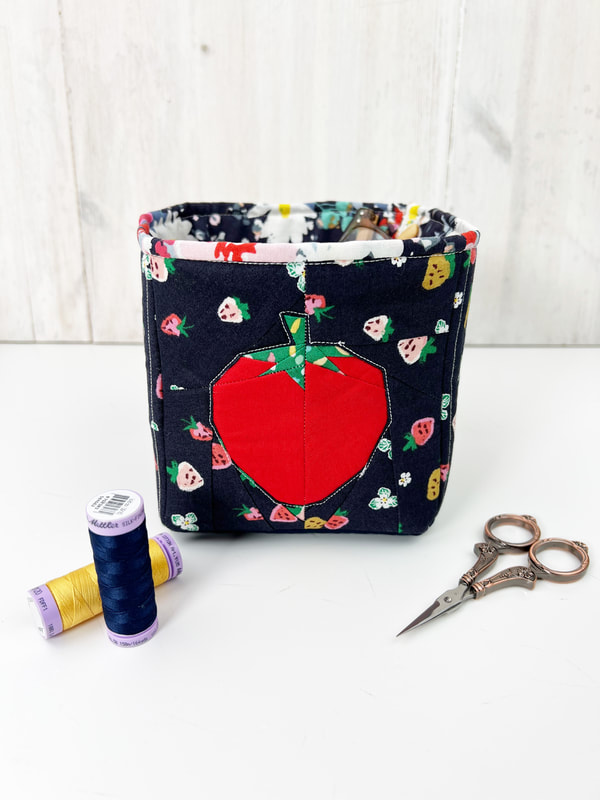
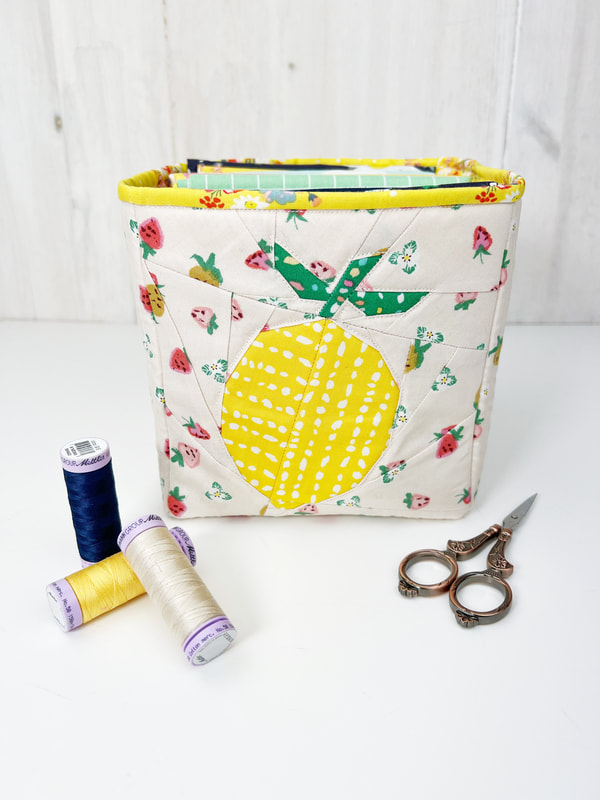
 Square fabric boxes Do you love boxes and baskets as much as I do? I have to admit I am a little bit obsessed. I love storing things in little boxes, baskets and containers, especially if they're square shaped. So I decided it's high time I made a free pattern for some little square fabric boxes. When I saw this new fabric line from Minkie Kim for Riley Blake Designs I thought fruits, fruits and some more fruits. And these delicious fruits needed to go somewhere special, don't you agree? So I made some cute little square fabric containers. These are really easy to make. 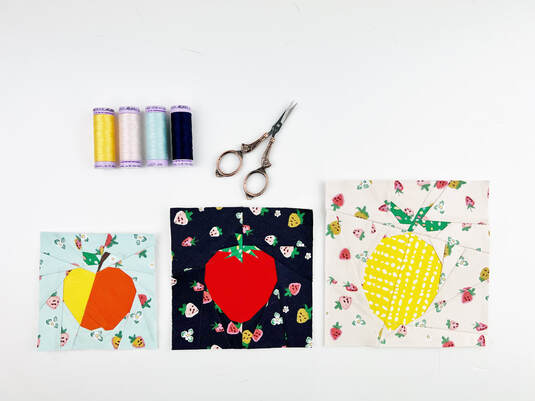 fruit quilt blocks Fabric square boxes: please read through the instructions first Tools needed: -sewing machine/ thread and fabric -cutting mat/ rotary cutter and acrylic ruler -pins or clips and iron optional tools to make your life easier: -spray baste -fabric glue pen for your foundation paper piecing Materials needed: box sizes: S - 4"x 4"x 4" , M - 5"x 5"x 5", L - 6"x 6"x 6" ( width x hight x depth) S: quilt block apple in 4" size (will be 4 1/2" when sewn together) 4 squares 4 1/2" of fabric for exterior 5 squares 4 1/4" of 'soft and stable' @byAnnie or Pellon Fusible Flex foam stabilizer 5 squares 4 1/2" of fabric for lining. M: quilt block strawberry in 5" (will be 5 1/2" when sewn together) 4 squares 5 1/2" of fabric for exterior 5 squares 5 1/4" of stabilizer (see above) 5 squares 5 1/2" of fabric for lining L: quilt block lemon in 6" (will be 6 1/2" when sewn together) 4 squares 6 1/2" of fabric for exterior 5 squares 6 1/4" of stabilizer (see above) 5 squares 6 1/2" of fabric for lining  Materials for fabric box 1. Sew your apple quilt block ( size 4"x 4") and cut your fabrics and foam stabilizer according to the measurements given above.. 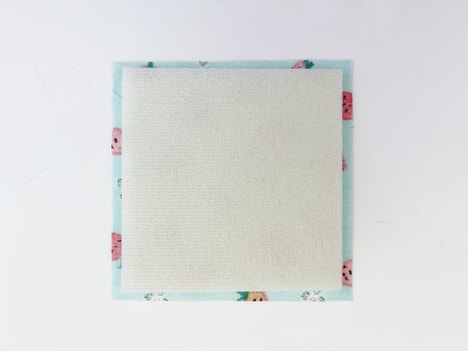 add foam stabilizer to your fabric squares 2. Add the foam stabilizer to your fabric squares. If you have fusible stabilizer you will need to iron it on your squares. If you're using 'soft and stable' @Byannie like me, you can attach it to your fabric squares with glue baste spray. Your foam stabilizer will be 1/8" smaller than your squares. 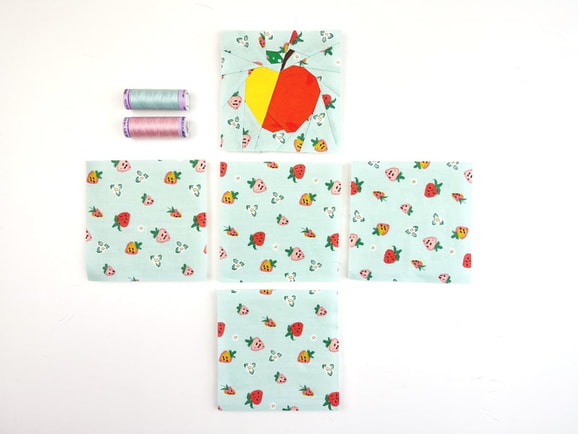 fabric squares for your fabric square box 3. Assemble the exterior of your fabric square box. Place your squares as shown above. First start with sewing your apple quilt block to the center square. Before you start sewing, mark 1/4" cross from both edges at the corners. Start sewing at the point of the cross with 1/4" seam allowance, back stitch at the beginning and the end of your seam. Then sew the opposite square of your quilt block to the center square the same way. Then add the two side squares. Sew all 4 squares to your center square the same way. The center square will be the base of your fabric cube. 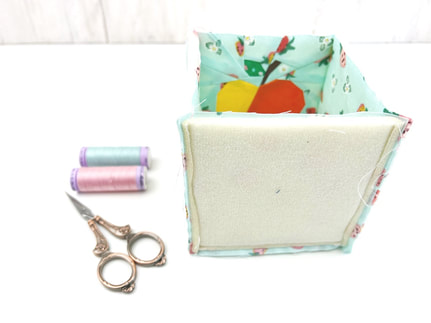 join the side edge seams of your fabric cube Next you will need to lay the adjacent side pieces together (right sides together). And sew them the same way, with a 1/4" seam allowance, start right at the top, but stop 1/4" from the end. Repeat for all 4 sides till your cube is all sewn together, like shown above. 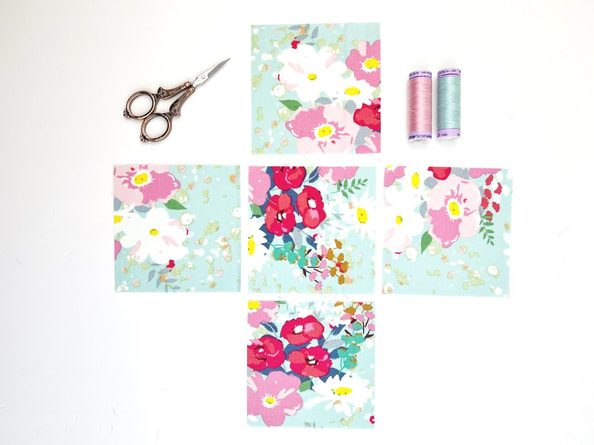 place lining squares as exterior squares 4. Sewing the lining of your fabric cube Place your lining squares the same way you placed your exterior squares. Stitch them together the same way too. Attach the side squares to the bottom square first. Then sew the side seams. Leave a 3" gap in one of the side seams for turning your cube later. 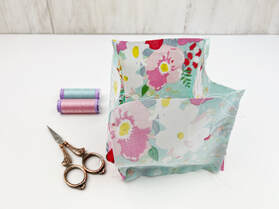 leave a 3" opening in one of the side seams of the lining 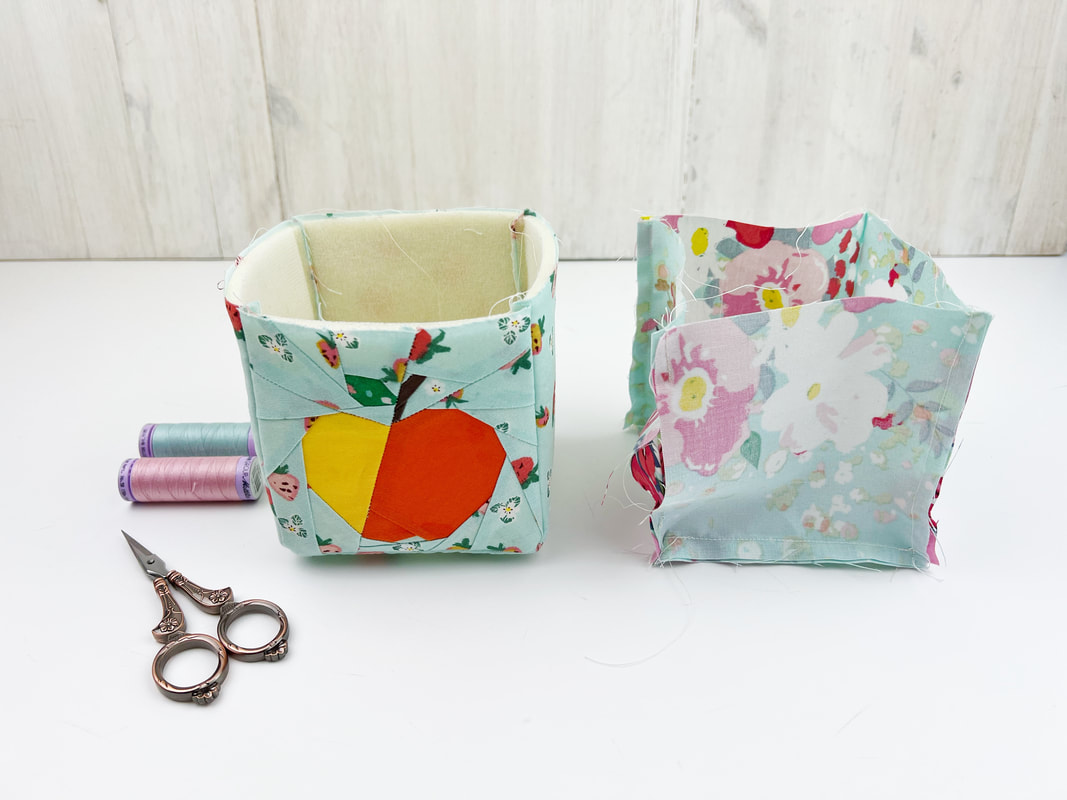 turn the exterior cube right sides out, leave lining cube as is. 5. Put the square fabric box together. Turn your exterior box right sides out, but leave your lining cube the way it is, insides out. Now place your exterior box inside the lining box. Align the side seams and pin or clip in place, make sure the top edges align. 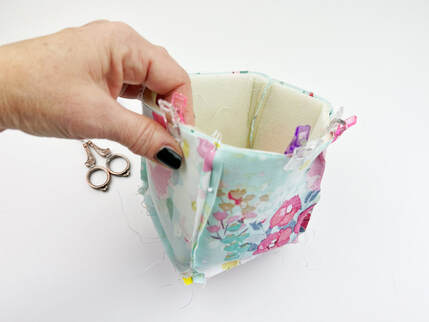 place the exterior box inside the lining and clip in place Sew along the top edge with 1/4" seam allowance. To finish your fabric basket/ box, turn the box right sides out through the opening in the side seam of the lining. Press the lining at the top edge into the box. Do not press down the foam stabilizer, this way you get a cute trim of your lining fabric at the top edge. Stitch along the top edge with a small seam allowance. 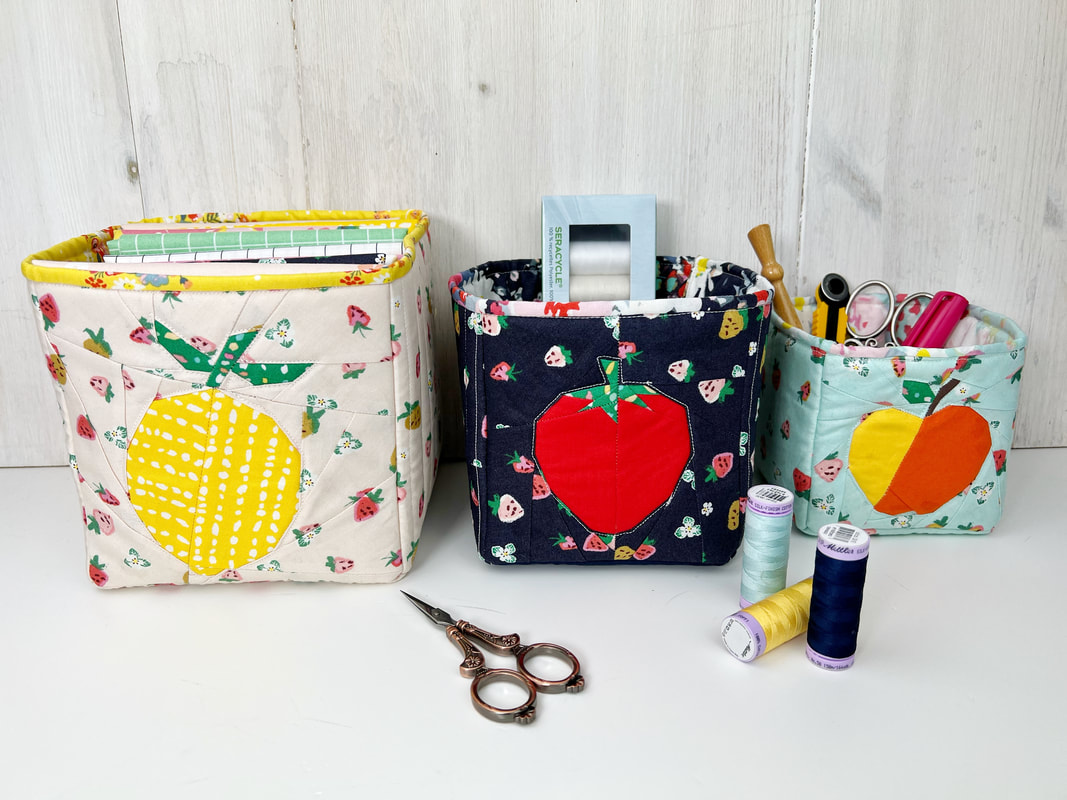 square fabric boxes Thank you Riley Blake Designs for the opportunity to design these fruity quilt block patterns and for supplying the super pretty fabric series 'misty morning' designed by Minkie Kim that I used in this quilt pattern series. Happy sewing everyone Ingrid x
|

Author
Ingrid Alteneder Archive
March 2022
Categories
All
|


 RSS Feed

|
Visit us at
|