
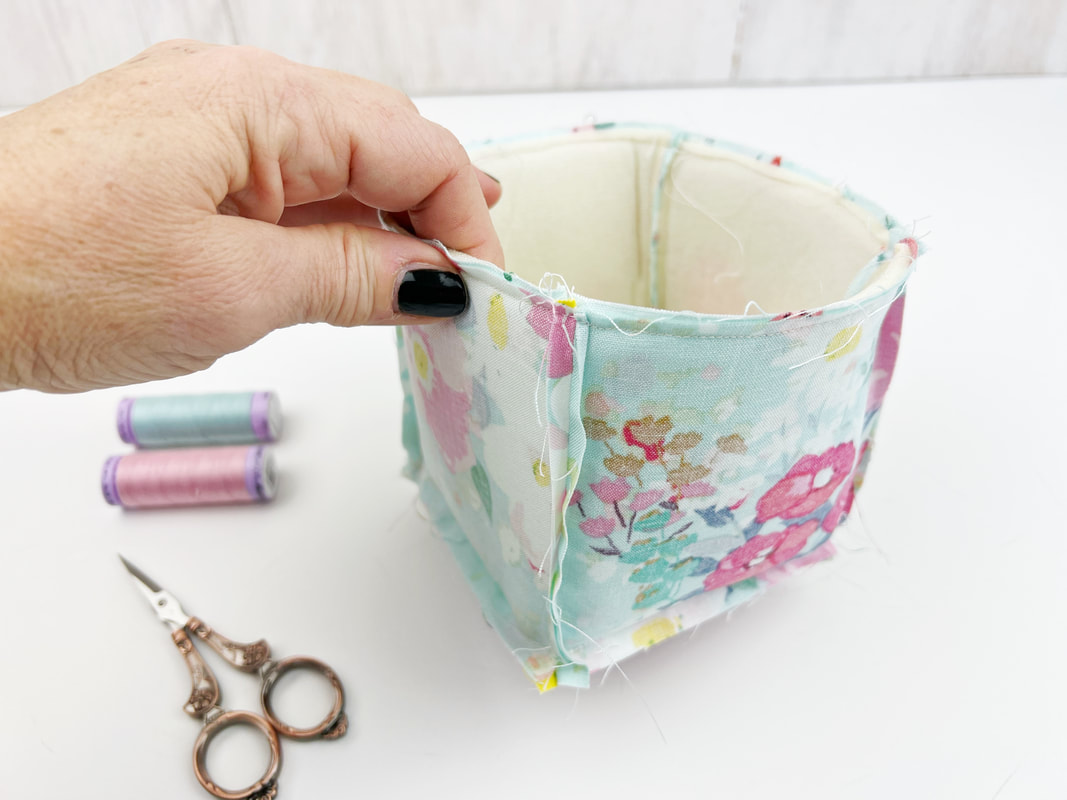
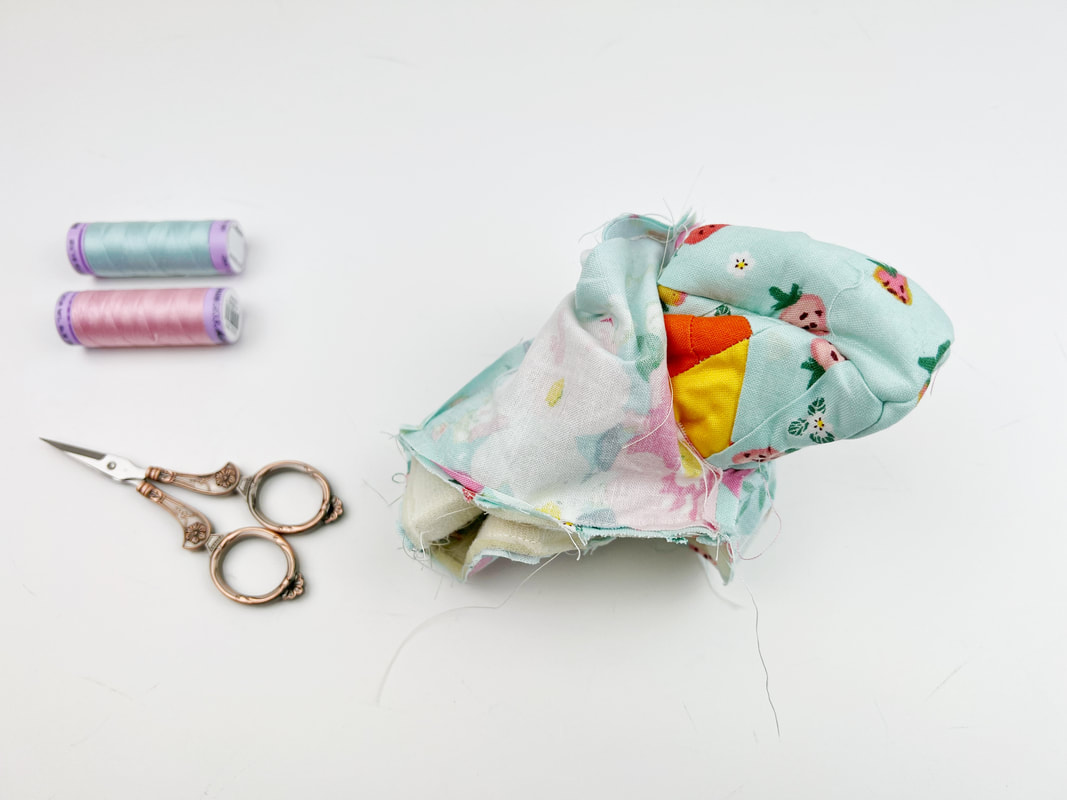
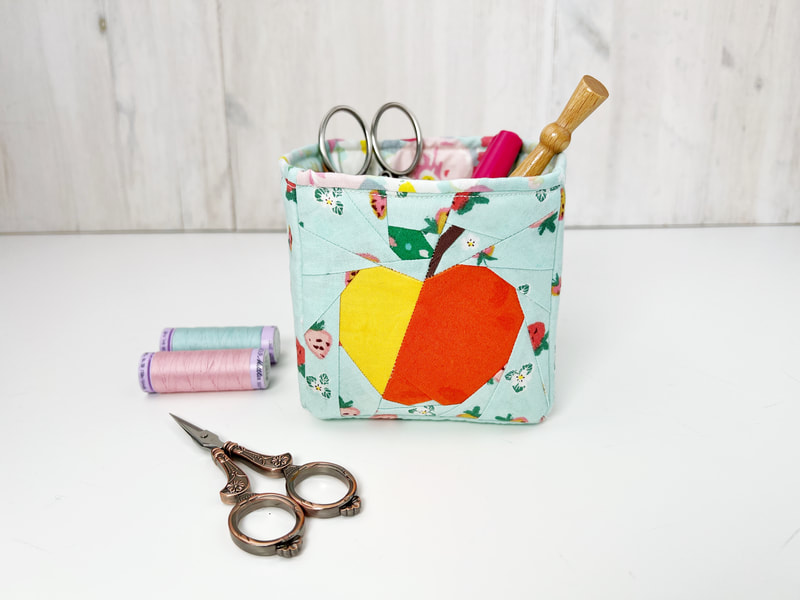
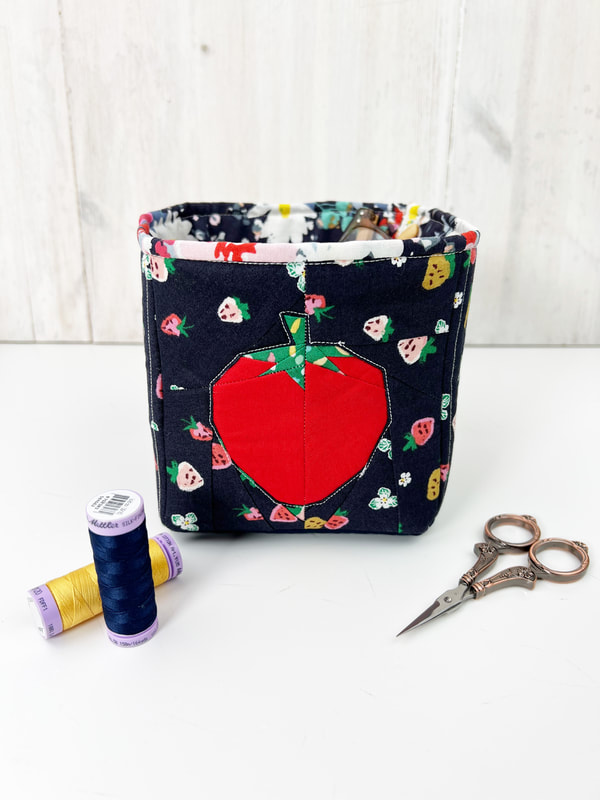
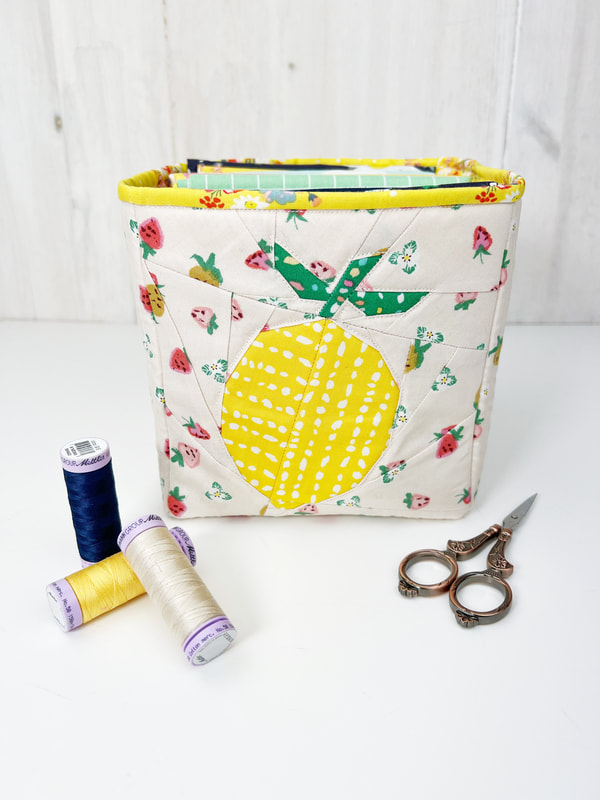
 Square fabric boxes Do you love boxes and baskets as much as I do? I have to admit I am a little bit obsessed. I love storing things in little boxes, baskets and containers, especially if they're square shaped. So I decided it's high time I made a free pattern for some little square fabric boxes. When I saw this new fabric line from Minkie Kim for Riley Blake Designs I thought fruits, fruits and some more fruits. And these delicious fruits needed to go somewhere special, don't you agree? So I made some cute little square fabric containers. These are really easy to make. 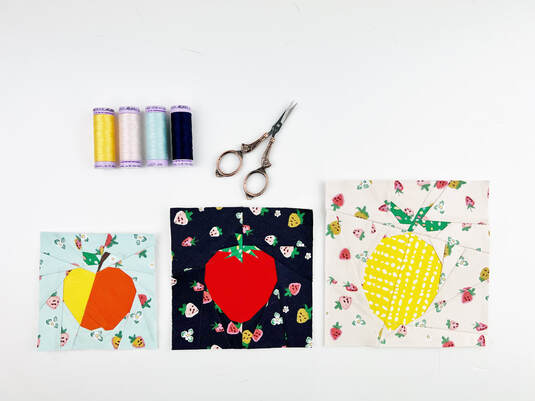 fruit quilt blocks Fabric square boxes: please read through the instructions first Tools needed: -sewing machine/ thread and fabric -cutting mat/ rotary cutter and acrylic ruler -pins or clips and iron optional tools to make your life easier: -spray baste -fabric glue pen for your foundation paper piecing Materials needed: box sizes: S - 4"x 4"x 4" , M - 5"x 5"x 5", L - 6"x 6"x 6" ( width x hight x depth) S: quilt block apple in 4" size (will be 4 1/2" when sewn together) 4 squares 4 1/2" of fabric for exterior 5 squares 4 1/4" of 'soft and stable' @byAnnie or Pellon Fusible Flex foam stabilizer 5 squares 4 1/2" of fabric for lining. M: quilt block strawberry in 5" (will be 5 1/2" when sewn together) 4 squares 5 1/2" of fabric for exterior 5 squares 5 1/4" of stabilizer (see above) 5 squares 5 1/2" of fabric for lining L: quilt block lemon in 6" (will be 6 1/2" when sewn together) 4 squares 6 1/2" of fabric for exterior 5 squares 6 1/4" of stabilizer (see above) 5 squares 6 1/2" of fabric for lining  Materials for fabric box 1. Sew your apple quilt block ( size 4"x 4") and cut your fabrics and foam stabilizer according to the measurements given above.. 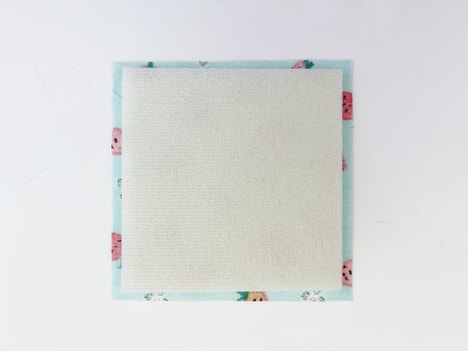 add foam stabilizer to your fabric squares 2. Add the foam stabilizer to your fabric squares. If you have fusible stabilizer you will need to iron it on your squares. If you're using 'soft and stable' @Byannie like me, you can attach it to your fabric squares with glue baste spray. Your foam stabilizer will be 1/8" smaller than your squares. 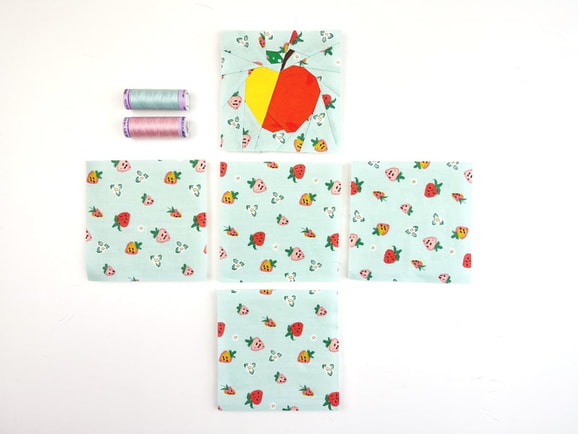 fabric squares for your fabric square box 3. Assemble the exterior of your fabric square box. Place your squares as shown above. First start with sewing your apple quilt block to the center square. Before you start sewing, mark 1/4" cross from both edges at the corners. Start sewing at the point of the cross with 1/4" seam allowance, back stitch at the beginning and the end of your seam. Then sew the opposite square of your quilt block to the center square the same way. Then add the two side squares. Sew all 4 squares to your center square the same way. The center square will be the base of your fabric cube. 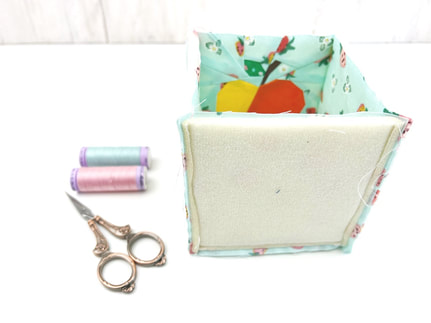 join the side edge seams of your fabric cube Next you will need to lay the adjacent side pieces together (right sides together). And sew them the same way, with a 1/4" seam allowance, start right at the top, but stop 1/4" from the end. Repeat for all 4 sides till your cube is all sewn together, like shown above. 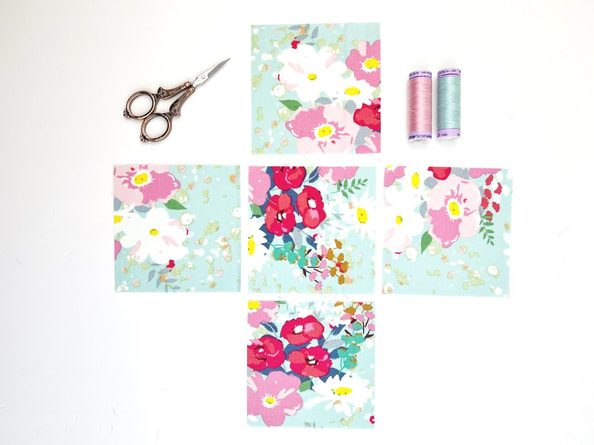 place lining squares as exterior squares 4. Sewing the lining of your fabric cube Place your lining squares the same way you placed your exterior squares. Stitch them together the same way too. Attach the side squares to the bottom square first. Then sew the side seams. Leave a 3" gap in one of the side seams for turning your cube later.  leave a 3" opening in one of the side seams of the lining 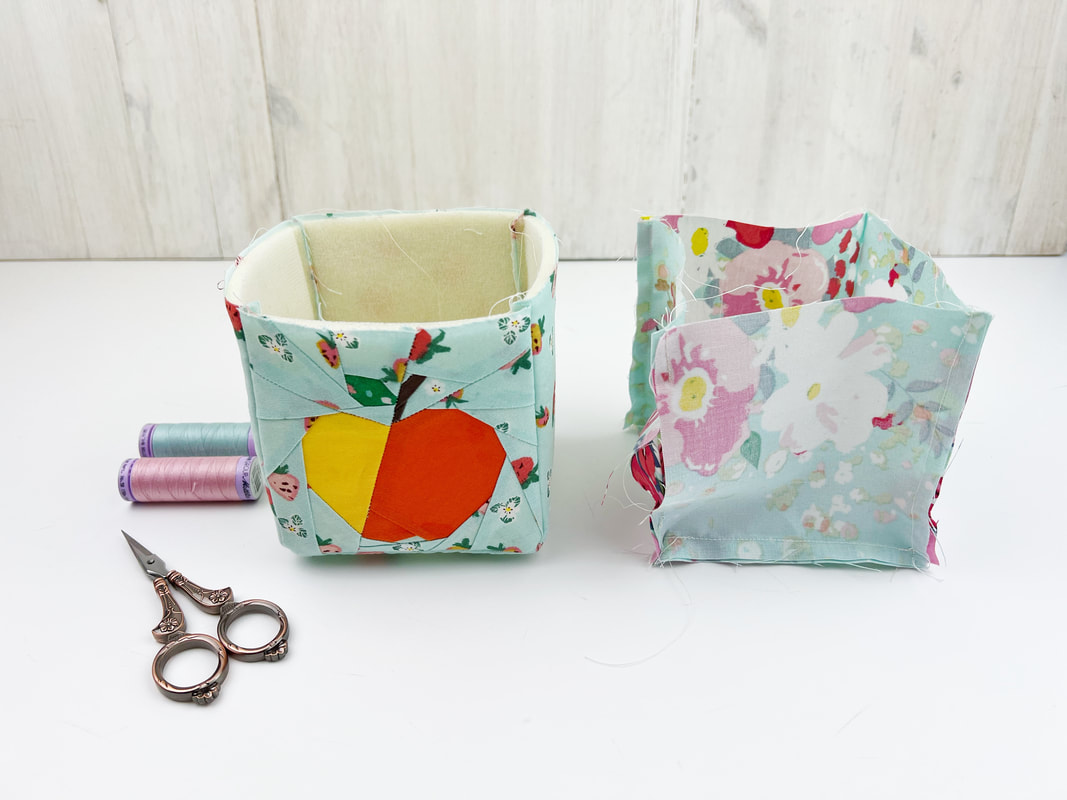 turn the exterior cube right sides out, leave lining cube as is. 5. Put the square fabric box together. Turn your exterior box right sides out, but leave your lining cube the way it is, insides out. Now place your exterior box inside the lining box. Align the side seams and pin or clip in place, make sure the top edges align. 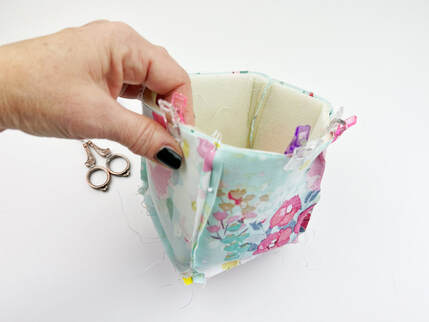 place the exterior box inside the lining and clip in place Sew along the top edge with 1/4" seam allowance. To finish your fabric basket/ box, turn the box right sides out through the opening in the side seam of the lining. Press the lining at the top edge into the box. Do not press down the foam stabilizer, this way you get a cute trim of your lining fabric at the top edge. Stitch along the top edge with a small seam allowance. 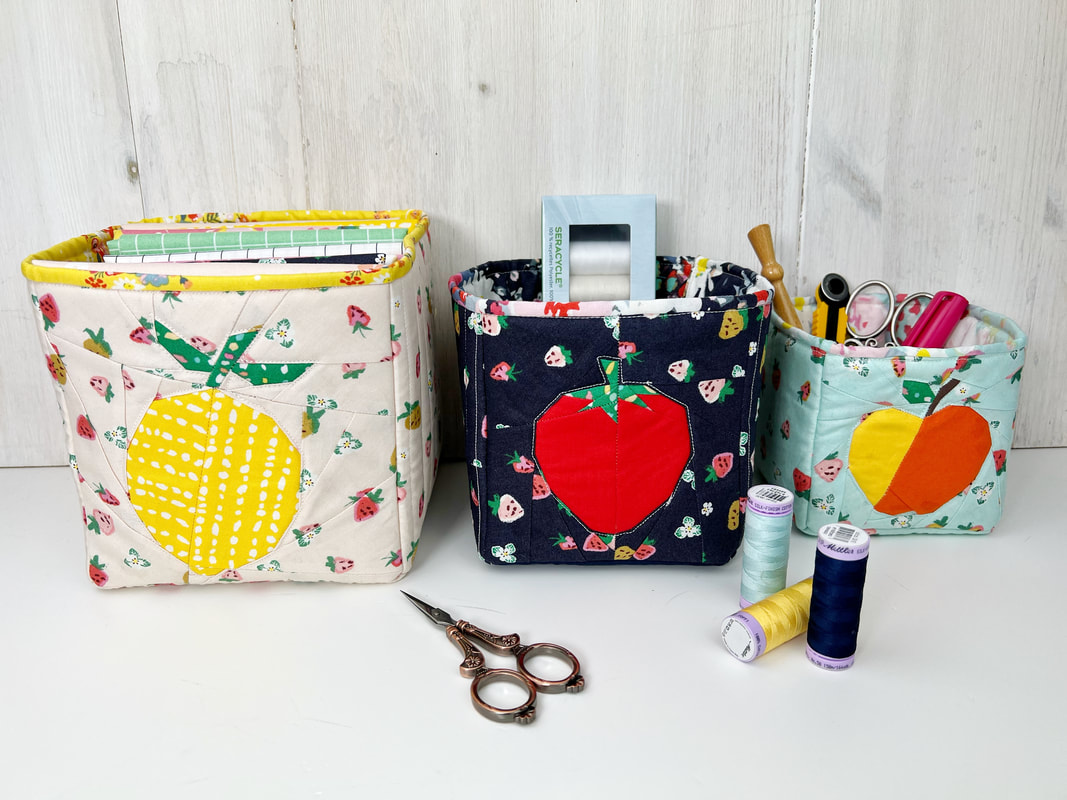 square fabric boxes Thank you Riley Blake Designs for the opportunity to design these fruity quilt block patterns and for supplying the super pretty fabric series 'misty morning' designed by Minkie Kim that I used in this quilt pattern series. Happy sewing everyone Ingrid x
6 Comments
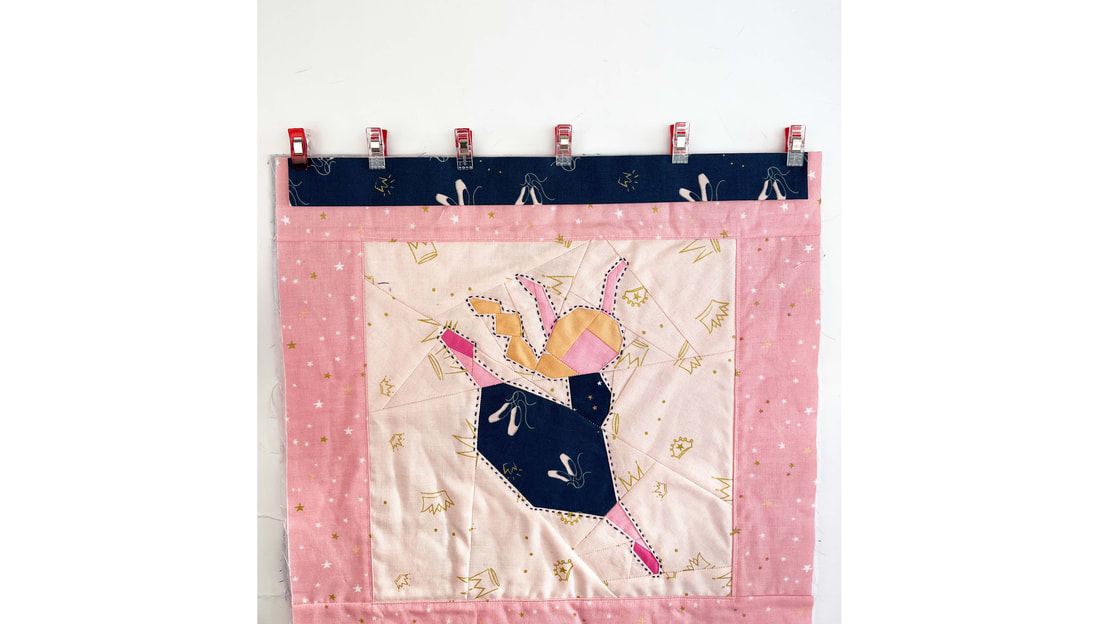
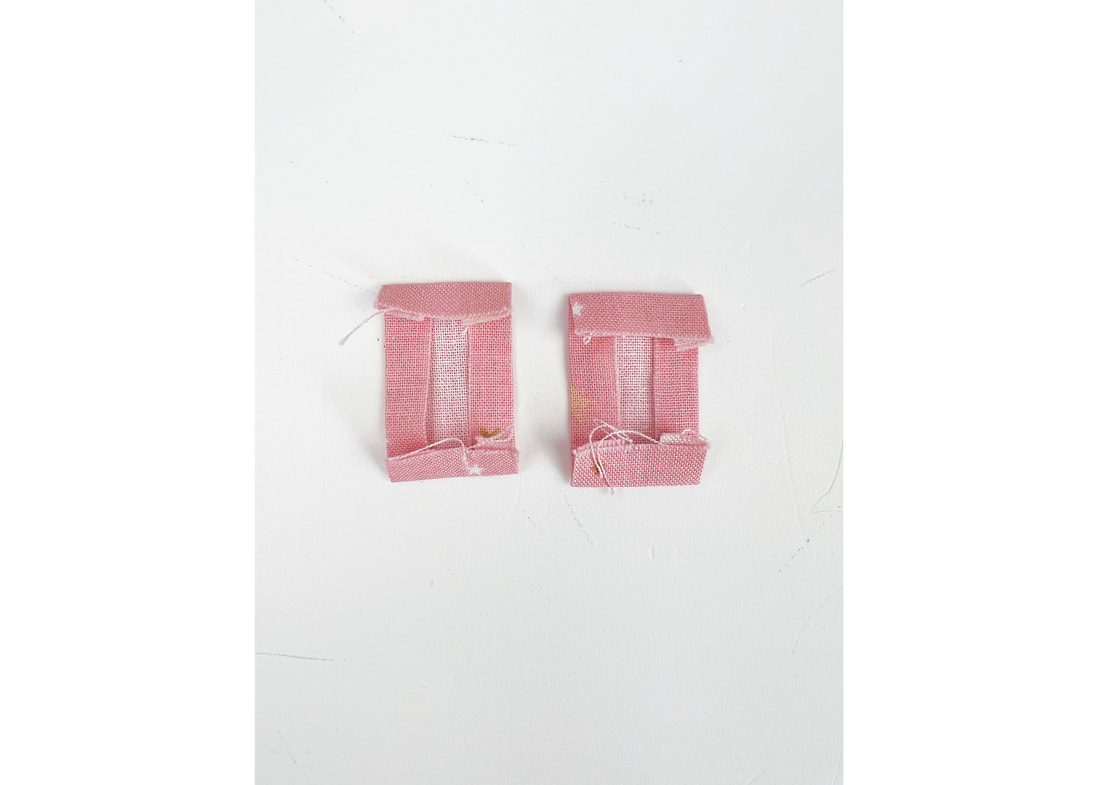
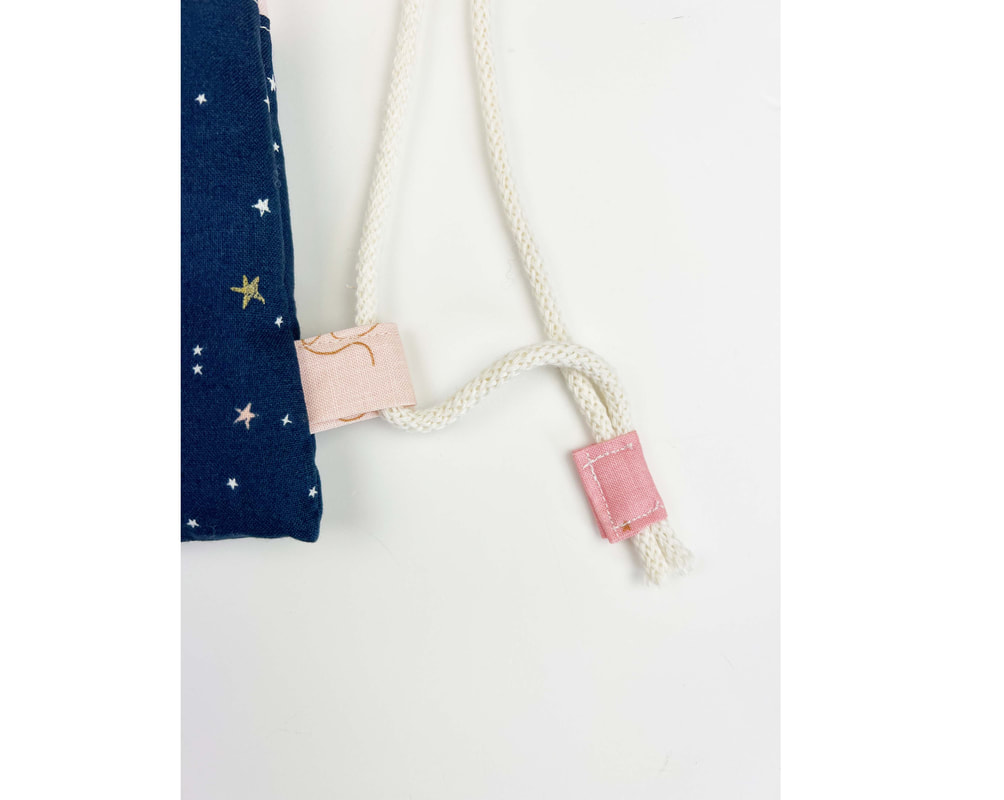
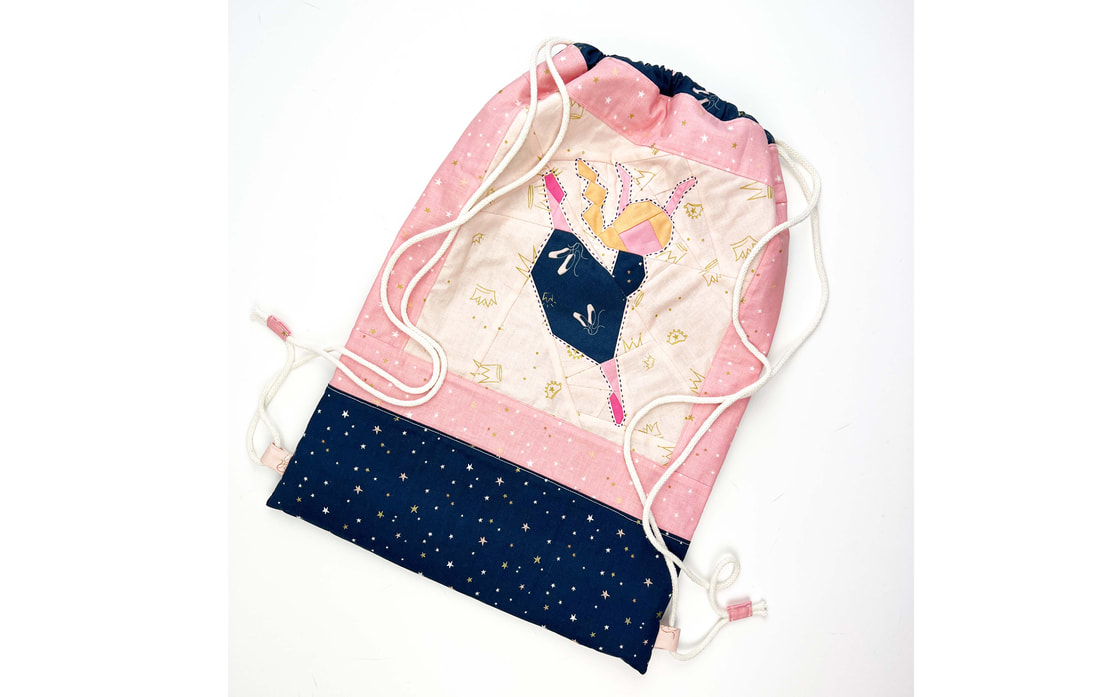
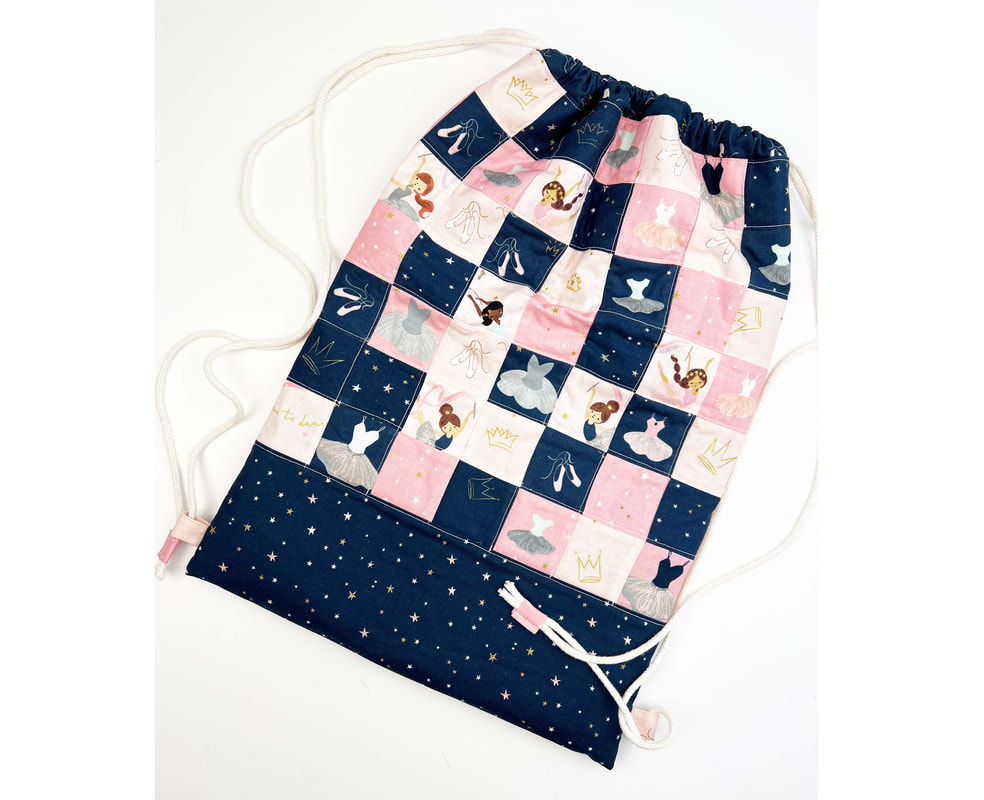
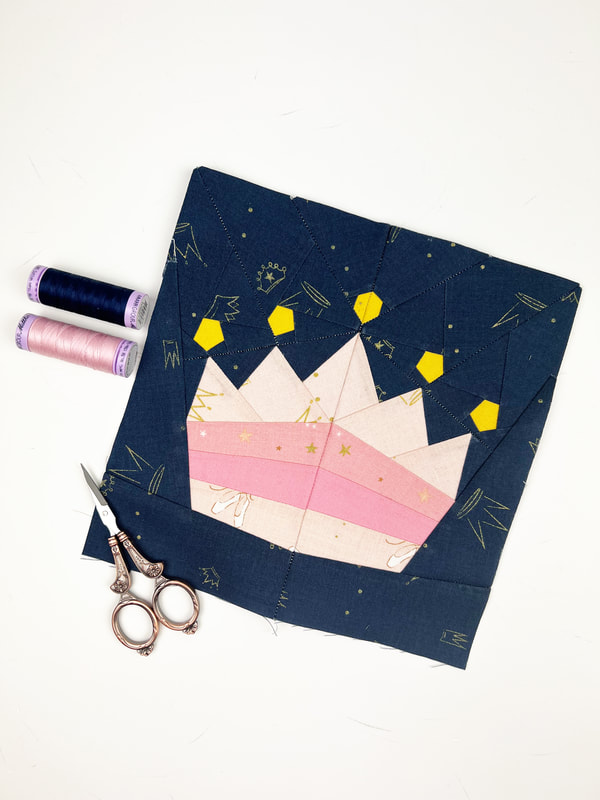
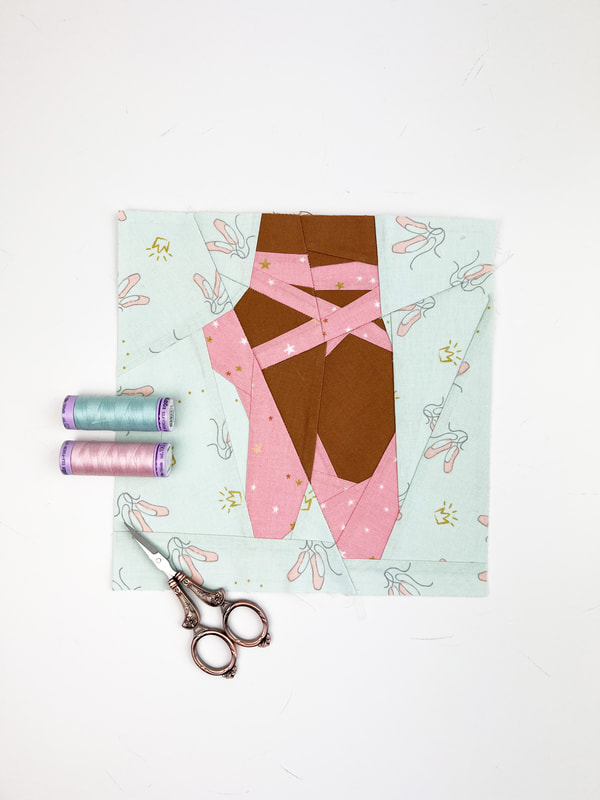
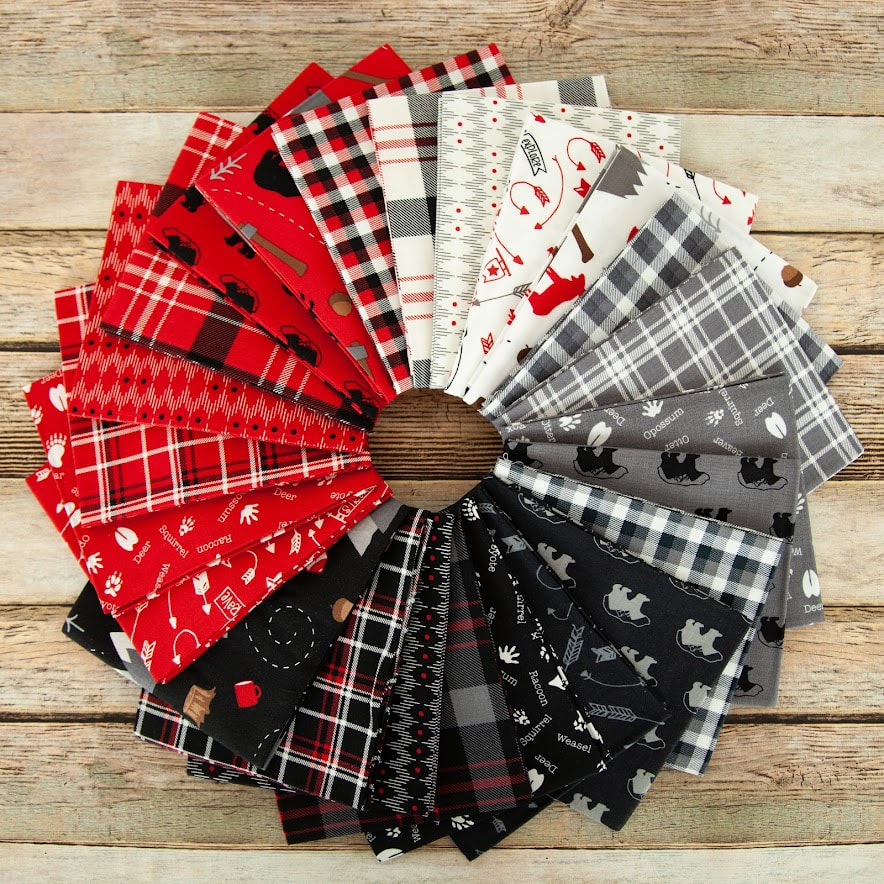
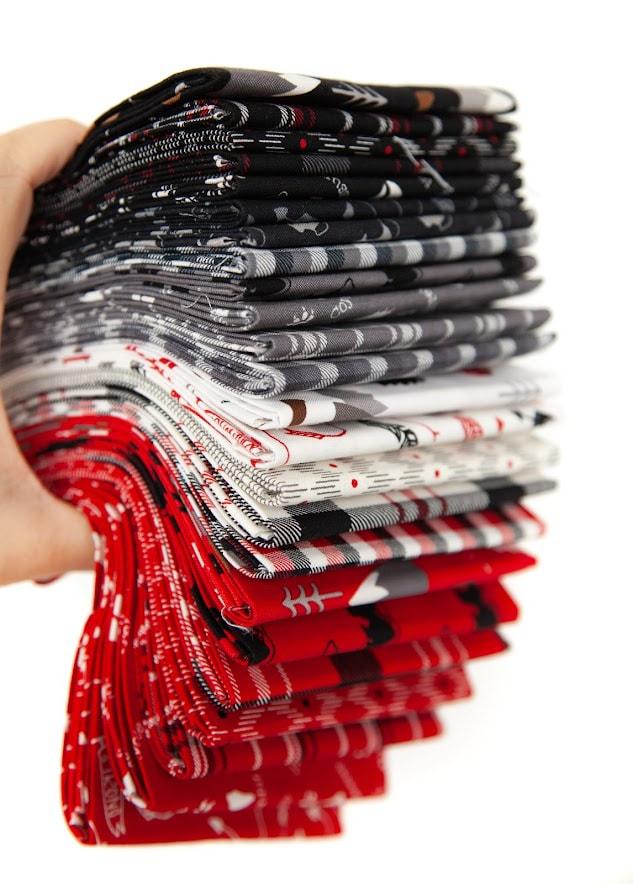
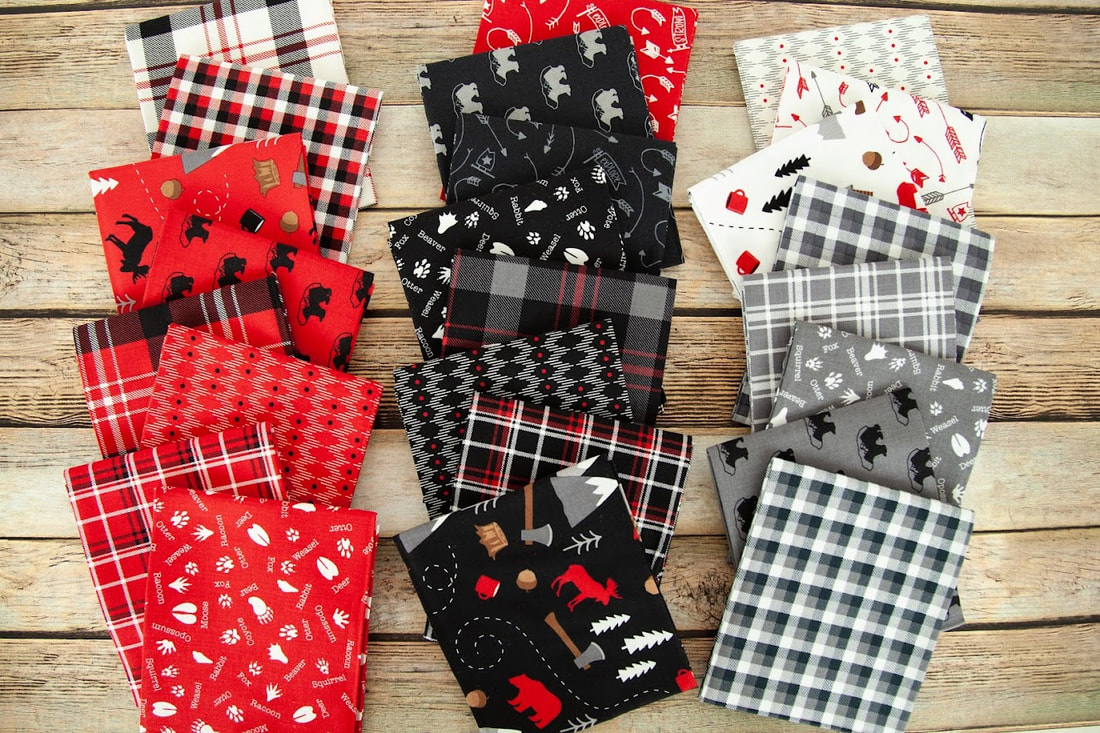
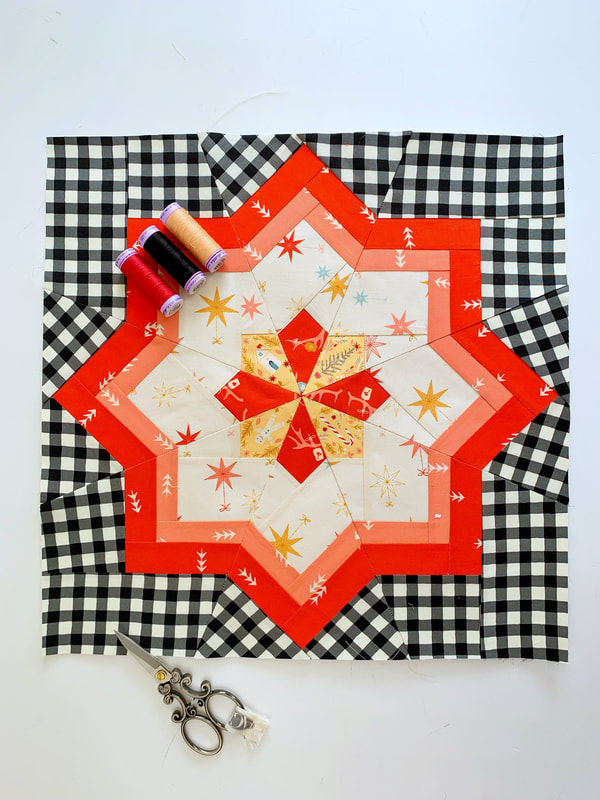
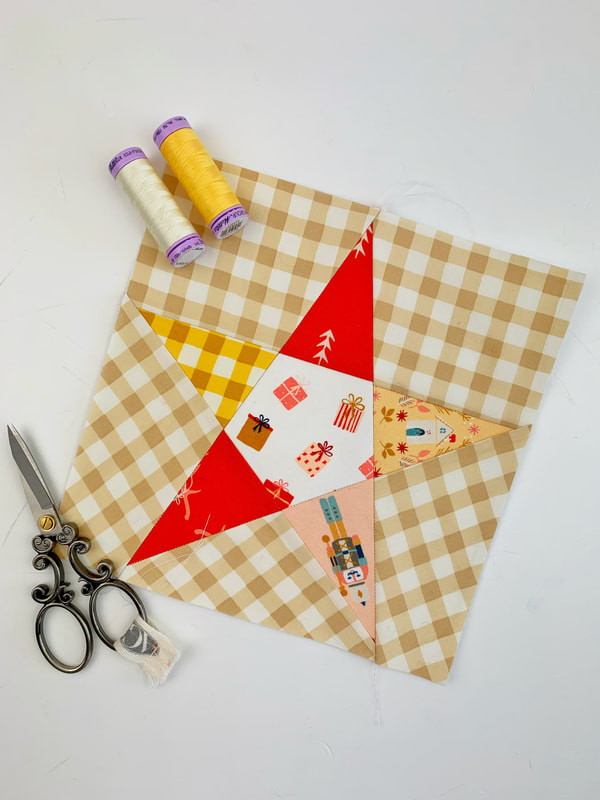
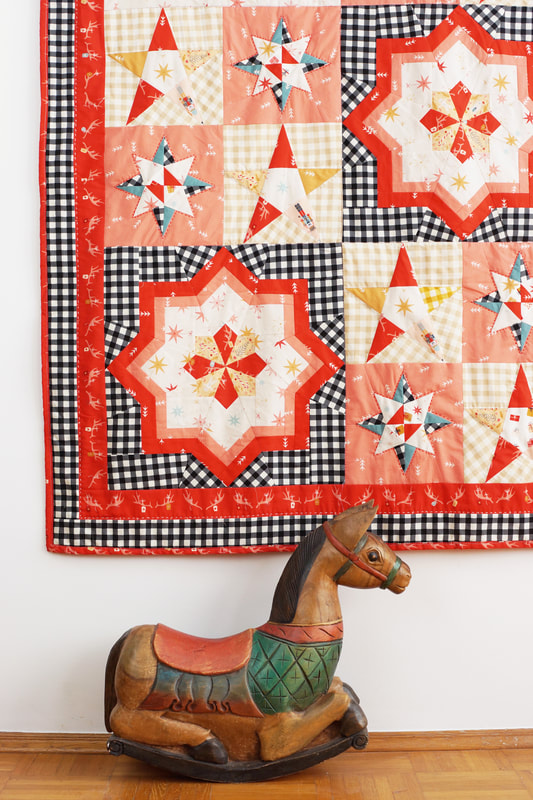
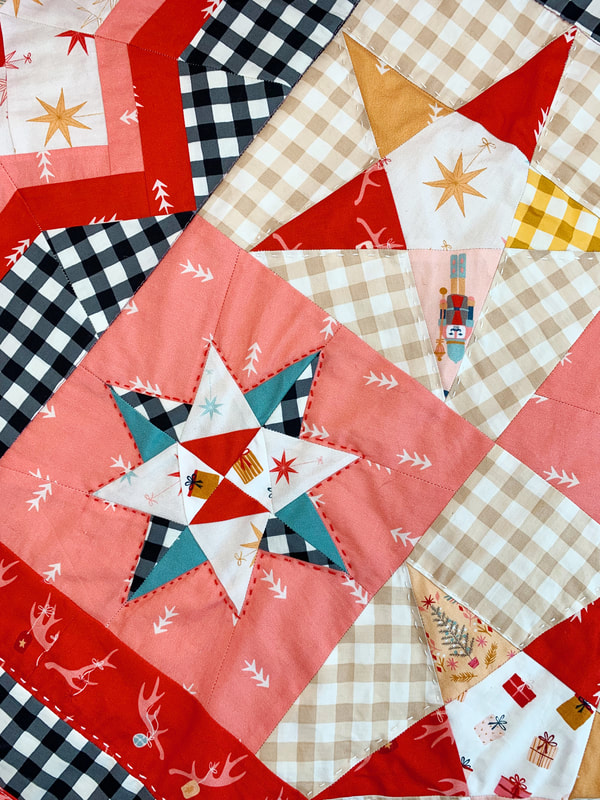
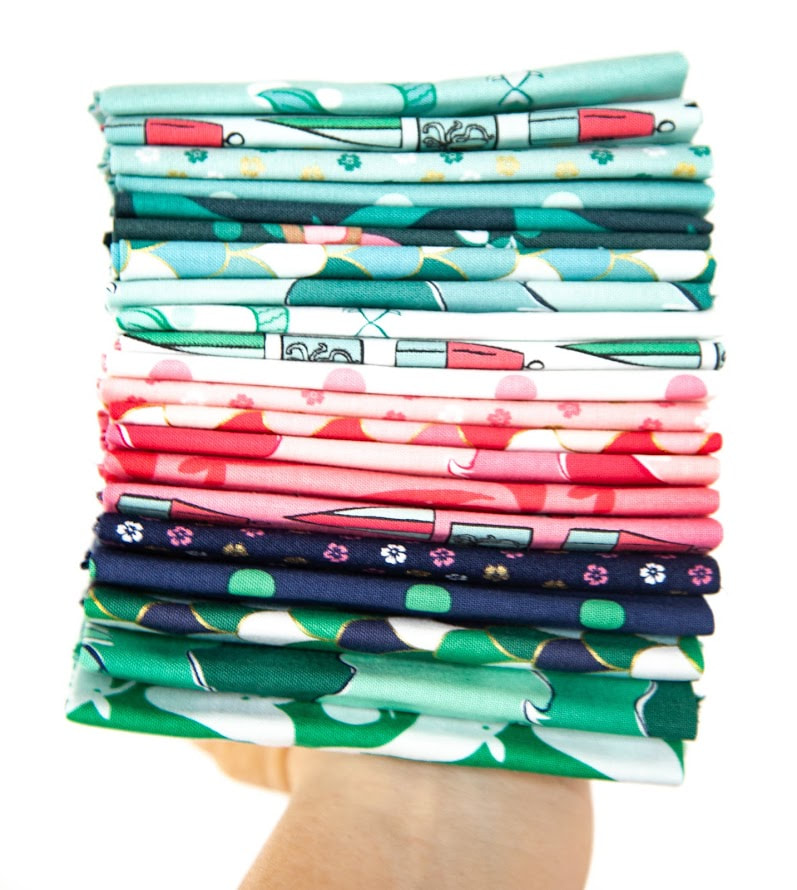
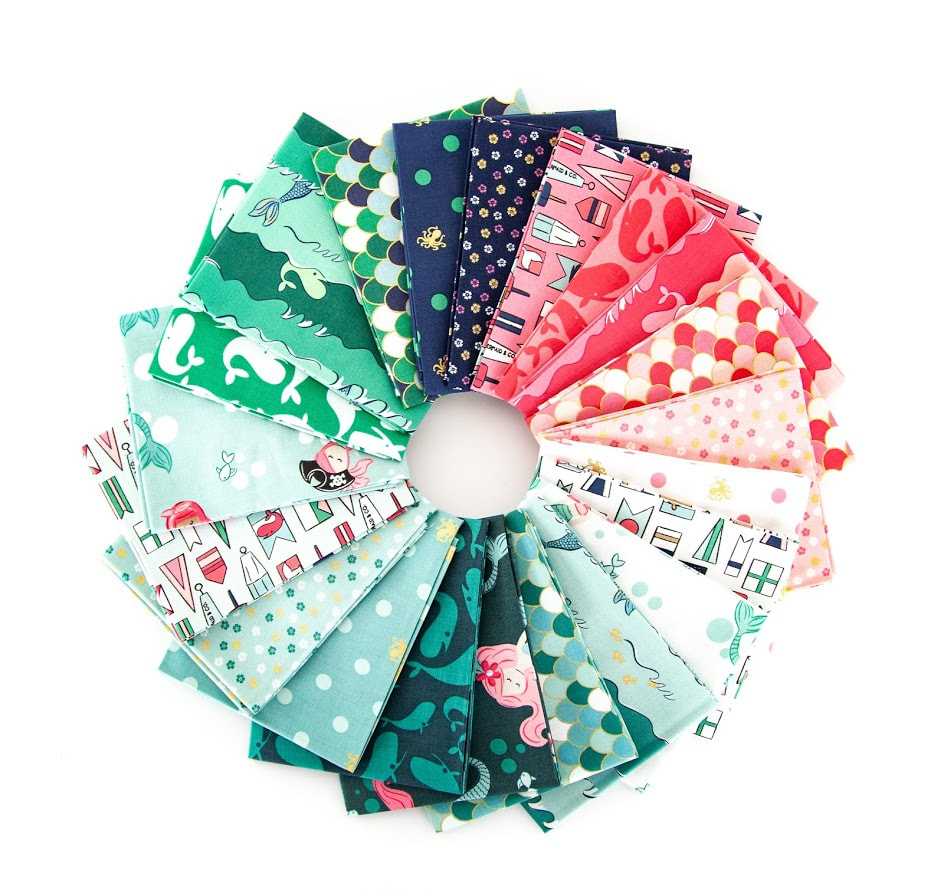
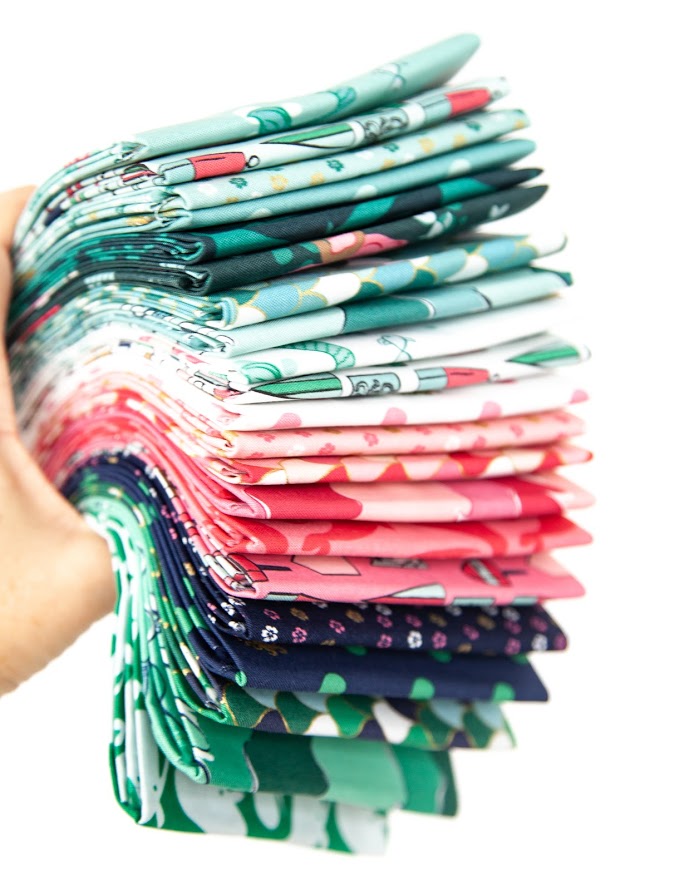
Do you have little dancer children? Do you want them to have the cutest ballet bag ever? You have come to the the right place. Riley Blake Designs just released this absolute perfect fabric series called 'Spin & Twirl' for stylish dancers. It's not too girly, of course it has pinks and whites, but the navy is such a perfect balance and gives this fabric series a classy touch. So let's get sewing, and let's make the best ballerina bag for our little dancer kids. 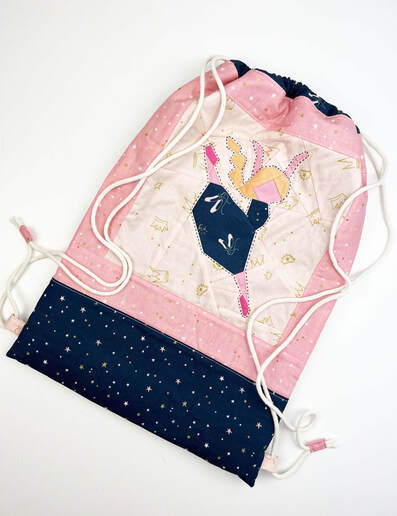 cutest ballet dancer bag ever Finished bag size: 14" wide x 18" high Materials needed: (width x hight) - 1 ballerina quilt block 10"x10" fabric around the quilt block: - 2x strips of fabric 2,5"x 10,5" - 2x strips of fabric 2,5" x 14,5" fabric for the bottom: - 1x 14,5" x 10" fabric for back: 49 squares of 2,5"x 2,5" ( or one piece of fabric 14,5"x 14,5") lining: - 1x piece of fabric 14,5" x 38" extras: - 1x piece of thin fusible batting (for example Vlieseline H630) - 2x pieces of fabric for the loops 2,5"x 2" - 2x pieces of fabric for the tabs ( cords) 2"x 1,5" - 2x pieces of fabric 14 1/4"x 2,5" for the casing at the top. - 2x pieces of 72" cord. Instructions: 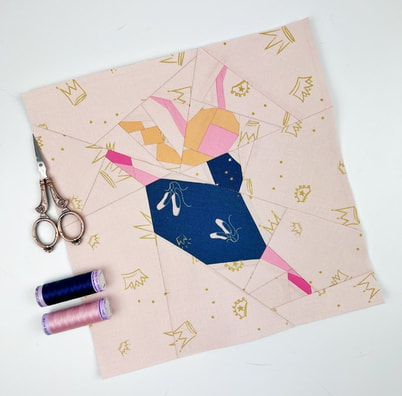 ballerina quilt block 10"x 10" 1. Sew the ballerina quilt block ( or any other quilt block of the ballet series) in the 10"x 10" size. The block will be 10,5"x 10,5" when you finish it. (10"x 10" refers to the block size when incorporated into a project) 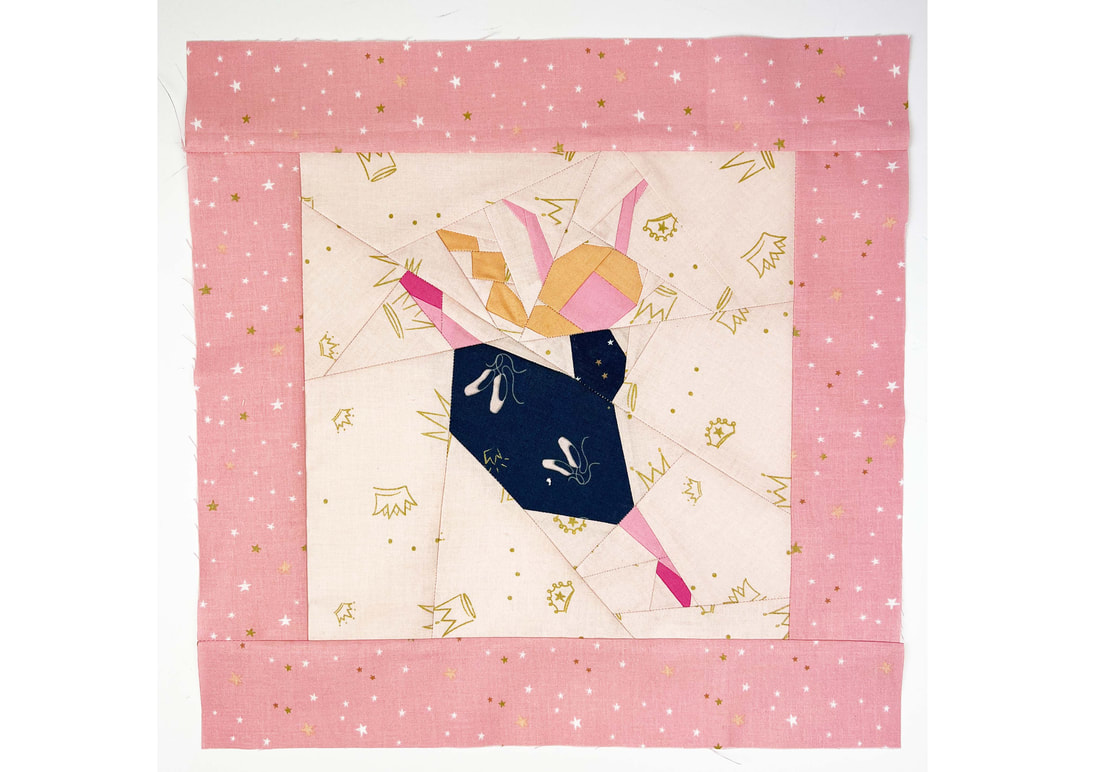 attach the fabric strips to the quilt block 2. Cut the fabric strips for the sides of the quilt block. (if you're using directional fabric, check the direction of the print before cutting) Attach the 2,5" fabric strips to the quilt block. First sew the two shorter strips to the sides of the quilt block, then attach the longer strips to the top and the bottom of the quilt block. If you're using directional fabric check the direction before attaching the strips. 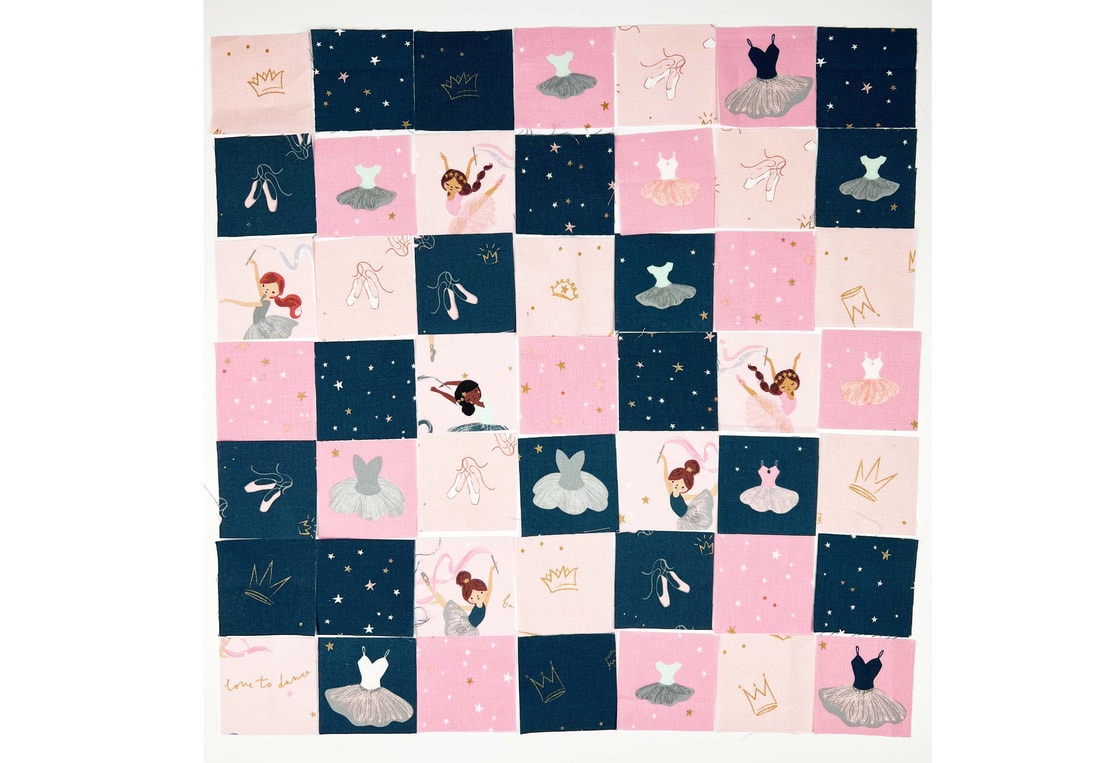 49 2,5" squares for the back of the ballet bag 3. Cut 49 pieces of 2,5"x 2,5" squares and place them the way you want them for the back of your bag. I love them to be totally random. This Riley Blake Designs 'Twist and Twirl' fabric line is absolutely perfect for fussy cutting, so I went a little crazy... LOL. 4. How to sew these small fabric squares together? There are several different ways to sew fabric squares together. For this ballerina bag I liked to sew the square together by rows. Then I pressed the seams in opposite directions, to get perfect nesting seams and therefore perfect corners. ( See video)  Ballerina bag fabric placement 5. Now that you're done with the back of your bag, it's time to place the fabric pieces in the right order and piece them together. You will need to place the front quilt block, then the bottom piece of fabric and the back piece in one row, as shown above. Beware of the directions of your quilt block and back piece, you want them facing each other, or facing the bottom of the ballerina bag. Now sew these 3 pieces together, press again and add fusible batting. 6. If you wish, you can either hand or machine quilt your outer ballerina bag piece. I did a combination of both. I hand quilted around the ballerina quilt block. Then I machine quilted the front and the back piece with simple straight line stitching. 7. Sewing the loops for the cord at the sides of the ballet bag. Cut the fabric pieces, fold them in half lengthwise and press in the 1/4" seam allowance. ( photo 1). Then stitch along the edge with a small seam allowance. ( photo 2). Fold in half so the short edges align and clip in place at 1" from the bottom edge of the bag on both sides. ( photo 3). 8. Making the casing: Cut the fabric pieces for the casing. Fold in the short ends 1/4" and stitch in place with a small seam allowance. Then fold the casing in half lengthwise. Clip or pin casing in place at the top edges of your ballerina bag so that it's centered and the raw edges align.( photo 2)  sew the side seams of outer fabric piece and lining 9. Preparing the outer piece of the ballerina bag and the lining. Fold the outer piece of the ballerina bag, right sides together in half, so the top edges align and stitch along the sides with 1/4" seam allowance. stitch the loops between these seams. You want to stitch across the loops twice for extra strength. Cut the lining piece according to the measurements given. Fold in half right sides together, so the top edges align and stitch along the sides with 1/4" seam allowance. Leave a 3-4" opening on one side for turning the bag later. 10. Turn the lining inside out and place it inside the outer piece, right sides together. Pin or clip the two pieces together so that the top raw edges align. I like to start at the side seams and place those on top of each other, then clip the rest. The casing will be between the two pieces. Now stitch along the top edge with a 1/4" seam allowance. Turn the bag inside out through the opening that you left in the side seam. Close the opening with a small seam allowance. Push the lining inside the bag.  stitch along the top edge of the ballerina bag 11. Stitch along the top edge of the ballerina bag. 12. Adding the cord to the bag. I love these little tabs on the cord, but you can also just tie the cord with a knot or add some beads. For the tabs, cut the fabric pieces as mentioned above and fold in a 1/4" seam allowance on the longer edges first, then fold in the shorter edges 1/4" and press. (photo 1) - How to put in the cord into the casing of the bag? You need to put the cord through the casing before you attach the tabs. Attach a large safety pin to one end of the cord and go through the front part of the casing onto the back part of the casing coming out at the same side you went in. I was going in from the right with the first cord, going through the back part of the casing and coming out on the right as well. Going in from the left with the second cord through the front part of the casing onto the back part of the casing coming out again at the left with the second cord. Go through the bottom loops with one end of the cord on either side of the bag. ( photo 2) Fold the tab in half and place both ends of the cord in the center and stitch in place. Repeat for the second cord. And here you go all done and finished, easy enough, right? Do you want to make another one? I absolutely think so :-) Here are three more quilt blocks, that I designed especially for this fabric series. Which one is your favorite? Thank you Riley Blake Designs for the opportunity to design this quilt block pattern series and for supplying the absolutely adorable fabric series 'Spin & Twirl' that I used in this quilt pattern series. Happy sewing everyone! Ingrid xx Here are the cutest bear quilt block patterns that are super easy to make..... I got to participate again in Riley Blake Designs blog tour for this new fabric series called 'Into the woods' by Lori Whitlock. I totally saw myself in a wooden cottage with a fireplace. The cottage standing in the middle of the mountains, bears roaming through the forest, a Hot Cocoa in my hands while I read a book in front of the fire place. Doesn't this sound Devine for the autumn weather we're having right now? As some of you know I used to live in Vancouver for quite some time and this fabric series brings back some of my best memories in Whistler or on Vancouver island. But Aspen and Lake Tahoe come to mind as well, right? 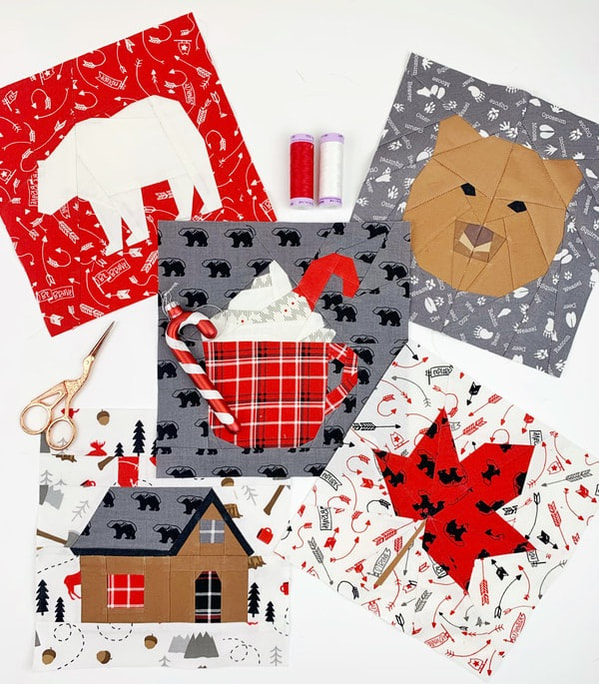 bear cottage quilt block pattern series This quilt block pattern series consists of 2 bear quilt blocks, a bear paw quilt block, a little cottage quilt block, a hot cocoa quilt block and I added my maple leaf quilt block just because it completes this series so perfectly. I designed it especially for this Riley Blake Designs fabric series and called it 'Bear cottage'. All of these quilt blocks will be stunning by themselves, but will make up very nice 'cottage themed' projects as well, such as pillowcases, table runners, mini quilts, apron and much more. Actually this would be a beautiful full on quilt as well, wouldn't it? 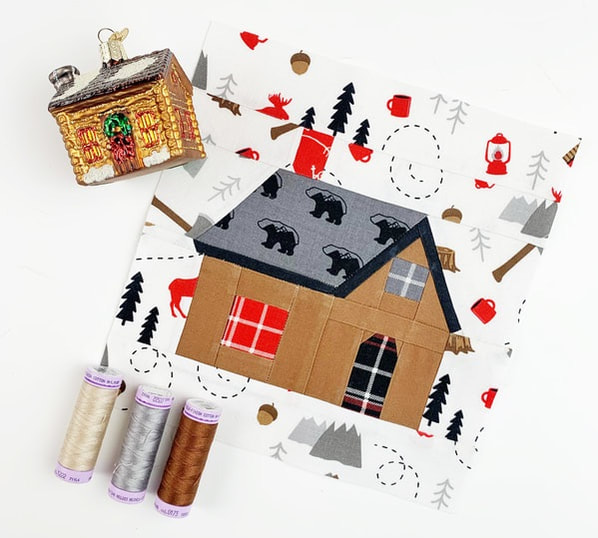 bear cottage quilt block The little bear cottage: This super simple but cute cottage quilt block pattern is perfect for fussy cutting. I placed the plaid pattern in the windows, so they look like window frames. But you could also place little faces in those windows and make a super sweet little cottage with this cottage quilt block pattern. 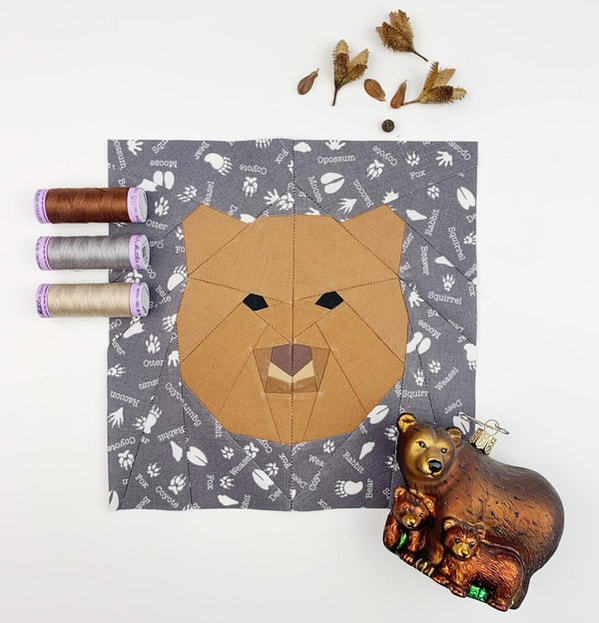 bear portrait quilt block The bear portrait: A bear portrait quilt block is a a great quilt block for a pillowcase. I especially love it if you add some hand quilting to the outline of the bear quilt block. I do have a whole series of animal portraits in my shop, and they would look adorable on a kids bed, don't you think? 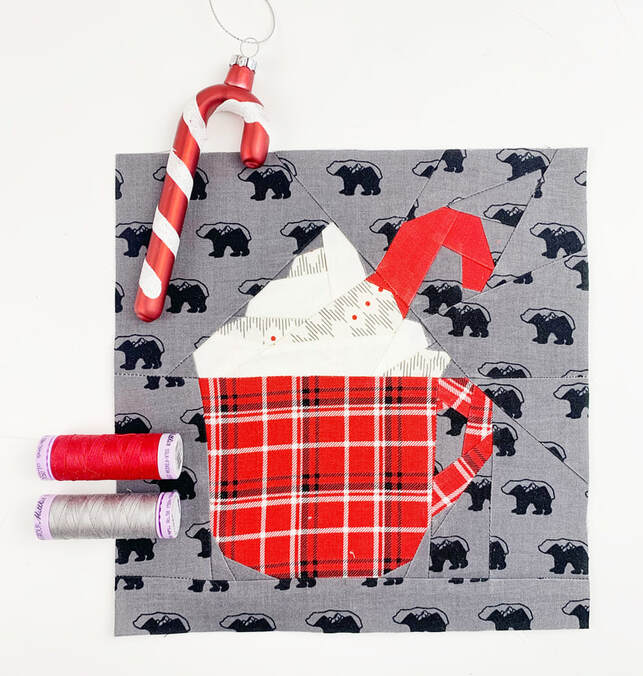 cup cocoa quilt block Hot cup of cocoa quilt block: A hot cup of cocoa is the epitome of coziness, right? And a red plaid cup with some sugar cane beats even that, isn't it so? Can't you just see yourself in some plaid onesie sitting in front of the fire place drinking your hot chocolate with lots of whipped cream? This hot chocolate quilt block pattern will be perfect for all sorts of kitchen related sewing projects. Think apron for Christmas, tea towel, oven mitt and much more. Let me know what other ideas you have for this cup cocoa quilt block pattern. 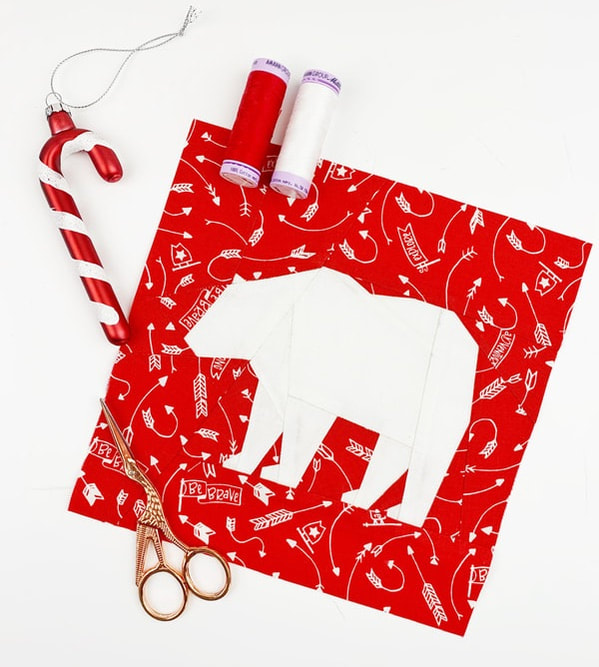 bear quilt block The bear: I always wanted to design a bear quilt block, that wasn't as cute as my Barney the Bear quilt block. This fabric series was the perfect inspiration for that. I made this bear quilt block into a polar bear quilt block. Just because the colors matched so perfectly. But this bear quilt block is perfect as a brown or black bear as well. Now he needs a name as well, don't you think? 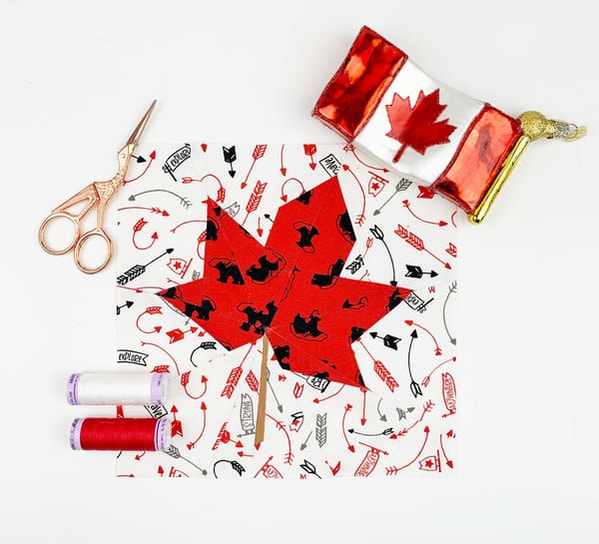 maple leaf quilt block The maple leaf: I just couldn't resist and add this maple leaf quilt block pattern to this 'Bear cottage' series. The fabric series just asked for this maple leaf quilt block to be added. Having lived in Canada for so long adds a little bit of home to this fabric series. 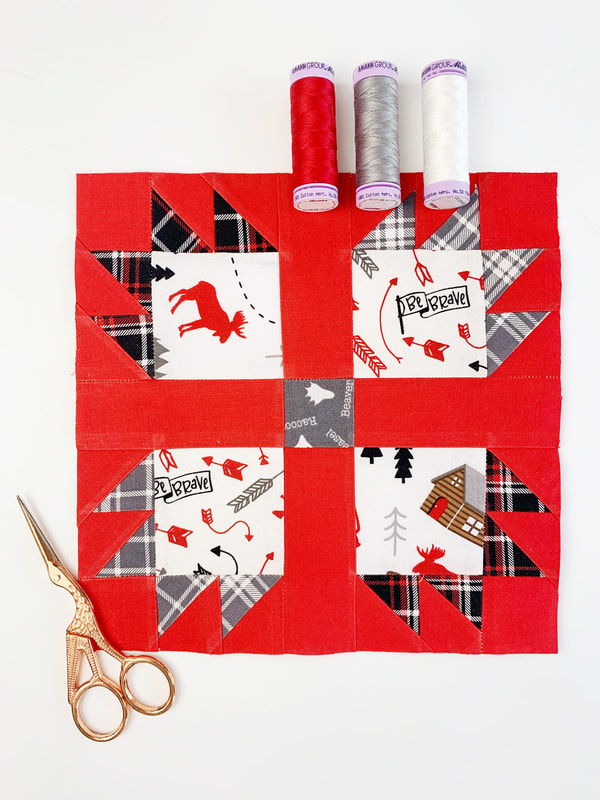 bear paw quilt block pattern The bear paw quilt block pattern: No 'Bear cottage' quilt block pattern series without the bear paw quilt block, right? The bear paw quilt block is an absolute classic. Usually the bear paw quilt block is made out of squares and half square triangles (HST). And sewing this bear paw quilt block in its classic way will make up a whole sewing tutorial by itself. It's a beginner friendly traditional piecing quilt block pattern. But you know me for being foundation paper piecing addicted, so I decided to make this classic pattern in to a paper pieced pattern. This has some advantages. You do not need to do complicated calculations for the squares and HST in order to figure out how to get a 8"x 8" or 10"x 10" quilt block. Just print the bear paw pattern, and you will get the perfect size. This bear paw quilt block pattern is also beginner friendly in its foundation paper piecing version. It's actually a pattern that doesn't take much longer than half an hour to sew. No pre cutting the fabric, just start sewing right away. And precision is a given with foundation paper piecing. You will get the bear paw quilt block pattern for free with the purchase of the bear cottage quilt block pattern series. 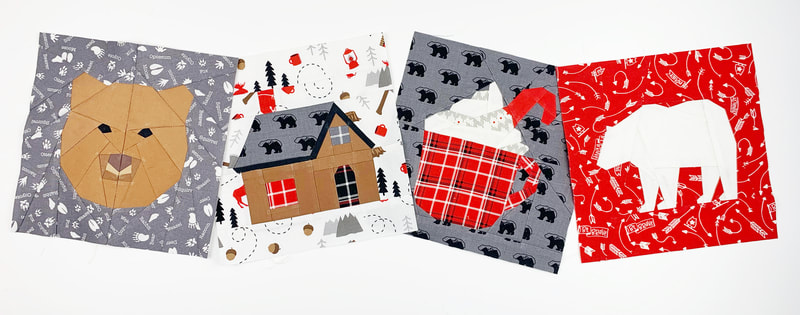 bear cottage quilt block patterns Thank you Riley Blake Designs for the opportunity to design a quilt block pattern series and for supplying the absolutely adorable fabric series designed by Lori Whitlock 'Into the woods' that I used in this quilt pattern series. What do you think? Ready to cozy up in front of the fire place? Let me know in the comments the projects you would love to sew with these quilt block patterns. Happy sewing Ingrid xx Rocking around the Christmas tree, is the name for my newest Christmas quilt pattern. 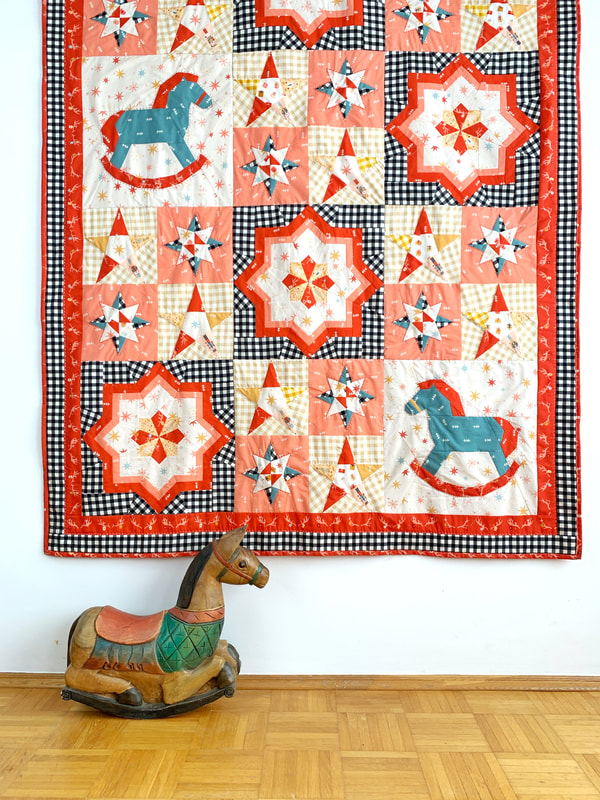 Christmas quilt 'Rocking around the Christmas tree' You think it's still a little early for Christmas sewing? Well that's what I thought when I started this Christmas quilt 3 weeks ago. Little did I know, I just turn around and it's September.... So I guess it's the perfect time to start Christmas projects for the favorite season of the the year. Christmas quilts are always special and remind us of cozy winter evenings with a hot cup of coco, right? Snow outside makes this picture even more perfect. So let's get into the Christmas spirit a little early this year. 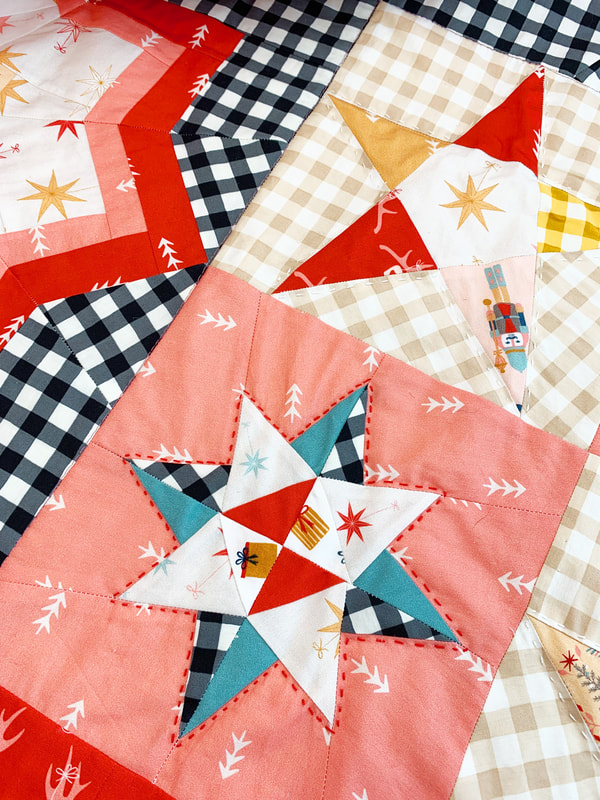 Star quilt blocks This Christmas quilt pattern includes some of my favorite quilt block patterns. The best thing about this pattern is, that the quilt blocks that I used for this Christmas quilt are super easy and quick to make. This quilt pattern is a simple patchwork pattern for a stunning Christmas quilt. And while I really love traditional Christmas quilts with simple shapes for cute fabric scraps, I really think this Christmas quilt pattern is simple enough, but gives you stunning results. And you can use fabric scraps as well as a whole Christmas fabric series. Here I show you all the quilt blocks , that are needed for this Christmas quilt. As you can see there are several different star quilt blocks, all of them super easy to make, and two rocking horses. The rocking horses are 16"x 16" in size and therefore also not difficult at all, since no small pieces are involved. These are the three star quilt block patterns, that make up for most of this Christmas quilt pattern. I made one of the stars quilt blocks after another. I started with sewing all the sections of each star quilt block first, then I assembled the sections for each star quilt block pattern. That way you get a little bit of a chain workflow. The 5-point star quilt block is my favorite quilt block for fussy cutting. The Christmas fabric series that I got to use for this quilt pattern by Art Gallery Fabrics features an adorable nutcracker print. The print size is perfect for my 8"x 8" 5-point star quilt block. So I used the little nutcrackers in each one of these 5-point stars. A light box is not necessary, but if you're fussy cutting a lot, like me, than it sure makes your life a lot easier. You can place the fabric onto the light box, wrong side up, and just place the segment on top of the desired part of your print. I use a fabric glue pen from sew line, so the image stays perfectly in place. My Lightbox has a clear cutting mat, so I can cut right there on the light box, which makes my quilting even more simple. As you can see, the sunny star quilt block is just as fun and simple to make. Make sure you remove the paper from the seam allowance and press often. This guarantees a perfect 8"x 8" size of your quilt block, and straight side seams and corners. This large star quilt block is 16"x 16" in size and you only need 4 for this Christmas quilt pattern. It is also a perfect pattern for Christmas pillowcases. I called it blowing in the wind star, because it reminds me a little bit of small pinwheels. This star quilt block pattern is brilliant for a quick Christmas gift. 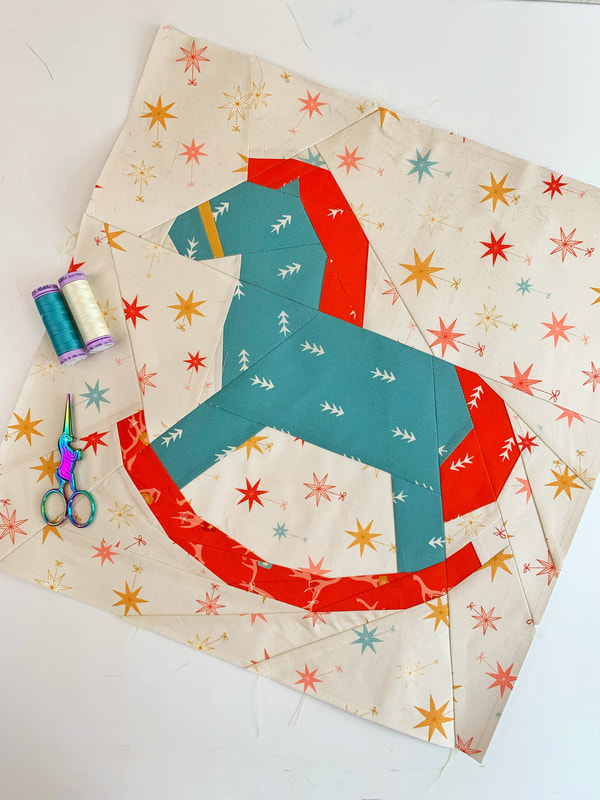 rocking horse quilt block And last but not least the cutest little rocking horse that inspired me to the name of this Christmas quilt.... ROCKING AROUND THE CHRISTMAS TREE.... I finished this quilt with some hand quilting. In this video I show you how to bury the know while hand quilting. Tie a knot at the end of your thread. Enter your quilt with the needle at any random place inside the batting in the center of your quilt sandwich and come out where you want to start your quilting. Pull the thread slowly till the knot gets to the fabric. Now you give your thread a little tug that way it slips nicely inside of your quilt sandwich. In case it doesn't, you can spread the threads of your fabric a tiny bit, so the knot can get through, and use your nails to push them back together again.  'Rocking around the Christmas tree' Christmas-quilt-pattern Thank you so much to Art Galley Fabrics for supplying the absolutely adorable Cozy and Magical fabric series designed by Maureen Cracknell that I used in this quilt pattern. I hope you are now slowly getting into the Christmas spirit, and you like this Christmas quilt pattern as much as I do. Happy Christmas sewing Ingrid xxx Halloween comes early this year, because Riley Blake Designs just released this super adorable fabric series called 'spooky hollow' designed by Melissa Mortenson of The Polka Dot Chair. 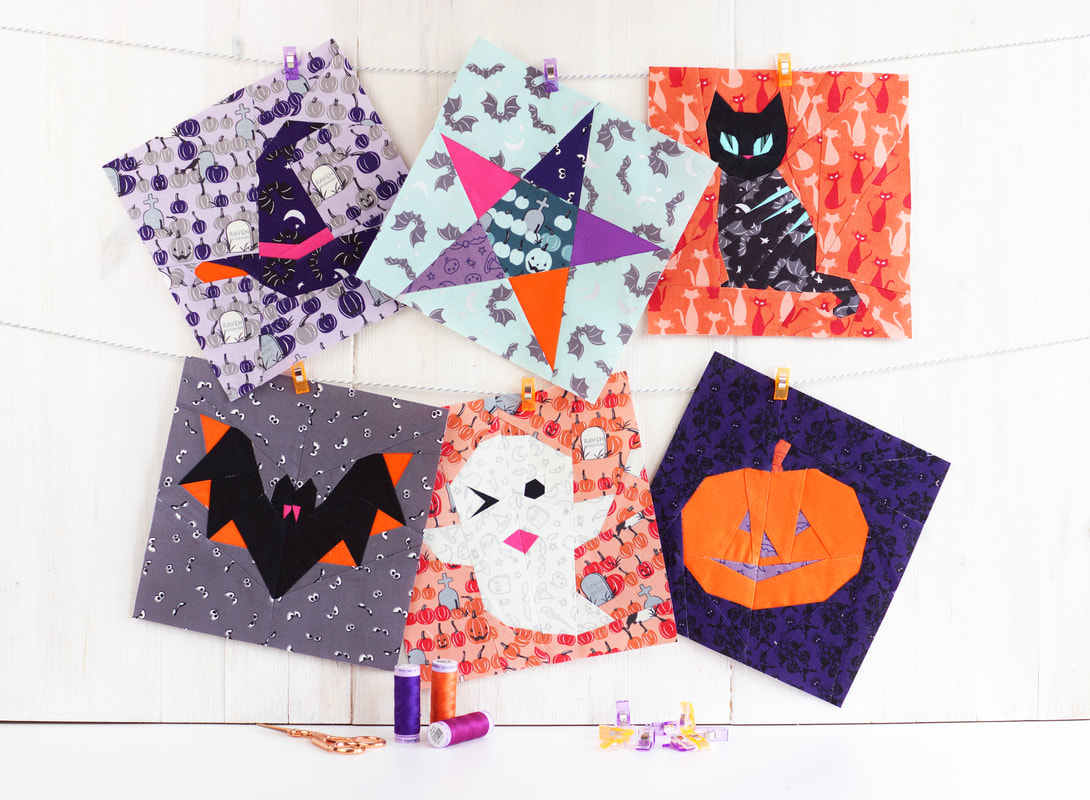 I decided to sew up all of my Halloween quilt blocks with this cute fabric series and I am over the moon with the results. The fabric patterns are small enough to work great as background fabrics, but are equally fun for fussy cutting. These quilt blocks will be perfect for these little trick-or-treat bags, it's a free pattern and tutorial. But let's see what all these Halloween symbols mean: The witch: 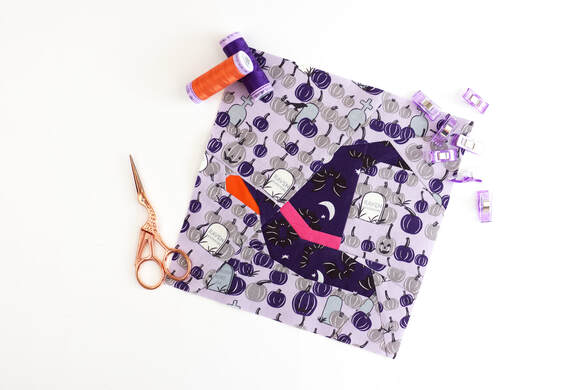 witch hat quilt block Halloween as we know it today, was celebrated by Celtic cultures as a feast for 'summer's end' and to honor the fall harvest. It was called Samhain, pronounced sow-in. It was celebrated on the evening of October 31. until sunrise on November 1. and is also known as the pagan New Year's Eve. It was a celebration for the deceased as much as for the beginning of the pagan New Year. Celebrations included bonfires and feasts. In the Middle Ages people who celebrated with bonfires were accused of being witches. And their power was believed to be greatest during Halloween night. So it's no surprise, that the witch, her hat or broomstick are still to this day, one of the most prominent symbols for Halloween. The bat: 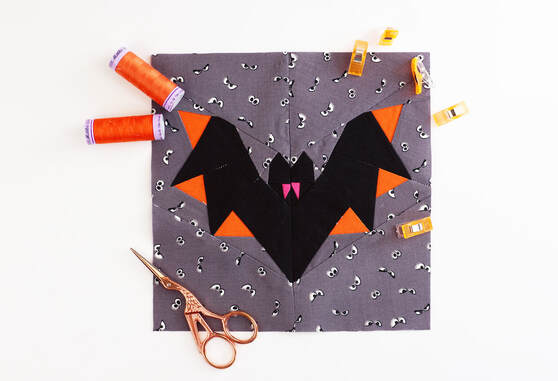 bat quilt block The original Celtic bonfires at Samhian would attract many bugs and flying insects. Which then caused bats to emerge at these festivals to have a little feast of their own. Therefore there's no Halloween without a bat. Halloween black cat:  Halloween cat quilt block The association of black cats with Halloween also comes form the Middle Ages. The women accused of witchcraft often fed wild cats or had pet cats themselves. Black cats were feared especially, since their dark black fur allowed them to roam through the dark undetected, leaving only their piercing eyes to be seen. And who doesn't agree, this is a little bit scary, right? The ghost: 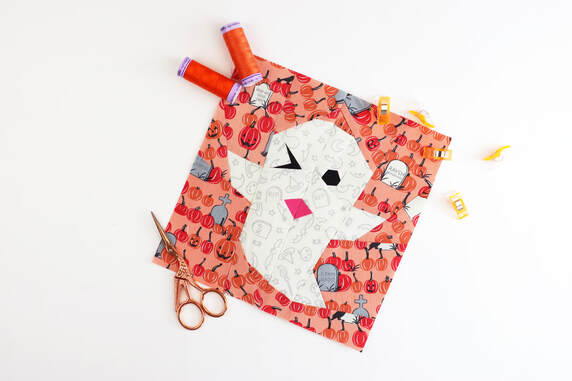 ghost quilt block Ghosts have always been a symbol for Halloween. Samhain and the Christian holiday 'All Hallow's Eve' or 'All Saints Day' are both celebrations for the deceased. During the night of Samhain it was believed, that the veil between the living and the dead is the thinnest and people are closest to the dead and their spirits. Making the ghost the most fitting symbol for this 'ghosty' holiday. The Jack-o-lantern: 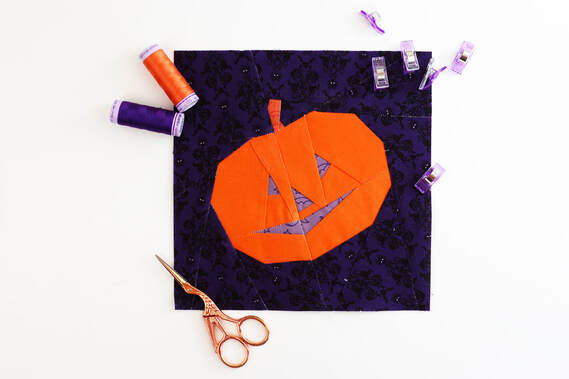 pumpkin quilt block The Celts would carve turnips on 'All Hallow's Eve' and would place and ember inside. This was done to keep evil spirits away. Funny enough pumpkins didn't exist in Ireland at that time that why turnips were used. The Pumpkin only became popular when the Irish migrated to America and were more popular and easier to carve that turnips. So what do you think? Are you in the mood to start Halloween sewing early this year ? 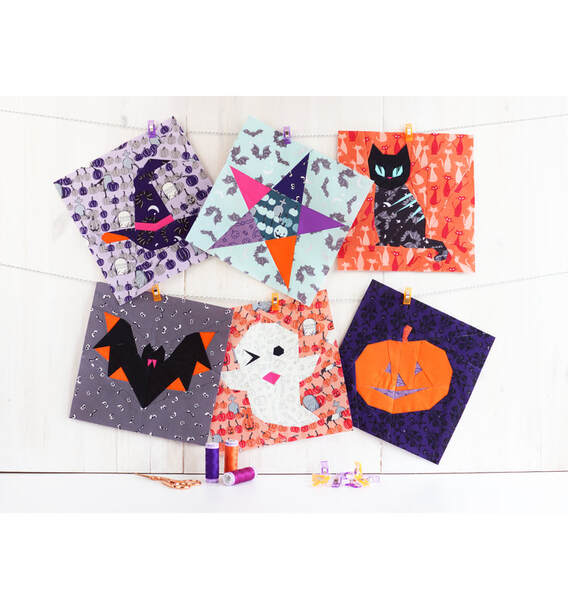 Halloween quilt block pattern Thank you so much to Riley Blake Designs for supplying the absolutely adorable Spooky Hollow fabric series designed by Melissa Mortenson that I used for these cute quilt blocks. Ingrid xx
Mindfulness featuring Buddha and the eight auspicious symbols of Buddhism,
is a new quilt pattern I designed these past few months. I hope it helps and inspires you. And maybe helps you navigate easier through these special times. 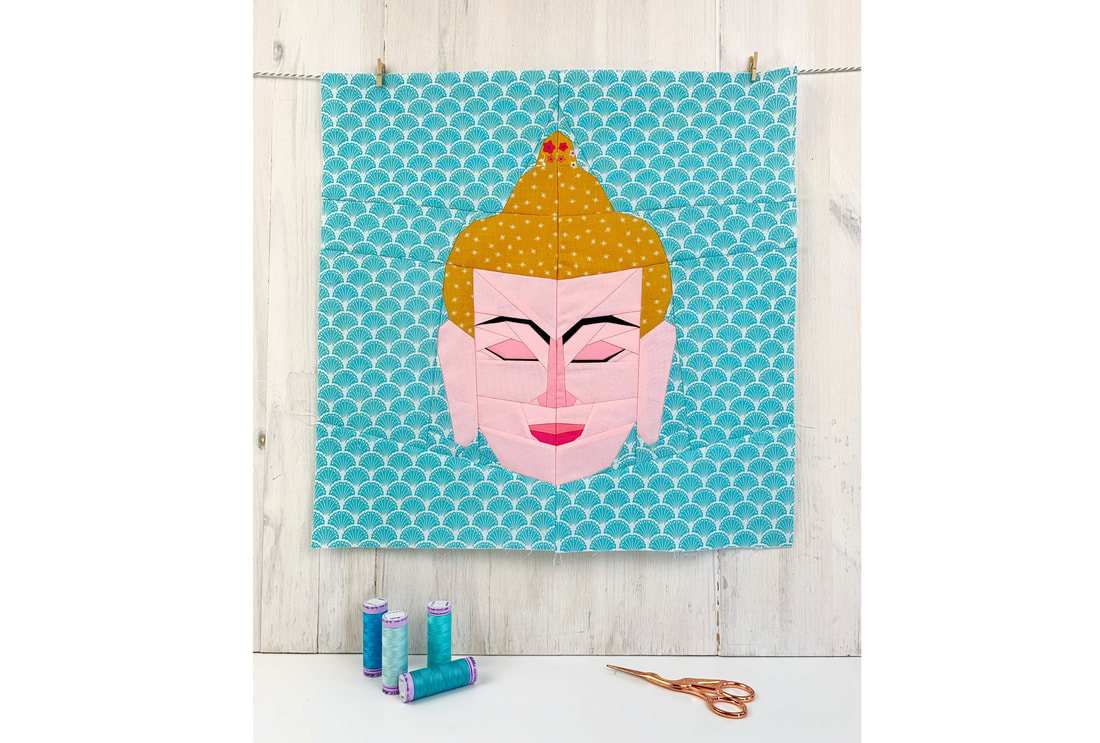
Buddha quilt block
Buddha and the eight auspicious symbols of Buddhism...
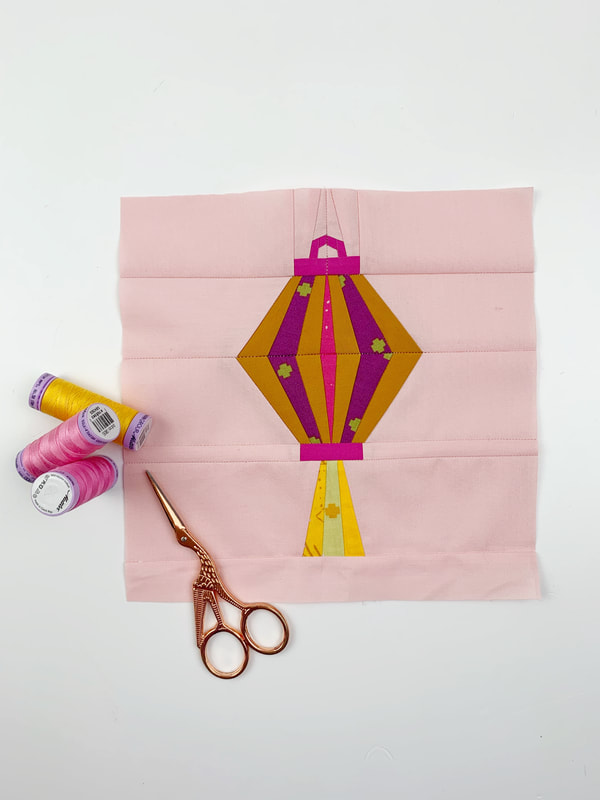
The eight auspicious symbols of Buddhism can be traced back to ancient India where Buddhism originated. Some of these eight symbols are also associated with ancient royal rituals in India such as coronations of kings. Today, the eight auspicious symbols of Buddhism are closely related to Buddha or Dharma. Dharma is an important Hindu or Buddhist concept, referring to a law that governs the universe. Although there is no single-word English translation, a close adaption is 'right way of living'. These symbols represent the offerings that were made to Buddha by the gods when he achieved enlightenment. Why are these eight Buddhist symbols called 'auspicious'? Auspicious means, giving or being a sign of future success. And that's exactly what these symbols represent, they are symbols that are helpful for success and prosperity. These eight symbols are often seen in many holy altars in front of a Buddha statue or mural. They also serve as focal points of meditation and contemplation, so if you want a better future or if you want to grow deeper in your spirituality, it might help to make these symbols your focus. Here are the eight auspicious symbols of Buddhism and their meanings: 1. The Lotus Flower 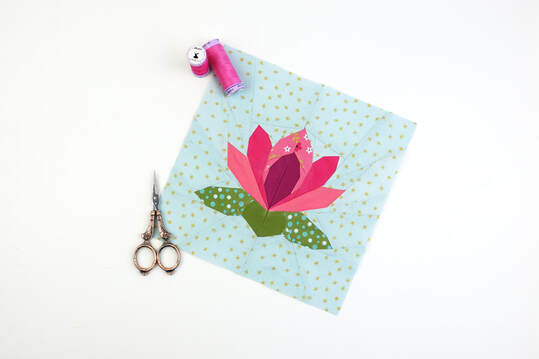
lotus flower quilt block
Thelotus flower symbolizes the complete purification of the body, mind and speech.
Since the lotus flower is an aquatic plant with its roots in deep mud, but a blossom that rises above the muck and opens to the sun, beautiful and fragrant, it's no surprise that the lotus represents the clarity of enlightenment. 2. The Conch Shell 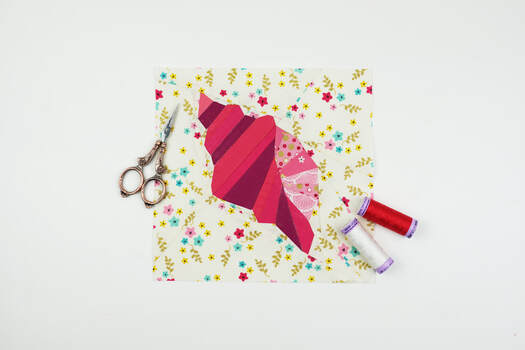
conch shell quilt block
The conch shell has long been used as a battle horn in Asia. In ancient India the conch also represented the Brahmin caste.
In Buddhism the conch shell represents the sound of Dharma, reaching far and wide to awaken the human beings from their slumber of ignorance. Dharma, which derives from a Sanskrit root word meaning 'to uphold or sustain'. The concept behind Dharma is anything that produces or keeps a positive order. The conch shell symbolizes the need to accomplish one own and others wellbeing. 3. The Precious Parasol 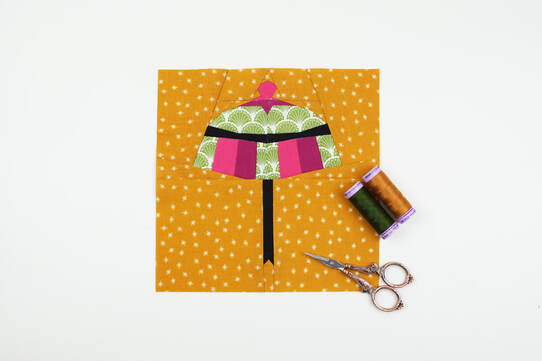
Precious Parasol quilt block
Theprecious parasol is a symbol of royal dignity and protection of the sun.
In Buddhism the precious parasol represents the wholesome protection from illness and suffering in general. 4. The Treasure Vase 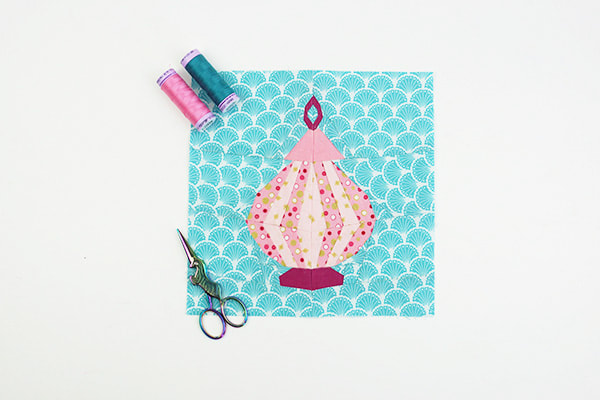
Treasure Vase quilt block
The treasure vase is filled with precious sacred things, but no matter how much is taken out, it's always full.
It symbolizes a long life and prosperity. 5. The Eternal Knot 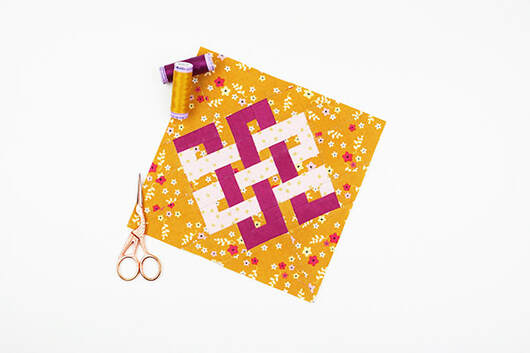
Eternal knot quilt block
The eternal or endless knot represents Buddha's endless wisdom and eternal harmony.
It's a symbol for the endless cycle of suffering, birth and rebirth. As well as the inter-twining of wisdom and compassion. 6.The Victory Banner 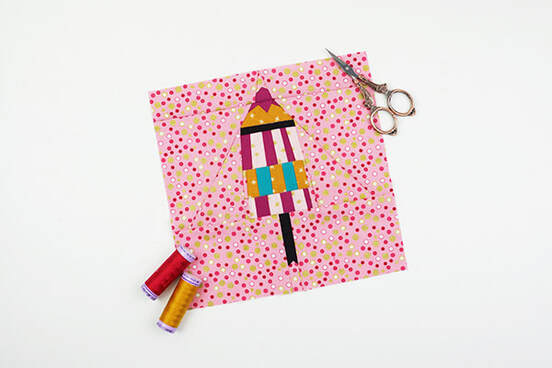
victory banner quilt block
The victory banner symbolizes the victory over obstacles and negativities and the fear of death.
More generally it represents the victory of wisdom over ignorance . There is a legend, that Buddha raised the victory banner over Mount Meru to mark his victory over all phenomenal things. 7. The Dharma Wheel 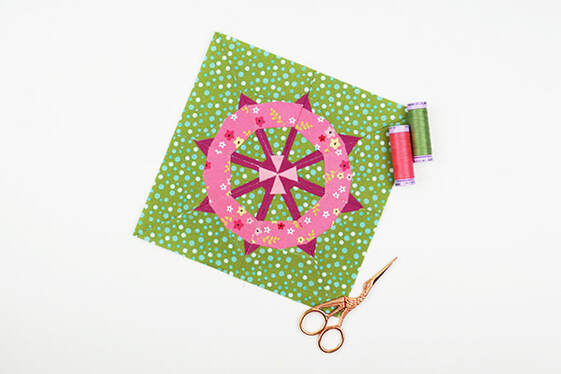
Dharma Wheel quilt block
The dharma wheel is one of the most well known symbols of Buddhism.
The wheel has eight spokes, representing the Eightfold path. The Dharma wheel, according to tradition, was first turned when Buddha delivered his first sermon after his enlightenment. It symbolizes the turning of Buddha's teachings, which enables humans to experience joy and liberation. 8. The Golden Fish 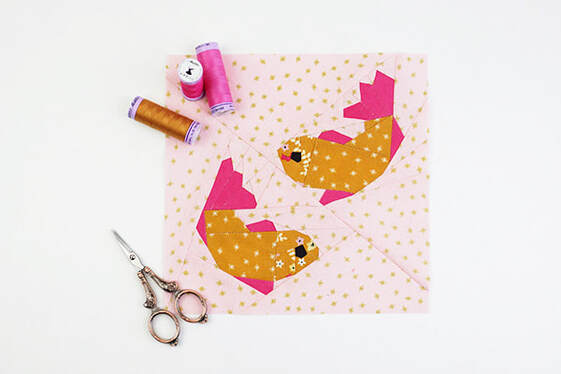
Golden fish quilt block
The golden fish were originally the symbol for the rivers Ganges and Yamuna.
They came to represent over time the good fortune in most Asian religions. In Buddhism the golden fish symbolize happiness as they have complete freedom of movement in the water. 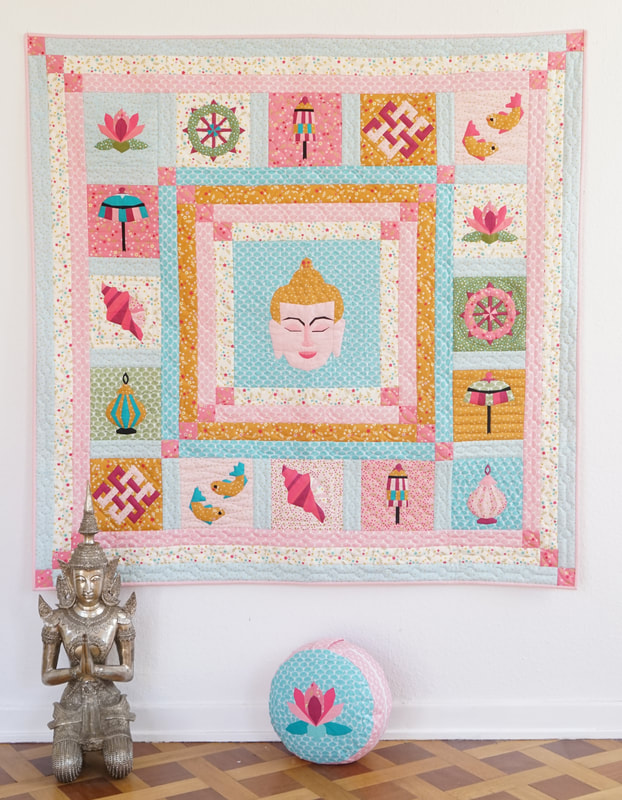
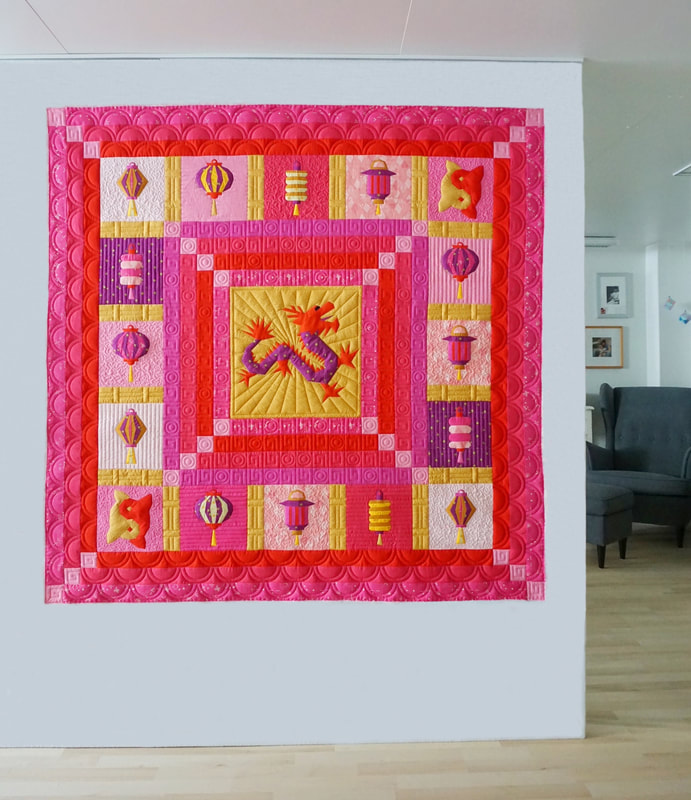
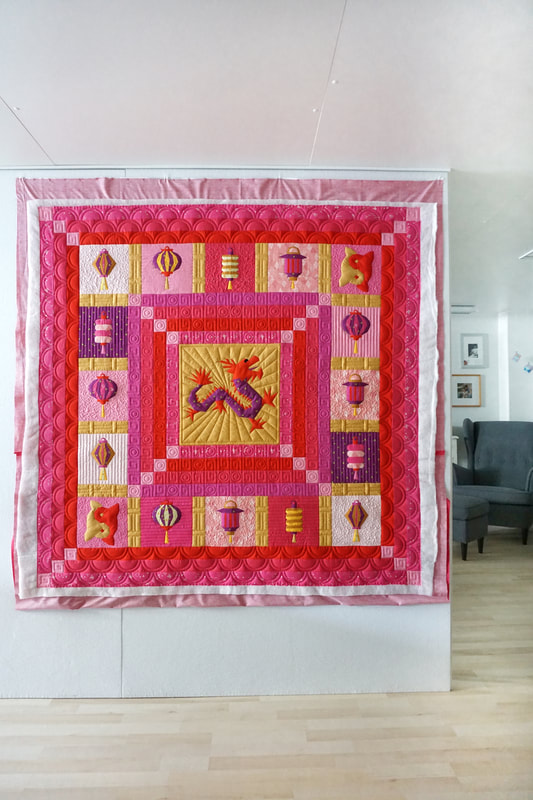
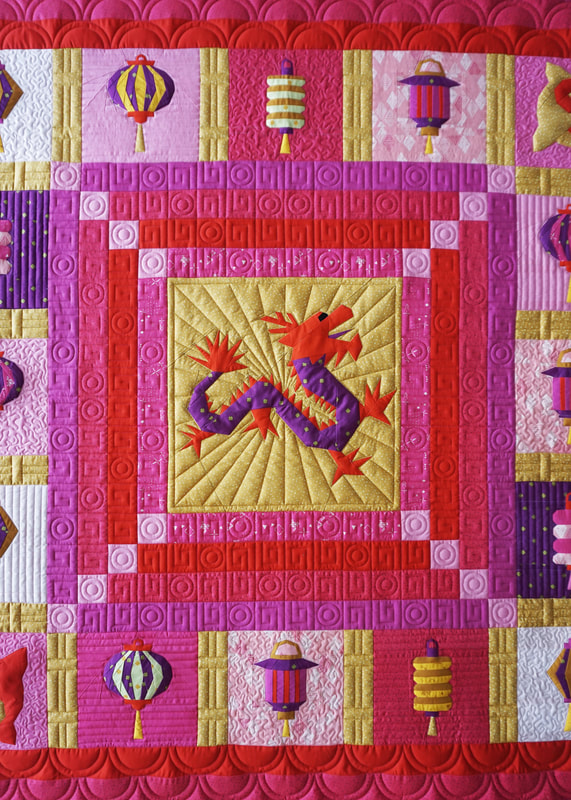
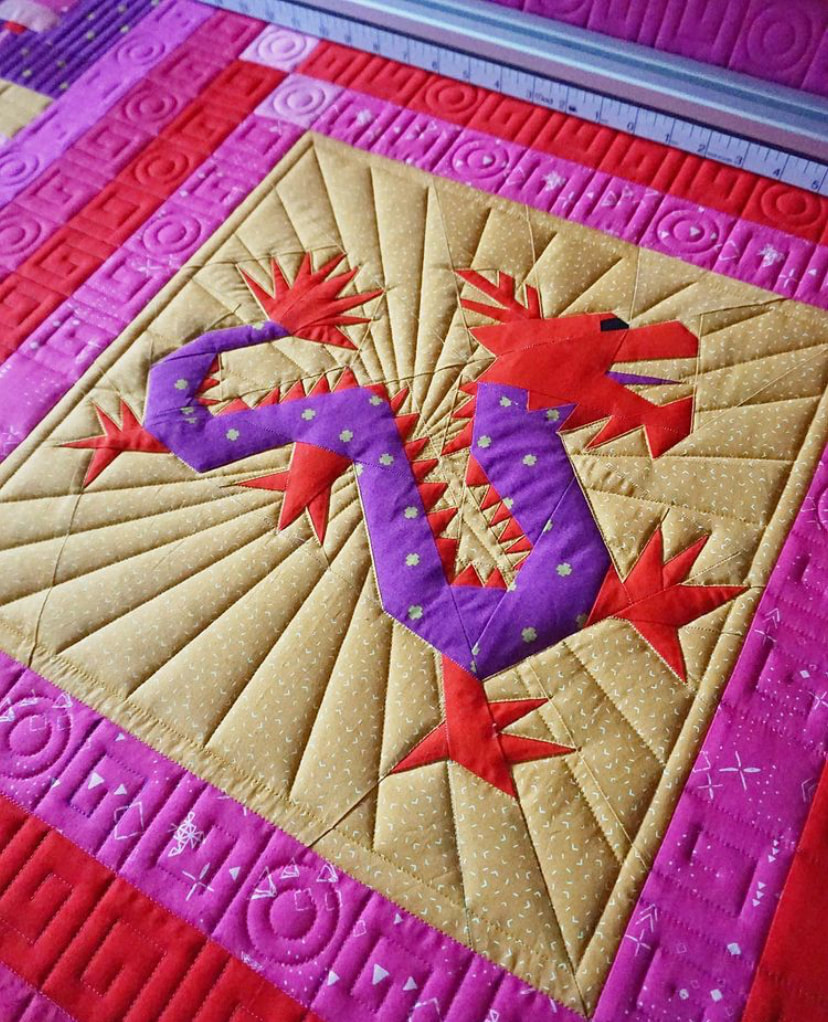
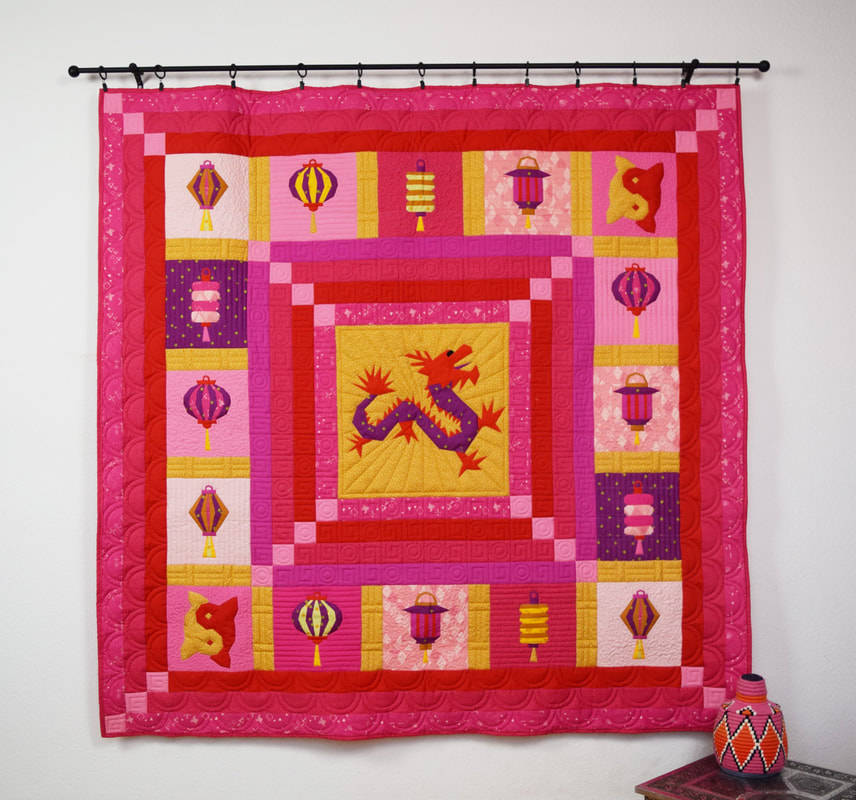
Buddha quilt with the eight auspicious symbols
And here is the whole Mindfulness quilt with all the eight symbols surrounding Buddha.
What do you think? One can't go wrong with all the auspiciousness right? It does present favorable circumstances and is showing signs of a favorable outcome, isn't it? Thank you so much to Riley Blake Designs for supplying the absolutely adorable Stardust fabric series designed by Beverly McCullough that I used for this amazing project. Also a huge thank you to Iva Steiner @schnigschnagquiltsandmore for quilting this beautiful quilt. For more info on her services check out her Instagram. 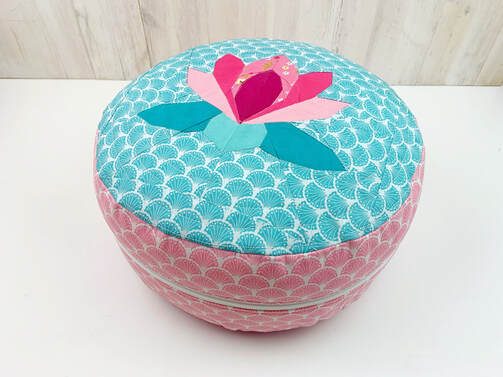
Yoga pillow with lotus flower
Now lets explore MINDFULNESS a bit more.
Mindfulness is the human ability to be totally present and aware of where we are and what we're doing. It is the ability to not be overly reactive or overwhelmed by what's going on around us. We all own mindfulness, we just have to learn how to access it. This past year has shown us, that our lives can be turned upside down easily from one day to another and there's little to nothing we can do about it. And while we probably looked on the outside before, for comfort and fun, it's now more important than ever, to learn to be just content with what we have, and concentrate on our insides. Tweet this: Meditation can significantly reduce stress Thats where mindfulness finds it's perfect place. Our minds go all over the place and we loose touch with our body and surroundings and sooner than we think we're stuck with obsessive thoughts about things that happened or we're anxious about the future. Studies say that 8 out of 10 Americans ( or Europeans) experience stress in their daily lives and therefore have a hard time calming their minds and bodies. This puts them at a high risk of numerous diseases among them being heart disease and stroke. Mindful meditation, even for just 10 minutes per day, can make a huge difference. 
Yoga pillow with lotus flower
This is why I added this Yoga Pillowcase pattern to my Buddha quilt pattern series.
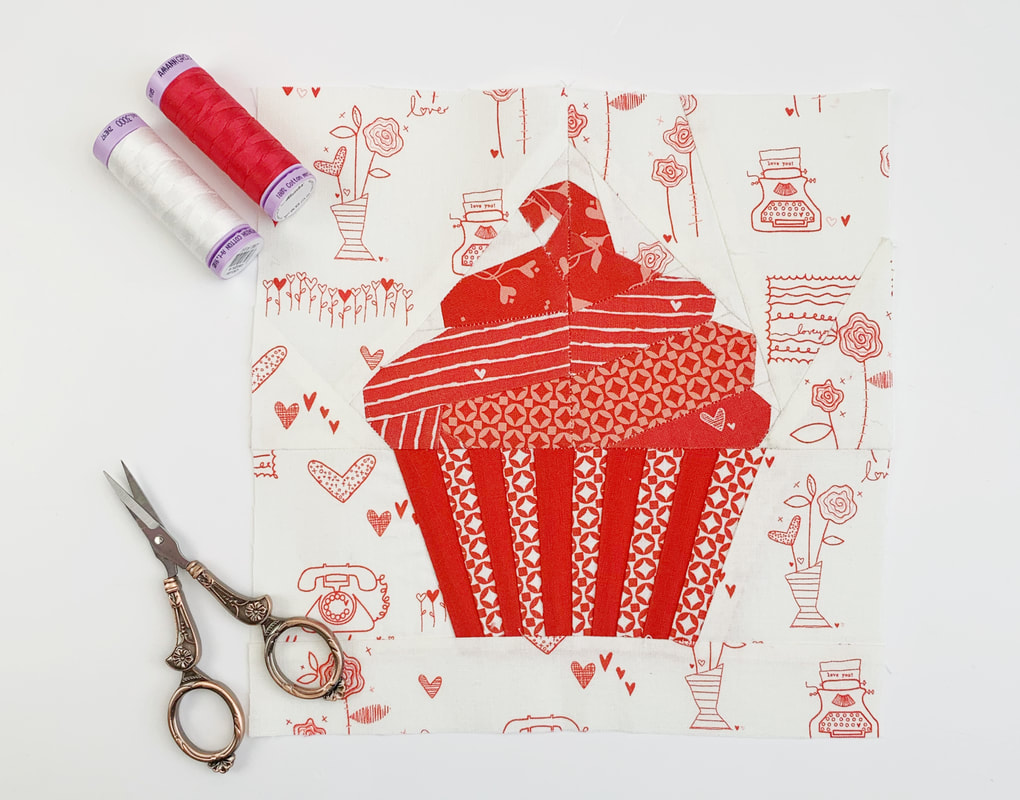
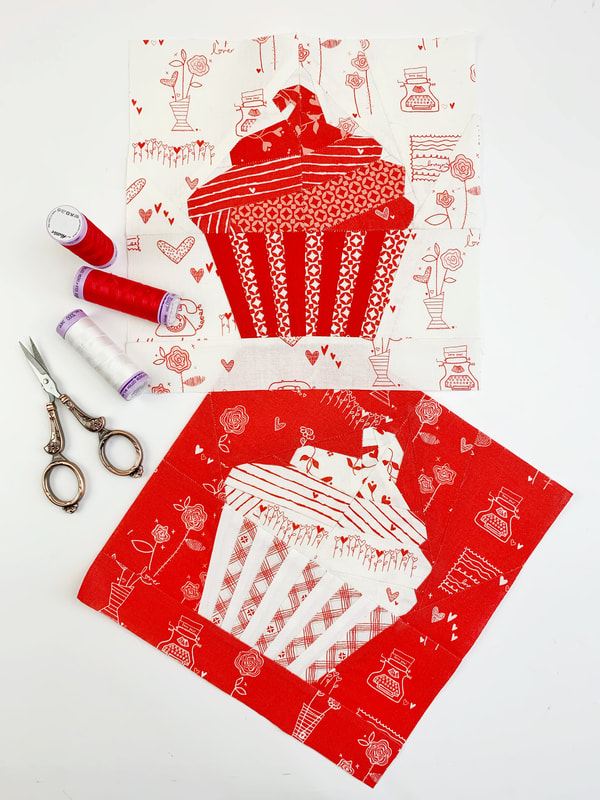
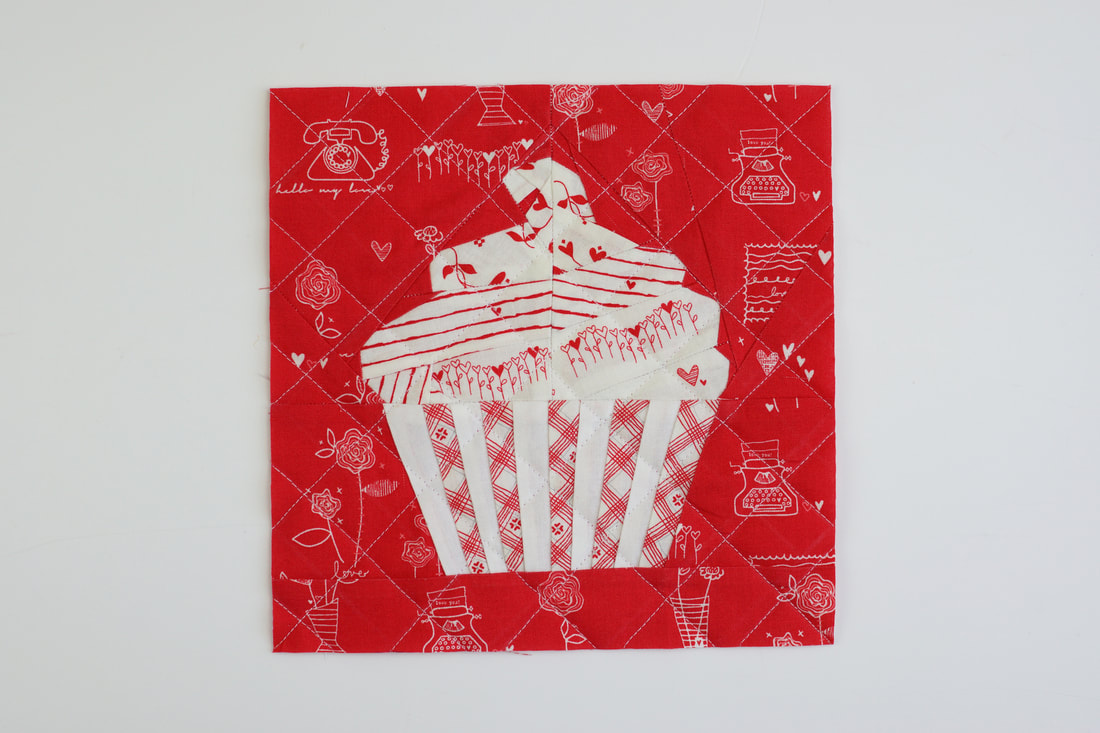
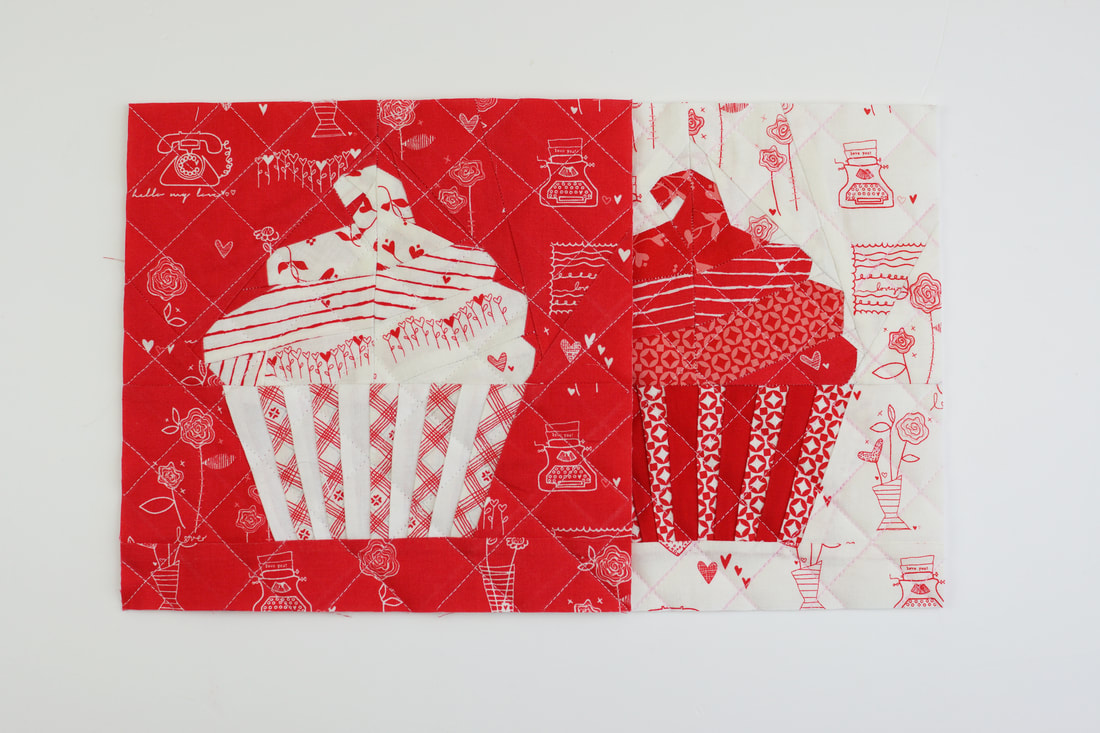
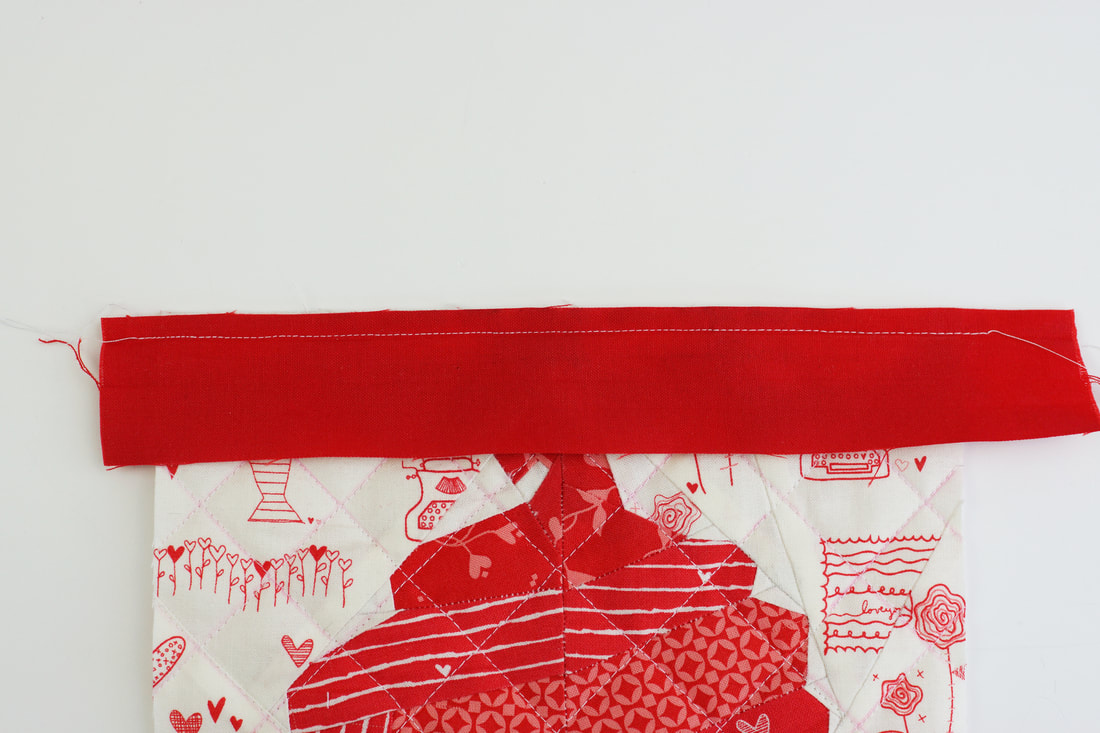
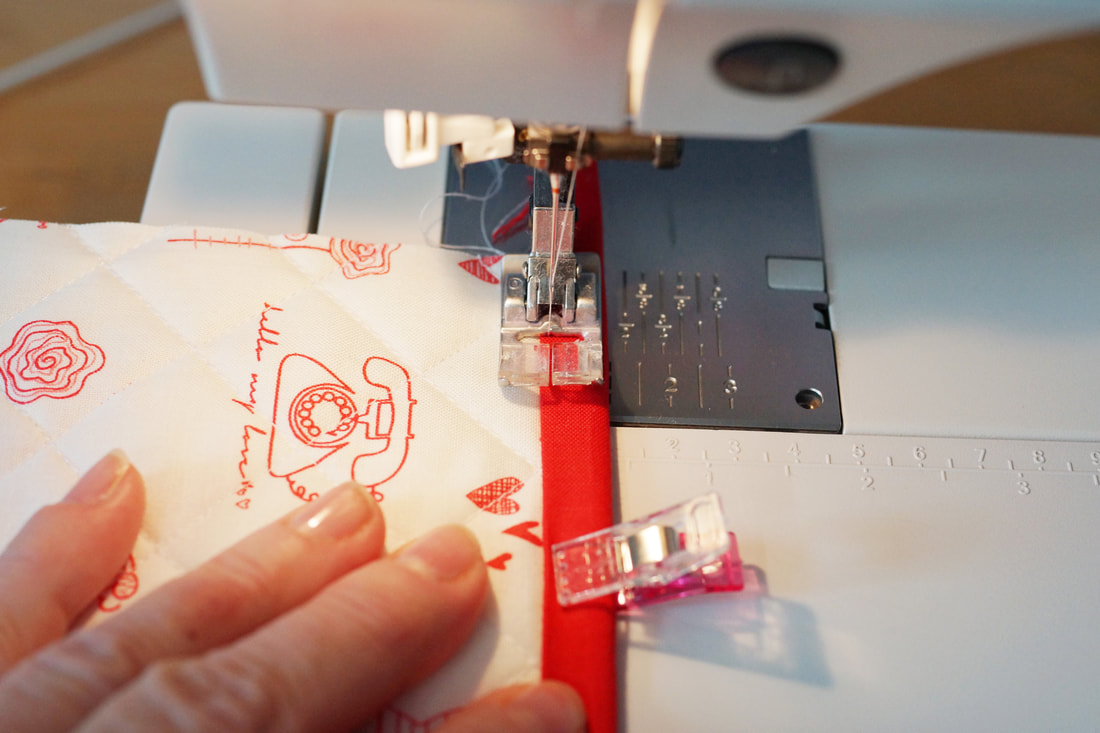
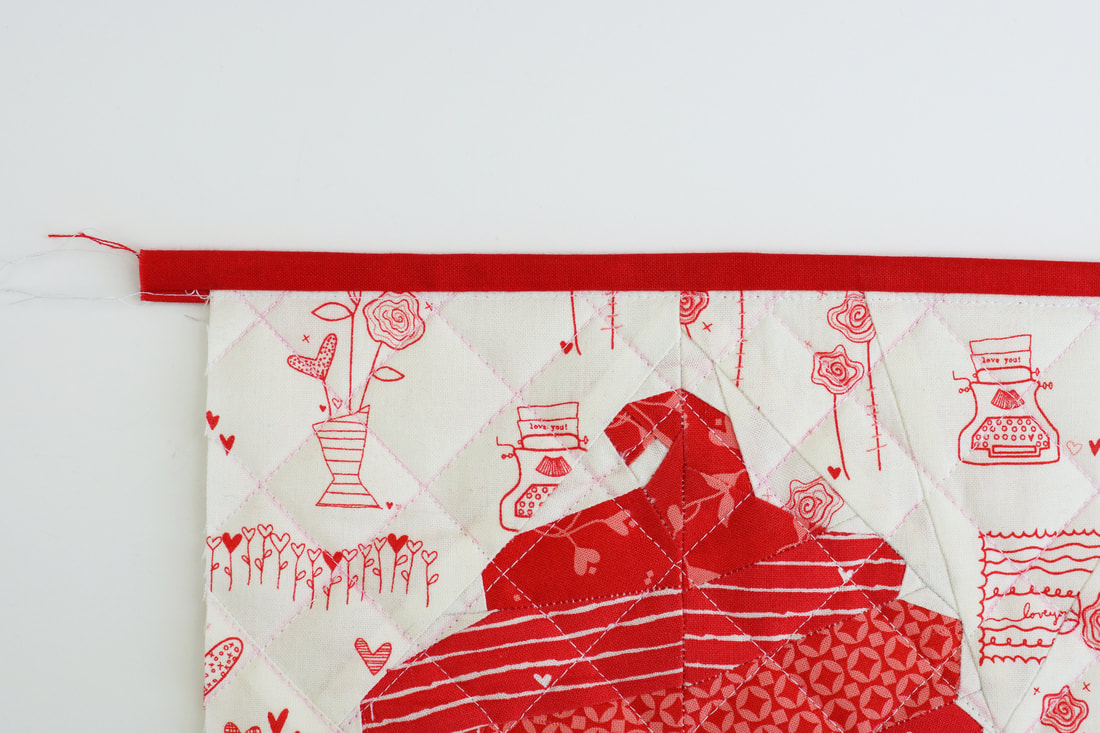
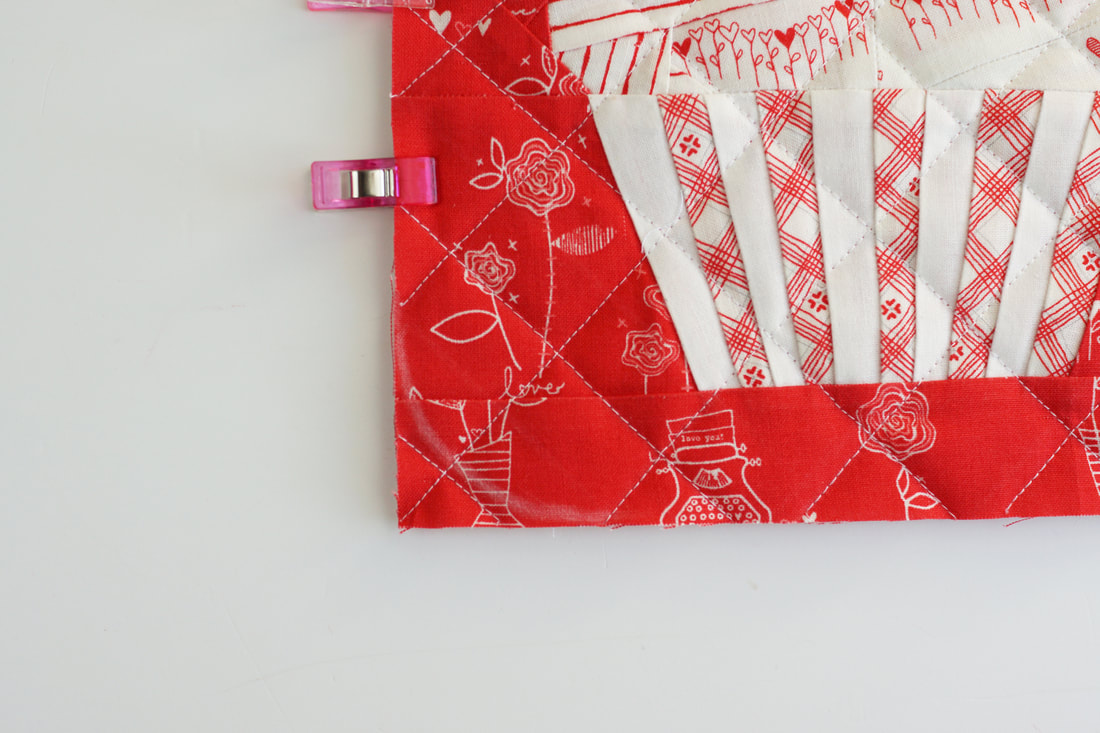
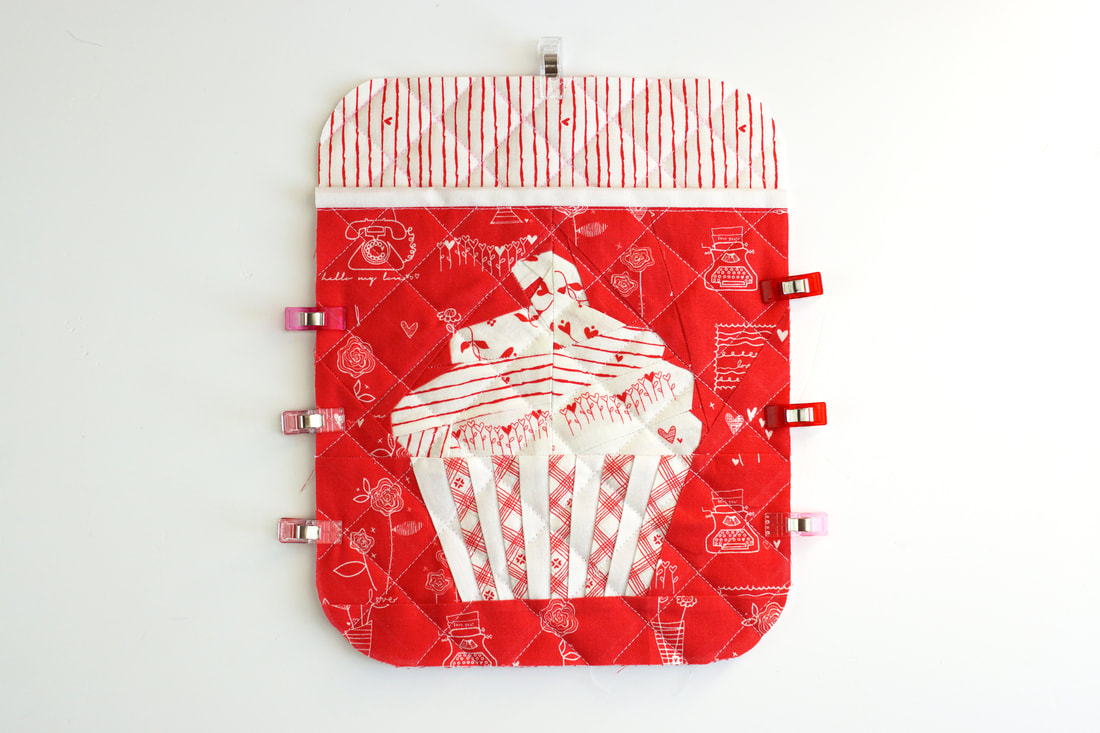
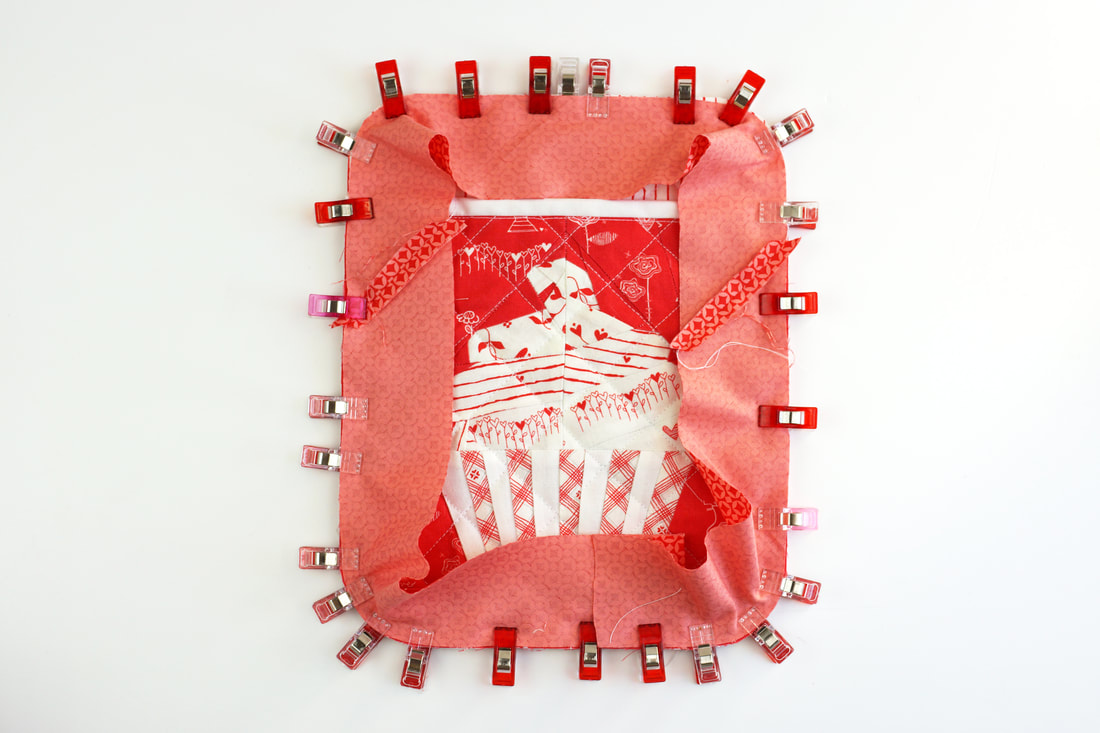
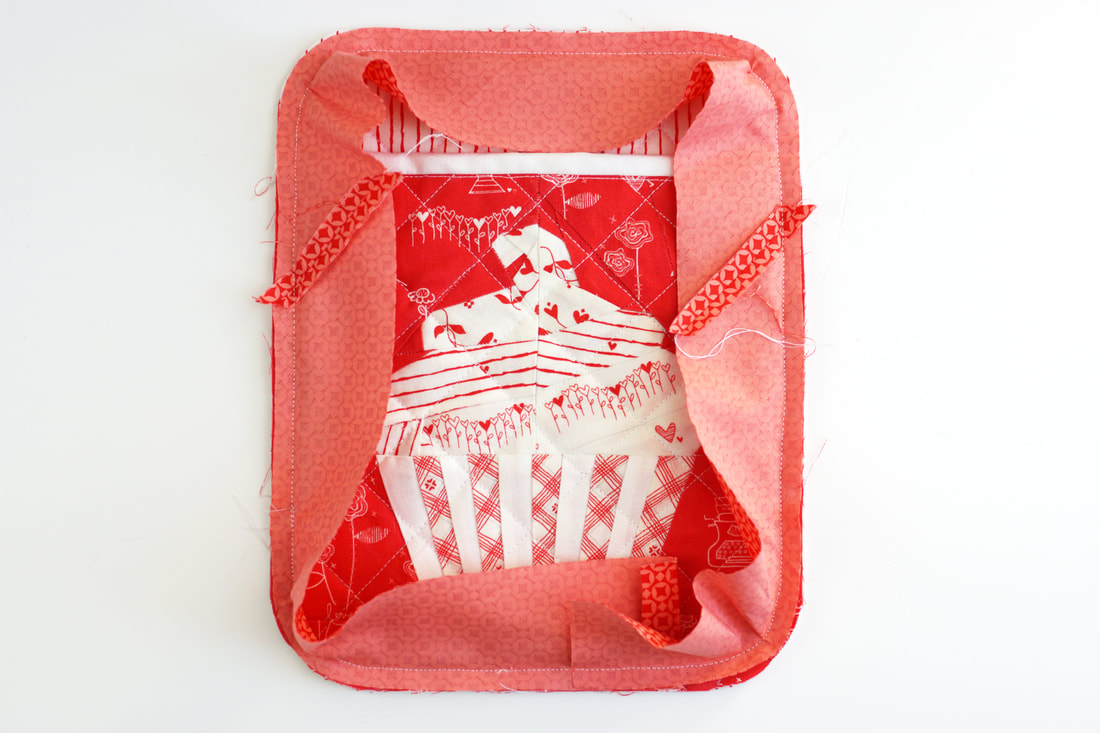
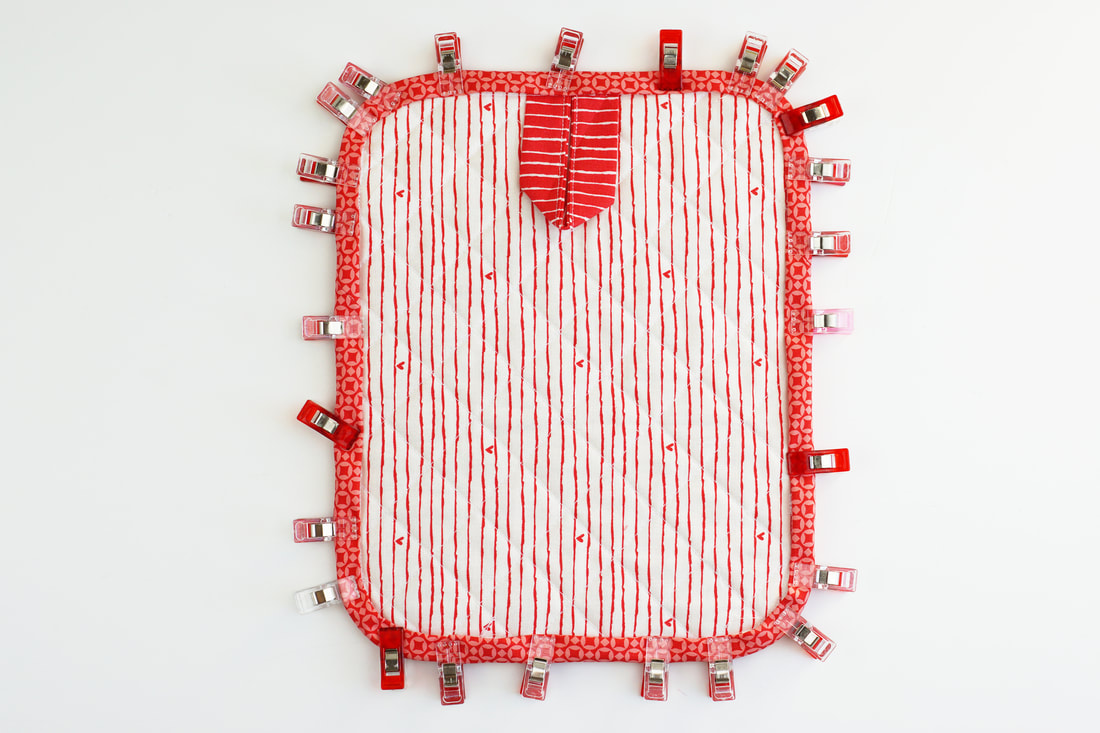
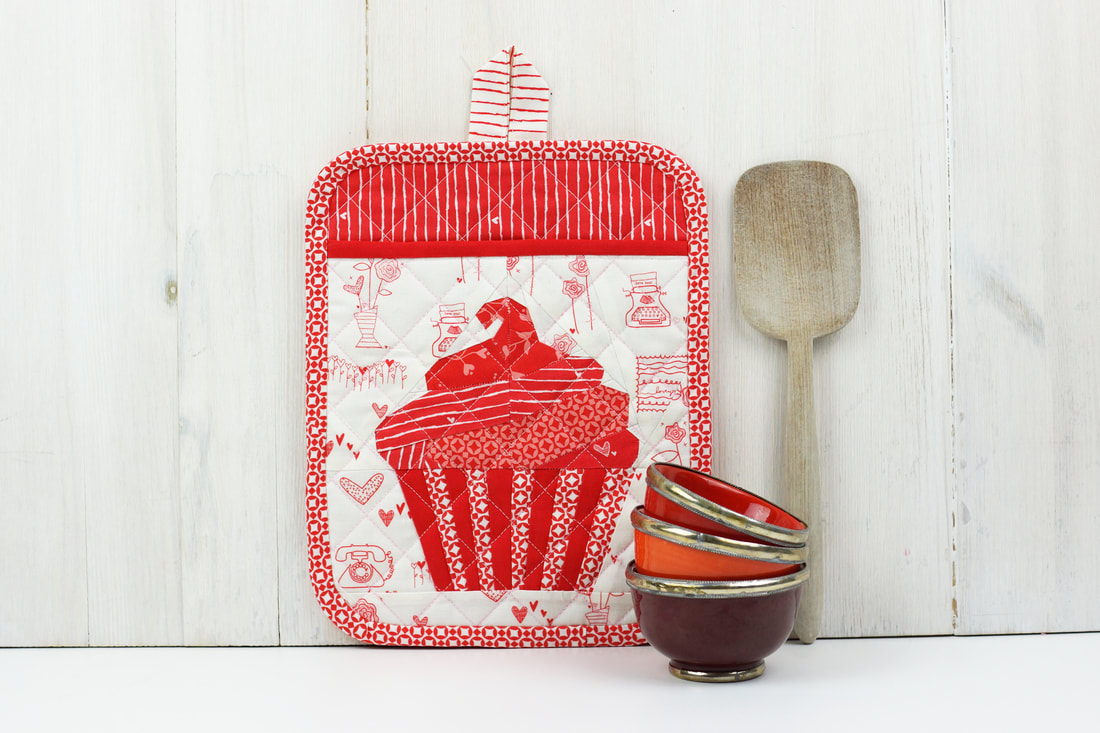
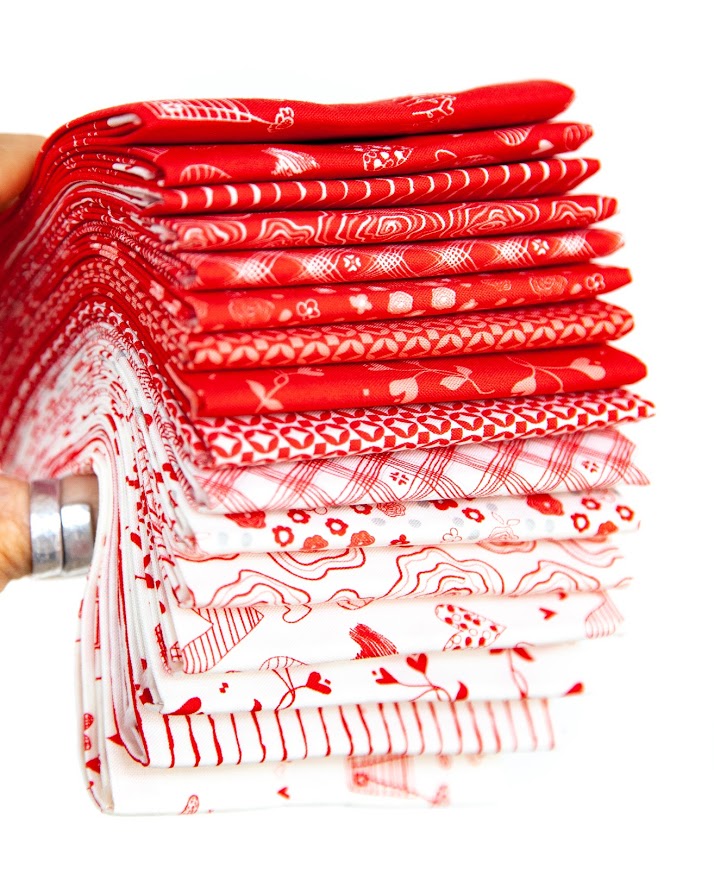
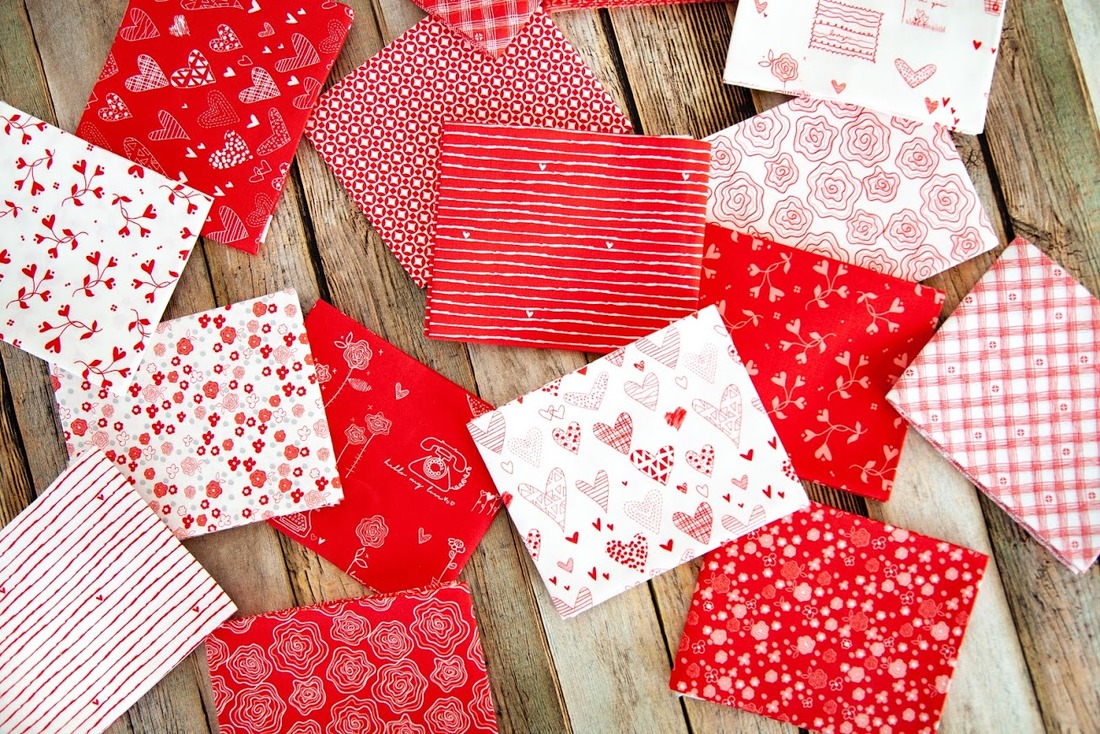
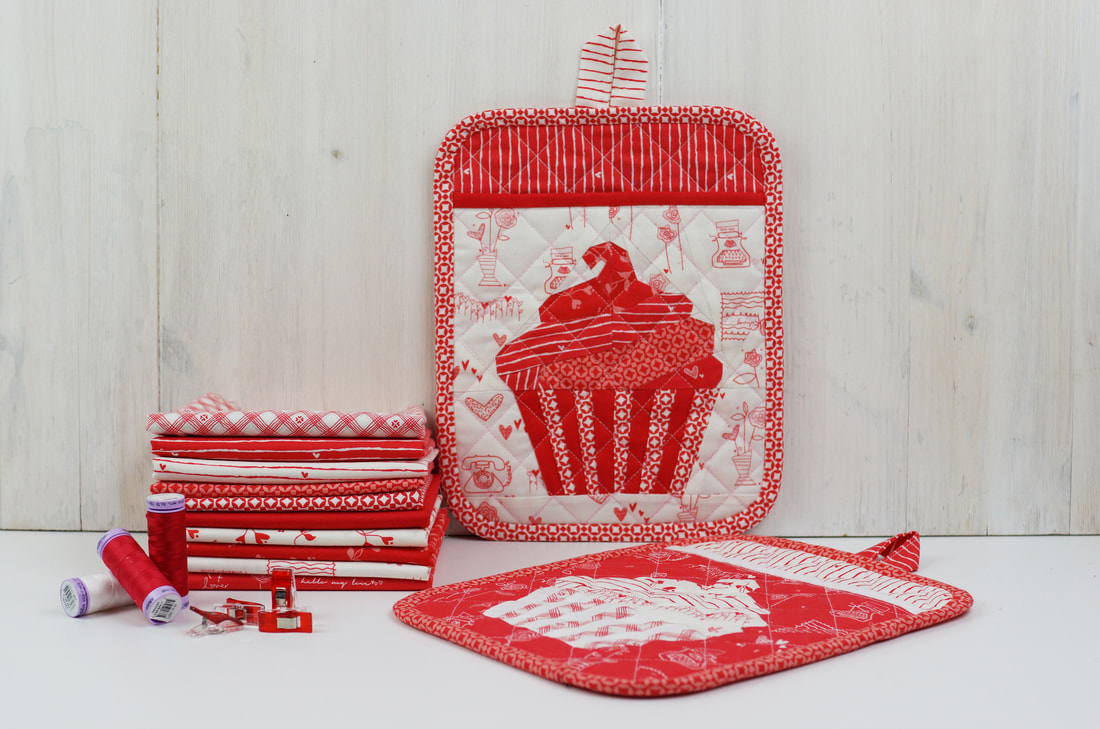
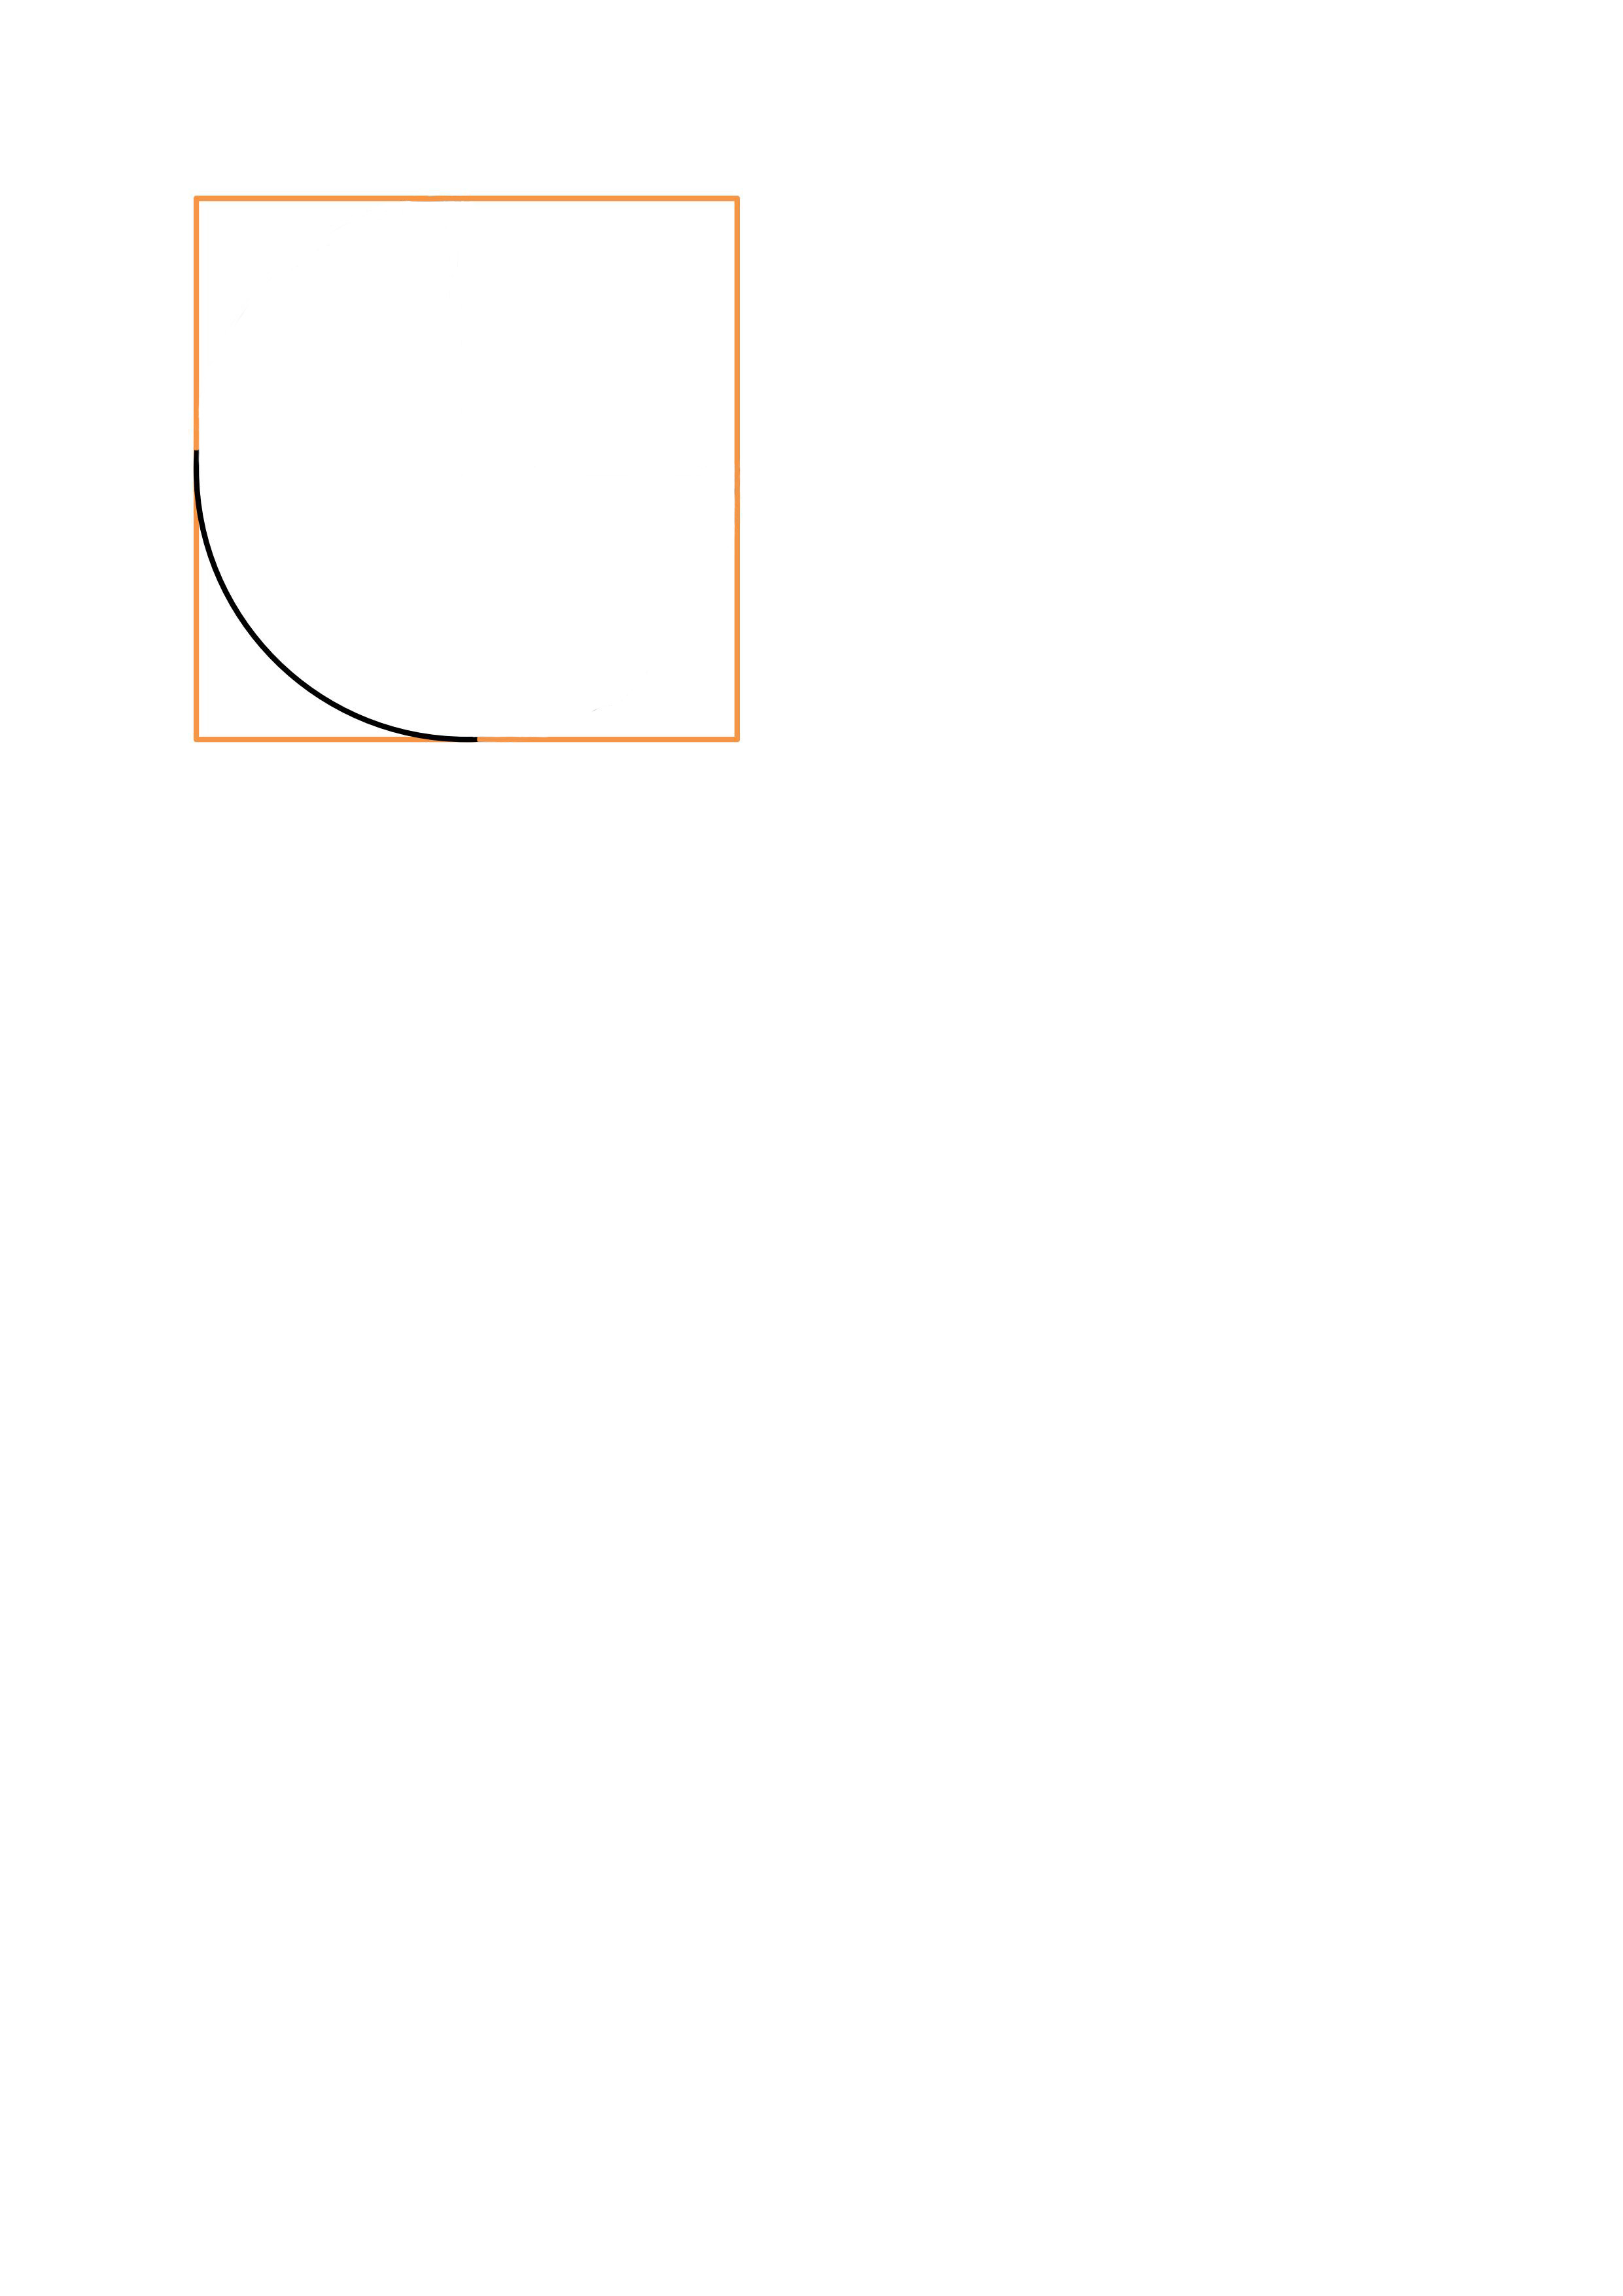
It's an easy sewing pattern for a standard round Yoga pillow. Three facts about Mindfulness: 1. Anyone can do it You don't have to change your beliefs or anything like that. Everyone can benefit and it's easy to learn. 2. It's a proven practice You don't have to take mindfulness on faith. Both experience and science have proven its positive benefits on our health, work and over all wellbeeing. 3. Mindfulness is not exotic It's what we already do and what we already are. We just have to learn to come back to it more and more. Here are 6 helpful, mindful attitudes: - non-judging, - acceptance, - patience, - trust, - letting-go, - gratitude A great way to come back to our mindful attitudes and get unstuck is meditation. What do you think? Something you would want to explore? Or is it already something you practice regularly? Let me know ... Ingrid x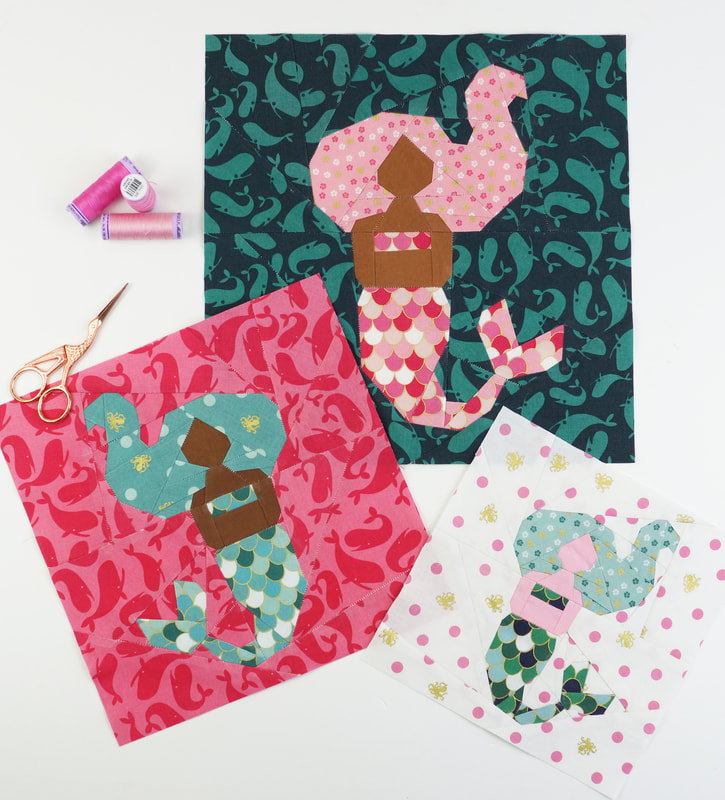 Ahoi Mermaids quilt blocks Oh, when I saw this new fabric line from Riley Blake Design called Ahoi Mermaids! by Melissa Mortenson, I just new I had to design a matching pattern. This mermaid pattern comes in three different quilt block sizes and it will be perfect for too many quilting projects. I think I need to make a mini quilt for my youngest daughter. And just because these Mermaids are so cute and pretty, here are some Mermaid facts or stories: 1. The earliest mention of a Mermaid legend comes from Syria. The woman's name was Atargatis. Apparently she was beautiful and powerful and fell in love with a shepherd boy. After she had his baby girl Semiranis the boy died and Atargatis became depressed and very , very sad. So she decided to throw herself in the ocean. But because of her beauty, the gods saved her and changed her into a Mermaid, with only her lower body being transformed into a fishtail. 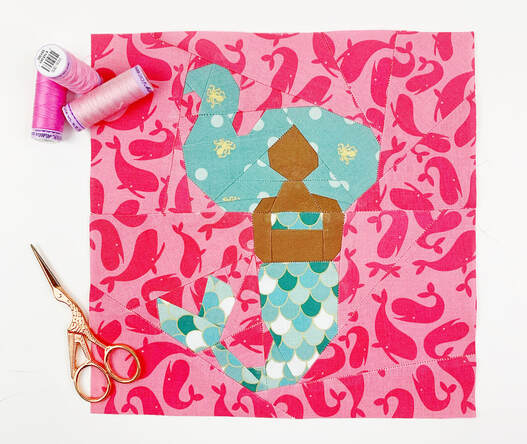 Mermaid quilt block 2. The name Mermaid literally means 'woman of the sea' The old English word Mer means sea and maid means woman... There we go Mermaid, ahh woman of the sea :-) 3. The aquamarine is said to be made out of a mermaids tears 4. Seacows or Manatees were often mistaken for Mermaids. Many lonely and maybe drunken sailor saw these huge mammals and thought they were Mermaids. Christopher Columbus was said to have seen ' ugly and fat Mermaids'. I mean can you blame Christopher Columbus or the sailors? Months at a time at sea... but then again apparently only 5% of the ocean has been explored, so who knows for sure. 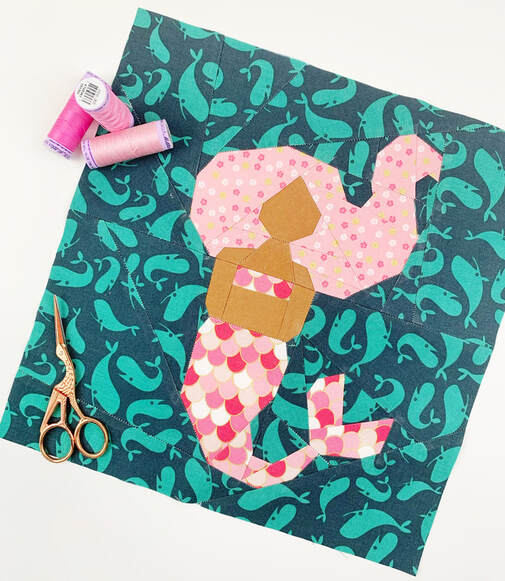 Mermaid quilt block 5. A Mermaids kiss gives you gills. According to an old folks tale, if you kiss a Mermaid you can breathe under water. 6. The color of a Mermaids tail depicts her mood. You be the judge, because whatever color a Mermaids tail is, is a clear sign of her mood. And of course it totally reflects her personality... well if was a Mermaid what color tail would I have ? 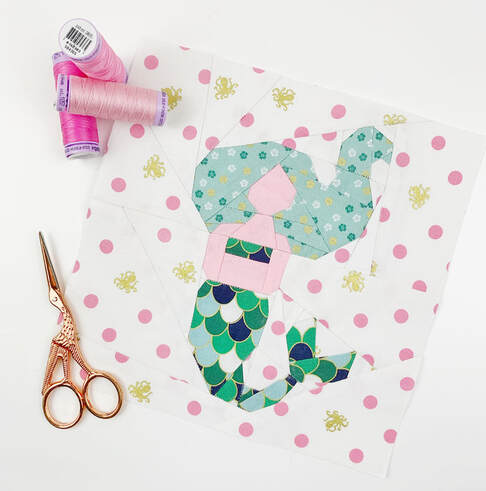 Mermaid quilt block Thank you so much to Riley Blake Designs for supplying the absolutely adorable Ahoi Mermaids! fabric series designed by Melissa Mortenson that I used for these adorable Mermaid quilt blocks. So what color tail will your Mermaid have? Happy swimming... ahh sewing Ingrid x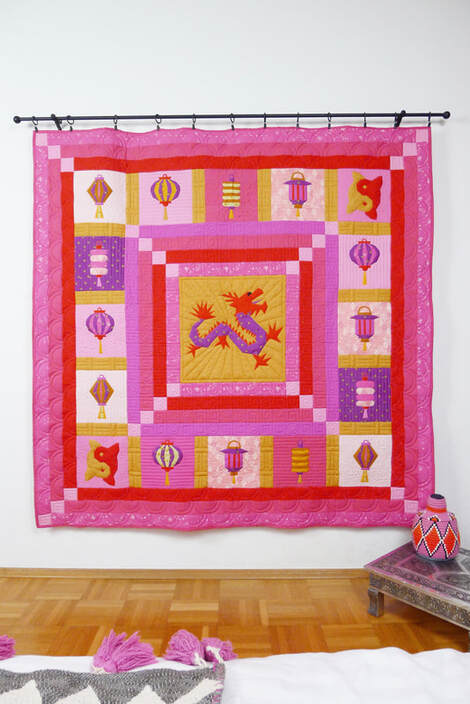 Chinese New Year Quilt The story of my Chinese New Year quilt. Our youngest daughter was born in Taiwan. So we get to celebrate Chinese New Year as well as our regular New Year. Chinese New year is also called Spring Festival, as it falls at the end of the still very cold and wintry days, but marks the end of those days and welcomes spring, with all its new beginnings and fresh starts. You can also call it the Lunar New Year since its date is set according to the Lunar calendar. The Lunar calendar is still very important in China and South East Asia and all traditional holidays are still celebrated and many people calculate their birthdays according to the Lunar calendar as well.  simple paper lanterns quilt block The idea for this quilt was born in January of 2020. I have to admit I always loved paper lanterns, they feel light, breezy and fun and always give a vibe of happiness, don't you think? So I started my Chinese New Year series with all sorts of different paper lanterns. There are 4 types of paper lanterns in this pattern. The longer skinny lantern as you can see in the photo above. A paper lantern that's shaped as a double trapeze. The prettiest lantern of them all, called the palace lantern. And of course the most popular paper lantern, the balloon lantern. A quilt just with lanterns was the first idea, but it needed something more dramatic, so I designed the dragon. The dragon is a symbol of power, strength and good luck in East Asian culture. They supposedly control water, rain, typhoons and anything that has to do with water. Dragons are everywhere all over East Asia - in legends, festivals, astrology, art, names and idioms. Dragons are definitely seen as LUCKY and good, quite different from the evil, dangerous fire breathing dragons of most Western stories. So here is my good luck dragon.  Chinese dragon quilt block Just a dragon and lanterns didn't feel right and complete, so I added another very important Asian sign, the Yin Yang koi fish symbol. It represents duality and harmony in life. In Feng Shui the Koi is tied to the Yin Yang symbol and it is said to represent two Koi, one female and one male and shows that all things in life are connected.  Yin Yang Koi How did I decide on the fabric and colors? First of all, I have always been a huge fan of Art Gallery Fabrics, because they are the nicest finest cotton fabric. And when it comes to detailed foundation paper piecing patterns a high quality cotton fabric is very helpful. A light weight cotton just makes your life so much easier when piecing small segments with many seams. It was an absolute joy to work with Art Gallery Fabrics for this quilt pattern. The fabric series 'Matchmade' by Pat Bravo was a real match made in heaven. And second of all my color choices depended heavily on traditional Chinese colors in general and for Chinese New Years in particular. Red is Chinas favorite color which represents luck, joy and happiness as well as it wards off anything evil. Yellow is an imperial color and represents power, royalty and prosperity. So how perfect was the 'Matchmade' series for this quilt project? I had to add a little more pink, since anything without a good splash of pink is just not me :-) Therefore I mixed in some Art Gallery Pure Solids to add some more of my favorite hues. I couldn't be happier with the fabric choices for this Chinese New Year quilt, I think it's the perfect combo. Don't you agree? 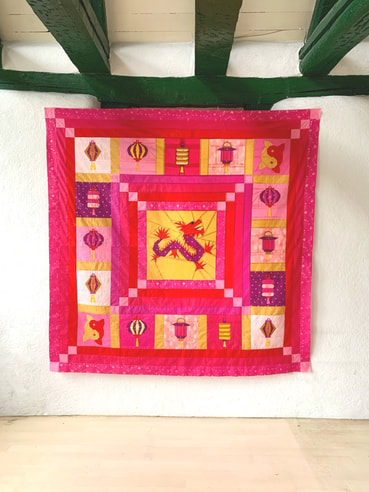 finished Chinese New Year quilt top It took me about two weeks to finish this quilt top. The paper lanterns are fairly quick and easy to sew, they took me about two hours each. The dragon was a great project for a Sunday afternoon. And while this quilt top looks really fabulous as it is, I knew I wanted something really special for it as far a quilting goes. I am usually very content with simpler straight line quilting, but I thought this quilt asked for more. So I called up Iva Steiner @schnigschnagquiltsandmore , and asked her if she would have the time to quilt this beauty. And yes thank goodness she did. So I drove down to Luzern/ Switzerland and brought her my quilt top. It 's about a five hour drive from Frankfurt, but I loved the nice change during our Covid lockdown. And all I can say, Iva did a fantastic job, her quilting is absolutely stunning and the icing on the cake of my Chinese New Year quilt, don't you agree? Thank you so much to Art Gallery Fabrics for supplying the fantastic 'Match-Made' fabric series designed by Pat Bravo that made this stunning quilt possible. And a special thank you to Iva Steiner for her stunning quilting in this Chinese New Year quilt. So who is ready for a Sew Along ? Let me know :-) Happy Lunar New Year.... Ingrid xA design collab with Riley Blake Designs - 'From the heart' fabric collection by Sandy Gervais 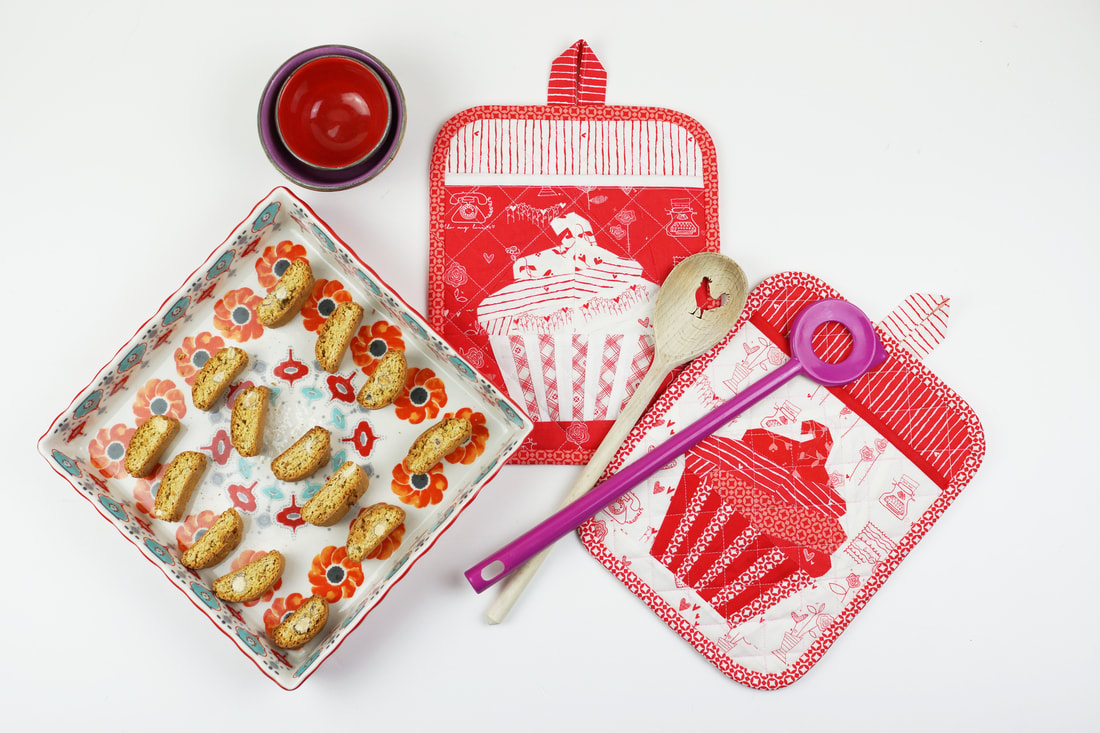 'YOU'RE-MY-CUPCAKE' pot-holders Everybody needs pot-holders in the kitchen, and if they're this cute, even better, right? So how about pulling out some fabric and getting started. These are super easy to make and will be a perfect gift for any passionate cook. 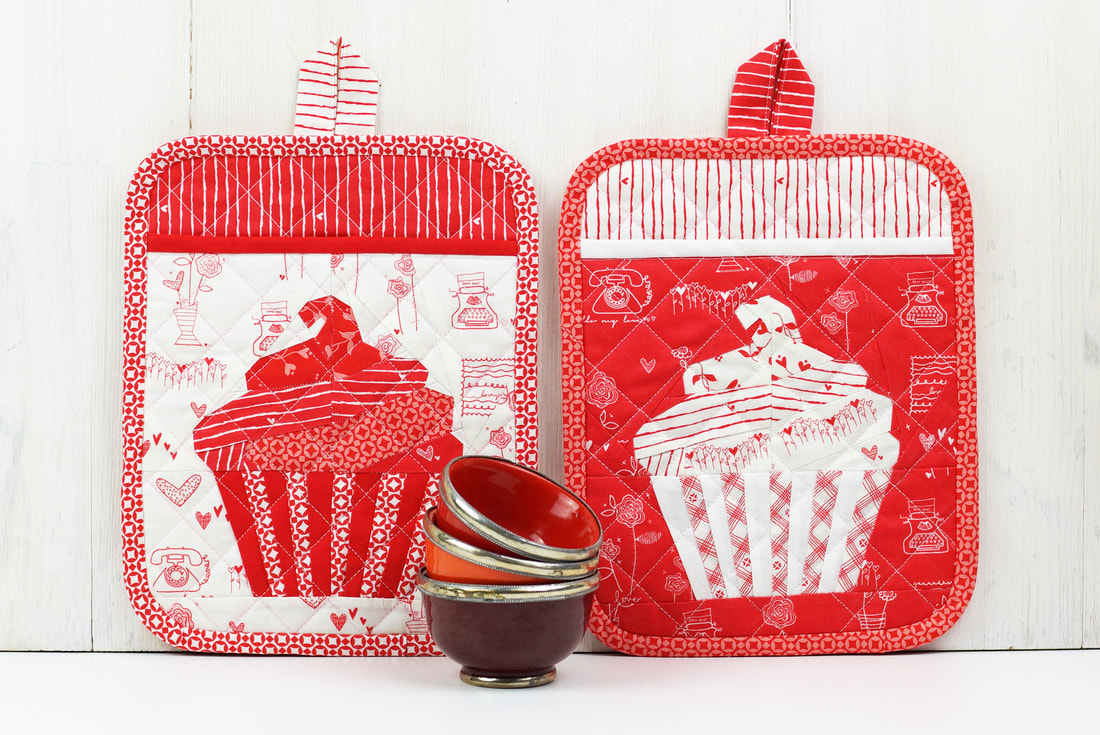 'YOU'RE-MY-CUPCAKE' pot-holders 'You-are-my-cupcake' pot-holders finished size 8"x 10" Fabrics needed per pot-holder: - finished cupcake quilt block 8"x 8" - cut 2 pieces of fabric for backing 8 1/2"x 10 1/2" - cut 1 piece of fabric 8 1/2"x 8 1/2" for pocket lining - 1 piece of fusible interfacing 8 1/2"x 8 1/2" for pocket - 1 piece of fusible interfacing 8 1/2"x 10 1/2" for backing - 1 piece of insul-brite 8 1/2"x 10 1/2" for backing - cut 1 strip of fabric 1 1/2"x 10" as binding for pocket - cut 1 strip of fabric 2"x 6" or use ribbon for hanging tab - bias tape 2"x 40" for pot-holder binding Sewing the potholder: 1. Finish the cup cake quilt block ( shop pattern here ) in size 8"x 8" 2. Cut all of your fabric pieces as mentioned above. 3. Iron on fusible interfacing to your quilt block . Then lay pocket lining piece of fabric face down on flat surface and lay quilt block face up on top of it. Clip or pin in place. 4. Quilt as desired, to hold these layers together. I did 1" diagonal squares. I used my acrylic ruler and a fabric chalk pen to draw the lines. 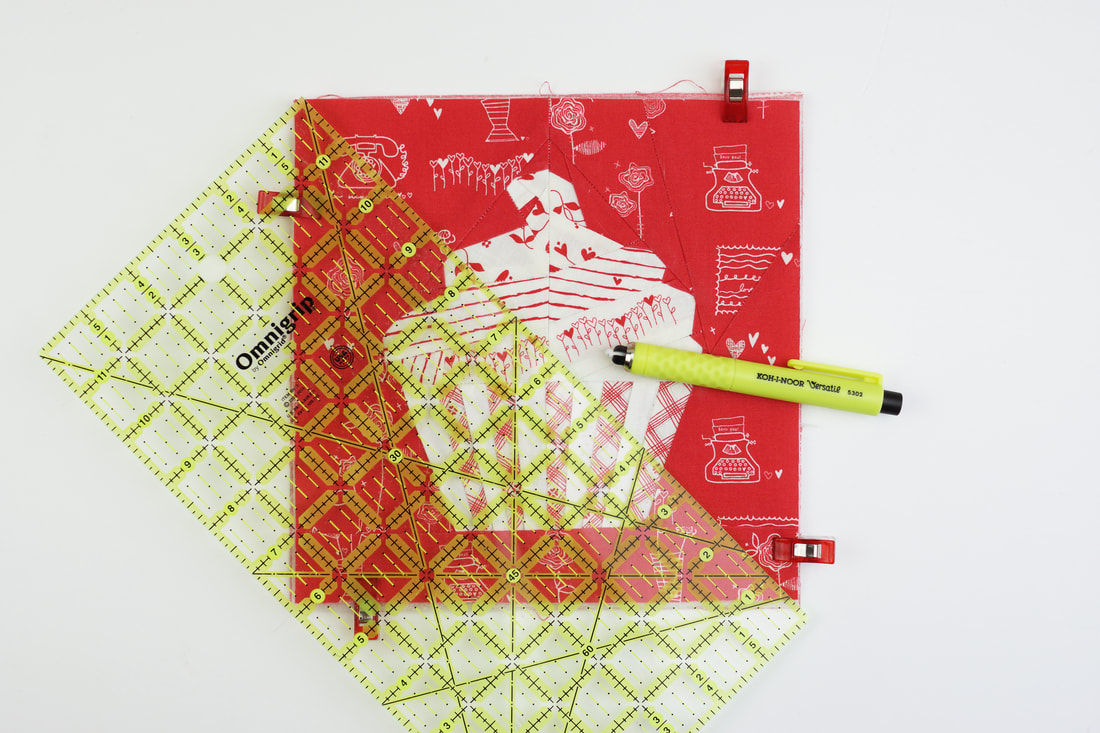 Drawing the lines with a fabric chalk pen 5. Trim to 8"x 8" size. 6. Iron on the fusible interfacing to one of the backing fabrics. Place the other backing fabric face down on a flat surface. Position the insul-brite on top of it and finish off with the backing/fusable interfacing piece, face up. Pin or clip all three layers in place. Quilt as desired, I did 1" diagonal squares again, as with the pocket piece. Make the hanging tab: ( or use a strip of ribbon) - Fold the 2"x 6" strip in half lengthwise and press. Fold in 1/4" seam allowance on each long raw edge and press again. - Stitch with small seam allowance. - Fold the tab in half and clip in place at the center of the back of your pot-holder. 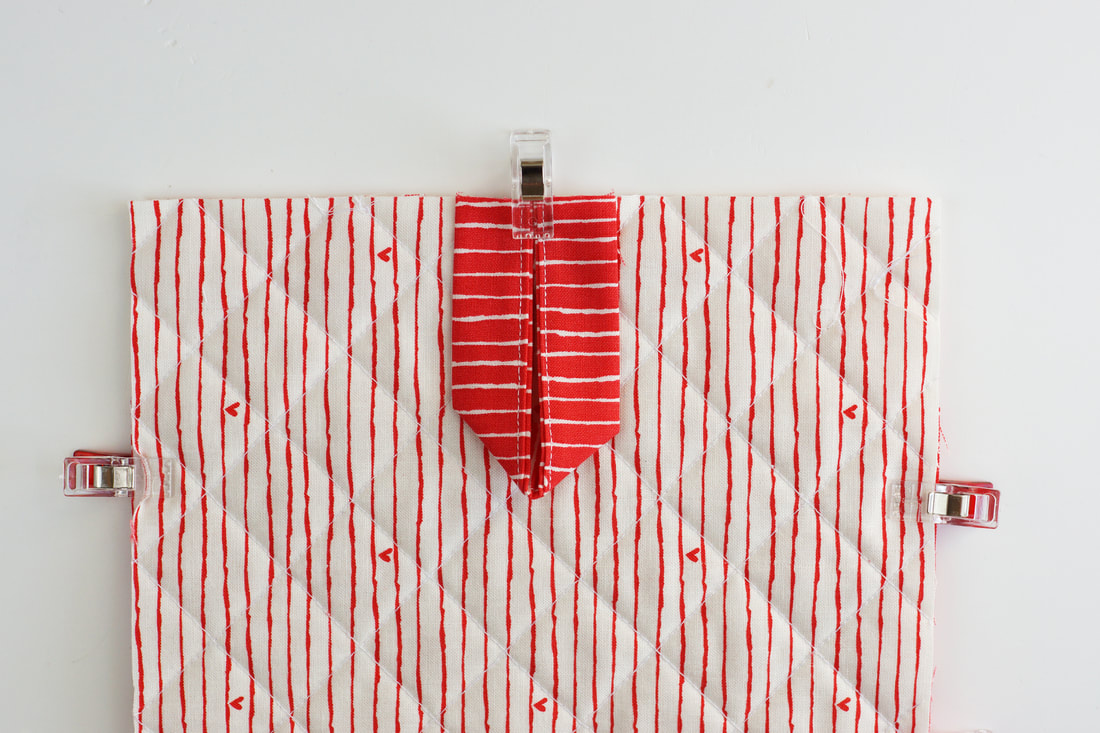 attach hanging tab at the center 7. Binding for the pocket: Take the strip of fabric 1 1/2"x 10" and pin it to the top of the cupcake pocket with the raw edges aligned and stitch in place with 1/4" seam allowance. ( photo 1) Fold the binding over to the back ( photo 2) and stitch in place ( photo 3) Finished binding seen from the front ( photo 4) Trim the ends. 8. Place the quilted pocket piece on top of the backing , aligning the side and the bottom raw edges. Clip or pin in place. 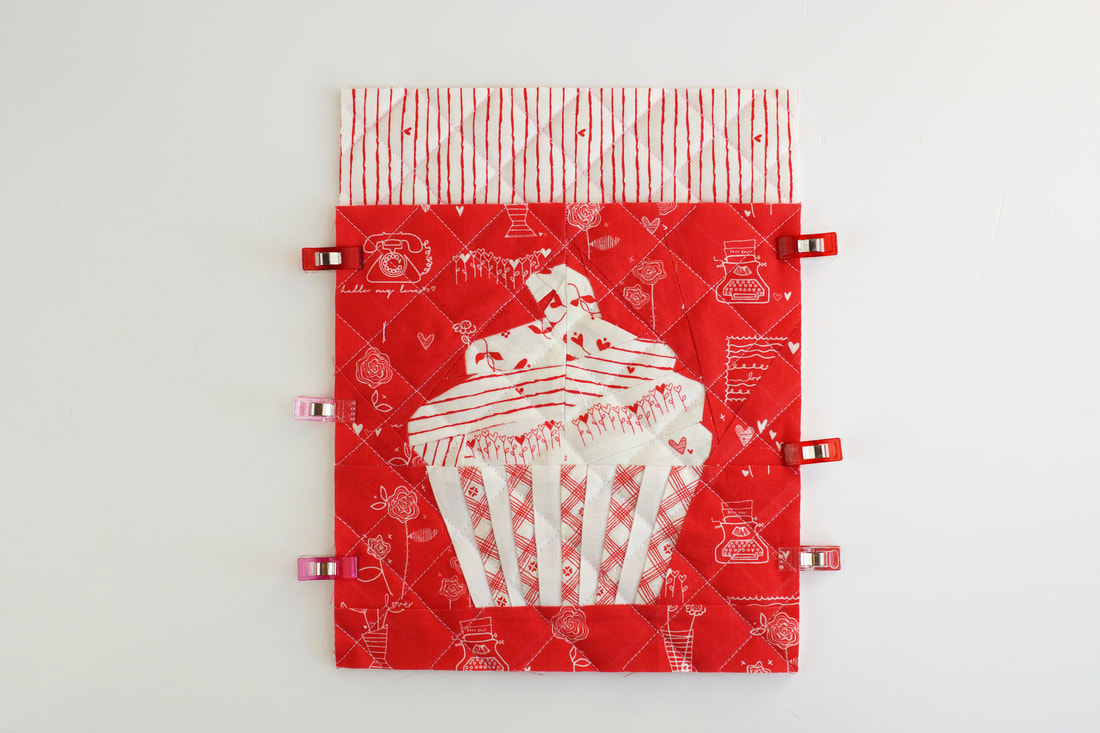 9. Round the corners of your pot-holder. I drew a 1/4 circle at the corners first and then cut it. here's a template for the corners, cut it along the black line. 10. Fold the bias tape over 1/4" at one end of the binding strip and clip or pin in place around the pot-holder with the end overlapping about 1/2" ( photo 1 ) . Stitch in place. ( photo 2 ). Fold the binding over to the backof the pot-holder and then hand stitch in place. Et voila .... all done. Thank you so much to Riley Blake Designs for supplying the absolutely adorable 'From the Heart' fabric series designed by Sandy Gervais that I used in this super cute project. This pattern is perfect for any 8"x 8" quilt block. I can't wait to see your makes. How do you like these pot-holders? Happy sewing Ingrid x follow me on 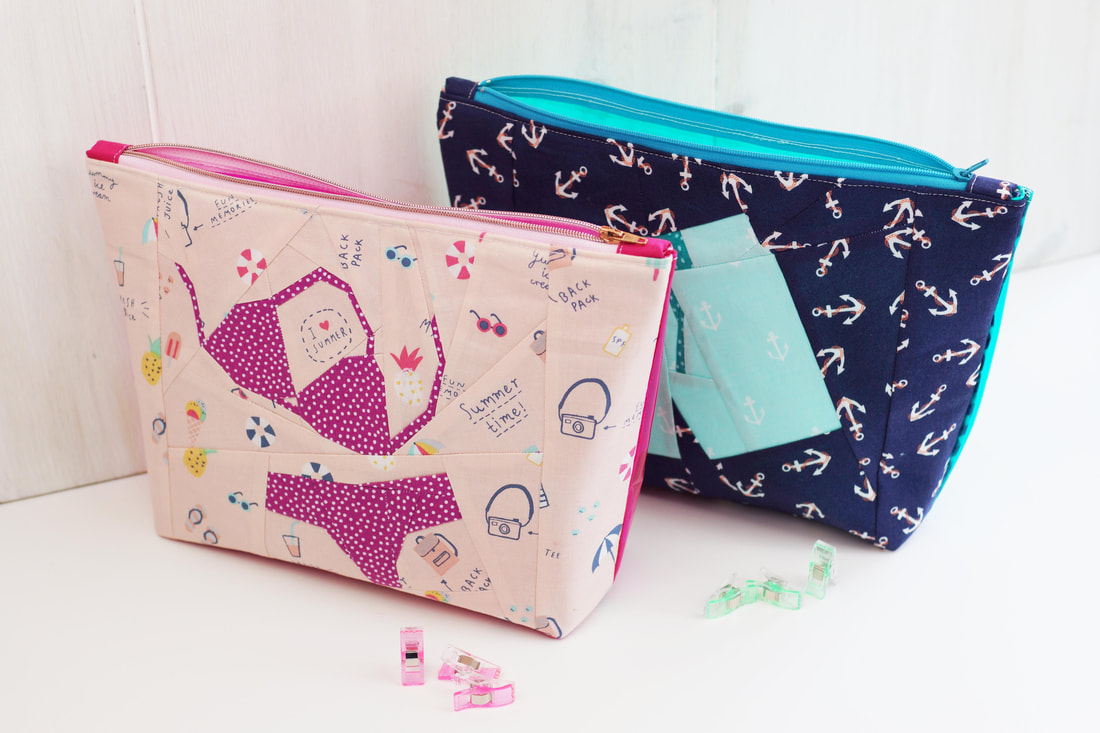
#twopiecepouch
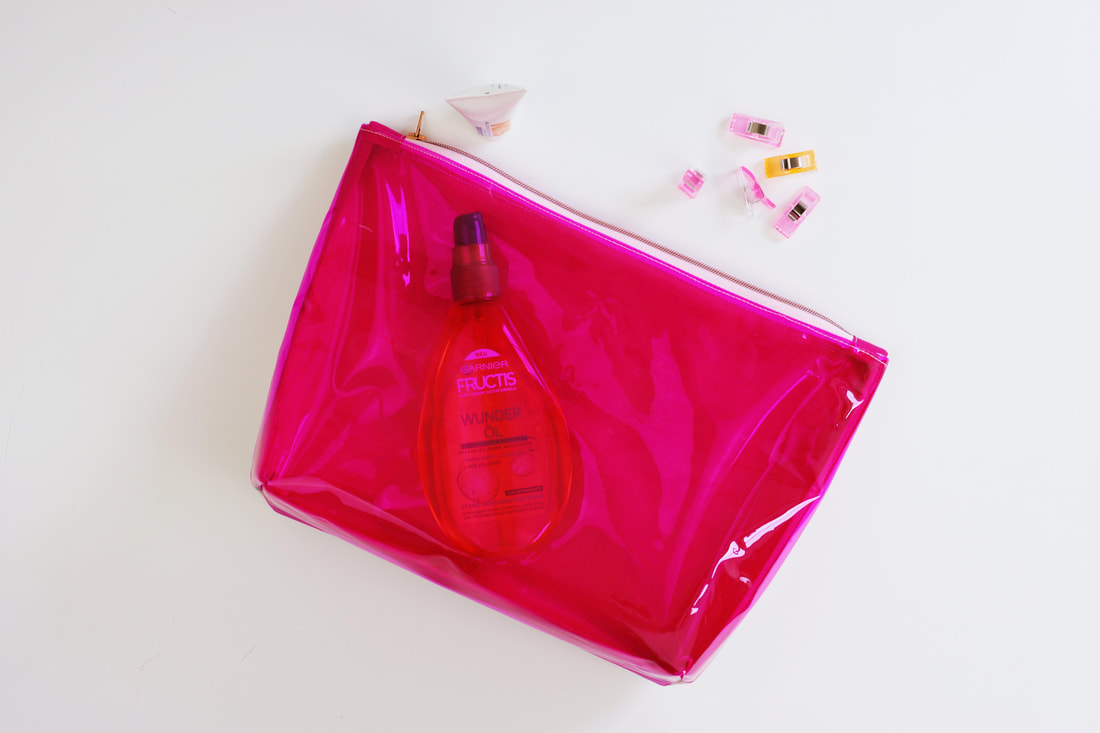
Sometimes connection happens in the most unexpected ways. This happened when I first saw Natalie Santini's profile on Instagram @sewhungryhippie you could even say it was love at first sight, literally. 'I believe we're all interconnected, to each other and to the Earth-more than we realize.'- this is Natalie's quote and she's 100% right. I love her quirky, fun and colorful sewing projects, photos, patterns and general approach to life. She has some fantastic items and projects in her shop, and the thing that really caught my attention are her fun and bright colored vinyls and patterns with them. So immediately there was a pattern idea that popped into my head and Natalie was on the same page right away. And we created the ' TWO PIECE POUCH' #twopiecepouch
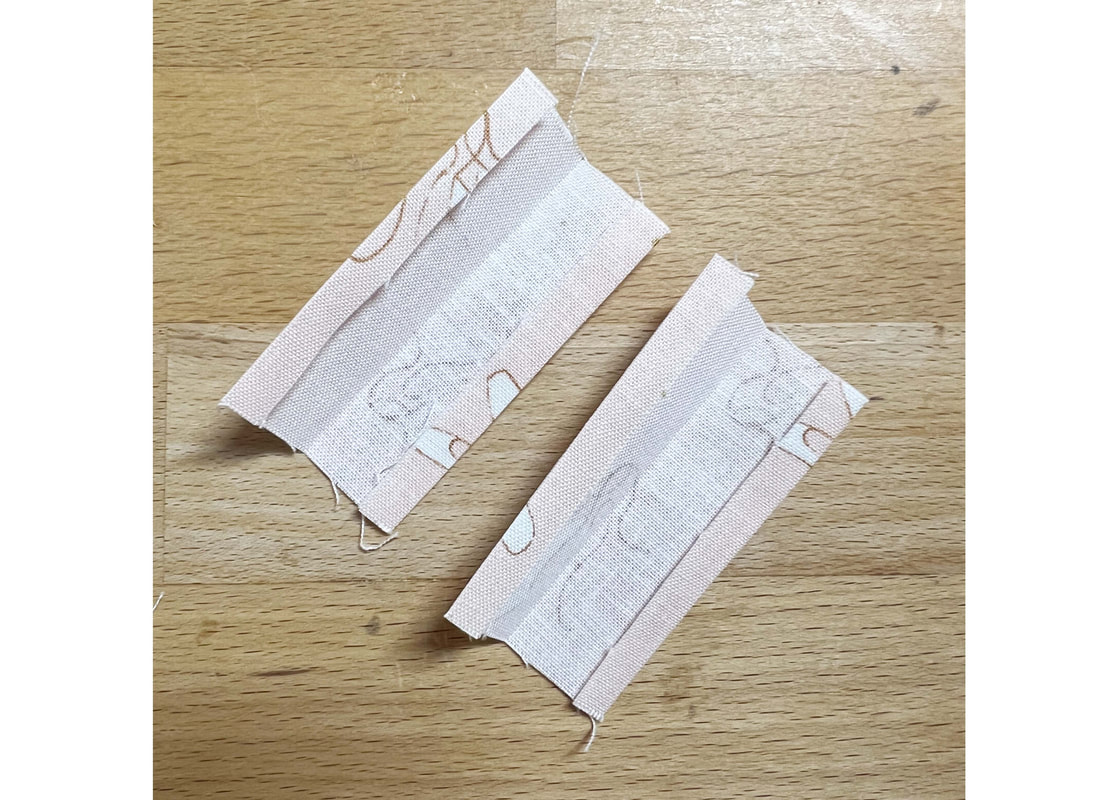
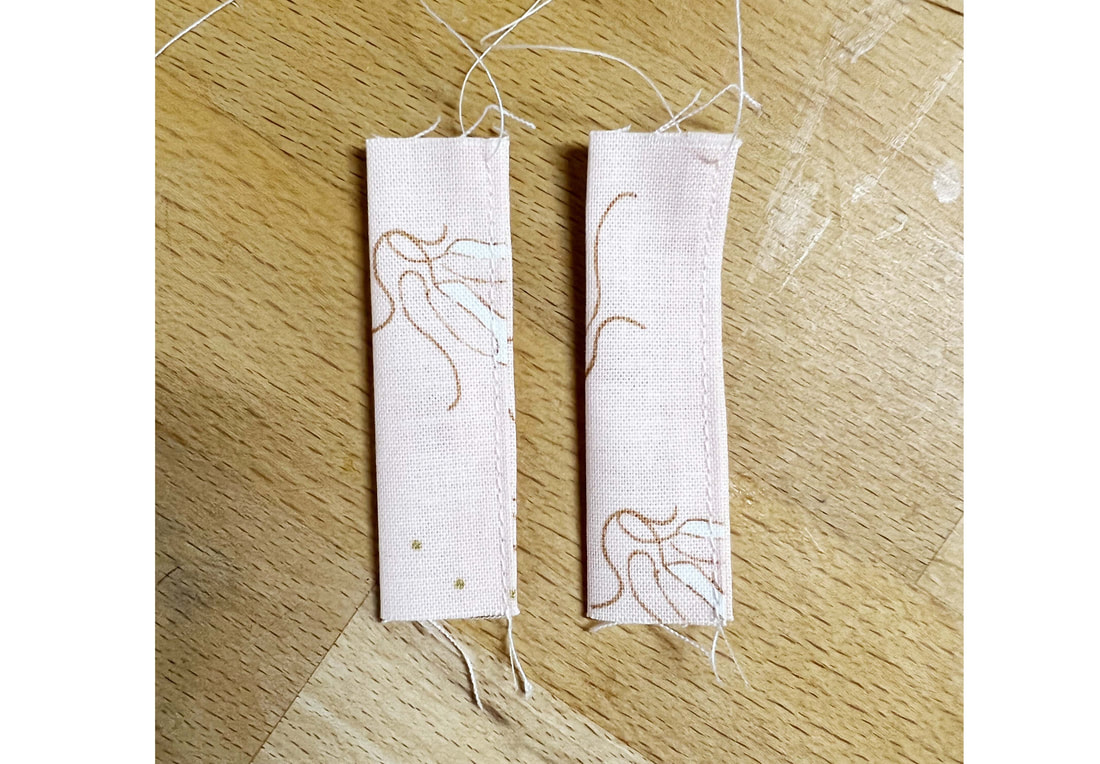
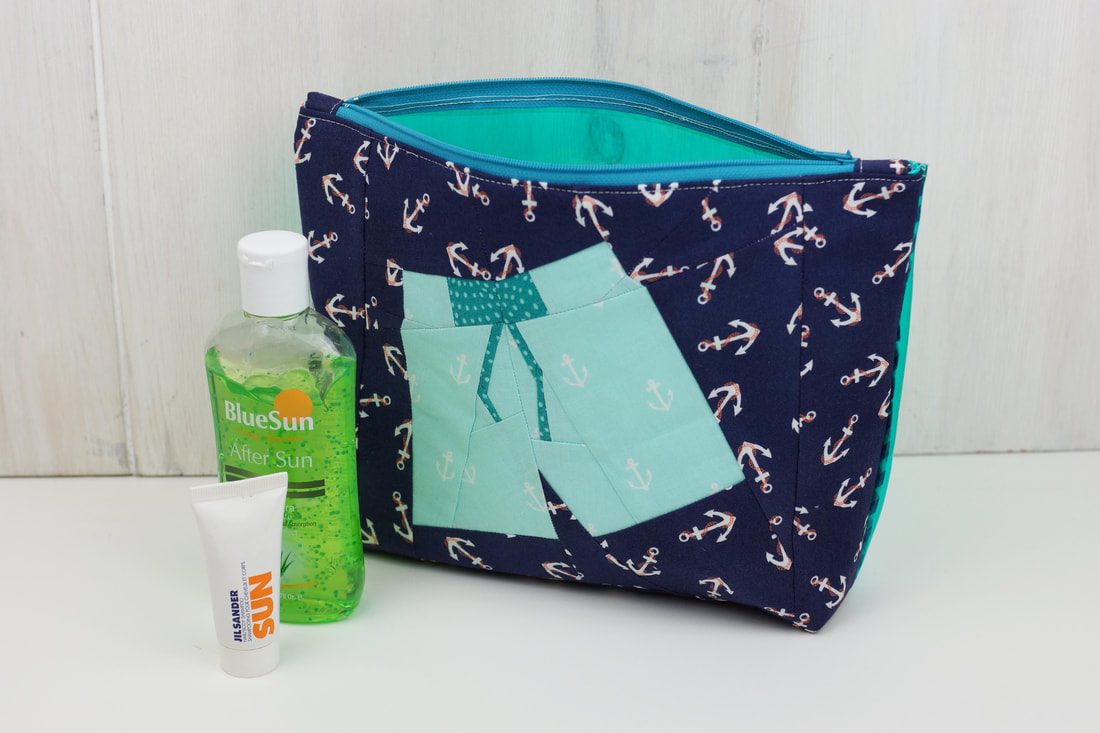
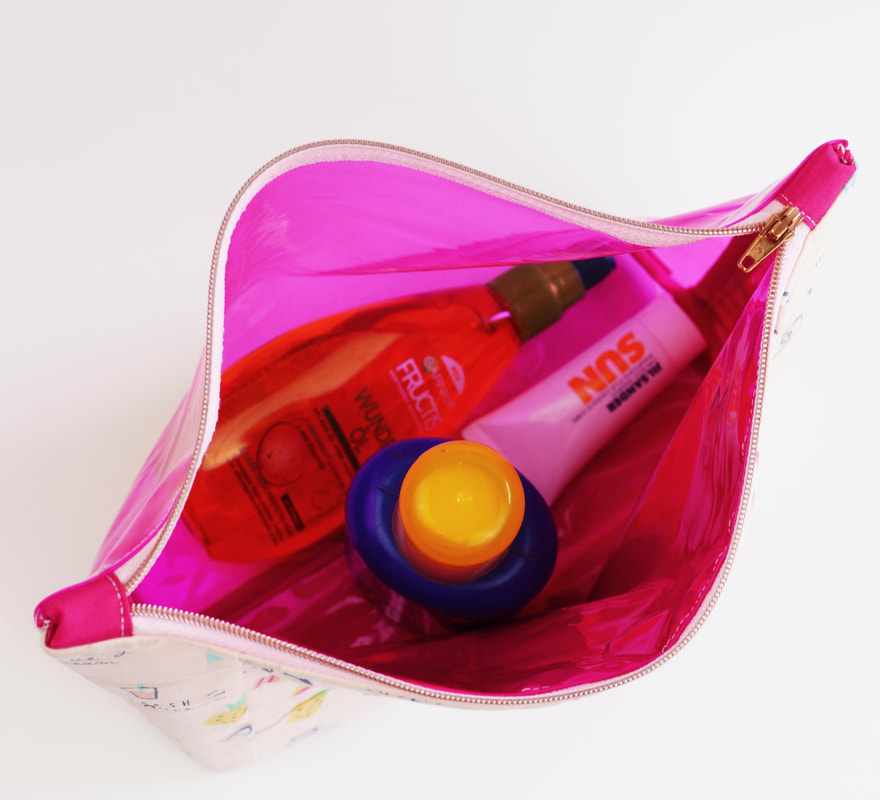
a super practical and pretty wet bag for BIKINI/SWIMMSHORTS
This is a fab combination of foundation paper piecing and vinyl.
Natalie's fantastic way of sewing a beautiful pouch with vinyl and two of my summer, beach quilt block patterns make some useful and fantastic pouches. I am sure it happened to you as well, you spend all day at the beach, want to pack your things but all the swimsuits are still wet, so you wrap them in the towels. When you get home, the towels are moist, the pages of your book or magazines are wet and roll themselves. And to top it all off, one of you ( I'm not pointing fingers :-) forgot to close the lid of your sunscreen all the way, so it's spilled nicely all over your beach bag. 
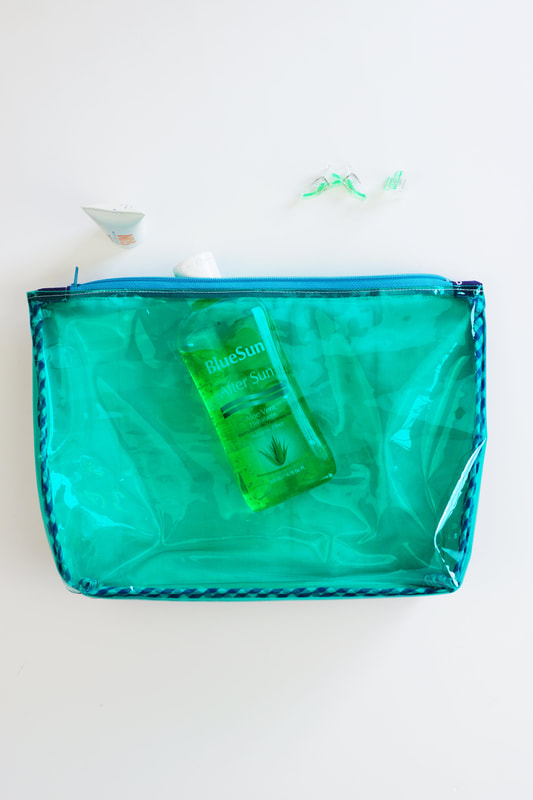
Needless to say these problems will all be solved, when you store your wet bikini or shorts perfectly in this pretty vinyl pouch.
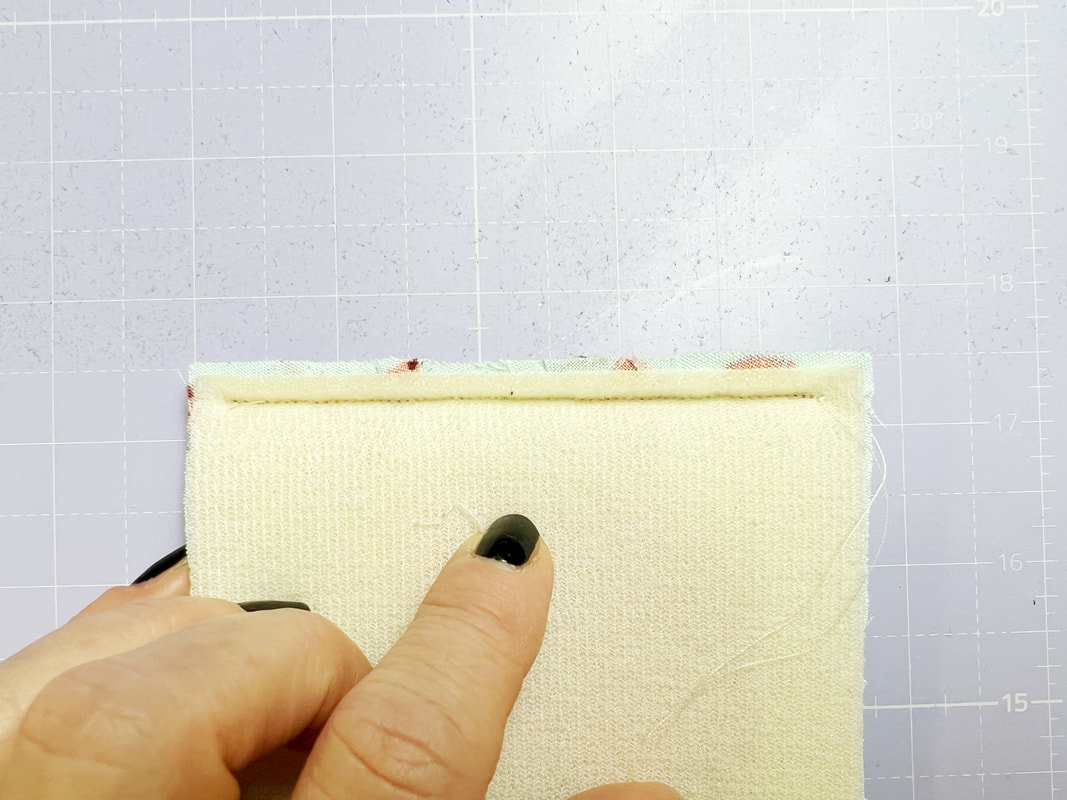
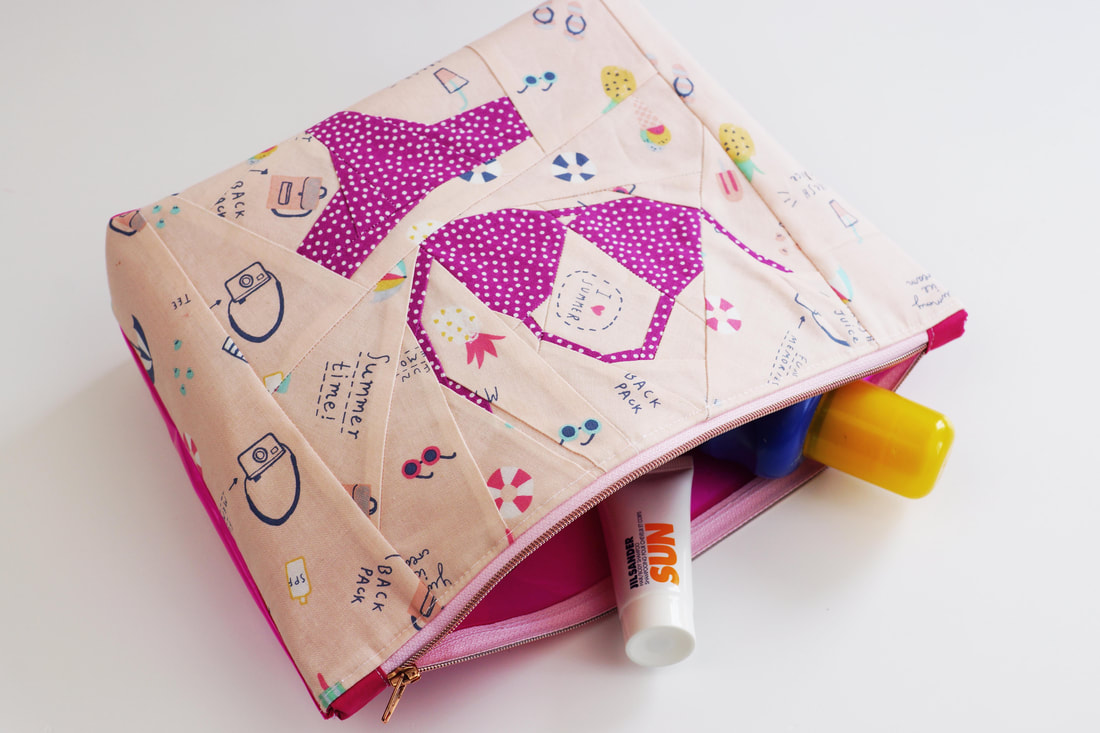
Your beach bag and all the rest of your stuff stays nice and dry, clean and safe. Plus you will be the hit at the pool or beach with this adorable #twopiecepouch. This pattern shows you step by step how to sew a vinyl pouch, as well as two unusual quilt blocks . The instructions are for two different quilt block sizes each, as well as two diffferent pouch sizes. The pouches don't have open vinyl seams, but awesome binding covered seams inside. 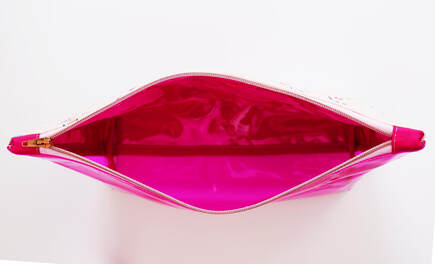
awesome binding covered inside seams
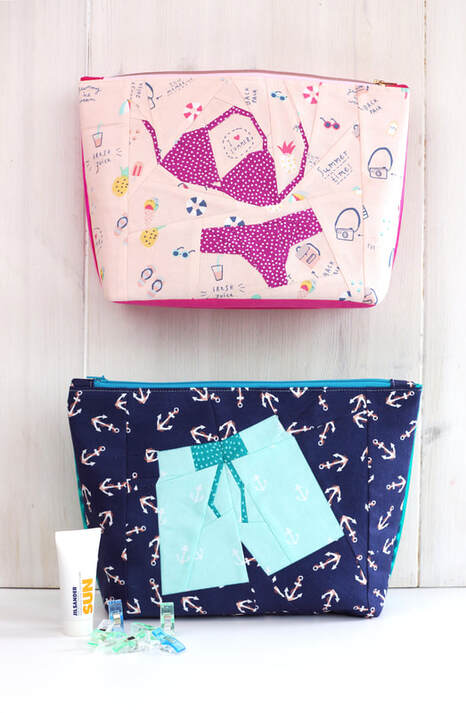
#twopiecepouch bikini and swimshorts
Get your sewing machine ready and make yourself some stunning
beach-bikini-swimmshorts wet bags. Shop the pattern here. And if you share them on social media why not use #twopiecepouch so we can cheer your makes :-) happy sewing Natalie and Ingrid xx |
Author
Ingrid Alteneder Archive
March 2022
Categories
All
|


 RSS Feed

|
Visit us at
|