|
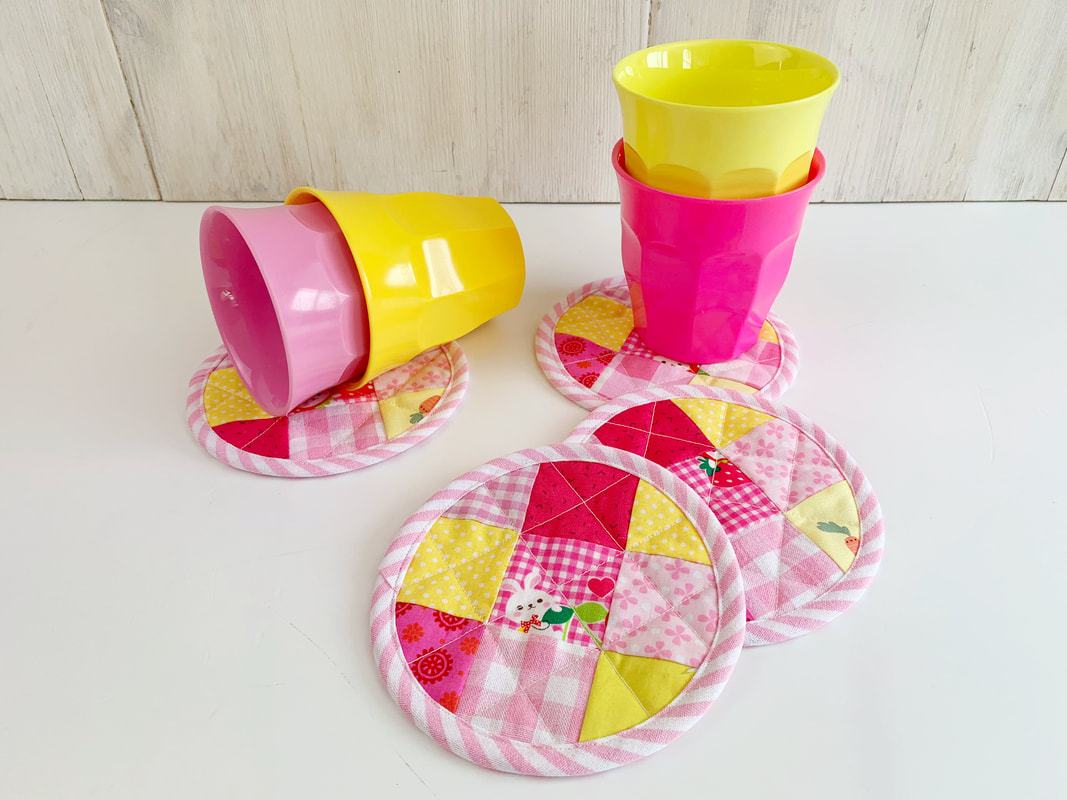
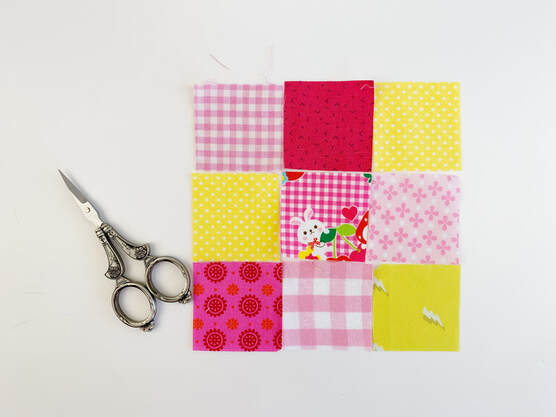
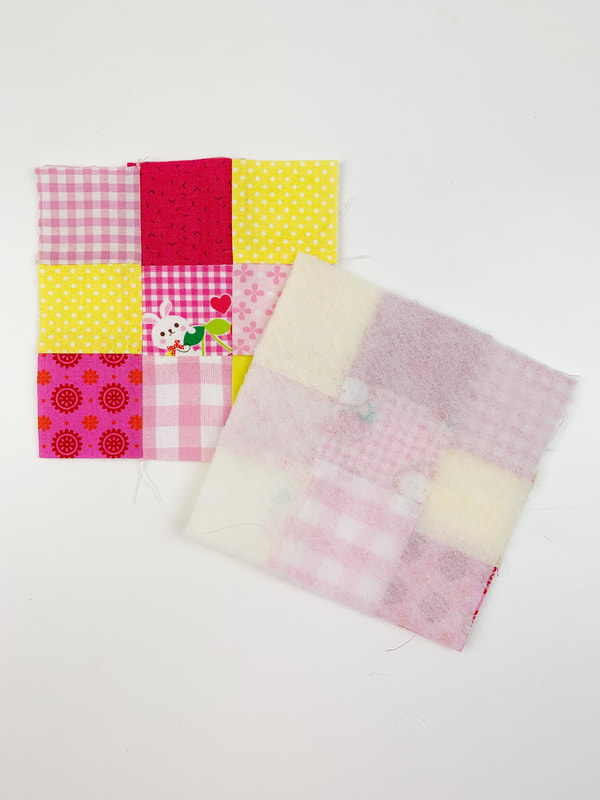
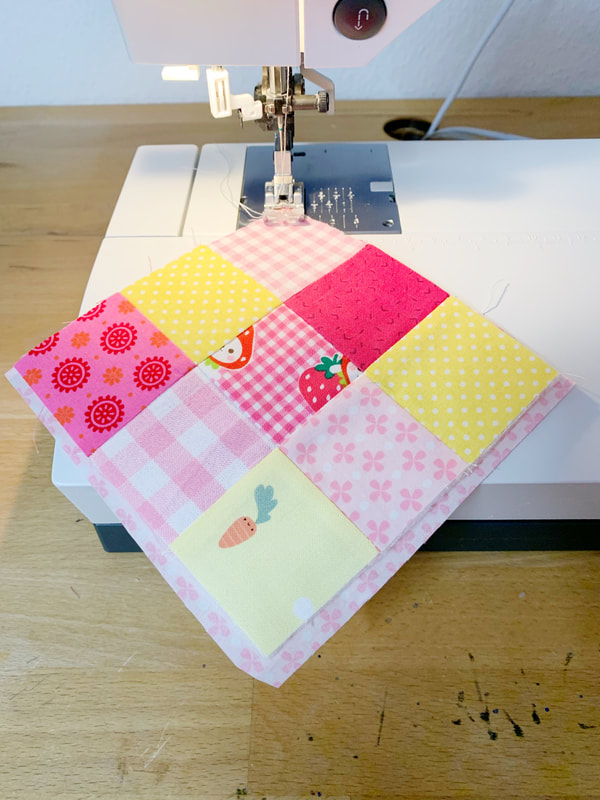
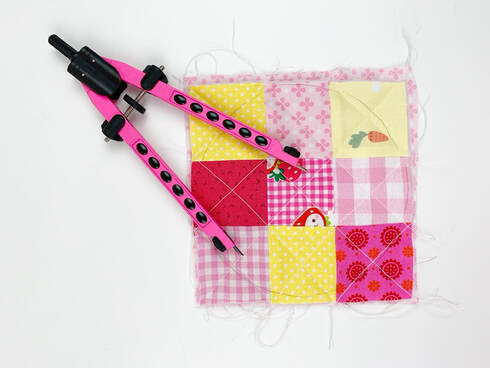
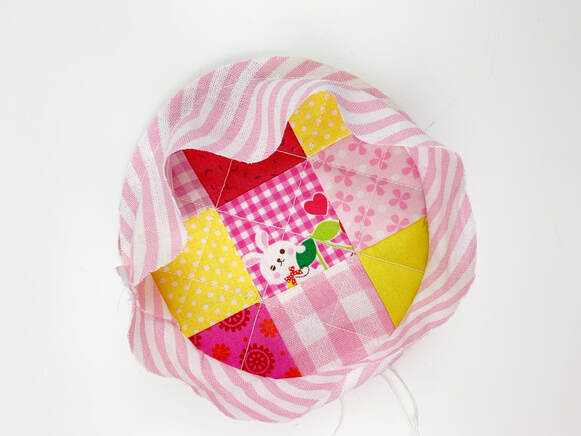
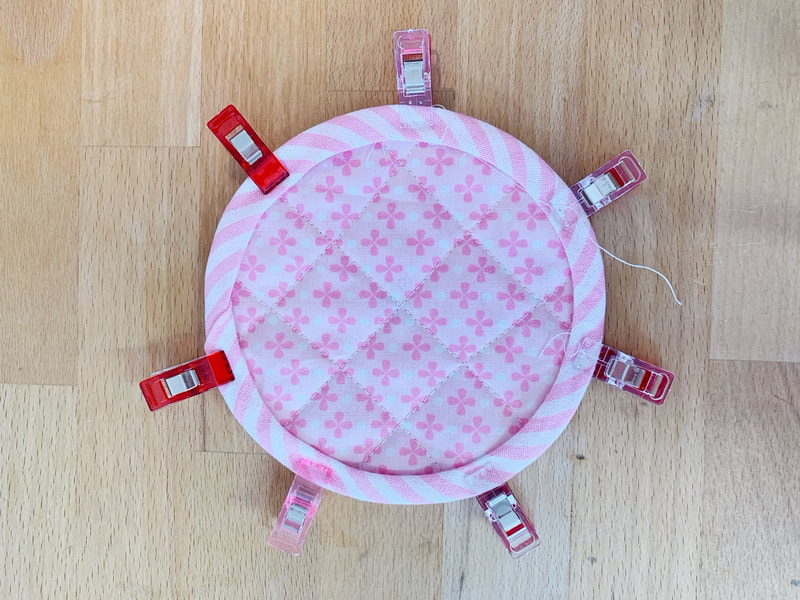
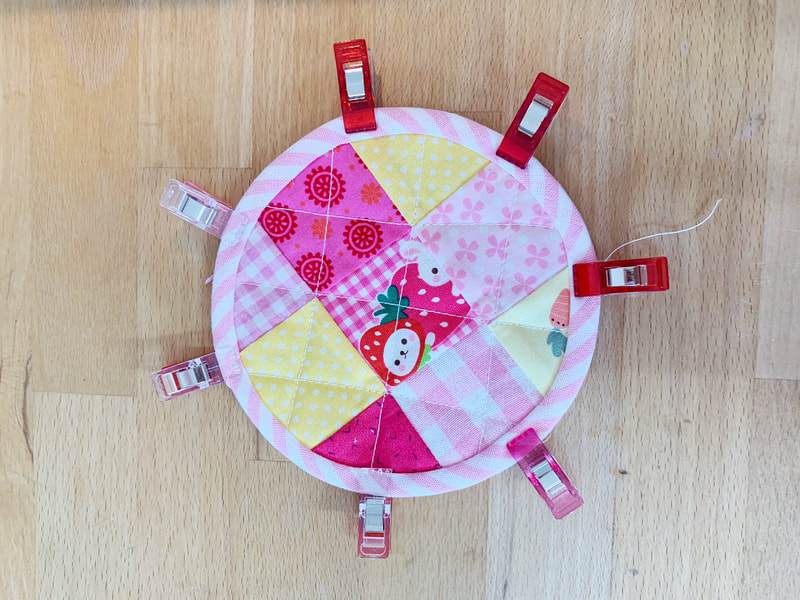
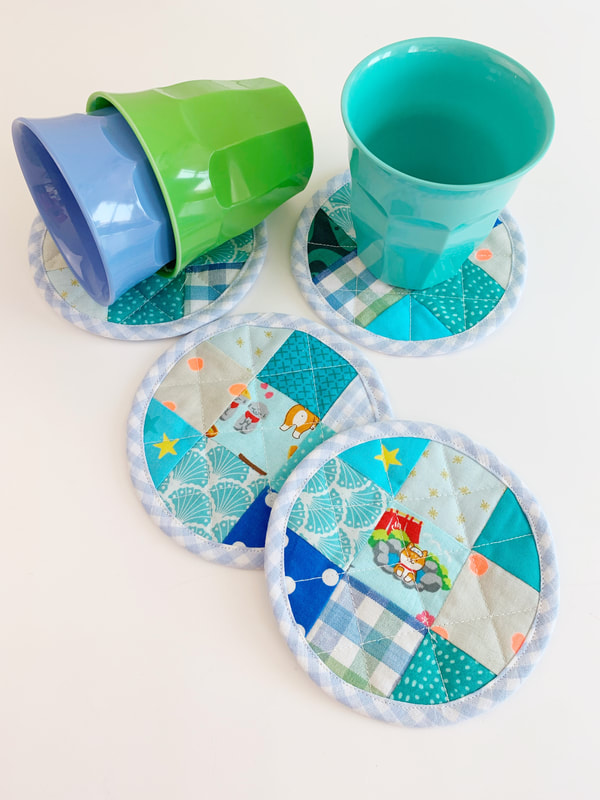
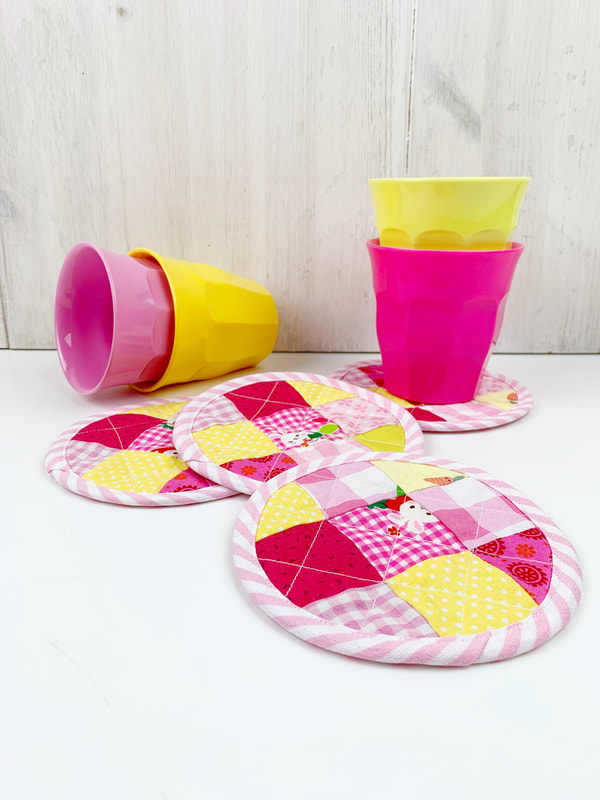
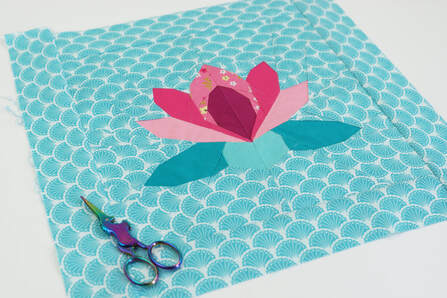
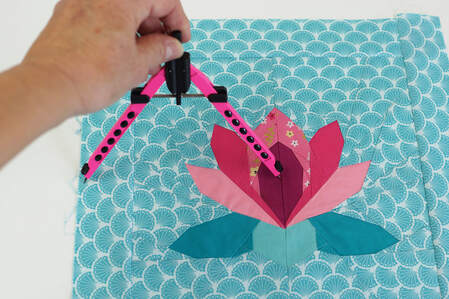
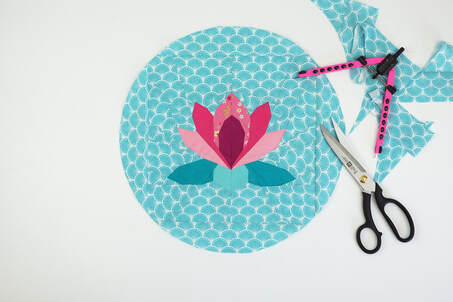
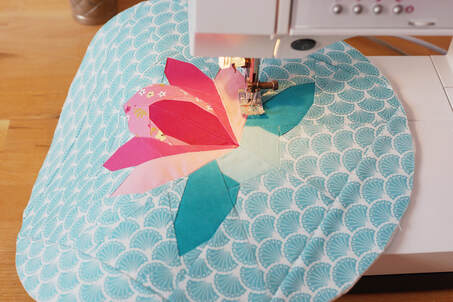
How to sew the cutest coasters in less than 15 minutes... We all have tons of fabric scraps left over from our sewing projects right? That's why I love quick little projects to use all these cuties. Here is one, that you will love and actually use as well. Materials needed: ( for one coaster) finished size: 5" circle - 9 x 2" squares - fusible batting 5"x 5" - 1 piece of fabric for the back 5"x 5" - binding strip ( bias cut, that's important! ) 18"x 1.5" - If you want to make these coasters water proof, iron on some vinyl ( heat n bond) before or after you quilt them ( note: the ones here are without vinyl). Before you start: Read the instructions carefully Seam allowance is always 1⁄4” unless mentioned otherwise. Instructions: 1. Cut out all your fabrics and batting as mentioned above. 2. Sew your 9 squares together. Here is a quick video on how to piece these squares successfully. 3. Iron on the fusible batting and place on back piece of fabric wrong sides together. Then quilt the square to your liking. If you want to make these coasters water proof, iron on some vinyl ( Heat 'n Bond) before you quilt them . 4. Draw a circle on your quilted square and cut it out 5. Fold over the beginning of your binding strip 1/4" and then clip, pin ore clue your binding strip in place, along the outer edge of your circle. Stitch along the outer edge with 1/4" seam allowance. 6. Fold over your binding to the back and fold it under 3/8" as shown in photo 1, photo 2 shows the coaster from the front. 7. Now stitch binding in place from the front. Or hand stitch from the back, which ever way you prefer. It's super easy with the machine.... I feel good :-) Here we go, all done... What do you think? Easy and cute, right? Happy coaster sewing..... Ingrid xx
10 Comments
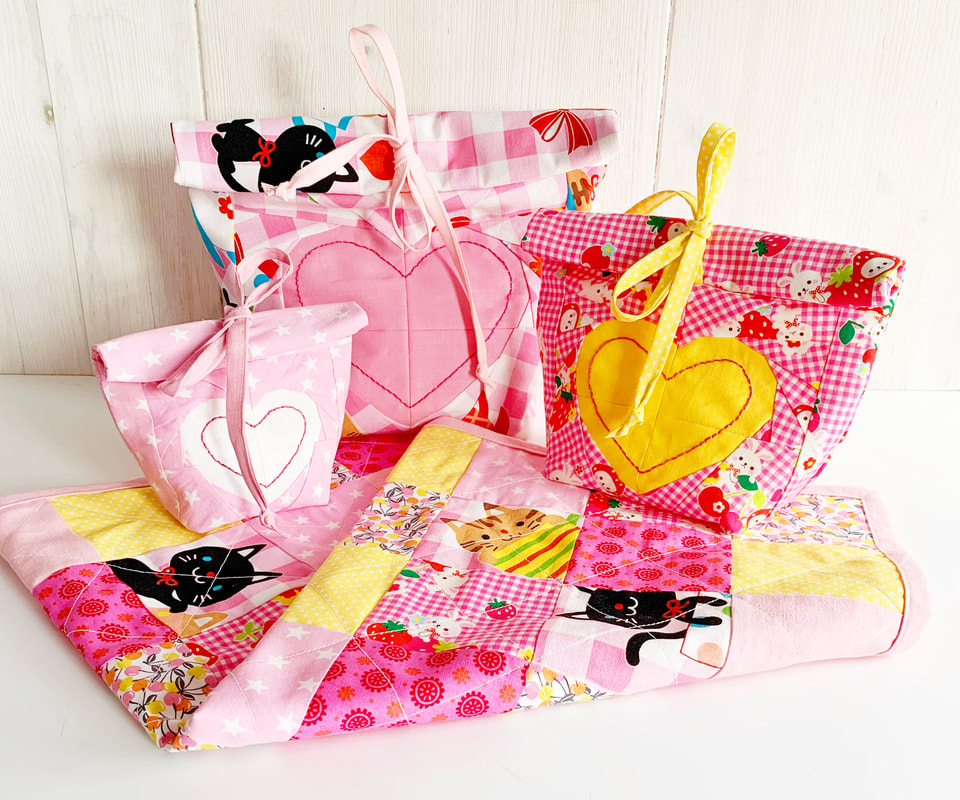
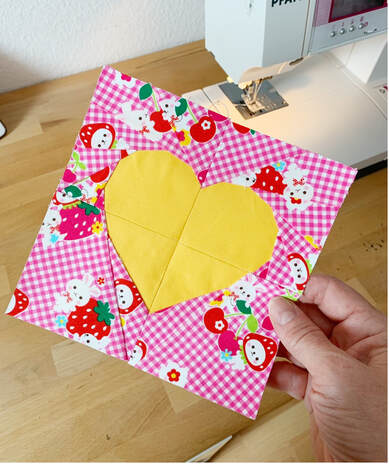
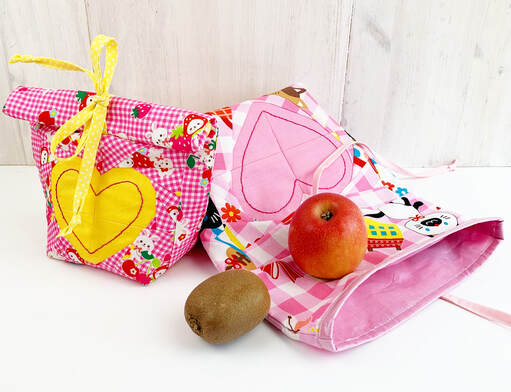
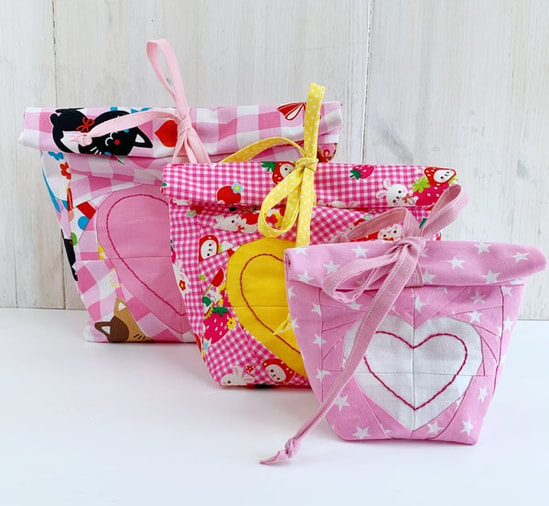
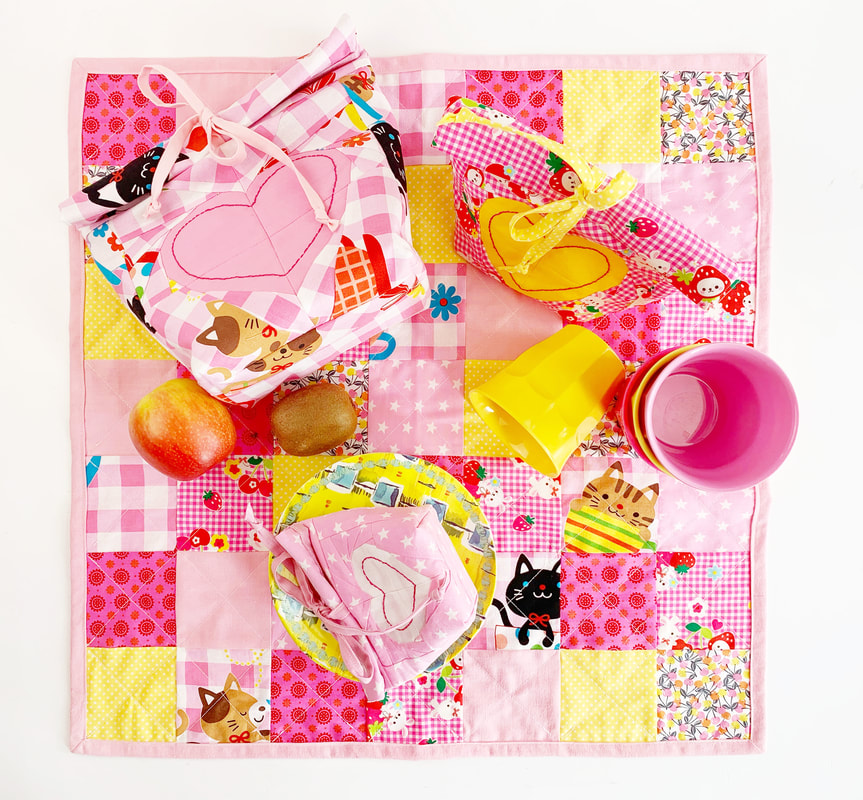
This adorable little lunch bag set or picnic set consists of three vinyl lined snack bags and a small patchwork tablecloth. This is a fun set for this upcoming summer picnic season. We might not be able to go to restaurants any time soon, but we will be able to go for picnics. This is the perfect excuse to sew something cute for ourselves, don't you think? Each little snack bag or lunch bag has a cute and most importantly easy to sew heart in the front. I added a simple running stitch row to the heart for extra cuteness. But you could also embroider the lunch bag owners name or a sweet message, in case you want to gift these cuties. How about a subtle 'I love you' ? I used iron on vinyl for the lining of these snack bags. It's super practical and easy to use. You can use any kind of quilting cotton fabric and just iron on the vinyl. The one I used here is from Heat n Bond. This way you can wipe the inside easily. And just in case something spills, your outside bag and everything else is protected. There are three sizes in this picnic/ lunch bag set. Enough options for all sorts of snacks, fruits and sandwiches. And to complete this adorable little set and to use up the scraps you have left over from sewing the bags, I added a small table cloth to the pattern. The size is 21"x 21" and perfect for a short picnic at the motorway service station when on a road trip, or when hiking, to enhance your mountain view even more. Are you ready for a picnic? Let me know what you think about this easy to sew little set in the comments. Ingrid xx
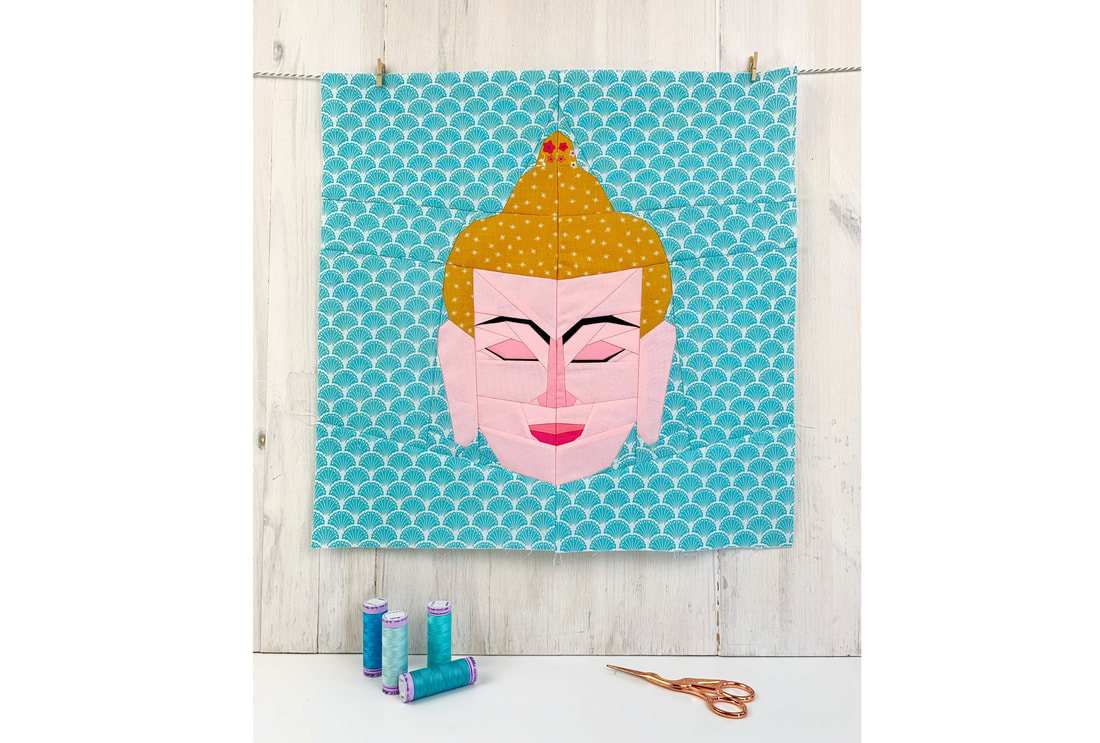
Mindfulness featuring Buddha and the eight auspicious symbols of Buddhism,
is a new quilt pattern I designed these past few months. I hope it helps and inspires you. And maybe helps you navigate easier through these special times.
Buddha and the eight auspicious symbols of Buddhism...
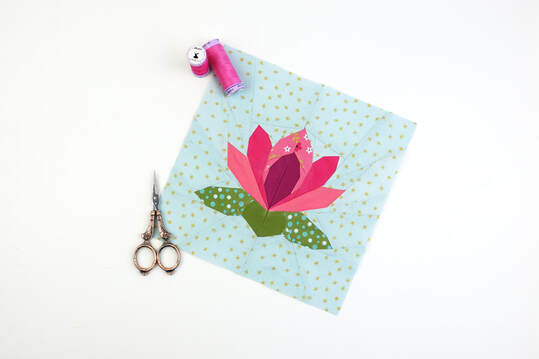
The eight auspicious symbols of Buddhism can be traced back to ancient India where Buddhism originated. Some of these eight symbols are also associated with ancient royal rituals in India such as coronations of kings. Today, the eight auspicious symbols of Buddhism are closely related to Buddha or Dharma. Dharma is an important Hindu or Buddhist concept, referring to a law that governs the universe. Although there is no single-word English translation, a close adaption is 'right way of living'. These symbols represent the offerings that were made to Buddha by the gods when he achieved enlightenment. Why are these eight Buddhist symbols called 'auspicious'? Auspicious means, giving or being a sign of future success. And that's exactly what these symbols represent, they are symbols that are helpful for success and prosperity. These eight symbols are often seen in many holy altars in front of a Buddha statue or mural. They also serve as focal points of meditation and contemplation, so if you want a better future or if you want to grow deeper in your spirituality, it might help to make these symbols your focus. Here are the eight auspicious symbols of Buddhism and their meanings: 1. The Lotus Flower
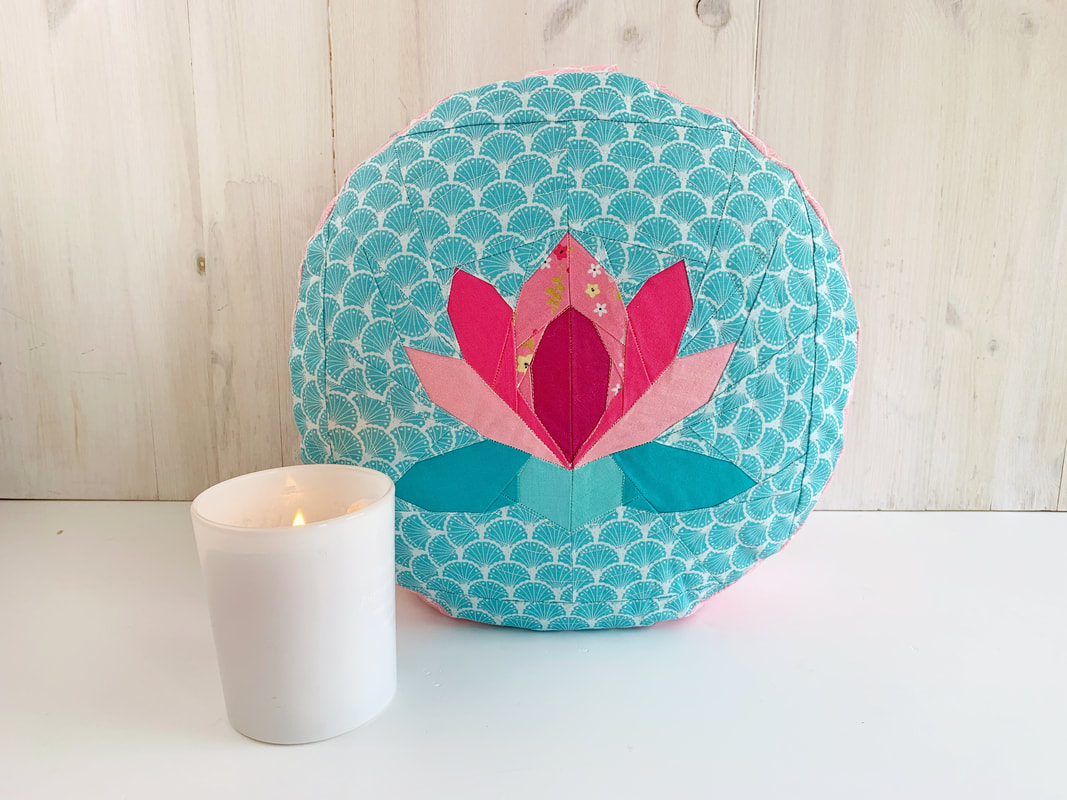
Thelotus flower symbolizes the complete purification of the body, mind and speech.
Since the lotus flower is an aquatic plant with its roots in deep mud, but a blossom that rises above the muck and opens to the sun, beautiful and fragrant, it's no surprise that the lotus represents the clarity of enlightenment. 2. The Conch Shell
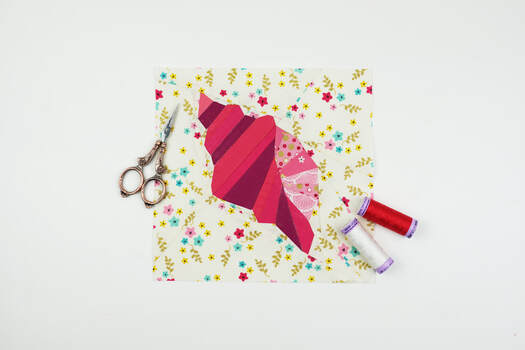
The conch shell has long been used as a battle horn in Asia. In ancient India the conch also represented the Brahmin caste.
In Buddhism the conch shell represents the sound of Dharma, reaching far and wide to awaken the human beings from their slumber of ignorance. Dharma, which derives from a Sanskrit root word meaning 'to uphold or sustain'. The concept behind Dharma is anything that produces or keeps a positive order. The conch shell symbolizes the need to accomplish one own and others wellbeing. 3. The Precious Parasol
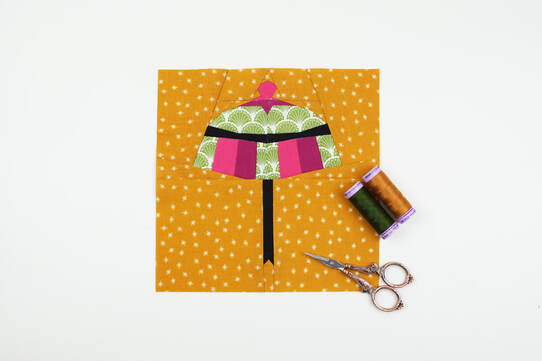
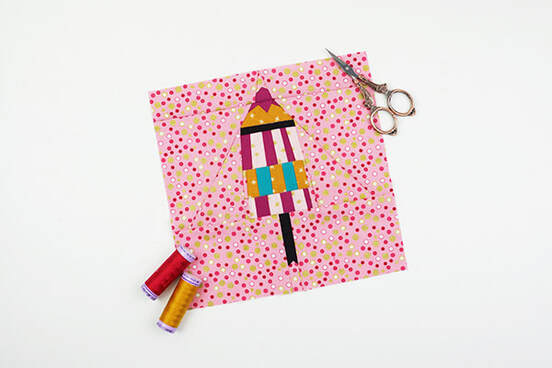
Theprecious parasol is a symbol of royal dignity and protection of the sun.
In Buddhism the precious parasol represents the wholesome protection from illness and suffering in general. 4. The Treasure Vase
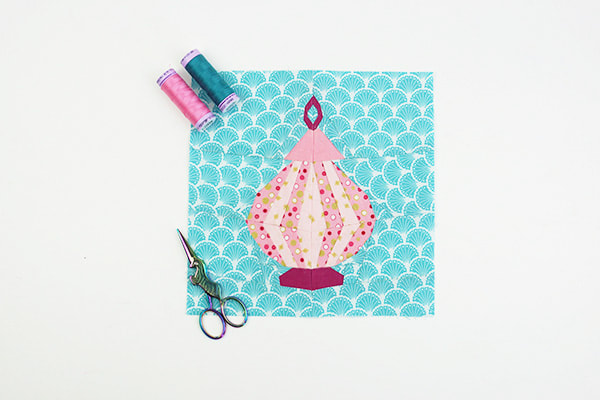
The treasure vase is filled with precious sacred things, but no matter how much is taken out, it's always full.
It symbolizes a long life and prosperity. 5. The Eternal Knot
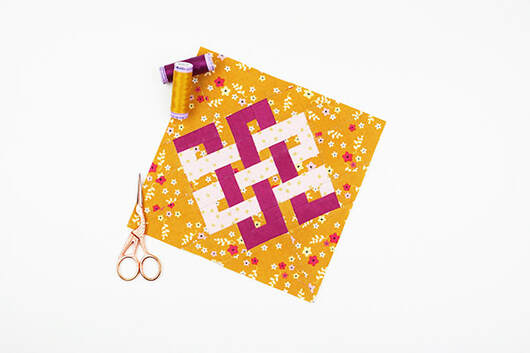
The eternal or endless knot represents Buddha's endless wisdom and eternal harmony.
It's a symbol for the endless cycle of suffering, birth and rebirth. As well as the inter-twining of wisdom and compassion. 6.The Victory Banner
The victory banner symbolizes the victory over obstacles and negativities and the fear of death.
More generally it represents the victory of wisdom over ignorance . There is a legend, that Buddha raised the victory banner over Mount Meru to mark his victory over all phenomenal things. 7. The Dharma Wheel
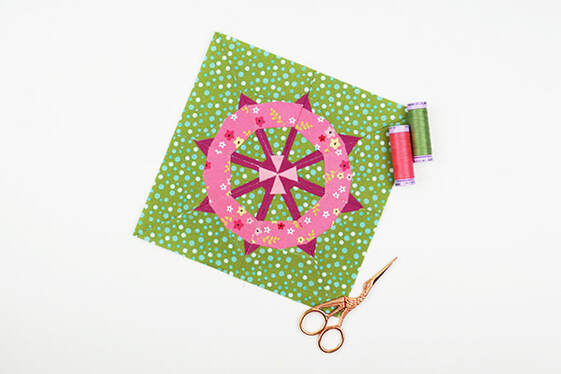
The dharma wheel is one of the most well known symbols of Buddhism.
The wheel has eight spokes, representing the Eightfold path. The Dharma wheel, according to tradition, was first turned when Buddha delivered his first sermon after his enlightenment. It symbolizes the turning of Buddha's teachings, which enables humans to experience joy and liberation. 8. The Golden Fish
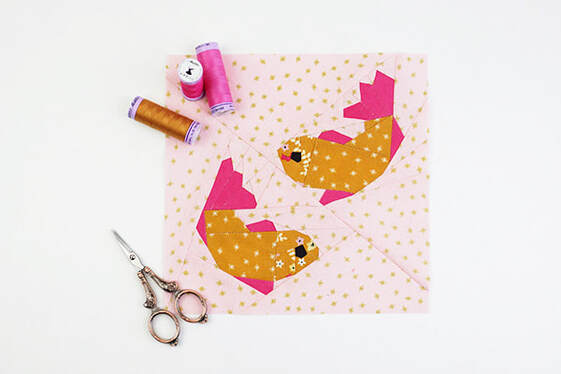
The golden fish were originally the symbol for the rivers Ganges and Yamuna.
They came to represent over time the good fortune in most Asian religions. In Buddhism the golden fish symbolize happiness as they have complete freedom of movement in the water.
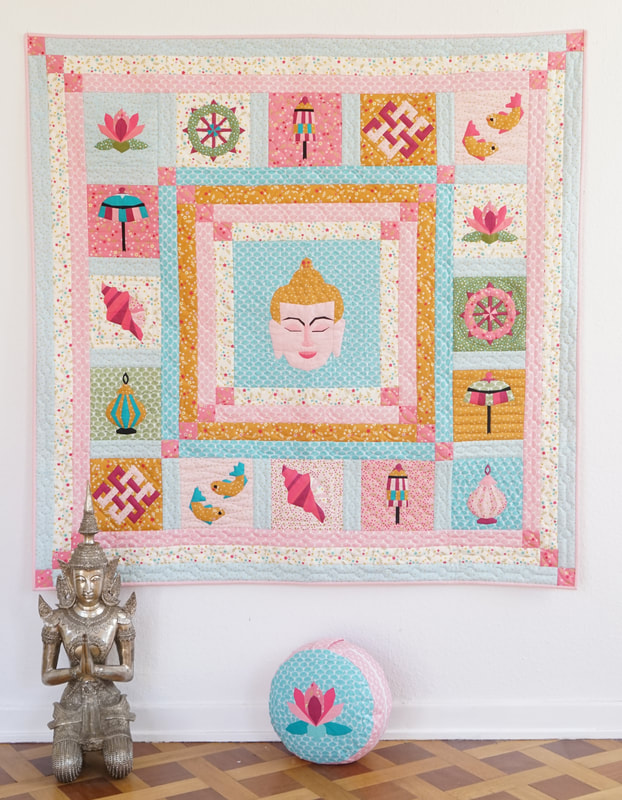
And here is the whole Mindfulness quilt with all the eight symbols surrounding Buddha.
What do you think? One can't go wrong with all the auspiciousness right? It does present favorable circumstances and is showing signs of a favorable outcome, isn't it? Thank you so much to Riley Blake Designs for supplying the absolutely adorable Stardust fabric series designed by Beverly McCullough that I used for this amazing project. Also a huge thank you to Iva Steiner @schnigschnagquiltsandmore for quilting this beautiful quilt. For more info on her services check out her Instagram.
Now lets explore MINDFULNESS a bit more.
Mindfulness is the human ability to be totally present and aware of where we are and what we're doing. It is the ability to not be overly reactive or overwhelmed by what's going on around us. We all own mindfulness, we just have to learn how to access it. This past year has shown us, that our lives can be turned upside down easily from one day to another and there's little to nothing we can do about it. And while we probably looked on the outside before, for comfort and fun, it's now more important than ever, to learn to be just content with what we have, and concentrate on our insides. Tweet this: Meditation can significantly reduce stress Thats where mindfulness finds it's perfect place. Our minds go all over the place and we loose touch with our body and surroundings and sooner than we think we're stuck with obsessive thoughts about things that happened or we're anxious about the future. Studies say that 8 out of 10 Americans ( or Europeans) experience stress in their daily lives and therefore have a hard time calming their minds and bodies. This puts them at a high risk of numerous diseases among them being heart disease and stroke. Mindful meditation, even for just 10 minutes per day, can make a huge difference.
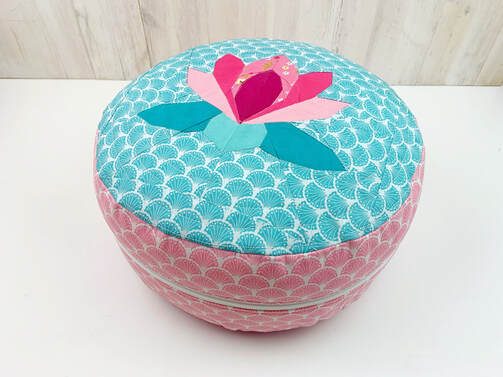
This is why I added this Yoga Pillowcase pattern to my Buddha quilt pattern series.
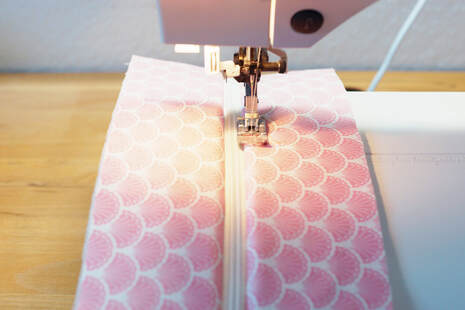
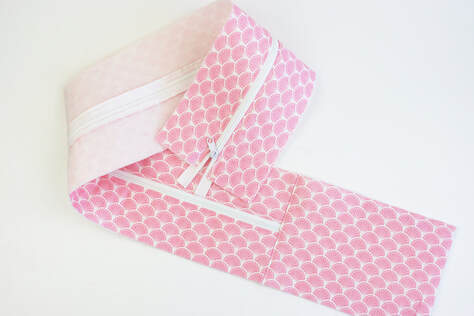
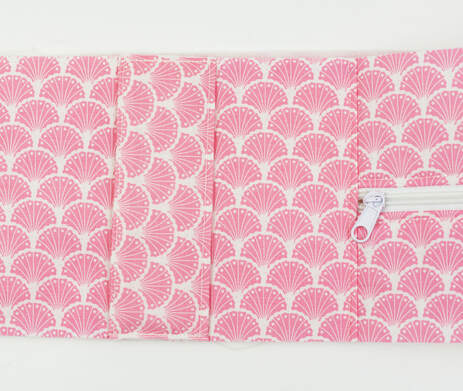
It's an easy sewing pattern for a standard round Yoga pillow. Three facts about Mindfulness: 1. Anyone can do it You don't have to change your beliefs or anything like that. Everyone can benefit and it's easy to learn. 2. It's a proven practice You don't have to take mindfulness on faith. Both experience and science have proven its positive benefits on our health, work and over all wellbeeing. 3. Mindfulness is not exotic It's what we already do and what we already are. We just have to learn to come back to it more and more. Here are 6 helpful, mindful attitudes: - non-judging, - acceptance, - patience, - trust, - letting-go, - gratitude A great way to come back to our mindful attitudes and get unstuck is meditation. What do you think? Something you would want to explore? Or is it already something you practice regularly? Let me know ... Ingrid xMaterials needed: (all measurements are width x height) For the pillowcase top: > 1 FPP Block of lotus flower in 8”x 8” size (unfinished 8.5”x 8.5”) > 2 2 strips of fabric 3” x 8.5” > 3 2 strips of fabric 3”x 13” > 4 one piece of fusible interfacing 13” x13” For the side panel: > 1 2 strips of fabric 32.5” x 3” > 2 2 pieces of fusible interfacing 32.5” x 3” > 3 1 strip of fabric 7” x 5.5” > 4 1 strip of fusible interfacing 7”x 5.5” > 5 1 endless zipper + slider 32.5 ” length > 6 2 pieces of fabric (for the handle) 2.5” x 6” > 7 1 piece of fusible interfacing 2.5” x 6” For the bottom: > 1 one piece of fabric for bottom of pillow 13” x 13” > 2 one piece fusible interfacing 13” x 13” Before you start: Read the instructions carefully Seam allowance is always 1⁄4” unless mentioned otherwise. Instructions: 1. Cut out all your fabrics as mentioned above. 2. Sew your lotus flower quilt block, it will measure 8.5” x 8.5” 3. Attach the side strips to your quilt block 4. Draw a 13” diameter circle (or a 6.5” radius) 5. Cut out a 13” diameter circle 6. Iron on fusible interfacing and quilt to your liking 7. Attach the fusible interfacing to the side strips of fabric ( 2x 32.5”x 3” and 1x 7”x 5.5”) Sew the endless zipper to the long sides of the two 32.5” x 3” strips of fabric. And top stich along the zipper. 8. Stitch the 7”x 5.5” fabric to one end of the zipper part. Top stitch along the seam as well. 8. Lay the two pieces of fabric for the handle right sides together and attach fusible interfacing to one side. Stich along the long edge with a ¼” seam allowance. Then turn inside out and top stich along the long edge again with a small seamallowance. 9. Attach the handle to the side panel and cut to width of panel. 10. Now clip the side panel to the top circle till the side panel ends meet. This is where you stick your side seam, this way the side panel fits exactly to your yoga pillow top. Once the top piece is stitched in, repeat for the bottom circle. 11. Open up your zipper and turn your pillowcase inside out. Tadaaaa your yoga pillowcase is all done.... Now take your time for some mindful meditation and enjoy :-) Thank you so much to Riley Blake Designs for supplying the absolutely adorable Stardust fabric series designed by Beverly McCullough that I used for this amazing project. Ingrid xPs |
Author
Ingrid Alteneder Archive
March 2022
Categories
All
|
-
Shop
- New patterns
- All Patterns
- Appliqué Patterns
- Animals
- Baby
- Ballet
- Bear Cottage
- Beach/ Boats/ Nautical
- Buddha/ Mindfulness
- Chinese New Year
- Christmas
- Easter and Spring
- Fairytale
- Fall/ Autumn
- Flowers, Trees and Plants
- Food/ Drinks
- Halloween
- Oktoberfest
- Quilted items
- Stars
- Viva la Frida/ Dia de los Muertos
- Valentine's Day
- Village Patterns
- Mixed pattern
- Home
- About
- Blog
- Publications
- Etsy
- News
- Deutsch
|
Visit us at
|
 RSS Feed
