|
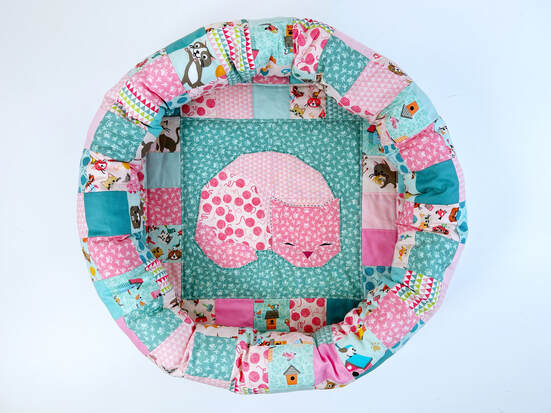
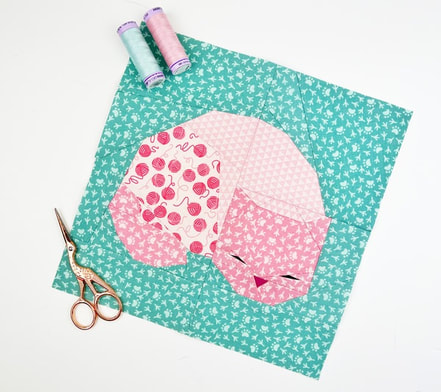
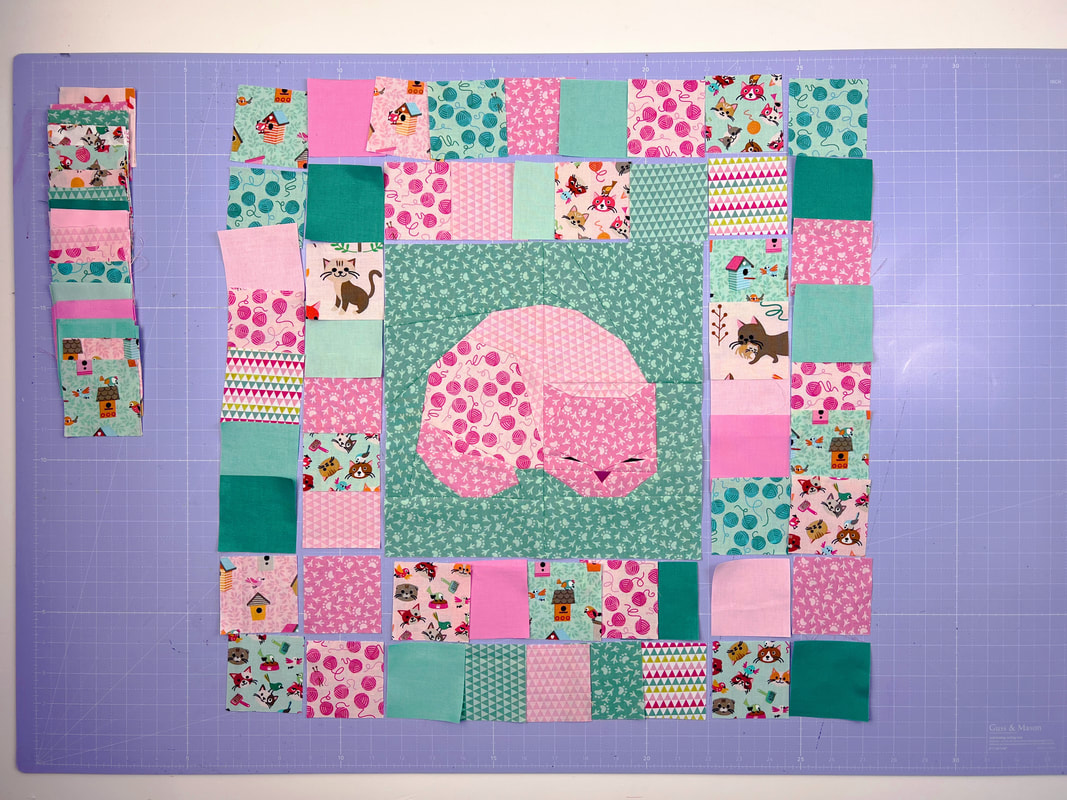
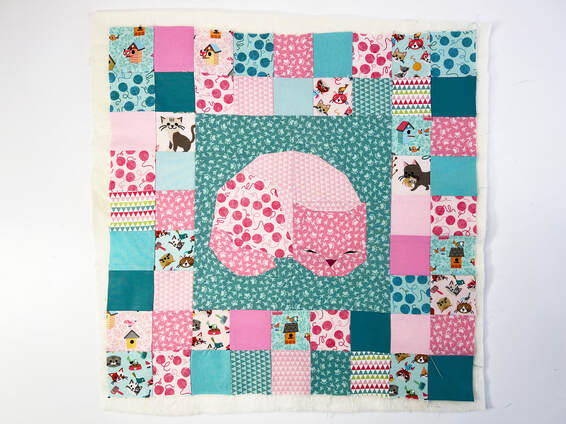
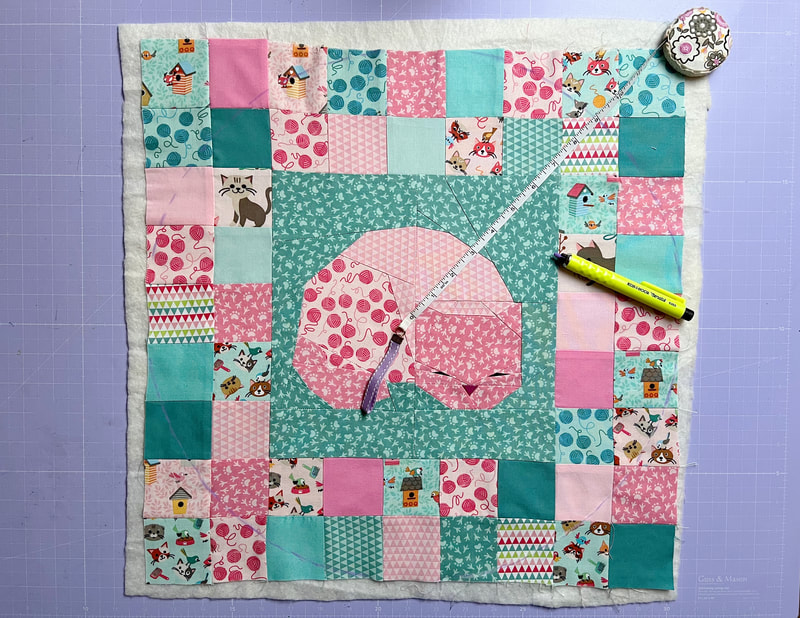
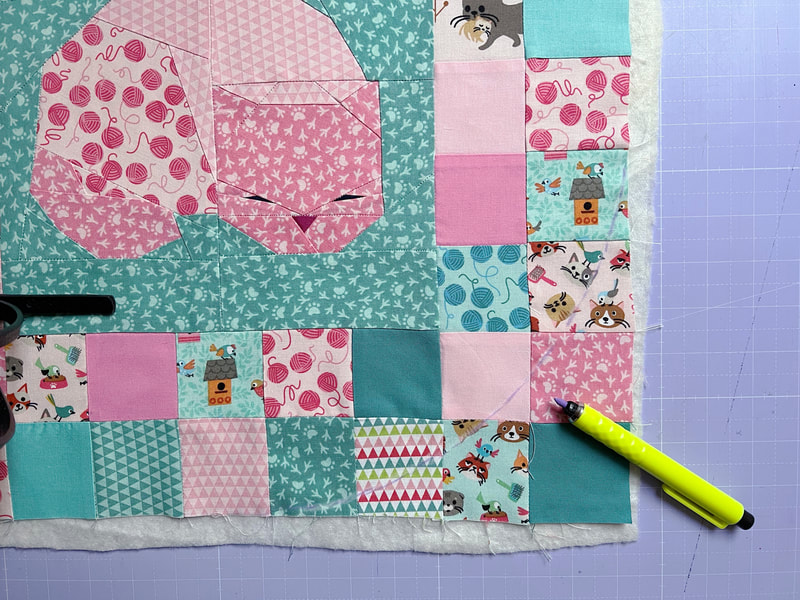
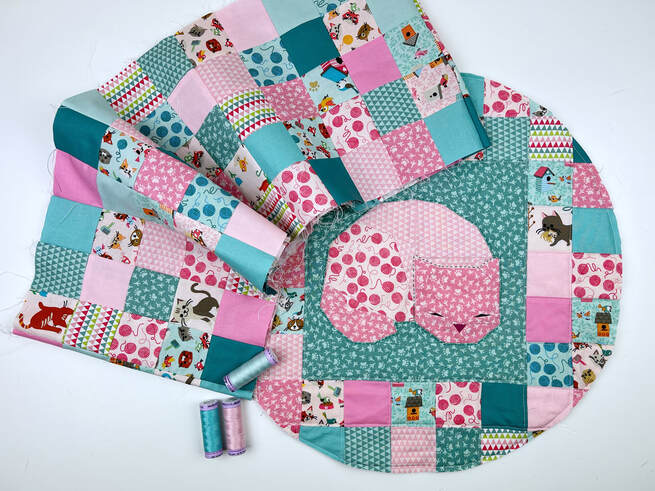
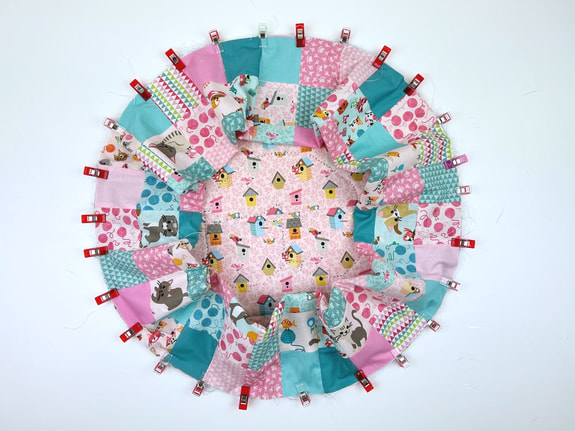
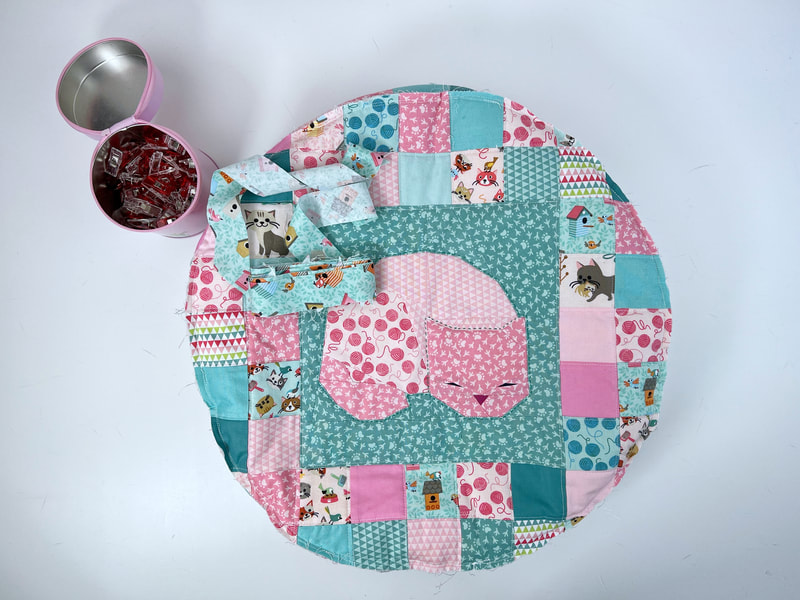
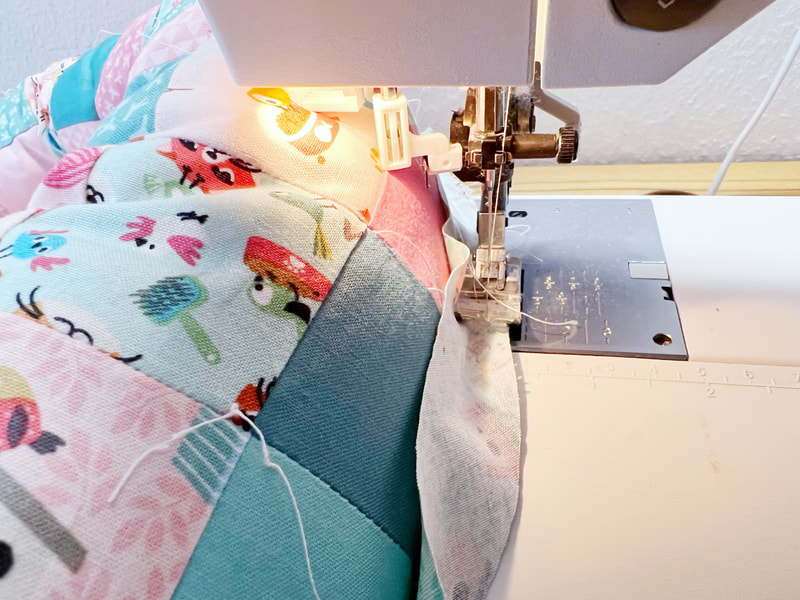
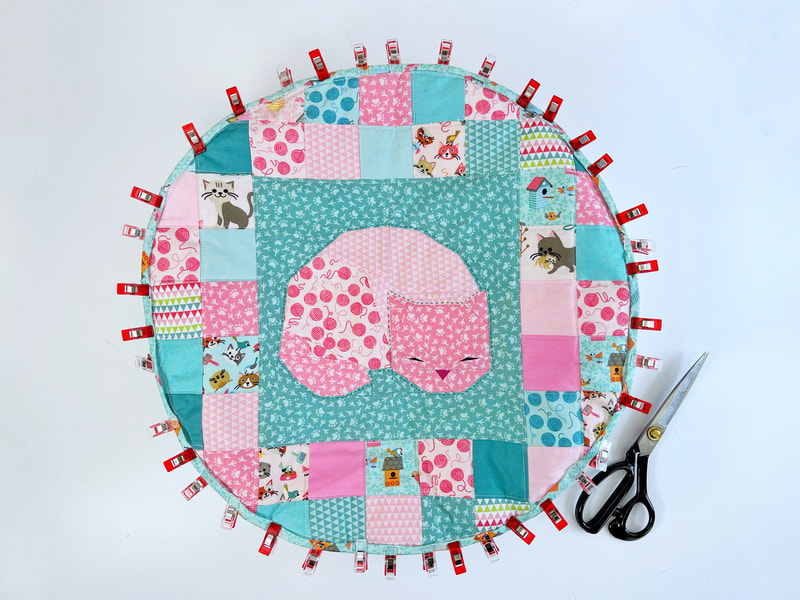
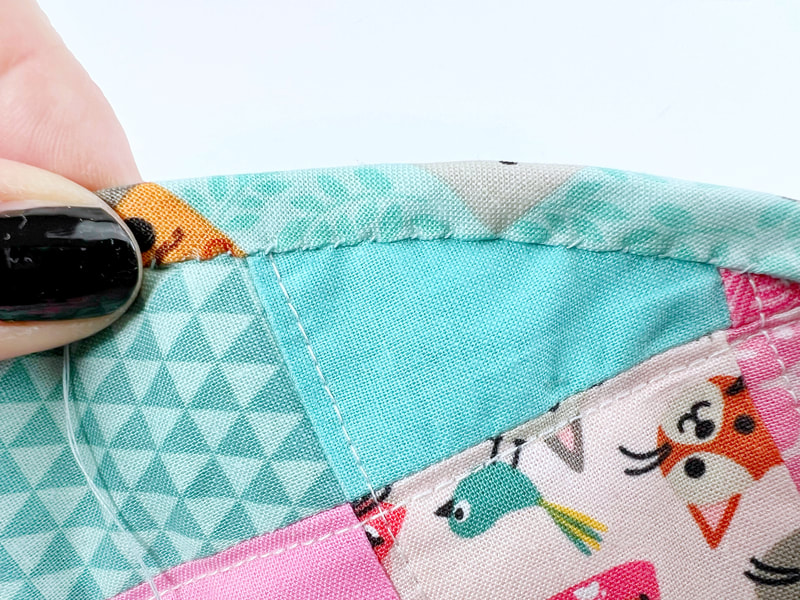
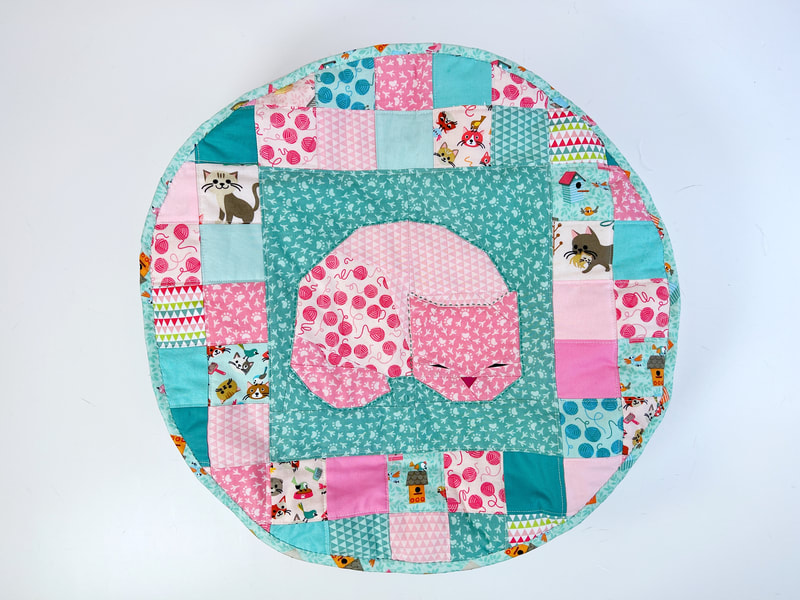
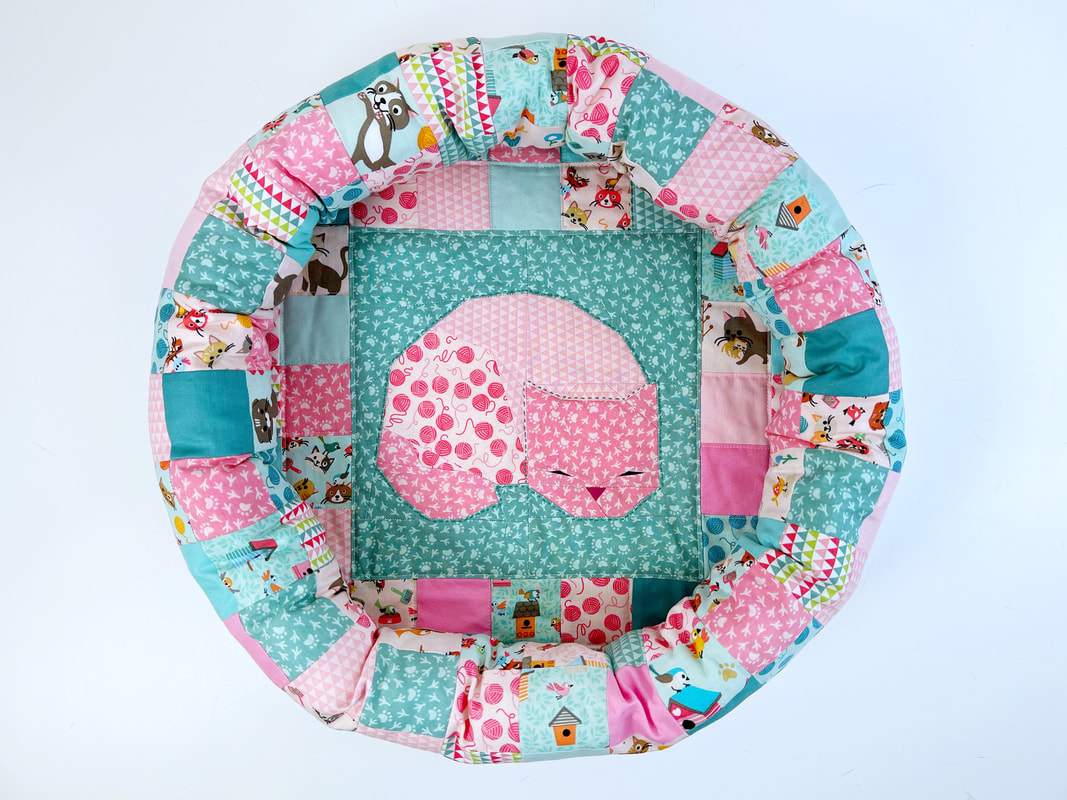
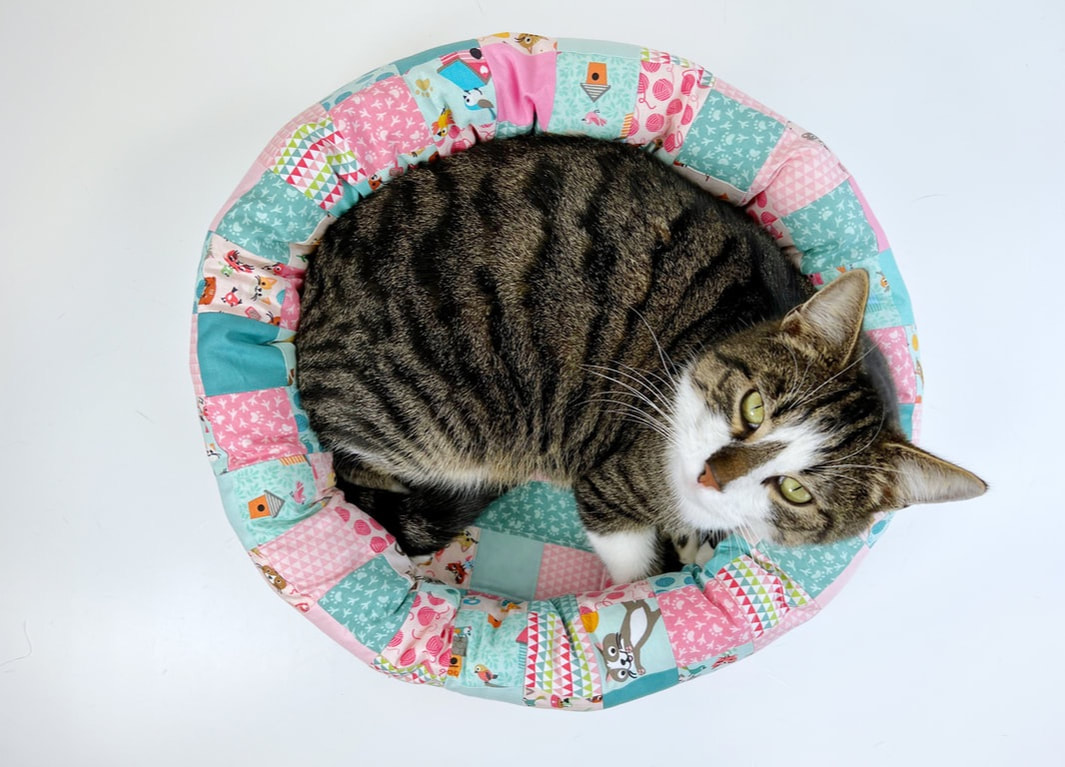
There is something to be said about quilters and cats, right? At least it seems like every quilter has a cat, or is it just me? This super adorable fabric line called 'Cats Meow' from Riley Blake Designs had me thinking about my cats immediately. I mean doesn't a quilter's cat , deserve a quilted cat bed? I sure would think so. So here we go, I made the cutest quilted cat bed pattern... How to sew a quilted cat bed? Quilted Cat Bed: please read through the instructions first ( finished size aprox. 18" diameter and 4" high) Tools needed: -sewing machine -cutting mat/ rotary cutter and acrylic ruler -pins or clips and iron optional tools to make your life easier: -spray baste -fabric glue pen for your foundation paper piecing Materials needed: - the sleeping cat quilt block in size 10"x 10" (will be 10 1/2" square when sewn together) or the Cat's Back or Yarn Ball quilt block or any other quilt block of your choice. - 56x 2.5" squares for the bottom of the cat bed to surround the quilt block (note, you will cut off 4 of the corner squares when cutting the bottom of the cat bed into a circle, but it's easier to sew with these 4 corner squares in place) - 135x 2.5" squares for the edge of the cat bed. - a piece of fabric about 18"x 18" for the bottom backing of the cat bed - a piece of batting about 18"x 18" (I used a thicker wool batting I had left over from a quilt) - stuffing for the edge of the cat bed - a 56" bias binding strip 1 1/4" wide Instructions: Step 1: Sew the sleeping cat quilt block in size 10"x 10". The quilt block will be 10.5"x 10.5" when sewn together, this includes the 1/4" seam allowance. Step 2: Cut all the fabric squares. There are 56 fabric squares around the sleeping cat quilt block for the bottom of the cat bed and another 135 fabric squares for the edge of the cat bed. (which we will get to later) Place the squares around the quilt block to your liking, I like to place them totally random, and as you can see, I love fussy cutting. So as with some of my other sewing projects I used parts of these super adorable prints to highlight my fabric squares. Start by sewing the squares together into rows. Begin with the inner squares and then do the outer squares. I like to sew the squares at the top and bottom of the quilt block together first and attach them to the quilt block, that's 5 blocks at the top and 5 at the bottom. Then sew the squares at the sides together into a row, that's 7 squares on each side and attach them to the quilt block. Repeat for the blocks of the outer row. Step 3: Place the piece of fabric for the bottom backing in from of you, with the wrong side facing you. Place the batting on top of the back piece of fabric then add the patchwork top of the cat bed bottom on top of the batting, the right side facing you. Essentially you have a 'quilt sandwich', backing, batting and quilt top. I like to use spray baste (ex: Odif Temporary Adhesive Spray) to keep the layers together. But you can just as easily use safety pins or use basting stitches. Step 4: Draw a circle on the square. I measured 9" from the center of the square ( as shown in photo 1) and drew a circle on the square for the bottom of the cat bed. Sew along that circle for extra support. Now quilt the bottom of the cat bed to your liking. I did some hand quilting around the shape of the cat in the sleeping cat quilt block, and added some straight line quilting to the squares. Then cut the bottom of the cat bed along the circle line that you drew/sewed onto the square. My circle ended up being a little less than 18" diameter through the quilting. Step 5: Sew the squares for the cat bed edge into one long rectangle of 5 squares high and 27 squares long. (it should now be 10" high and 54" long) Again I placed the squares totally random, it's up to you, just let your creativity run wild. Then fold the rectangle for the edge in half, right sides together so the two short ends align and stitch them together. You now have a circle for the edge of the cat bed. Then fold the rectangle in half lengthwise, wrong sides together. This will be the edge 'tube' of your cat bed. Step 6: Clip the 'tube' rectangle of your cat bed edge to the bottom of the cat bed. Right sides together to the right side of the bottom of the cat bed. (as shown in the photo, not the quilted top!) Stitch in place with a 1/4" seam allowance but leave two 3" openings for stuffing your 'tube'. If your 'tube' rectangle and base are not 100% the same length, it's not a problem at all. Let the fabric gather a little bit as you sew. This will not be visible at all after you stuffed the edge of the cat bed. Leave the two 3" openings on opposite sides of the tube. This makes stuffing the tube easier. Stuff your tube pretty full, as stuffing tends to settle with use. Then sew the two gaps closed. Step 7: I like to finish the inside seam of the cat bed with a bias binding. If you want, you could also just use pinking shears and cut along the edge. This seam or edge won't be visible, since it's under the edge tube. I personally think a bias binding just gives your cat bed the deserved finishing touch. Clip or pin the bias binding, right sides together, in place. I did this from the 'tube' side. So when you fold the binding over, you have more room to sew it in place. Fold over the beginning of your binding for a 1/4". Then stitch the binding all around with 1/4 " seam allowance, when you get to the end, just let it overlap. Step 8: Fold over the binding towards the 'cat' side and clip or pin in place. Then hand stitch the binding to the bottom of the cat bed. It's very tight to machine stitch here, since the 'tube' is already stuffed. It's much easier to sew the binding by hand. Once you're done turn the cat bed, so the binding edge is tucked in on the inside of the cat bed. The clean finish is now on the outside of the cat bed. And there we go, it's all done. And I think you have to agree, this is the cutest quilters cat bed ever, right? Thank you so much Riley Blake Designs for the opportunity to design this cat bed pattern and this small quilt block pattern series to match it. Thank you for supplying the super pretty fabric series 'Cat's Meow' designed by Shawn Wallace, that I used in this quilt pattern series. Isn't this cat bed an absolute jewel? I'm sure any cat would just love to cuddle up inside this beauty. Ohh hey, go figure, my cat just did... :-) Happy sewing.... Ingrid xx
10 Comments
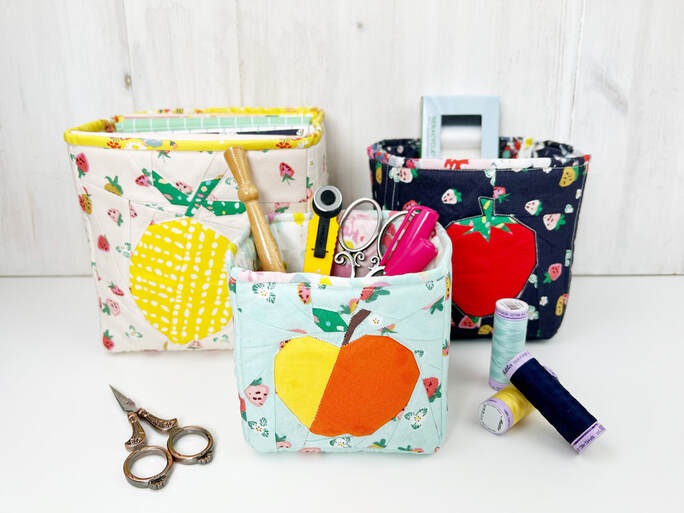
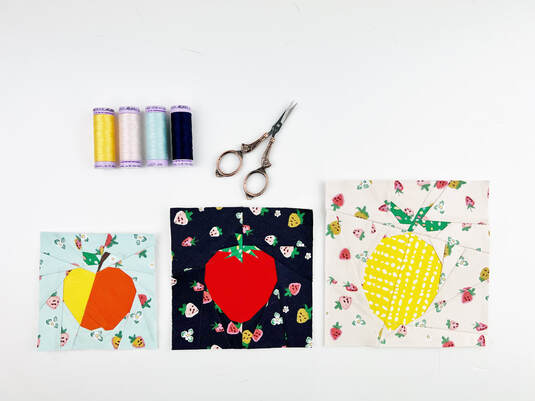
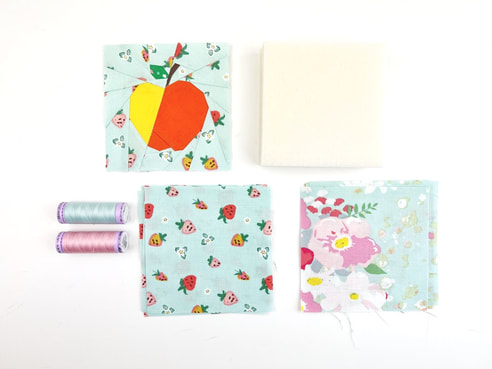
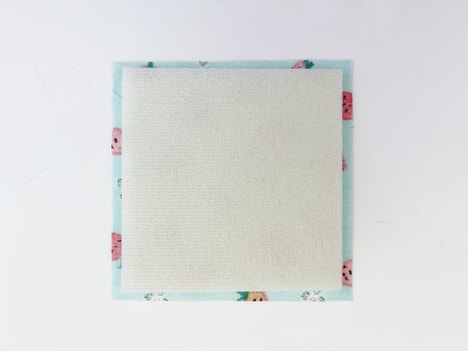
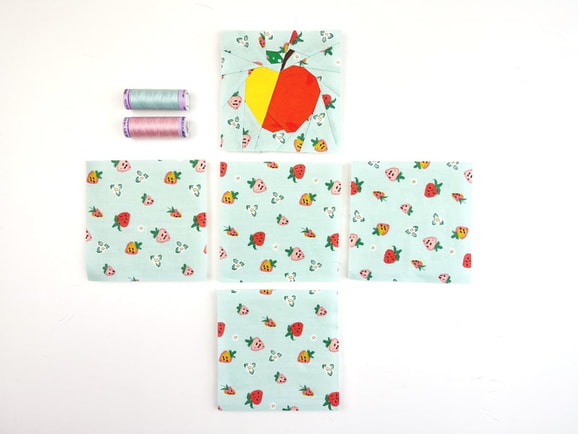
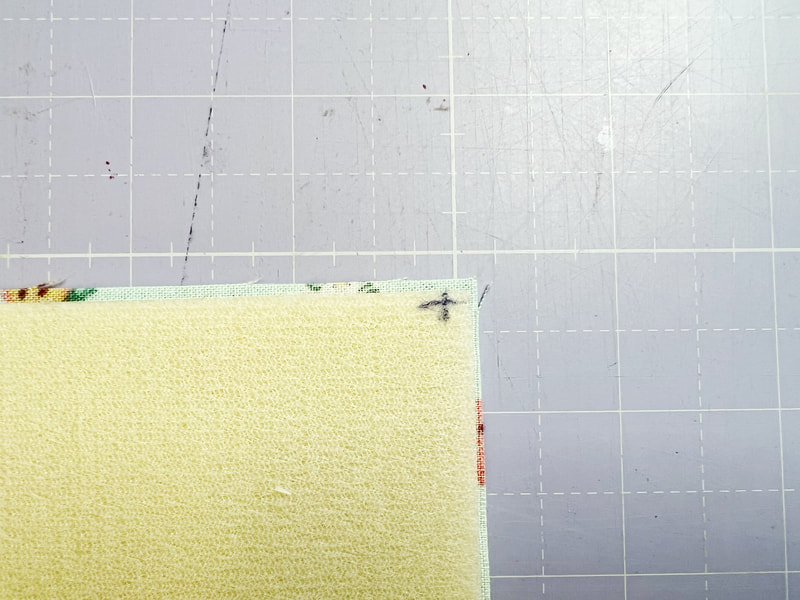
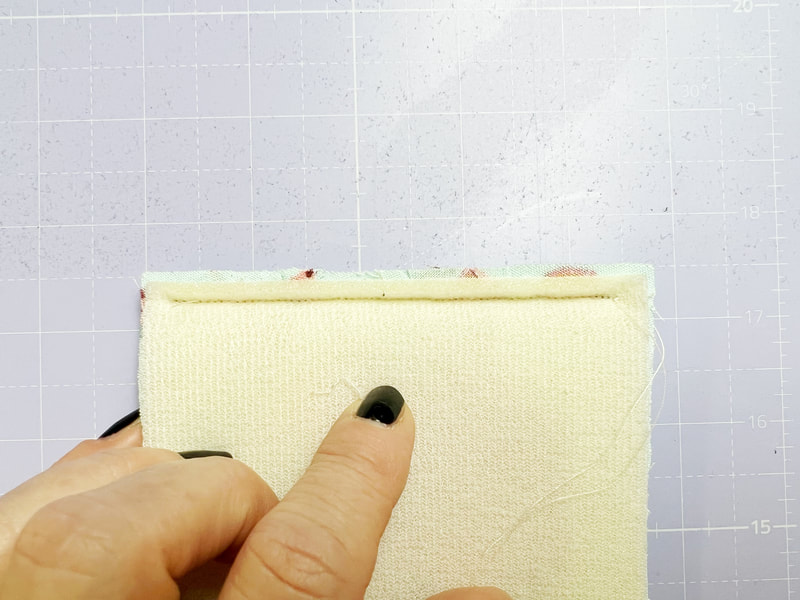
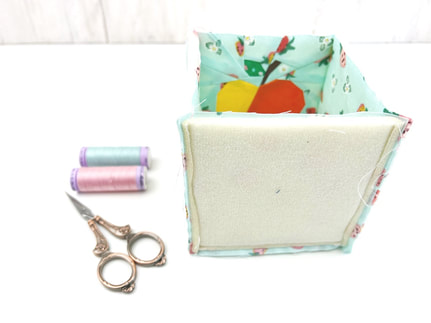
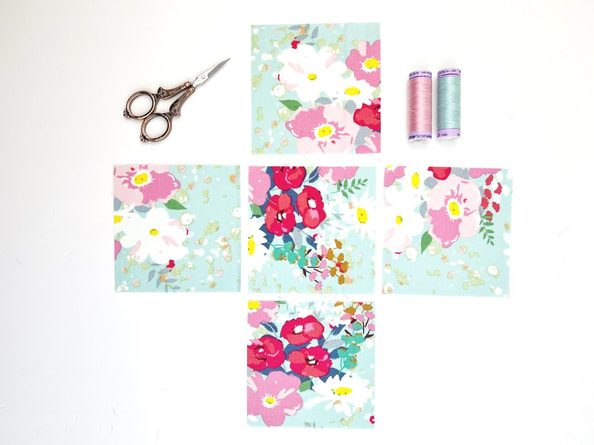
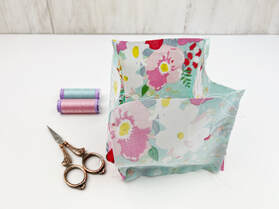
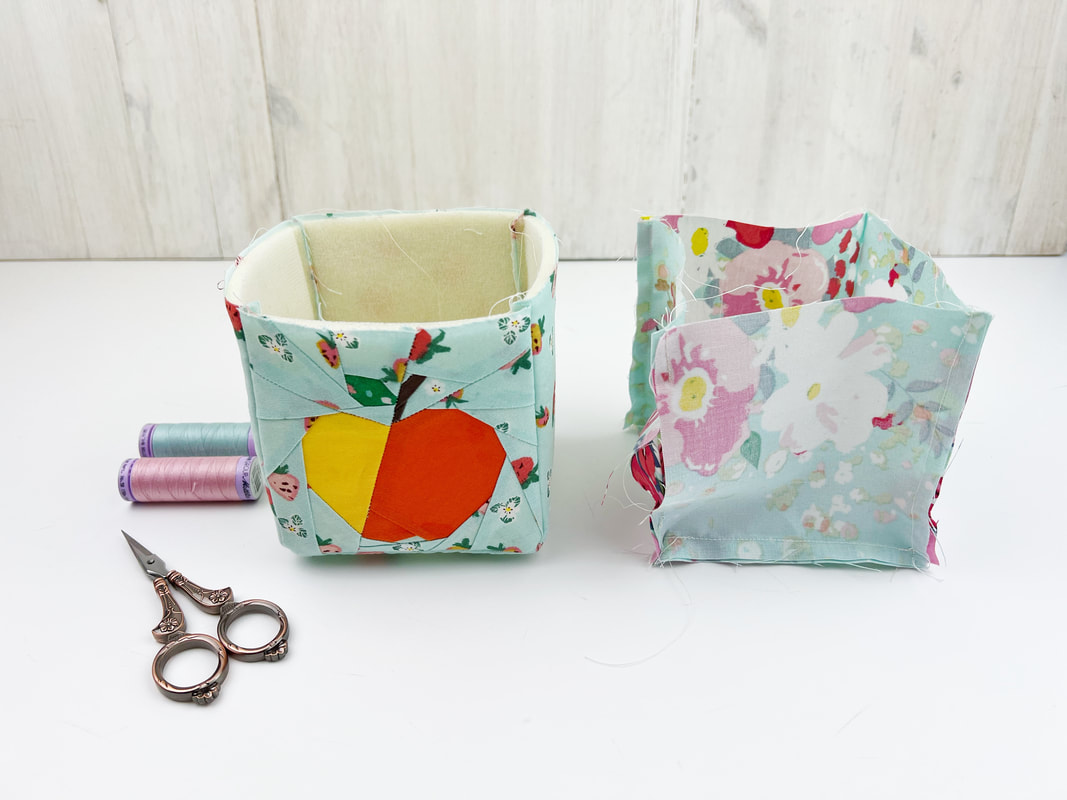
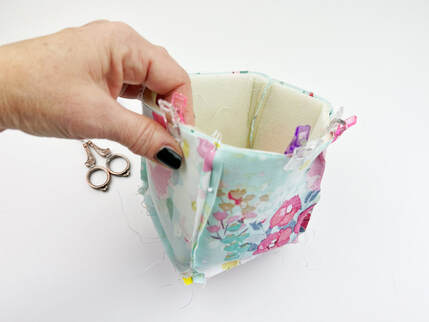
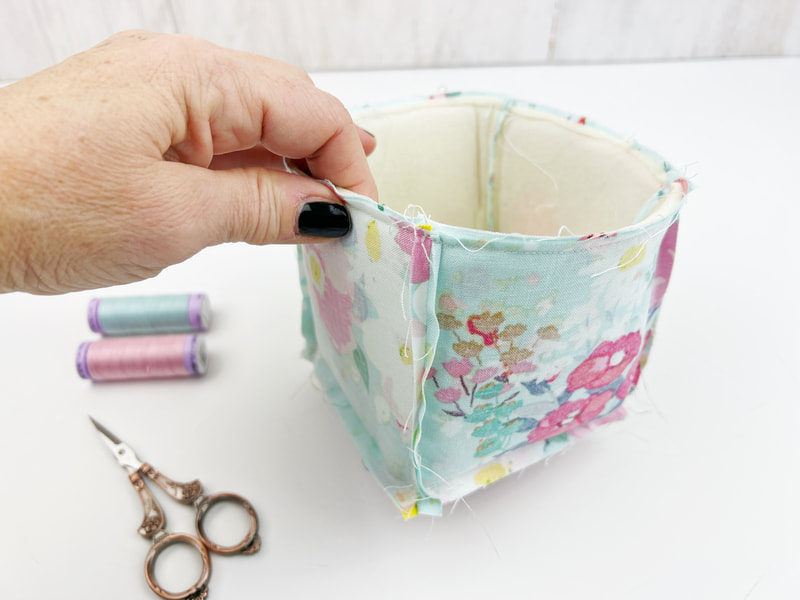
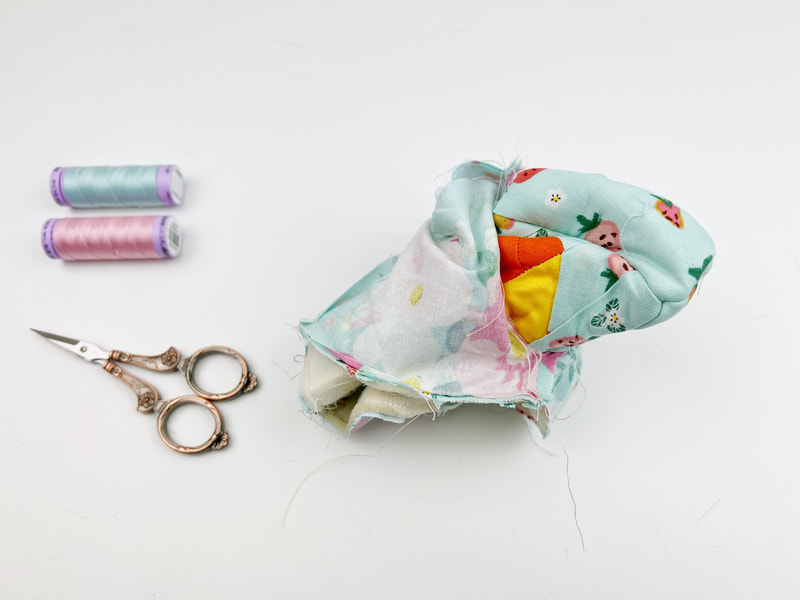
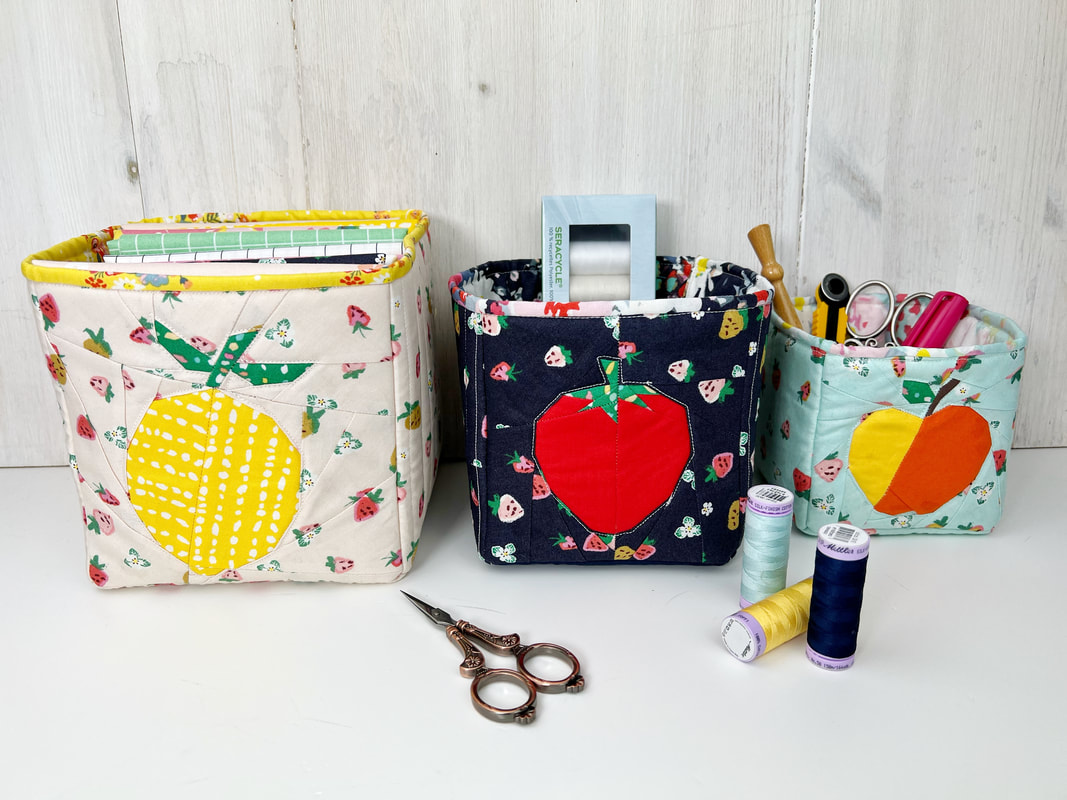
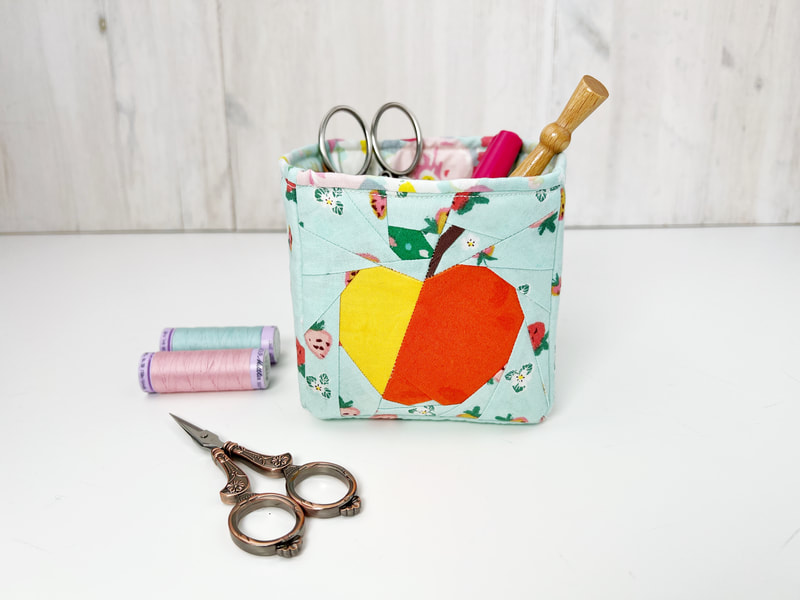
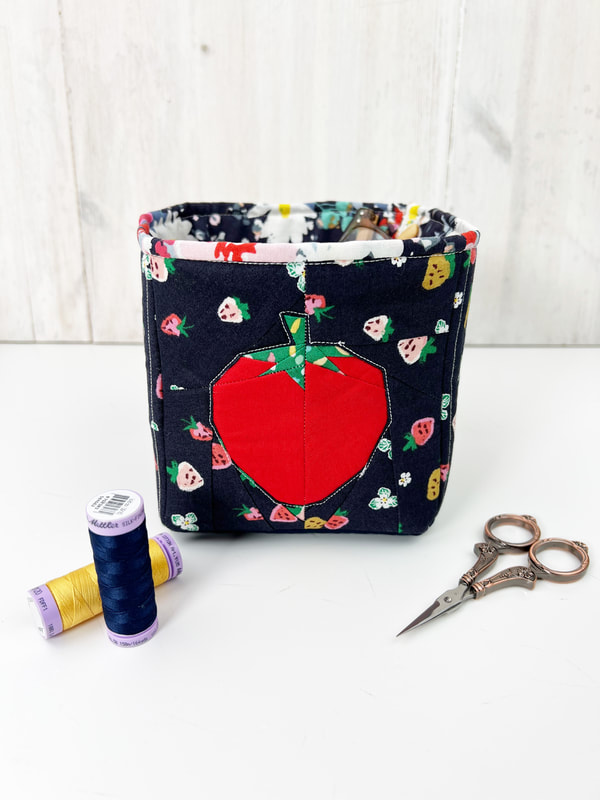
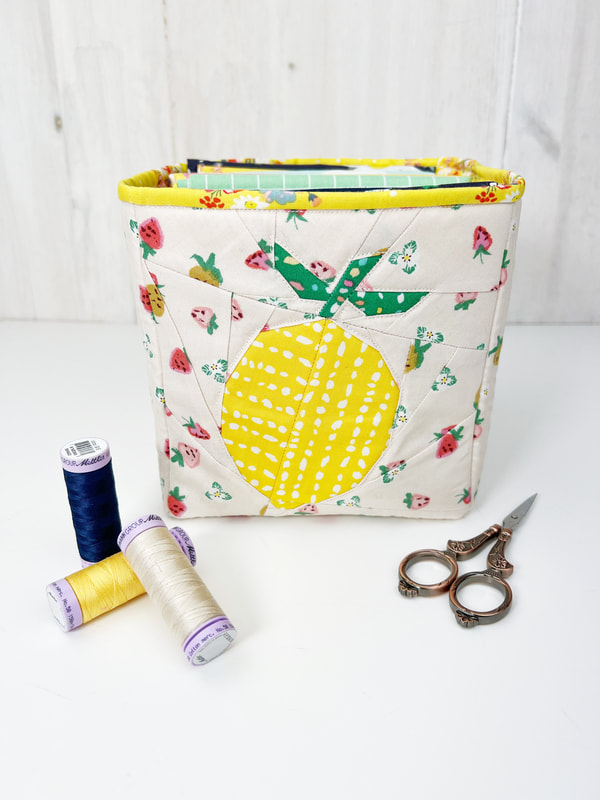
Do you love boxes and baskets as much as I do? I have to admit I am a little bit obsessed. I love storing things in little boxes, baskets and containers, especially if they're square shaped. So I decided it's high time I made a free pattern for some little square fabric boxes. When I saw this new fabric line from Minkie Kim for Riley Blake Designs I thought fruits, fruits and some more fruits. And these delicious fruits needed to go somewhere special, don't you agree? So I made some cute little square fabric containers. These are really easy to make. Fabric square boxes: please read through the instructions first Tools needed: -sewing machine/ thread and fabric -cutting mat/ rotary cutter and acrylic ruler -pins or clips and iron optional tools to make your life easier: -spray baste -fabric glue pen for your foundation paper piecing Materials needed: box sizes: S - 4"x 4"x 4" , M - 5"x 5"x 5", L - 6"x 6"x 6" ( width x hight x depth) S: quilt block apple in 4" size (will be 4 1/2" when sewn together) 4 squares 4 1/2" of fabric for exterior 5 squares 4 1/4" of 'soft and stable' @byAnnie or Pellon Fusible Flex foam stabilizer 5 squares 4 1/2" of fabric for lining. M: quilt block strawberry in 5" (will be 5 1/2" when sewn together) 4 squares 5 1/2" of fabric for exterior 5 squares 5 1/4" of stabilizer (see above) 5 squares 5 1/2" of fabric for lining L: quilt block lemon in 6" (will be 6 1/2" when sewn together) 4 squares 6 1/2" of fabric for exterior 5 squares 6 1/4" of stabilizer (see above) 5 squares 6 1/2" of fabric for lining 1. Sew your apple quilt block ( size 4"x 4") and cut your fabrics and foam stabilizer according to the measurements given above.. 2. Add the foam stabilizer to your fabric squares. If you have fusible stabilizer you will need to iron it on your squares. If you're using 'soft and stable' @Byannie like me, you can attach it to your fabric squares with glue baste spray. Your foam stabilizer will be 1/8" smaller than your squares. 3. Assemble the exterior of your fabric square box. Place your squares as shown above. First start with sewing your apple quilt block to the center square. Before you start sewing, mark 1/4" cross from both edges at the corners. Start sewing at the point of the cross with 1/4" seam allowance, back stitch at the beginning and the end of your seam. Then sew the opposite square of your quilt block to the center square the same way. Then add the two side squares. Sew all 4 squares to your center square the same way. The center square will be the base of your fabric cube. Next you will need to lay the adjacent side pieces together (right sides together). And sew them the same way, with a 1/4" seam allowance, start right at the top, but stop 1/4" from the end. Repeat for all 4 sides till your cube is all sewn together, like shown above. 4. Sewing the lining of your fabric cube Place your lining squares the same way you placed your exterior squares. Stitch them together the same way too. Attach the side squares to the bottom square first. Then sew the side seams. Leave a 3" gap in one of the side seams for turning your cube later. 5. Put the square fabric box together. Turn your exterior box right sides out, but leave your lining cube the way it is, insides out. Now place your exterior box inside the lining box. Align the side seams and pin or clip in place, make sure the top edges align. Sew along the top edge with 1/4" seam allowance. To finish your fabric basket/ box, turn the box right sides out through the opening in the side seam of the lining. Press the lining at the top edge into the box. Do not press down the foam stabilizer, this way you get a cute trim of your lining fabric at the top edge. Stitch along the top edge with a small seam allowance. Thank you Riley Blake Designs for the opportunity to design these fruity quilt block patterns and for supplying the super pretty fabric series 'misty morning' designed by Minkie Kim that I used in this quilt pattern series. Happy sewing everyone Ingrid x
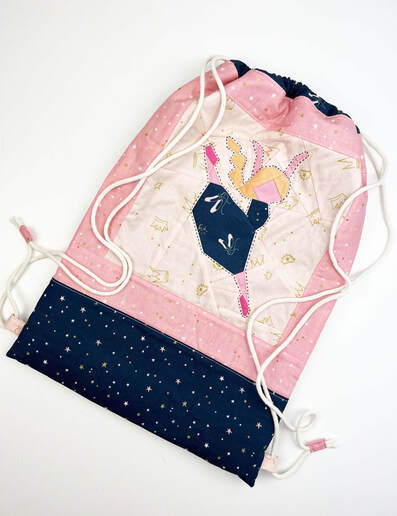
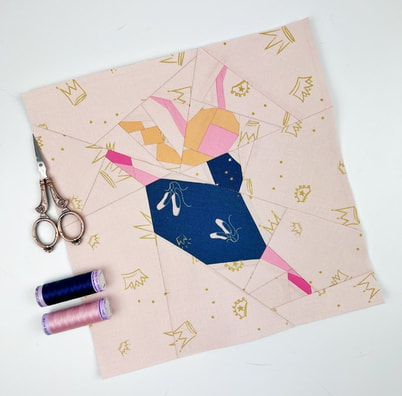
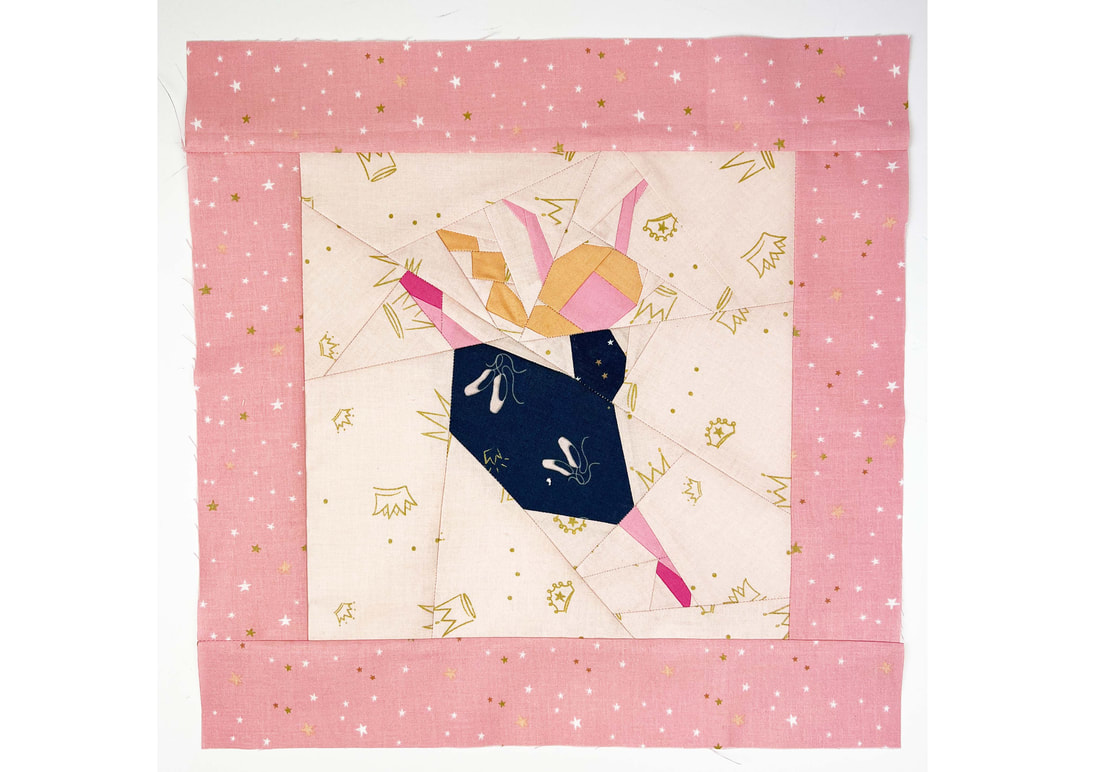
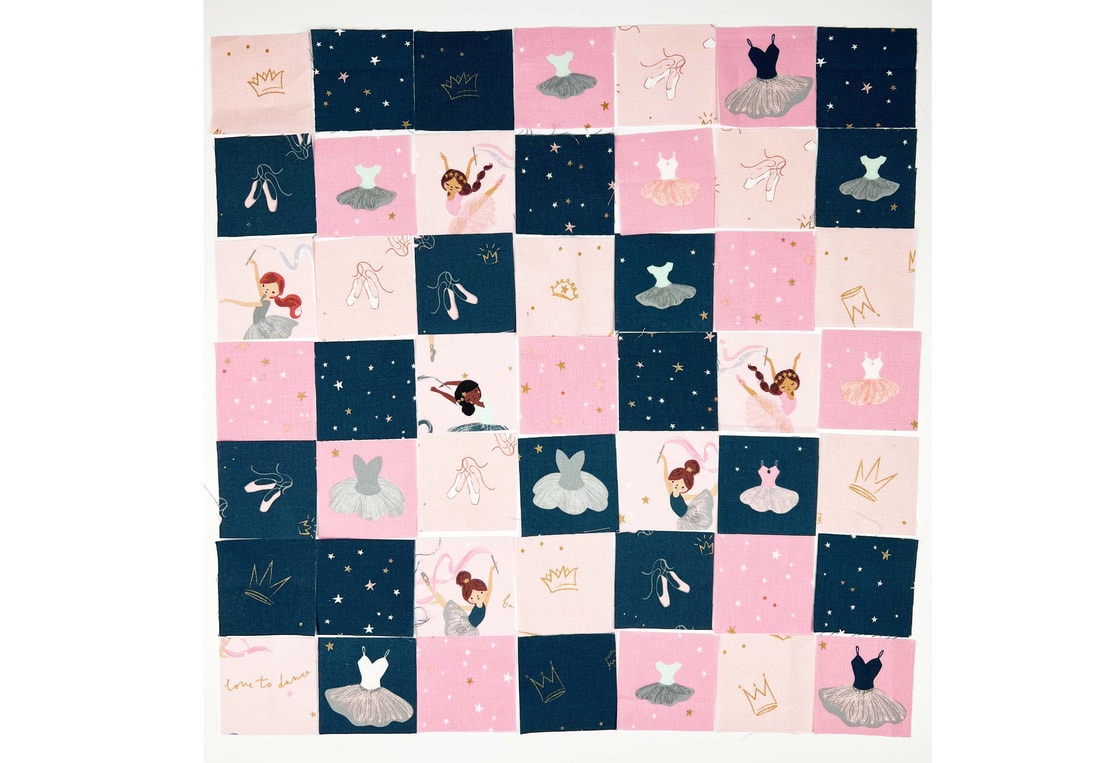
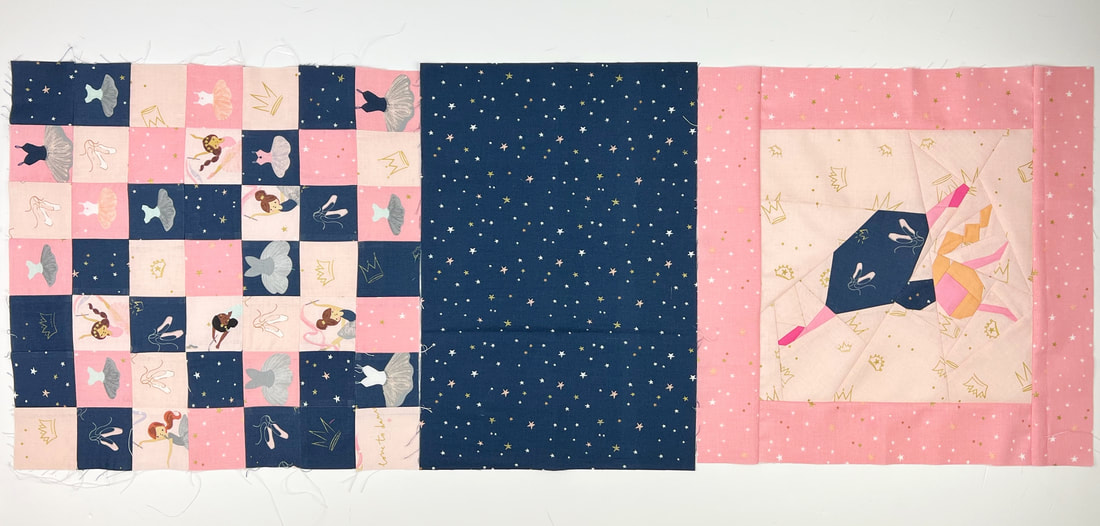
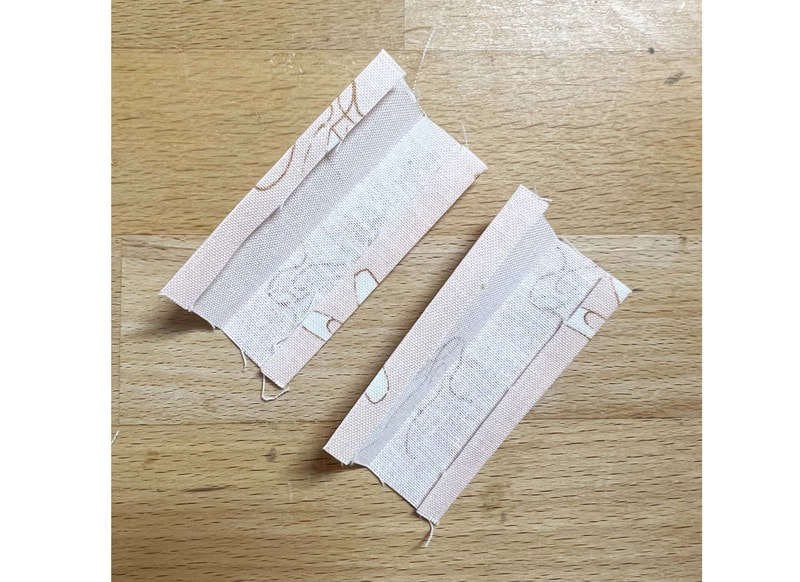
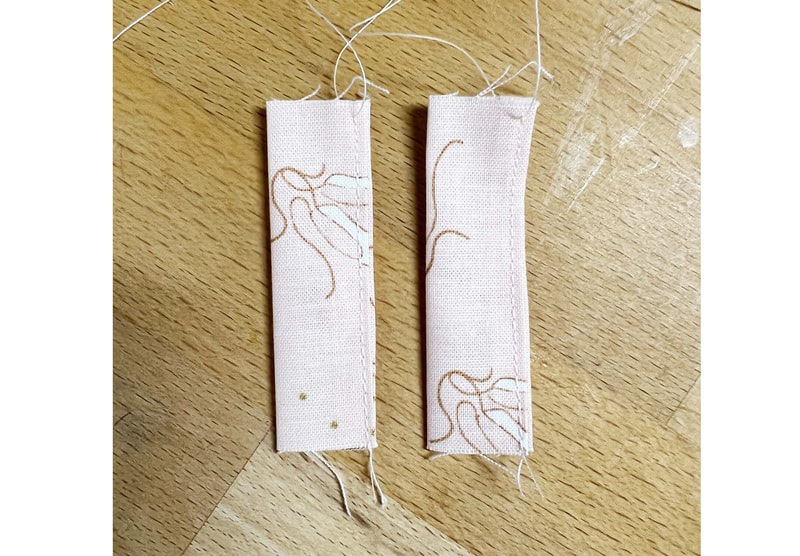
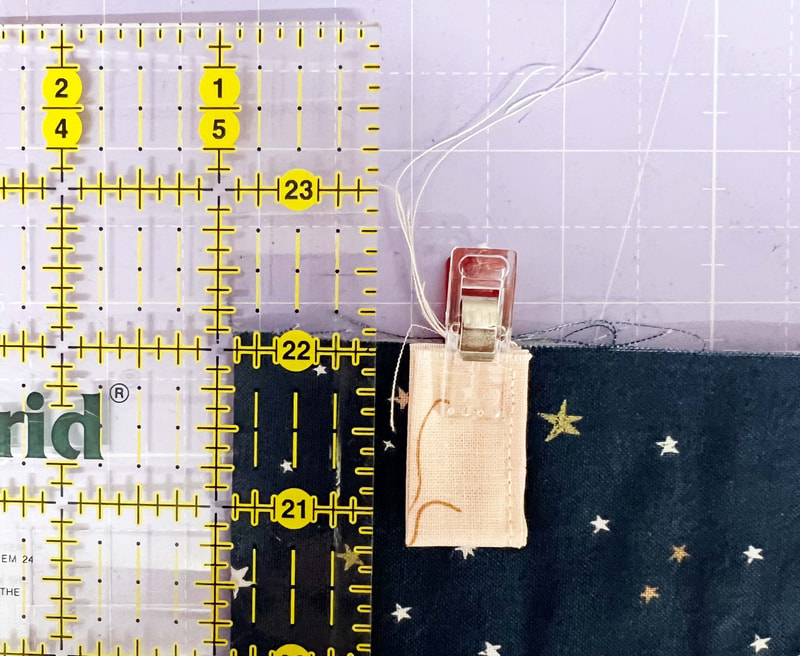
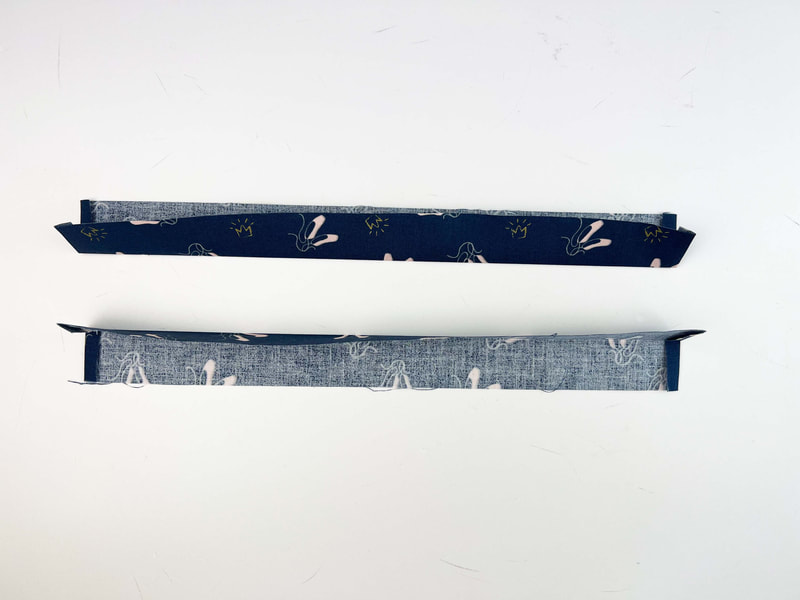
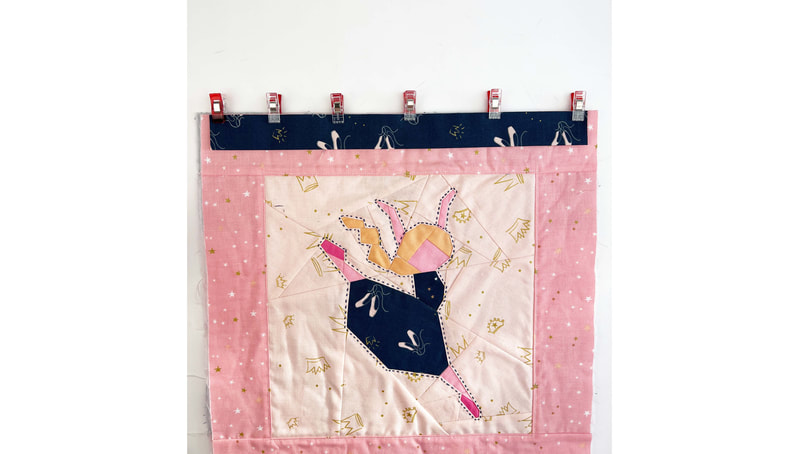
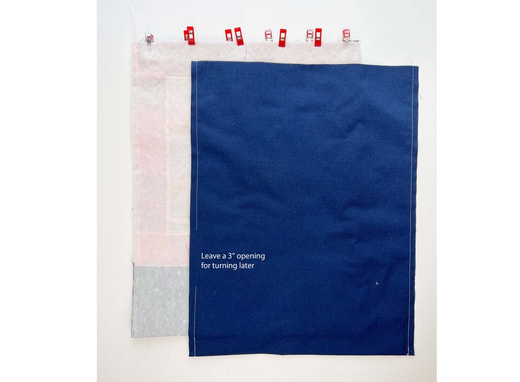
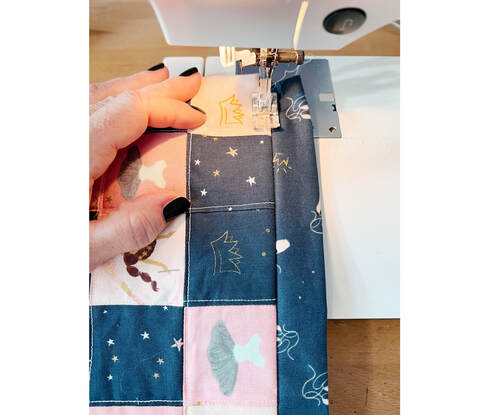
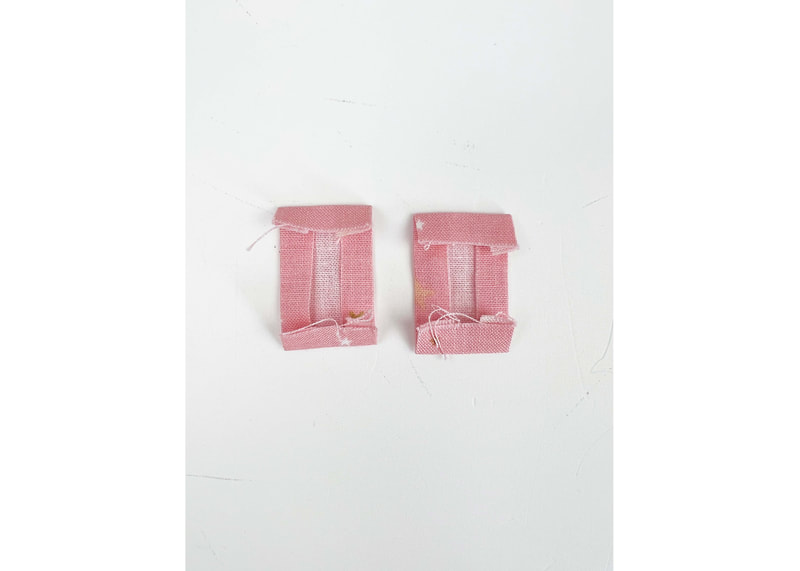
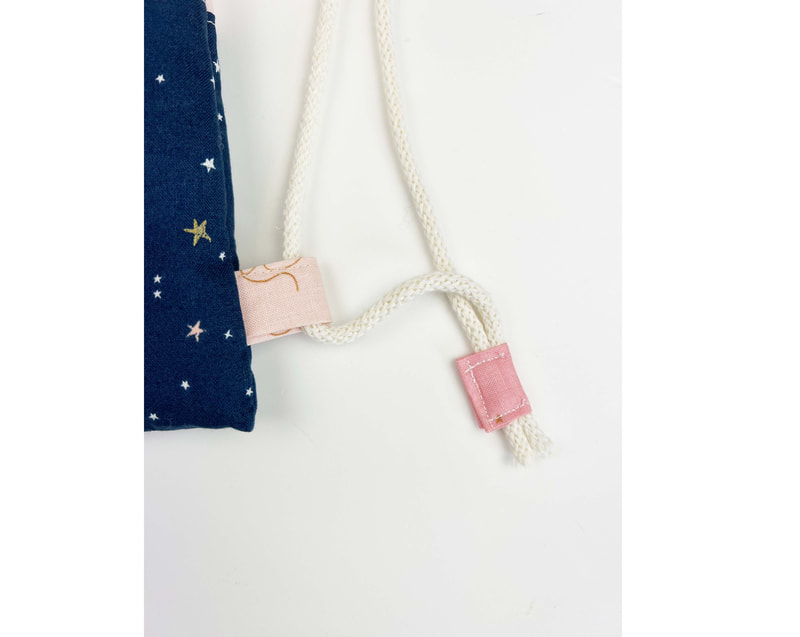
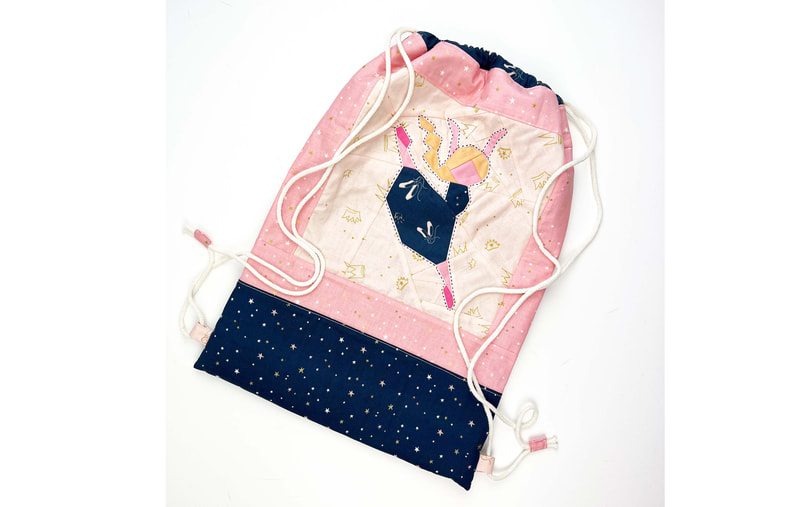
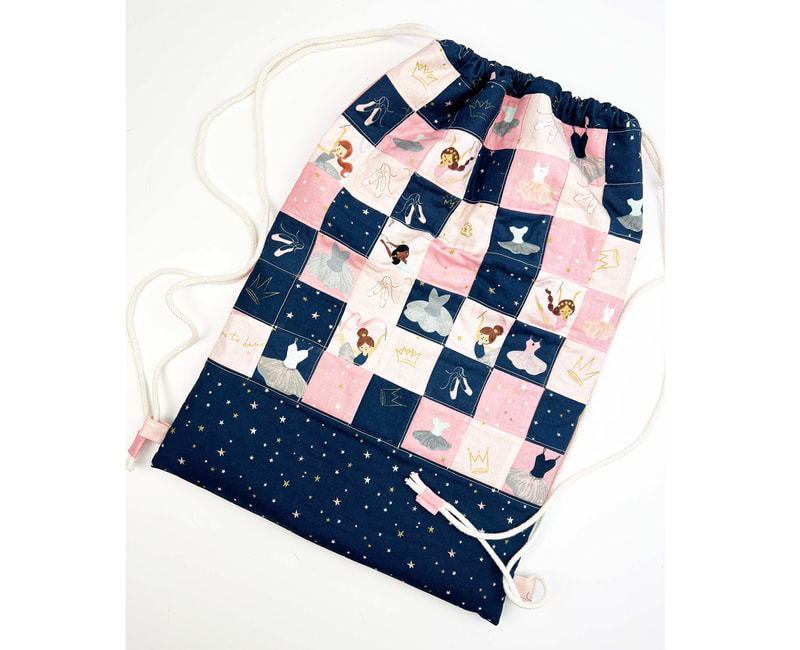
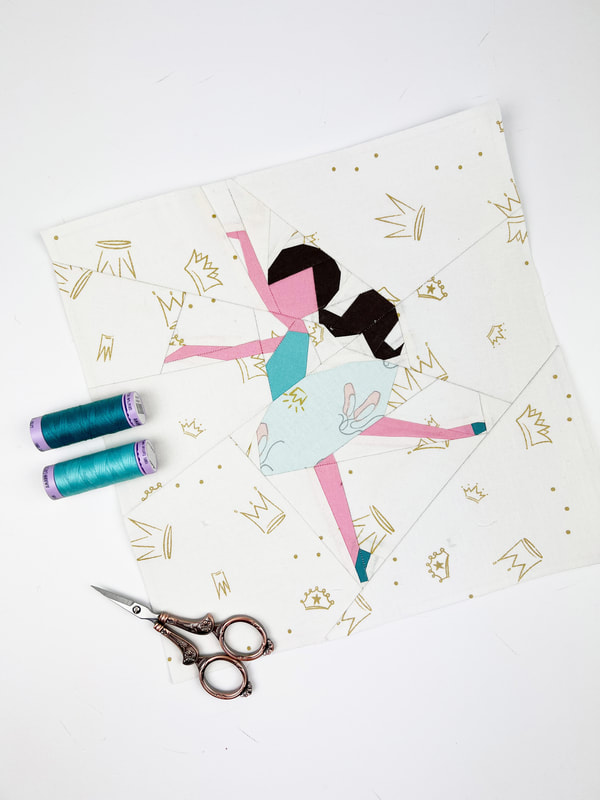
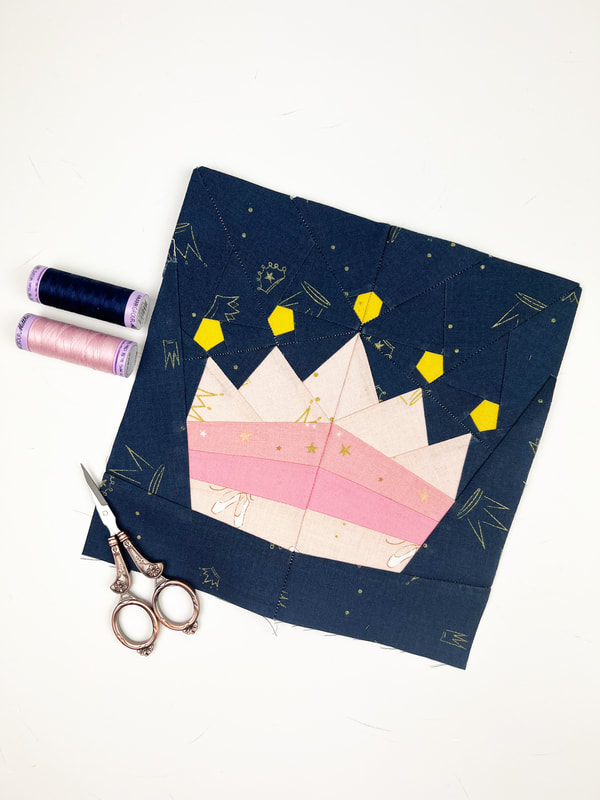
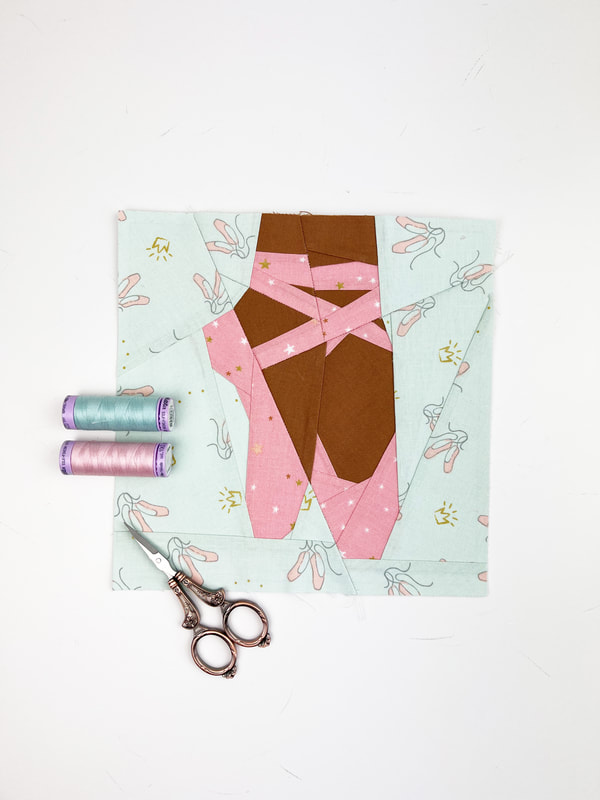
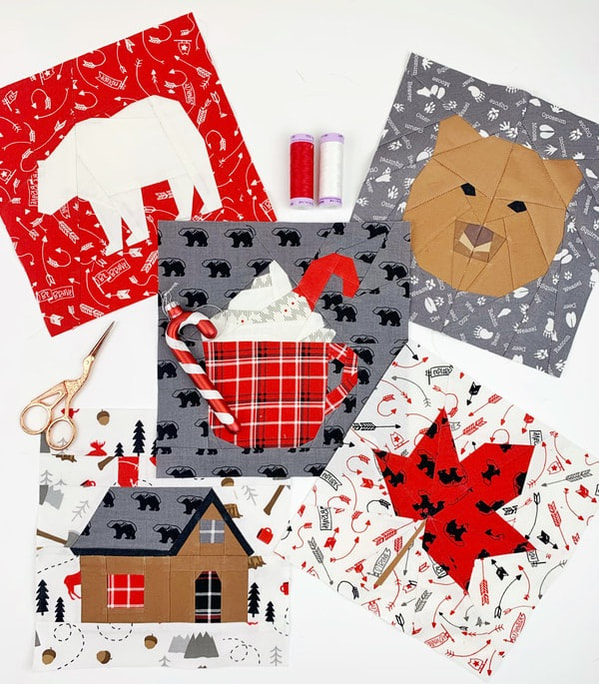
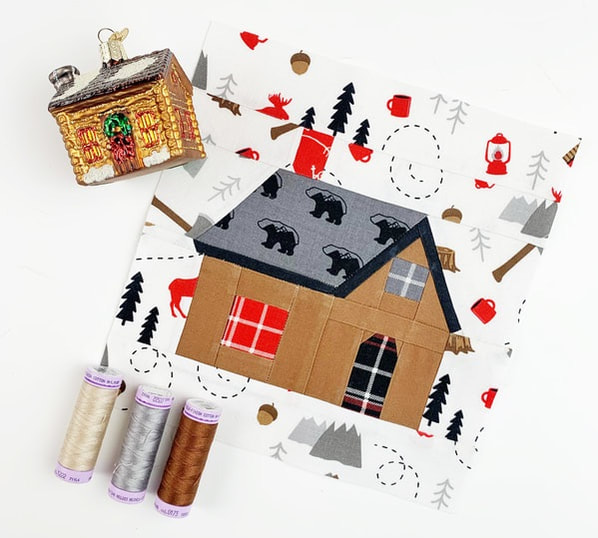
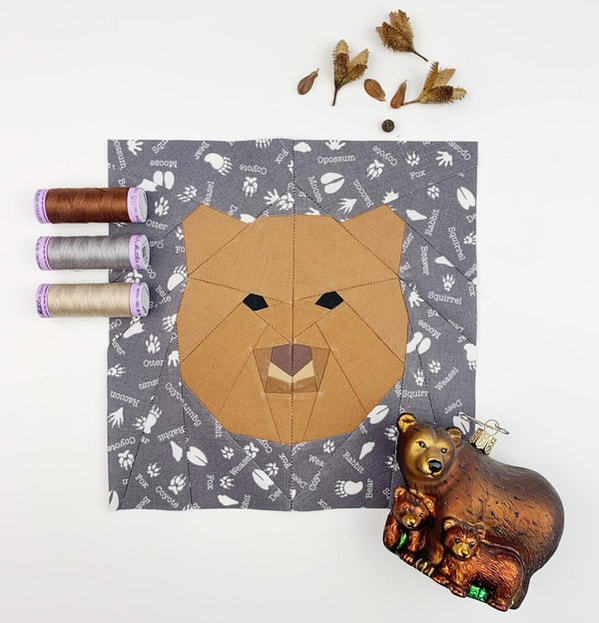
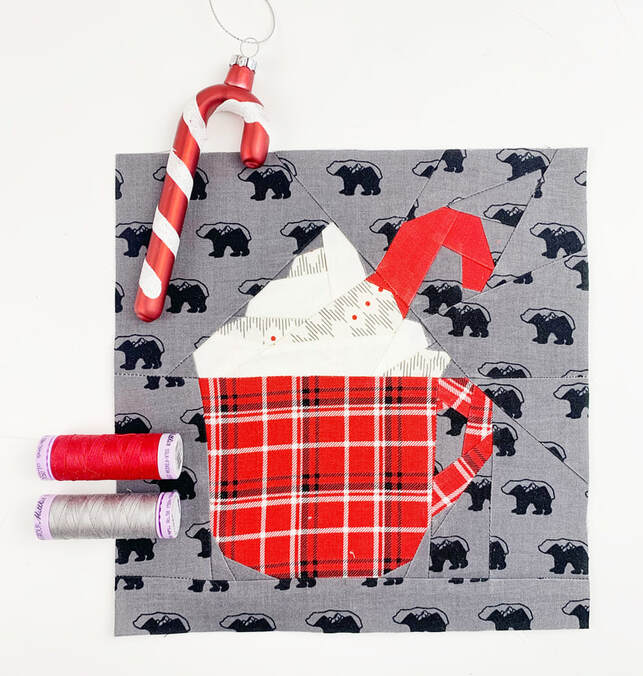
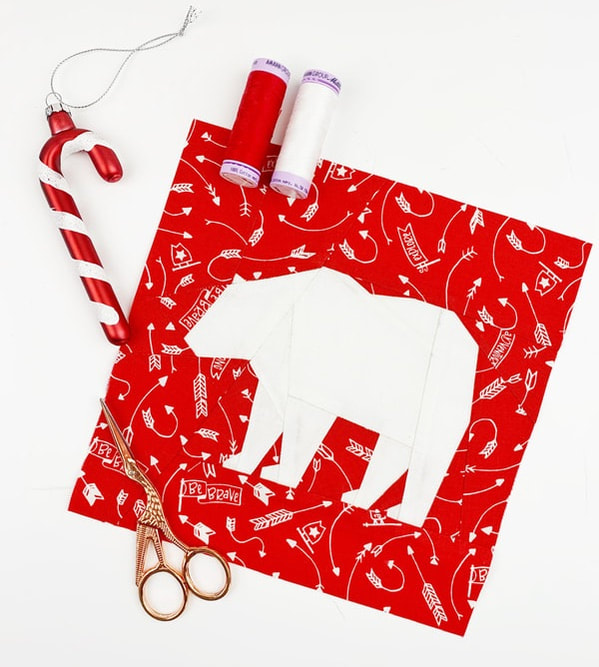
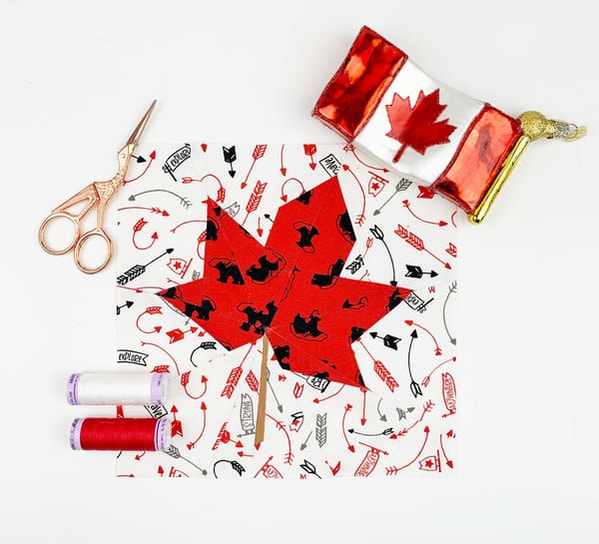
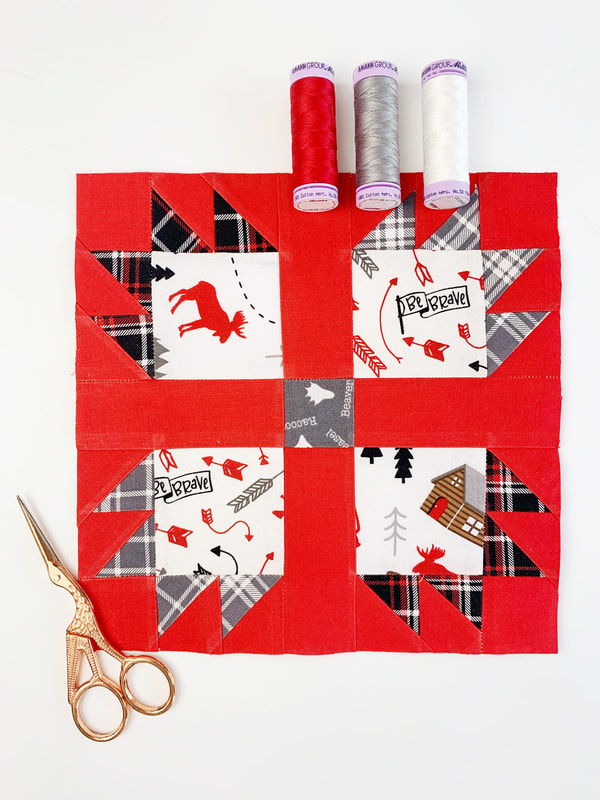
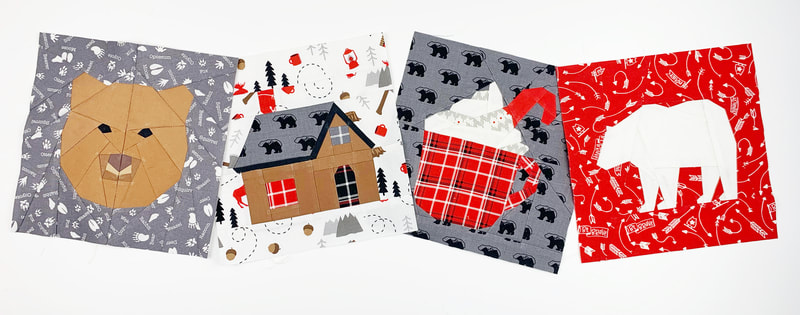
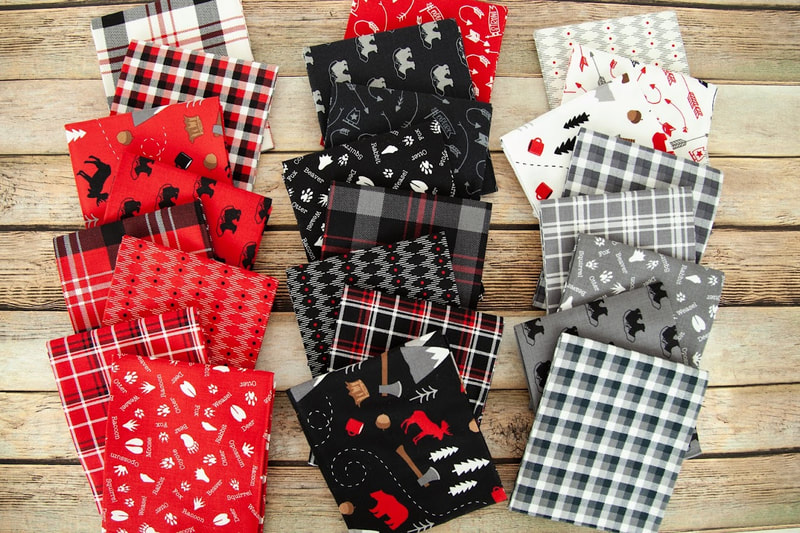
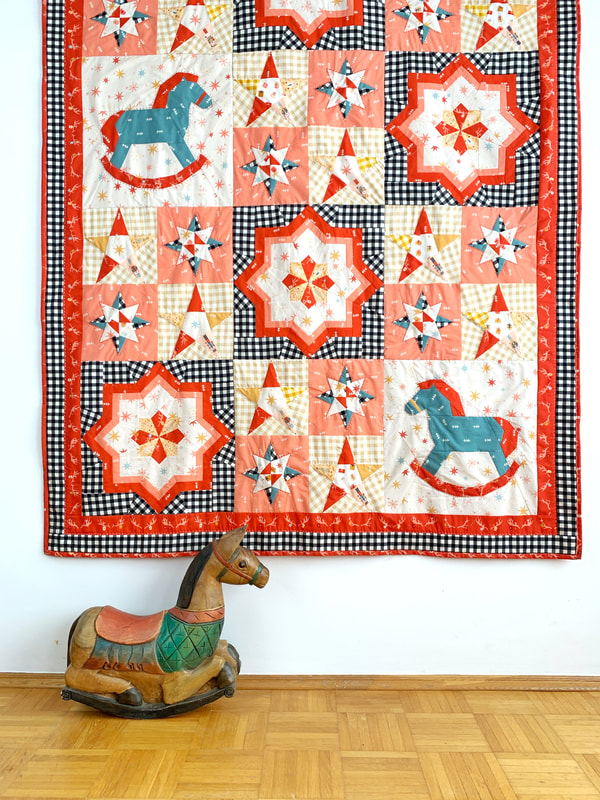
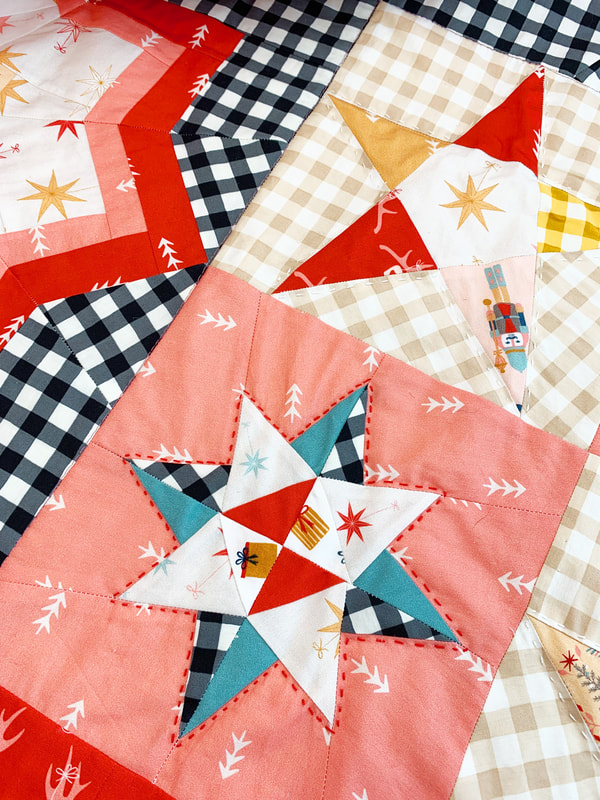
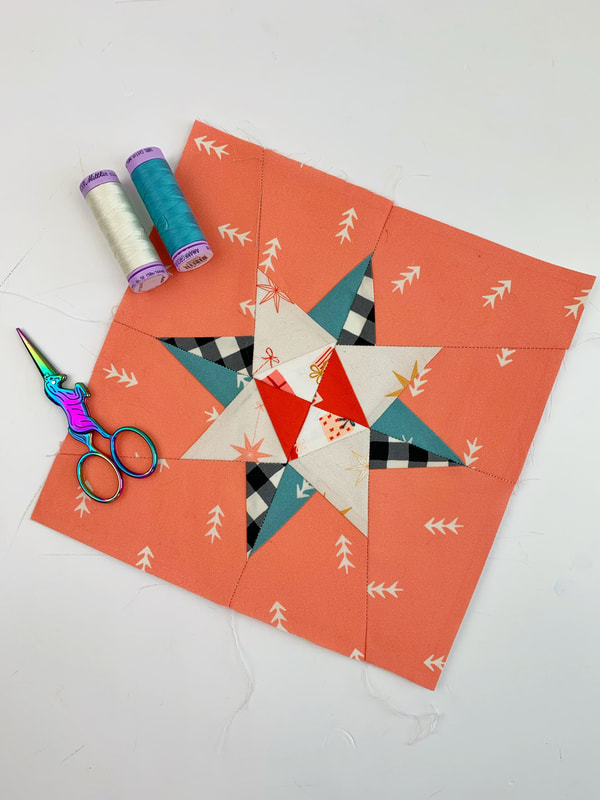
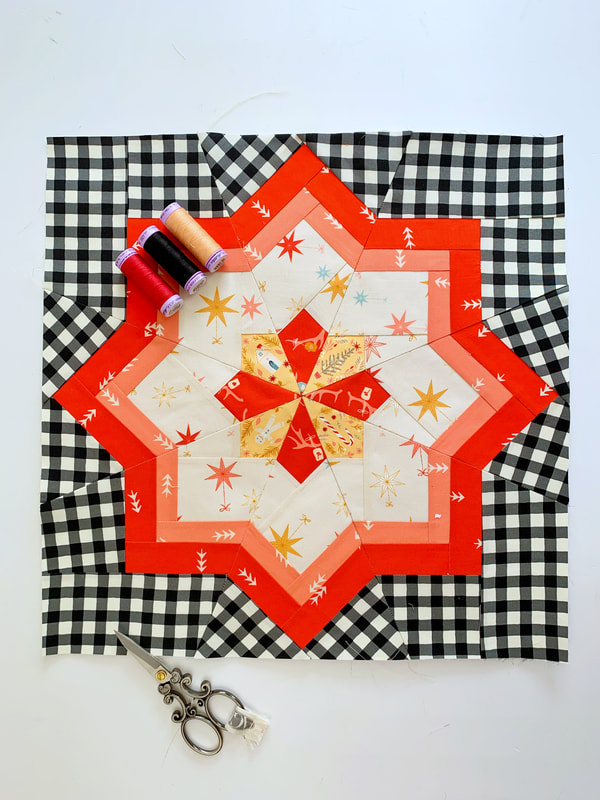
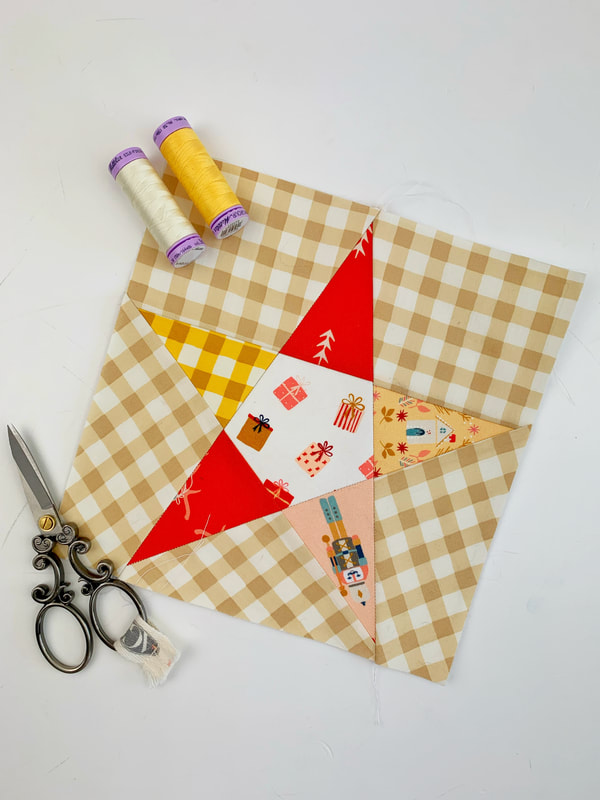
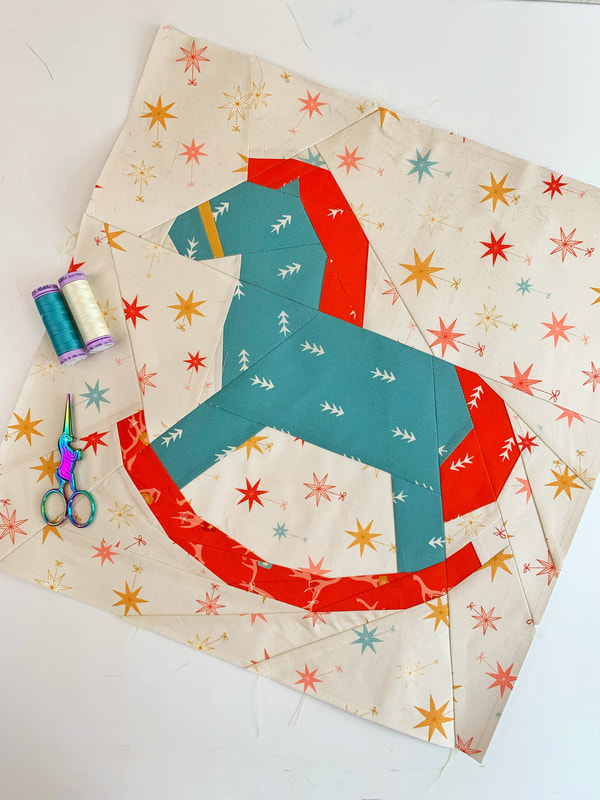
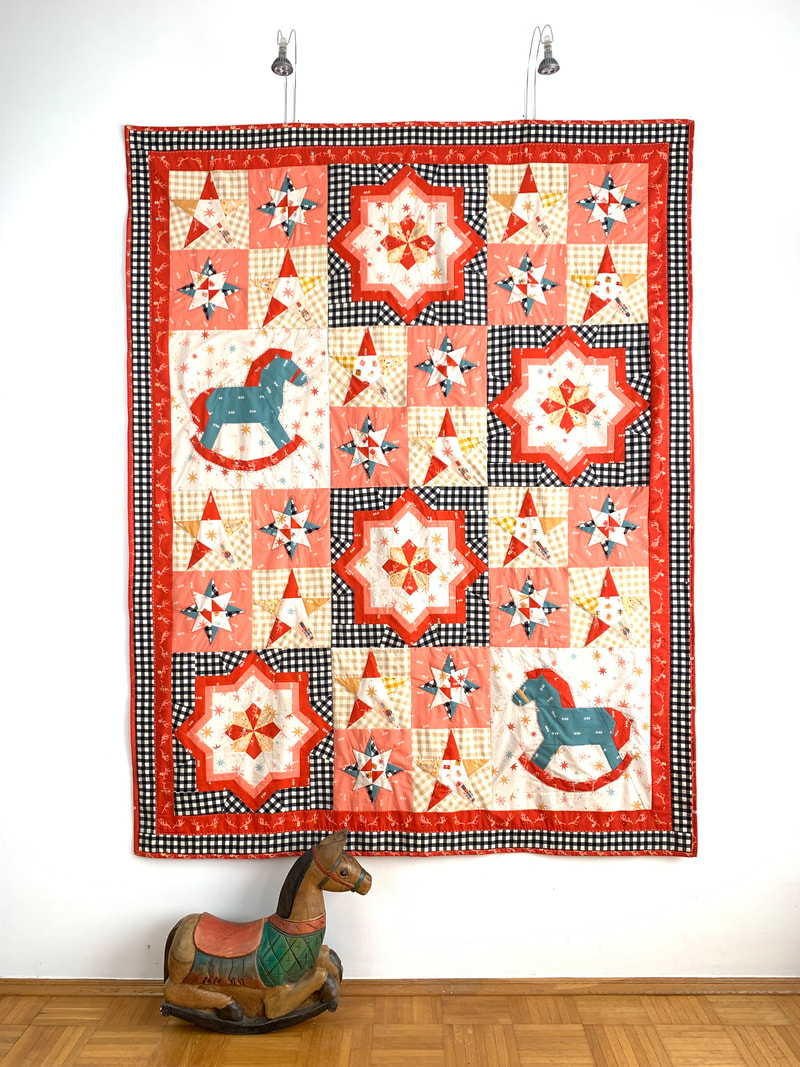
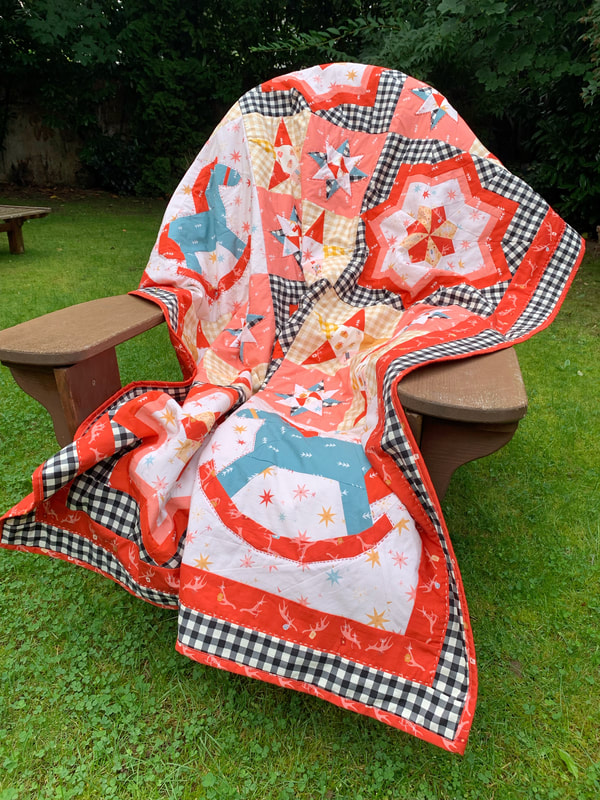
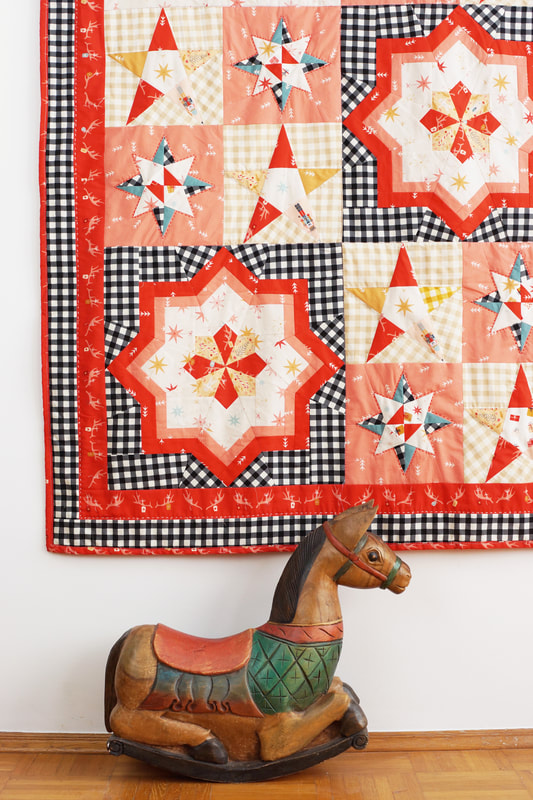
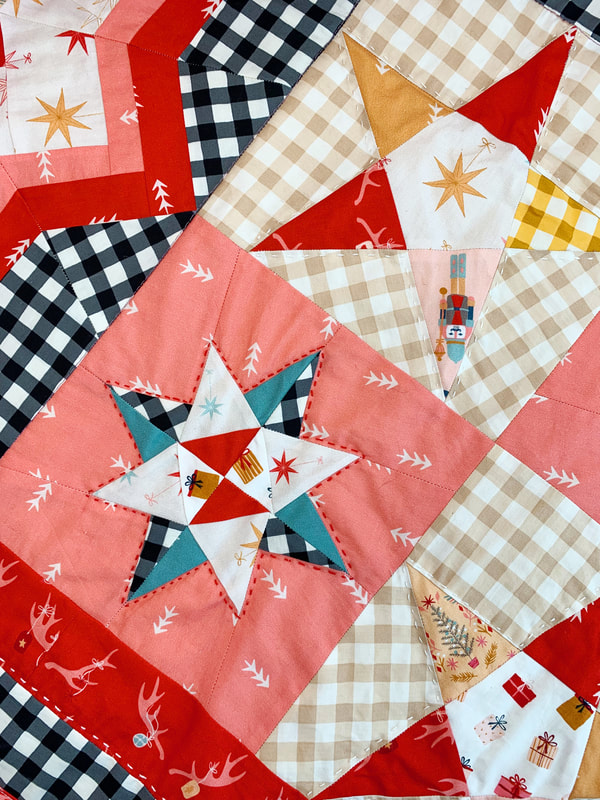
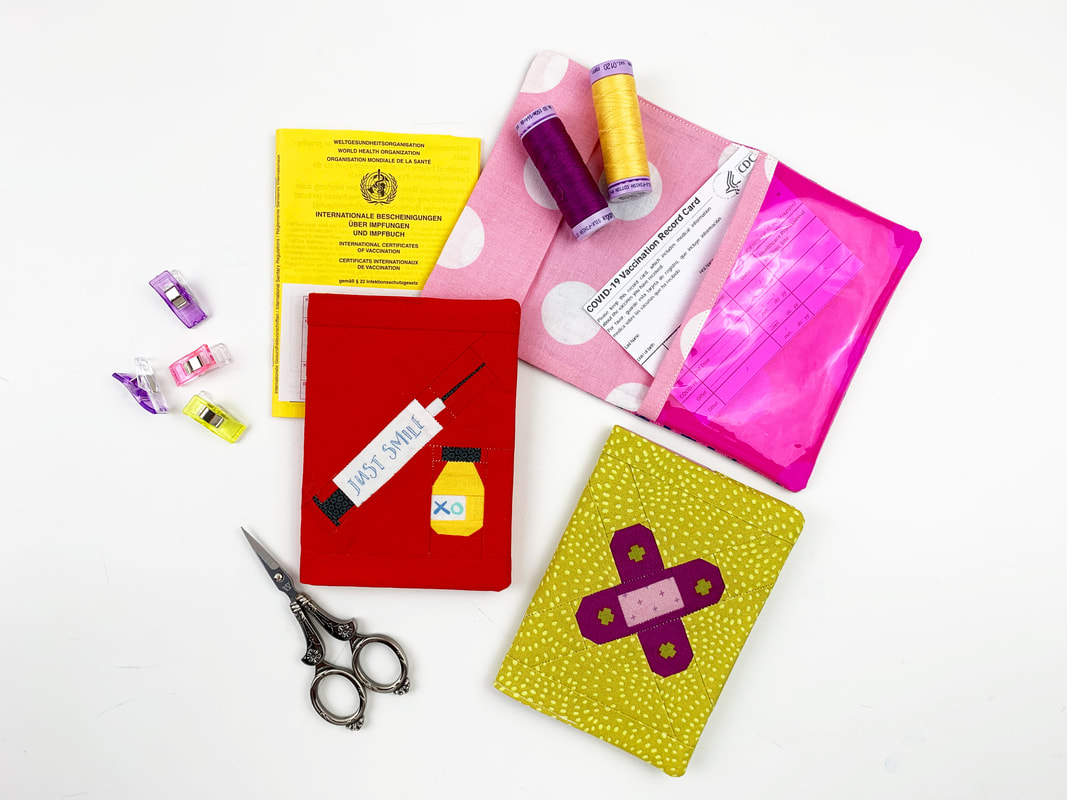
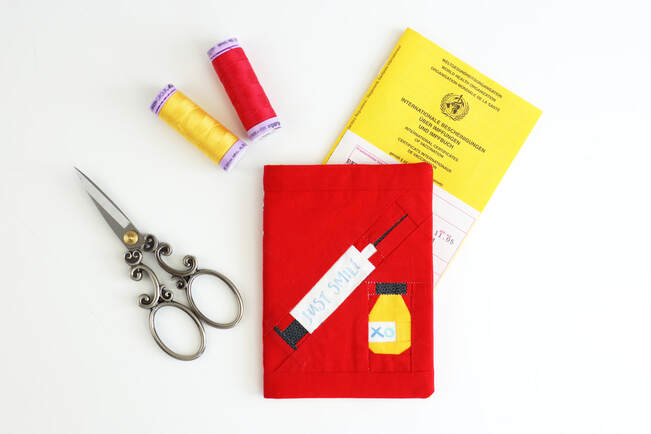
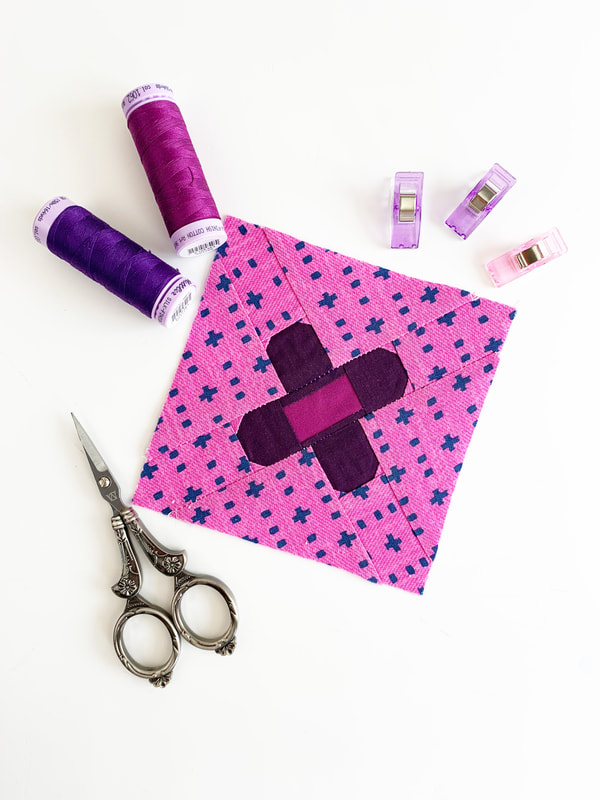
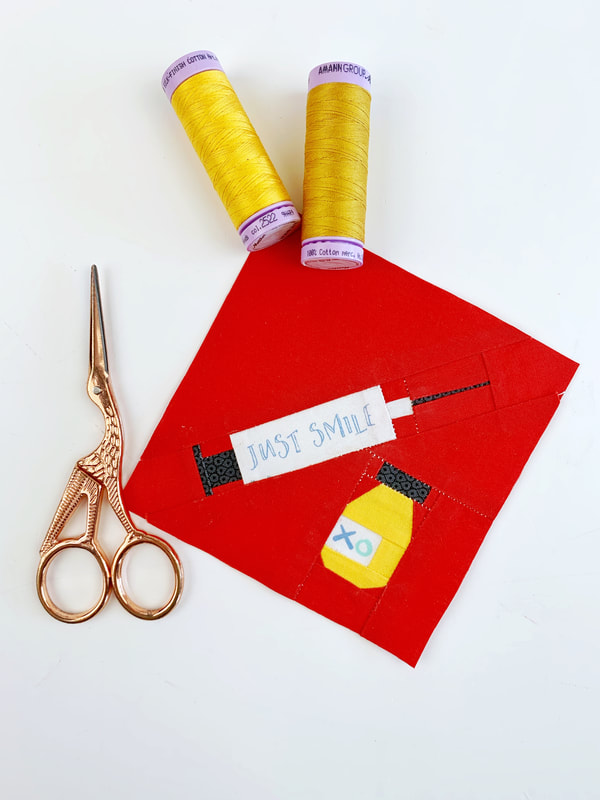
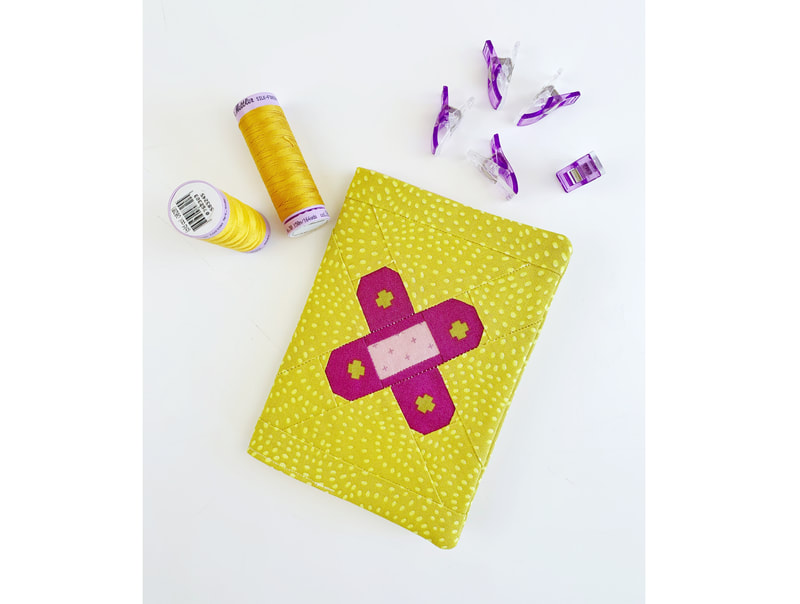
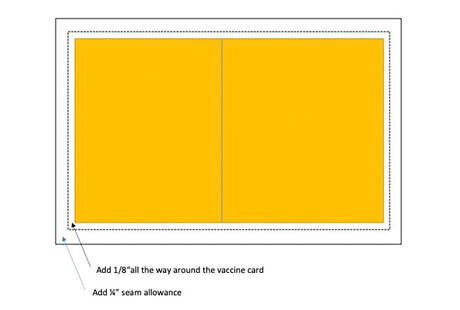
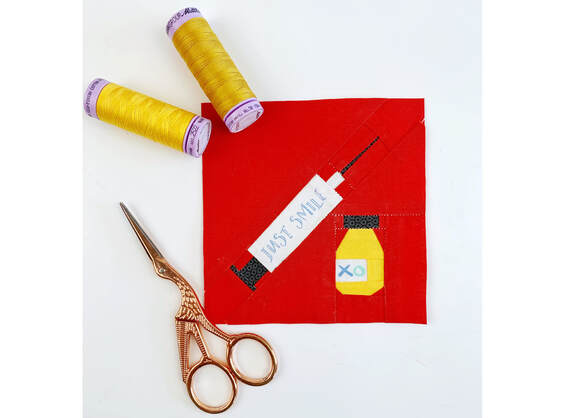
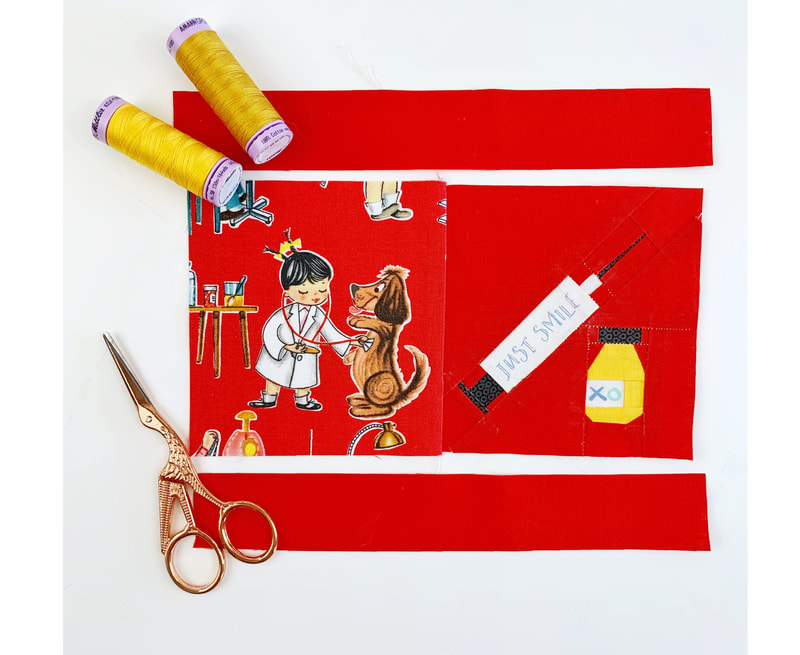
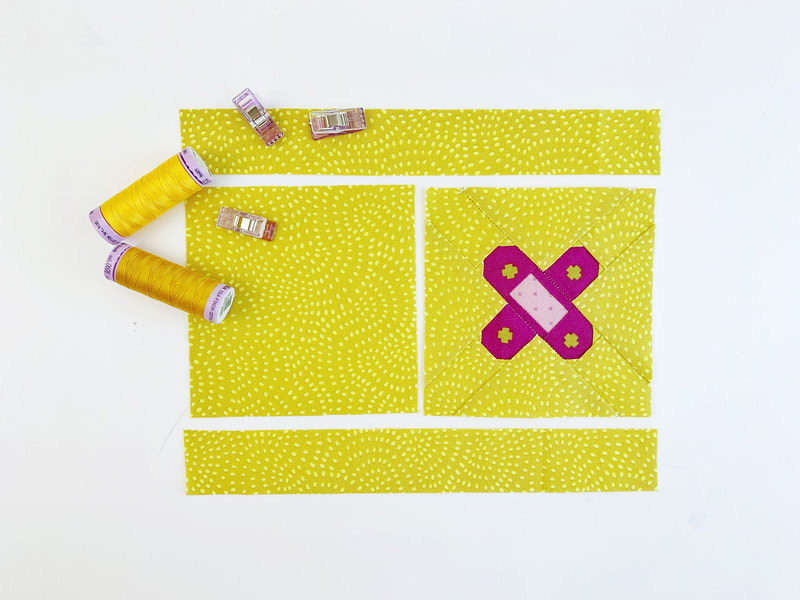
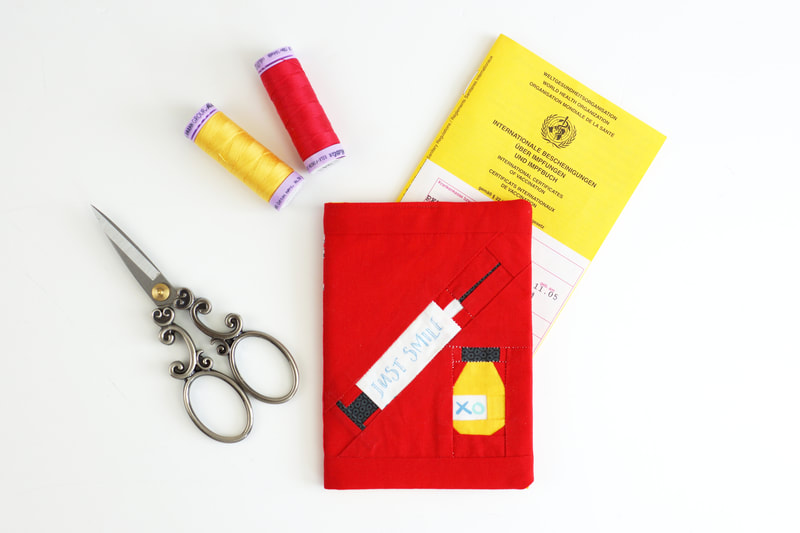
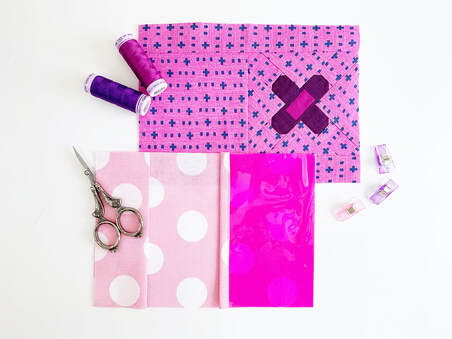
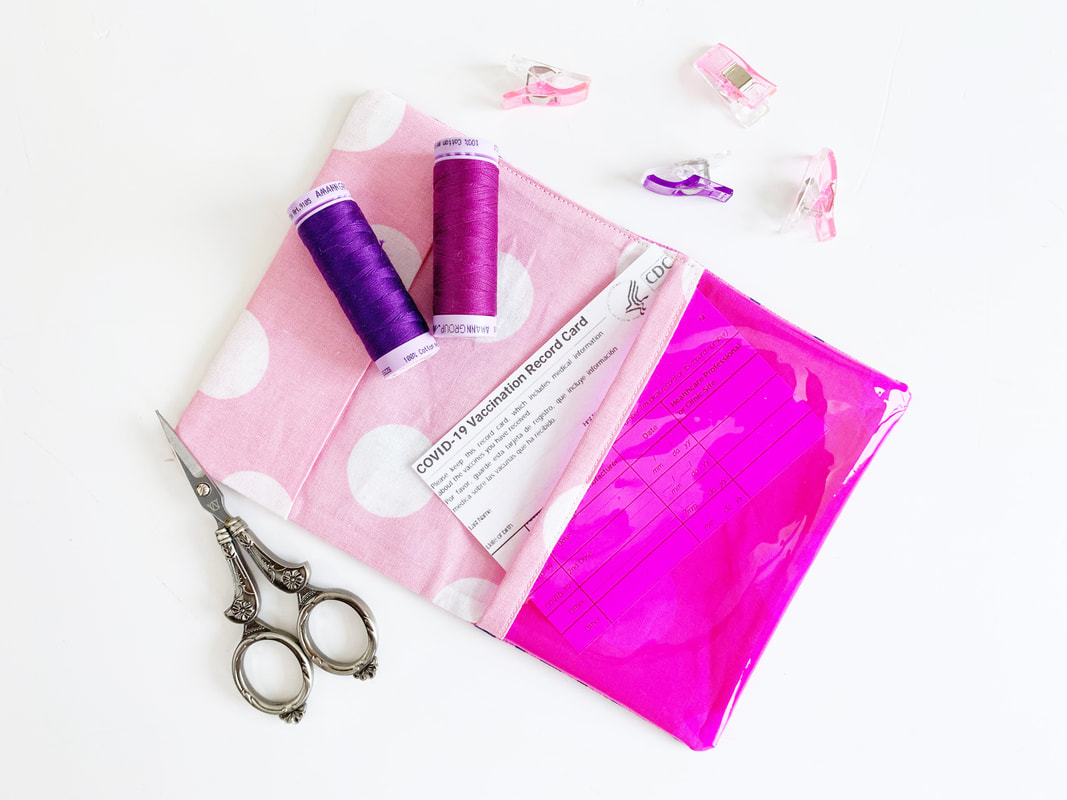
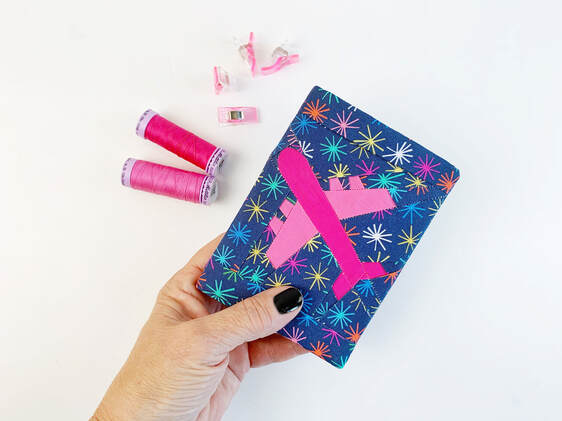
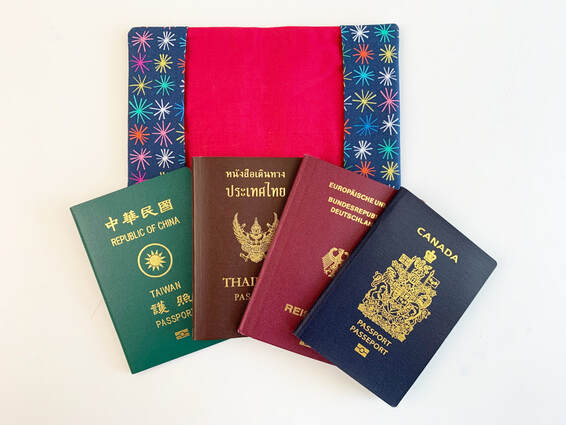
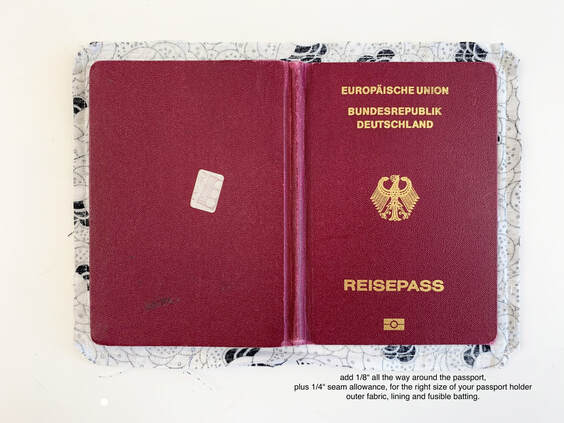
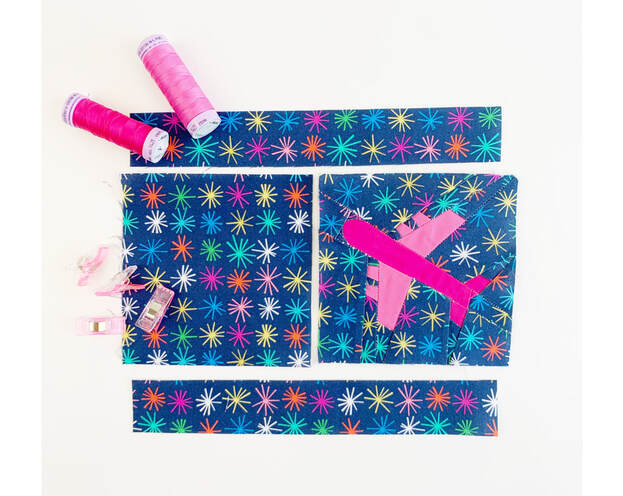
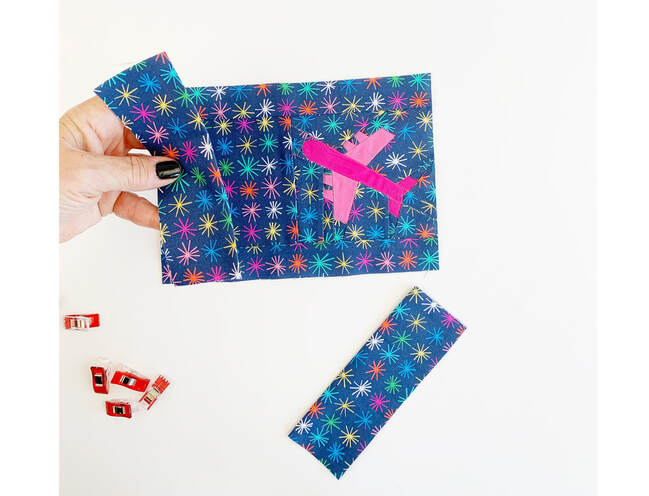
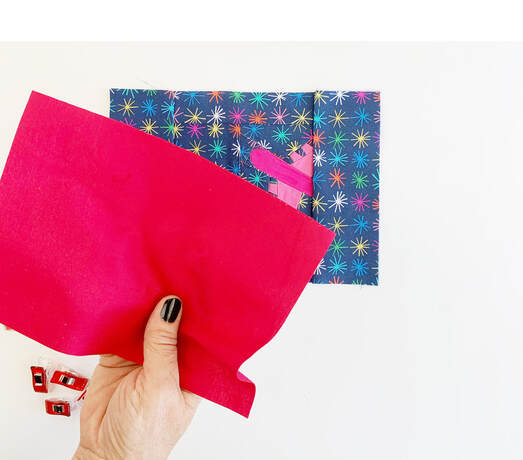
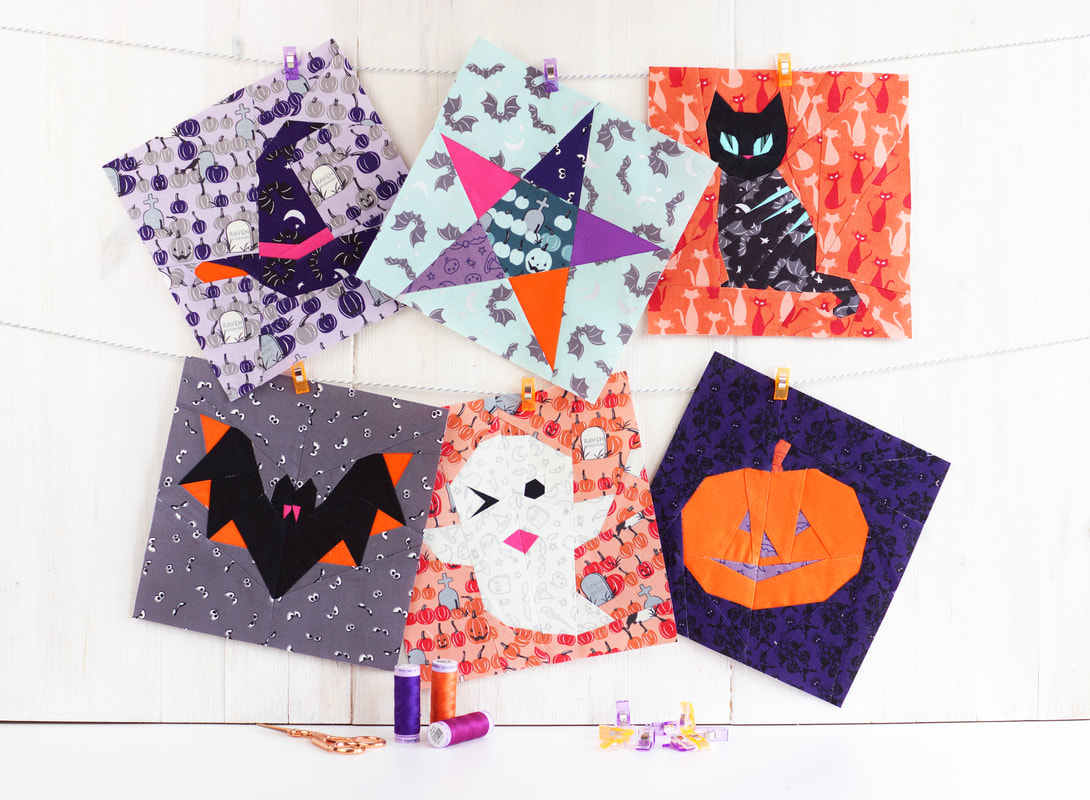
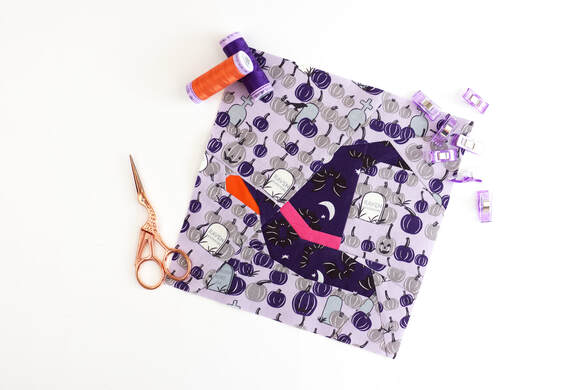
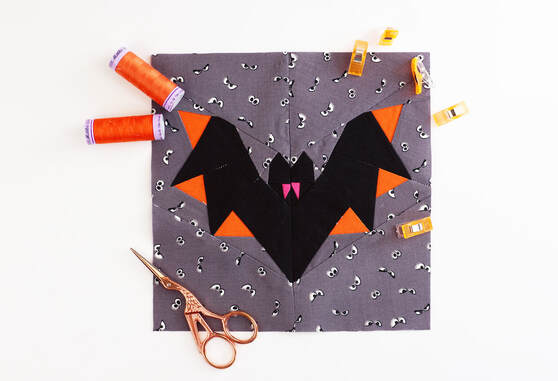
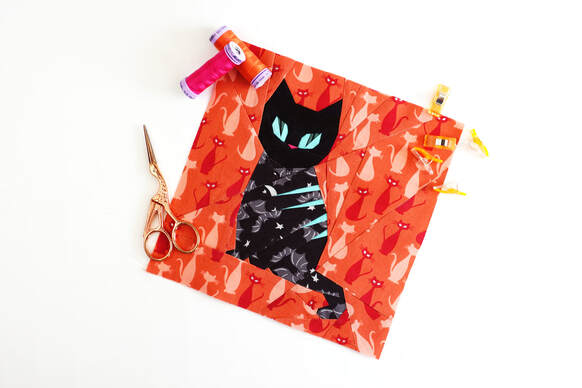
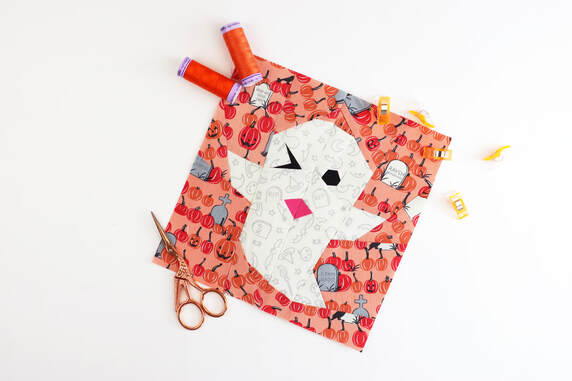
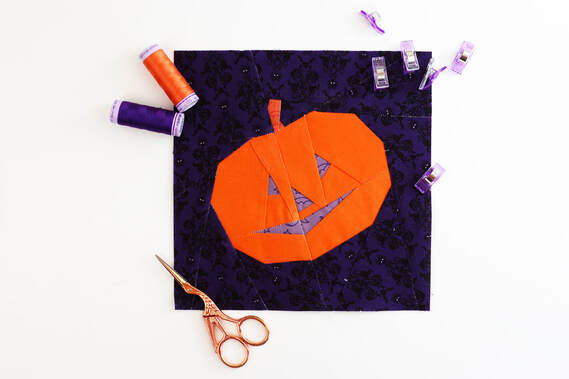
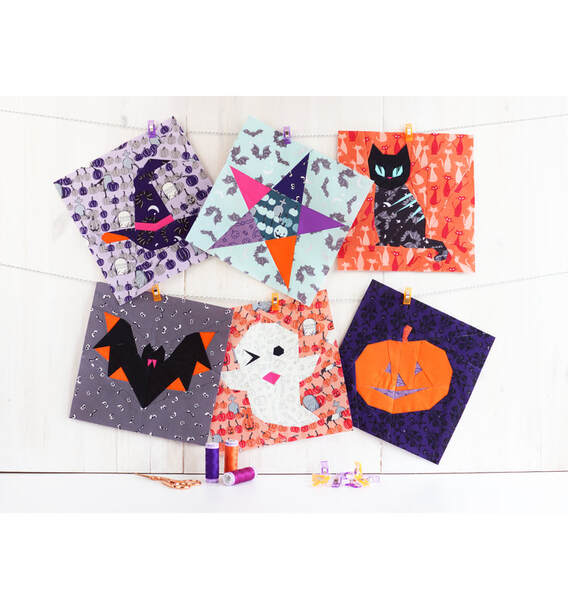
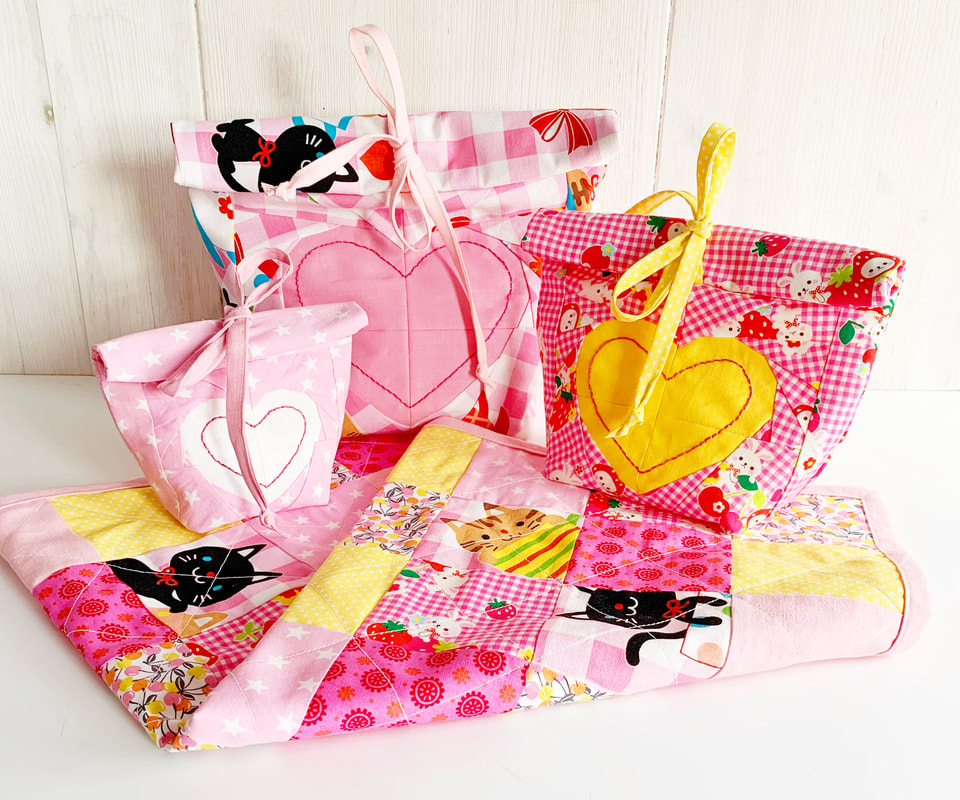
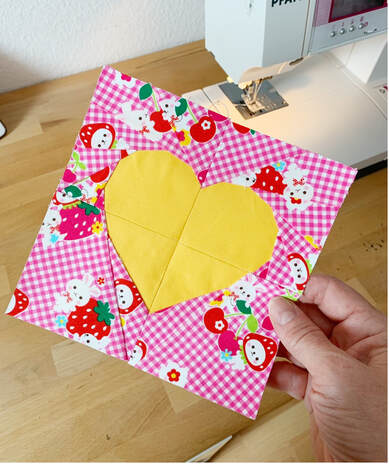
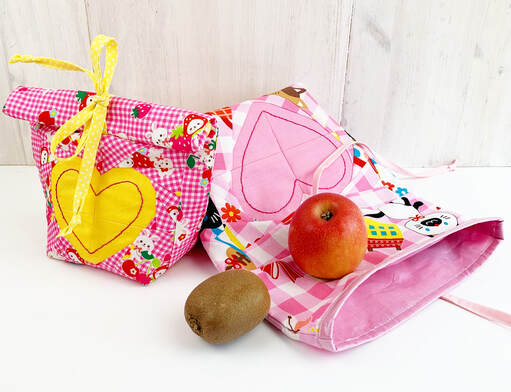
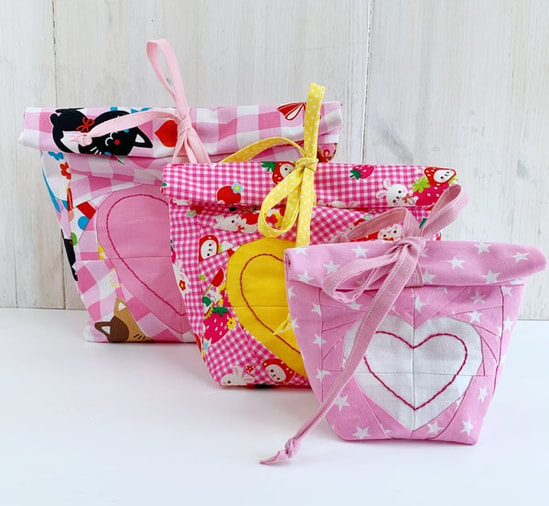
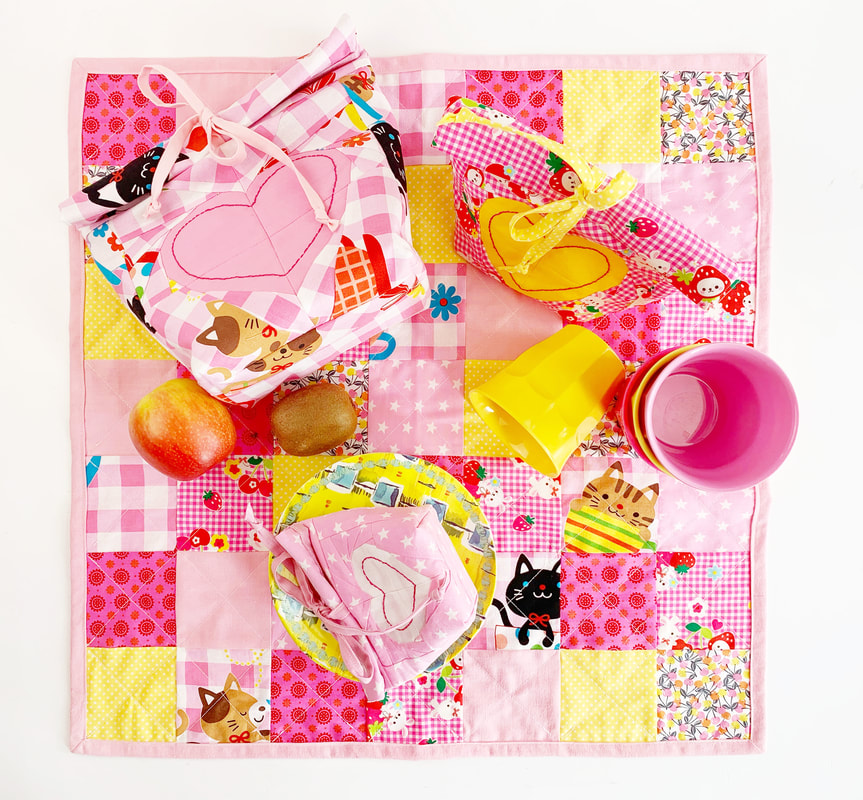
Do you have little dancer children? Do you want them to have the cutest ballet bag ever? You have come to the the right place. Riley Blake Designs just released this absolute perfect fabric series called 'Spin & Twirl' for stylish dancers. It's not too girly, of course it has pinks and whites, but the navy is such a perfect balance and gives this fabric series a classy touch. So let's get sewing, and let's make the best ballerina bag for our little dancer kids. Finished bag size: 14" wide x 18" high Materials needed: (width x hight) - 1 ballerina quilt block 10"x10" fabric around the quilt block: - 2x strips of fabric 2,5"x 10,5" - 2x strips of fabric 2,5" x 14,5" fabric for the bottom: - 1x 14,5" x 10" fabric for back: 49 squares of 2,5"x 2,5" ( or one piece of fabric 14,5"x 14,5") lining: - 1x piece of fabric 14,5" x 38" extras: - 1x piece of thin fusible batting (for example Vlieseline H630) - 2x pieces of fabric for the loops 2,5"x 2" - 2x pieces of fabric for the tabs ( cords) 2"x 1,5" - 2x pieces of fabric 14 1/4"x 2,5" for the casing at the top. - 2x pieces of 72" cord. Instructions: 1. Sew the ballerina quilt block ( or any other quilt block of the ballet series) in the 10"x 10" size. The block will be 10,5"x 10,5" when you finish it. (10"x 10" refers to the block size when incorporated into a project) 2. Cut the fabric strips for the sides of the quilt block. (if you're using directional fabric, check the direction of the print before cutting) Attach the 2,5" fabric strips to the quilt block. First sew the two shorter strips to the sides of the quilt block, then attach the longer strips to the top and the bottom of the quilt block. If you're using directional fabric check the direction before attaching the strips. 3. Cut 49 pieces of 2,5"x 2,5" squares and place them the way you want them for the back of your bag. I love them to be totally random. This Riley Blake Designs 'Twist and Twirl' fabric line is absolutely perfect for fussy cutting, so I went a little crazy... LOL. 4. How to sew these small fabric squares together? There are several different ways to sew fabric squares together. For this ballerina bag I liked to sew the square together by rows. Then I pressed the seams in opposite directions, to get perfect nesting seams and therefore perfect corners. ( See video) 5. Now that you're done with the back of your bag, it's time to place the fabric pieces in the right order and piece them together. You will need to place the front quilt block, then the bottom piece of fabric and the back piece in one row, as shown above. Beware of the directions of your quilt block and back piece, you want them facing each other, or facing the bottom of the ballerina bag. Now sew these 3 pieces together, press again and add fusible batting. 6. If you wish, you can either hand or machine quilt your outer ballerina bag piece. I did a combination of both. I hand quilted around the ballerina quilt block. Then I machine quilted the front and the back piece with simple straight line stitching. 7. Sewing the loops for the cord at the sides of the ballet bag. Cut the fabric pieces, fold them in half lengthwise and press in the 1/4" seam allowance. ( photo 1). Then stitch along the edge with a small seam allowance. ( photo 2). Fold in half so the short edges align and clip in place at 1" from the bottom edge of the bag on both sides. ( photo 3). 8. Making the casing: Cut the fabric pieces for the casing. Fold in the short ends 1/4" and stitch in place with a small seam allowance. Then fold the casing in half lengthwise. Clip or pin casing in place at the top edges of your ballerina bag so that it's centered and the raw edges align.( photo 2) 9. Preparing the outer piece of the ballerina bag and the lining. Fold the outer piece of the ballerina bag, right sides together in half, so the top edges align and stitch along the sides with 1/4" seam allowance. stitch the loops between these seams. You want to stitch across the loops twice for extra strength. Cut the lining piece according to the measurements given. Fold in half right sides together, so the top edges align and stitch along the sides with 1/4" seam allowance. Leave a 3-4" opening on one side for turning the bag later. 10. Turn the lining inside out and place it inside the outer piece, right sides together. Pin or clip the two pieces together so that the top raw edges align. I like to start at the side seams and place those on top of each other, then clip the rest. The casing will be between the two pieces. Now stitch along the top edge with a 1/4" seam allowance. Turn the bag inside out through the opening that you left in the side seam. Close the opening with a small seam allowance. Push the lining inside the bag. 11. Stitch along the top edge of the ballerina bag. 12. Adding the cord to the bag. I love these little tabs on the cord, but you can also just tie the cord with a knot or add some beads. For the tabs, cut the fabric pieces as mentioned above and fold in a 1/4" seam allowance on the longer edges first, then fold in the shorter edges 1/4" and press. (photo 1) - How to put in the cord into the casing of the bag? You need to put the cord through the casing before you attach the tabs. Attach a large safety pin to one end of the cord and go through the front part of the casing onto the back part of the casing coming out at the same side you went in. I was going in from the right with the first cord, going through the back part of the casing and coming out on the right as well. Going in from the left with the second cord through the front part of the casing onto the back part of the casing coming out again at the left with the second cord. Go through the bottom loops with one end of the cord on either side of the bag. ( photo 2) Fold the tab in half and place both ends of the cord in the center and stitch in place. Repeat for the second cord. And here you go all done and finished, easy enough, right? Do you want to make another one? I absolutely think so :-) Here are three more quilt blocks, that I designed especially for this fabric series. Which one is your favorite? Thank you Riley Blake Designs for the opportunity to design this quilt block pattern series and for supplying the absolutely adorable fabric series 'Spin & Twirl' that I used in this quilt pattern series. Happy sewing everyone! Ingrid xx Here are the cutest bear quilt block patterns that are super easy to make..... I got to participate again in Riley Blake Designs blog tour for this new fabric series called 'Into the woods' by Lori Whitlock. I totally saw myself in a wooden cottage with a fireplace. The cottage standing in the middle of the mountains, bears roaming through the forest, a Hot Cocoa in my hands while I read a book in front of the fire place. Doesn't this sound Devine for the autumn weather we're having right now? As some of you know I used to live in Vancouver for quite some time and this fabric series brings back some of my best memories in Whistler or on Vancouver island. But Aspen and Lake Tahoe come to mind as well, right? This quilt block pattern series consists of 2 bear quilt blocks, a bear paw quilt block, a little cottage quilt block, a hot cocoa quilt block and I added my maple leaf quilt block just because it completes this series so perfectly. I designed it especially for this Riley Blake Designs fabric series and called it 'Bear cottage'. All of these quilt blocks will be stunning by themselves, but will make up very nice 'cottage themed' projects as well, such as pillowcases, table runners, mini quilts, apron and much more. Actually this would be a beautiful full on quilt as well, wouldn't it? The little bear cottage: This super simple but cute cottage quilt block pattern is perfect for fussy cutting. I placed the plaid pattern in the windows, so they look like window frames. But you could also place little faces in those windows and make a super sweet little cottage with this cottage quilt block pattern. The bear portrait: A bear portrait quilt block is a a great quilt block for a pillowcase. I especially love it if you add some hand quilting to the outline of the bear quilt block. I do have a whole series of animal portraits in my shop, and they would look adorable on a kids bed, don't you think? Hot cup of cocoa quilt block: A hot cup of cocoa is the epitome of coziness, right? And a red plaid cup with some sugar cane beats even that, isn't it so? Can't you just see yourself in some plaid onesie sitting in front of the fire place drinking your hot chocolate with lots of whipped cream? This hot chocolate quilt block pattern will be perfect for all sorts of kitchen related sewing projects. Think apron for Christmas, tea towel, oven mitt and much more. Let me know what other ideas you have for this cup cocoa quilt block pattern. The bear: I always wanted to design a bear quilt block, that wasn't as cute as my Barney the Bear quilt block. This fabric series was the perfect inspiration for that. I made this bear quilt block into a polar bear quilt block. Just because the colors matched so perfectly. But this bear quilt block is perfect as a brown or black bear as well. Now he needs a name as well, don't you think? The maple leaf: I just couldn't resist and add this maple leaf quilt block pattern to this 'Bear cottage' series. The fabric series just asked for this maple leaf quilt block to be added. Having lived in Canada for so long adds a little bit of home to this fabric series. The bear paw quilt block pattern: No 'Bear cottage' quilt block pattern series without the bear paw quilt block, right? The bear paw quilt block is an absolute classic. Usually the bear paw quilt block is made out of squares and half square triangles (HST). And sewing this bear paw quilt block in its classic way will make up a whole sewing tutorial by itself. It's a beginner friendly traditional piecing quilt block pattern. But you know me for being foundation paper piecing addicted, so I decided to make this classic pattern in to a paper pieced pattern. This has some advantages. You do not need to do complicated calculations for the squares and HST in order to figure out how to get a 8"x 8" or 10"x 10" quilt block. Just print the bear paw pattern, and you will get the perfect size. This bear paw quilt block pattern is also beginner friendly in its foundation paper piecing version. It's actually a pattern that doesn't take much longer than half an hour to sew. No pre cutting the fabric, just start sewing right away. And precision is a given with foundation paper piecing. You will get the bear paw quilt block pattern for free with the purchase of the bear cottage quilt block pattern series. Thank you Riley Blake Designs for the opportunity to design a quilt block pattern series and for supplying the absolutely adorable fabric series designed by Lori Whitlock 'Into the woods' that I used in this quilt pattern series. What do you think? Ready to cozy up in front of the fire place? Let me know in the comments the projects you would love to sew with these quilt block patterns. Happy sewing Ingrid xx Rocking around the Christmas tree, is the name for my newest Christmas quilt pattern. You think it's still a little early for Christmas sewing? Well that's what I thought when I started this Christmas quilt 3 weeks ago. Little did I know, I just turn around and it's September.... So I guess it's the perfect time to start Christmas projects for the favorite season of the the year. Christmas quilts are always special and remind us of cozy winter evenings with a hot cup of coco, right? Snow outside makes this picture even more perfect. So let's get into the Christmas spirit a little early this year. This Christmas quilt pattern includes some of my favorite quilt block patterns. The best thing about this pattern is, that the quilt blocks that I used for this Christmas quilt are super easy and quick to make. This quilt pattern is a simple patchwork pattern for a stunning Christmas quilt. And while I really love traditional Christmas quilts with simple shapes for cute fabric scraps, I really think this Christmas quilt pattern is simple enough, but gives you stunning results. And you can use fabric scraps as well as a whole Christmas fabric series. Here I show you all the quilt blocks , that are needed for this Christmas quilt. As you can see there are several different star quilt blocks, all of them super easy to make, and two rocking horses. The rocking horses are 16"x 16" in size and therefore also not difficult at all, since no small pieces are involved. These are the three star quilt block patterns, that make up for most of this Christmas quilt pattern. I made one of the stars quilt blocks after another. I started with sewing all the sections of each star quilt block first, then I assembled the sections for each star quilt block pattern. That way you get a little bit of a chain workflow. The 5-point star quilt block is my favorite quilt block for fussy cutting. The Christmas fabric series that I got to use for this quilt pattern by Art Gallery Fabrics features an adorable nutcracker print. The print size is perfect for my 8"x 8" 5-point star quilt block. So I used the little nutcrackers in each one of these 5-point stars. A light box is not necessary, but if you're fussy cutting a lot, like me, than it sure makes your life a lot easier. You can place the fabric onto the light box, wrong side up, and just place the segment on top of the desired part of your print. I use a fabric glue pen from sew line, so the image stays perfectly in place. My Lightbox has a clear cutting mat, so I can cut right there on the light box, which makes my quilting even more simple. As you can see, the sunny star quilt block is just as fun and simple to make. Make sure you remove the paper from the seam allowance and press often. This guarantees a perfect 8"x 8" size of your quilt block, and straight side seams and corners. This large star quilt block is 16"x 16" in size and you only need 4 for this Christmas quilt pattern. It is also a perfect pattern for Christmas pillowcases. I called it blowing in the wind star, because it reminds me a little bit of small pinwheels. This star quilt block pattern is brilliant for a quick Christmas gift. And last but not least the cutest little rocking horse that inspired me to the name of this Christmas quilt.... ROCKING AROUND THE CHRISTMAS TREE.... I finished this quilt with some hand quilting. In this video I show you how to bury the know while hand quilting. Tie a knot at the end of your thread. Enter your quilt with the needle at any random place inside the batting in the center of your quilt sandwich and come out where you want to start your quilting. Pull the thread slowly till the knot gets to the fabric. Now you give your thread a little tug that way it slips nicely inside of your quilt sandwich. In case it doesn't, you can spread the threads of your fabric a tiny bit, so the knot can get through, and use your nails to push them back together again. Thank you so much to Art Galley Fabrics for supplying the absolutely adorable Cozy and Magical fabric series designed by Maureen Cracknell that I used in this quilt pattern. I hope you are now slowly getting into the Christmas spirit, and you like this Christmas quilt pattern as much as I do. Happy Christmas sewing Ingrid xxx Yes, if you're wondering, a vaccine card holder is a 'thing'. Now that more and more people are getting vaccinated, things are definitely looking a lot better. Restrictions are being lifted everywhere, meaning we will be returning to some sort of 'normal' in the near future. This depends strongly on as many people as possible receiving a vaccination. And this in return means lots of vaccine cards and vaccine card holders. The vaccine card might be an important item on our future trip/holiday packing list. While it's currently not clear how and if we will need our vaccine cards, one thing is for sure: you will want to keep it safe and clean, and why not do that in style? The international vaccine card isn't really a card. The little booklet was most probably, by the looks of it, not designed to be carried around. The CDC vaccine card is only made out of paper as well. So I decided vaccine cards, whether CDC cards or international vaccine cards need a pretty cover. After I made my free passport holder pattern, a sweet customer suggested to use the same pattern for the vaccine card and of course I had to add a little foundation paper pieced design. And here are actually two. The vaccine and syringe pattern, and the band aid pattern. Of course these patterns would be equally cute on a pouch, for example a pouch for your travel medical supplies. Or how about a fabric box for your medical supplies at home? A pillowcase or a cover for a coolpad and much, much more, I am sure you will come up with many more ideas, let me know in the comments. This vaccine card holder pattern is essentially the same as for the passport holder pattern and the international vaccine card is the same size as a passport. Materials needed: ( for both vaccine cards, international vaccine card and CDC vaccine card) outer piece: - 4"x 4" foundation pieced quilt block, vaccine and syringe or band aid outer piece: - 1 piece of fabric 4.5"x 4.5" (same as the background fabric of the quilt block ) - 2 strips of fabric 1 1/4" x 8.5" (same as the background fabric of the quilt block ) - 8 1/4" x 5 7/8" for the lining - 2 x 4" x 5 7/8" for the pockets - For a CDC vaccine card you only need one pocket piece of fabric, and one piece of clear vinyl 3 1/2"x 5 7/8" plus a strip of fabric for the binding 1 1/4"x 6". - 8 1/4" x 5 7/8" very thin but stiff fusible interfacing (I used Vlieseseline S320) In case your vaccine card is a different size, this overview shows you how to determine the right size for your outer piece and lining. Instructions: (for the international vaccine card) 1. Sew the quilt block of your choice, either the vaccine with the syringe or the band aid, in the 4"x 4" size. 2. Cut all your fabrics, lining and interfacing. Stitch the fabric pieces for the outer piece together the way its shown here in the assembly photo. Join the two squares first, then add the two strips of fabric at the top and bottom. This will be the outer piece of the vaccine card holder. 3. Iron on fusible interfacing to the wrong side of the outer piece of the vaccine card holder. Cut the outer piece to 8 1/4" x 5 7/8". ( check the size with your own vaccine card as shown above) 4. Fold the pocket fabric pieces in half aligning the longer raw edges and press. Then place these two on the outer piece aligning each with the left and right raw edge. 5. Place the lining piece on top of the outer piece with the two pockets, right sides together, pin or clip in place. Stitch around the outer edge with 1/4" seam allowance leave about a 3" opening at the bottom longer edge for turning your vaccine card holder later. Cut the corners at a 45° angle, that gives you nice crisp edges when turning the vaccine card holder inside out. Close the opening with a small seam allowance. Instructions for the vinyl version: (for the CDC vaccine card) Follow steps 1.-3. as above. 4. Fold the pocket fabric piece in half aligning the longer raw edge and press. 5. Stitch the binding to the piece of vinyl. 6.Place the pocket piece of fabric onto the left of the lining piece and the vinyl to the right aligning the raw edges to the left and to the right, as show in the photo below. 7. Place the outer piece on top of the lining piece, right sides together. Clip or pin in place and stitch around the outer edge with a 1/4" seam allowance leaving a 3" opening for turning the vaccine card holder later. 8. Cut the edges in a 45° angle ( this gives you nice crisp edges) . Turn inside out and close the opening with a small seam allowance. Here is a short sewing video for the vaccine card holder for you. Tadaaaa and Yippie all done .... What do you think? Super cute and easy, right? What other projects would you be making with the syringe and band aid pattern? Let me know in the comments. Happy sewing Ingrid xx Are you all as hopeful as I am, that traveling season will start soon again? This was something I really missed in the last 15 months. I bet all of you as well? More and more people are getting vaccinated and this means for all of us, that we're slowly getting back to normal. I am sooo looking forward to this. After 15 months of lockdown, more or less strict and 15 months of homeschooling two teenage daughters, you know that I really miss getting away :-) Therefore I decided our passports need some dressing up and I made this cute little passport holder pattern. The Airplane pattern is a super quick and easy foundation paper piecing pattern and suits this passport wallet perfectly, don't you think. I used the 4"x 4" size for the outer piece of the passport cover. I decided on a new sewing project to enhance our passports... this fabric passport holder looks just so much cuter going through passport control, don't you agree? So let's get to sewing this cute passport holder/ passport cover with the cutest paper pieced airplane quilt block. Materials needed: ( this is the size for a European Passport ) Most passports are very similar in size, (as you maybe know, we have a few nationalities in our family) the European passport is about 1/8" to 1/4" wider than the others. To double check the right size for your passport cover, fold the passport open add 1/8" all the way around the passport and then add 1/4" seam allowance, that will be the size of your lining and outer piece. outer piece: - 1 airplane quilt block size 4"x 4" - 1 piece of fabric 4.5"x 4.5" (same as the background fabric of the airplane block ) - 2 strips of fabric 1 1/4" x 8.5" (same as the background fabric of the airplane block ) - 8 1/4" x 5 7/8" for the lining - 2 x 4" x 5 7/8" for the pockets - 8 1/4" x 5 7/8" very thin fusible batting (optional but this gives a bit more stand I used Vlieseline H180) Instructions: 1. Sew your airplane quilt block in 4"x 4" size. Cut all your fabrics, lining and batting pieces. Stitch the fabric pieces for the outer piece together the way its shown here in the assembly photo. Join the two squares first, then add the two strips of fabric at the top and bottom. 2. Iron on fusible batting to the wrong side of the outer piece of the passport holder. Cut the outer piece to 8 1/4" x 5 7/8". ( check the size with your own passport as shown above) Fold the pocket pieces in half aligning the longer raw edges and press. Then place these two on the outer piece aligning the left and right raw edges. 3. Place the lining piece on top of the outer piece with the two pockets, right sides together, pin or clip in place. 4. Stitch around the outer edge with 1/4" seam allowance leave a 3" opening at the bottom longer edge for turning your passport holder or passport wallet later. Cut the corners at a 45° angle, that gives you nice crisp corners when turning the passport holder inside out. Close the opening with a small seam allowance. And YAY you're all done . Happy and save travels everyone.... I'm off to stitch a few more in other colors. Ingrid x PS: let me know what colors you are making , can't wait to see your photos on social media. Halloween comes early this year, because Riley Blake Designs just released this super adorable fabric series called 'spooky hollow' designed by Melissa Mortenson of The Polka Dot Chair. I decided to sew up all of my Halloween quilt blocks with this cute fabric series and I am over the moon with the results. The fabric patterns are small enough to work great as background fabrics, but are equally fun for fussy cutting. These quilt blocks will be perfect for these little trick-or-treat bags, it's a free pattern and tutorial. But let's see what all these Halloween symbols mean: The witch: Halloween as we know it today, was celebrated by Celtic cultures as a feast for 'summer's end' and to honor the fall harvest. It was called Samhain, pronounced sow-in. It was celebrated on the evening of October 31. until sunrise on November 1. and is also known as the pagan New Year's Eve. It was a celebration for the deceased as much as for the beginning of the pagan New Year. Celebrations included bonfires and feasts. In the Middle Ages people who celebrated with bonfires were accused of being witches. And their power was believed to be greatest during Halloween night. So it's no surprise, that the witch, her hat or broomstick are still to this day, one of the most prominent symbols for Halloween. The bat: The original Celtic bonfires at Samhian would attract many bugs and flying insects. Which then caused bats to emerge at these festivals to have a little feast of their own. Therefore there's no Halloween without a bat. Halloween black cat: The association of black cats with Halloween also comes form the Middle Ages. The women accused of witchcraft often fed wild cats or had pet cats themselves. Black cats were feared especially, since their dark black fur allowed them to roam through the dark undetected, leaving only their piercing eyes to be seen. And who doesn't agree, this is a little bit scary, right? The ghost: Ghosts have always been a symbol for Halloween. Samhain and the Christian holiday 'All Hallow's Eve' or 'All Saints Day' are both celebrations for the deceased. During the night of Samhain it was believed, that the veil between the living and the dead is the thinnest and people are closest to the dead and their spirits. Making the ghost the most fitting symbol for this 'ghosty' holiday. The Jack-o-lantern: The Celts would carve turnips on 'All Hallow's Eve' and would place and ember inside. This was done to keep evil spirits away. Funny enough pumpkins didn't exist in Ireland at that time that why turnips were used. The Pumpkin only became popular when the Irish migrated to America and were more popular and easier to carve that turnips. So what do you think? Are you in the mood to start Halloween sewing early this year ? Thank you so much to Riley Blake Designs for supplying the absolutely adorable Spooky Hollow fabric series designed by Melissa Mortenson that I used for these cute quilt blocks. Ingrid xx This adorable little lunch bag set or picnic set consists of three vinyl lined snack bags and a small patchwork tablecloth. This is a fun set for this upcoming summer picnic season. We might not be able to go to restaurants any time soon, but we will be able to go for picnics. This is the perfect excuse to sew something cute for ourselves, don't you think? Each little snack bag or lunch bag has a cute and most importantly easy to sew heart in the front. I added a simple running stitch row to the heart for extra cuteness. But you could also embroider the lunch bag owners name or a sweet message, in case you want to gift these cuties. How about a subtle 'I love you' ? I used iron on vinyl for the lining of these snack bags. It's super practical and easy to use. You can use any kind of quilting cotton fabric and just iron on the vinyl. The one I used here is from Heat n Bond. This way you can wipe the inside easily. And just in case something spills, your outside bag and everything else is protected. There are three sizes in this picnic/ lunch bag set. Enough options for all sorts of snacks, fruits and sandwiches. And to complete this adorable little set and to use up the scraps you have left over from sewing the bags, I added a small table cloth to the pattern. The size is 21"x 21" and perfect for a short picnic at the motorway service station when on a road trip, or when hiking, to enhance your mountain view even more. Are you ready for a picnic? Let me know what you think about this easy to sew little set in the comments. Ingrid xx
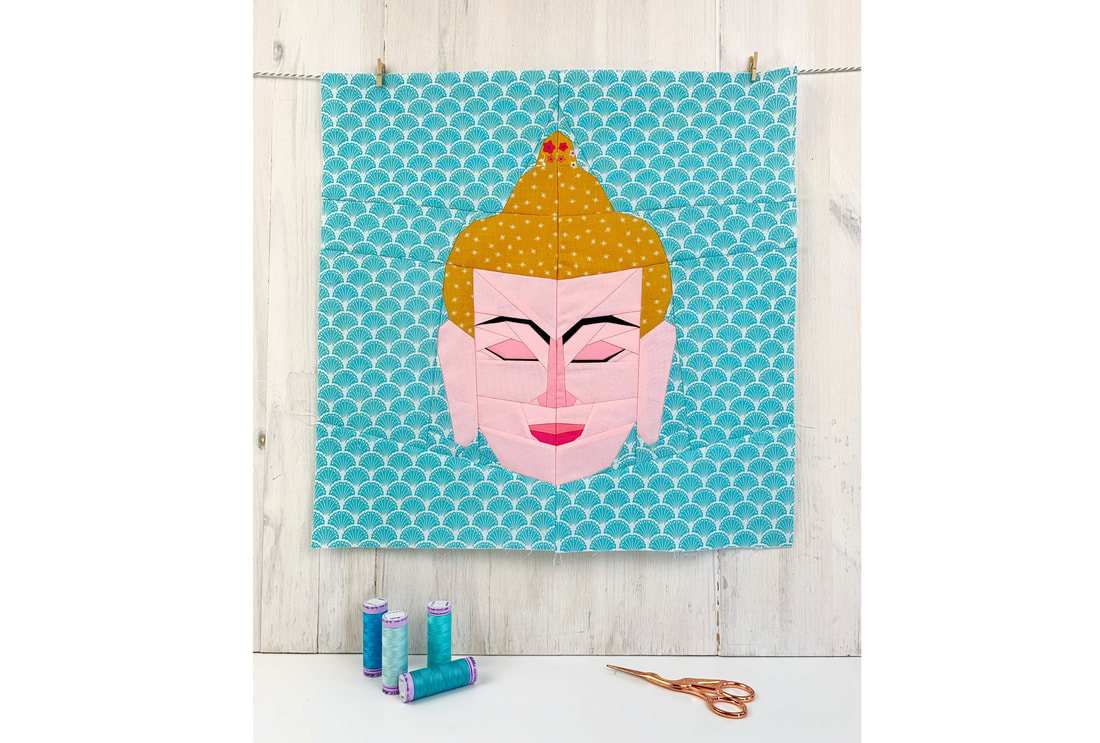
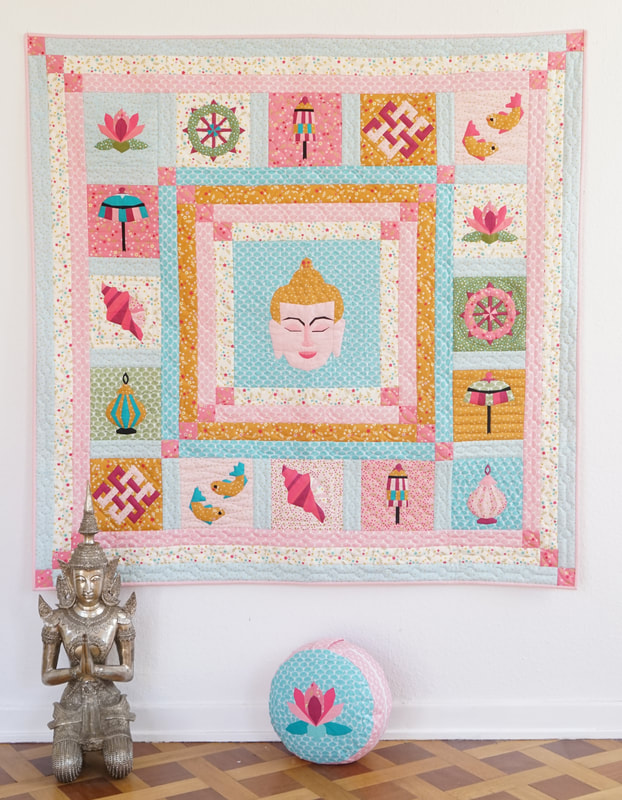
Mindfulness featuring Buddha and the eight auspicious symbols of Buddhism,
is a new quilt pattern I designed these past few months. I hope it helps and inspires you. And maybe helps you navigate easier through these special times.
Buddha and the eight auspicious symbols of Buddhism...
The eight auspicious symbols of Buddhism can be traced back to ancient India where Buddhism originated. Some of these eight symbols are also associated with ancient royal rituals in India such as coronations of kings. Today, the eight auspicious symbols of Buddhism are closely related to Buddha or Dharma. Dharma is an important Hindu or Buddhist concept, referring to a law that governs the universe. Although there is no single-word English translation, a close adaption is 'right way of living'. These symbols represent the offerings that were made to Buddha by the gods when he achieved enlightenment. Why are these eight Buddhist symbols called 'auspicious'? Auspicious means, giving or being a sign of future success. And that's exactly what these symbols represent, they are symbols that are helpful for success and prosperity. These eight symbols are often seen in many holy altars in front of a Buddha statue or mural. They also serve as focal points of meditation and contemplation, so if you want a better future or if you want to grow deeper in your spirituality, it might help to make these symbols your focus. Here are the eight auspicious symbols of Buddhism and their meanings: 1. The Lotus Flower
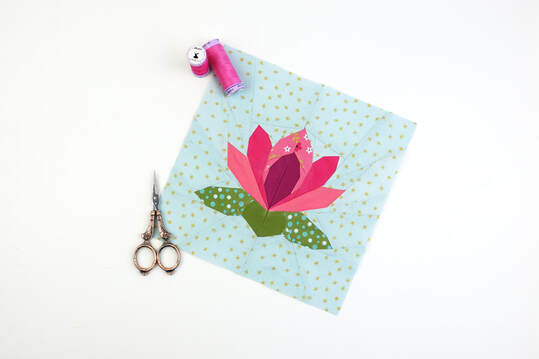
Thelotus flower symbolizes the complete purification of the body, mind and speech.
Since the lotus flower is an aquatic plant with its roots in deep mud, but a blossom that rises above the muck and opens to the sun, beautiful and fragrant, it's no surprise that the lotus represents the clarity of enlightenment. 2. The Conch Shell
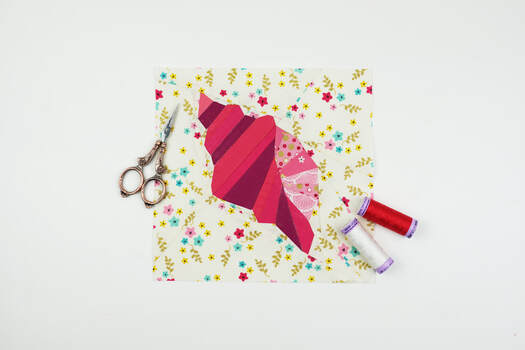
The conch shell has long been used as a battle horn in Asia. In ancient India the conch also represented the Brahmin caste.
In Buddhism the conch shell represents the sound of Dharma, reaching far and wide to awaken the human beings from their slumber of ignorance. Dharma, which derives from a Sanskrit root word meaning 'to uphold or sustain'. The concept behind Dharma is anything that produces or keeps a positive order. The conch shell symbolizes the need to accomplish one own and others wellbeing. 3. The Precious Parasol
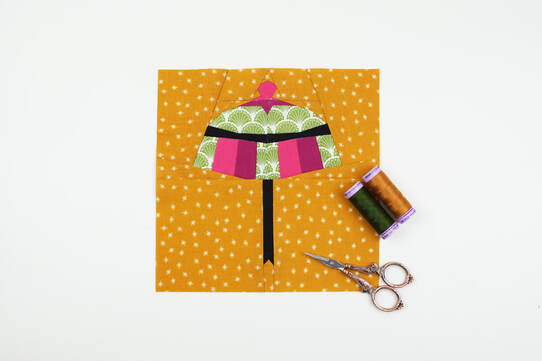
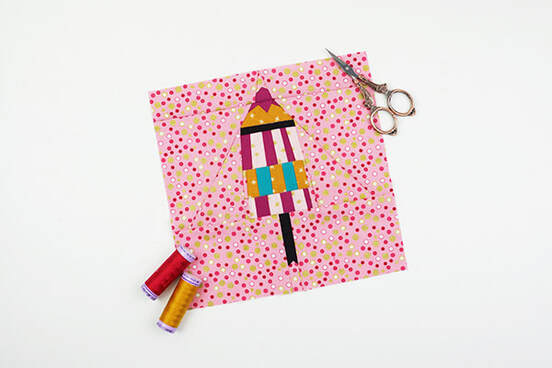
Theprecious parasol is a symbol of royal dignity and protection of the sun.
In Buddhism the precious parasol represents the wholesome protection from illness and suffering in general. 4. The Treasure Vase
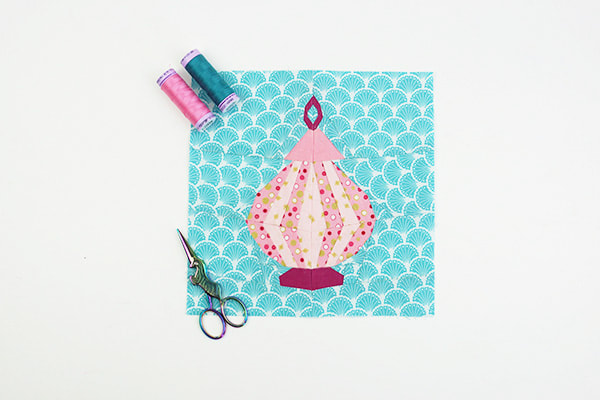
The treasure vase is filled with precious sacred things, but no matter how much is taken out, it's always full.
It symbolizes a long life and prosperity. 5. The Eternal Knot
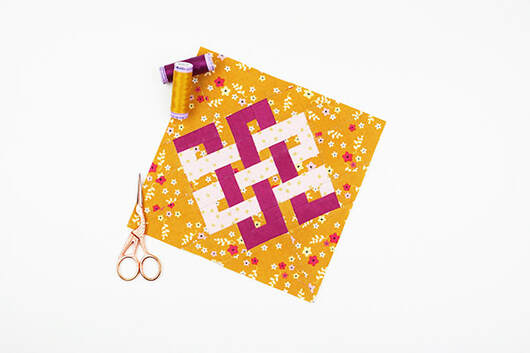
The eternal or endless knot represents Buddha's endless wisdom and eternal harmony.
It's a symbol for the endless cycle of suffering, birth and rebirth. As well as the inter-twining of wisdom and compassion. 6.The Victory Banner
The victory banner symbolizes the victory over obstacles and negativities and the fear of death.
More generally it represents the victory of wisdom over ignorance . There is a legend, that Buddha raised the victory banner over Mount Meru to mark his victory over all phenomenal things. 7. The Dharma Wheel
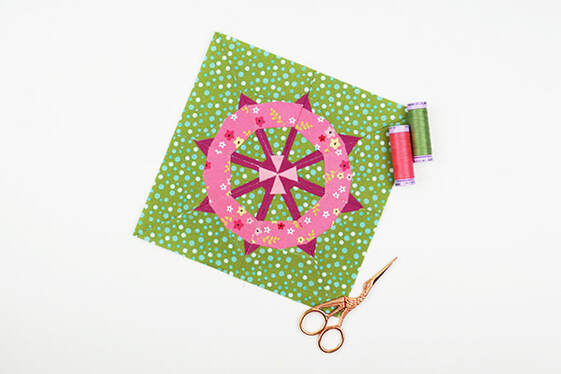
The dharma wheel is one of the most well known symbols of Buddhism.
The wheel has eight spokes, representing the Eightfold path. The Dharma wheel, according to tradition, was first turned when Buddha delivered his first sermon after his enlightenment. It symbolizes the turning of Buddha's teachings, which enables humans to experience joy and liberation. 8. The Golden Fish
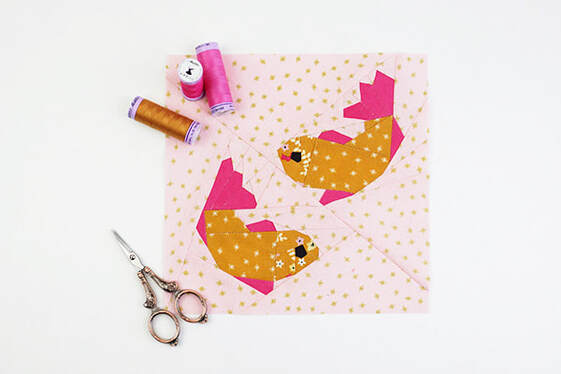
The golden fish were originally the symbol for the rivers Ganges and Yamuna.
They came to represent over time the good fortune in most Asian religions. In Buddhism the golden fish symbolize happiness as they have complete freedom of movement in the water.
And here is the whole Mindfulness quilt with all the eight symbols surrounding Buddha.
What do you think? One can't go wrong with all the auspiciousness right? It does present favorable circumstances and is showing signs of a favorable outcome, isn't it? Thank you so much to Riley Blake Designs for supplying the absolutely adorable Stardust fabric series designed by Beverly McCullough that I used for this amazing project. Also a huge thank you to Iva Steiner @schnigschnagquiltsandmore for quilting this beautiful quilt. For more info on her services check out her Instagram.
Now lets explore MINDFULNESS a bit more.
Mindfulness is the human ability to be totally present and aware of where we are and what we're doing. It is the ability to not be overly reactive or overwhelmed by what's going on around us. We all own mindfulness, we just have to learn how to access it. This past year has shown us, that our lives can be turned upside down easily from one day to another and there's little to nothing we can do about it. And while we probably looked on the outside before, for comfort and fun, it's now more important than ever, to learn to be just content with what we have, and concentrate on our insides. Tweet this: Meditation can significantly reduce stress Thats where mindfulness finds it's perfect place. Our minds go all over the place and we loose touch with our body and surroundings and sooner than we think we're stuck with obsessive thoughts about things that happened or we're anxious about the future. Studies say that 8 out of 10 Americans ( or Europeans) experience stress in their daily lives and therefore have a hard time calming their minds and bodies. This puts them at a high risk of numerous diseases among them being heart disease and stroke. Mindful meditation, even for just 10 minutes per day, can make a huge difference.
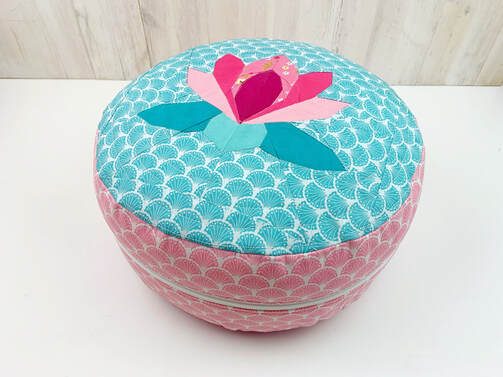
This is why I added this Yoga Pillowcase pattern to my Buddha quilt pattern series.
It's an easy sewing pattern for a standard round Yoga pillow. Three facts about Mindfulness: 1. Anyone can do it You don't have to change your beliefs or anything like that. Everyone can benefit and it's easy to learn. 2. It's a proven practice You don't have to take mindfulness on faith. Both experience and science have proven its positive benefits on our health, work and over all wellbeeing. 3. Mindfulness is not exotic It's what we already do and what we already are. We just have to learn to come back to it more and more. Here are 6 helpful, mindful attitudes: - non-judging, - acceptance, - patience, - trust, - letting-go, - gratitude A great way to come back to our mindful attitudes and get unstuck is meditation. What do you think? Something you would want to explore? Or is it already something you practice regularly? Let me know ... Ingrid x |
Author
Ingrid Alteneder Archive
March 2022
Categories
All
|
-
Shop
- New patterns
- All Patterns
- Appliqué Patterns
- Animals
- Baby
- Ballet
- Bear Cottage
- Beach/ Boats/ Nautical
- Buddha/ Mindfulness
- Chinese New Year
- Christmas
- Easter and Spring
- Fairytale
- Fall/ Autumn
- Flowers, Trees and Plants
- Food/ Drinks
- Halloween
- Oktoberfest
- Quilted items
- Stars
- Viva la Frida/ Dia de los Muertos
- Valentine's Day
- Village Patterns
- Mixed pattern
- Home
- About
- Blog
- Publications
- Etsy
- News
- Deutsch
|
Visit us at
|



 RSS Feed
