|
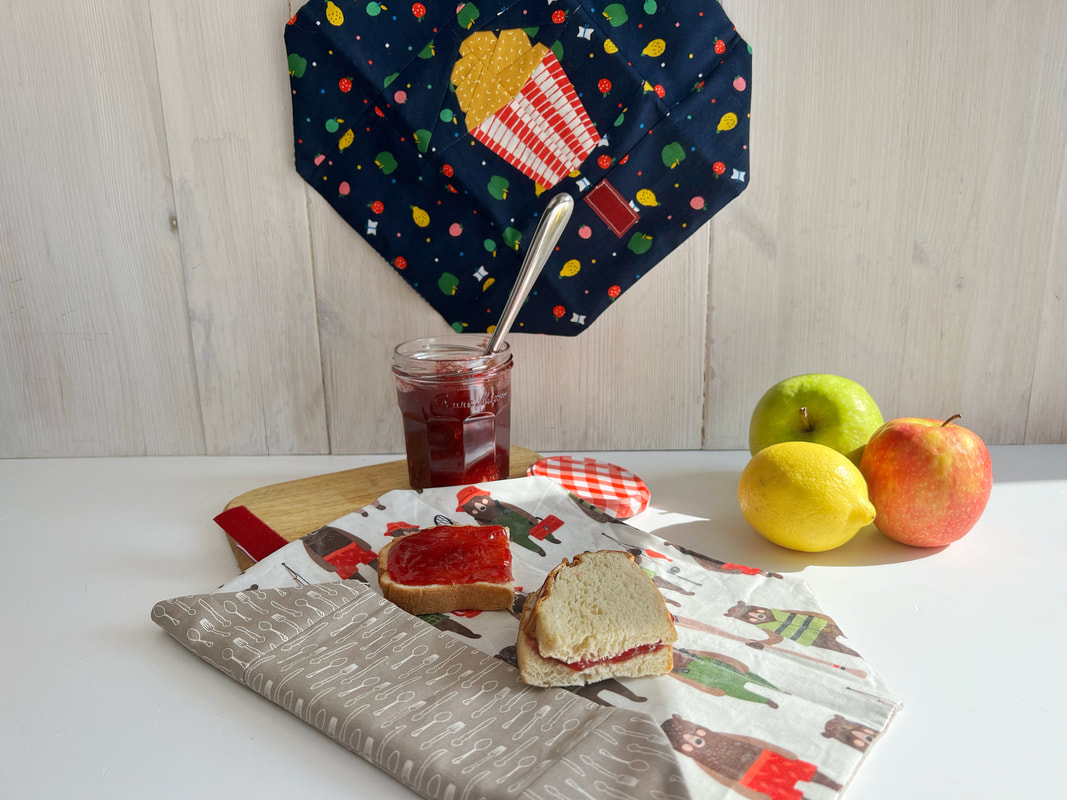
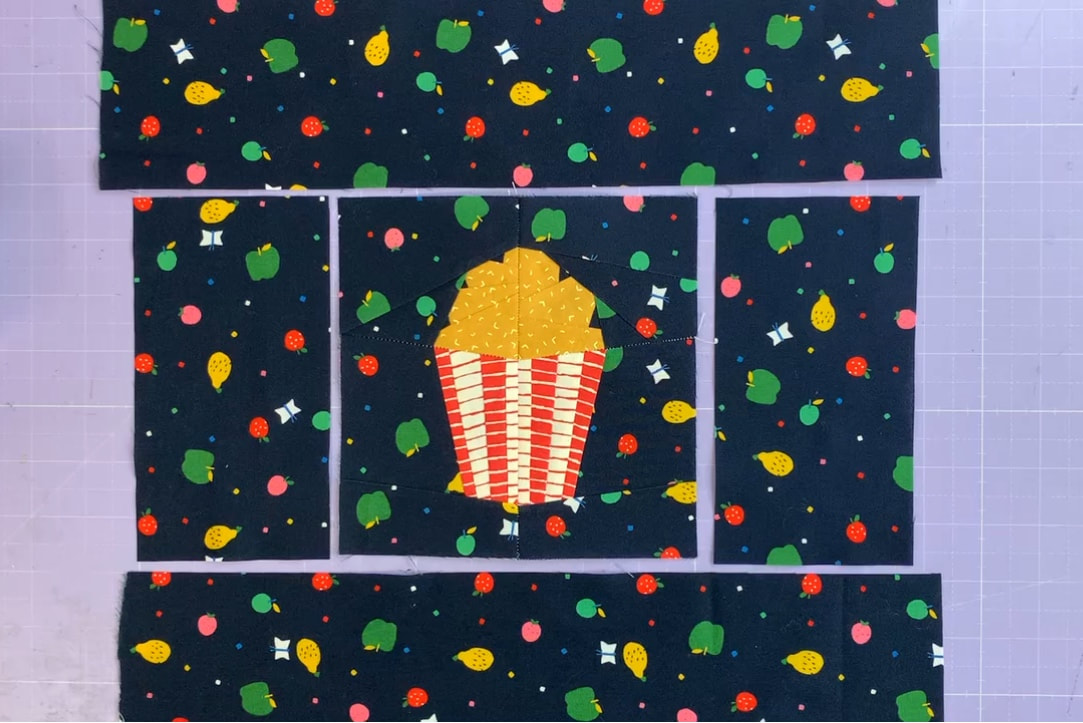
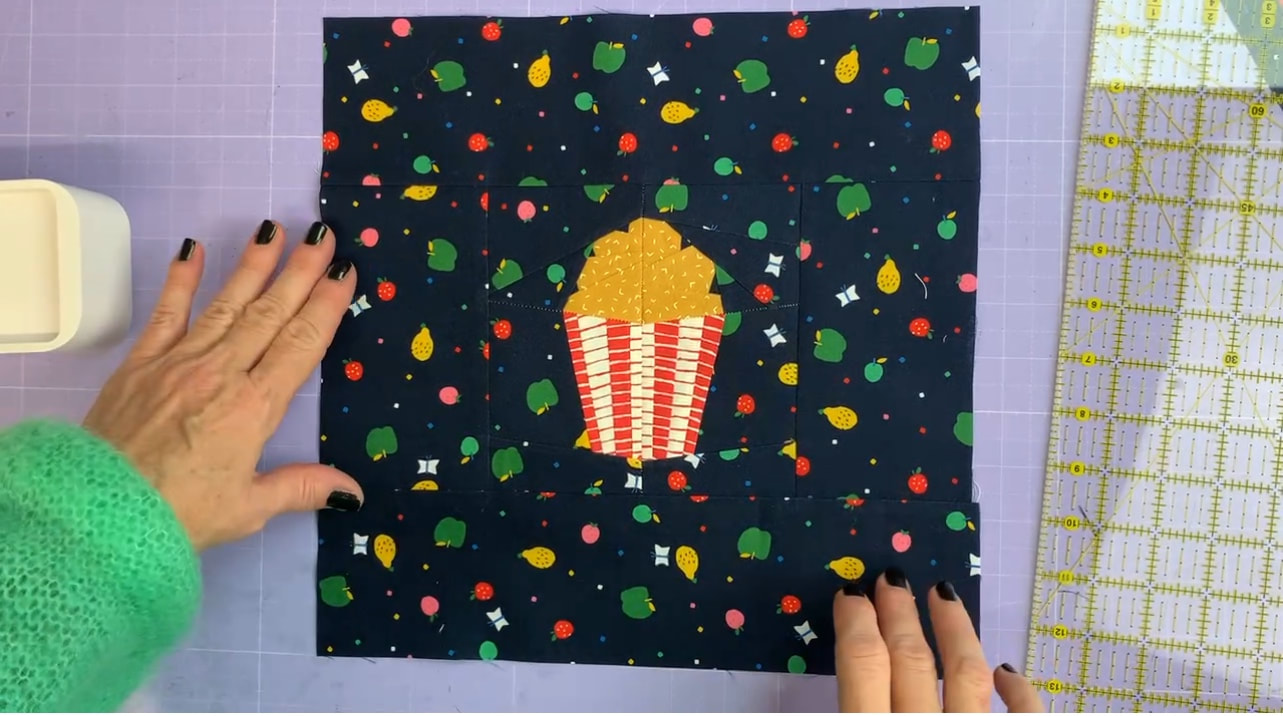
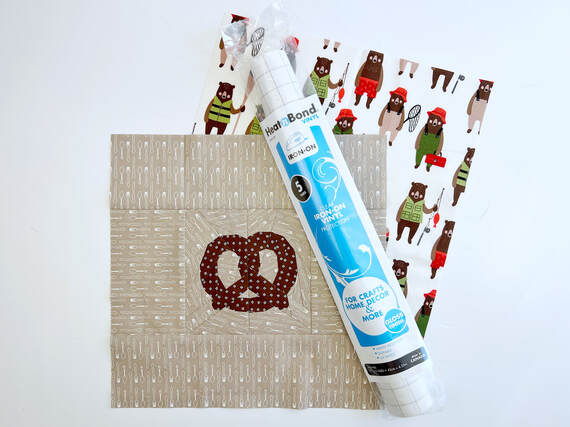
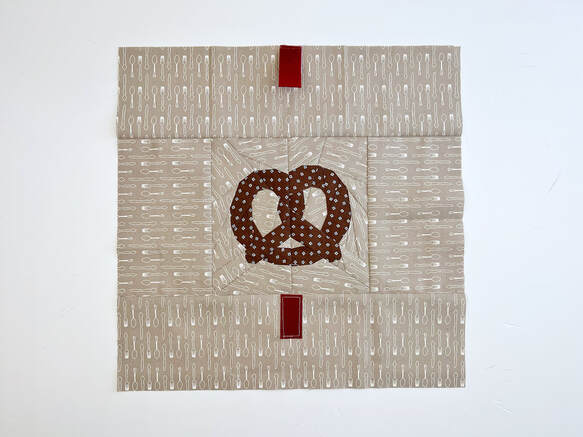
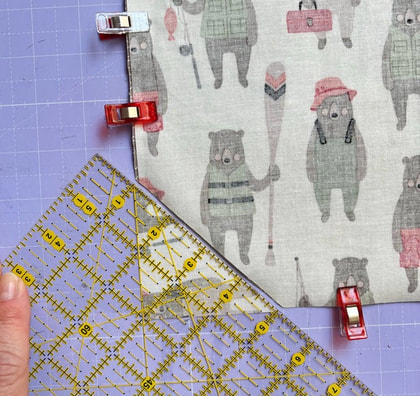
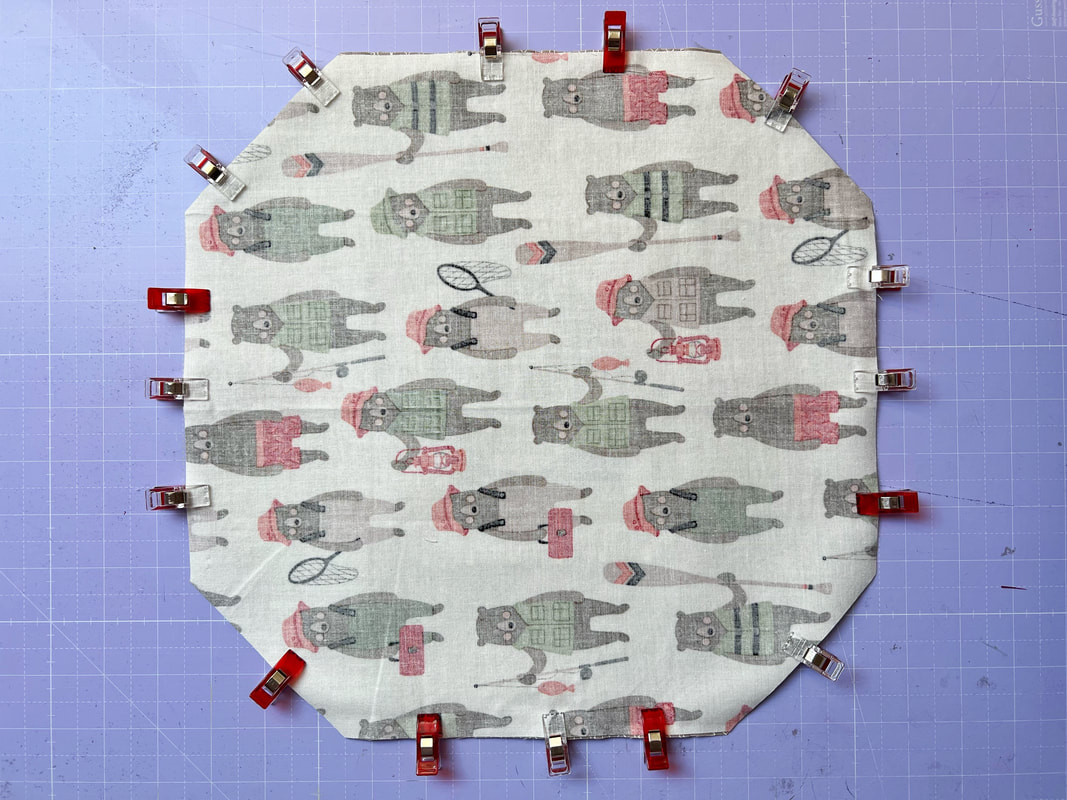
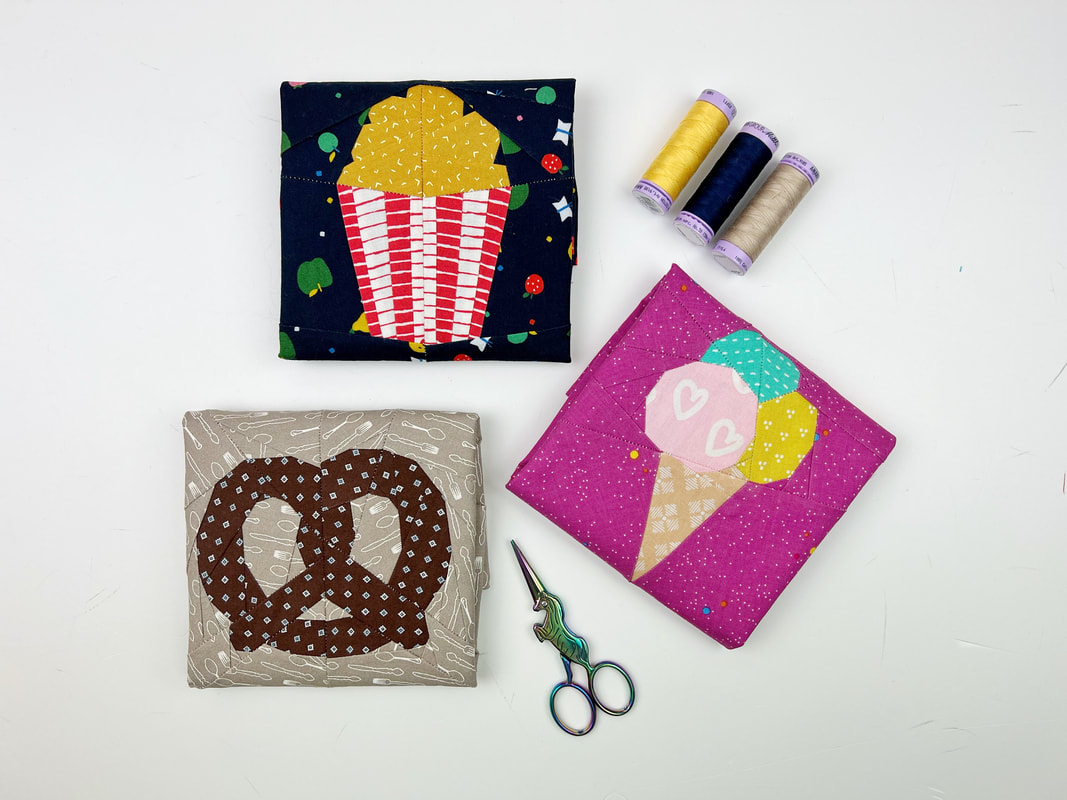
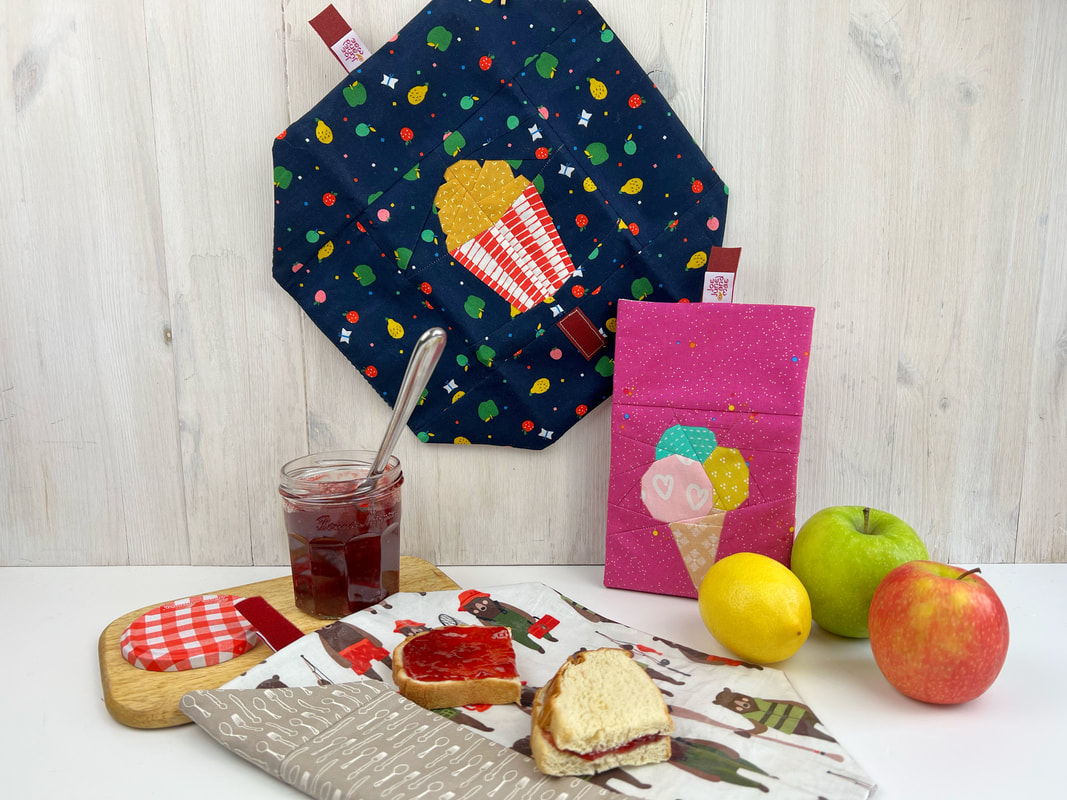
Now we all want to save plastic, no question about that. The easiest way to do this, is to start in our own home. I don't even want to think about the amount of little bags or foil I used to quickly wrap my kids lunch. Many years ago I made reusable lunch wraps and they are still in constant use. I experimented with lots of different materials and patterns for reusable sandwich wraps over the years. Here, I 'll show you my sandwich wrap pattern, that I like best at the moment .... and it totally helps, that it is SUUUUPER cute. I'm sure you can't wait to start sewing, so how to make a reusable lunch wrap? It's a lot easier than you think. Reusable lunch wrap pattern : please read through the instructions first ( finished size aprox. 12"x 12") Tools needed: -sewing machine -cutting mat/ rotary cutter and acrylic ruler -pins or clips and iron optional tools to make your life easier: -spray baste -fabric glue pen for your foundation paper piecing Materials needed: -one of the food quilt blocks in size 6"x 6" (will be 6 1/2" square when sewn together) I used the pretzel, ice cream cone, and pop corn. - 2 strips of fabric for the side of the quilt block 3,5"x 6,5" - 2 strips of fabric for the top and bottom of the quilt block 12,5"x 3,5" - 2" velcro strip (I cut the 'hooked' part a little shorter 1,5") for the lining: - a piece of fabric 12,5"x 12,5" - Heat'nBond vinyl 12,5"x 12,5" (or a piece of clear vinyl 12,5"x 12,5") Step 1: Sew the quilt block of your choice in size 6"x 6" (the finished block will be 6,5"x 6,5" when sewn together, that includes the 1/4" seam allowance) Then cut the fabric strips for the sides and top and bottom of the quilt block. What fabrics can I use for reusable snack bags and sandwich wraps? You want fabric that is water resistant or waterproof. That's the reason why I used Heat'nBond Vinyl to cover the lining fabric. You could also use oilcloth ( typically cotton) that's coated in linseed oil to make it waterproof. You could also use beeswax covered fabric or coat your fabric with beeswax yourself. Step 2: Attach the side strips of fabric and the top and bottom strip to the quilt block. Sewing the side strips on first and then the other two fabric strips. Square off the sandwich wrap top with your ruler, so it measures 12,5"x 12,5". Then cut the lining piece of fabric and the Heat'nBond to 12,5"x 12,5". Step 3: Attach the Heat'nBond to the lining fabric. This is done by peeling off the paper of the vinyl and putting the 'sticky' side towards the fabric. You can still correct it, it will only melt into the fabric once you press it. lay the paper on top and press it with medium heat. If you're using clear vinyl, you just cut the vinyl the same size as the lining piece and lay it on top of the lining fabric. *HeatnBond Iron-On Vinyl contains no BPA or lead. However, Iron-On Vinyl does utilize a plasticizer, DID in the manufacturing process. At this time there is no data testing regarding Iron-On Vinyl on children's toys, bibs, food storage, etc. since this product was not intended for children. Step 4: Cut the VELCRO strips. I did cut the 'hooked' part to 1,5" and the velvet part a little longer to 2". Btw. here is a little fun fact about VELCRO that you probably didn't know. VELCRO was invented by a gentleman in Switzerland named George de Mestral in the 1950s. In Switzerland French is one of the official languages of the country. So VELCRO got its name from the French words “velour” (velvet) and “crochet” (hook), de Mestral created the iconic VELCRO® trademark to identify his brand of hook and loop fastener. Stitch the 'hooked' part of the VELCRO right underneath the quilt block in the center of the bottom fabric. Stitch the 'velvet' part to the center of the top edge of the sandwich wrap, with the velvety side facing up. (I placed a small 'JoeJuneandMae' logo underneath it as well) Step 5: Place top fabric and lining fabric of your lunch wrap, right sides together and pin or clip in place. (if you're using clear vinyl, the vinyl will now be placed between lining and top of your lunch wrap.) Then cut off the corners at a 45° angle. Measure 2" from the corner edge and align your clear ruler at the 45° line, as shown in the photo. The long side of the cut off triangle will be 4". Then pin or clip the corners in place as well. Step 6: Stitch all the way around it with 1/4" seam allowance leaving a 3" opening on one side for turning your sandwich wrap later. Before turning the sandwich wrap inside out, clip the corners carefully , this gives you nice sharp edges when turned inside out. Now turn the lunch wrap inside out and push out the edges carefully. Step 7: Fold in the seam allowance at the opening and stitch close with a very small seam allowance. And here we go ... You are all done and you are now the owner of the cutest reusable sandwich wrap. Aren't these the best? Which one is your favorite? I know you want to pull out all your cute fabrics right now and start sewing a reusable lunch wrap right away, am I right? Happy sewing Ingrid xx
2 Comments
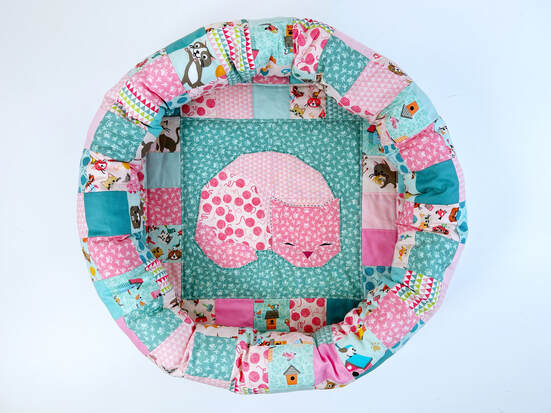
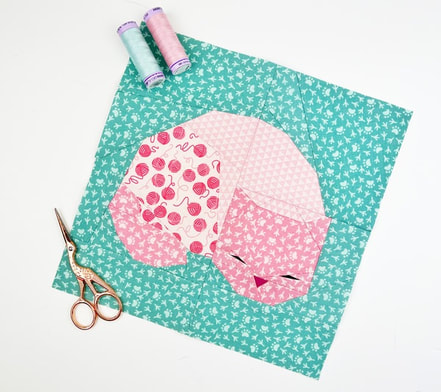
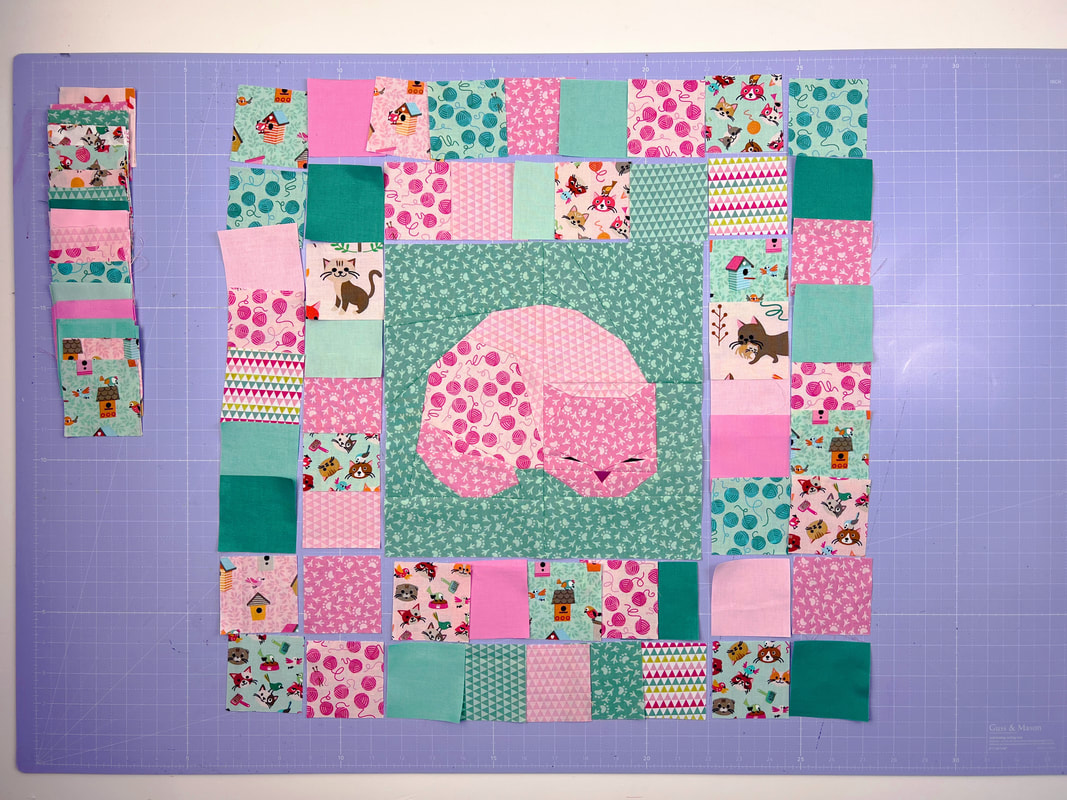
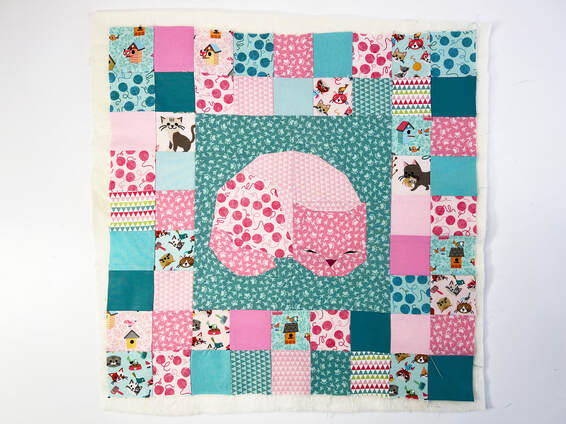
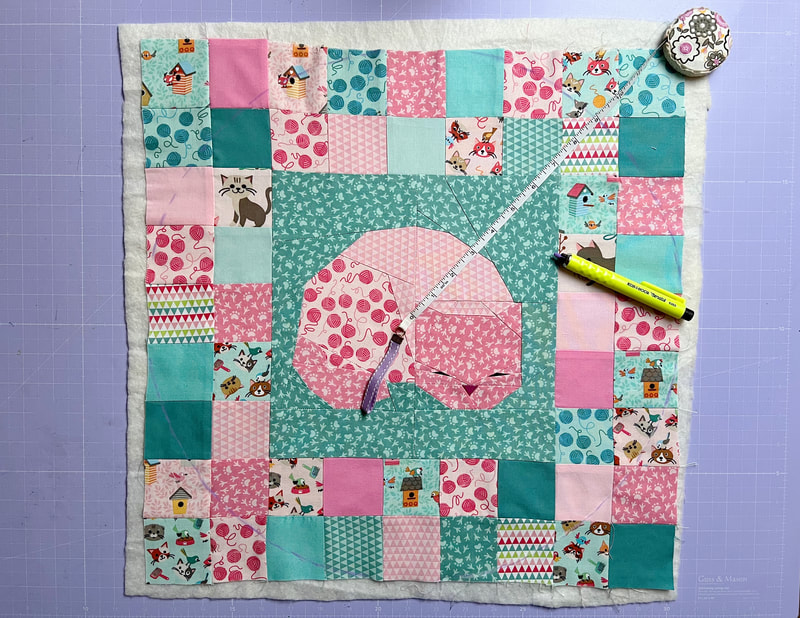
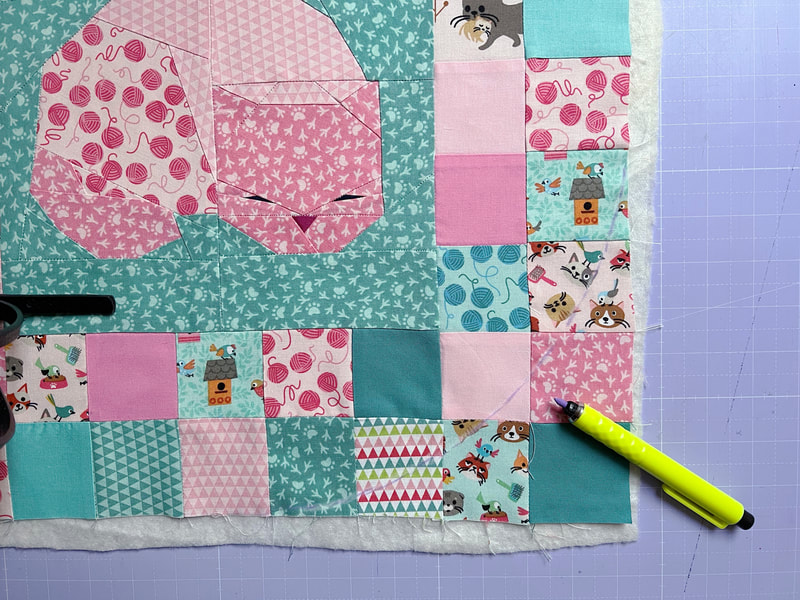
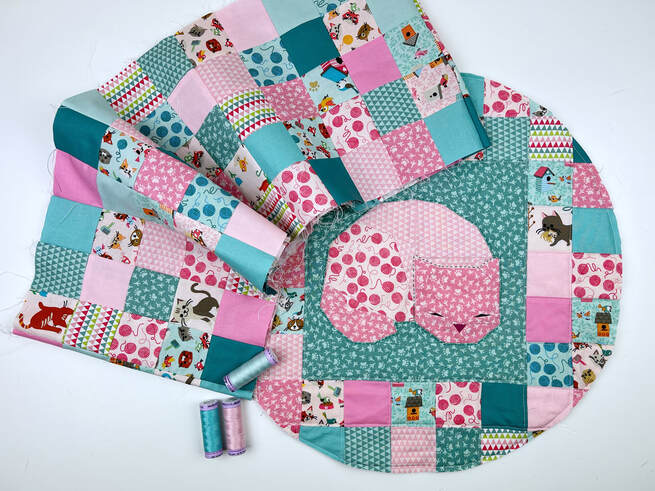
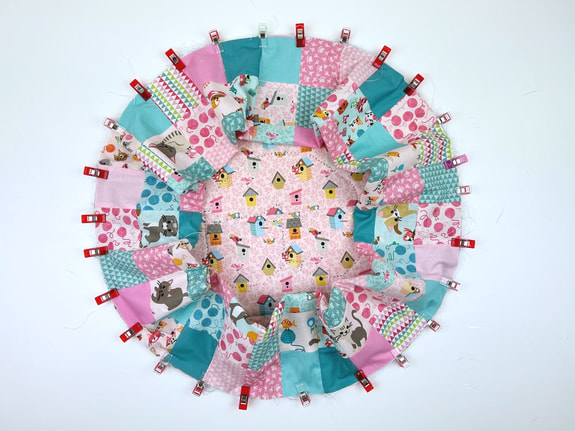
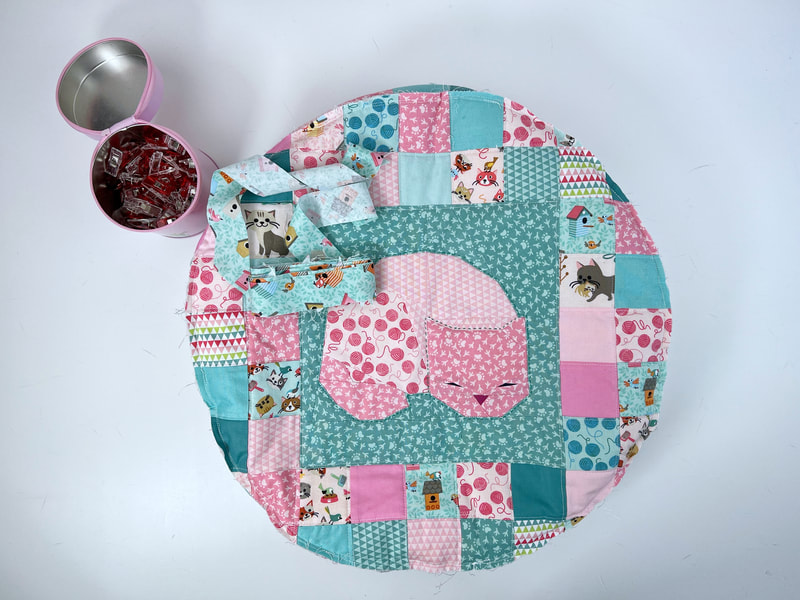
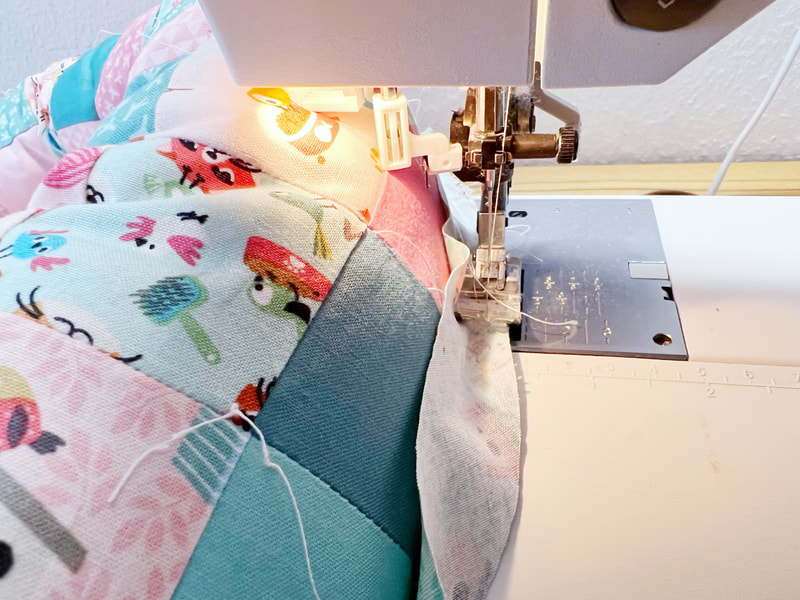
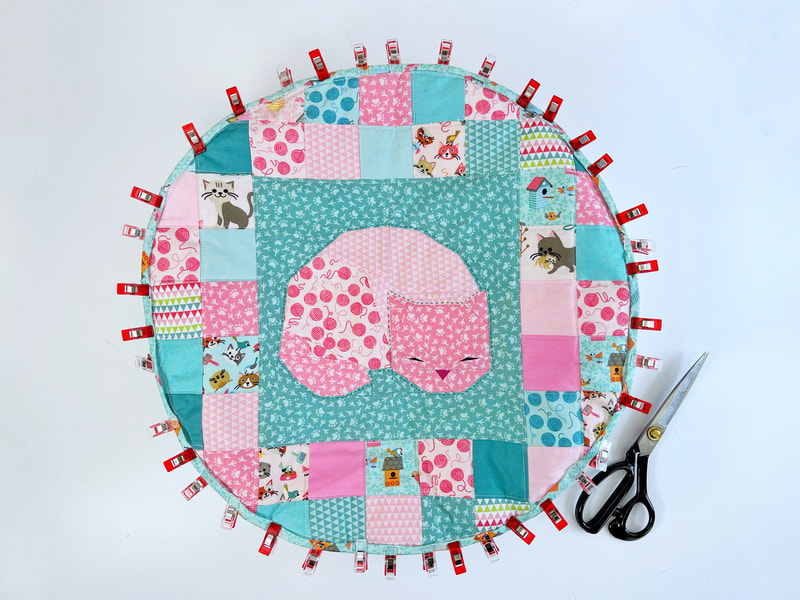
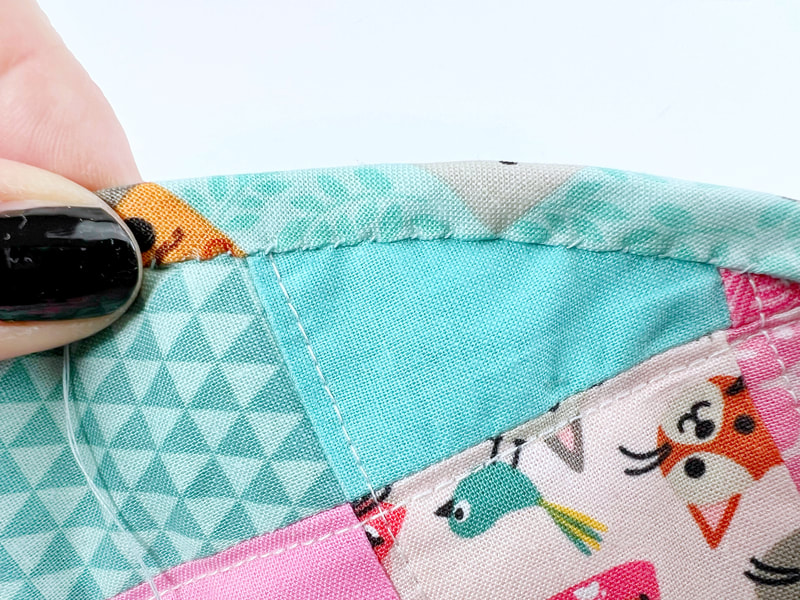
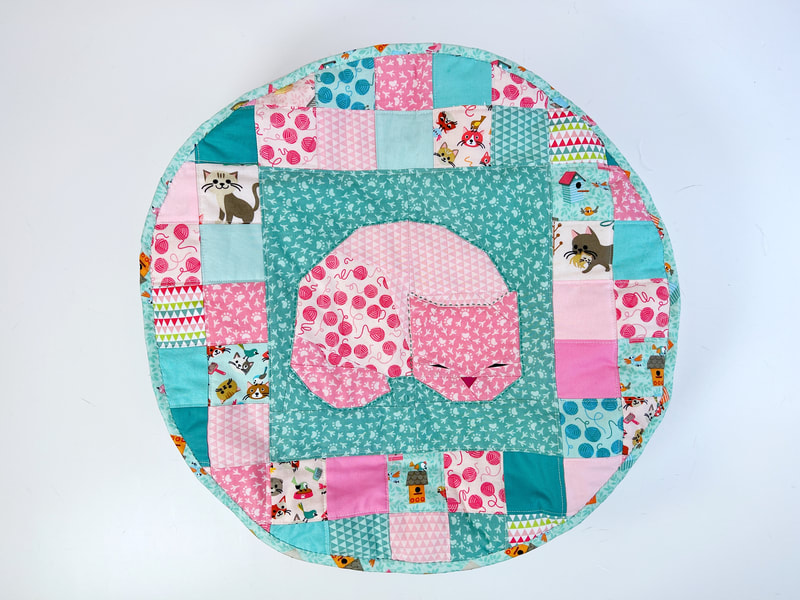
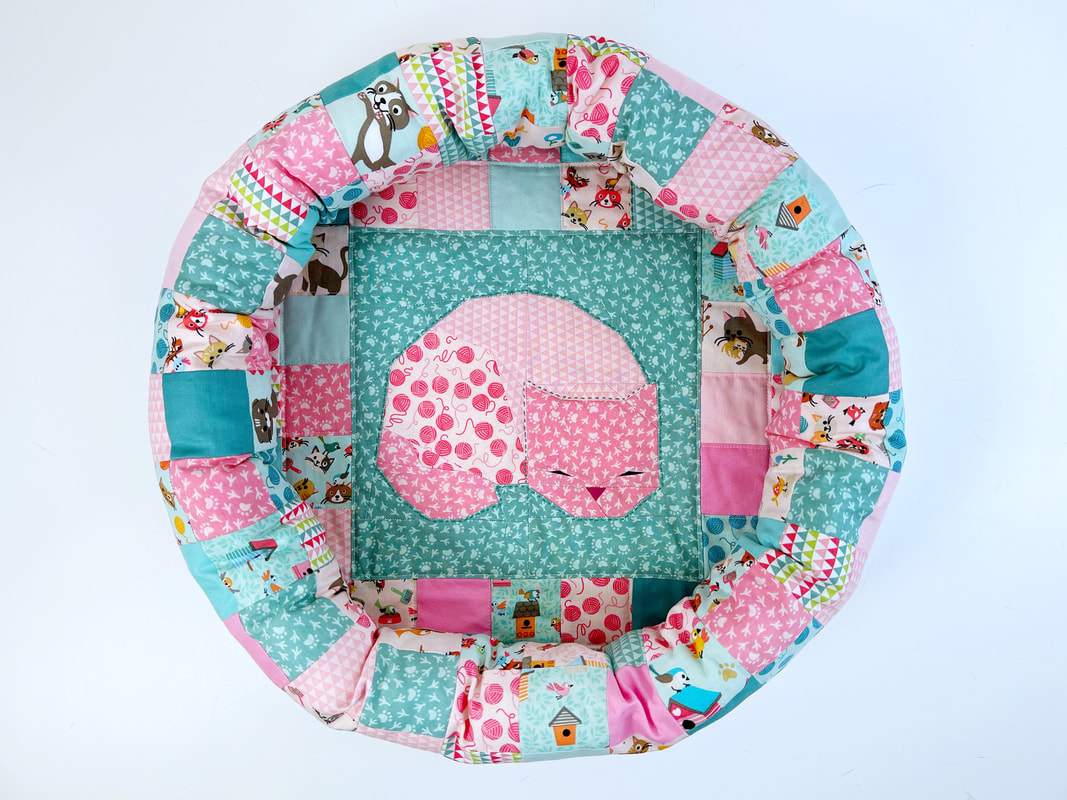
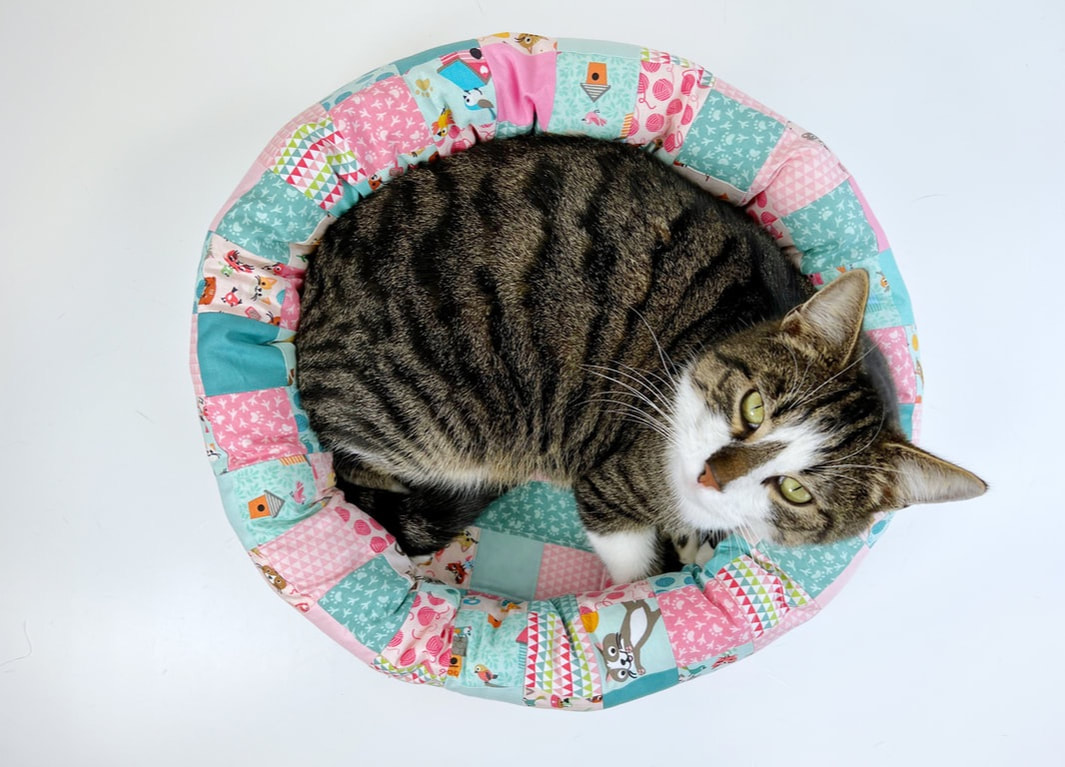
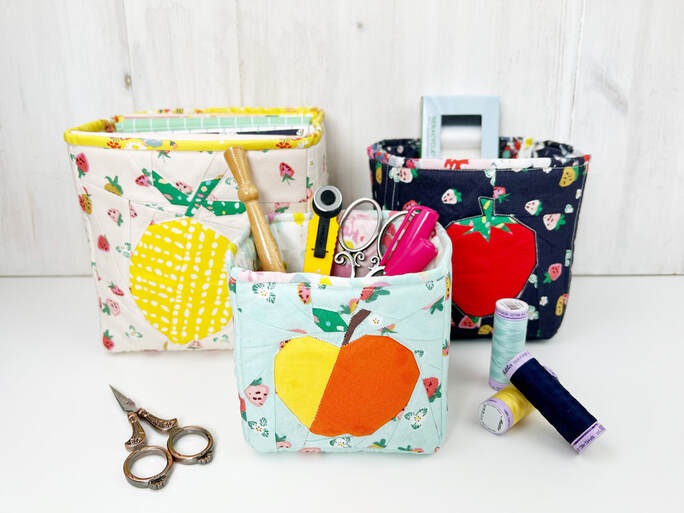
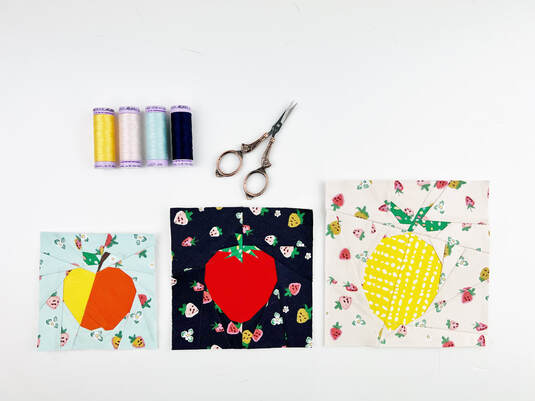
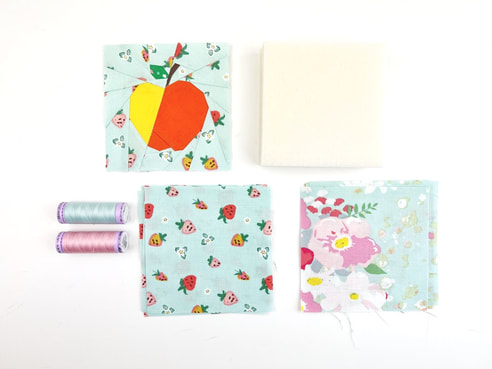
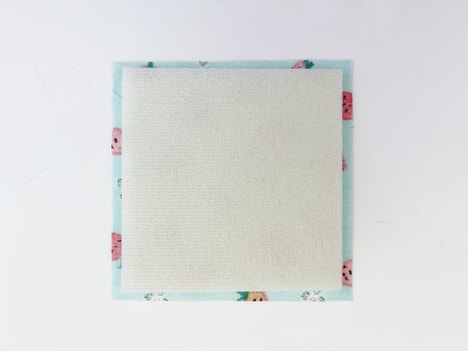
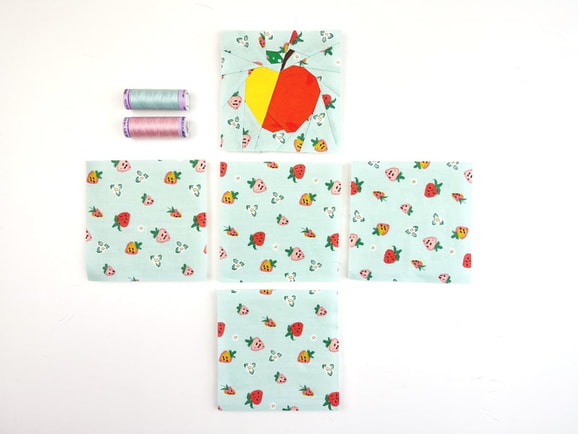
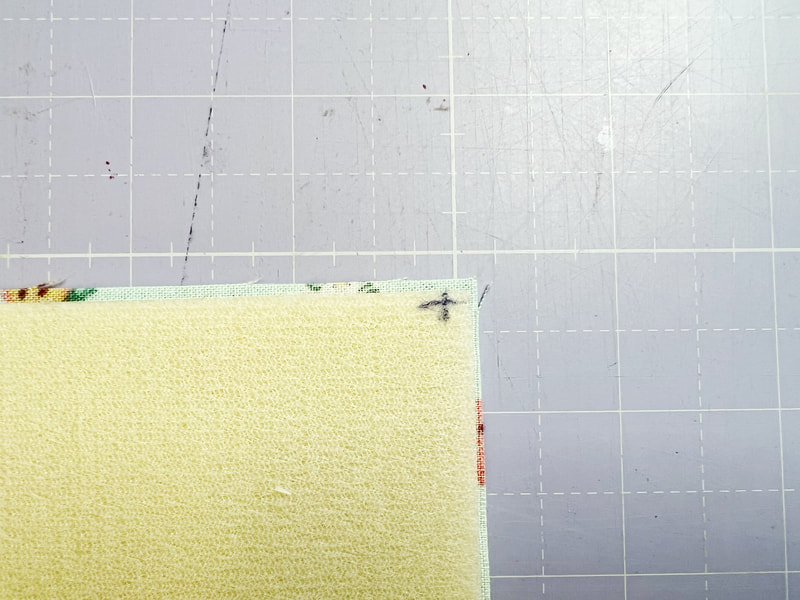
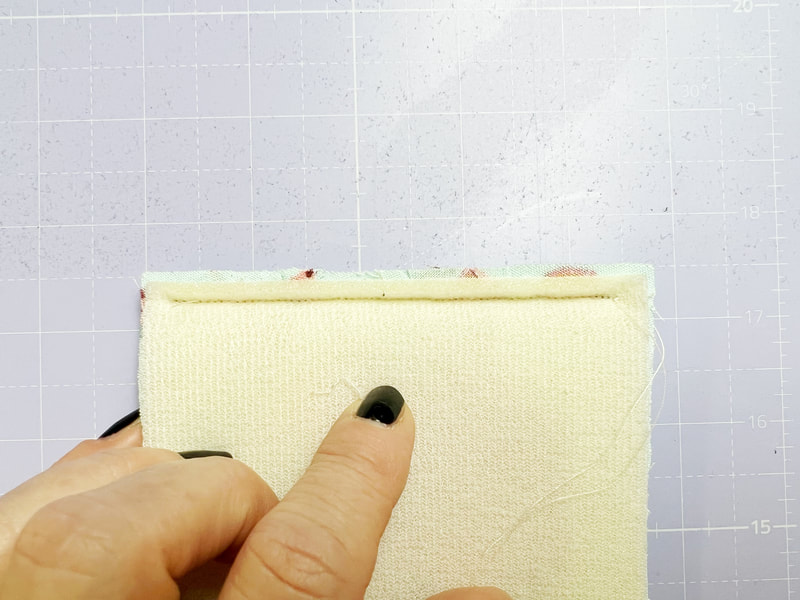
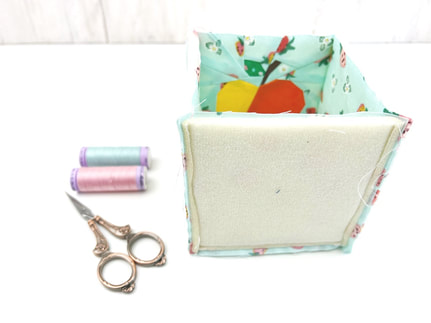
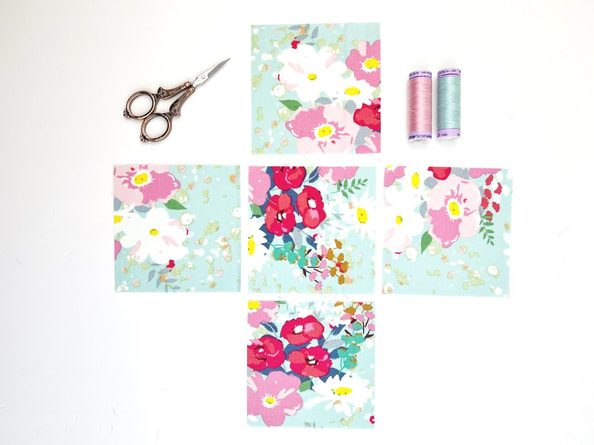
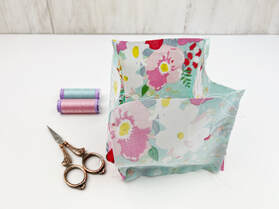
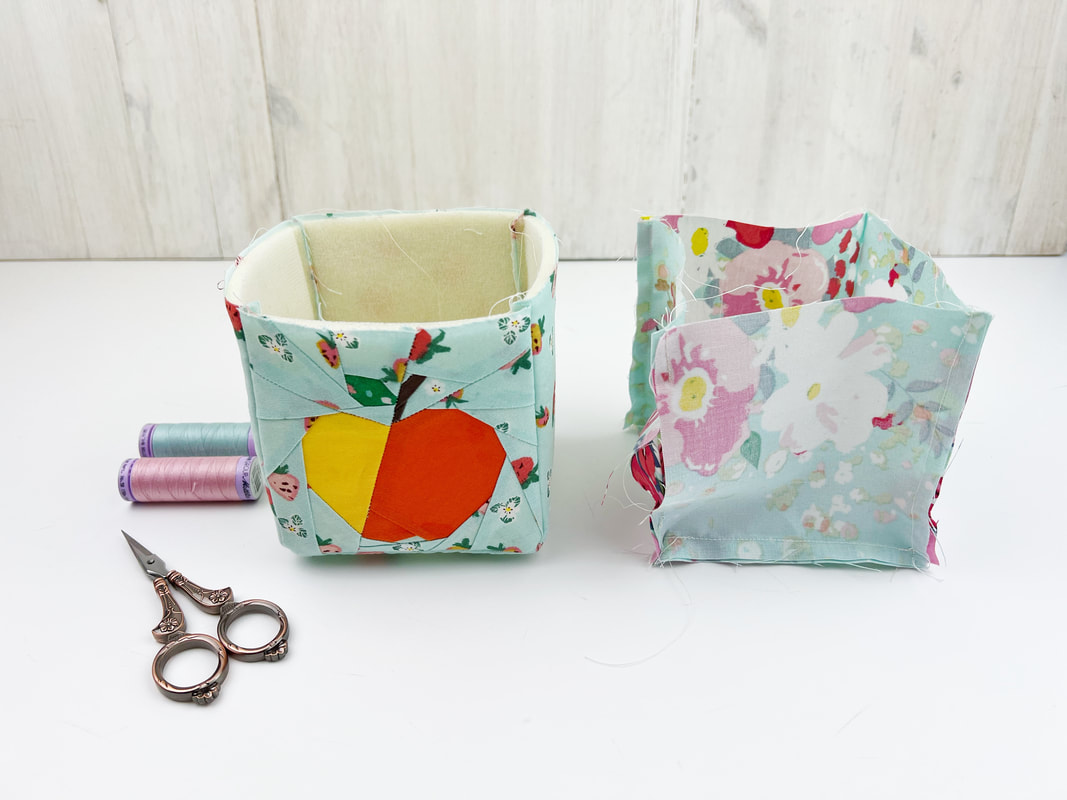
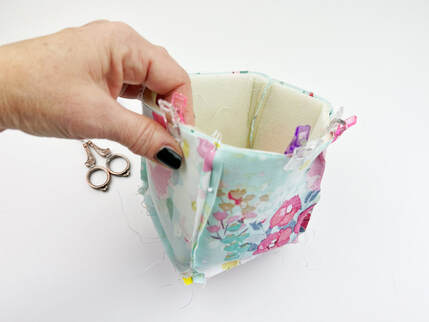
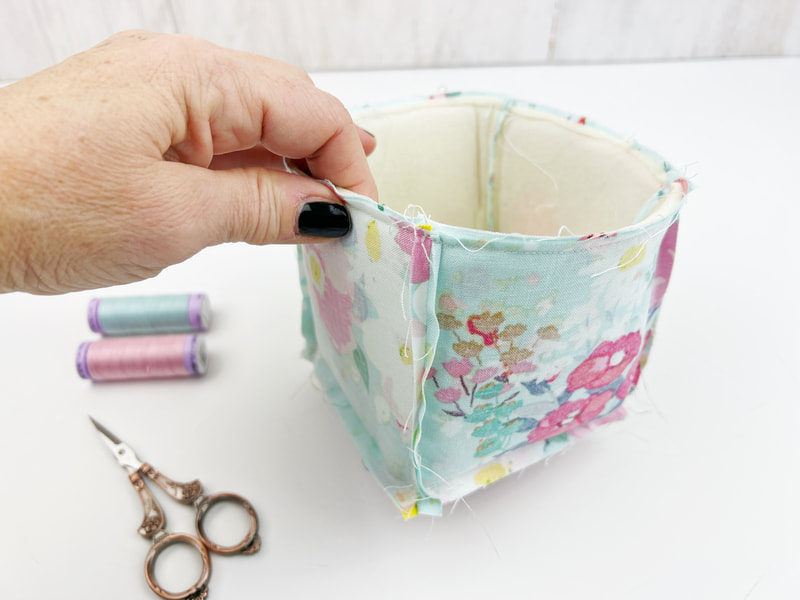
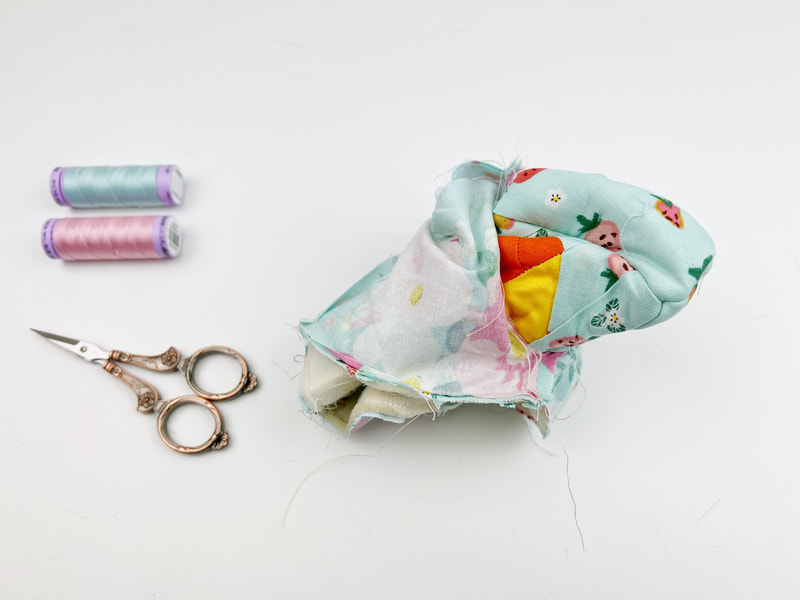
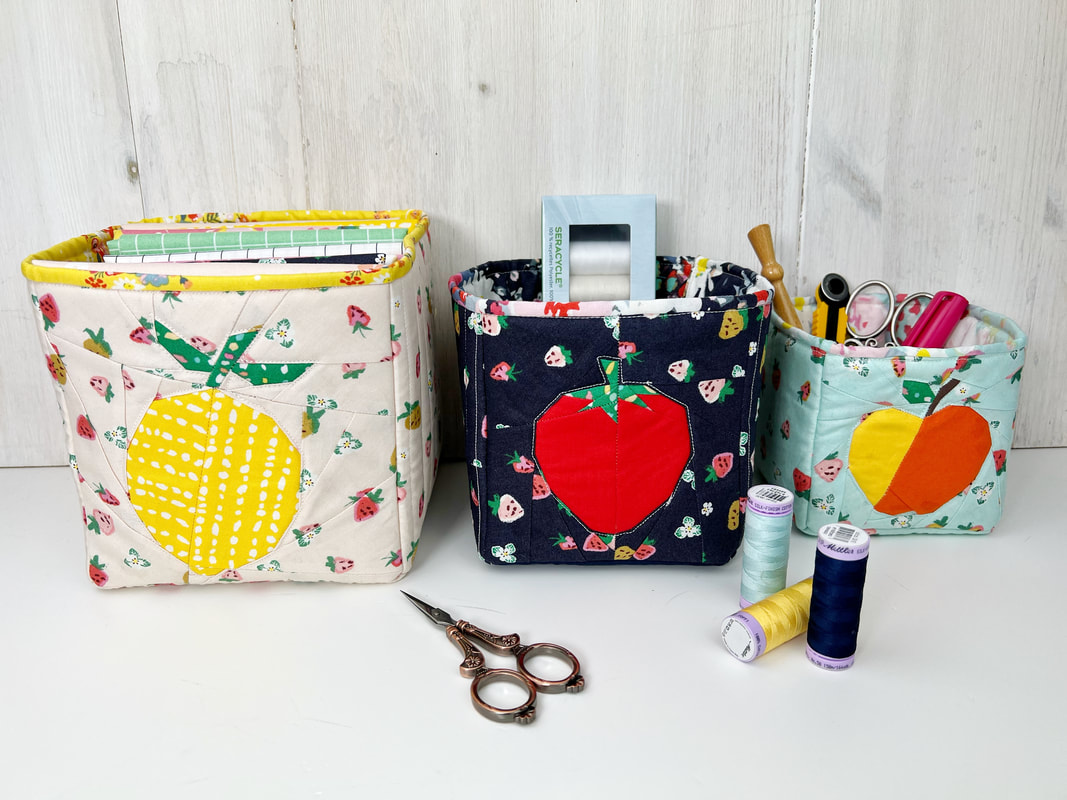
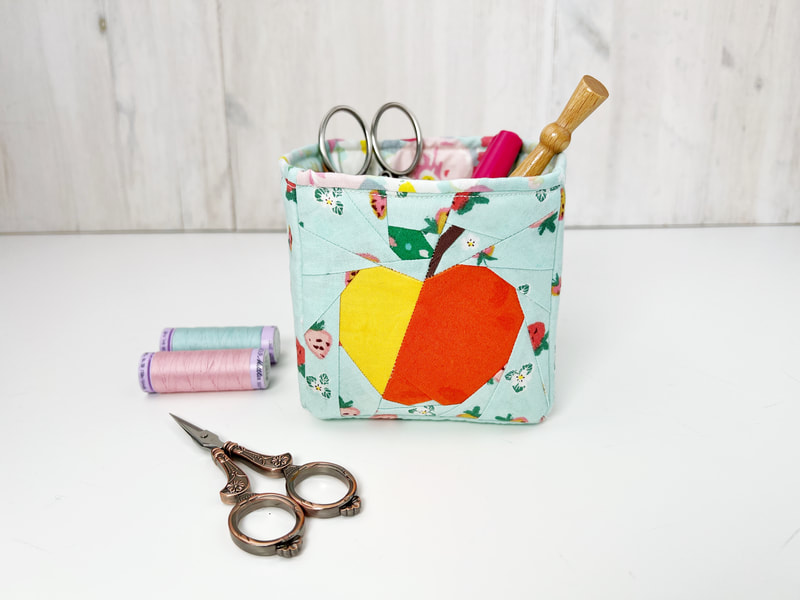
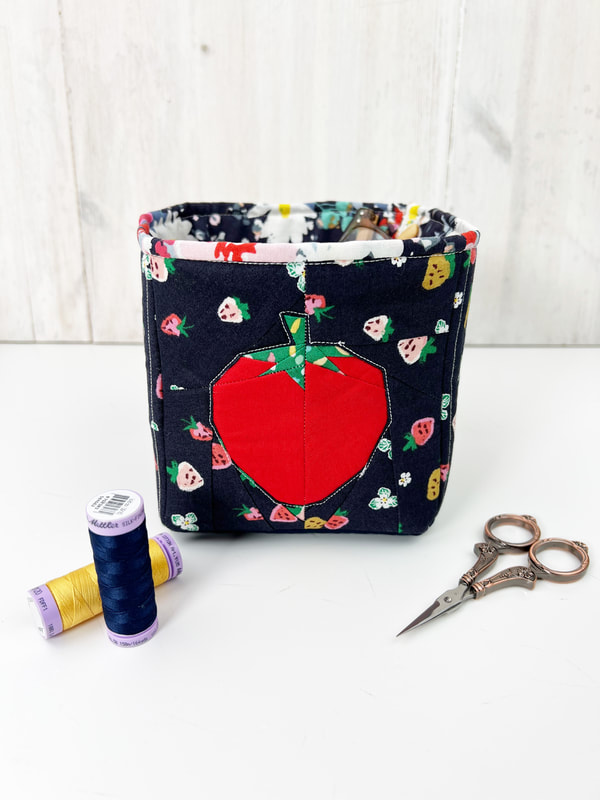
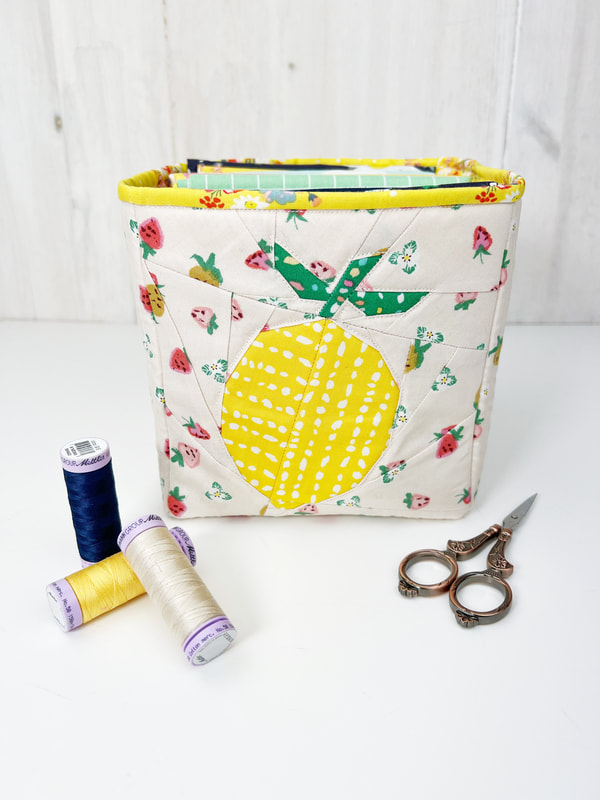
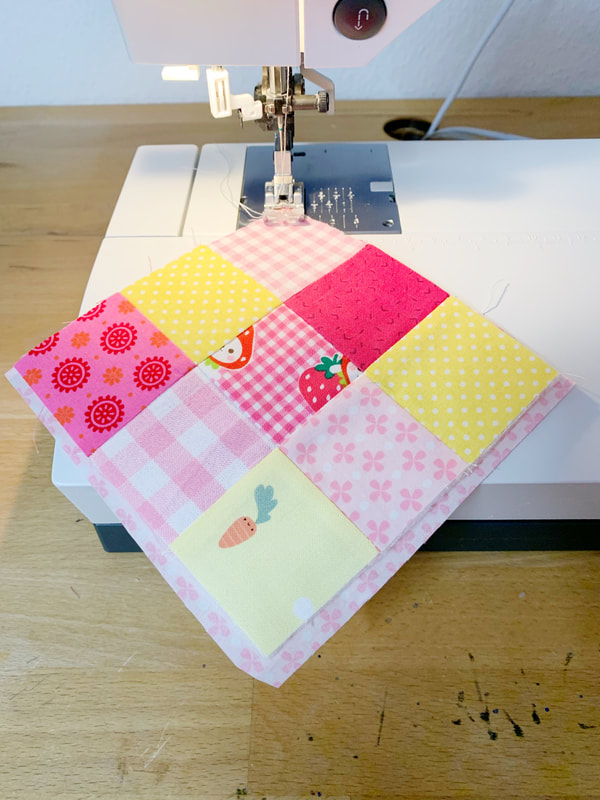
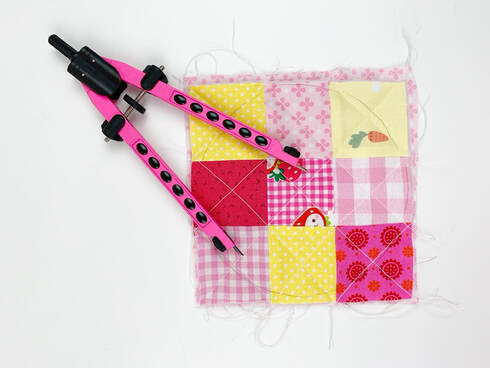
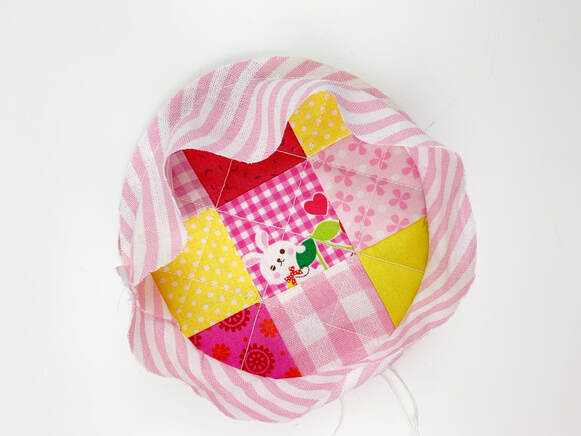
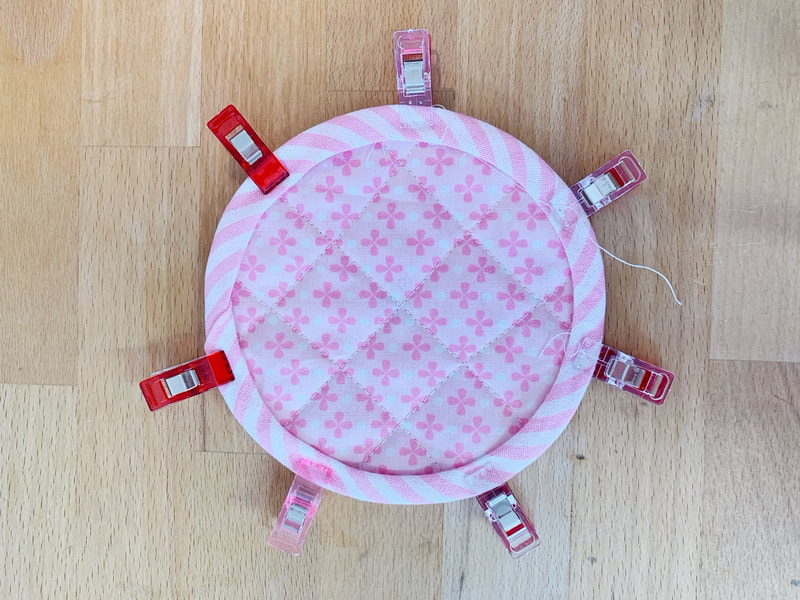
There is something to be said about quilters and cats, right? At least it seems like every quilter has a cat, or is it just me? This super adorable fabric line called 'Cats Meow' from Riley Blake Designs had me thinking about my cats immediately. I mean doesn't a quilter's cat , deserve a quilted cat bed? I sure would think so. So here we go, I made the cutest quilted cat bed pattern... How to sew a quilted cat bed? Quilted Cat Bed: please read through the instructions first ( finished size aprox. 18" diameter and 4" high) Tools needed: -sewing machine -cutting mat/ rotary cutter and acrylic ruler -pins or clips and iron optional tools to make your life easier: -spray baste -fabric glue pen for your foundation paper piecing Materials needed: - the sleeping cat quilt block in size 10"x 10" (will be 10 1/2" square when sewn together) or the Cat's Back or Yarn Ball quilt block or any other quilt block of your choice. - 56x 2.5" squares for the bottom of the cat bed to surround the quilt block (note, you will cut off 4 of the corner squares when cutting the bottom of the cat bed into a circle, but it's easier to sew with these 4 corner squares in place) - 135x 2.5" squares for the edge of the cat bed. - a piece of fabric about 18"x 18" for the bottom backing of the cat bed - a piece of batting about 18"x 18" (I used a thicker wool batting I had left over from a quilt) - stuffing for the edge of the cat bed - a 56" bias binding strip 1 1/4" wide Instructions: Step 1: Sew the sleeping cat quilt block in size 10"x 10". The quilt block will be 10.5"x 10.5" when sewn together, this includes the 1/4" seam allowance. Step 2: Cut all the fabric squares. There are 56 fabric squares around the sleeping cat quilt block for the bottom of the cat bed and another 135 fabric squares for the edge of the cat bed. (which we will get to later) Place the squares around the quilt block to your liking, I like to place them totally random, and as you can see, I love fussy cutting. So as with some of my other sewing projects I used parts of these super adorable prints to highlight my fabric squares. Start by sewing the squares together into rows. Begin with the inner squares and then do the outer squares. I like to sew the squares at the top and bottom of the quilt block together first and attach them to the quilt block, that's 5 blocks at the top and 5 at the bottom. Then sew the squares at the sides together into a row, that's 7 squares on each side and attach them to the quilt block. Repeat for the blocks of the outer row. Step 3: Place the piece of fabric for the bottom backing in from of you, with the wrong side facing you. Place the batting on top of the back piece of fabric then add the patchwork top of the cat bed bottom on top of the batting, the right side facing you. Essentially you have a 'quilt sandwich', backing, batting and quilt top. I like to use spray baste (ex: Odif Temporary Adhesive Spray) to keep the layers together. But you can just as easily use safety pins or use basting stitches. Step 4: Draw a circle on the square. I measured 9" from the center of the square ( as shown in photo 1) and drew a circle on the square for the bottom of the cat bed. Sew along that circle for extra support. Now quilt the bottom of the cat bed to your liking. I did some hand quilting around the shape of the cat in the sleeping cat quilt block, and added some straight line quilting to the squares. Then cut the bottom of the cat bed along the circle line that you drew/sewed onto the square. My circle ended up being a little less than 18" diameter through the quilting. Step 5: Sew the squares for the cat bed edge into one long rectangle of 5 squares high and 27 squares long. (it should now be 10" high and 54" long) Again I placed the squares totally random, it's up to you, just let your creativity run wild. Then fold the rectangle for the edge in half, right sides together so the two short ends align and stitch them together. You now have a circle for the edge of the cat bed. Then fold the rectangle in half lengthwise, wrong sides together. This will be the edge 'tube' of your cat bed. Step 6: Clip the 'tube' rectangle of your cat bed edge to the bottom of the cat bed. Right sides together to the right side of the bottom of the cat bed. (as shown in the photo, not the quilted top!) Stitch in place with a 1/4" seam allowance but leave two 3" openings for stuffing your 'tube'. If your 'tube' rectangle and base are not 100% the same length, it's not a problem at all. Let the fabric gather a little bit as you sew. This will not be visible at all after you stuffed the edge of the cat bed. Leave the two 3" openings on opposite sides of the tube. This makes stuffing the tube easier. Stuff your tube pretty full, as stuffing tends to settle with use. Then sew the two gaps closed. Step 7: I like to finish the inside seam of the cat bed with a bias binding. If you want, you could also just use pinking shears and cut along the edge. This seam or edge won't be visible, since it's under the edge tube. I personally think a bias binding just gives your cat bed the deserved finishing touch. Clip or pin the bias binding, right sides together, in place. I did this from the 'tube' side. So when you fold the binding over, you have more room to sew it in place. Fold over the beginning of your binding for a 1/4". Then stitch the binding all around with 1/4 " seam allowance, when you get to the end, just let it overlap. Step 8: Fold over the binding towards the 'cat' side and clip or pin in place. Then hand stitch the binding to the bottom of the cat bed. It's very tight to machine stitch here, since the 'tube' is already stuffed. It's much easier to sew the binding by hand. Once you're done turn the cat bed, so the binding edge is tucked in on the inside of the cat bed. The clean finish is now on the outside of the cat bed. And there we go, it's all done. And I think you have to agree, this is the cutest quilters cat bed ever, right? Thank you so much Riley Blake Designs for the opportunity to design this cat bed pattern and this small quilt block pattern series to match it. Thank you for supplying the super pretty fabric series 'Cat's Meow' designed by Shawn Wallace, that I used in this quilt pattern series. Isn't this cat bed an absolute jewel? I'm sure any cat would just love to cuddle up inside this beauty. Ohh hey, go figure, my cat just did... :-) Happy sewing.... Ingrid xx Do you love boxes and baskets as much as I do? I have to admit I am a little bit obsessed. I love storing things in little boxes, baskets and containers, especially if they're square shaped. So I decided it's high time I made a free pattern for some little square fabric boxes. When I saw this new fabric line from Minkie Kim for Riley Blake Designs I thought fruits, fruits and some more fruits. And these delicious fruits needed to go somewhere special, don't you agree? So I made some cute little square fabric containers. These are really easy to make. Fabric square boxes: please read through the instructions first Tools needed: -sewing machine/ thread and fabric -cutting mat/ rotary cutter and acrylic ruler -pins or clips and iron optional tools to make your life easier: -spray baste -fabric glue pen for your foundation paper piecing Materials needed: box sizes: S - 4"x 4"x 4" , M - 5"x 5"x 5", L - 6"x 6"x 6" ( width x hight x depth) S: quilt block apple in 4" size (will be 4 1/2" when sewn together) 4 squares 4 1/2" of fabric for exterior 5 squares 4 1/4" of 'soft and stable' @byAnnie or Pellon Fusible Flex foam stabilizer 5 squares 4 1/2" of fabric for lining. M: quilt block strawberry in 5" (will be 5 1/2" when sewn together) 4 squares 5 1/2" of fabric for exterior 5 squares 5 1/4" of stabilizer (see above) 5 squares 5 1/2" of fabric for lining L: quilt block lemon in 6" (will be 6 1/2" when sewn together) 4 squares 6 1/2" of fabric for exterior 5 squares 6 1/4" of stabilizer (see above) 5 squares 6 1/2" of fabric for lining 1. Sew your apple quilt block ( size 4"x 4") and cut your fabrics and foam stabilizer according to the measurements given above.. 2. Add the foam stabilizer to your fabric squares. If you have fusible stabilizer you will need to iron it on your squares. If you're using 'soft and stable' @Byannie like me, you can attach it to your fabric squares with glue baste spray. Your foam stabilizer will be 1/8" smaller than your squares. 3. Assemble the exterior of your fabric square box. Place your squares as shown above. First start with sewing your apple quilt block to the center square. Before you start sewing, mark 1/4" cross from both edges at the corners. Start sewing at the point of the cross with 1/4" seam allowance, back stitch at the beginning and the end of your seam. Then sew the opposite square of your quilt block to the center square the same way. Then add the two side squares. Sew all 4 squares to your center square the same way. The center square will be the base of your fabric cube. Next you will need to lay the adjacent side pieces together (right sides together). And sew them the same way, with a 1/4" seam allowance, start right at the top, but stop 1/4" from the end. Repeat for all 4 sides till your cube is all sewn together, like shown above. 4. Sewing the lining of your fabric cube Place your lining squares the same way you placed your exterior squares. Stitch them together the same way too. Attach the side squares to the bottom square first. Then sew the side seams. Leave a 3" gap in one of the side seams for turning your cube later. 5. Put the square fabric box together. Turn your exterior box right sides out, but leave your lining cube the way it is, insides out. Now place your exterior box inside the lining box. Align the side seams and pin or clip in place, make sure the top edges align. Sew along the top edge with 1/4" seam allowance. To finish your fabric basket/ box, turn the box right sides out through the opening in the side seam of the lining. Press the lining at the top edge into the box. Do not press down the foam stabilizer, this way you get a cute trim of your lining fabric at the top edge. Stitch along the top edge with a small seam allowance. Thank you Riley Blake Designs for the opportunity to design these fruity quilt block patterns and for supplying the super pretty fabric series 'misty morning' designed by Minkie Kim that I used in this quilt pattern series. Happy sewing everyone Ingrid x
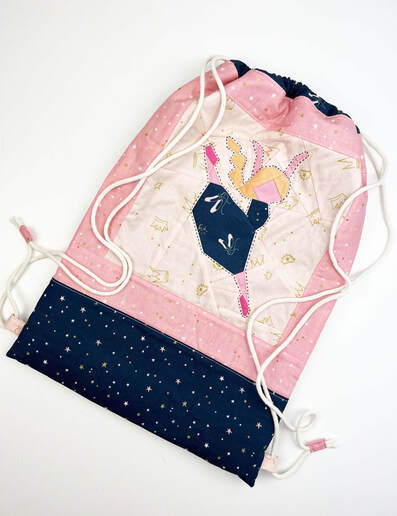
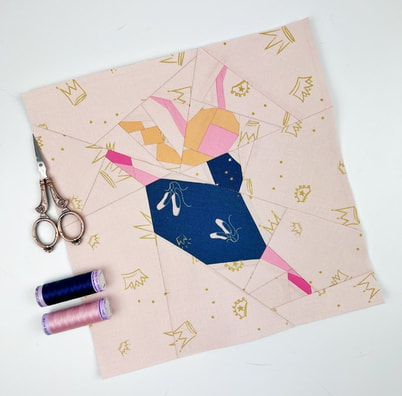
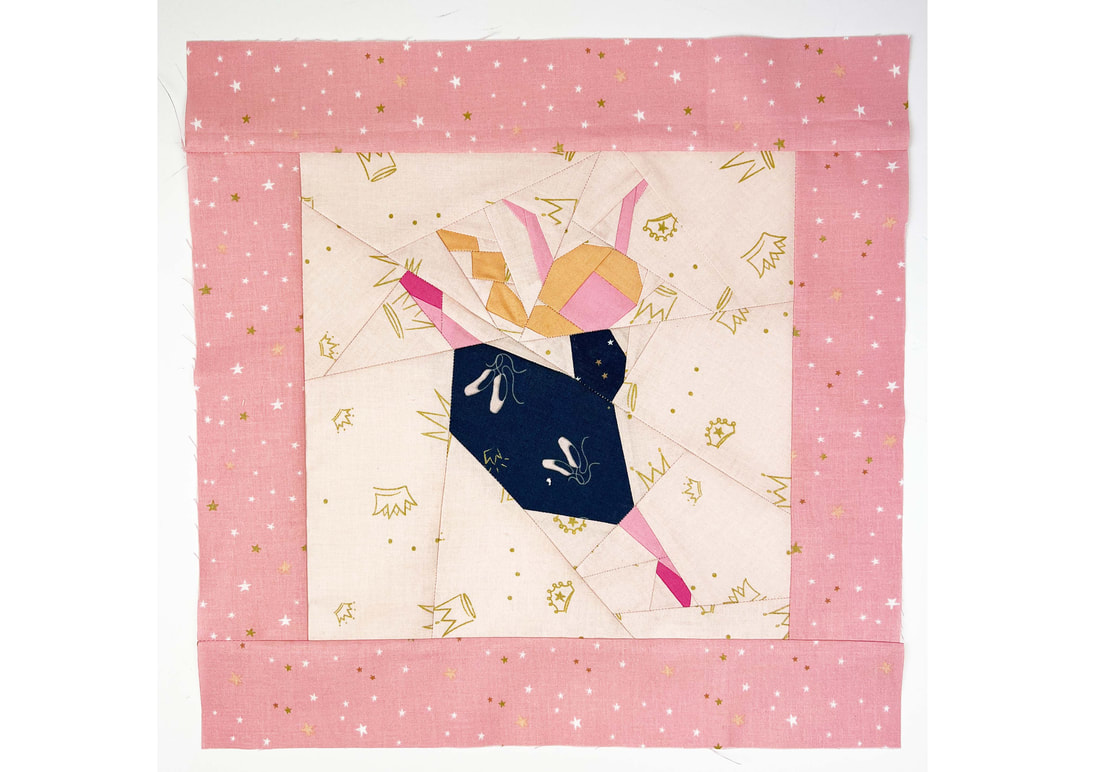
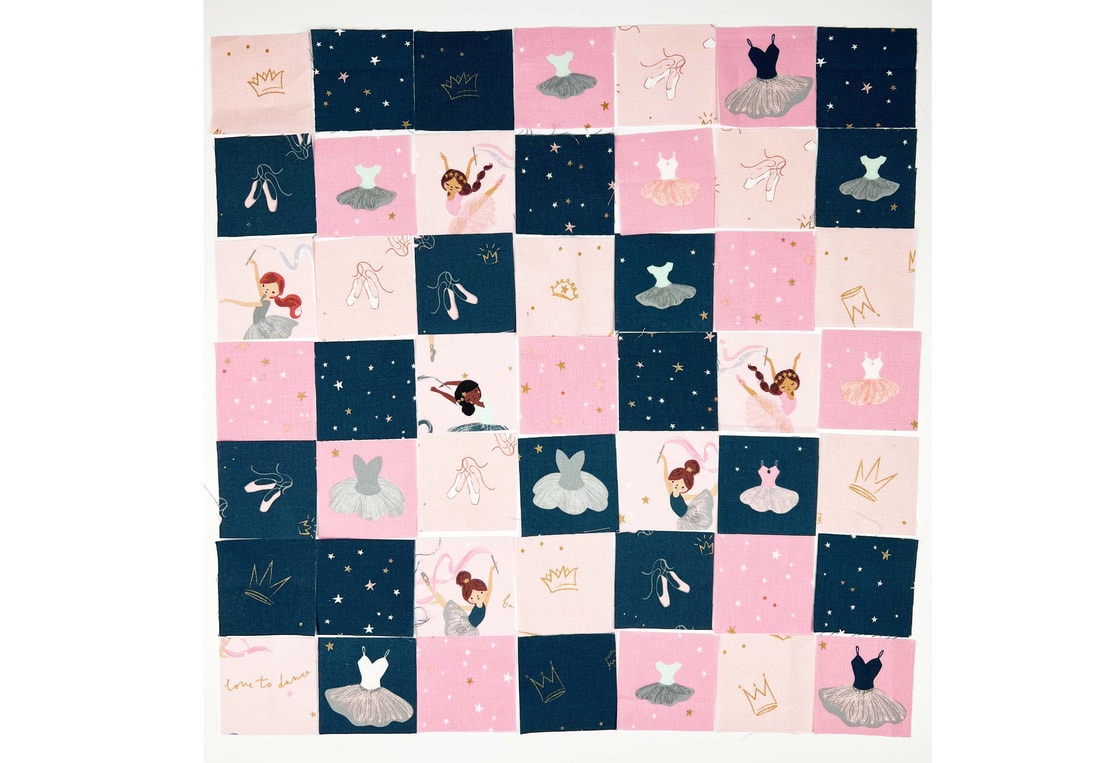
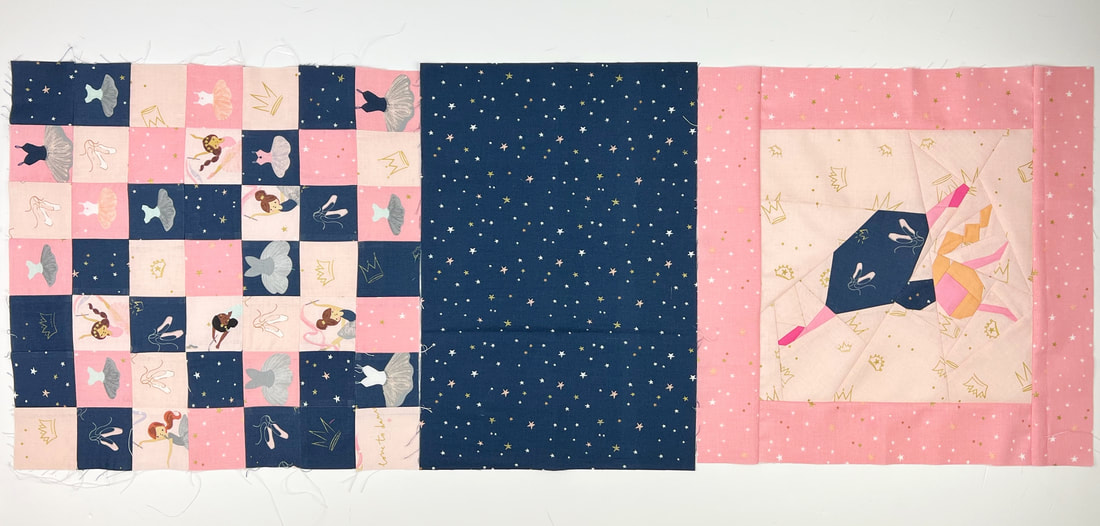
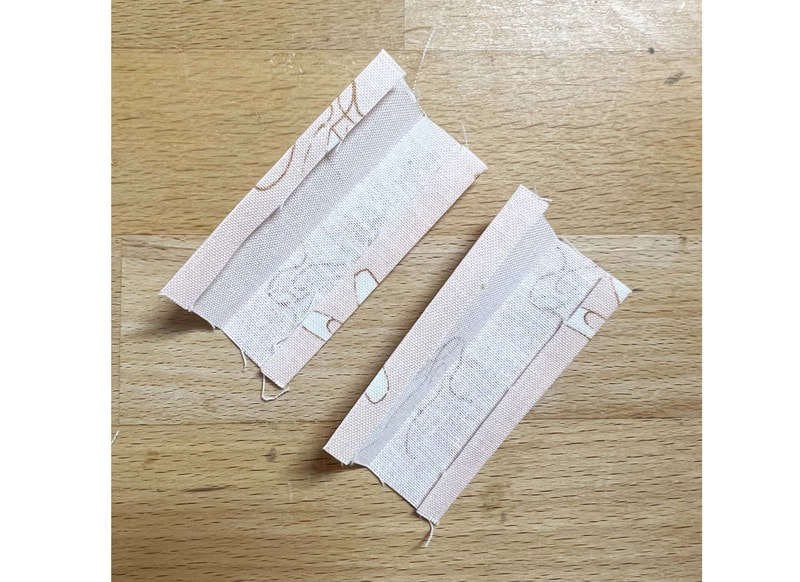
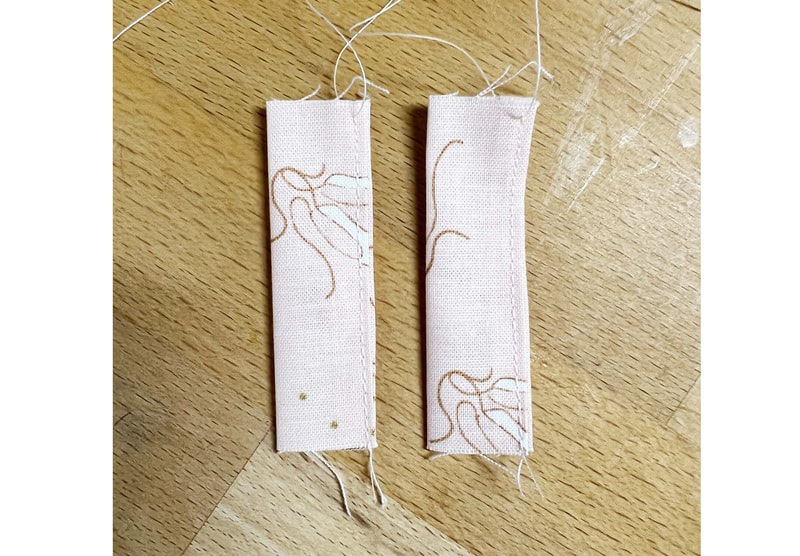
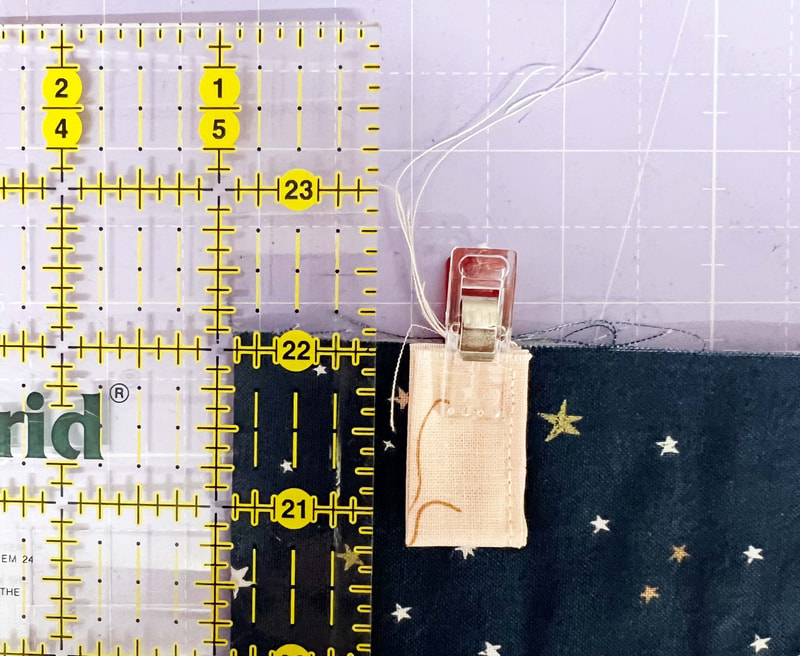
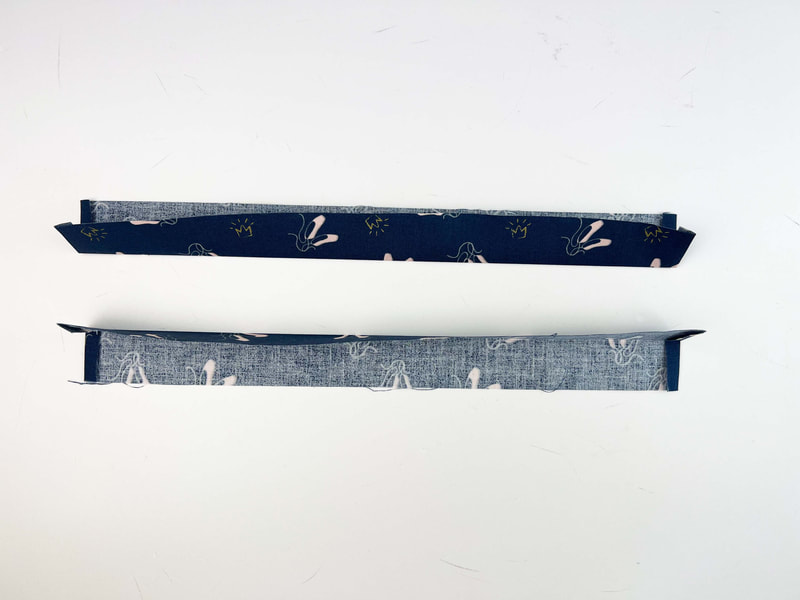
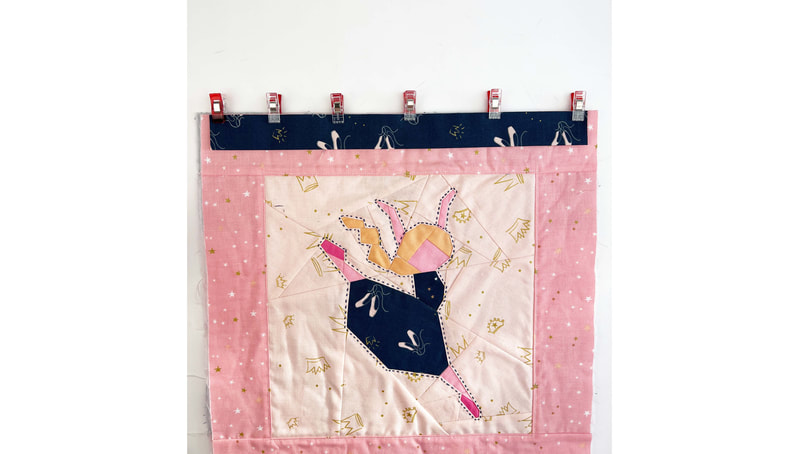
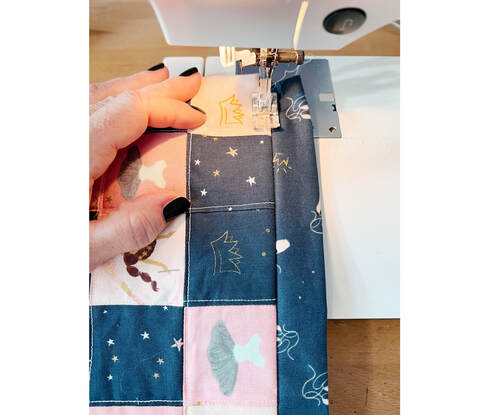
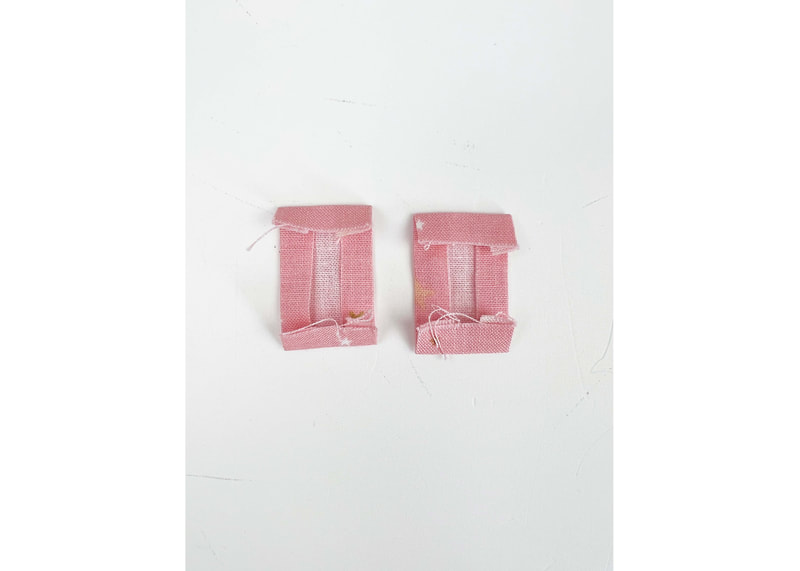
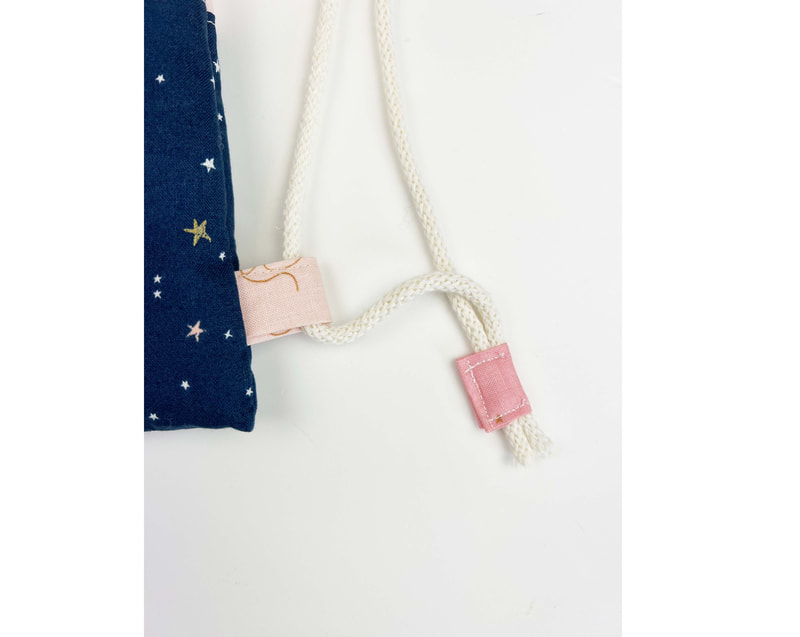
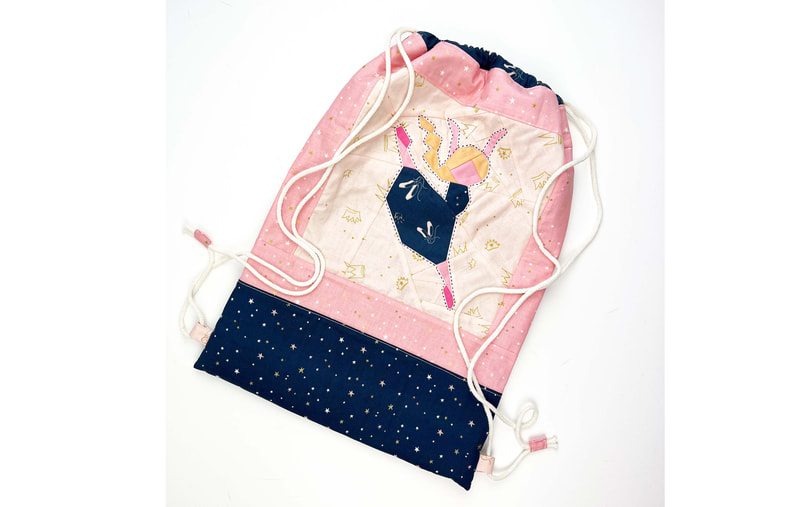
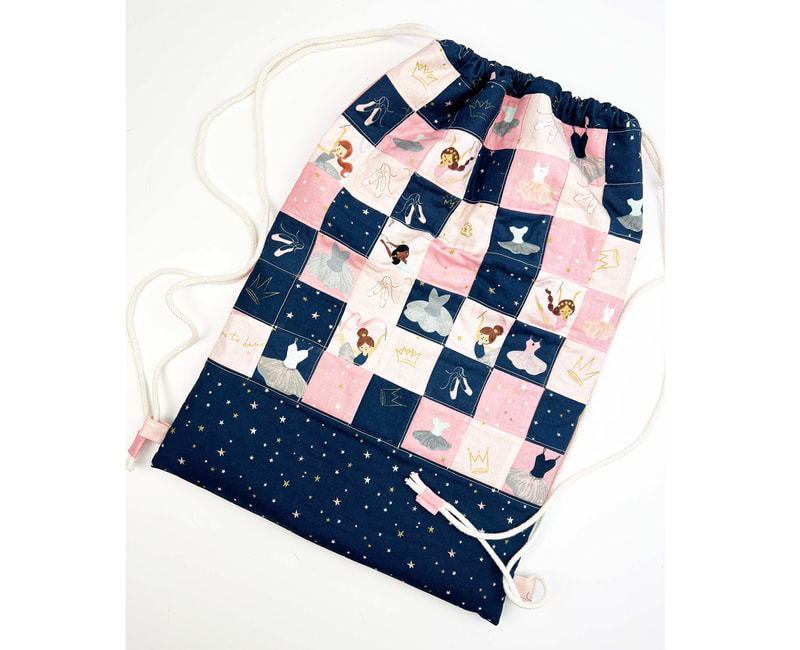
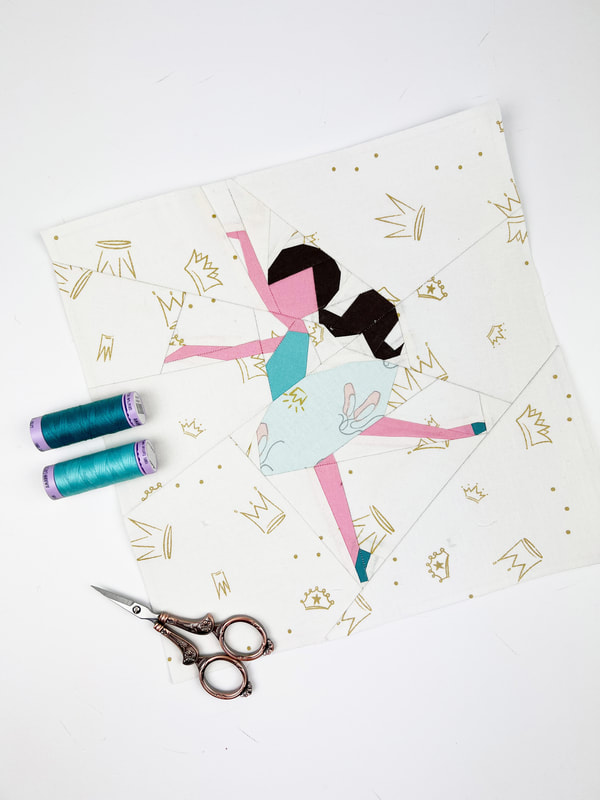
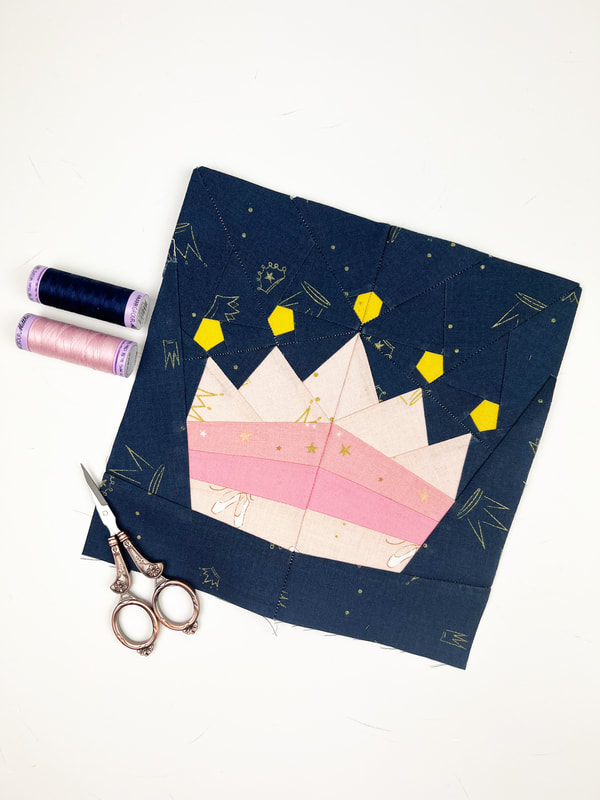
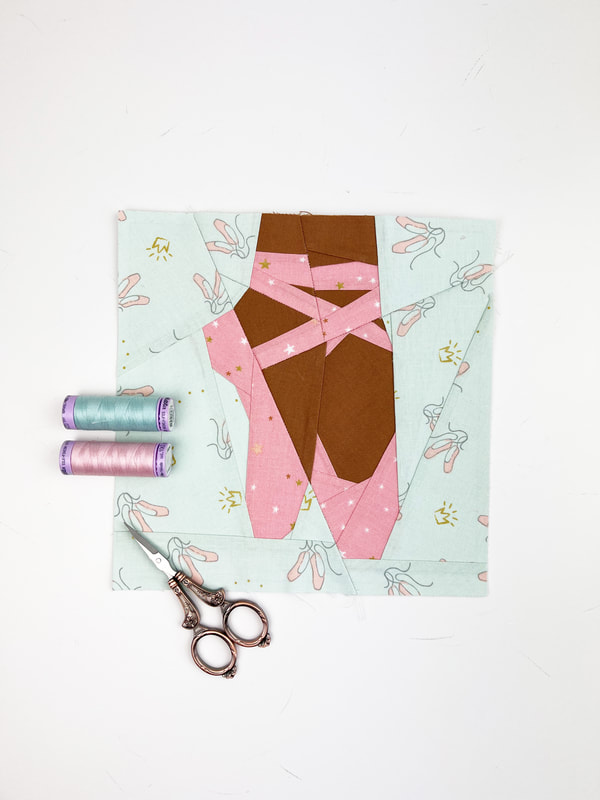
Do you have little dancer children? Do you want them to have the cutest ballet bag ever? You have come to the the right place. Riley Blake Designs just released this absolute perfect fabric series called 'Spin & Twirl' for stylish dancers. It's not too girly, of course it has pinks and whites, but the navy is such a perfect balance and gives this fabric series a classy touch. So let's get sewing, and let's make the best ballerina bag for our little dancer kids. Finished bag size: 14" wide x 18" high Materials needed: (width x hight) - 1 ballerina quilt block 10"x10" fabric around the quilt block: - 2x strips of fabric 2,5"x 10,5" - 2x strips of fabric 2,5" x 14,5" fabric for the bottom: - 1x 14,5" x 10" fabric for back: 49 squares of 2,5"x 2,5" ( or one piece of fabric 14,5"x 14,5") lining: - 1x piece of fabric 14,5" x 38" extras: - 1x piece of thin fusible batting (for example Vlieseline H630) - 2x pieces of fabric for the loops 2,5"x 2" - 2x pieces of fabric for the tabs ( cords) 2"x 1,5" - 2x pieces of fabric 14 1/4"x 2,5" for the casing at the top. - 2x pieces of 72" cord. Instructions: 1. Sew the ballerina quilt block ( or any other quilt block of the ballet series) in the 10"x 10" size. The block will be 10,5"x 10,5" when you finish it. (10"x 10" refers to the block size when incorporated into a project) 2. Cut the fabric strips for the sides of the quilt block. (if you're using directional fabric, check the direction of the print before cutting) Attach the 2,5" fabric strips to the quilt block. First sew the two shorter strips to the sides of the quilt block, then attach the longer strips to the top and the bottom of the quilt block. If you're using directional fabric check the direction before attaching the strips. 3. Cut 49 pieces of 2,5"x 2,5" squares and place them the way you want them for the back of your bag. I love them to be totally random. This Riley Blake Designs 'Twist and Twirl' fabric line is absolutely perfect for fussy cutting, so I went a little crazy... LOL. 4. How to sew these small fabric squares together? There are several different ways to sew fabric squares together. For this ballerina bag I liked to sew the square together by rows. Then I pressed the seams in opposite directions, to get perfect nesting seams and therefore perfect corners. ( See video) 5. Now that you're done with the back of your bag, it's time to place the fabric pieces in the right order and piece them together. You will need to place the front quilt block, then the bottom piece of fabric and the back piece in one row, as shown above. Beware of the directions of your quilt block and back piece, you want them facing each other, or facing the bottom of the ballerina bag. Now sew these 3 pieces together, press again and add fusible batting. 6. If you wish, you can either hand or machine quilt your outer ballerina bag piece. I did a combination of both. I hand quilted around the ballerina quilt block. Then I machine quilted the front and the back piece with simple straight line stitching. 7. Sewing the loops for the cord at the sides of the ballet bag. Cut the fabric pieces, fold them in half lengthwise and press in the 1/4" seam allowance. ( photo 1). Then stitch along the edge with a small seam allowance. ( photo 2). Fold in half so the short edges align and clip in place at 1" from the bottom edge of the bag on both sides. ( photo 3). 8. Making the casing: Cut the fabric pieces for the casing. Fold in the short ends 1/4" and stitch in place with a small seam allowance. Then fold the casing in half lengthwise. Clip or pin casing in place at the top edges of your ballerina bag so that it's centered and the raw edges align.( photo 2) 9. Preparing the outer piece of the ballerina bag and the lining. Fold the outer piece of the ballerina bag, right sides together in half, so the top edges align and stitch along the sides with 1/4" seam allowance. stitch the loops between these seams. You want to stitch across the loops twice for extra strength. Cut the lining piece according to the measurements given. Fold in half right sides together, so the top edges align and stitch along the sides with 1/4" seam allowance. Leave a 3-4" opening on one side for turning the bag later. 10. Turn the lining inside out and place it inside the outer piece, right sides together. Pin or clip the two pieces together so that the top raw edges align. I like to start at the side seams and place those on top of each other, then clip the rest. The casing will be between the two pieces. Now stitch along the top edge with a 1/4" seam allowance. Turn the bag inside out through the opening that you left in the side seam. Close the opening with a small seam allowance. Push the lining inside the bag. 11. Stitch along the top edge of the ballerina bag. 12. Adding the cord to the bag. I love these little tabs on the cord, but you can also just tie the cord with a knot or add some beads. For the tabs, cut the fabric pieces as mentioned above and fold in a 1/4" seam allowance on the longer edges first, then fold in the shorter edges 1/4" and press. (photo 1) - How to put in the cord into the casing of the bag? You need to put the cord through the casing before you attach the tabs. Attach a large safety pin to one end of the cord and go through the front part of the casing onto the back part of the casing coming out at the same side you went in. I was going in from the right with the first cord, going through the back part of the casing and coming out on the right as well. Going in from the left with the second cord through the front part of the casing onto the back part of the casing coming out again at the left with the second cord. Go through the bottom loops with one end of the cord on either side of the bag. ( photo 2) Fold the tab in half and place both ends of the cord in the center and stitch in place. Repeat for the second cord. And here you go all done and finished, easy enough, right? Do you want to make another one? I absolutely think so :-) Here are three more quilt blocks, that I designed especially for this fabric series. Which one is your favorite? Thank you Riley Blake Designs for the opportunity to design this quilt block pattern series and for supplying the absolutely adorable fabric series 'Spin & Twirl' that I used in this quilt pattern series. Happy sewing everyone! Ingrid xx
Do you ever wonder where certain Christmas traditions come from?
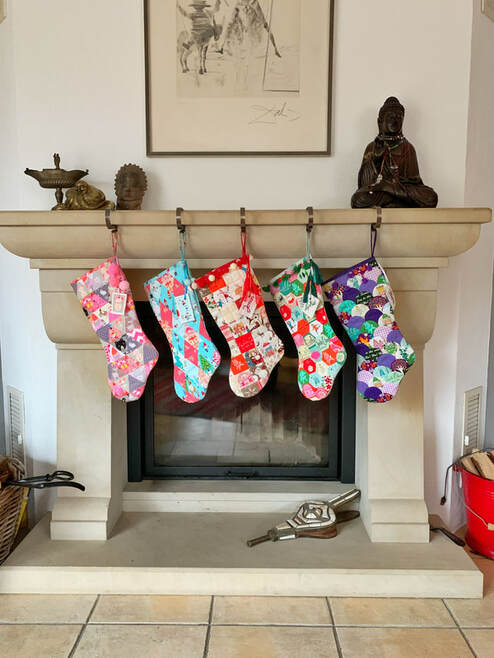
Well if you do and want to know more about Christmas stockings here is the story: The Christmas stocking tradition started in Europe, I have to add, a lot of Christmas traditions have, not sure why though, I have to get into that some other time. Christmas stockings traditionally have the owners name written on them, makes sense, otherwise Santa wouldn't know where to put the presents, right? " The stockings were hung by the chimney with care, in hopes that St.Nicholas soon would be there." - a visit from St. Nicolas Why People Hang Stockings
The Christmas stocking tradition is said to have started with the good deeds of a king noble man named Nicholas, who was born 280 AD, in Patara a city on the Mediterranean coast of Turkey. ( If you ever visit Turkey , you have to visit that coast, it's beyond beautiful).
Nicholas became a priest and used all his money to help the poor, the needy, sick or suffering. He was very religious and was made Bishop of Myra at a young age. He never married or had children. But he loved children and gave gifts often, this is why he also became known as the gift giver of Myra. He was a rich man and traveled all over the country and gave his gifts generously. He didn't want his identity to be known, so he gave his presents late at night. Children were told to sleep early, otherwise Nicholas wouldn't come. He became known as Saint Nicholas the patron saint of children and sailors. The most popular legend about why stockings are hung on Christmas is this: A very poor widowed father of three girls was worried his daughters weren't able to get married because of their impoverished status. St. Nicholas heard the story of the man and wanted to help, but he knew the father wouldn't accept any charity. So he slid down the chimney of the family's house and filled the girls' recently washed stockings, which were drying by the fire, with gold coins. When the girls woke up in the morning, overjoyed with the generous gift, they were now eligible to marry and they all were happy ever after... And there you have it, the Christmas stocking tradition was born. How To Make a Christmas Stocking From Hexies
Now lets make some great Christmas stockings ourselves:
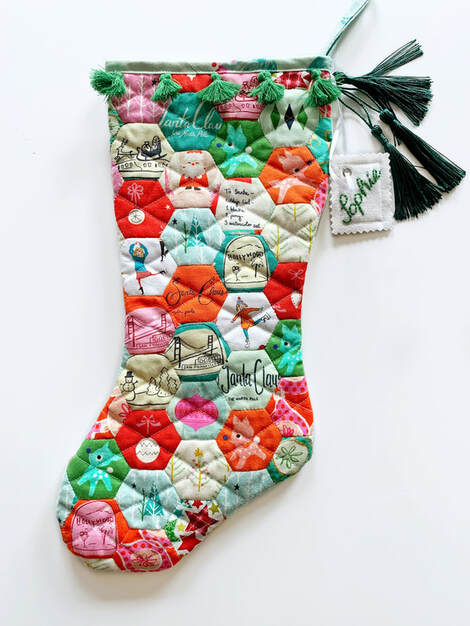
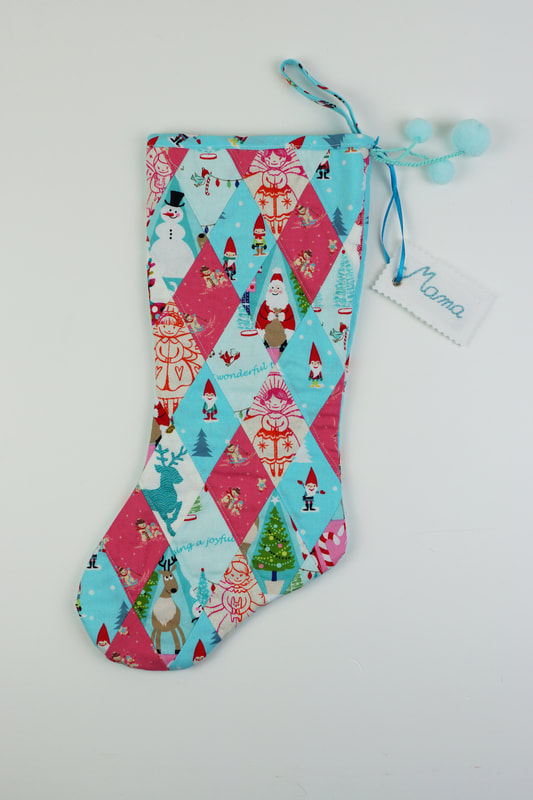
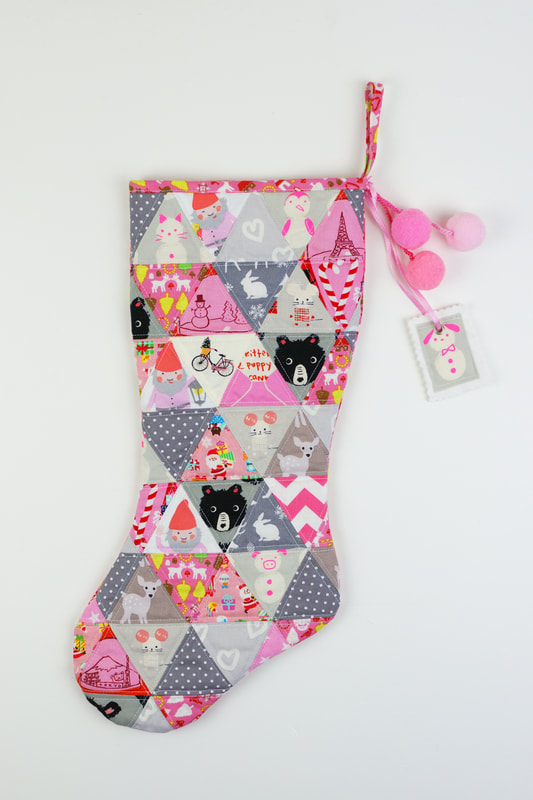
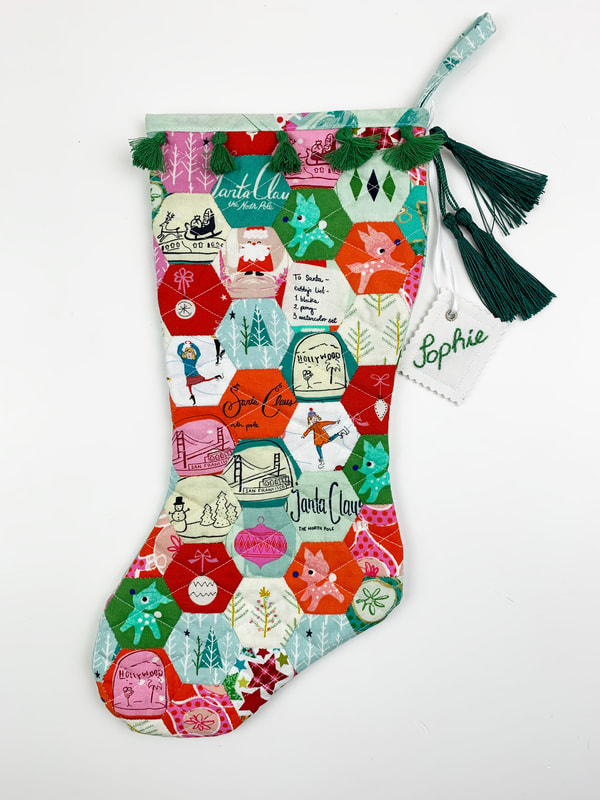
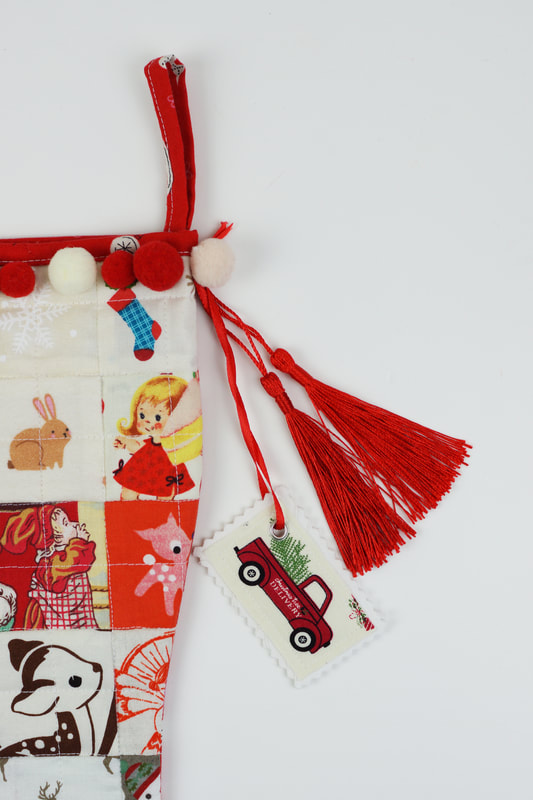
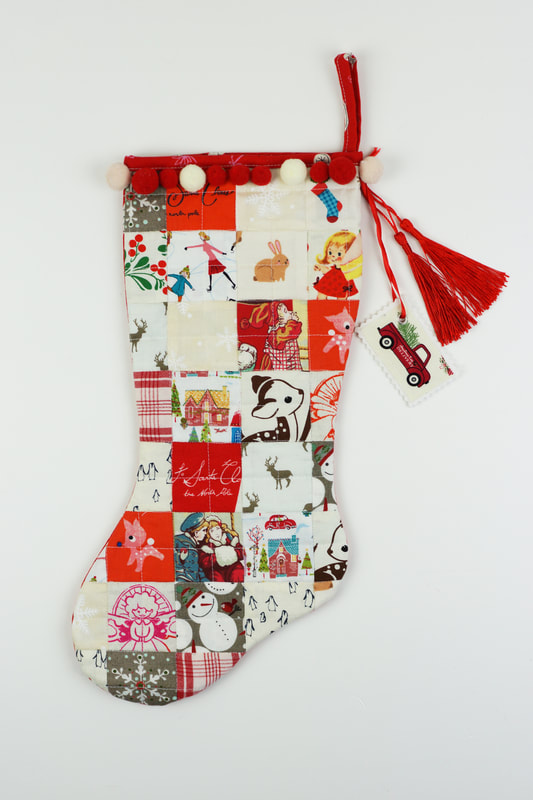
Fabrics needed for a Hexie stocking: - fabric scraps for about 42 - 1" hexies - 2 pieces of fusible interfacicing 16"x 9" - 2 pieces of fabric 16"x 9" for front and back lining - 1 piece of fabric 16"x 9" for the back - 1 strip of fabric 2"x 28" for binding - optional: tassels, fabric hangtag To make this process easier, you can download our Christmas stocking template.
Sewing the hexie Christmas stocking:
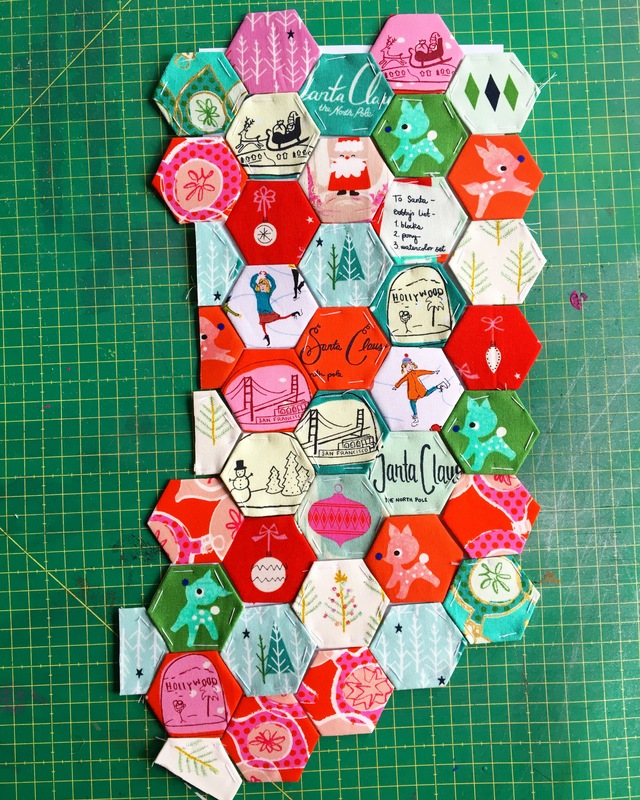
1. Print the stocking template and glue the two pages together and cut out the template. Find the PDF to the template here . 2. Baste about 42 - 1" sized hexies and place them on your stocking template. Depending on how you place them, you'll only need half hexies on the sides. This is a perfect way to use up all your adorable Christmas fabric scaps and do some fussy cutting.
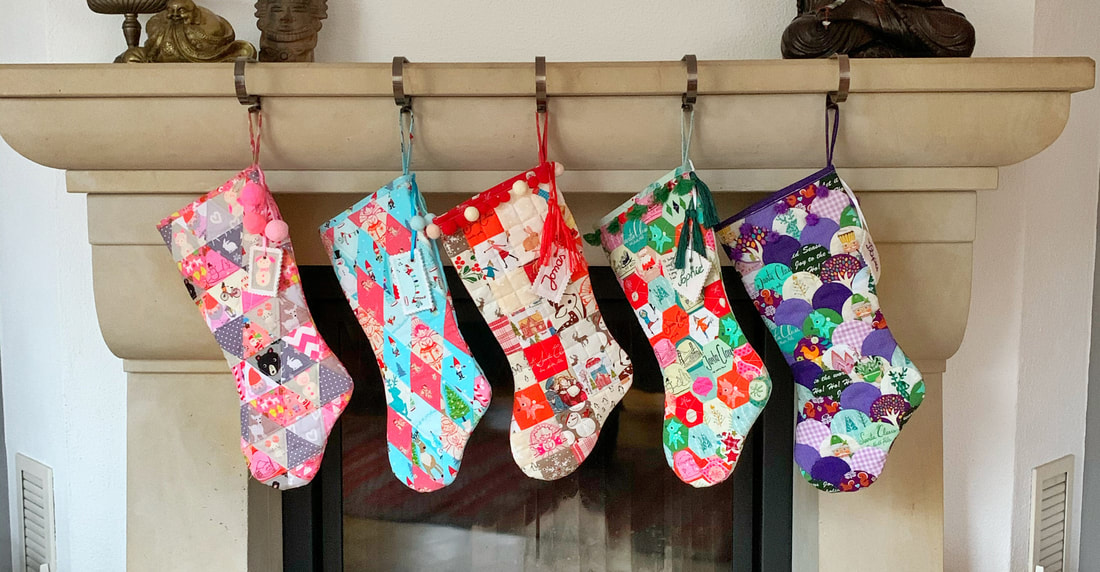
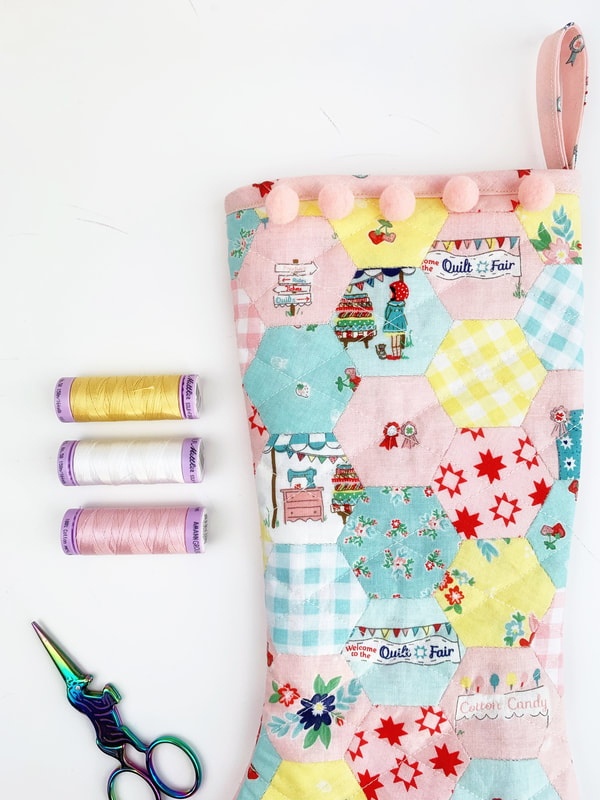
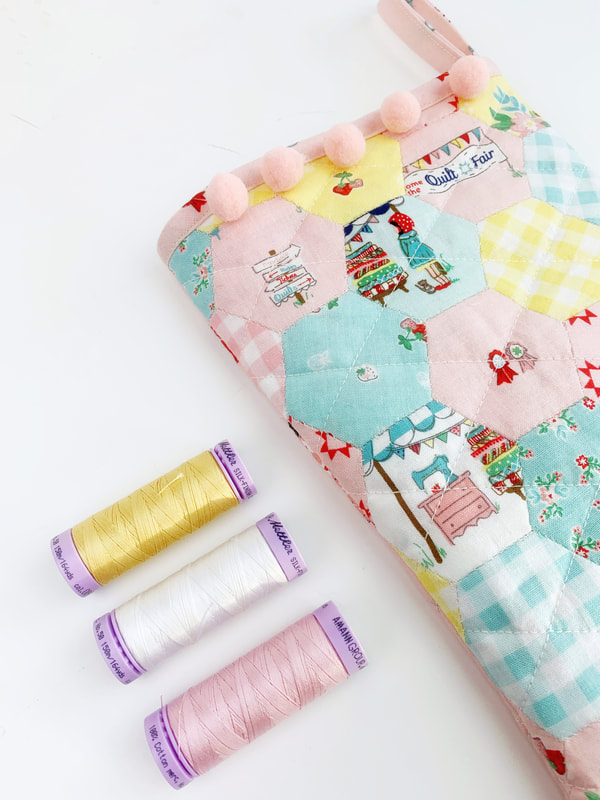
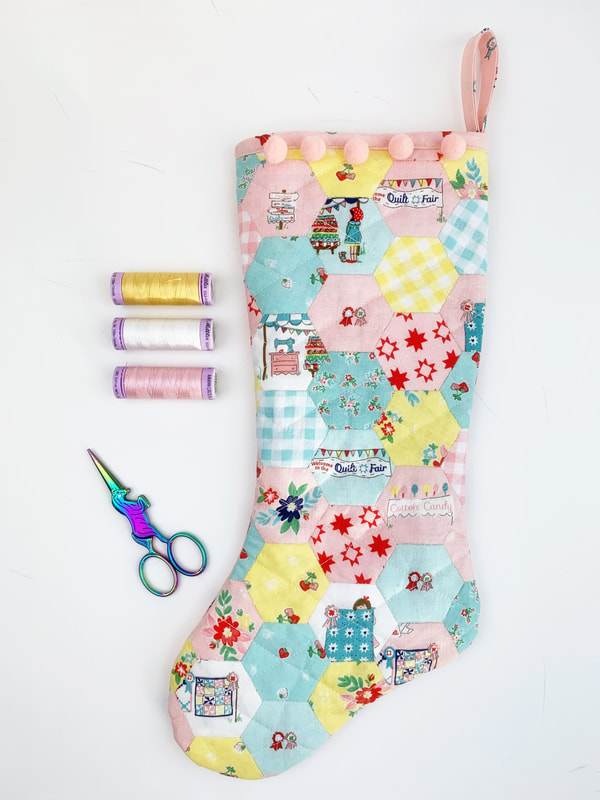
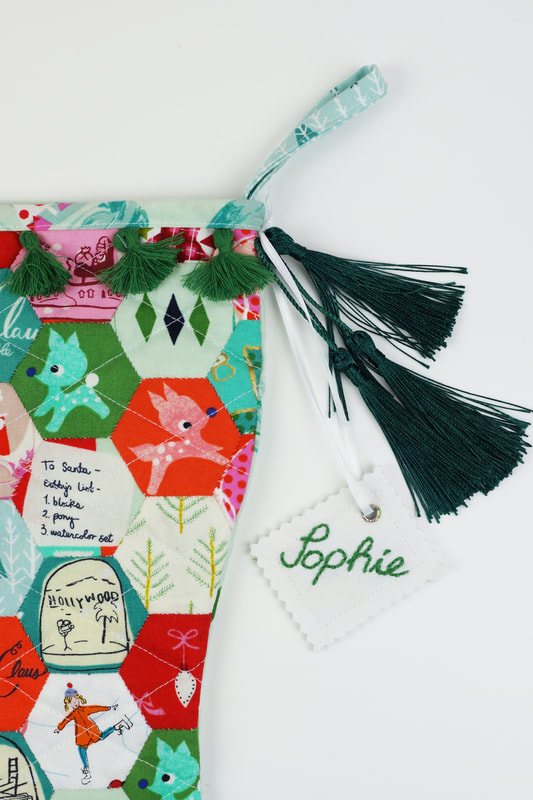
Even if you don't feel like using Christmas fabrics for your Christmas stockings, they look especially cute with all sorts of other fabrics too. I could not resist and had to make some with this uber adorable fabric line from Riley Blake Designs called 'Quilt Fair' by Tasha Noel.
Don't you agree, Christmas stockings in 'non-Christmas-fabrics' are equally cute? But let's get on with our sewing.
3. Sew together your hexies.
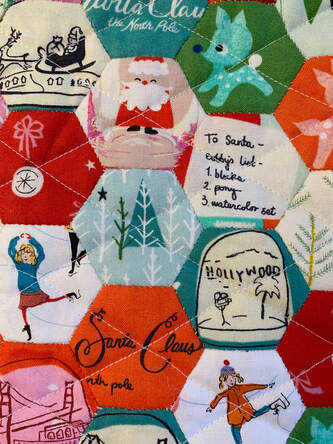
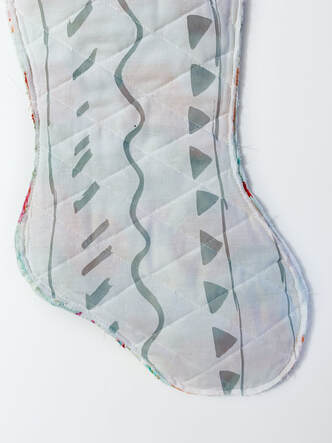
Add the fusible interfacing to your 'hexie fabric' piece and add the lining as well, wrong sides together and quilt as desired. I quilted diamonds. Repeat the same for the back of the stocking. Add the fusible interfacing to the back fabric, add the lining fabric wrong sides together and quilt as desired.
4. Now cut your quilted pieces into stocking shapes , use the stocking template.
5. Place front and back of your Christmas stocking right sides together and stitch along the outside edge using a 1/4" seam allowance.
6. Turn your stocking inside out.
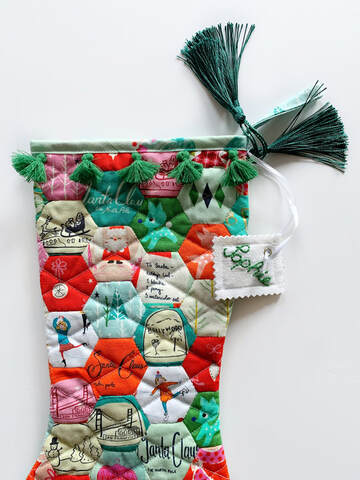
Attach the binding strip to the top edge of your stocking right sides together and raw edges aligned. Add a little hanging tab to the back of your stocking made out of the same binding strip. Clip or pin in place and stitch along the top edge with a 1/4" seam allowance. Fold over to the inside and stitch in place by hand. 7. optional: Add pompoms and/or tassels.
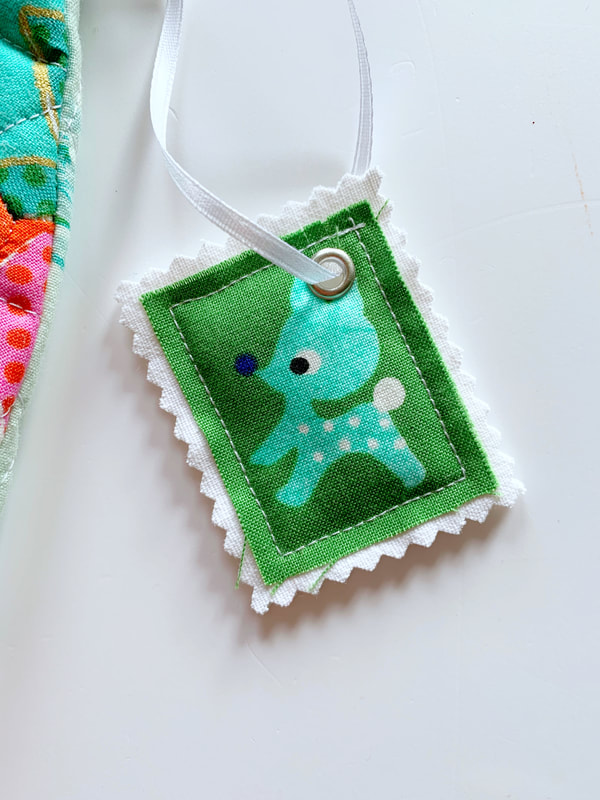
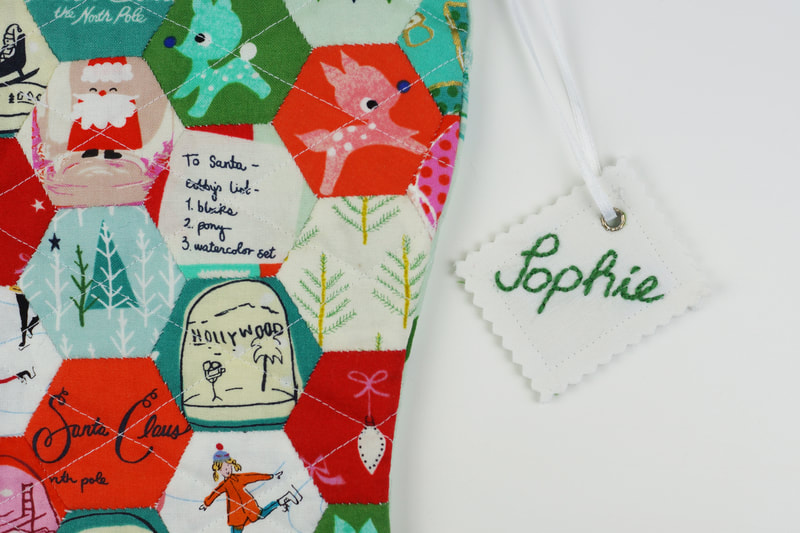
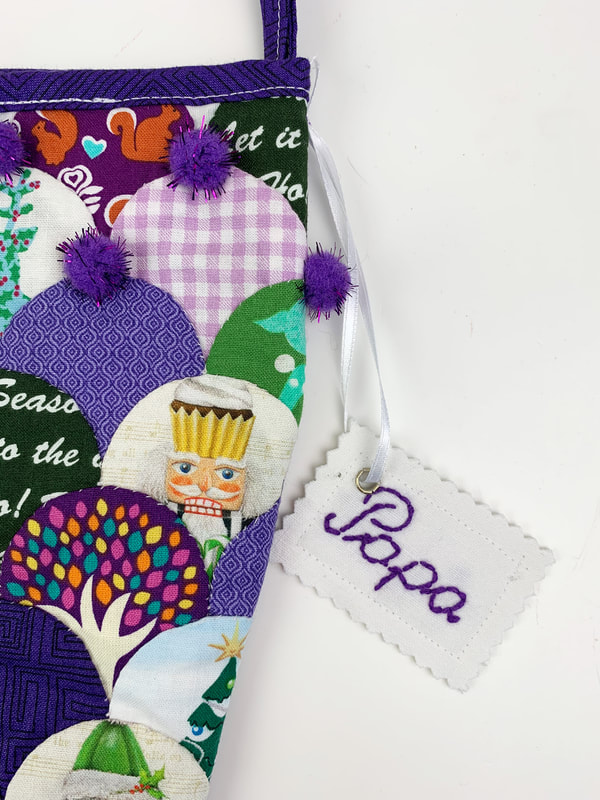
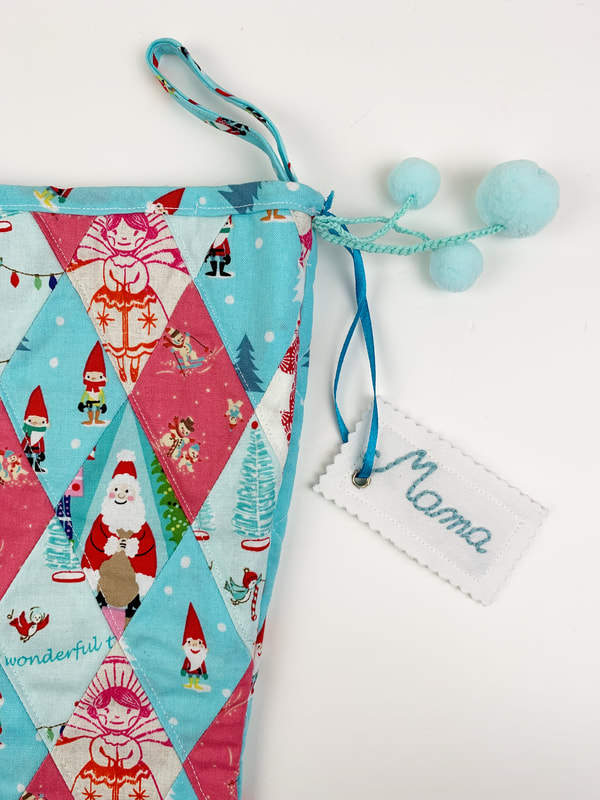
8. Make a little name tag.
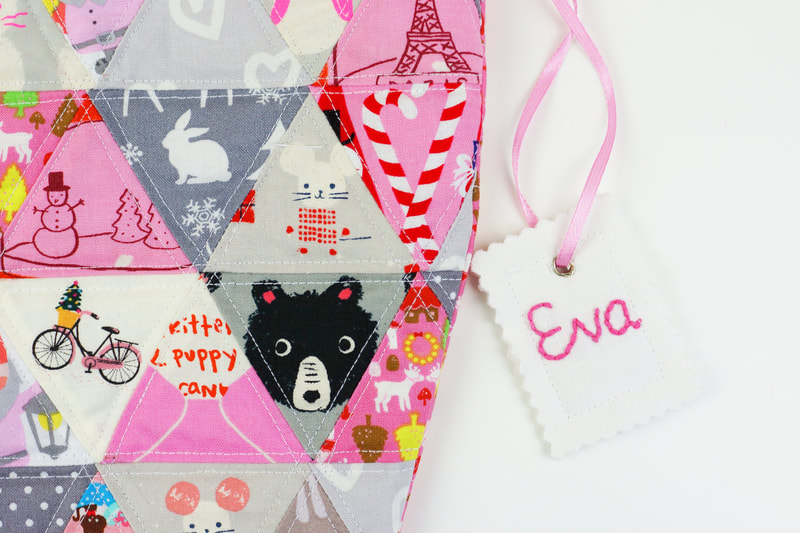
I used white fabric and embroidered the name on it. I added some fusible interfacing, to give it a little volume and topped it off with another piece of white fabric. I stitched the 'sandwhich' in place with a small piece of fussy cut motif and cut the outer edge of the white fabric with zig zag shears. Add a metal eyelet, or just use a hole punch and thread a little ribbon. Attach your name tag to your stocking. Et Voila .... all done! Now let your phantasie go wild and create stockings with all sorts of different patchwork techniques and styles. Whether you're using clamshells, triangles, hexies or just simple squares, these Christmas stockings will definitely make a lasting impression. If you are celebrating Christmas, What's your choice of Christmas stocking? Are you making one yourself? let me know in the comments. happy sewing Ingrid x
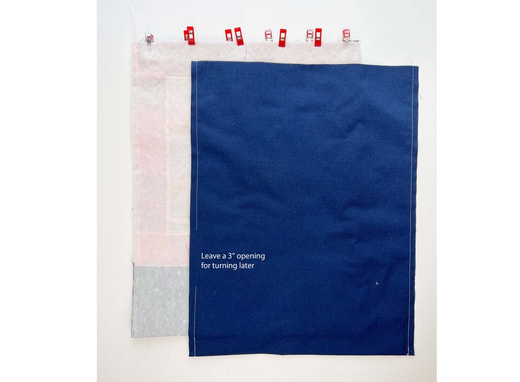
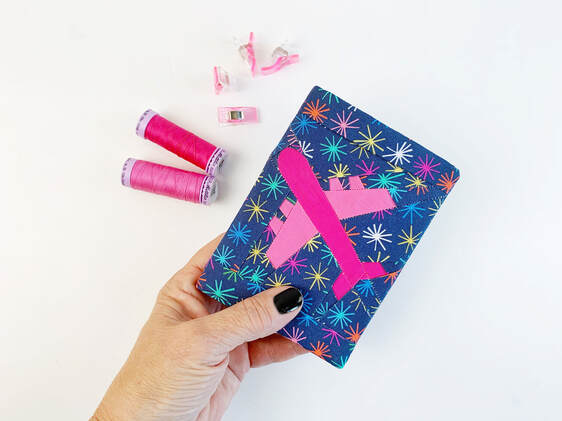
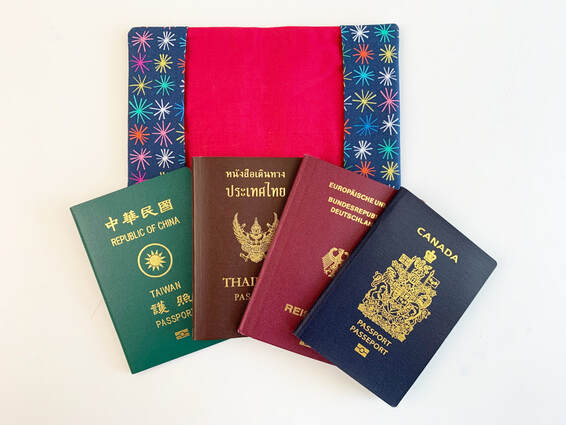
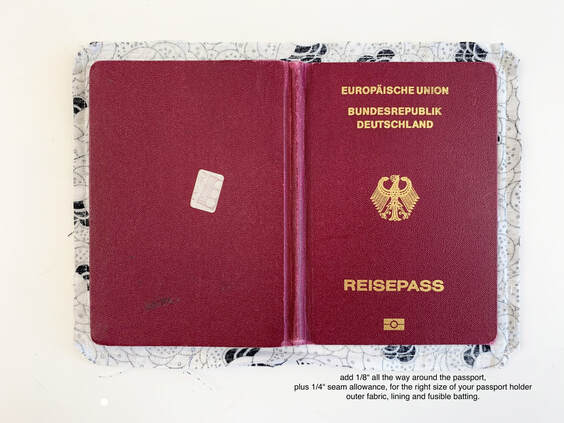
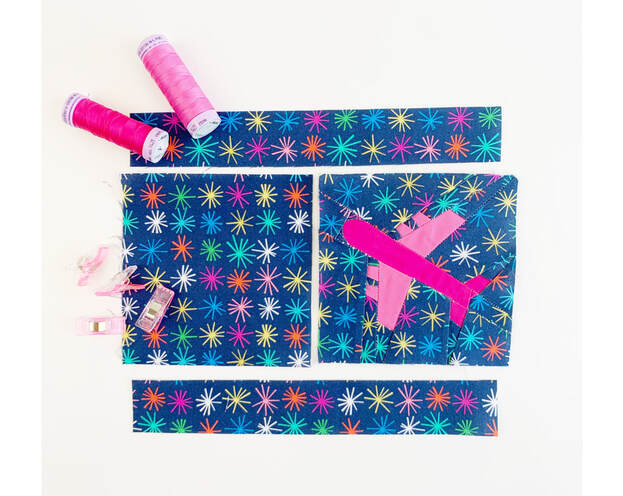
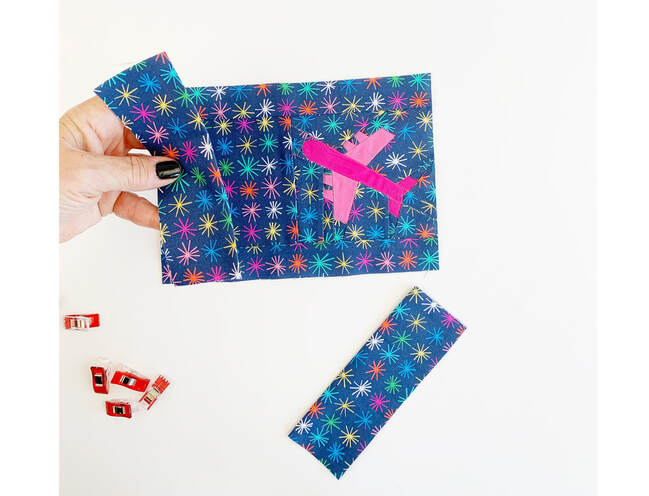
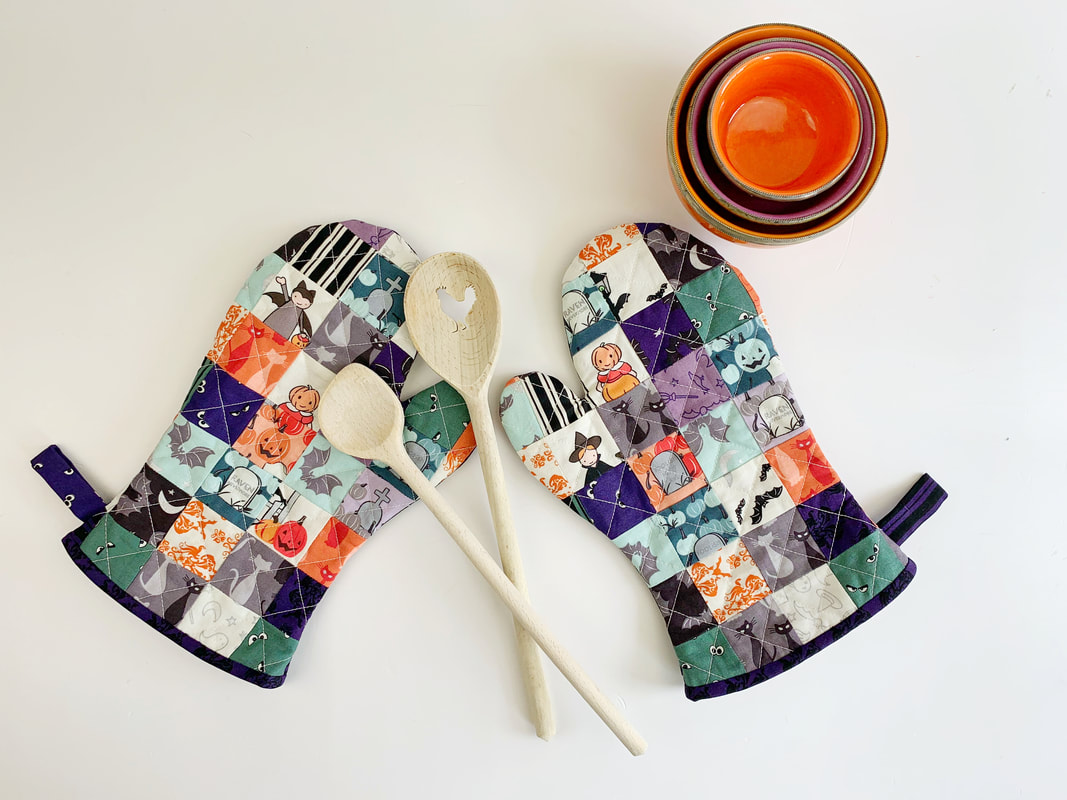
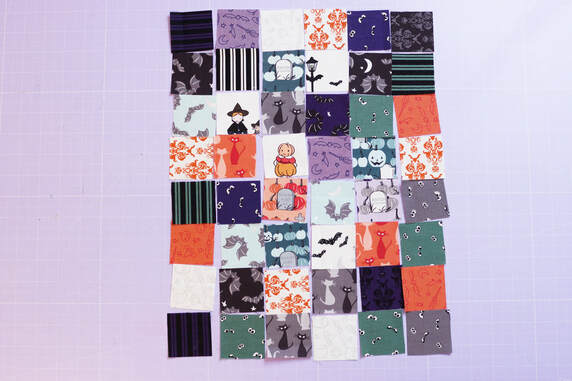
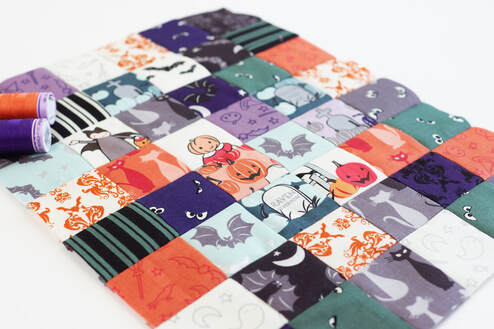
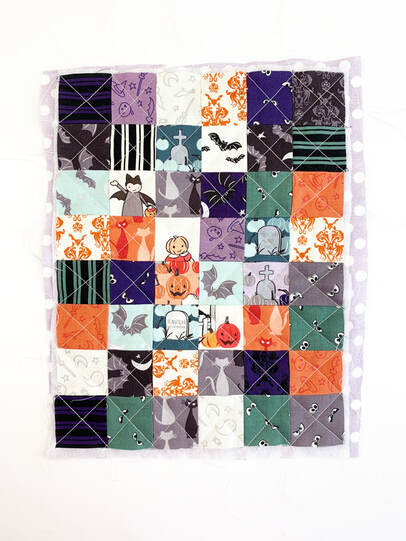
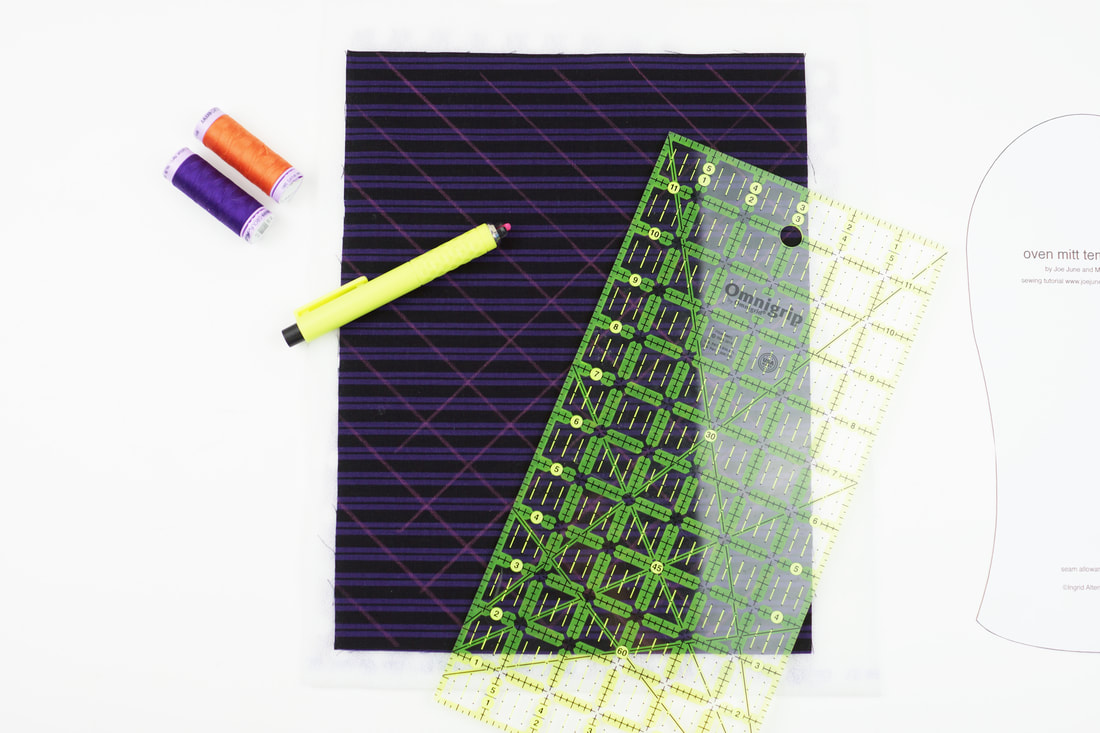
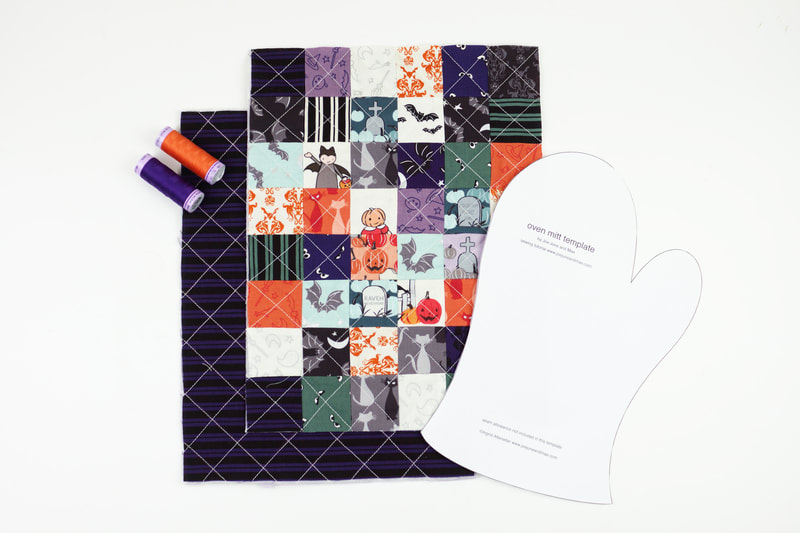
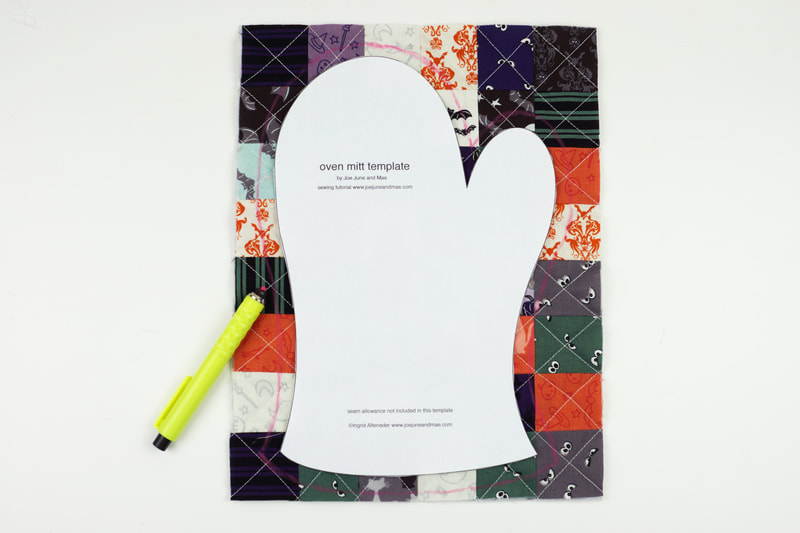
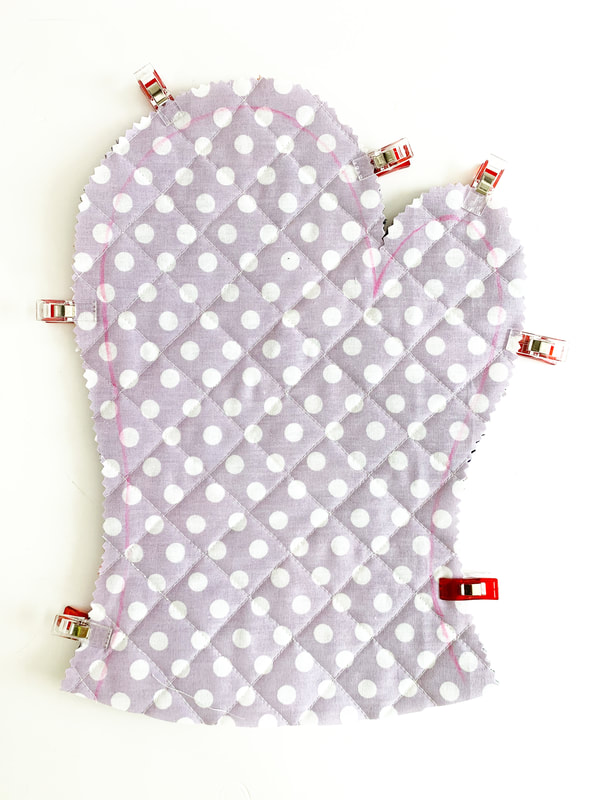
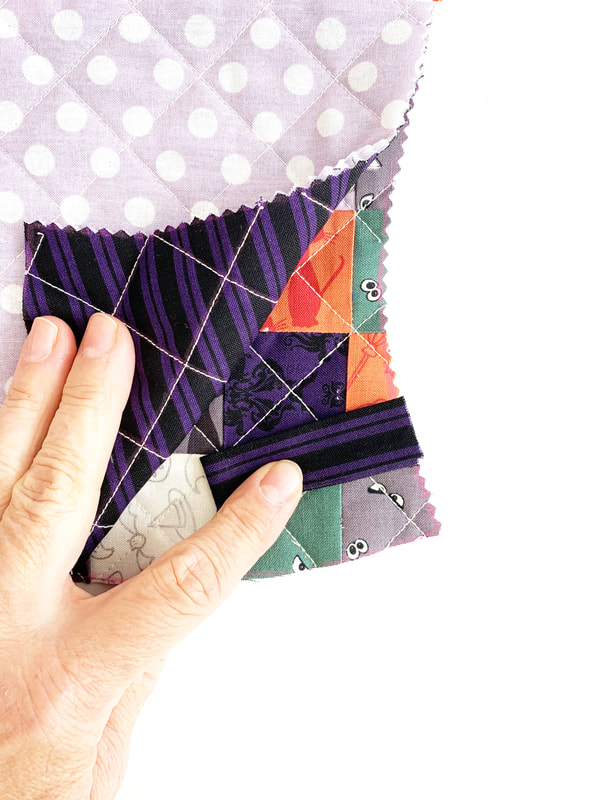
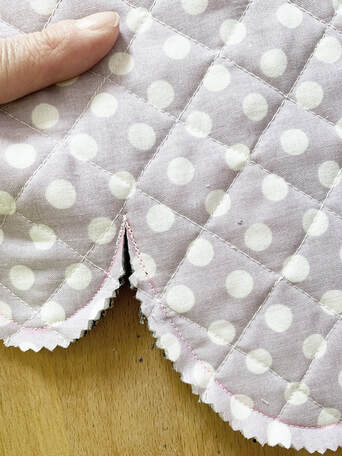
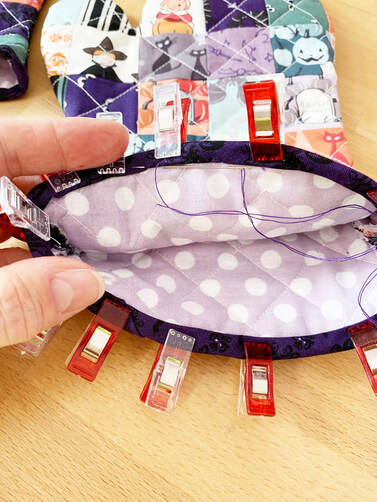
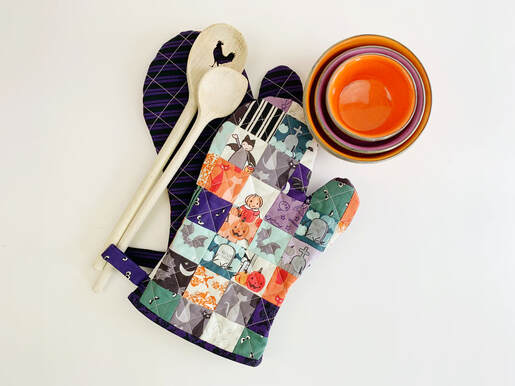
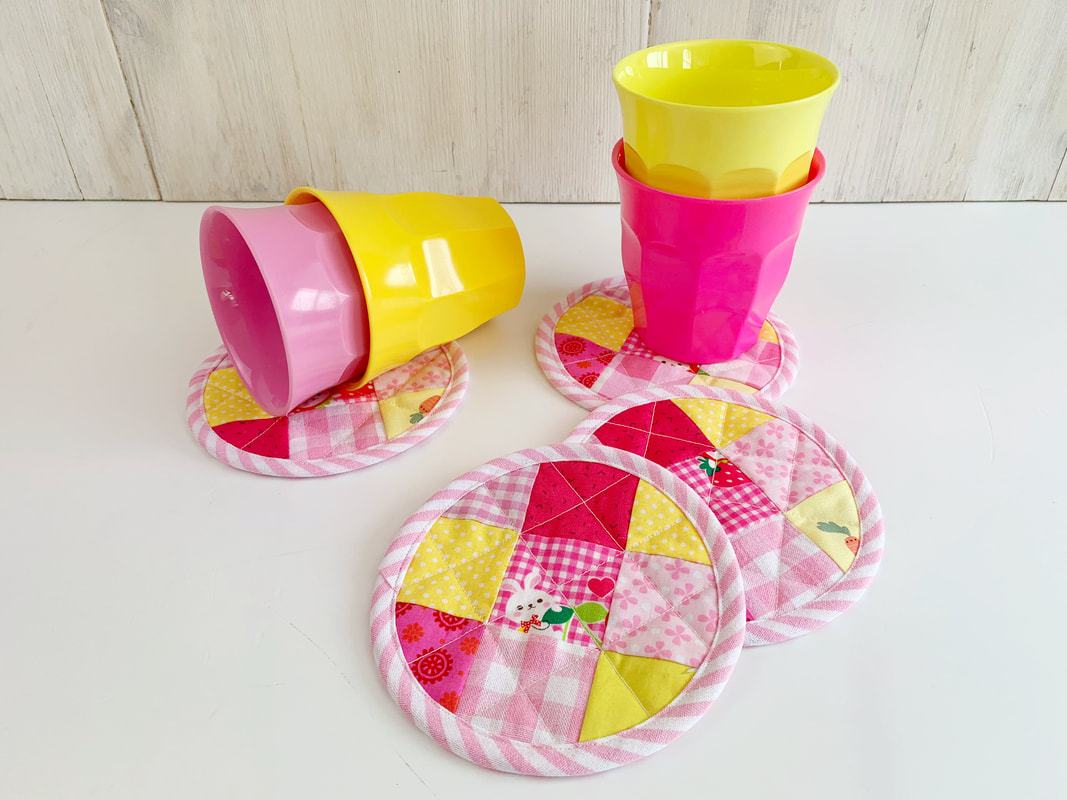
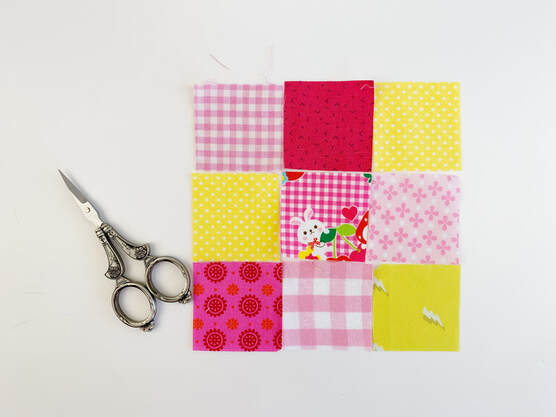
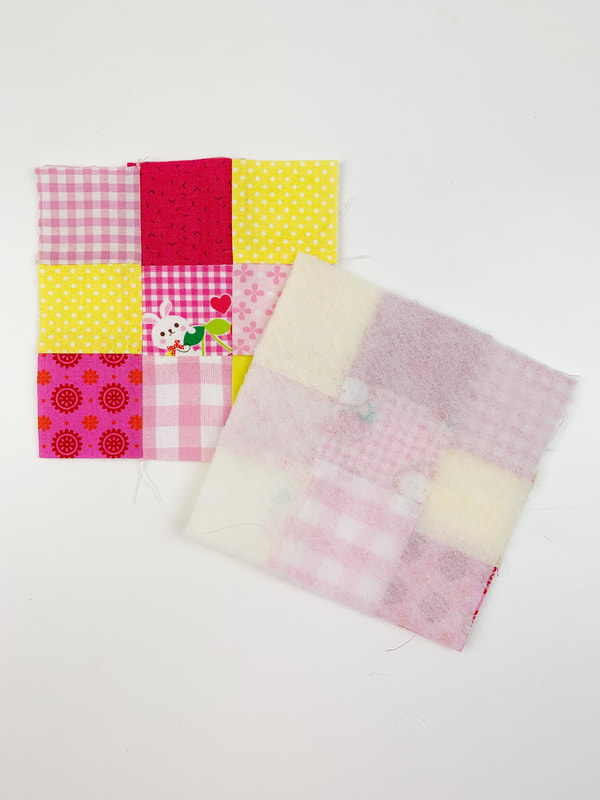
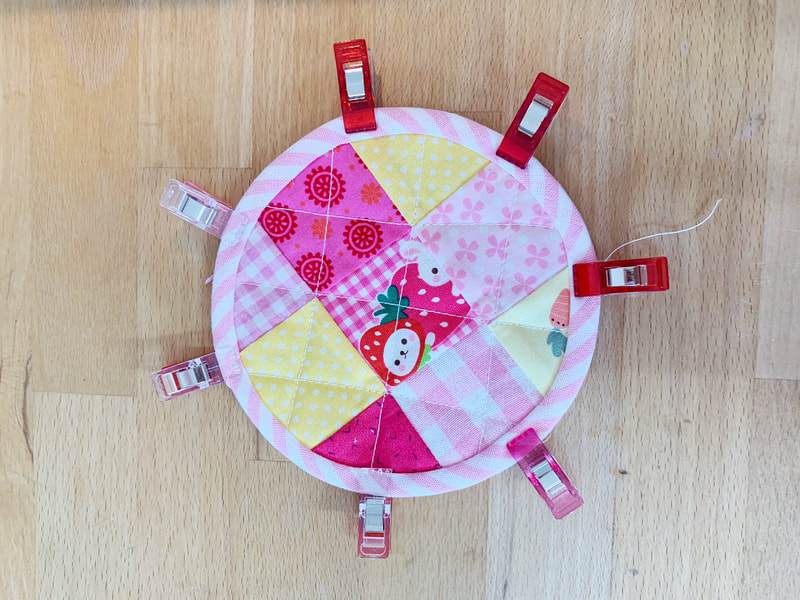
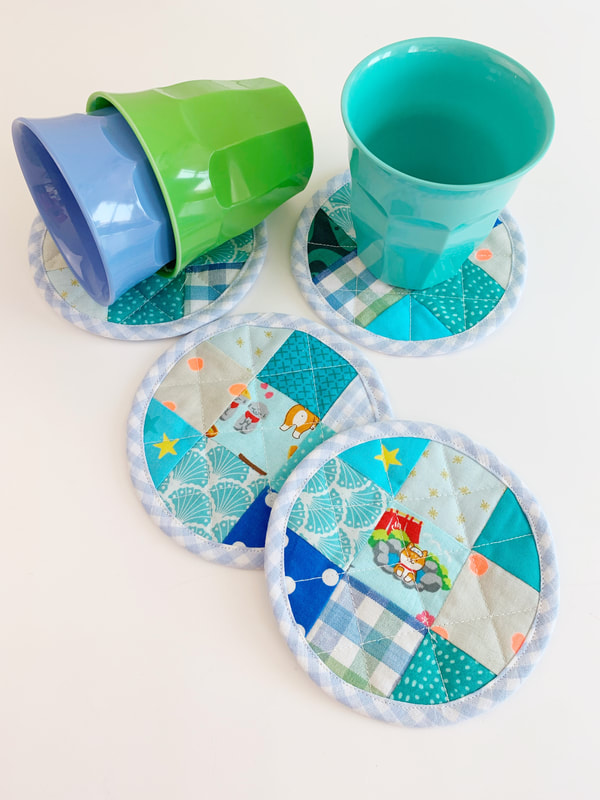
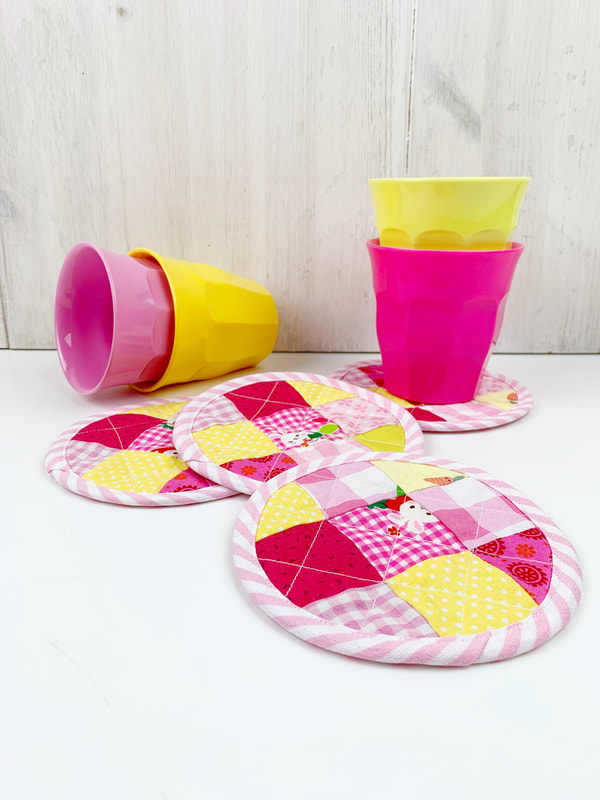
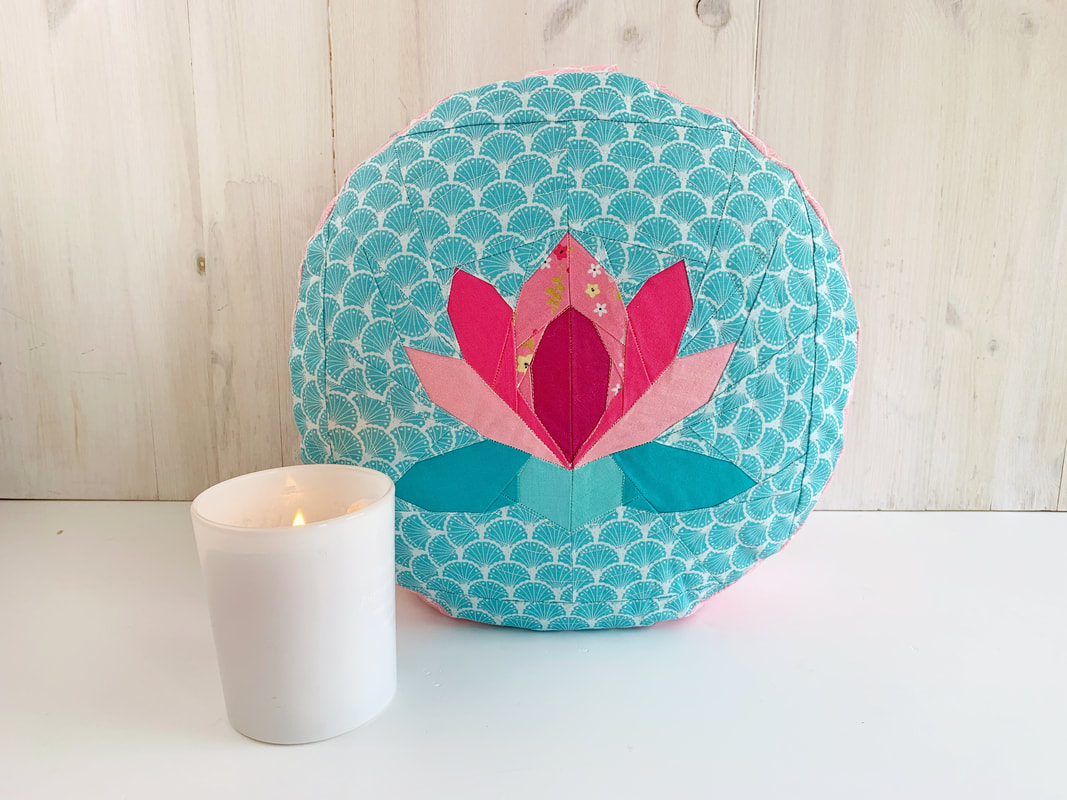
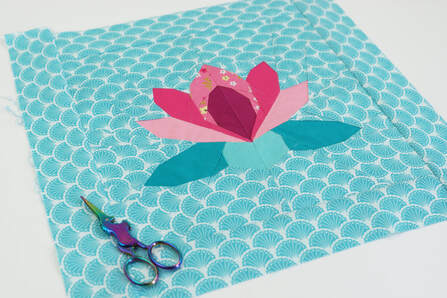
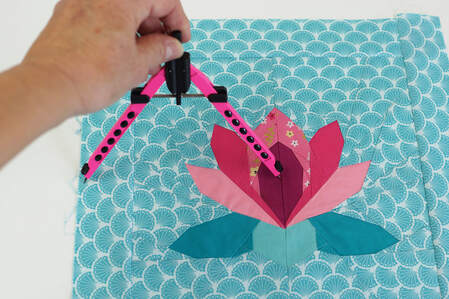
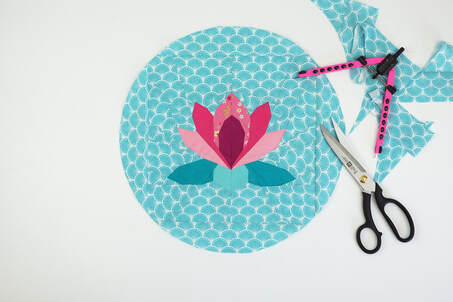
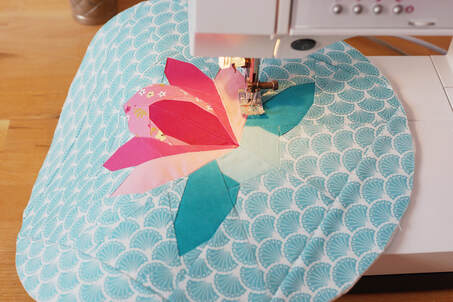
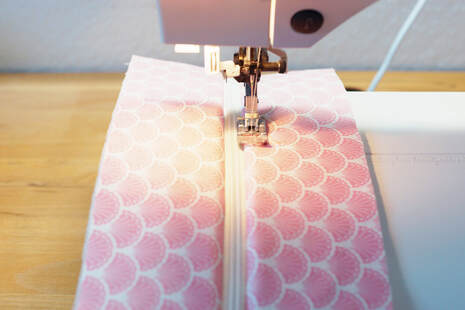
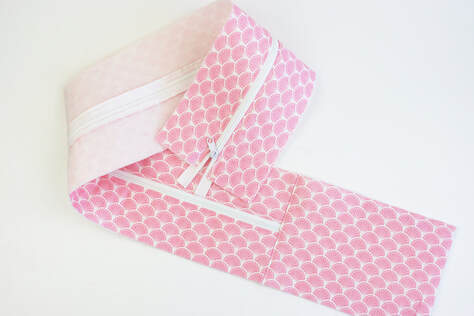
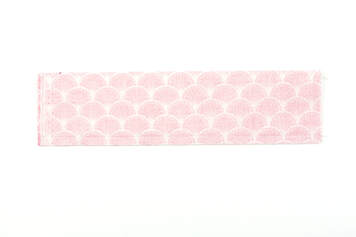
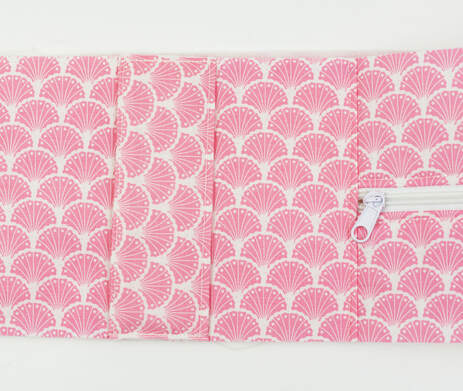
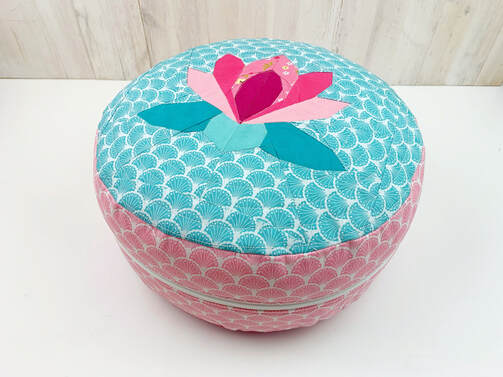
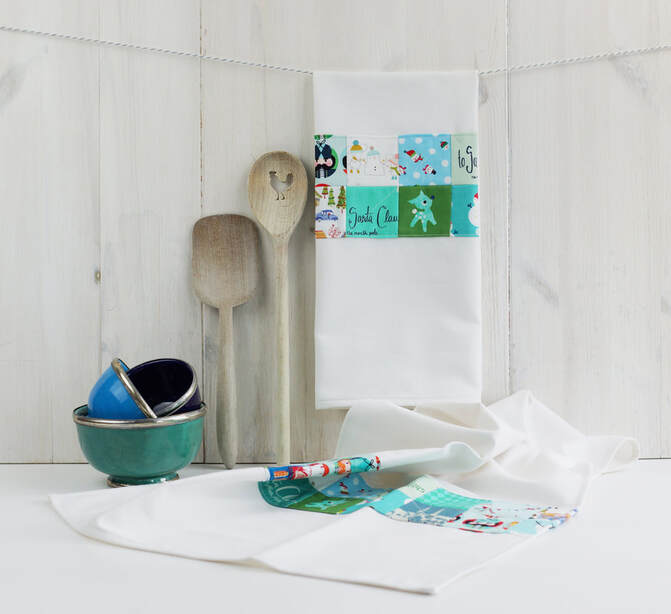
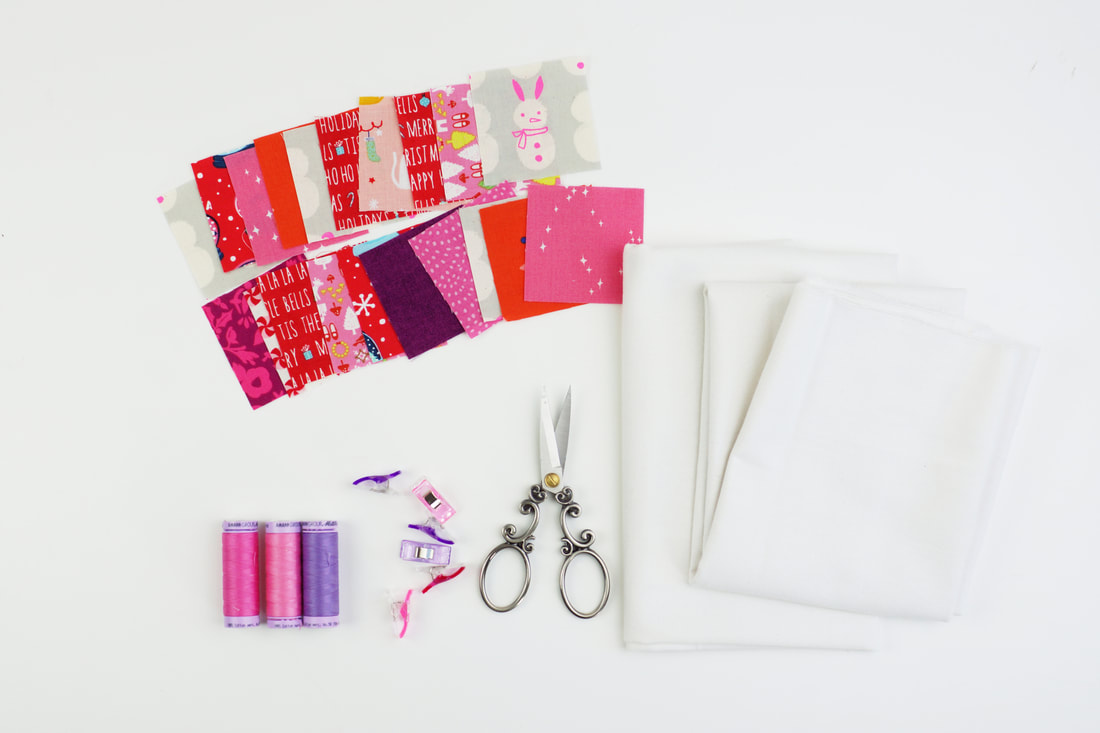
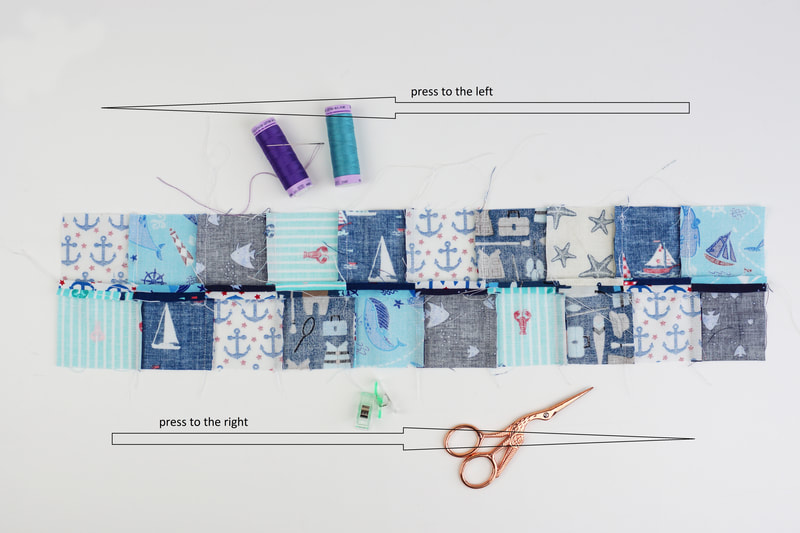
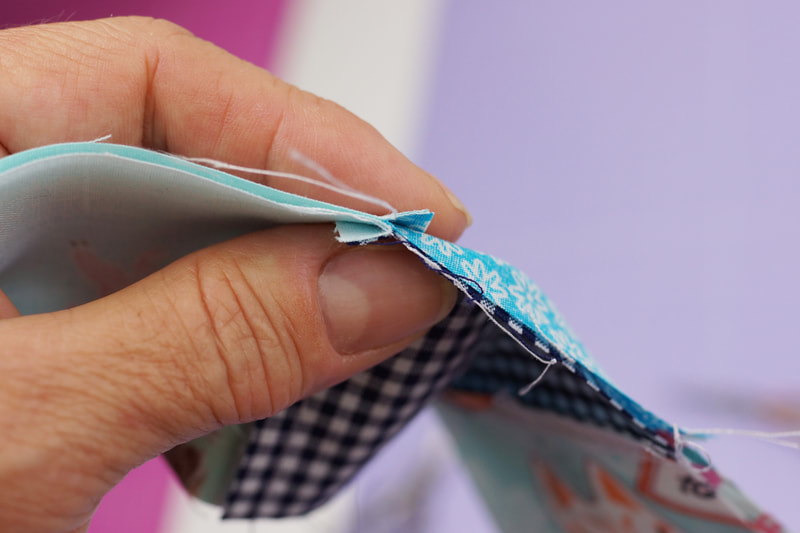
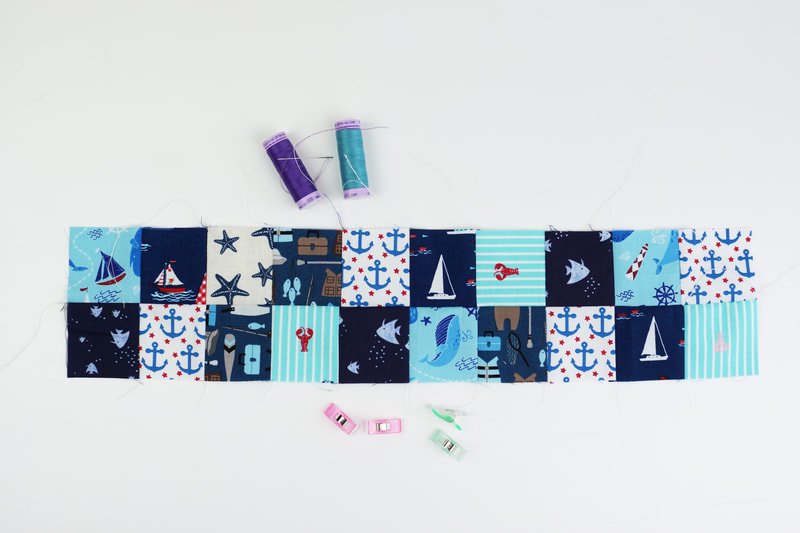
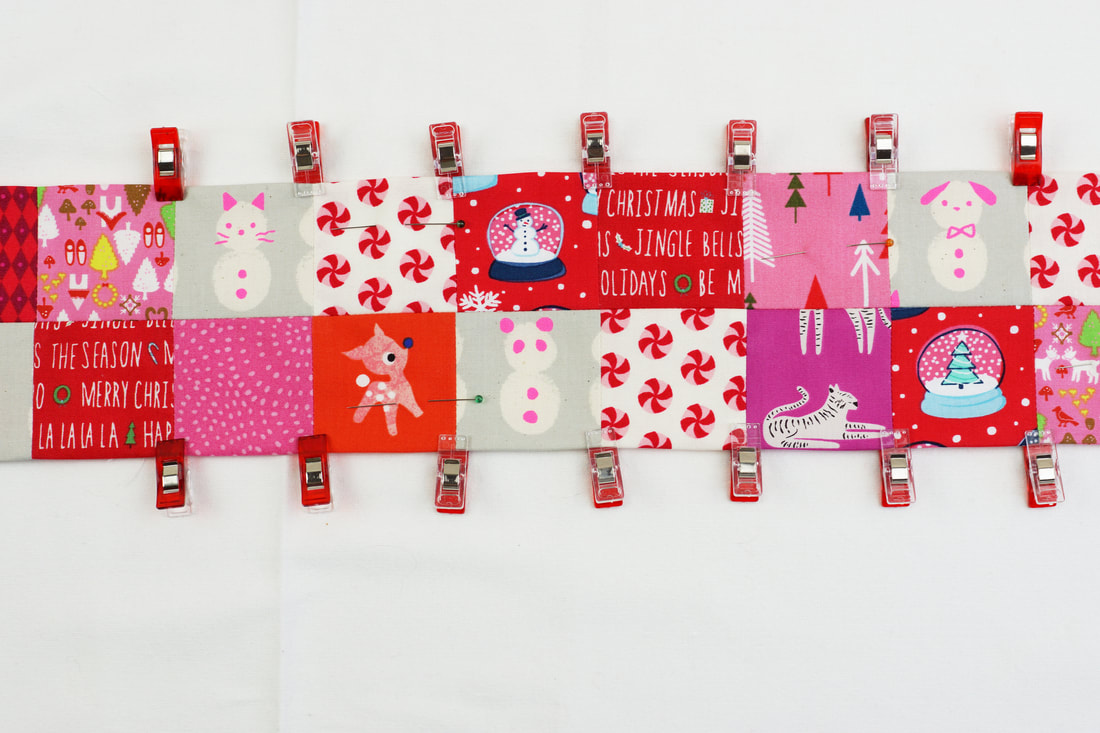
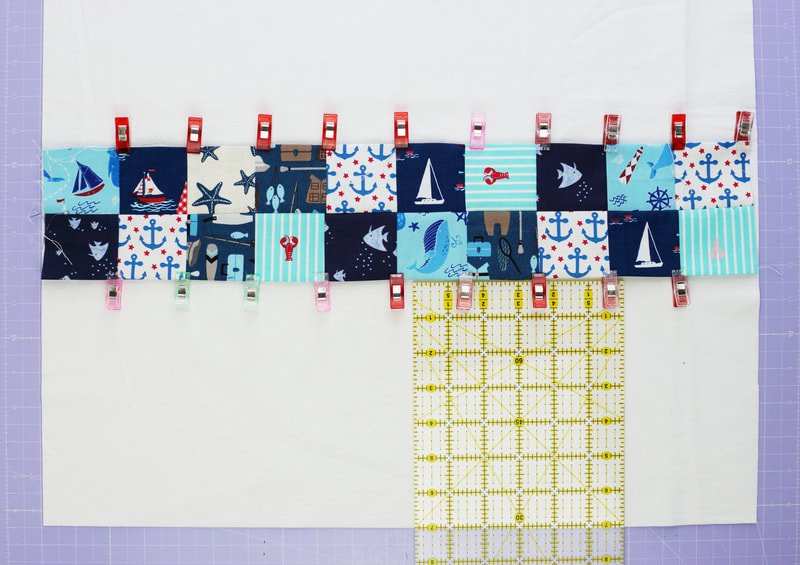
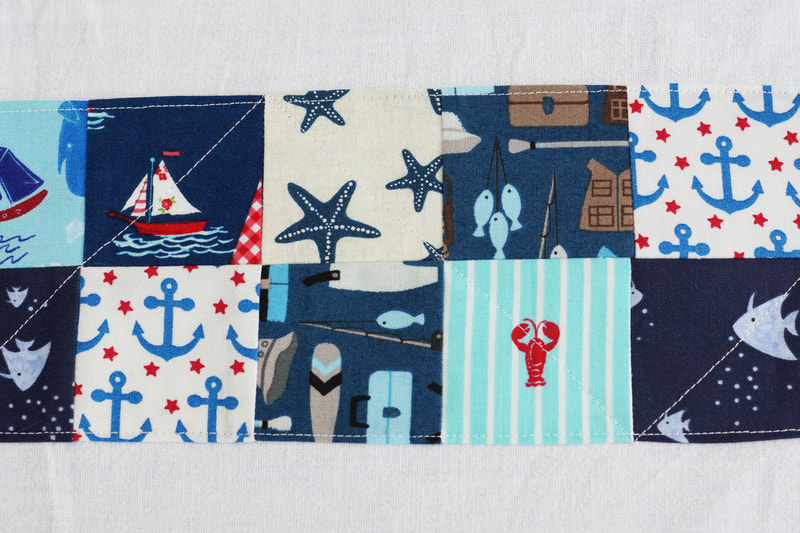
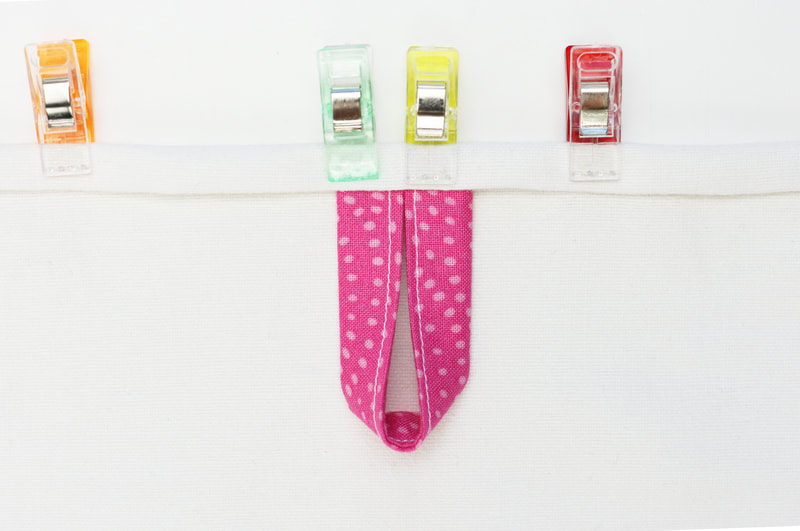
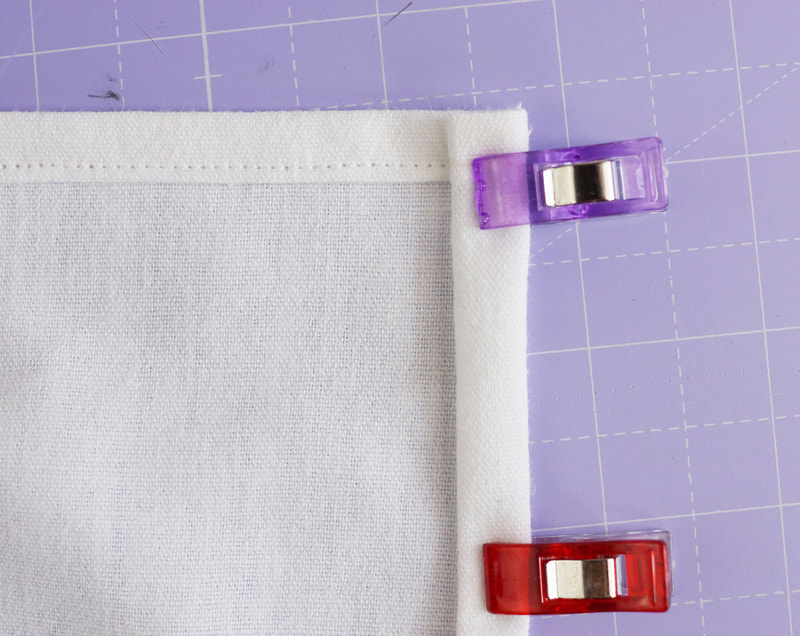
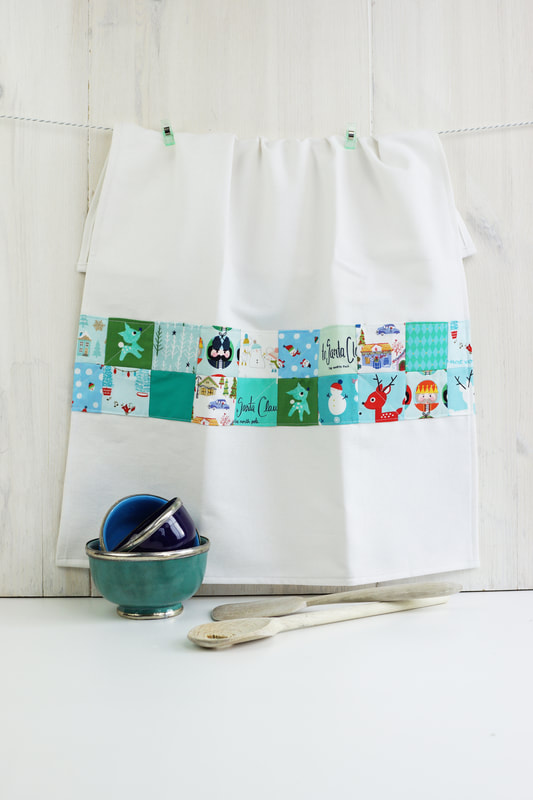
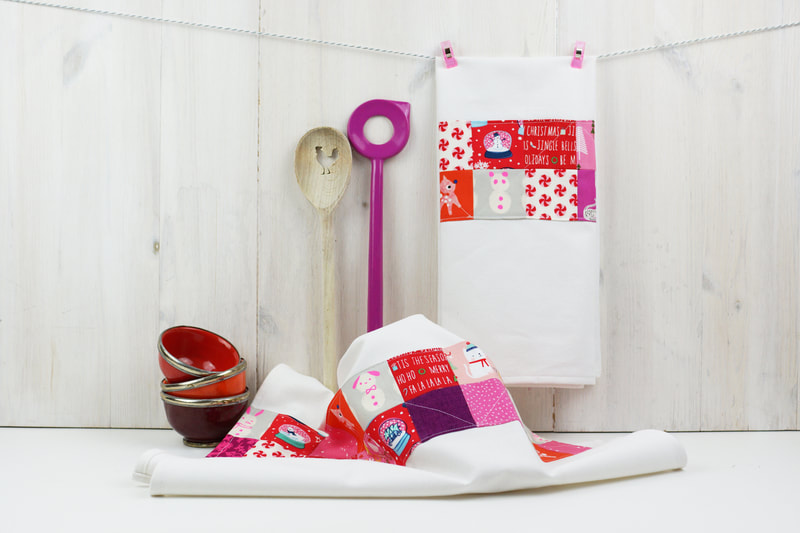
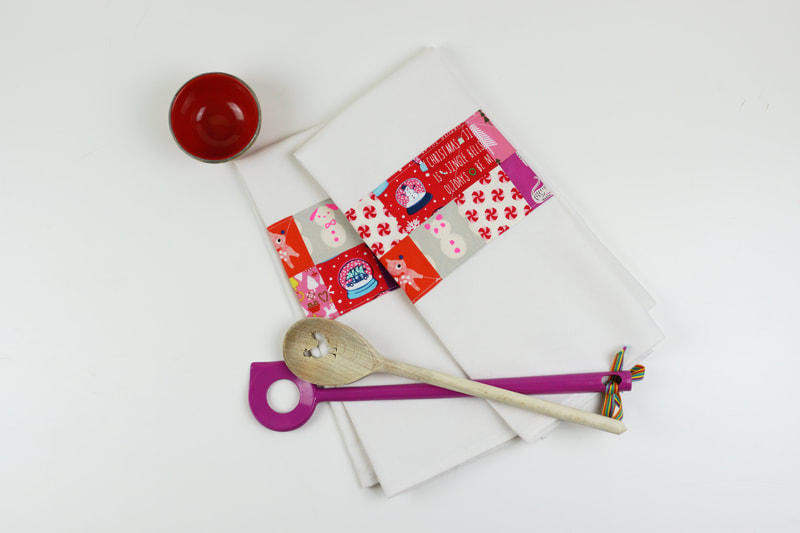
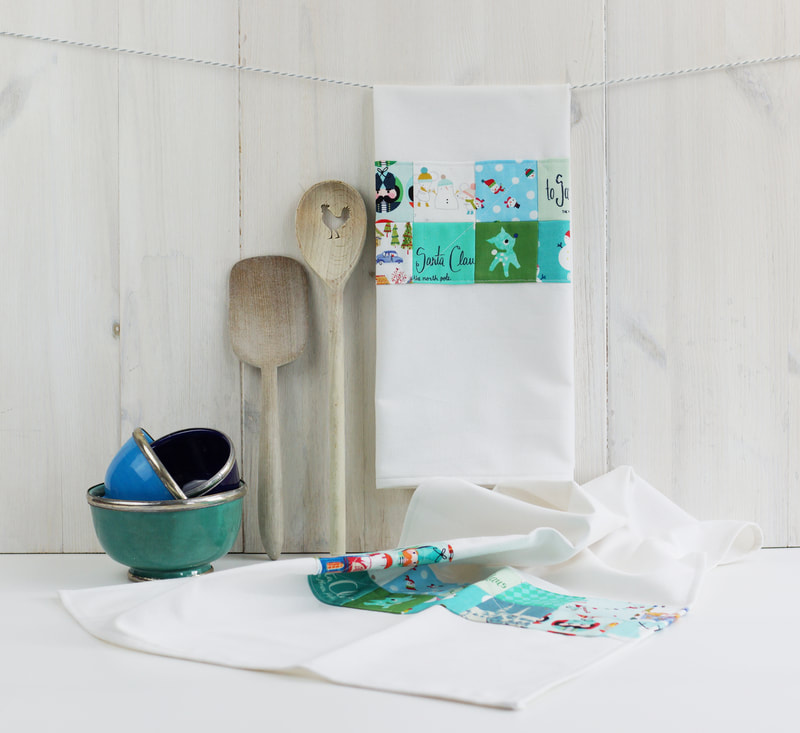
c Are you all as hopeful as I am, that traveling season will start soon again? This was something I really missed in the last 15 months. I bet all of you as well? More and more people are getting vaccinated and this means for all of us, that we're slowly getting back to normal. I am sooo looking forward to this. After 15 months of lockdown, more or less strict and 15 months of homeschooling two teenage daughters, you know that I really miss getting away :-) Therefore I decided our passports need some dressing up and I made this cute little passport holder pattern. The Airplane pattern is a super quick and easy foundation paper piecing pattern and suits this passport wallet perfectly, don't you think. I used the 4"x 4" size for the outer piece of the passport cover. I decided on a new sewing project to enhance our passports... this fabric passport holder looks just so much cuter going through passport control, don't you agree? So let's get to sewing this cute passport holder/ passport cover with the cutest paper pieced airplane quilt block. Materials needed: ( this is the size for a European Passport ) Most passports are very similar in size, (as you maybe know, we have a few nationalities in our family) the European passport is about 1/8" to 1/4" wider than the others. To double check the right size for your passport cover, fold the passport open add 1/8" all the way around the passport and then add 1/4" seam allowance, that will be the size of your lining and outer piece. outer piece: - 1 airplane quilt block size 4"x 4" - 1 piece of fabric 4.5"x 4.5" (same as the background fabric of the airplane block ) - 2 strips of fabric 1 1/4" x 8.5" (same as the background fabric of the airplane block ) - 8 1/4" x 5 7/8" for the lining - 2 x 4" x 5 7/8" for the pockets - 8 1/4" x 5 7/8" very thin fusible batting (optional but this gives a bit more stand I used Vlieseline H180) Instructions: 1. Sew your airplane quilt block in 4"x 4" size. Cut all your fabrics, lining and batting pieces. Stitch the fabric pieces for the outer piece together the way its shown here in the assembly photo. Join the two squares first, then add the two strips of fabric at the top and bottom. 2. Iron on fusible batting to the wrong side of the outer piece of the passport holder. Cut the outer piece to 8 1/4" x 5 7/8". ( check the size with your own passport as shown above) Fold the pocket pieces in half aligning the longer raw edges and press. Then place these two on the outer piece aligning the left and right raw edges. 3. Place the lining piece on top of the outer piece with the two pockets, right sides together, pin or clip in place. 4. Stitch around the outer edge with 1/4" seam allowance leave a 3" opening at the bottom longer edge for turning your passport holder or passport wallet later. Cut the corners at a 45° angle, that gives you nice crisp corners when turning the passport holder inside out. Close the opening with a small seam allowance. And YAY you're all done . Happy and save travels everyone.... I'm off to stitch a few more in other colors. Ingrid x PS: let me know what colors you are making , can't wait to see your photos on social media. Doesn't this happen to you all the time as well? You have tons of the cutest fabric scraps left over? But of course you don't want to throw them out? I like quick and easy projects with these fabrics, so I don't end up collecting tons and tons of fabric pieces, which I do anyways, haha. So here is another super pretty and easy pattern... this time for quilted oven mitts. Materials needed: ( for one oven mitt) size aprox. 7" wide x 11" high. - 48 pieces of 2" fabric squares ( thank you Riley Blake Designs for this adorable fabric series 'spooky hollow' by Polkadotchair ) - 1 piece of fabric for the back 9.5"x 12.5" - 2 pieces of fusible batting ( or insul brite if you wanted to ) 9.5"x 12.5" - 2 pieces of lining fabric 9.5"x 12.5" - 1 strip of fabric 2"x 5" for the hanging tab. - 1 piece of bias cut binding strip 1.5" wide 17" long. - printed oven mitt template Instructions: 1. Cut all your fabric pieces. Cut 48 2" fabric squares. And cut out the oven mitt template which you will find here. 2. Sew all the squares together. The easiest way, will be chain piecing the squares. Here's a quick video on how to do this. 3. Once you have all the squares sewn together, attach them to the fusible batting or insul brite. 4. Place the patchwork top on top the lining piece of fabric, wrong sides together. And quilt to your liking. I did quilt this with diagonal squares. 5. Iron the back piece of fabric on to the fusible batting and place on top of the lining piece wrong sides together. Then quilt to your liking. I quilted diagonal squares here as well. I drew them onto the fabric with a fabric marker ( Koh-I-Noor Fabric pen, that can easily be dusted off after sewing). 6. Sewing the hanging tab: Fold the piece of fabric for the hanging tab in half, aligning the long edges. Sew along the long edge with 1/4" seam allowance and turn inside out. 7. Place the oven mitt template on the patchwork piece and draw around it with a 3/8" seam allowance. Turn the template around ( so the wrong side is now facing you) and place it on the back piece and draw around the template again with a 3/8" seam allowance. Cut out the oven mitt shape with zigzag shears, then draw the oven mitt shape on the lining side ( again I used the fabric pen, that can easily be dusted off) 8. Place front and back pieces wrong sides together . Place the hanging tab between the two layers at the bottom corner facing the inside of the oven mitt. Sew along the drawn line, securing the hanging tab in the seam, then cut back the seam allowance to 1/4 ". 9. Cut the seam allowance, between the hand and thumb part of the oven mitt, all the way to the seam. This makes sure you don't get weird pleats when turning the oven mitt inside out. 9. Turn oven mitt inside out and clip the binding strip to the outside and stitch with 1/4" seam allowance. 10. Fold over the binding to the inside and hand stitch in place. And here we go you're all done. So get your pots out and ... happy cooking. What do you think? These adorable oven mitts are a great gift for any one, don't you agree? Ingrid xx How to sew the cutest coasters in less than 15 minutes... We all have tons of fabric scraps left over from our sewing projects right? That's why I love quick little projects to use all these cuties. Here is one, that you will love and actually use as well. Materials needed: ( for one coaster) finished size: 5" circle - 9 x 2" squares - fusible batting 5"x 5" - 1 piece of fabric for the back 5"x 5" - binding strip ( bias cut, that's important! ) 18"x 1.5" - If you want to make these coasters water proof, iron on some vinyl ( heat n bond) before or after you quilt them ( note: the ones here are without vinyl). Before you start: Read the instructions carefully Seam allowance is always 1⁄4” unless mentioned otherwise. Instructions: 1. Cut out all your fabrics and batting as mentioned above. 2. Sew your 9 squares together. Here is a quick video on how to piece these squares successfully. 3. Iron on the fusible batting and place on back piece of fabric wrong sides together. Then quilt the square to your liking. If you want to make these coasters water proof, iron on some vinyl ( Heat 'n Bond) before you quilt them . 4. Draw a circle on your quilted square and cut it out 5. Fold over the beginning of your binding strip 1/4" and then clip, pin ore clue your binding strip in place, along the outer edge of your circle. Stitch along the outer edge with 1/4" seam allowance. 6. Fold over your binding to the back and fold it under 3/8" as shown in photo 1, photo 2 shows the coaster from the front. 7. Now stitch binding in place from the front. Or hand stitch from the back, which ever way you prefer. It's super easy with the machine.... I feel good :-) Here we go, all done... What do you think? Easy and cute, right? Happy coaster sewing..... Ingrid xx Materials needed: (all measurements are width x height) For the pillowcase top: > 1 FPP Block of lotus flower in 8”x 8” size (unfinished 8.5”x 8.5”) > 2 2 strips of fabric 3” x 8.5” > 3 2 strips of fabric 3”x 13” > 4 one piece of fusible interfacing 13” x13” For the side panel: > 1 2 strips of fabric 32.5” x 3” > 2 2 pieces of fusible interfacing 32.5” x 3” > 3 1 strip of fabric 7” x 5.5” > 4 1 strip of fusible interfacing 7”x 5.5” > 5 1 endless zipper + slider 32.5 ” length > 6 2 pieces of fabric (for the handle) 2.5” x 6” > 7 1 piece of fusible interfacing 2.5” x 6” For the bottom: > 1 one piece of fabric for bottom of pillow 13” x 13” > 2 one piece fusible interfacing 13” x 13” Before you start: Read the instructions carefully Seam allowance is always 1⁄4” unless mentioned otherwise. Instructions: 1. Cut out all your fabrics as mentioned above. 2. Sew your lotus flower quilt block, it will measure 8.5” x 8.5” 3. Attach the side strips to your quilt block 4. Draw a 13” diameter circle (or a 6.5” radius) 5. Cut out a 13” diameter circle 6. Iron on fusible interfacing and quilt to your liking 7. Attach the fusible interfacing to the side strips of fabric ( 2x 32.5”x 3” and 1x 7”x 5.5”) Sew the endless zipper to the long sides of the two 32.5” x 3” strips of fabric. And top stich along the zipper. 8. Stitch the 7”x 5.5” fabric to one end of the zipper part. Top stitch along the seam as well. 8. Lay the two pieces of fabric for the handle right sides together and attach fusible interfacing to one side. Stich along the long edge with a ¼” seam allowance. Then turn inside out and top stich along the long edge again with a small seamallowance. 9. Attach the handle to the side panel and cut to width of panel. 10. Now clip the side panel to the top circle till the side panel ends meet. This is where you stick your side seam, this way the side panel fits exactly to your yoga pillow top. Once the top piece is stitched in, repeat for the bottom circle. 11. Open up your zipper and turn your pillowcase inside out. Tadaaaa your yoga pillowcase is all done.... Now take your time for some mindful meditation and enjoy :-) Thank you so much to Riley Blake Designs for supplying the absolutely adorable Stardust fabric series designed by Beverly McCullough that I used for this amazing project. Ingrid xPs You know I love recycling and reusing. And you know I looove recycling and reusing fabric. I roam through flea markets, garage sales, second hand and thrift stores and almost always find some pre-loved piece of fabric. And I always buy old fashioned flat sheets, they're most often made of really thick cotton, or a cotton/linen mix, which is absolutely perfect for all sorts of sewing projects. Especially dish cloths or napkins, but I also use them in quilts, key fobs, pouches and much more. I wrote a whole blog on fabric recycling in case you want to know more. Today I want to show you how to make the cutest dish towels with recycled cotton sheets and left over fabric scraps. Materials/fabrics needed for 2 dish towels: - 2 pieces of white fabric ( I use cotton table cloth or flat sheets for this, they're pre-washed so many times, that they work perfectly as dish cloths as they dry dishes very nicely) 20.5"x 27". - 40 pieces of 2.5"x 2.5" fabric squares. - 2 strips of fabric 2"x 5" for the hanging tab Sewing the dish towels: 1. Cut your fabrics as mentioned above. 2. Sew your fabric squares into 4 strips of 10 squares each ( two strips per towel) 3. Press your seam allowances. You can either seperate your seam allowances and press them each seperatly, or press the seam allowances in opposite directions before joining your fabric square strips. This is really easy and quick. (photo 1) You press one strip in one direction and the other in the opposite direction, this will help with nesting your seams and having accurate corners and matching points. The seams sort of fit together automatically ( photo 2). You end up with a perfectly flat fabric square panel. ( photo 3) 4. Fold over the long raw edges of your square panel 1/4" and press again then pin or clip in place. 5. Place this panel on one of your white fabric pieces at 7", mesured from the bottom raw edge of your kitchen towel and pin in place. 6. Stich this panel in place with a small seam allowance. I also added some diagonal seams. 7. Sewing the hanging tab for the tea towel: - Fold the 2"x 5" strip in half lengthwise and press. Fold in 1/2" seam allowance on each long raw edge and press again. - Stitch with small seam allowance. - Fold the tab in half and clip in place at the center of the back of your kitchen towel top edge. 8. Fold over the raw edges of your dish towel 3/8" twice and pin or clip in place. I did just simple corners on these tea towels, but if you want to get really fancy you could do mitered corners as well. 9. To finish stitch all the way around your kitchen towel. What do you think about these kitchen towels? Don't you agree they're ...... :-)? Now I cant wait to see all of your tea towel versions... use #dryinstyletowel on social media, so I can find your makes .... happy sewing. Ingrid xx
|
Author
Ingrid Alteneder Archive
March 2022
Categories
All
|
-
Shop
- New patterns
- All Patterns
- Appliqué Patterns
- Animals
- Baby
- Ballet
- Bear Cottage
- Beach/ Boats/ Nautical
- Buddha/ Mindfulness
- Chinese New Year
- Christmas
- Easter and Spring
- Fairytale
- Fall/ Autumn
- Flowers, Trees and Plants
- Food/ Drinks
- Halloween
- Oktoberfest
- Quilted items
- Stars
- Viva la Frida/ Dia de los Muertos
- Valentine's Day
- Village Patterns
- Mixed pattern
- Home
- About
- Blog
- Publications
- Etsy
- News
- Deutsch
|
Visit us at
|





 RSS Feed
