
|
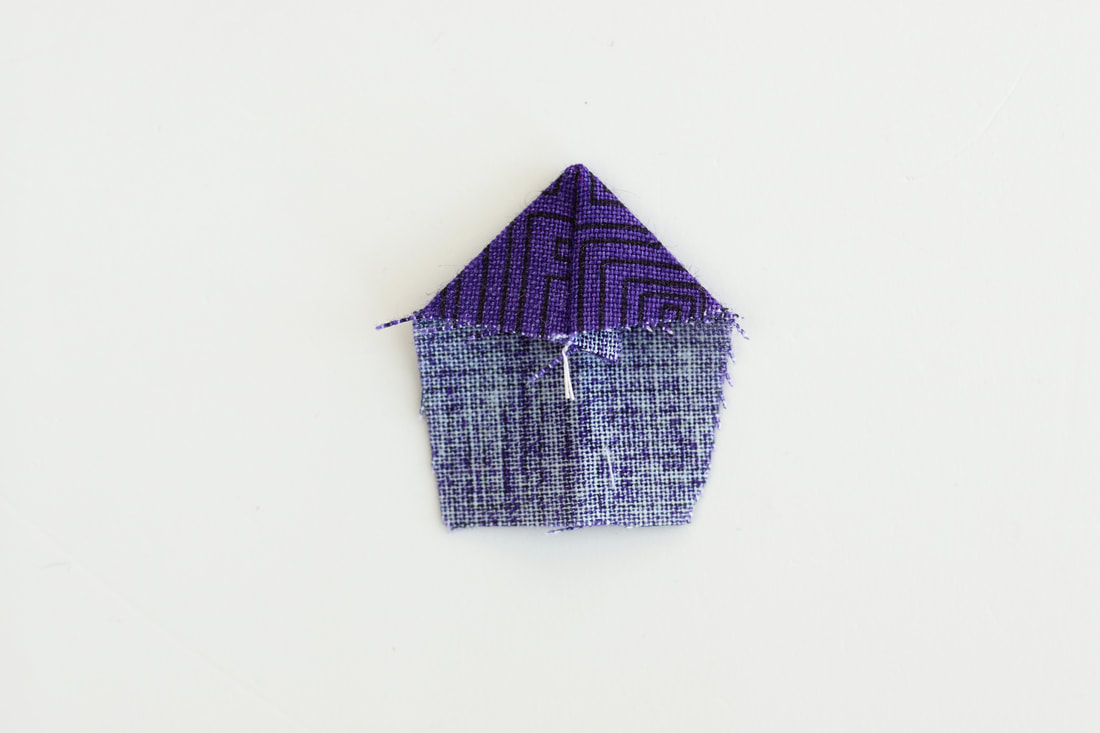
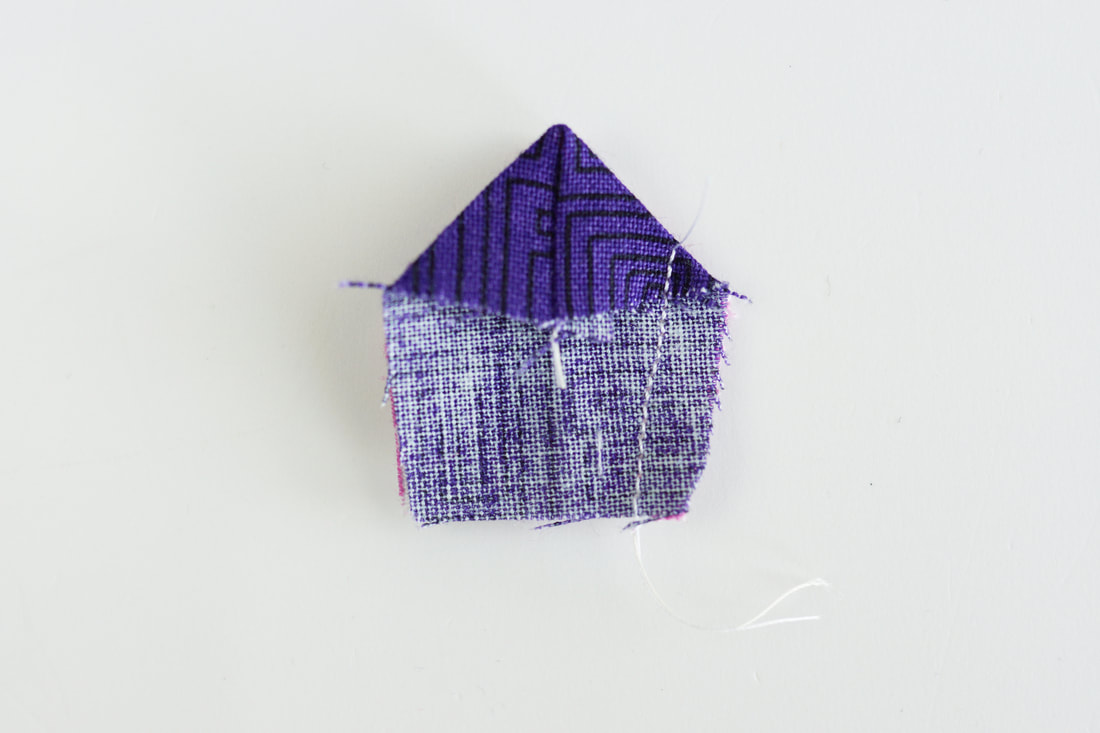
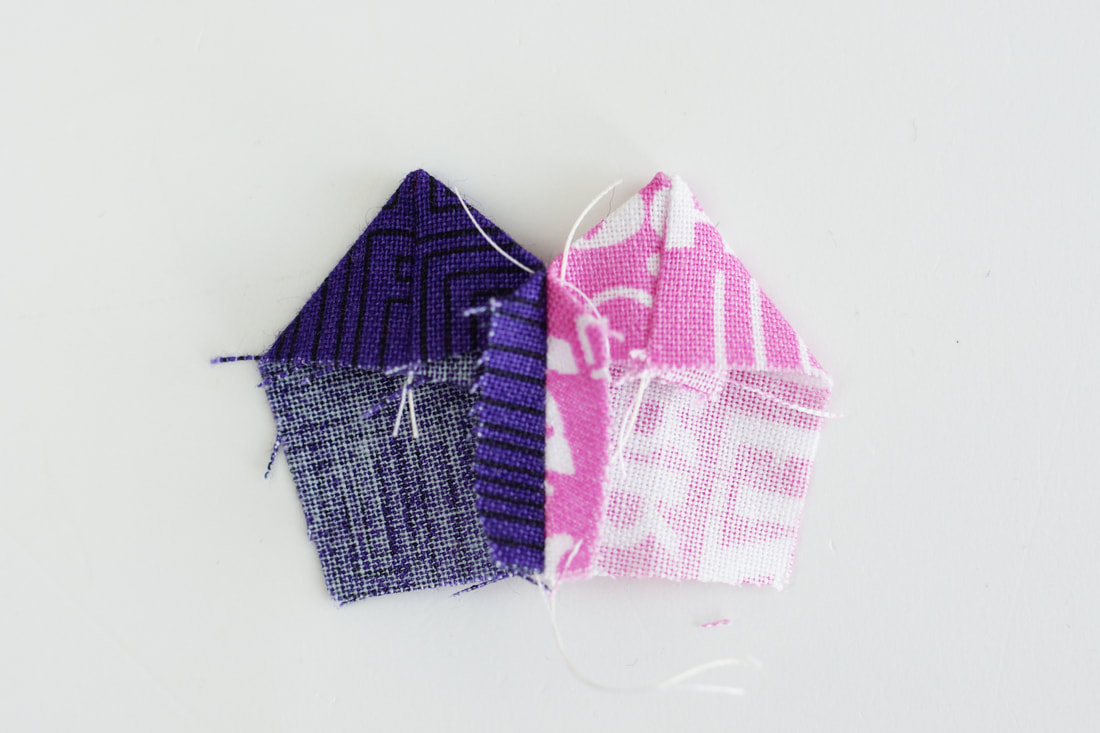
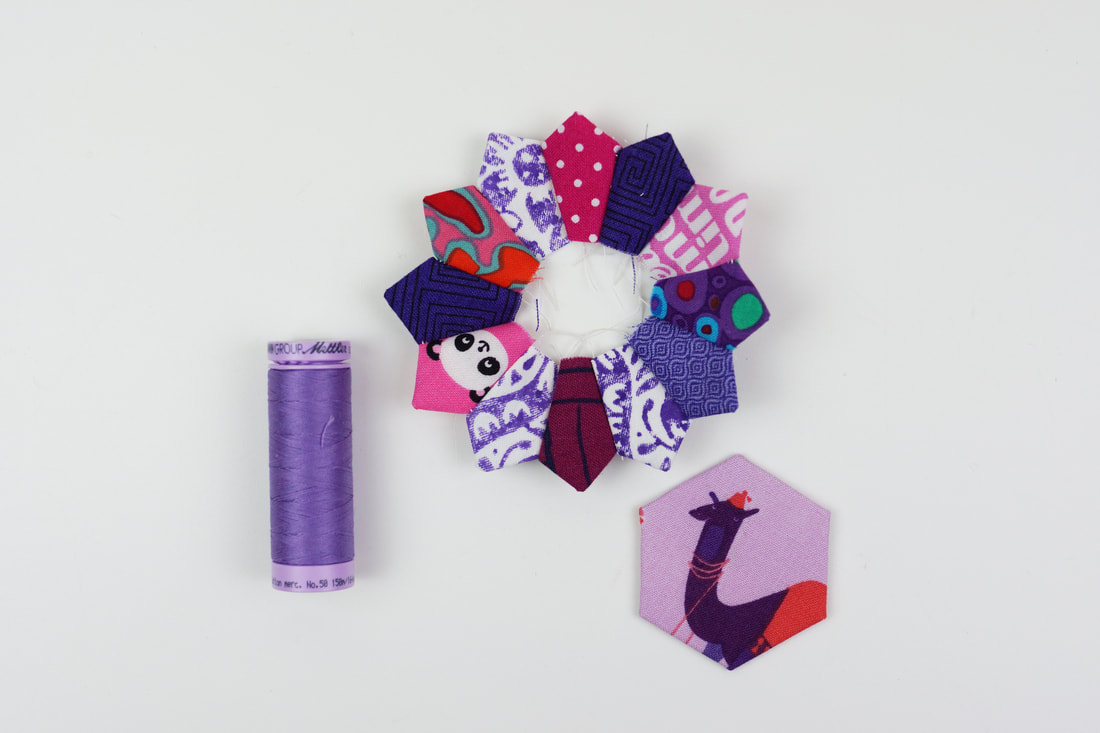
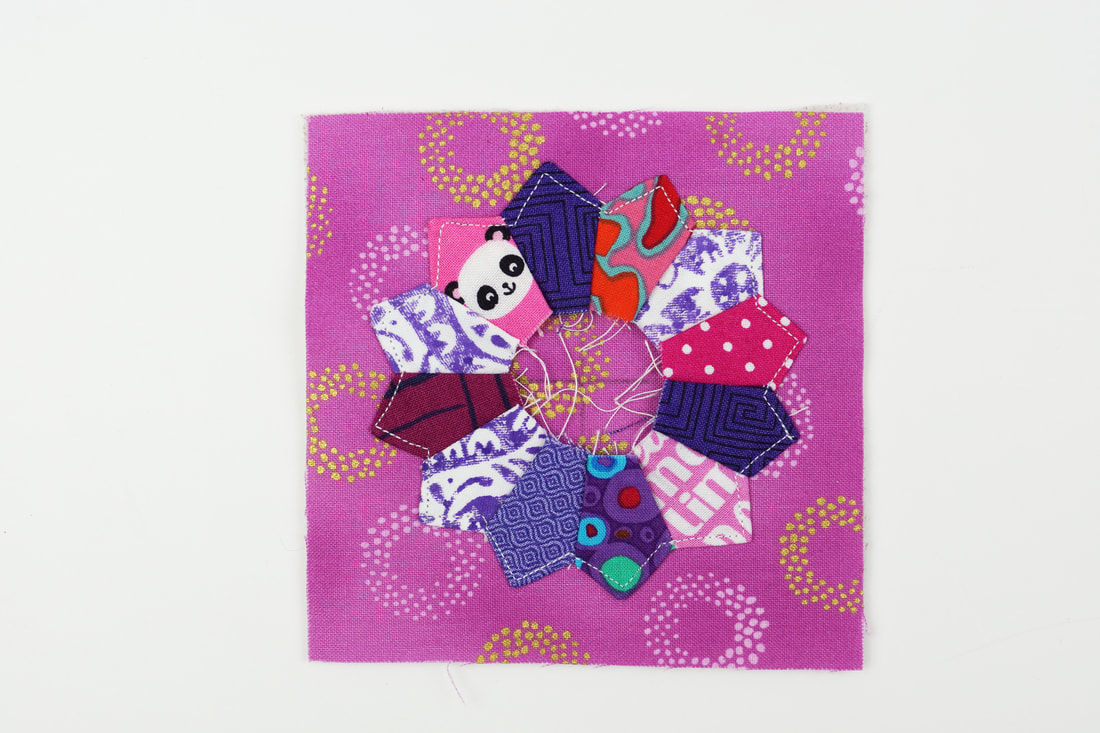
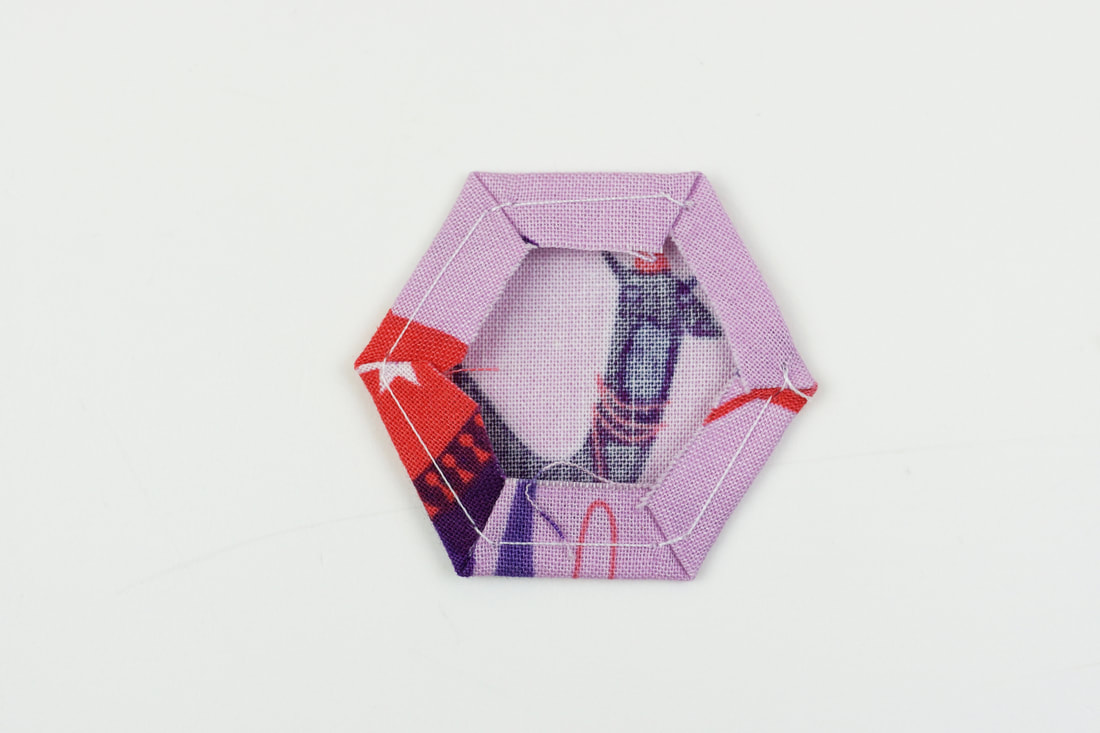
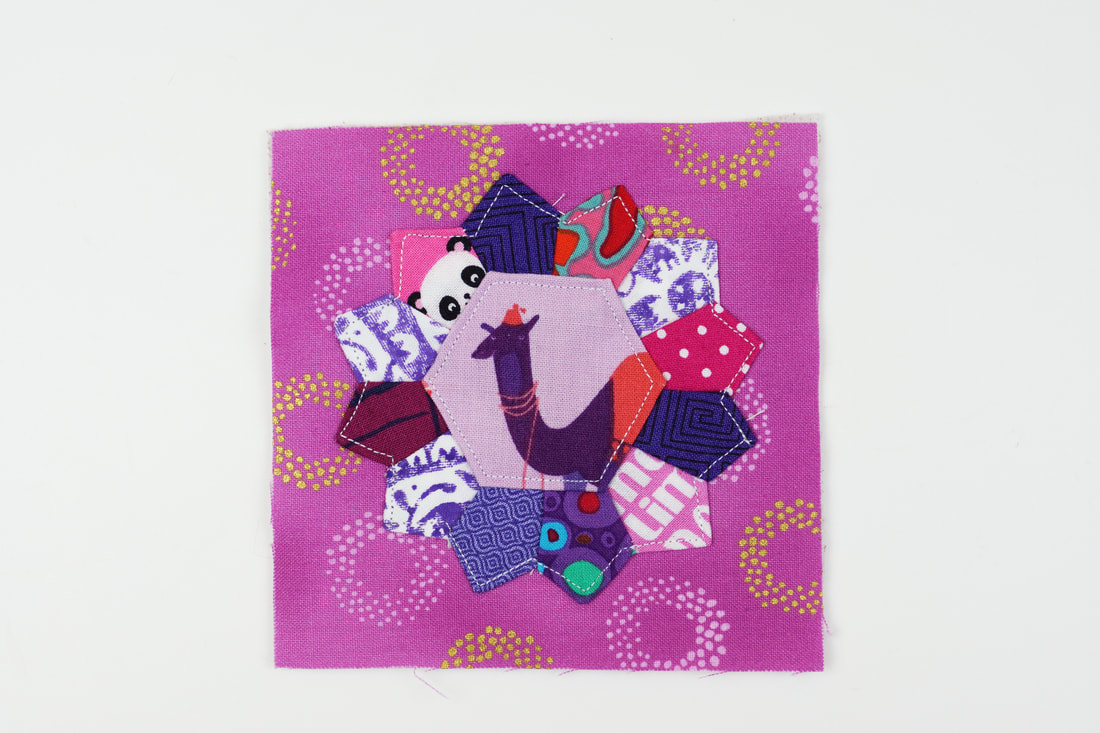
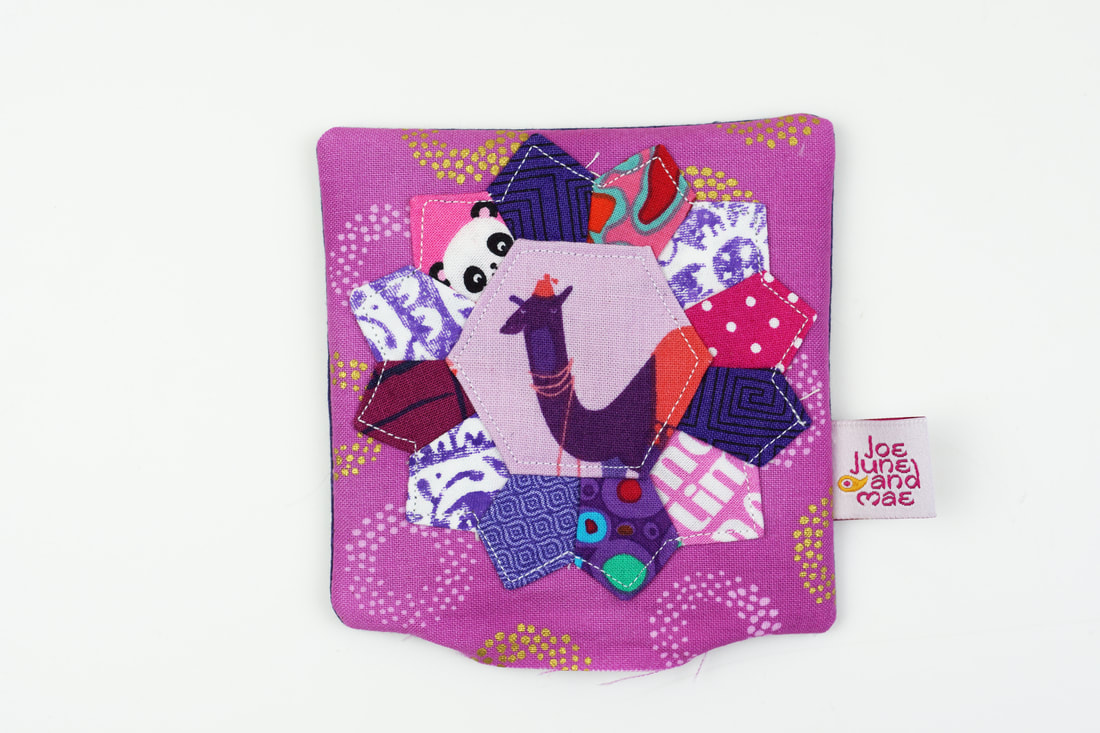
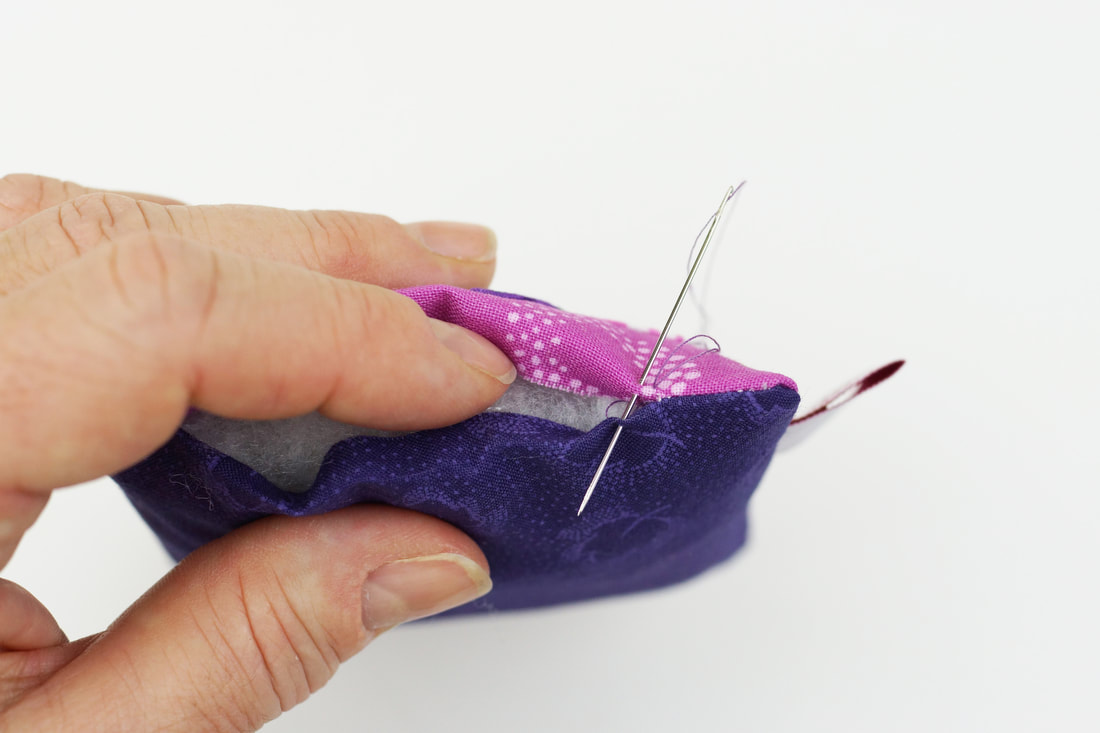
Do you ever wonder what to do with all those super cute fabric scraps that are left over from your sewing projects? Well, here are a couple of pincushion ideas for you to sew up with the smallest fabric pieces. 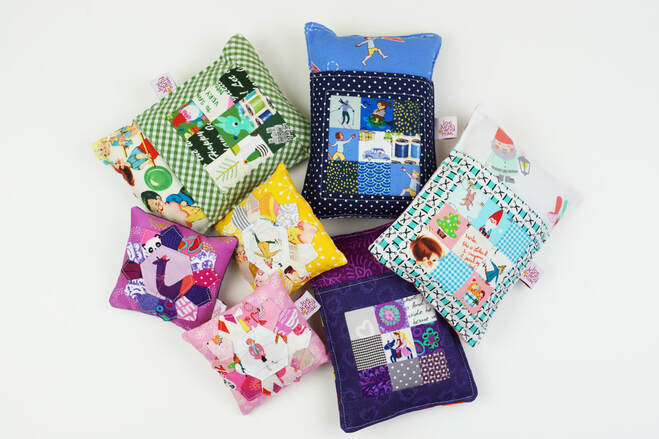 pincushion party Now you might wonder how I get those fabric scraps color coordinated, and how I will find them when I need them. Here's a simple trick, I make it a habit to cut up the cutest scraps right away into 1.5" squares and sort them by color into a simple acrylic organizer box. That way, I have them handy when I need them for fabric stamps, hang tags or smaller sewing projects like these pincushions. Plus that box is really pretty to look at, don't you think? 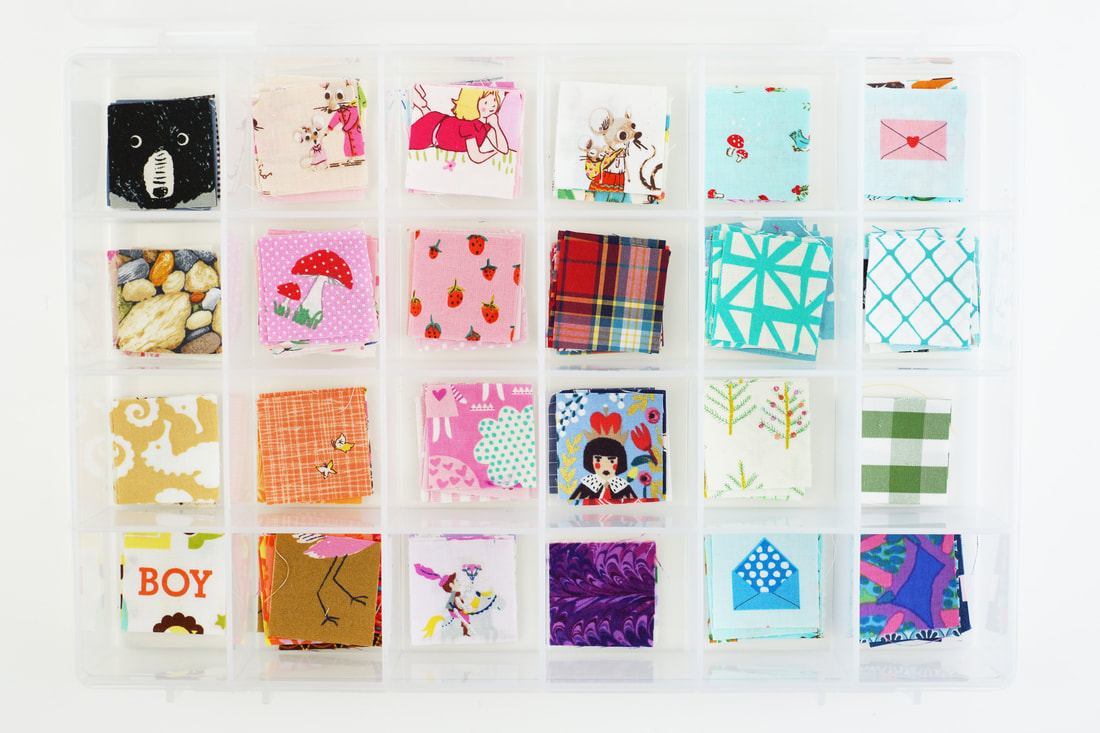 1 1/2" squares sorted by color I also cut up some Dresden plate pieces every once in a while and keep them in another box sorted the same way. I like making these tiny Dresden plates, just because they're so super cute, and I can really make use of the smallest fabric pieces. For cutting Dresden plate pieces I use the Darlene Zimmerman Dresden Acrylic Ruler. 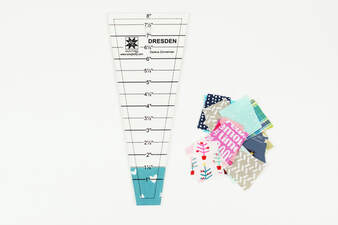 Darlene Zimmerman Dresden Ruler This awesome pincushion is also called Deluxe pincushion and is a super cute pattern from the book Sew organized for the Busy girl by Heidi Staples. It's a great pattern and a quick and easy make. This is an absolutely perfect pattern for all kinds of fabric scraps. You can use them color coordinated or by theme, make a little fairytale pincushion, or one with just flowers, a Christmas themed one or use very modern little scraps. I'm sure you will find tons of inspiration when you go through you fabric. 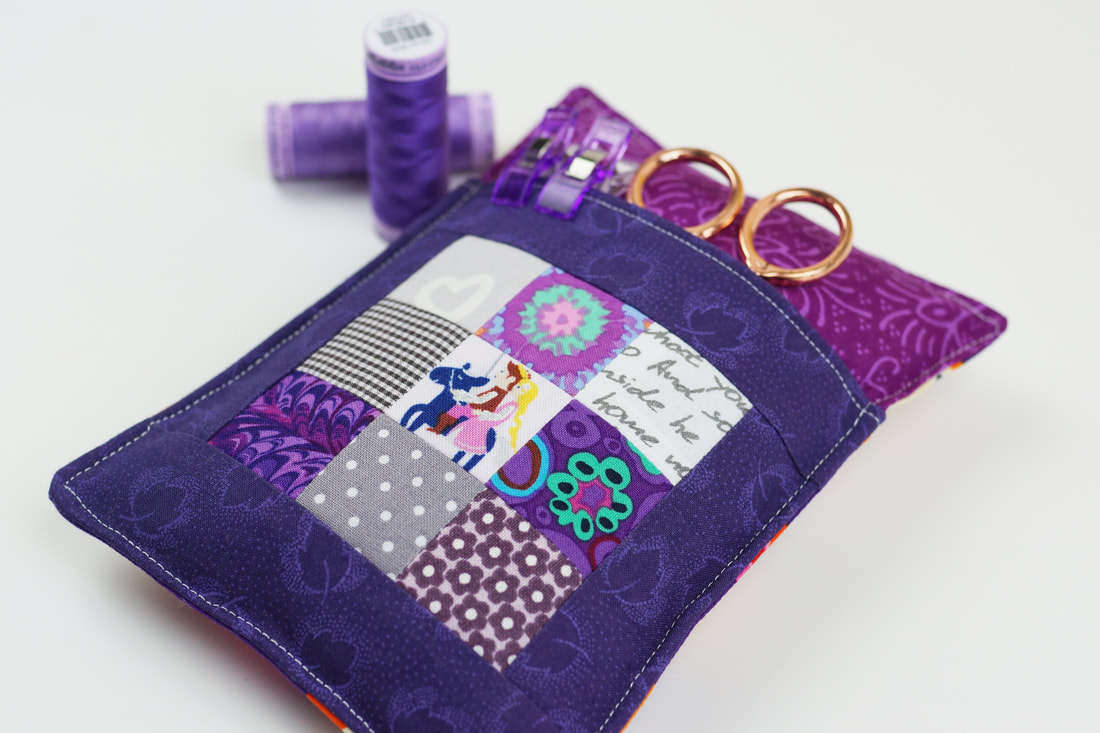 Deluxe pincushion with pocket Mini Dresden plate pincushion: finished size aprox 4"x 4" Fabrics/ materials needed: - 12 1.5" Dresden plate pieces - 2 pieces of fabric 4.5"x 4.5" - 1 basted 1" hexie, paper taken out. - 1 piece 4.5"x 4.5" fusible interfacing -a hand full of fiberfill, or your prefered pincushion stuffing material Sewing the pincushion: 1. Cut all the fabrics as mentioned above. Cut 12 1.5" Dresden plate pieces. (photo 1) 2. Fold the Dresden plate pieces in half , lengwise , right sides together and stitch along the top edge ( wider part of blade) with a 1/4" seam allowance. (photo 2) Chain piecing these blades makes this step super easy. 3. Cut off the corners (as shown in photo 3) at a 45° angle, this gives you nice, sharp points. 4. Turn each blade's sewn end right sides out. It usually just takes a finger to create a sharp point as you make that turn, but if necessary use a pencil to push the point outward. Be careful not to push too hard or cut through the fabric. Then press these. 5. Sew the Dresden Plate blades together by aligning the side edges right sides together with a 1/4" seam allowance from top to bottom, then press seam allowance open. After sewing the full circle, press the entire Dresden plate. Note: Most Dresden Plates are made with a 18° wedge ruler ( like the one I used), this means technically to form a full circle it would require 20 blades ( 18 x 20 = 360), but I use only 12 for this pincushion. Otherwise the full Dresden Plate would be too big and wouldn't fit on a small 4.5" square. The Dresden plate is so small, that it works just fine after pressing the full circle with 12 blades . And there will be a hexie placed on top anyways. Or you could us a 30° wedge ruler ( 30 x 12 = 360) 6. Stitch the Dresden plate onto one of the 4.5" x 4.5" pieces of fabric. Mark a cross in the center of the square to make placing the Dresden plate easier. 7. Place basted hexie ( paper taken out! ) on top and stitch in place. 8. Iron on fusible interfacing and place back 4.5"x 4.5" piece of fabric on top, right sides together and stitch around along the raw edges leaving a 2" opening for turning the pincushion. Cut the corners at a 45° angle, this gives you nice and sharp corners after turning. 9. Turn your pincushion right side out, and fill the pincushion with fiberfill or your preferred pincushion stuffing material. Press the opening under 1/4" and stitch closed by hand. The cutest little pincushions made entirely from fabric scraps, are all done ..... Aren't they just darling? 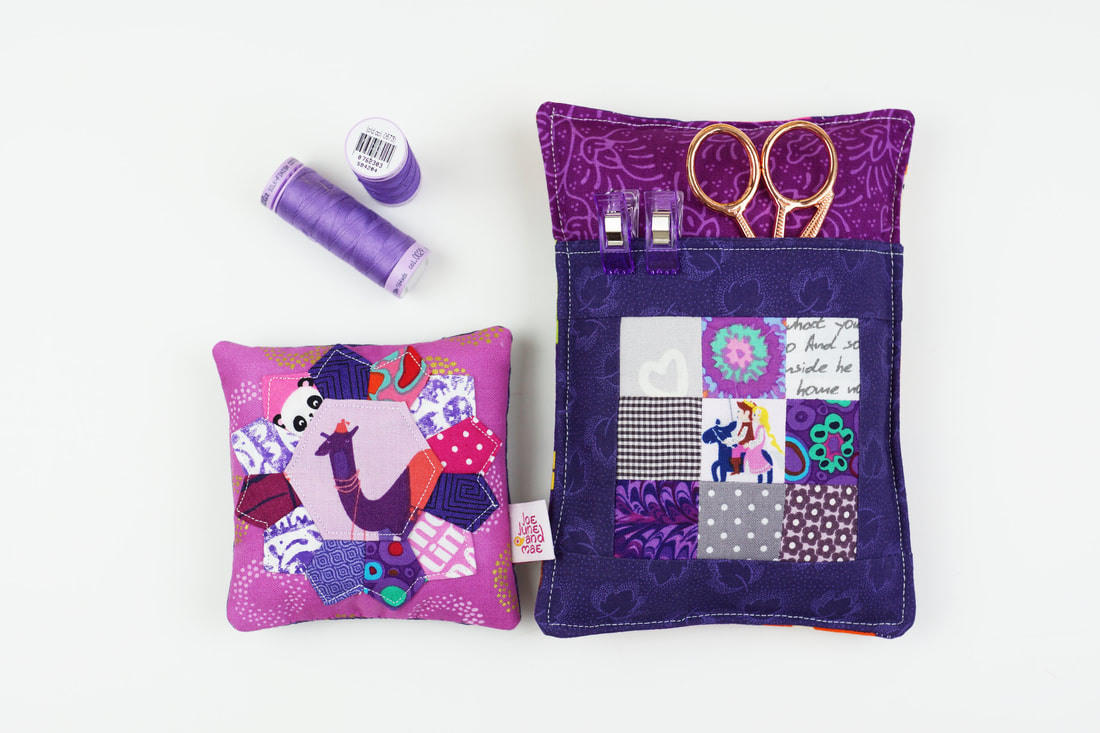 Have lots of fun sewing up all your fabric scraps. Ingrid x
0 Comments
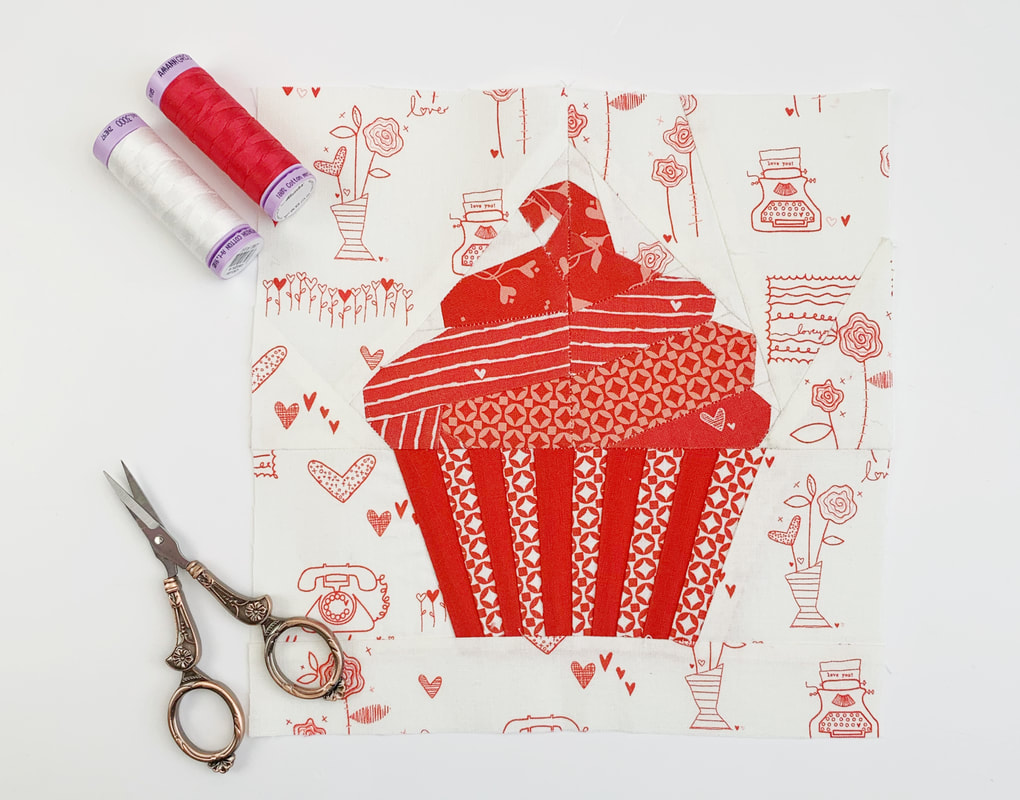
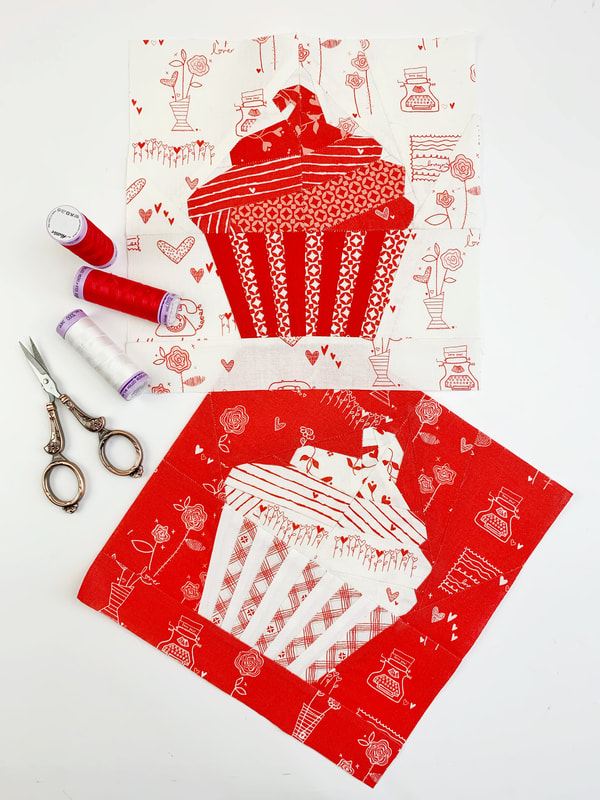
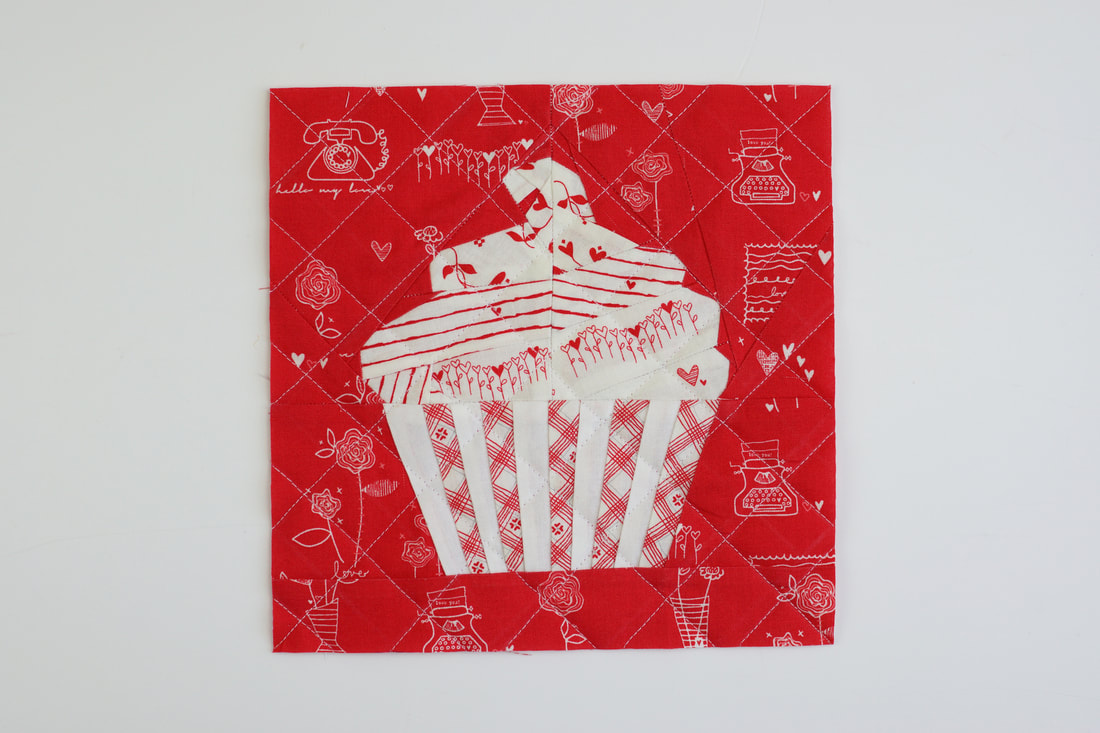
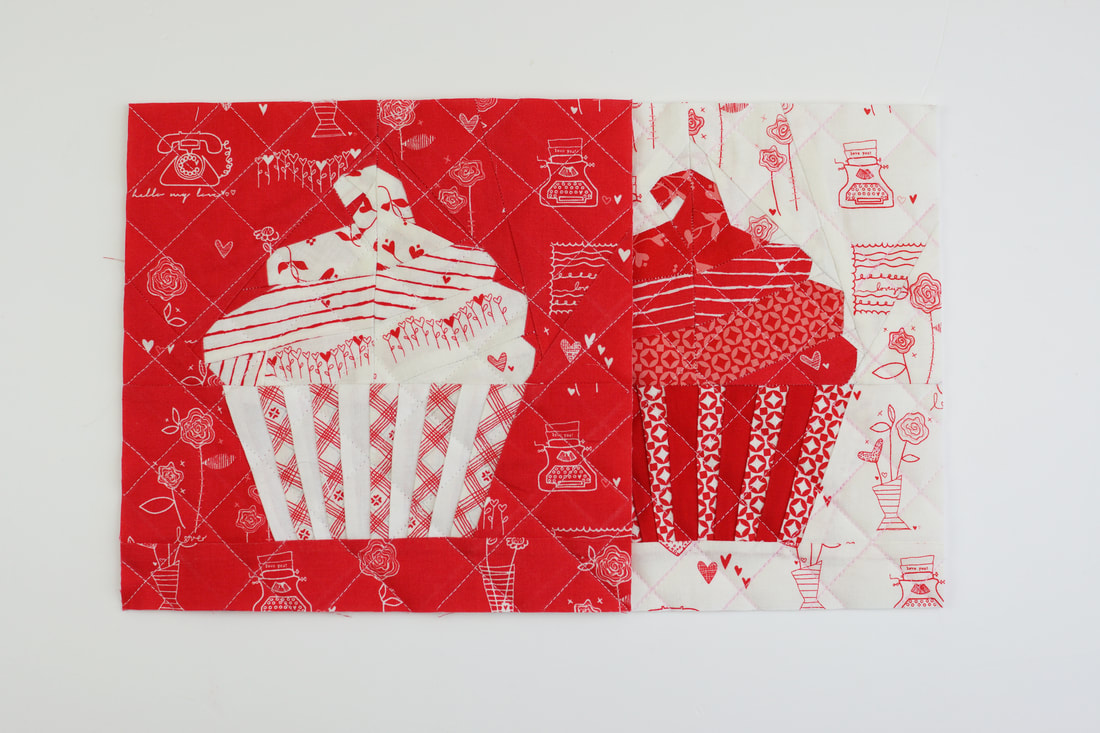
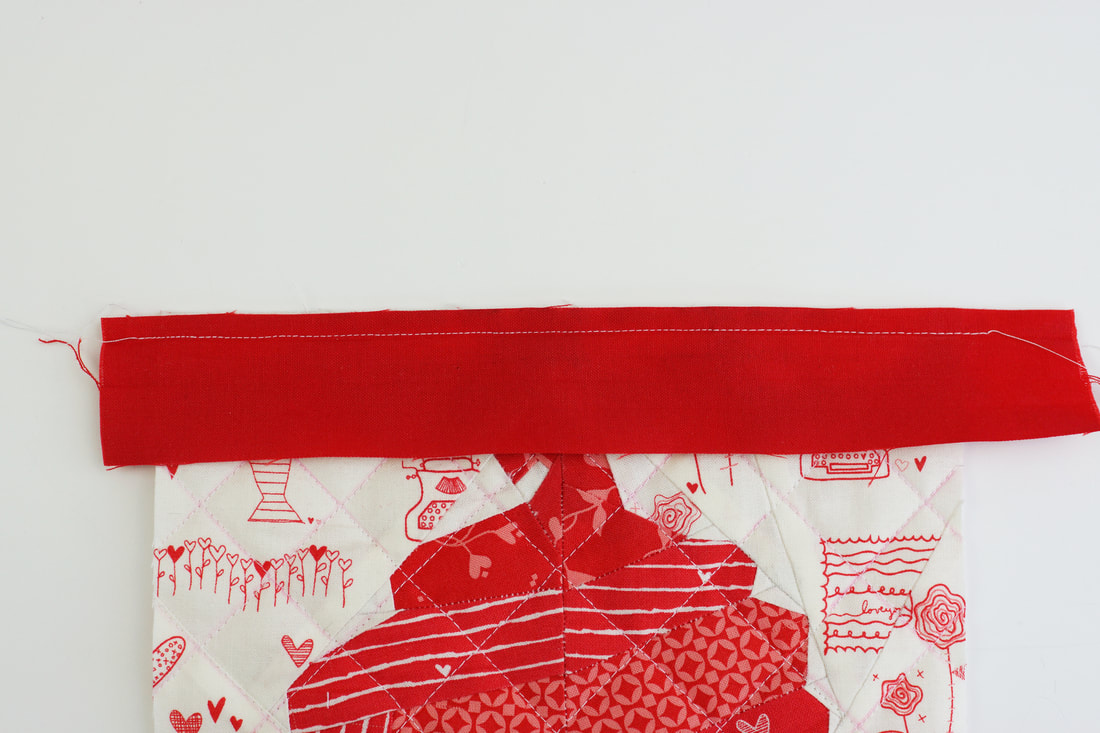
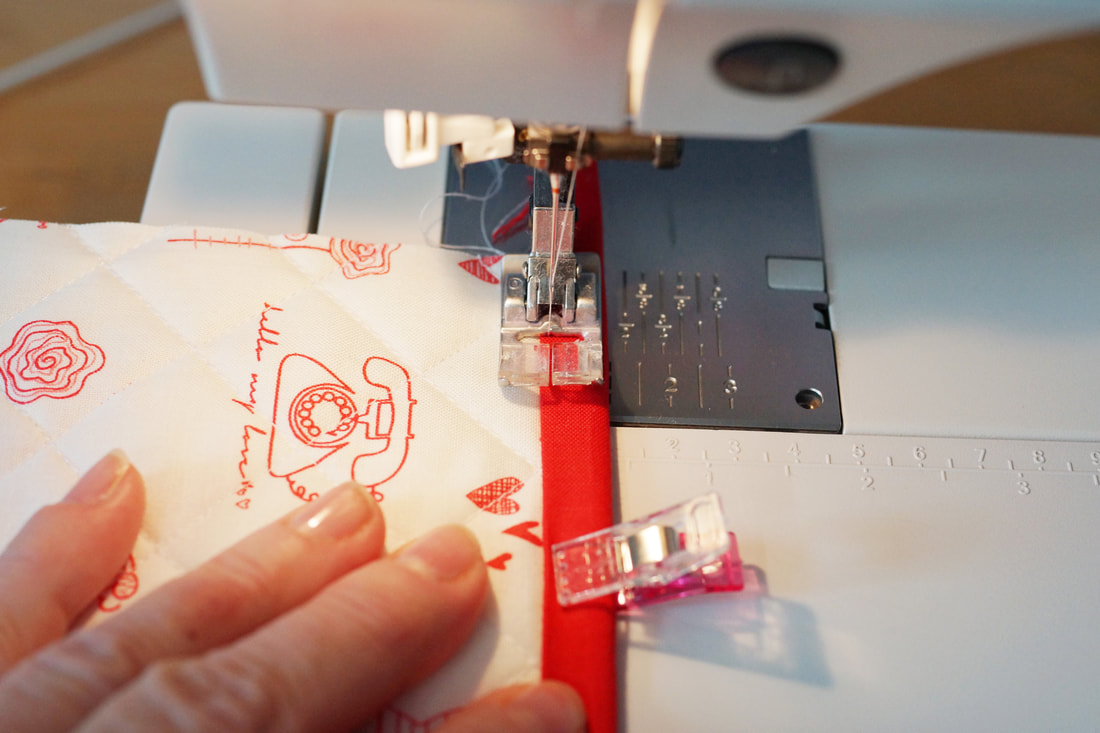
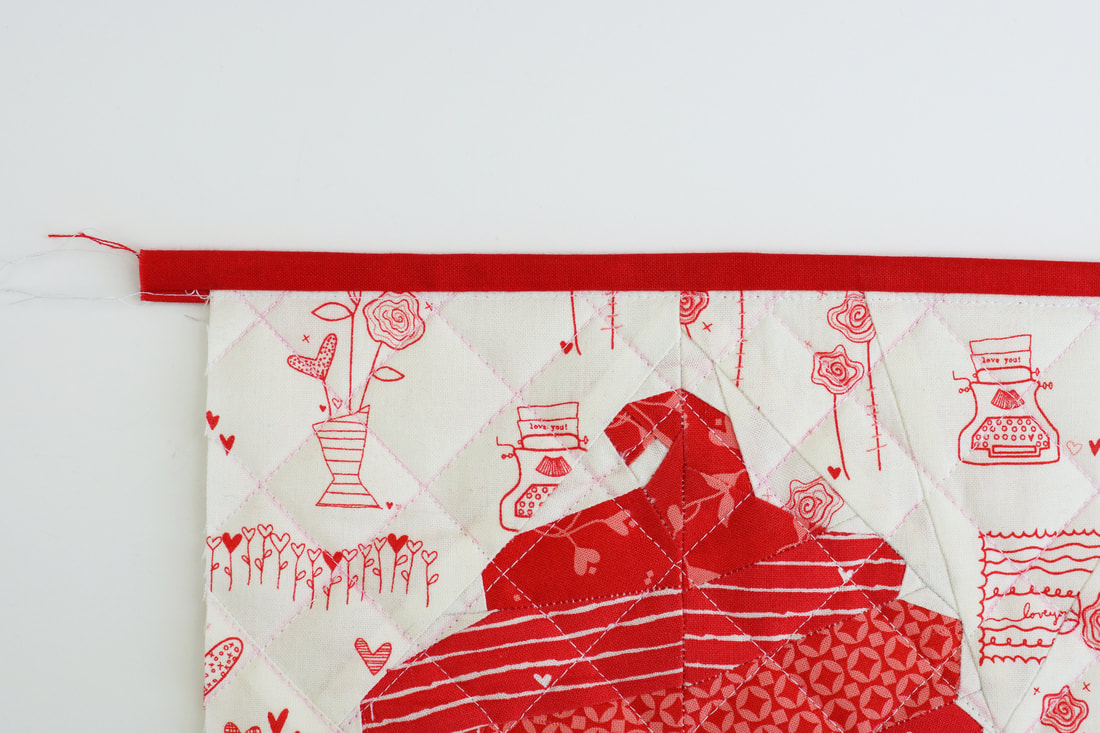
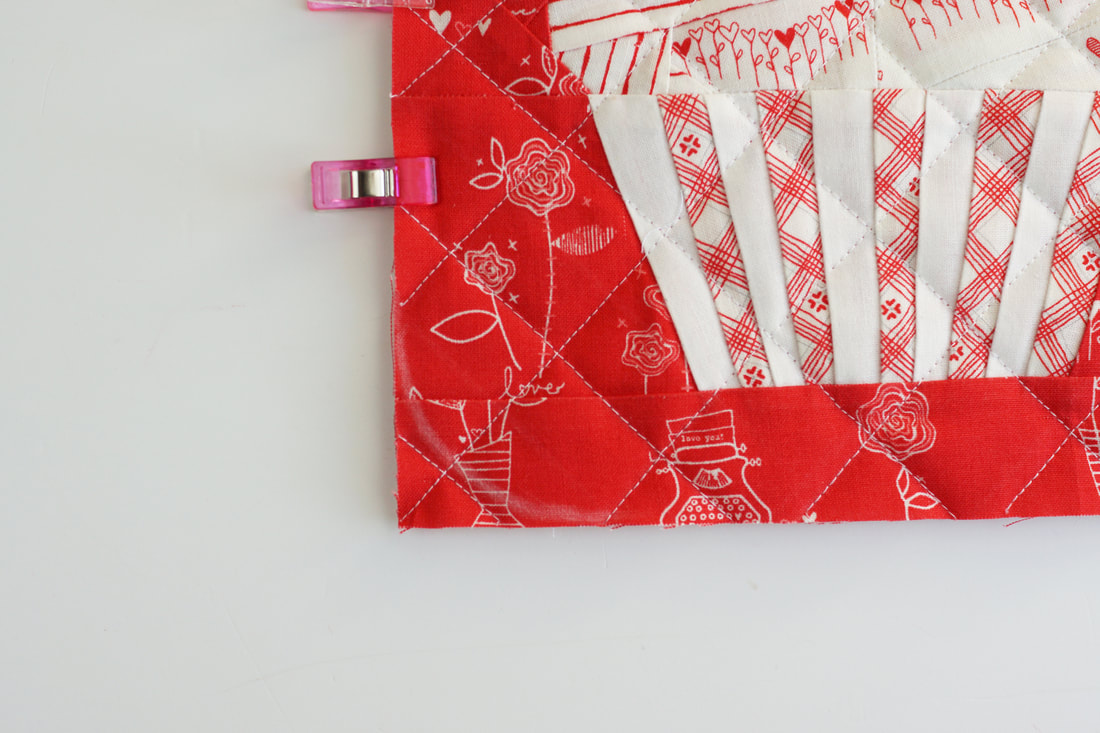
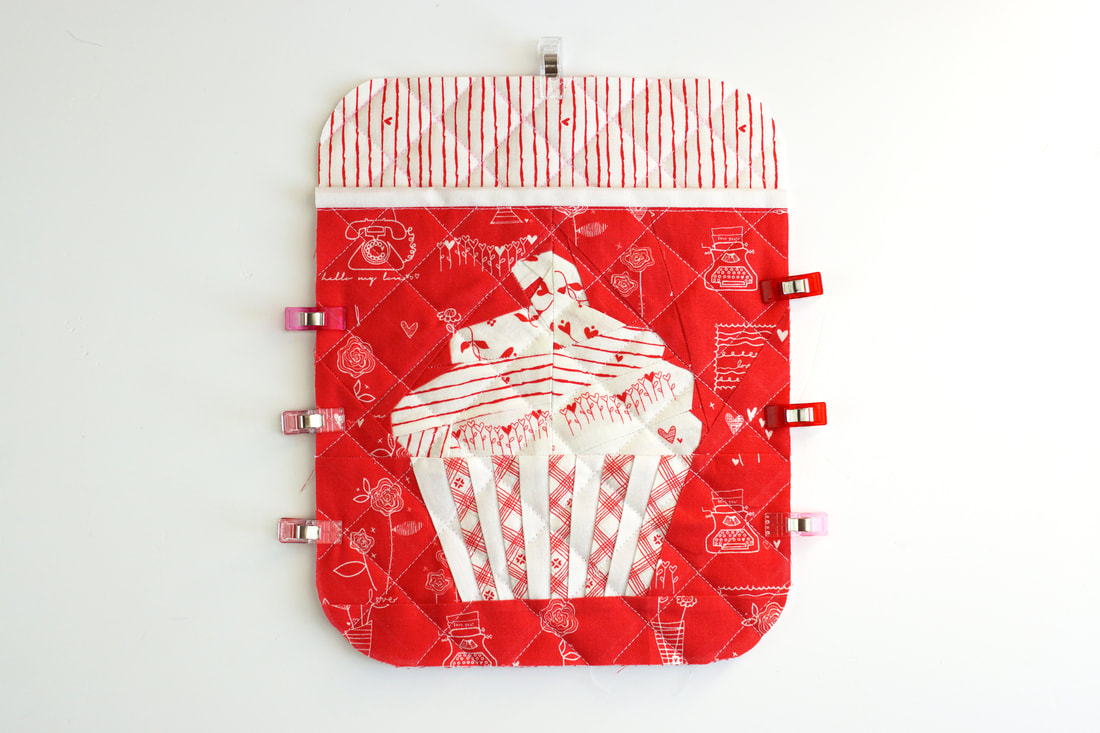
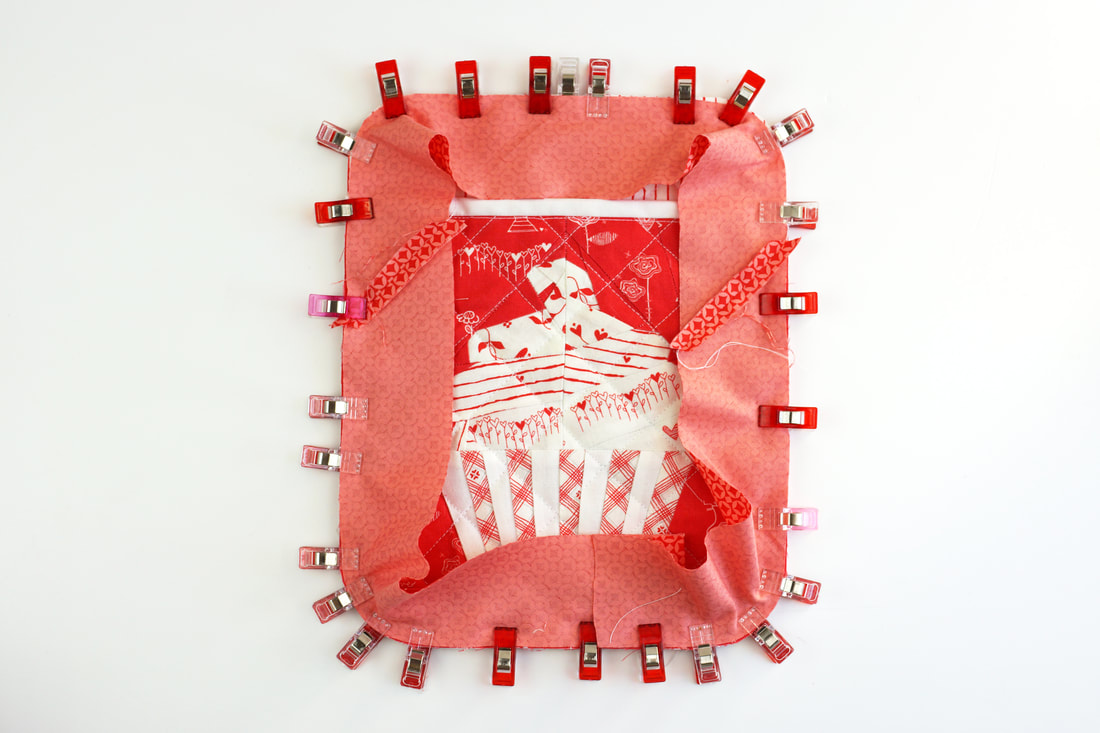
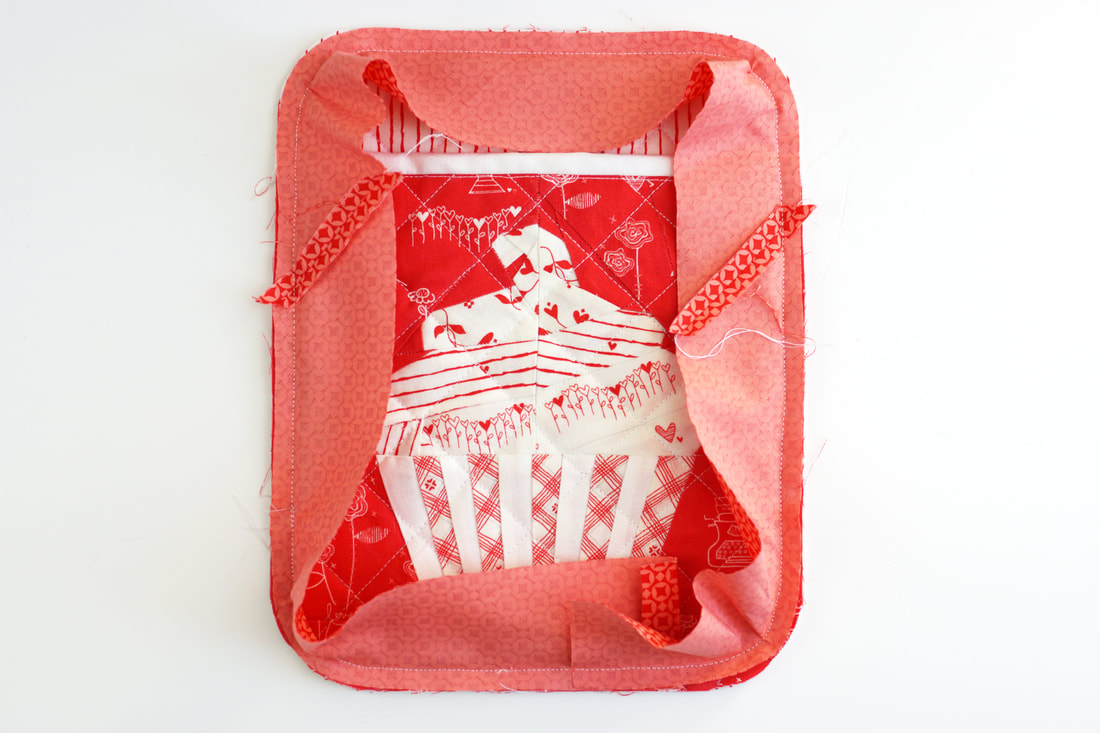
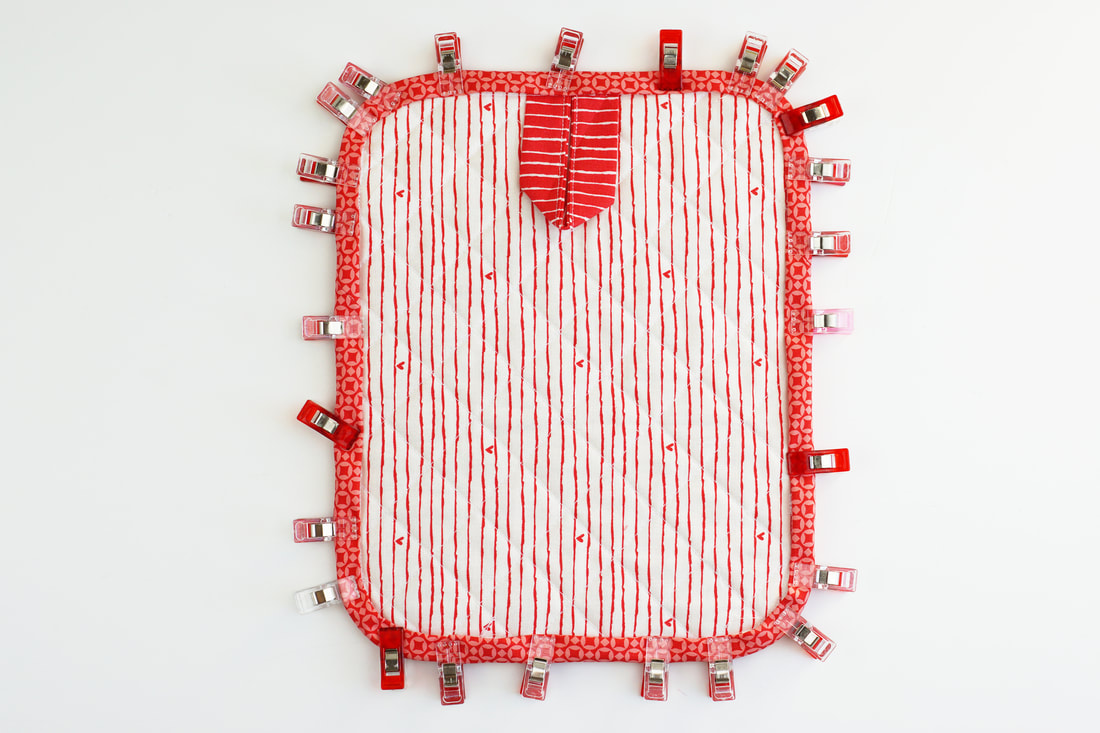
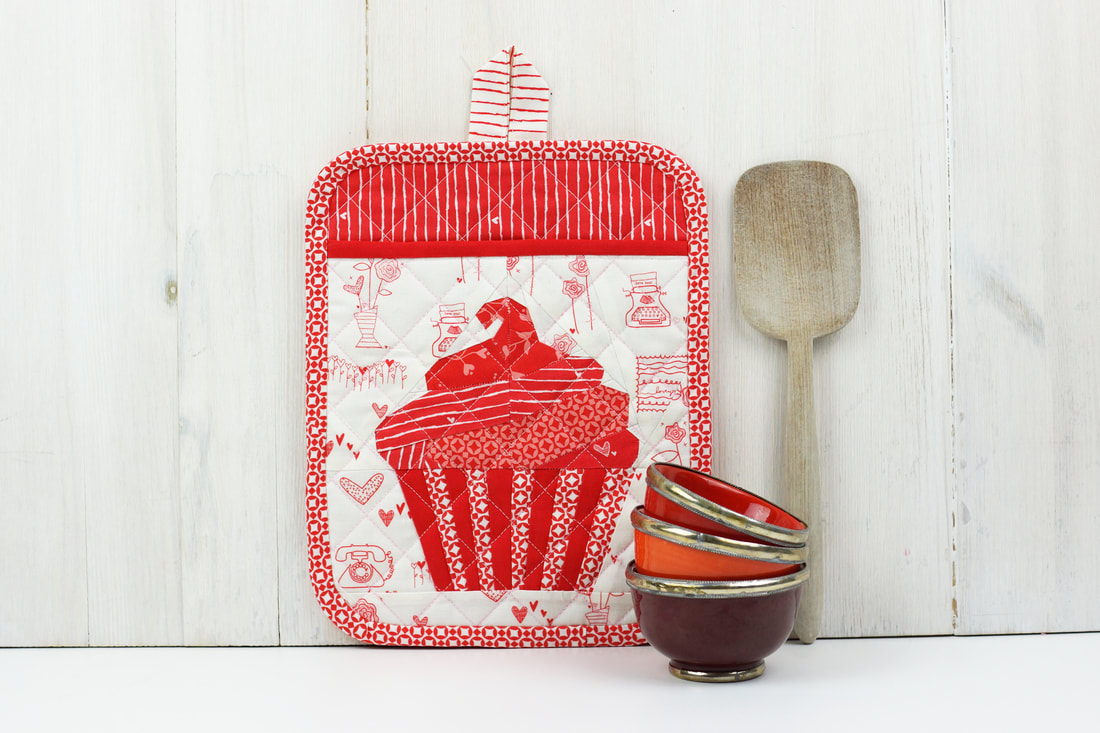
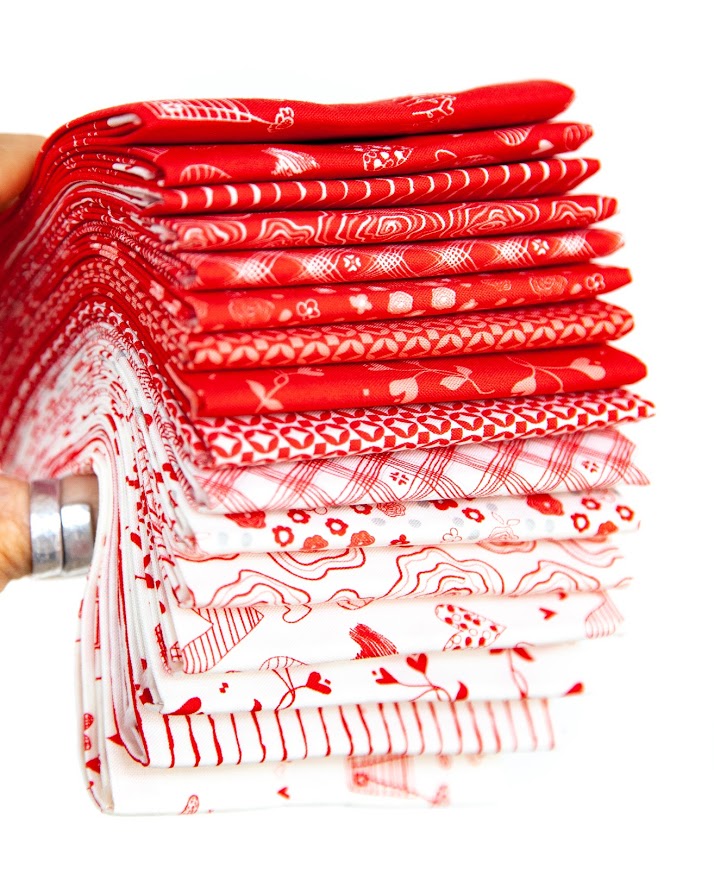
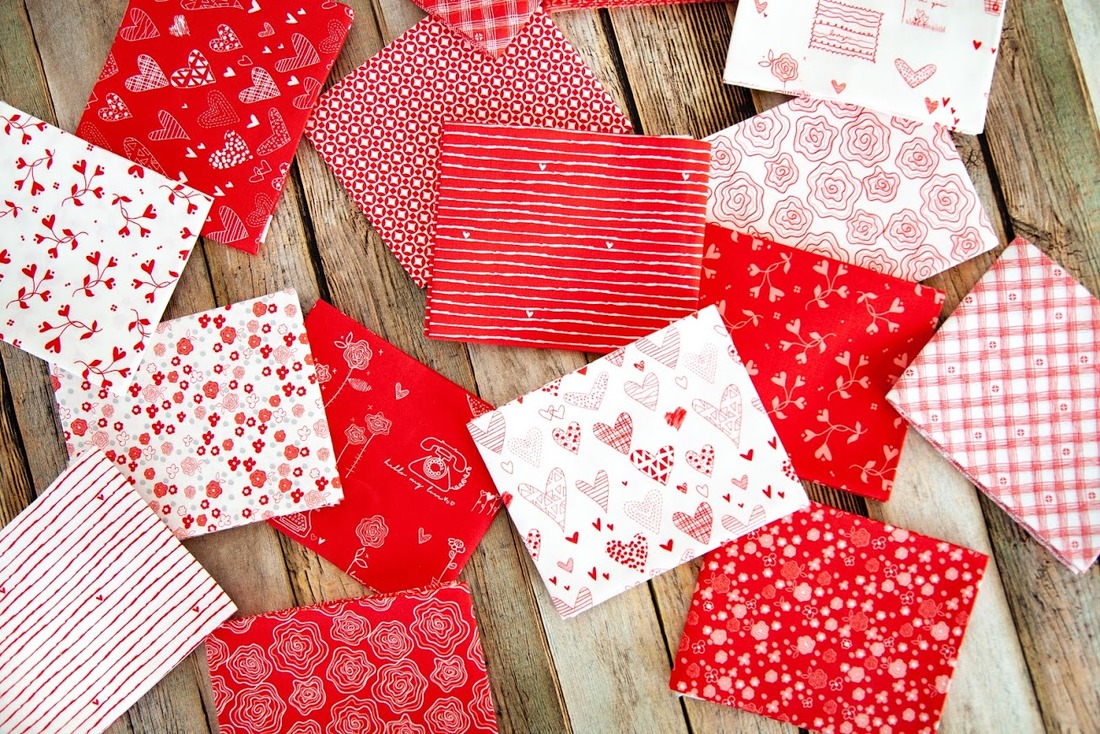
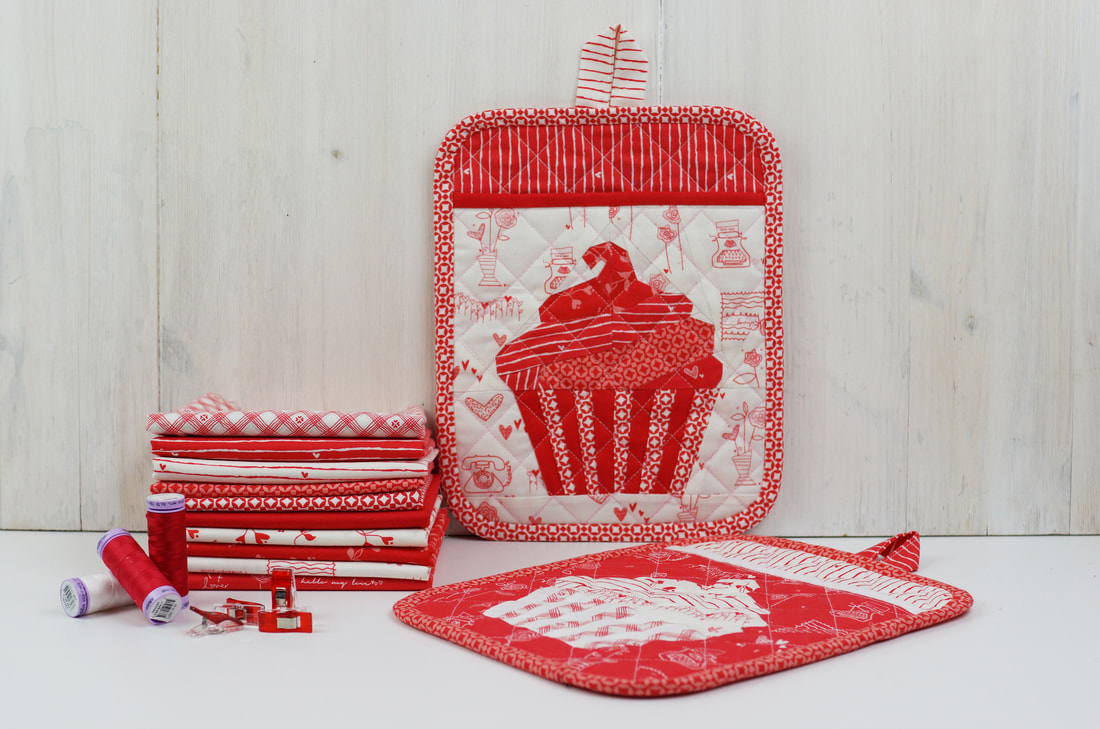
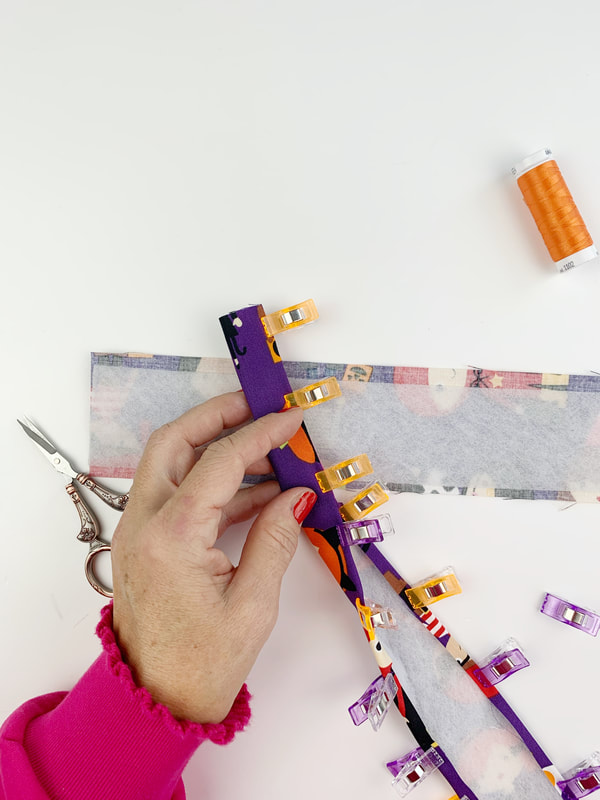
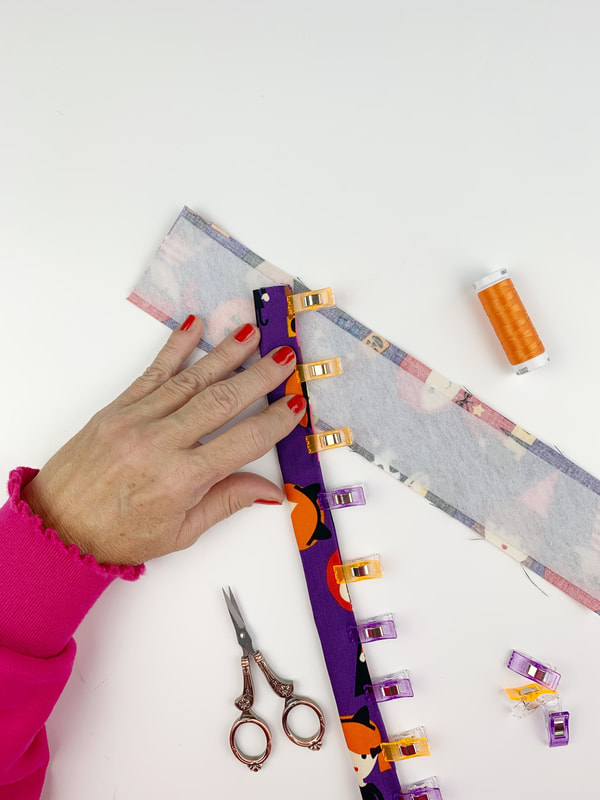
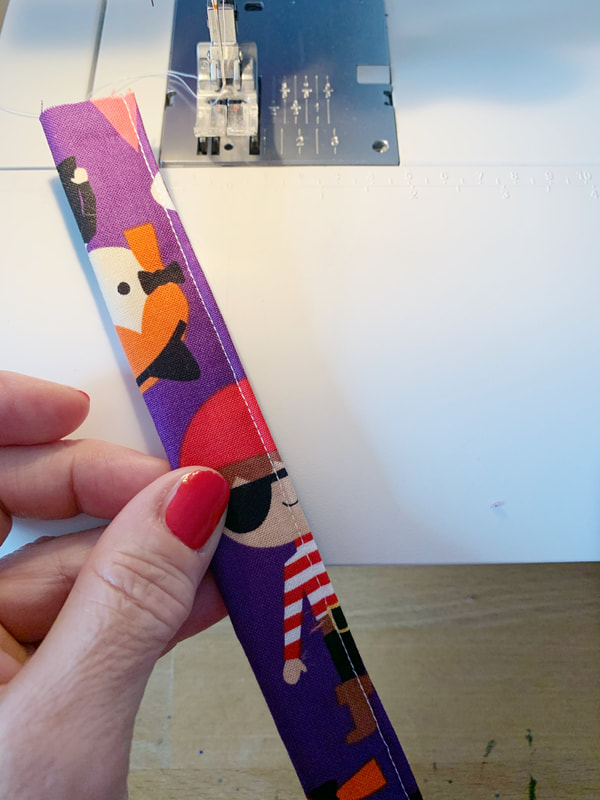
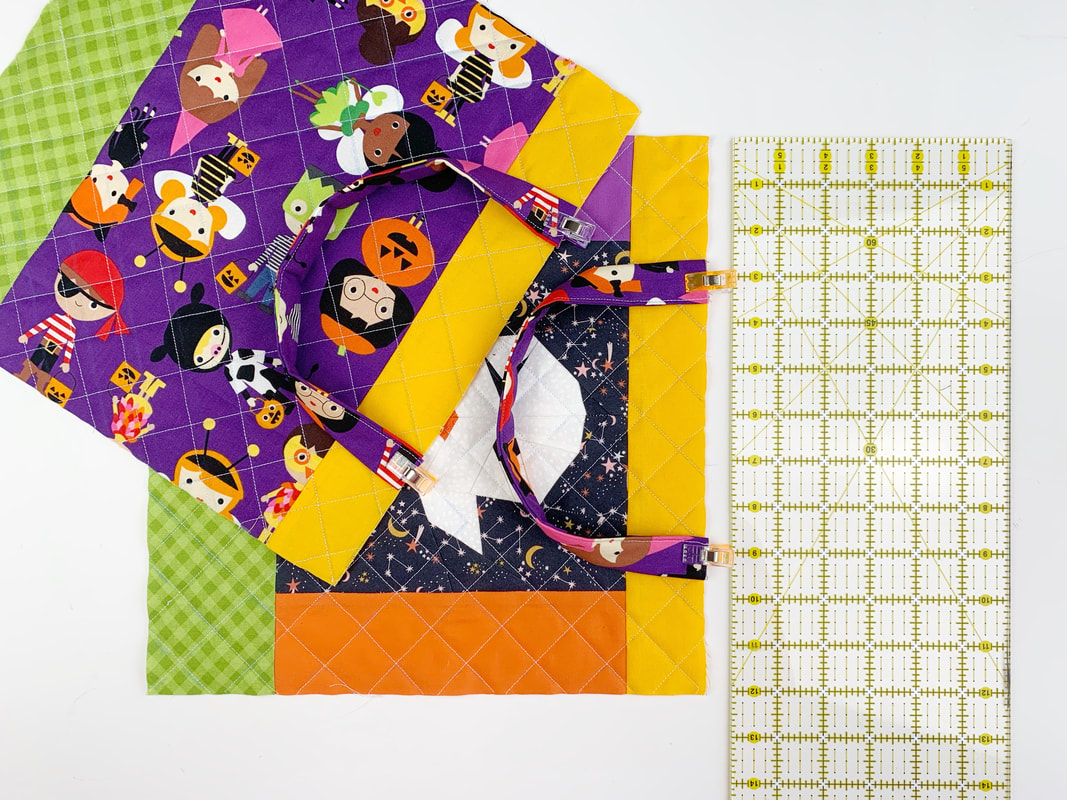
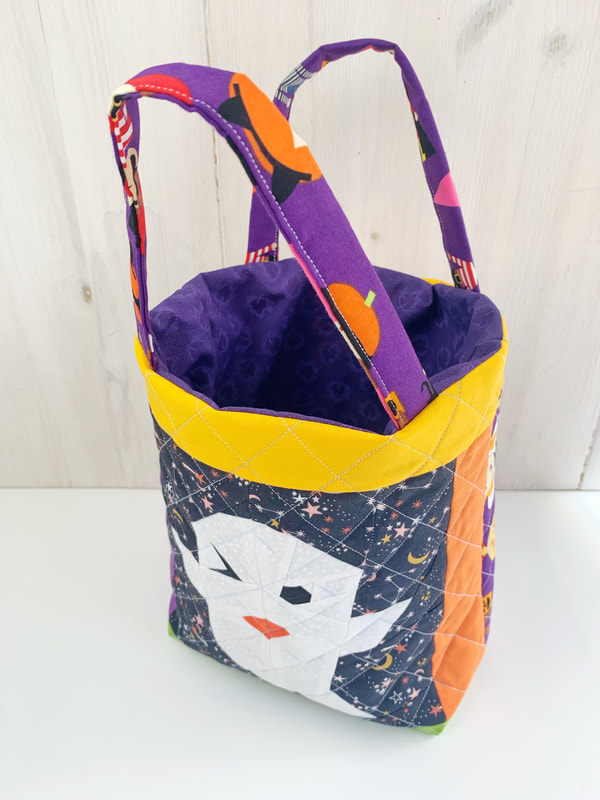
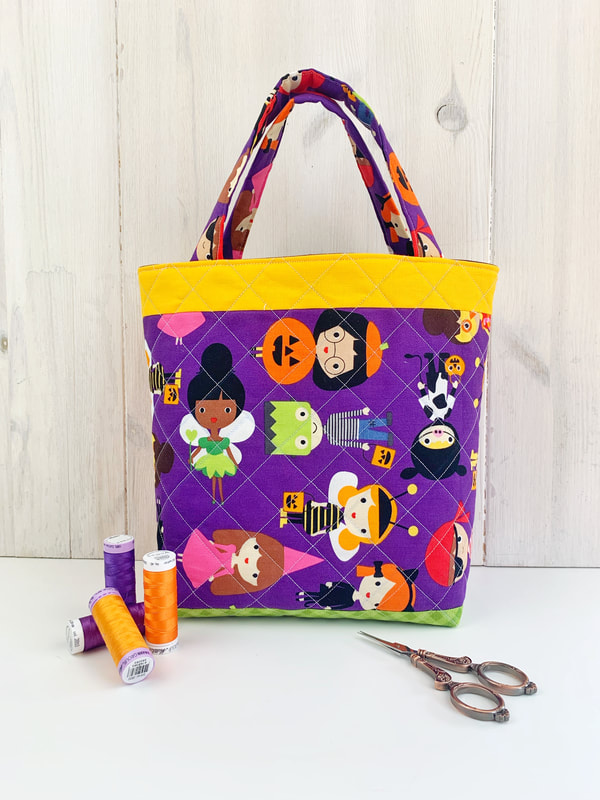
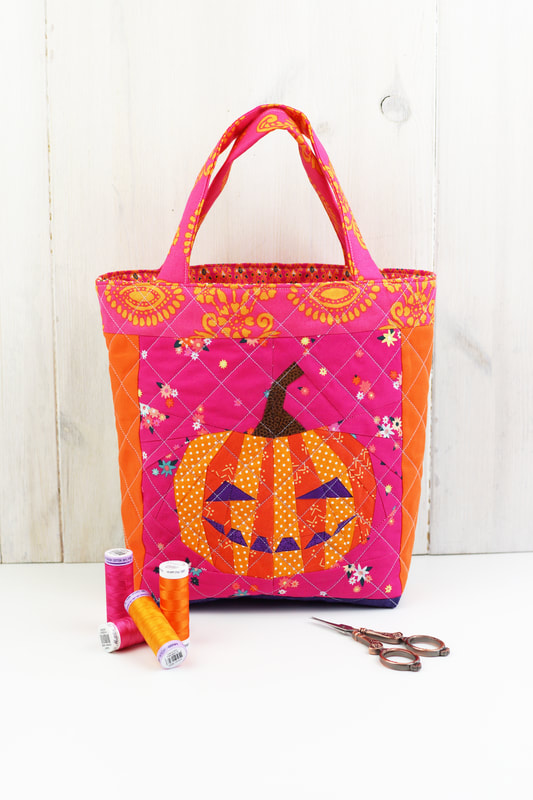
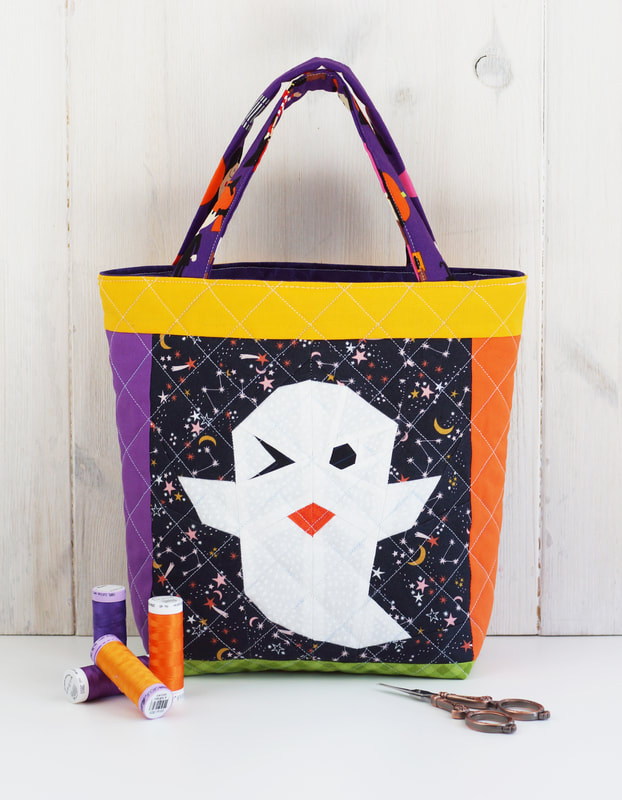
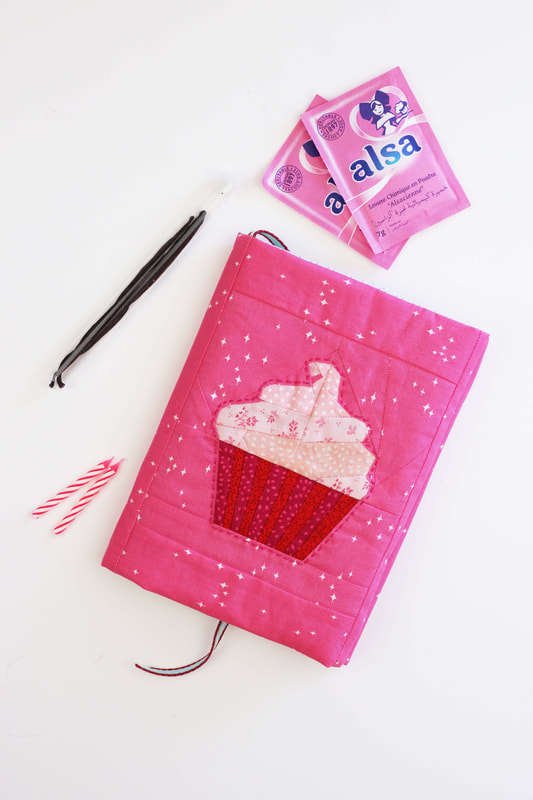
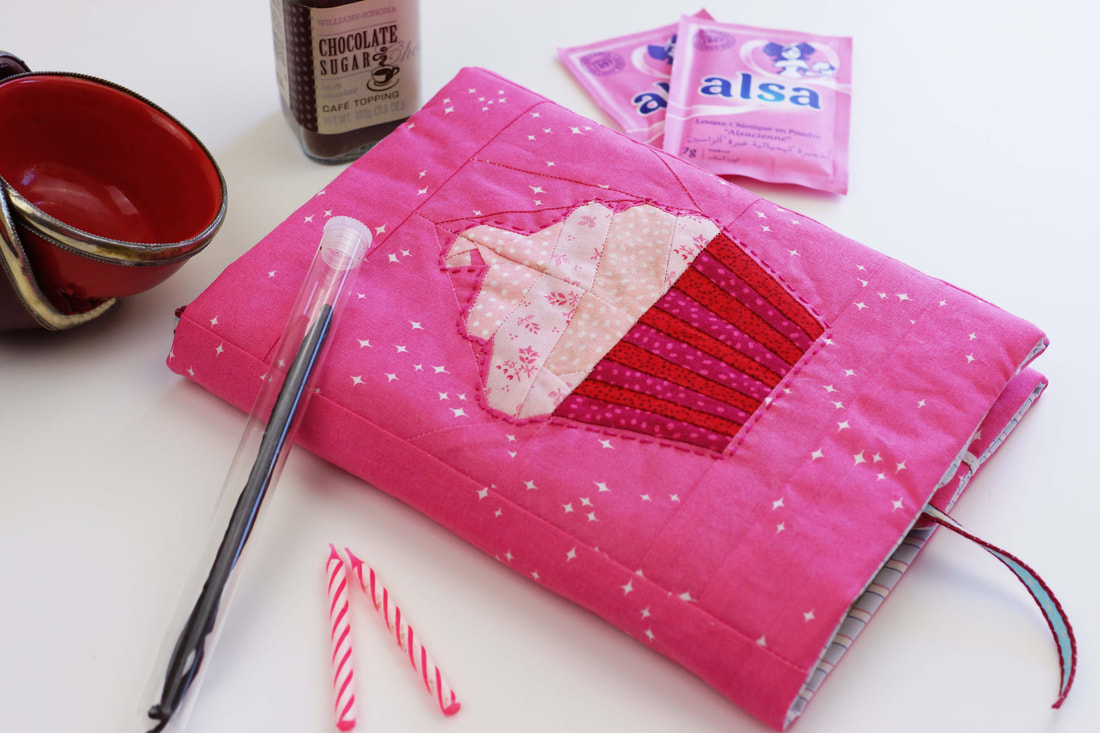
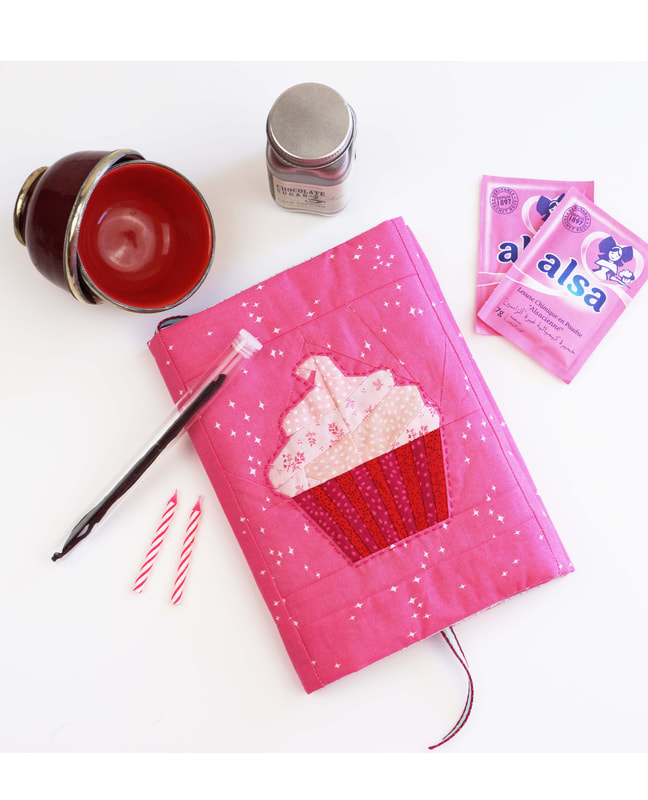
A design collab with Riley Blake Designs - 'From the heart' fabric collection by Sandy Gervais 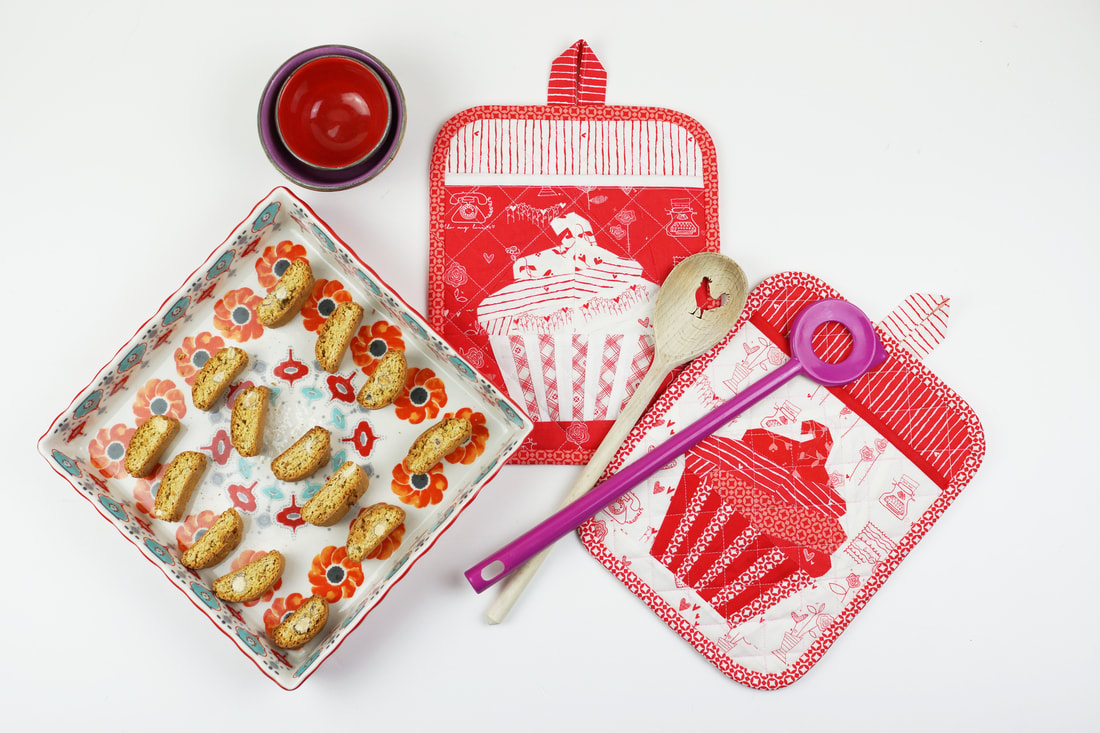 'YOU'RE-MY-CUPCAKE' pot-holders Everybody needs pot-holders in the kitchen, and if they're this cute, even better, right? So how about pulling out some fabric and getting started. These are super easy to make and will be a perfect gift for any passionate cook. 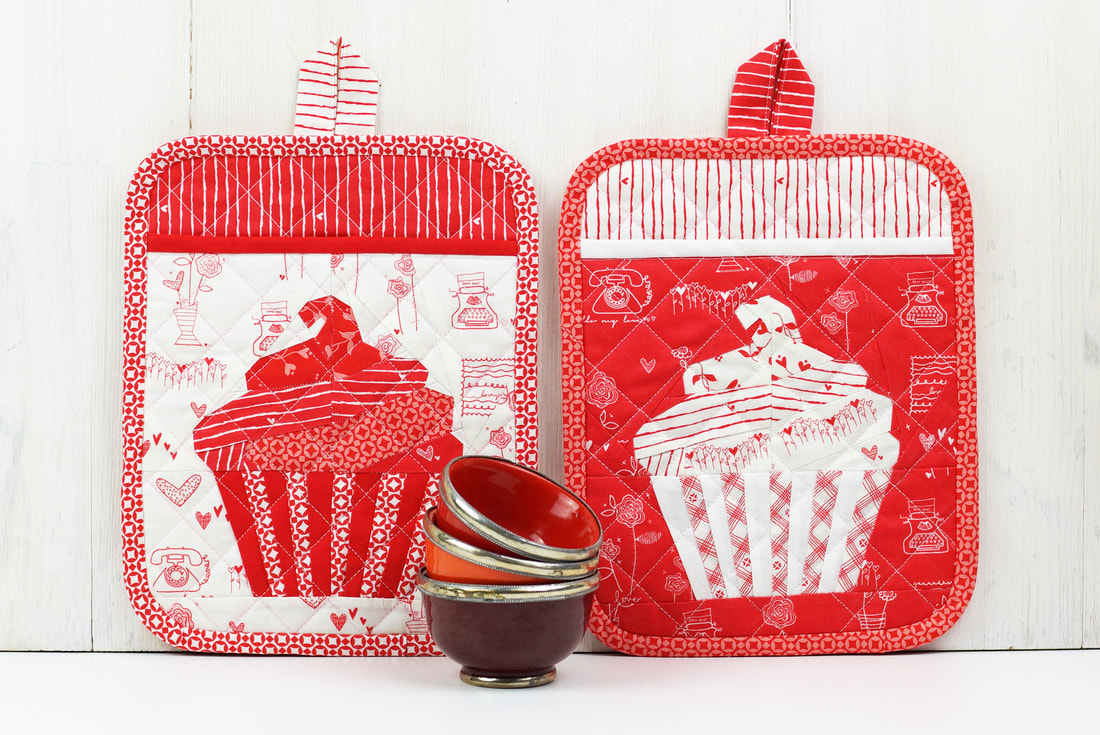 'YOU'RE-MY-CUPCAKE' pot-holders 'You-are-my-cupcake' pot-holders finished size 8"x 10" Fabrics needed per pot-holder: - finished cupcake quilt block 8"x 8" - cut 2 pieces of fabric for backing 8 1/2"x 10 1/2" - cut 1 piece of fabric 8 1/2"x 8 1/2" for pocket lining - 1 piece of fusible interfacing 8 1/2"x 8 1/2" for pocket - 1 piece of fusible interfacing 8 1/2"x 10 1/2" for backing - 1 piece of insul-brite 8 1/2"x 10 1/2" for backing - cut 1 strip of fabric 1 1/2"x 10" as binding for pocket - cut 1 strip of fabric 2"x 6" or use ribbon for hanging tab - bias tape 2"x 40" for pot-holder binding Sewing the potholder: 1. Finish the cup cake quilt block ( shop pattern here ) in size 8"x 8" 2. Cut all of your fabric pieces as mentioned above. 3. Iron on fusible interfacing to your quilt block . Then lay pocket lining piece of fabric face down on flat surface and lay quilt block face up on top of it. Clip or pin in place. 4. Quilt as desired, to hold these layers together. I did 1" diagonal squares. I used my acrylic ruler and a fabric chalk pen to draw the lines. 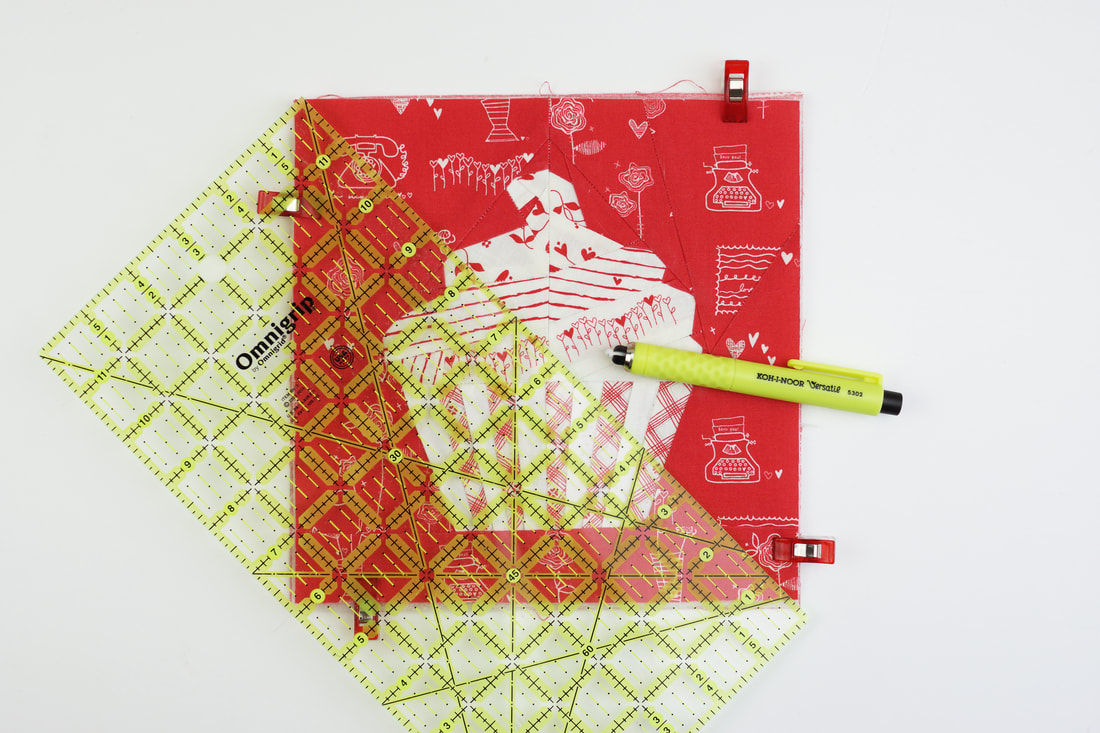 Drawing the lines with a fabric chalk pen 5. Trim to 8"x 8" size. 6. Iron on the fusible interfacing to one of the backing fabrics. Place the other backing fabric face down on a flat surface. Position the insul-brite on top of it and finish off with the backing/fusable interfacing piece, face up. Pin or clip all three layers in place. Quilt as desired, I did 1" diagonal squares again, as with the pocket piece. Make the hanging tab: ( or use a strip of ribbon) - Fold the 2"x 6" strip in half lengthwise and press. Fold in 1/4" seam allowance on each long raw edge and press again. - Stitch with small seam allowance. - Fold the tab in half and clip in place at the center of the back of your pot-holder. 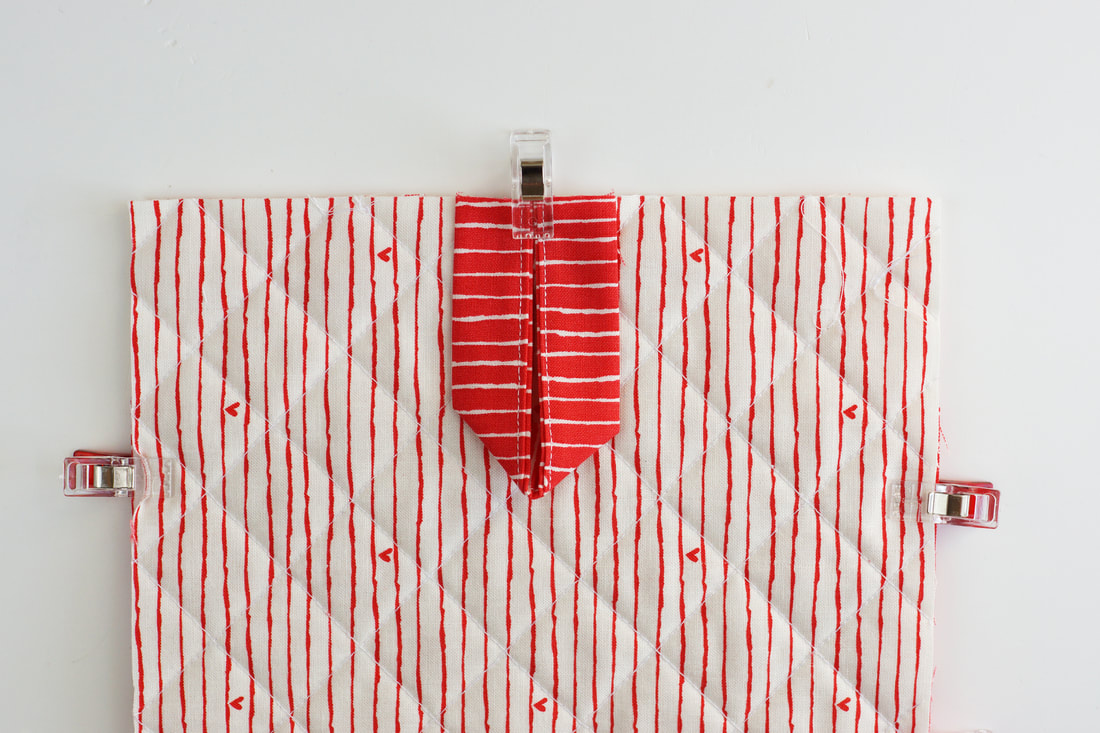 attach hanging tab at the center 7. Binding for the pocket: Take the strip of fabric 1 1/2"x 10" and pin it to the top of the cupcake pocket with the raw edges aligned and stitch in place with 1/4" seam allowance. ( photo 1) Fold the binding over to the back ( photo 2) and stitch in place ( photo 3) Finished binding seen from the front ( photo 4) Trim the ends. 8. Place the quilted pocket piece on top of the backing , aligning the side and the bottom raw edges. Clip or pin in place. 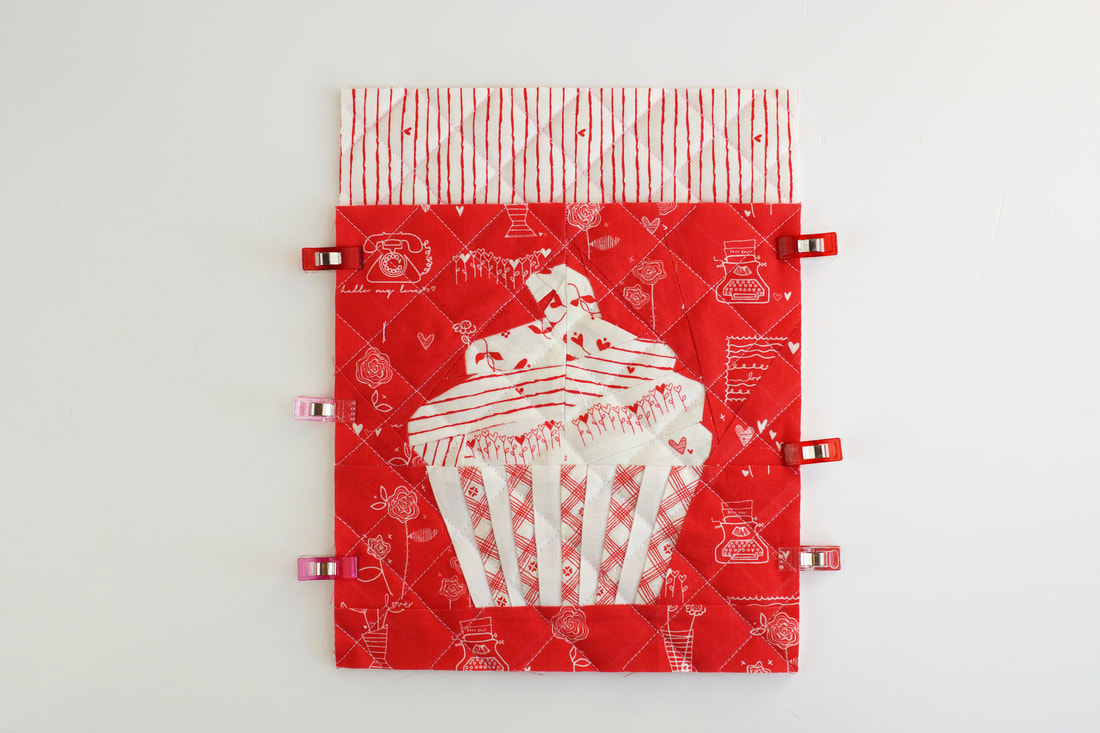 9. Round the corners of your pot-holder. I drew a 1/4 circle at the corners first and then cut it. here's a template for the corners, cut it along the black line. 10. Fold the bias tape over 1/4" at one end of the binding strip and clip or pin in place around the pot-holder with the end overlapping about 1/2" ( photo 1 ) . Stitch in place. ( photo 2 ). Fold the binding over to the backof the pot-holder and then hand stitch in place. Et voila .... all done. Thank you so much to Riley Blake Designs for supplying the absolutely adorable 'From the Heart' fabric series designed by Sandy Gervais that I used in this super cute project. This pattern is perfect for any 8"x 8" quilt block. I can't wait to see your makes. How do you like these pot-holders? Happy sewing Ingrid x follow me on Halloween is approaching and I want to show you how to sew a stunning little Trick-or-Treat bag with one of my quilt blocks... and best of all its really easy. 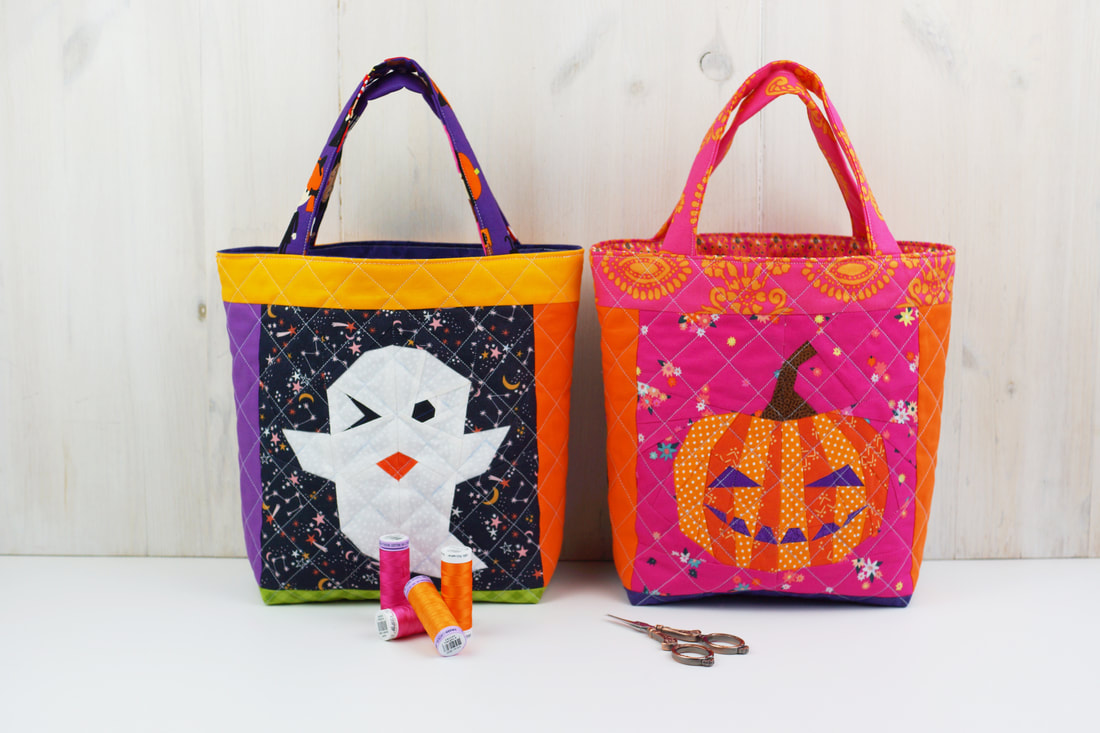 cutest ever trick-or-treat bags Finished bag size : 8.5" wide, 9.5" high and 4" deep at the bottom Fabric/ Materials needed: (all measurements are width x height) > 1 FPP quilt block 8.5" x 8.5" (ghost pattern shop here) > 2 strips of fabric on each side of the FPP block 2.5"x 8.5" > 2 strips of fabric for bottom panel 12.5"x 3" > 2 strips of fabric for top panel 12.5"x 2" > 1 piece of fabric for back 12.5"x 8.5" > 2 pieces of fabric for lining 12.5"x 12" > Fusible interfacing 2 pieces 12.5"x 12" > 2 strips of fabric for handles 2,5"x 12" > 2 strips of fusible interfacing 2"x 12" 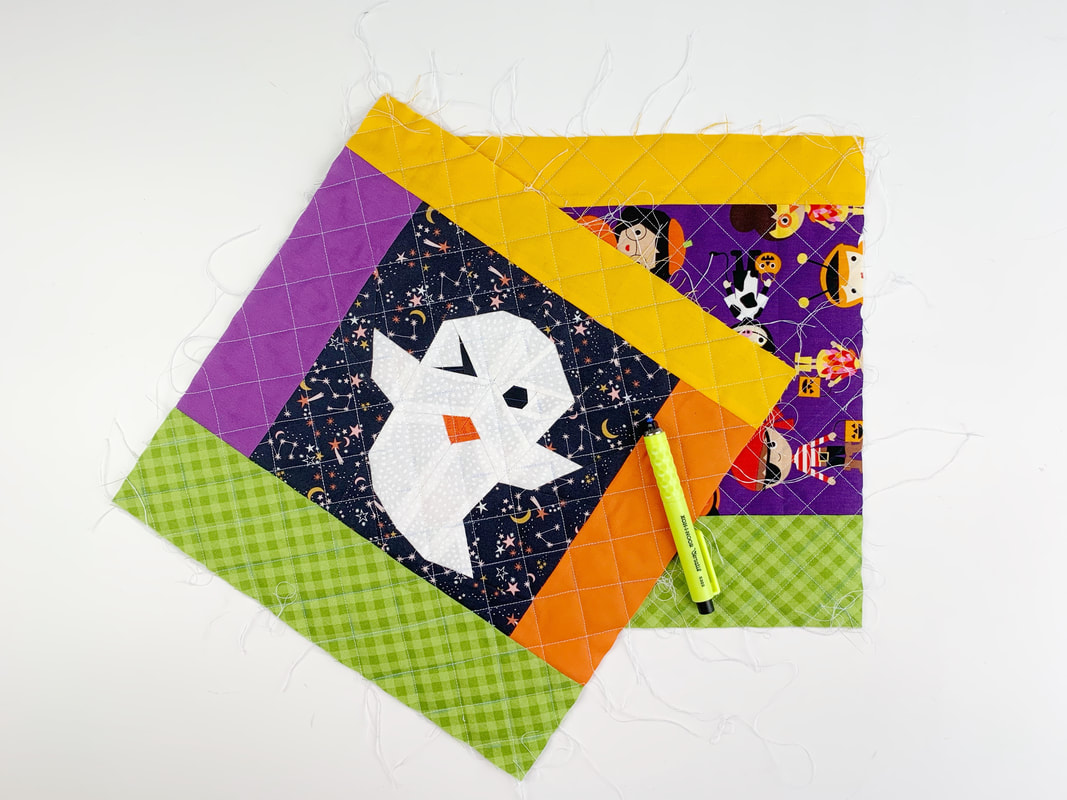 Front and back exterior fabric pieces of bag Instructions: -Sew your Foundation paper pieced quilt block - I chose the little ghost . ( shop Halloween patterns here ) the block will measure 8.5"x 8.5" when sewn together (unfinished- meaning not sewn into a project yet). -Cut out all the fabric, lining and fusible interfacing pieces. -Attach the side strips to the quilt block. Then attach the bottom and top panel to the quilt block and fabric for the back ( see picture above). Interfacing gives your bag more structure and stand. Iron on the fusible interfacing to your front and back exterior main pieces of your bag. 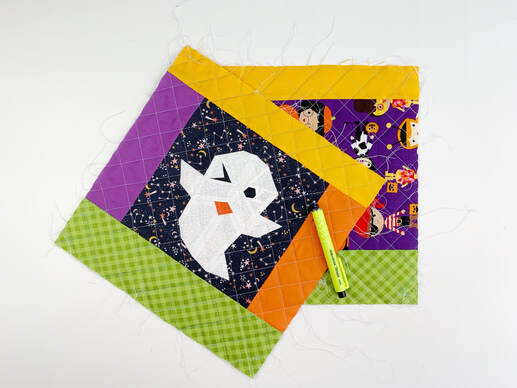 Trick or Treat bag exterior pieces quilted - Quilt your exterior pieces to your liking. - I did some diagonal straight line machine quilting. - I drew the lines with a washable fabric marker ( this one can actually just be dusted off, it's a dressmaking chalk pen, that comes with several different color refills) - Then I machine quilted the front and back exterior fabric pieces with diagonal 1" squares. Sewing the handles: - iron on fusible interfacing on fabric strips of handles, center to width of fabric, leaving 1/4" seam allowance on both long sides of the fabric strips. - Fold over 1/4" seam allowance on each side of the fabric strips and clip in place - (I use only orange and purple clips, to stay in the Halloween spirit :-) - Now fold the strip in half and clip in place again. Then sew along the clipped edge with a small seam allowance to finish off the handle strip. - Repeat for second handle. - Attach the handles at 3" from the outer edge to the top of exterior front and back fabric pieces. And clip in place. - Lay lining fabric right sides together on top of outer bag pieces and clip in place at top edge. Handles are now sandwiched between lining and outer piece. - stitch along top edge with 1/4" seam allowance. - fold exterior and lining pieces open. - lay both trick-or-treat bag pieces on top of each other, right sides together - Clip or pin the raw edges in place, matching up each seam and clipping or pinning the matched up seams. - Leave a 4" space at the center of the bottom end of the lining, this is your opening for turning the bag later. - Then sew along the four open sides. Do not sew the 4" opening at the end of the lining pieces. - For a flat bottom of your bag, you need to box all four corners. Two corners of the lining and two corners of the exterior fabric. Starting with flattening the corner, the seams, bottom seam and side seam should be on top of each other. Then measure 2" from the top corner with an acrylic ruler and draw a line across with your fabric marker or a water soluble pen. Stitch along that line and trim off the corner, leaving a 1/4" seam allowance. (Repeat this for all four corners) 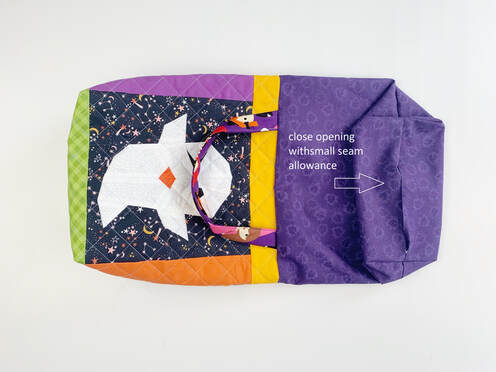 - Turn your bag by turning the pieces right sides out, pulling through the opening in the lining. Push out the corners nicely. Press the lining opening under 1/4" and stitch closed with a small 1/8" seam allowance. - Fold lining into bag and stitch along top edge of bag to secure handles and lining. Et Voila.... your cutest ever quilted Halloween TRICK-OR-TREAT bag is all done. How are you all celebrating Halloween this year? Let me know ....
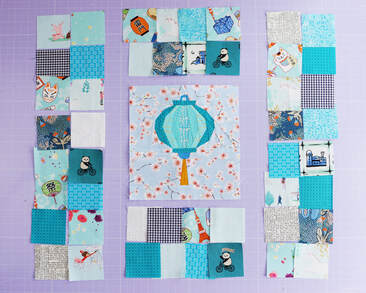
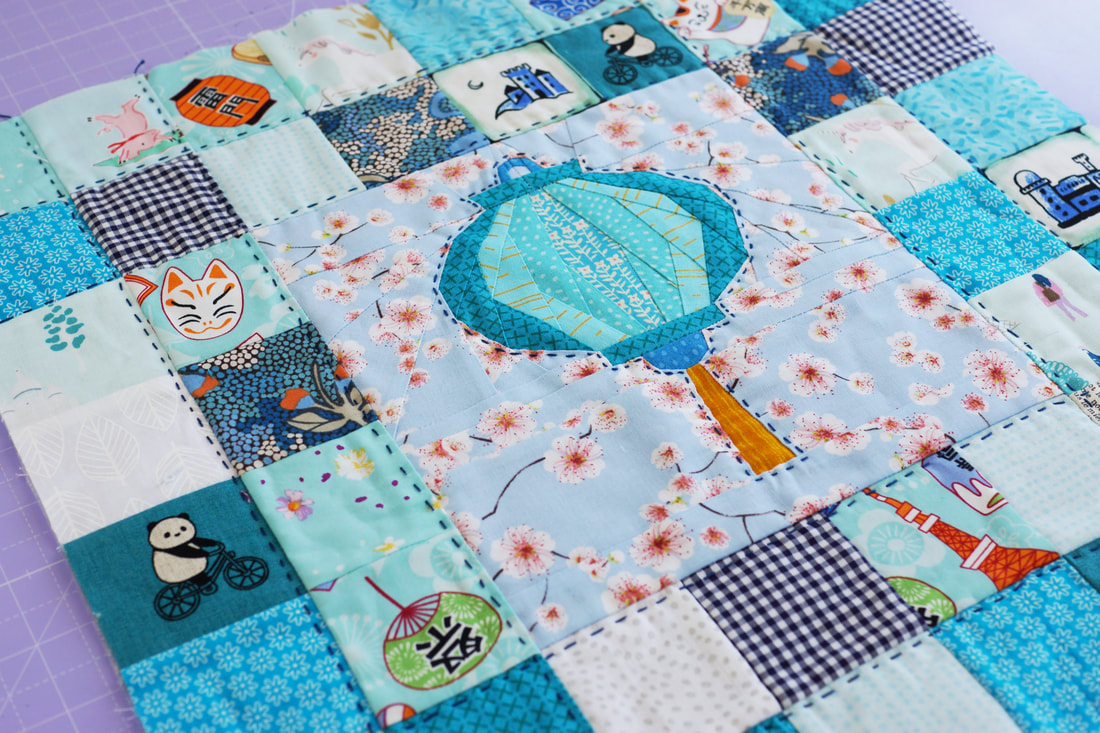
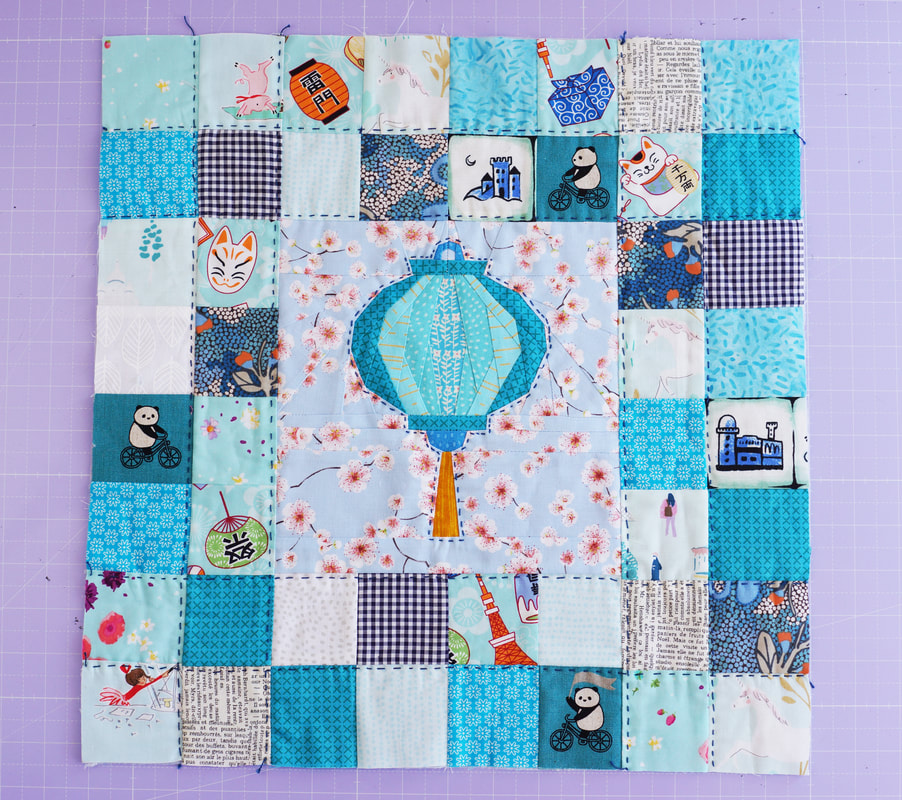
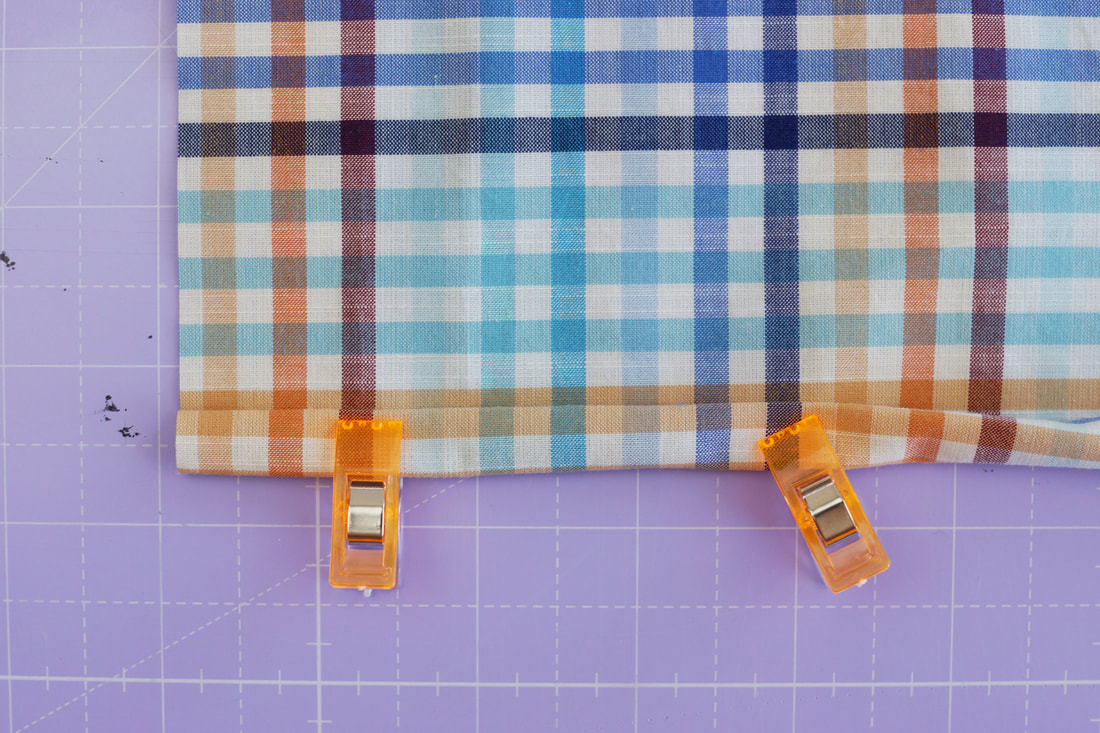
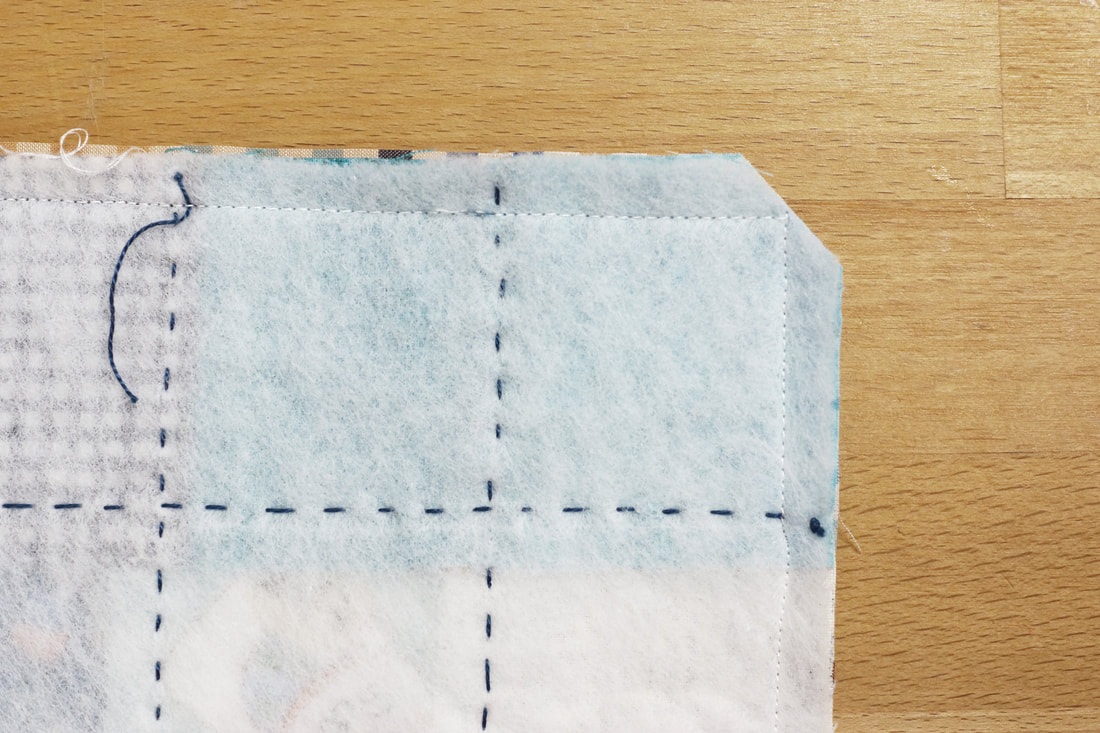
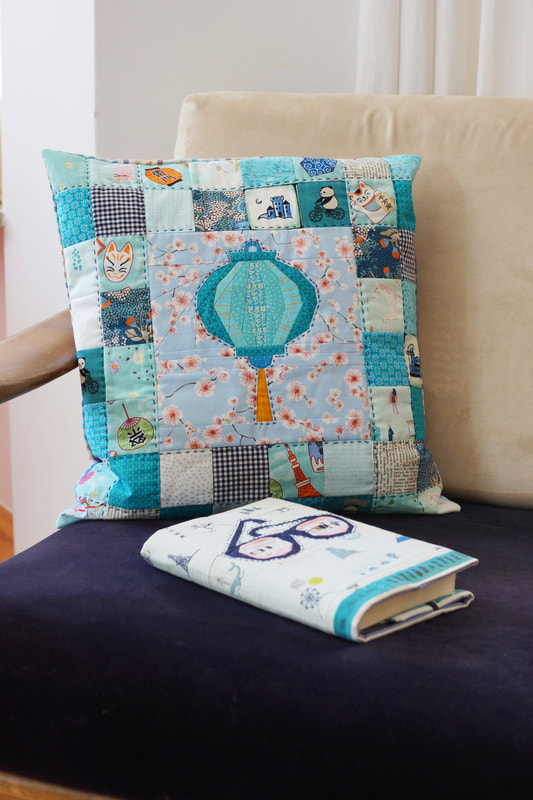
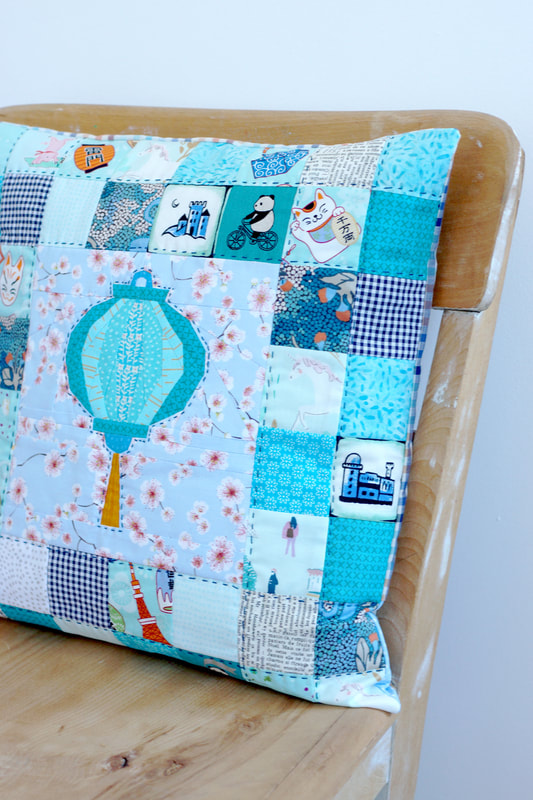
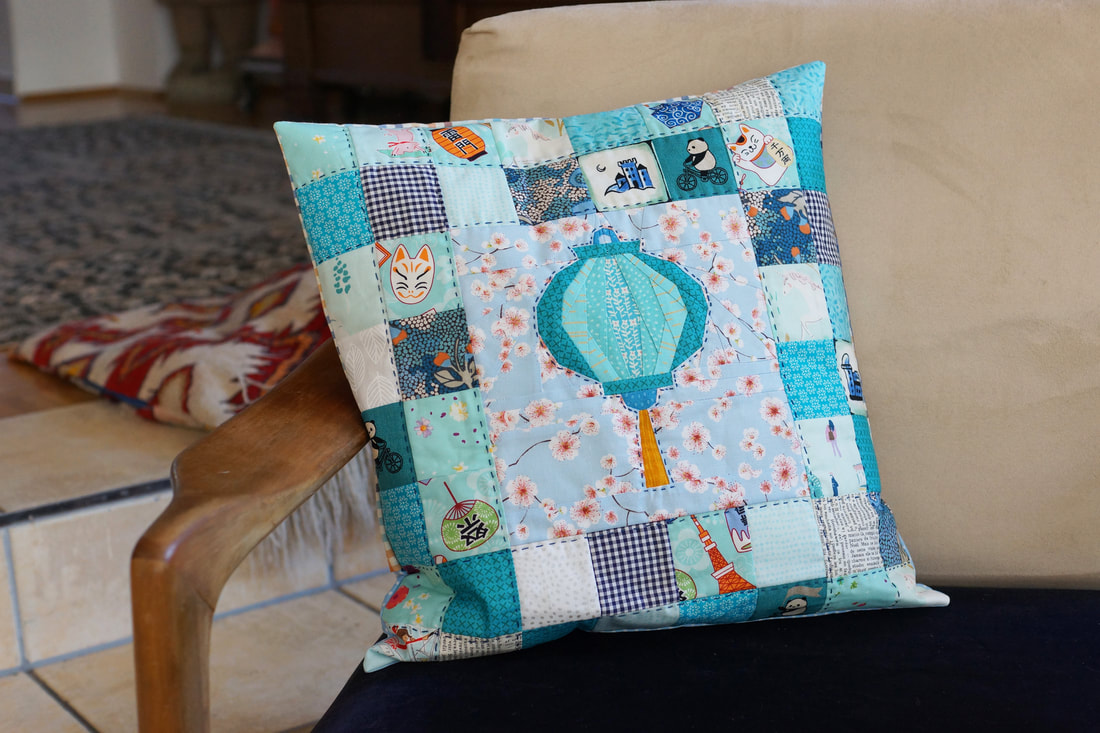
Ingrid xo Pillowcases are easy and fun, and the perfect way to redecorate your home without having to invest a lot of money. Everybody that knows me personally, has seen, that I am a tiny bit of a color freak and also like to rearrange and redecorate things in my home. Especially seasonal changes, from spring to summer, fall and winter/ christmas. My patio and garden get a makeover every year. I love different 'looks' and love to play with fabrics and colors. 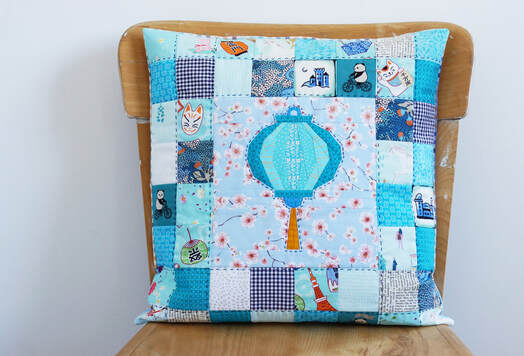 stunning quilted pillowcase I designed my Chinese Lunar New Year pattern series back in January but I think this series works all year around. Especially the lantern patterns are perfect for any patio decor. These are extremly easy and quick to make. And yes, the paper lantern pattern is easy to follow as well. Materials needed: - a 8" x 8" quilt block , paper lantern or any other ( 8 1/2" unfinished) - 48 2 1/2" squares ( the squares you cut will be 2 1/2" so they are 2" finished) - two pieces of fabric for the back 13" x 17" - low volume fusable batting 17" x 17" - thread and needle for handquilting if you decide to do that. Seam allowances are 1/4" unless mentioned otherwise. 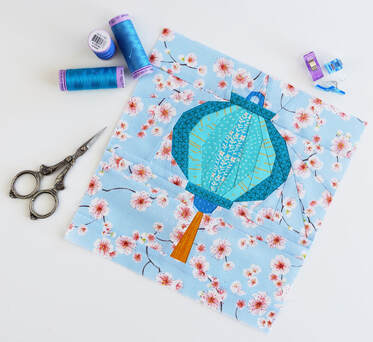 This is the quilt block that I will use for this pillowcase it's the 8" x 8" version of the balloon paper lantern pattern.
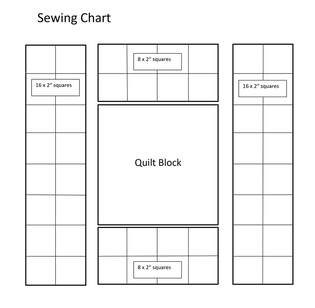
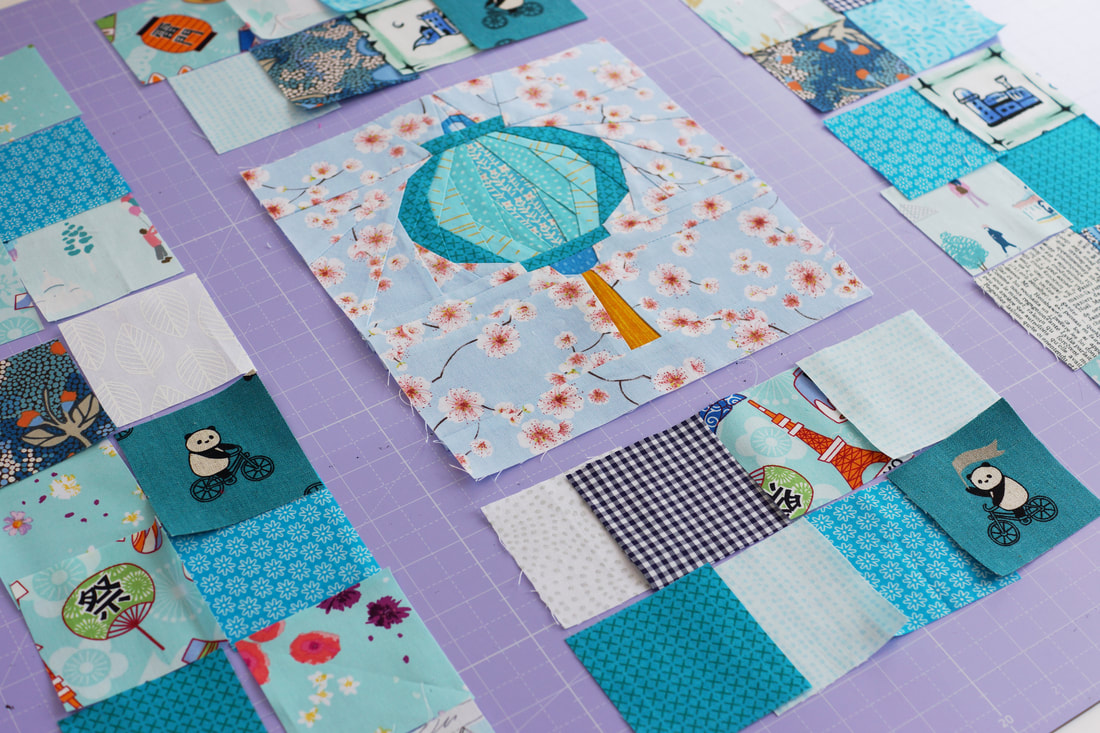
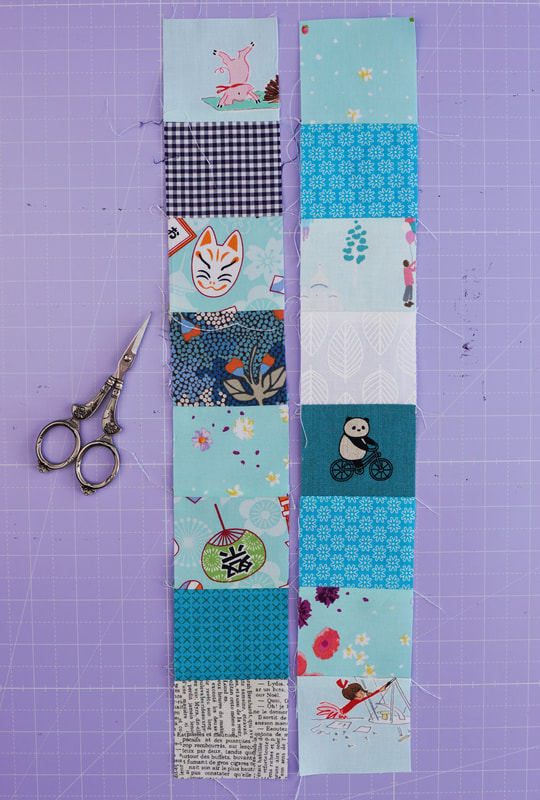
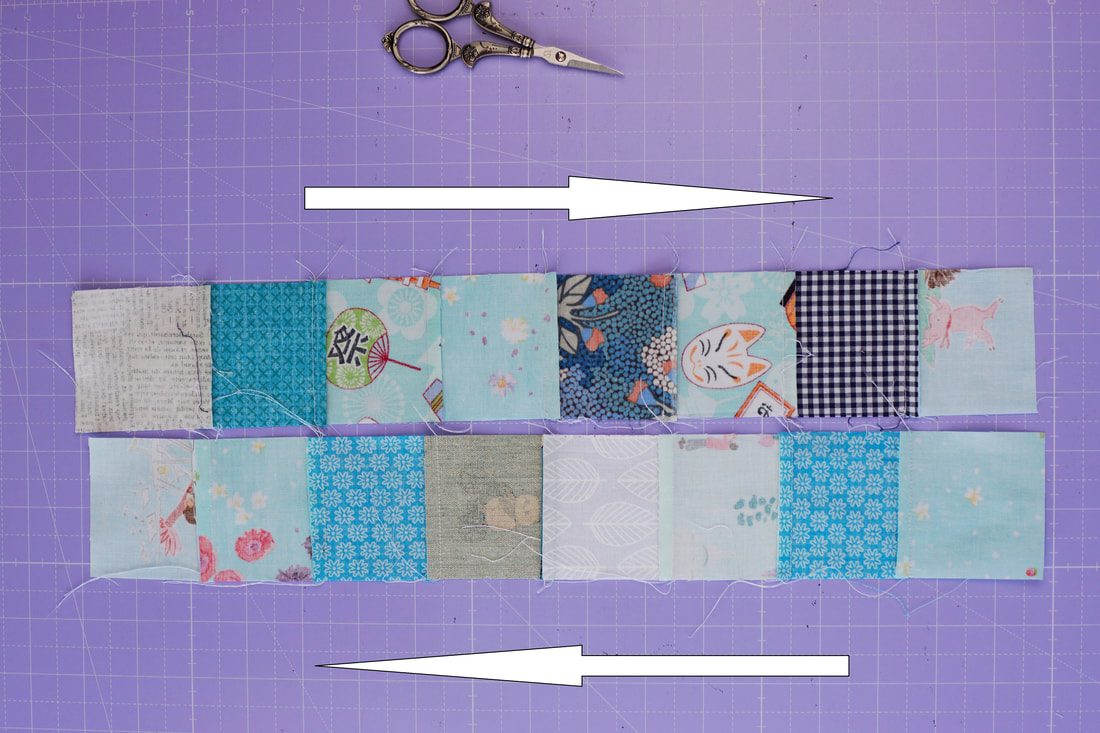
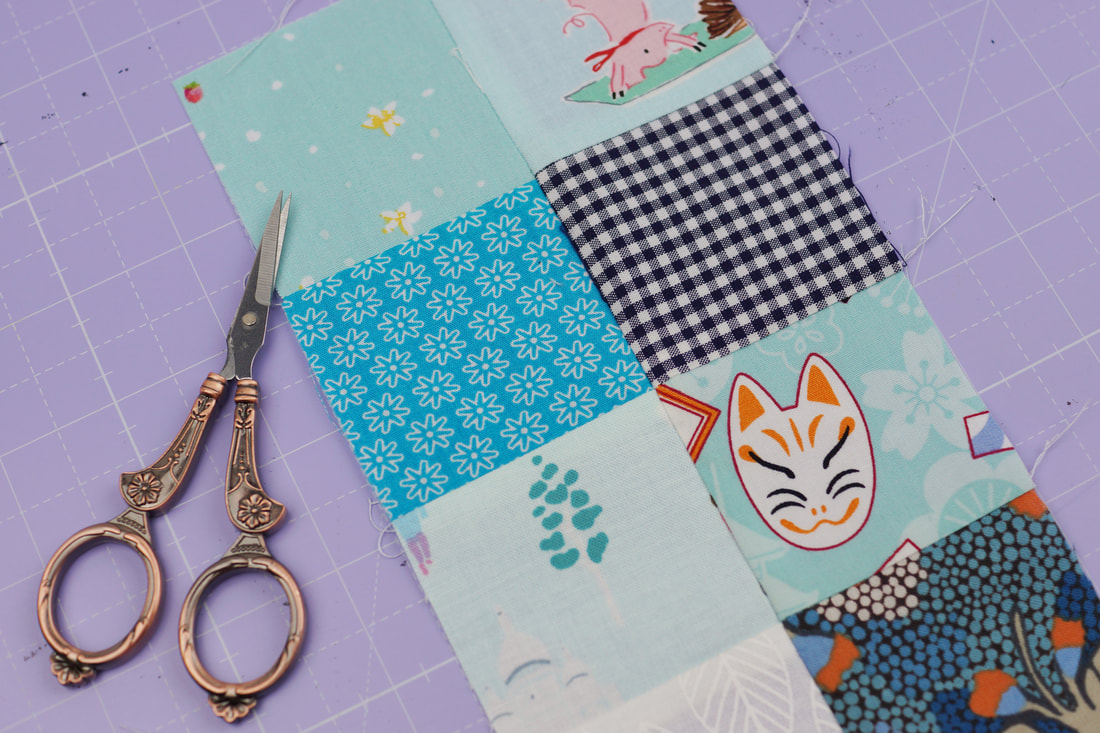
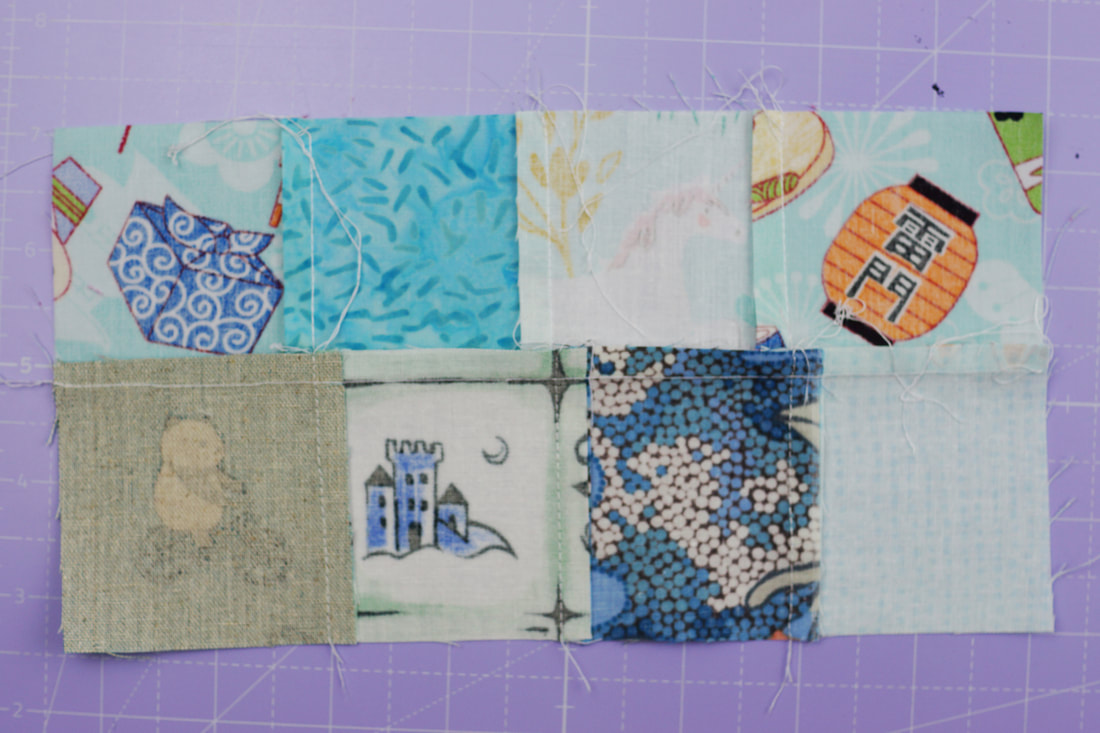
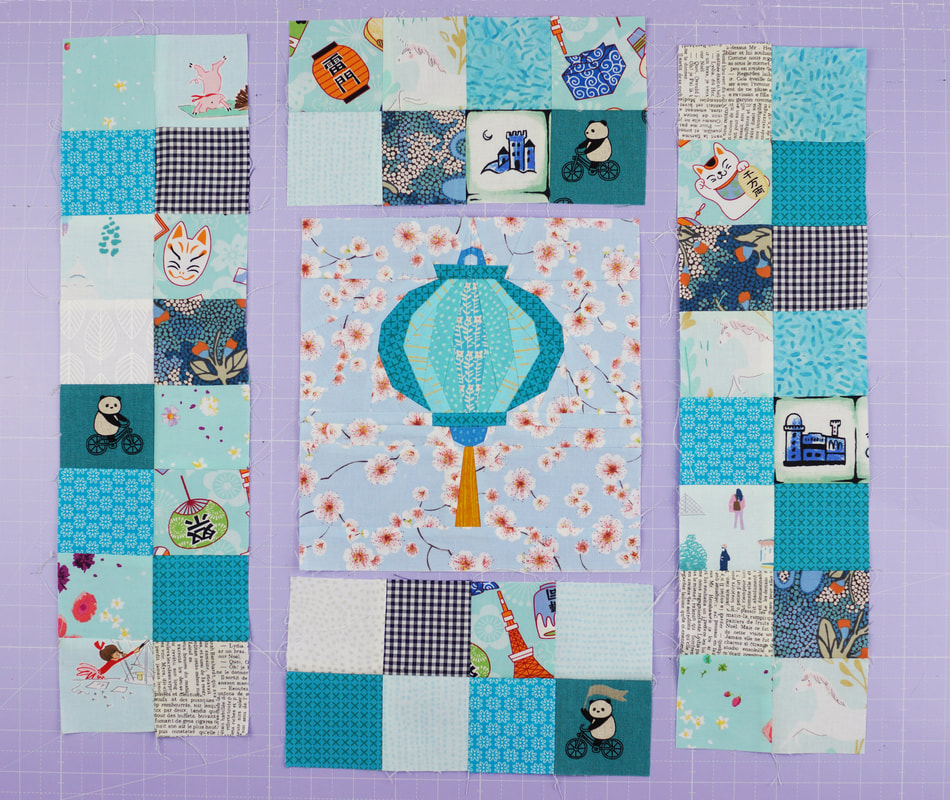
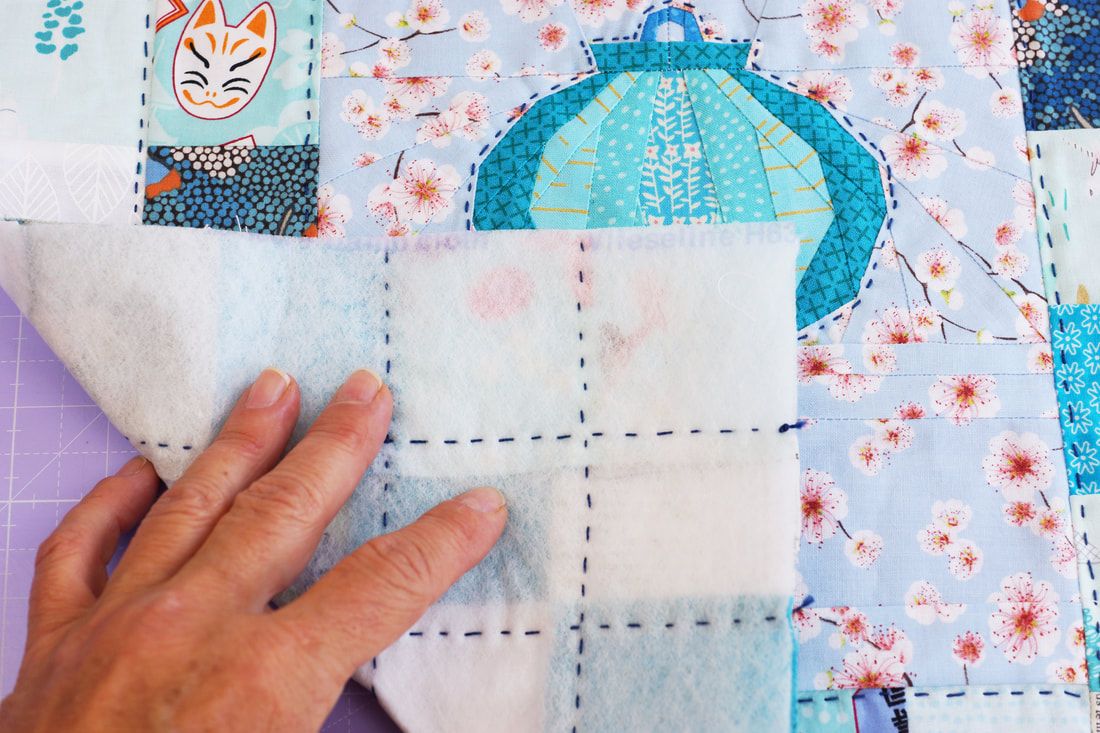
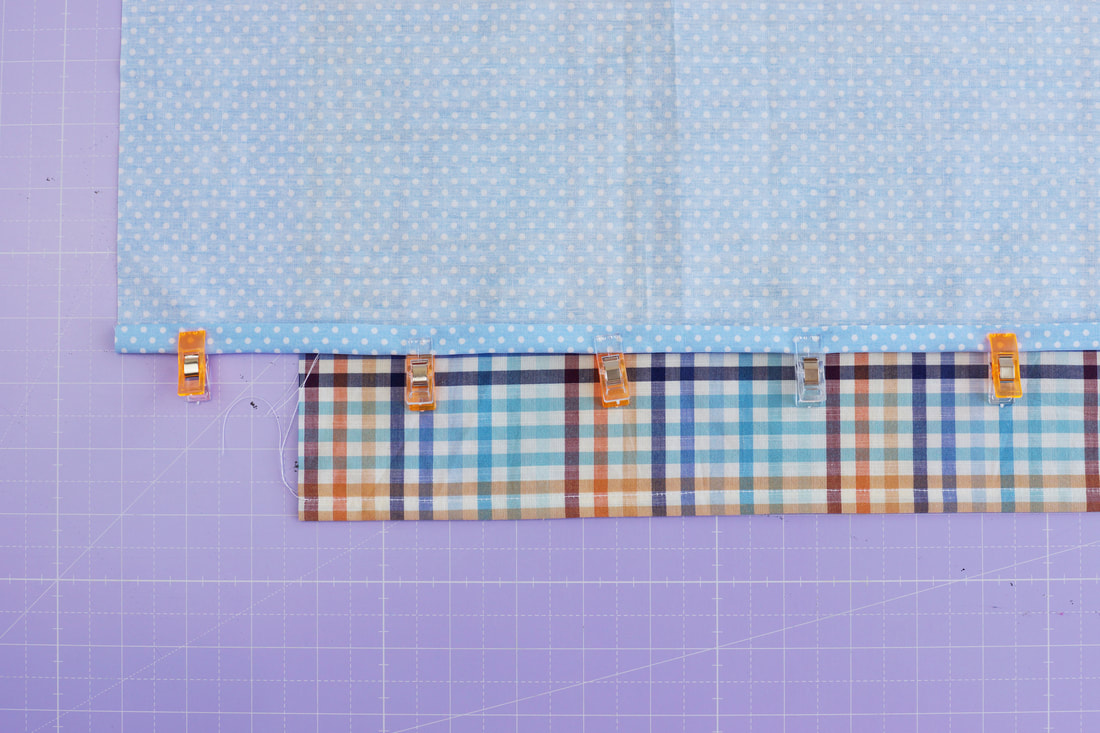
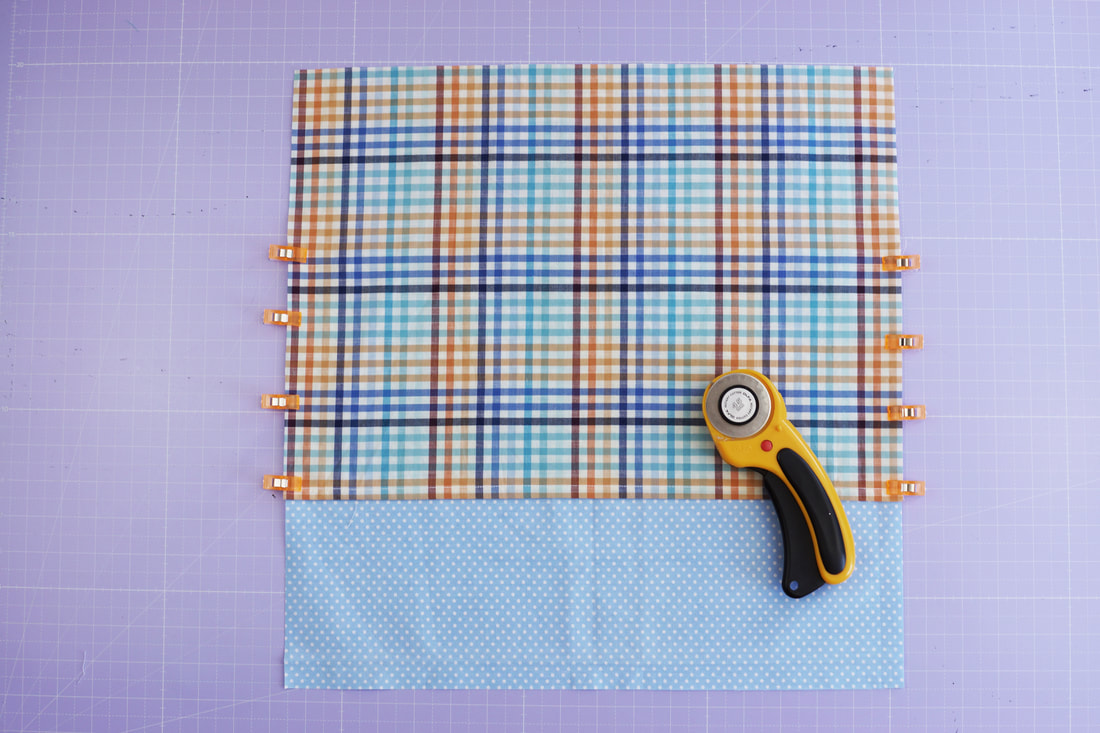
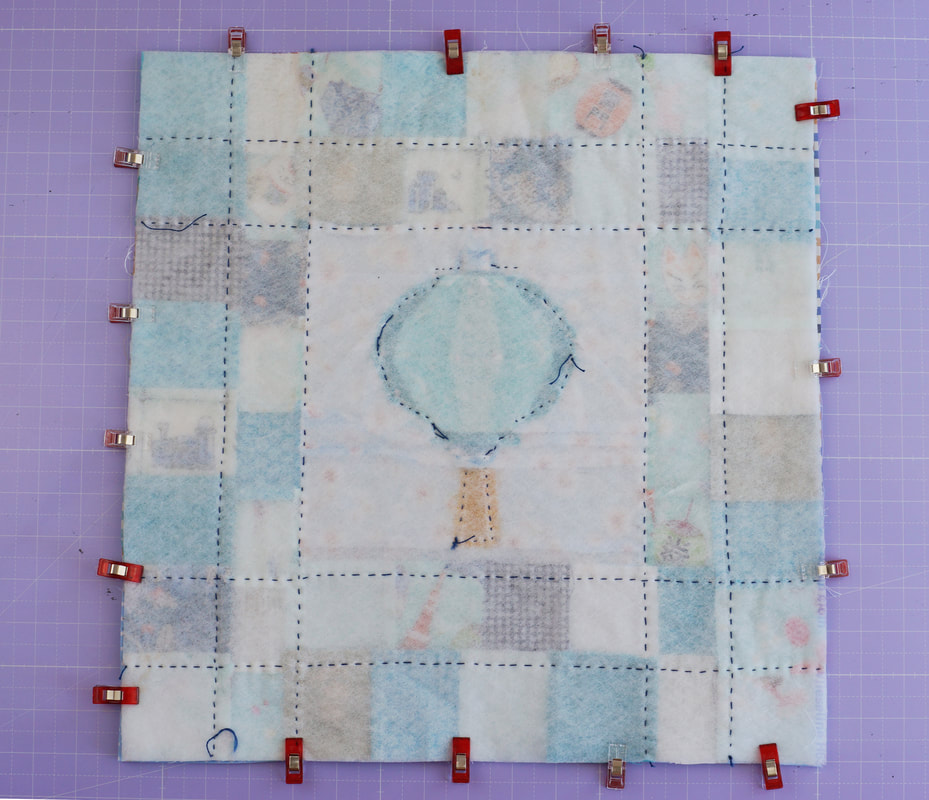
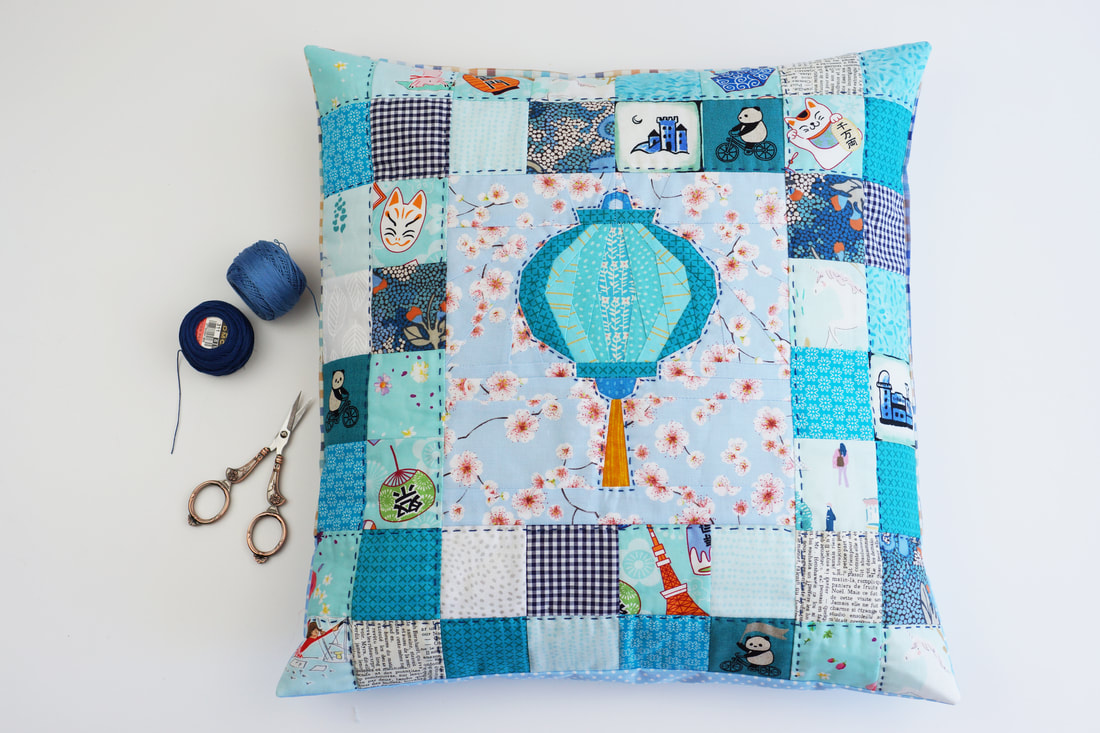
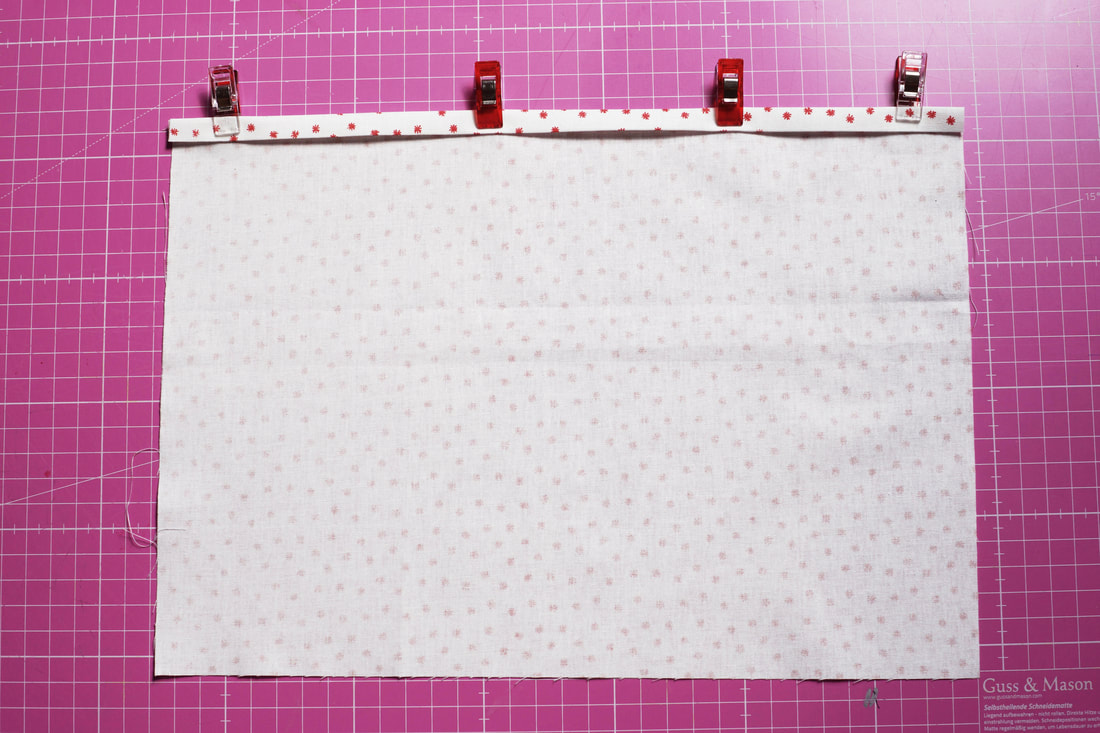
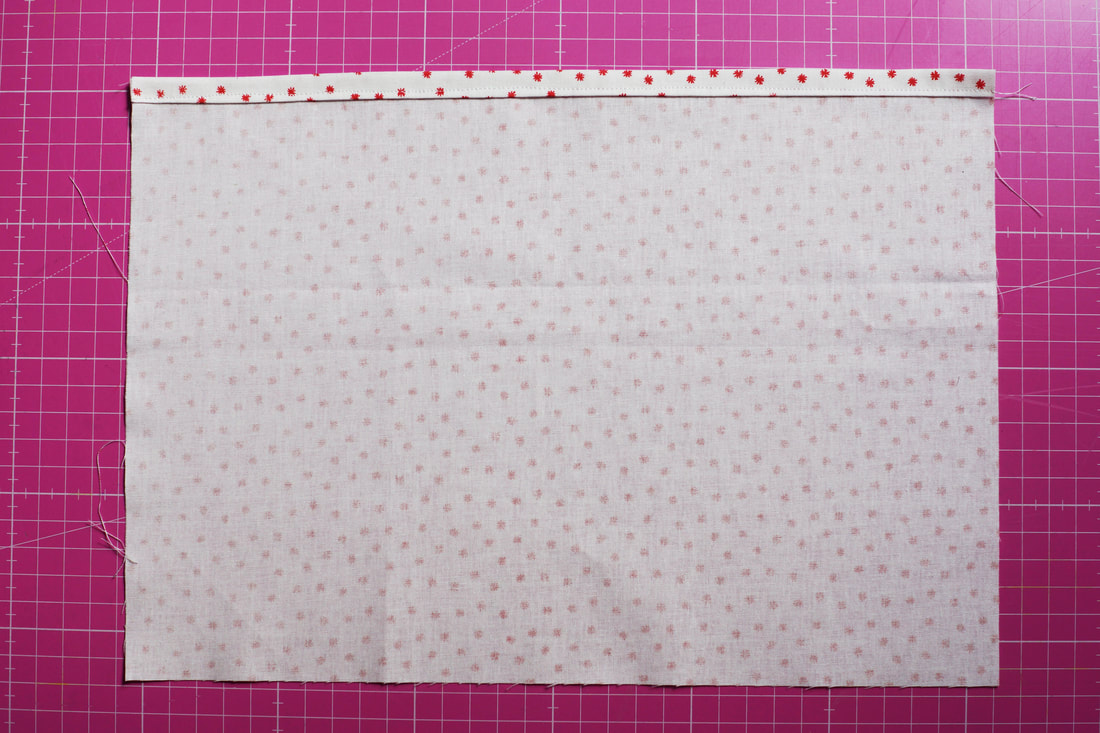
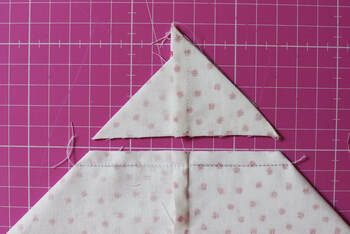
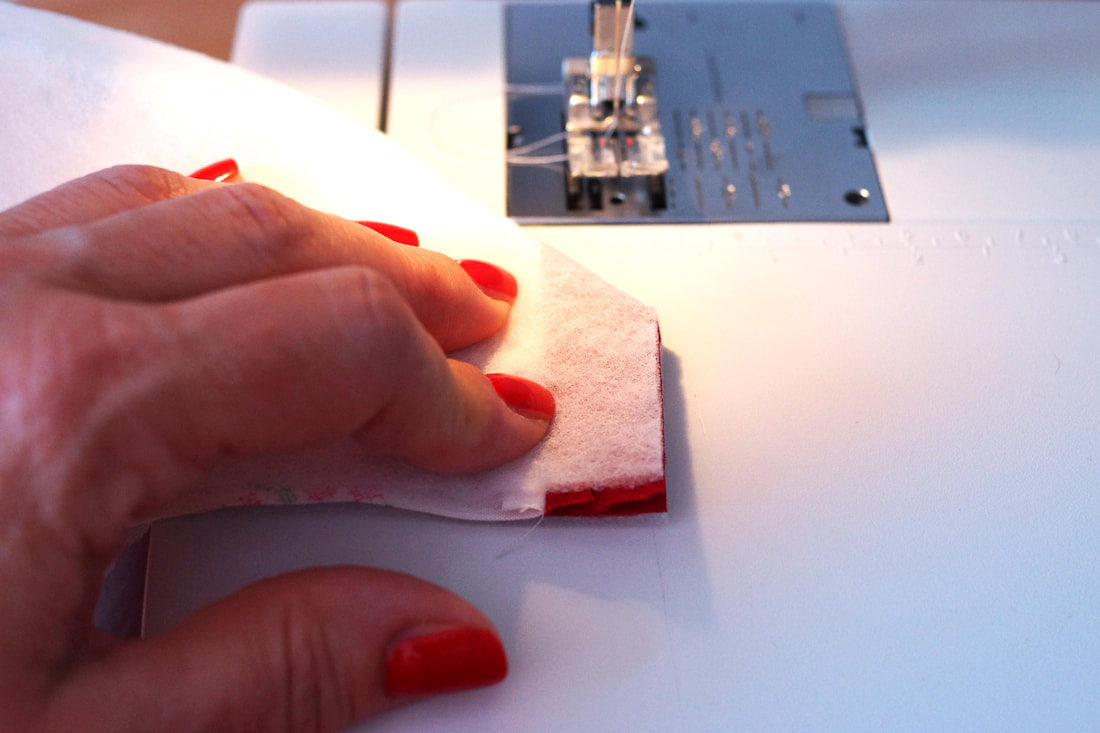
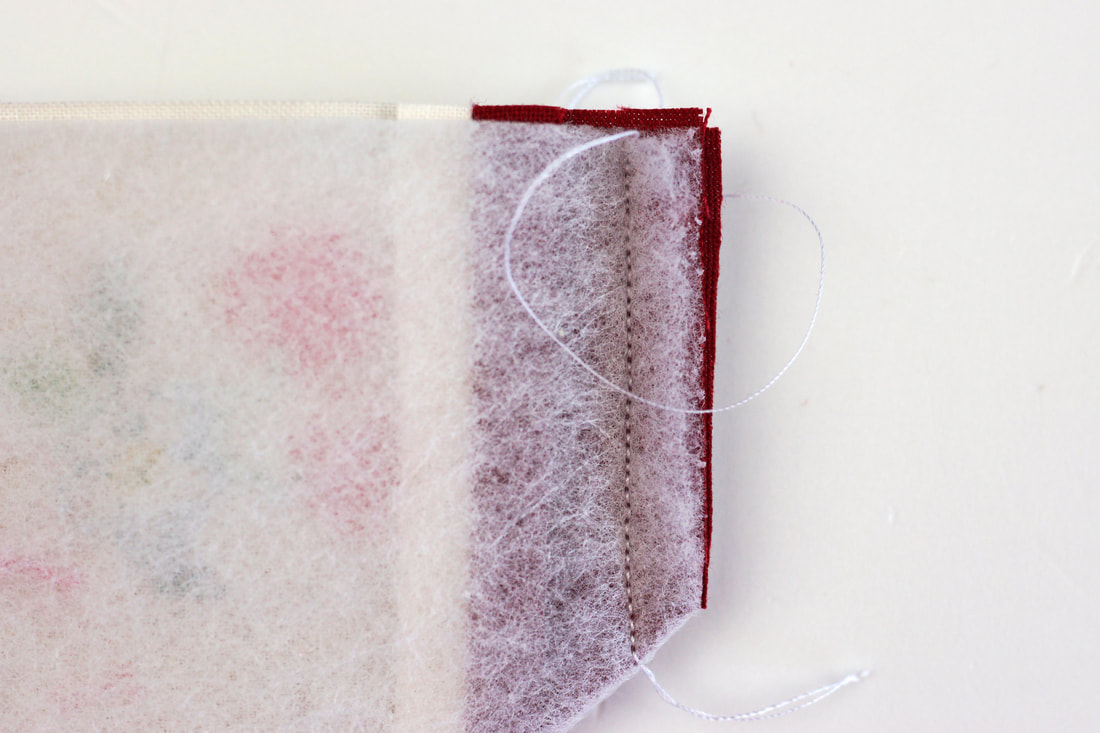
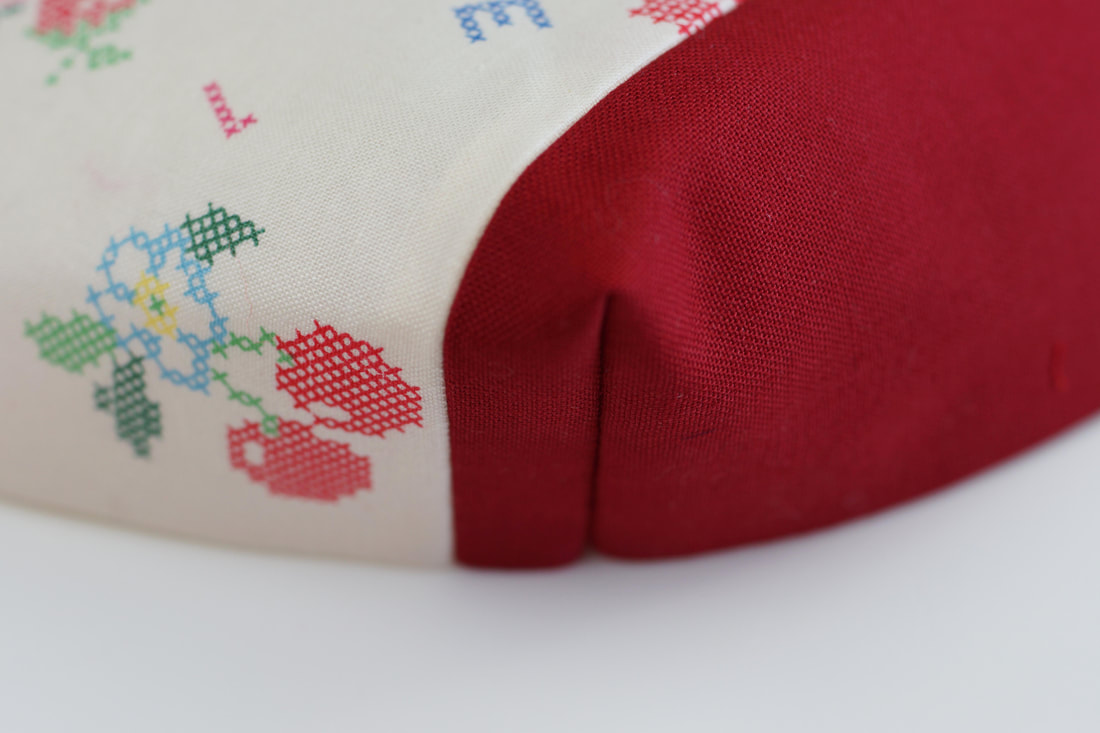
1> Place your squares around your quilt block the way you feel they will look good ( photo 1) This is a fab way to use up your fabric scraps and do some cute fussy cutting. Then sew together those squares. 2> I usually sew them into strips first and then join the strips.( photo 2 ) 3> Your can either seperate your seam allowances and press them each seperatly, or press the seam allowances in opposite directions before joining your fabric square strips. This is really easy and quick. (photo 3) You press one strip in one direction and the other in the opposite direction, this will help with nesting your seams and having accurate corners and matching points. 4> Nesting your seams is the easyest way to get accurate matching seams. if you pressed your seam allowances into opposite directions, this is quite easy. The seams sort of fit together automatically ( photo 4) 5> Sew the fabric strips together into four blocks . 16 x 2" squares sewn into two blocks to the left and to the right of the FPP quilt block. And 8 x 2" squares sewn into two blocks to the top and bottom of the paper lantern quilt block. 6> Join the 2" squares blocks with the foundation paper piecing quilt block. First attach the top and bottom 8 x 2" blocks to the paper lantern quilt block . Then you add the side panels of 16 x 2" squares to either side of the FPP quilt block. Press the seam allowances and iron on the fusable batting. Now is the perfect time to do some hand quilting if you want. You could also quilt some straight lines with your sewing machine, or machine quilt the entire pillowcase top. This is how I hand quilted this top, some 'straightish' lines and just one line of stitching around the paper lantern. 7> To make the back of the pillow, place one of the 13"x 17" fabric rectangles wrong side up, fold over the long edge ½” twice, press, clip and stitch in place. Repeat this to make the second one. Align the backing pieces, right sides up and raw edges aligned. The hemmed edges should overlap aprox 6". Trim to 16 1/2 " x 16 1/2" same size as pillowcase top. Clip the backing in place and machine baste ⅛″ from the edge on both sides. Have I mentioned, I like to recycle fabric? There are soo many beautiful fabrics out there and they do not belong in the garbage. Especially cotton woven fabrics such as shirts, sheets, douvet covers etc. My husband used to work in the fashion industry as well and still has tons of awesome shirts that are of great quality, so I use them as backings or linings for all sorts of sewing projects. ( here as well) 8> To finish the pillowcase place front and back right sides together and stitch these two together along the outer edges. Cut off the corners as shown in Photo 3 at a 45° angle. this gives you nice and crisp corners for your pillow. Turn inside out and VOILA..... Here it is all done and pretty :-)
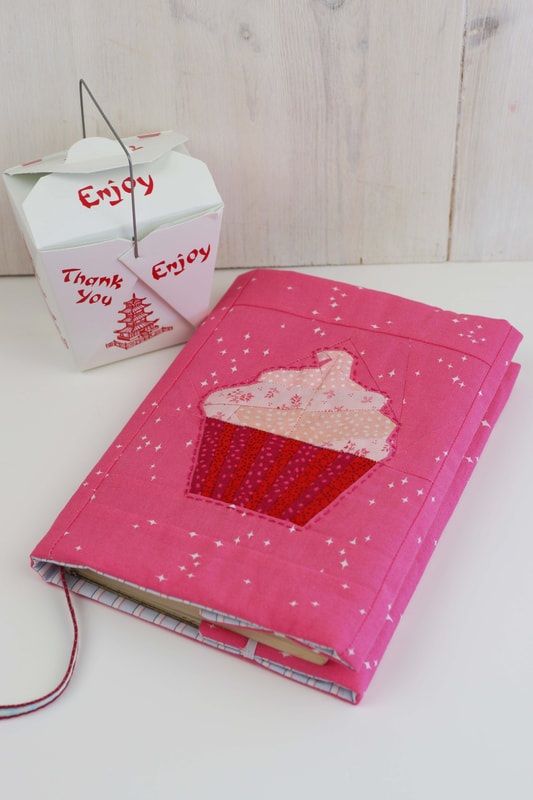
What do you think? Especially pretty with the quilted book cover right?
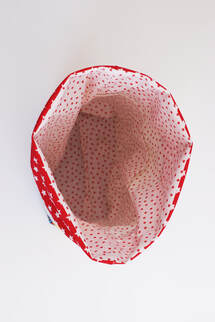
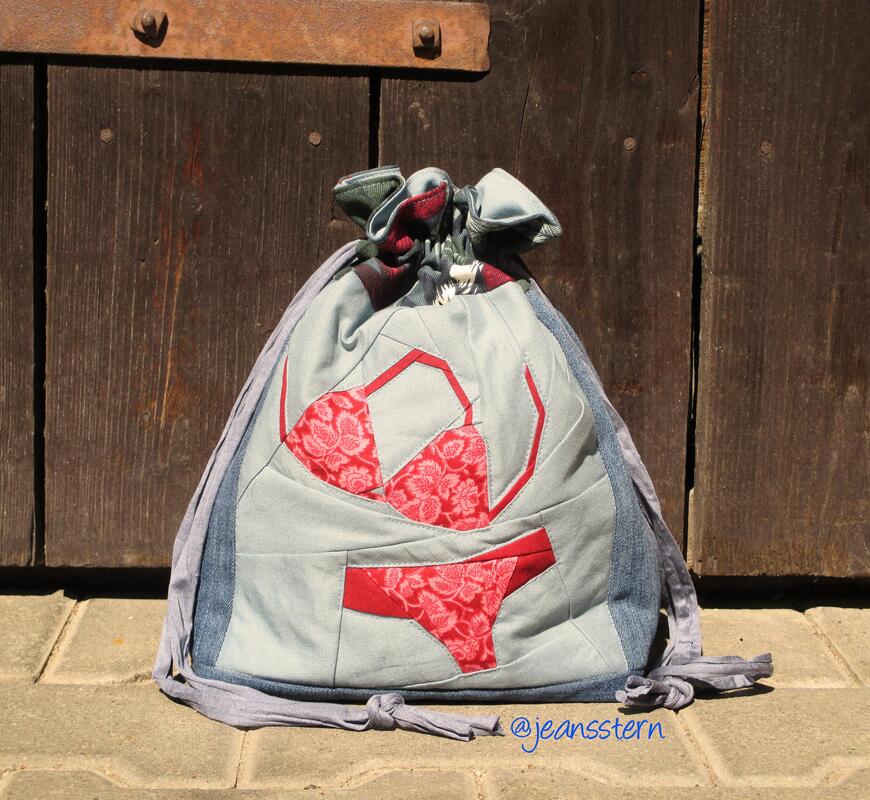
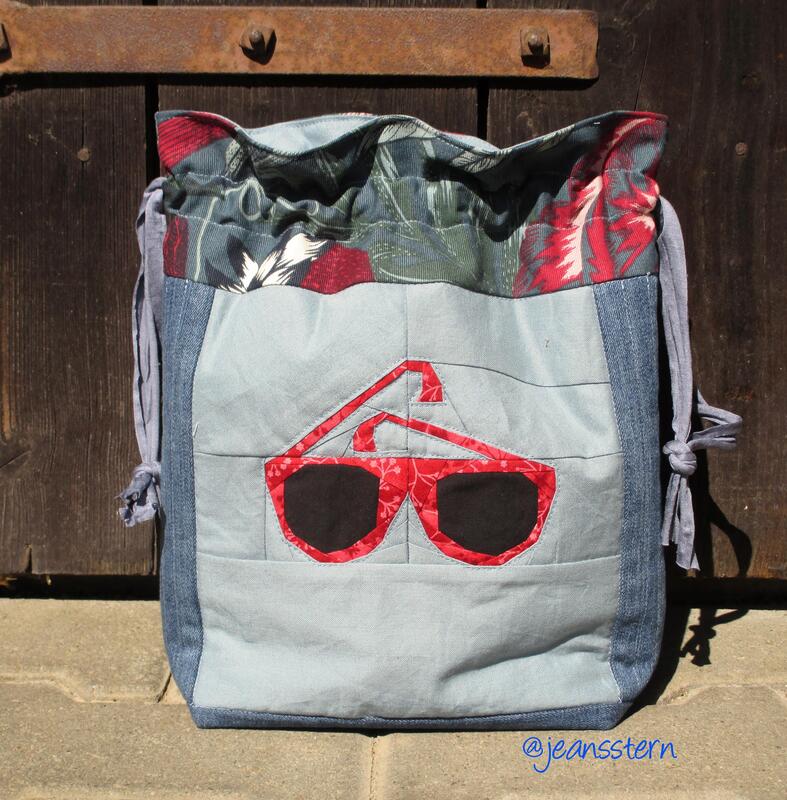
How to easily sew a simple, quilted drawstring bag with a paper pieced quilt block?
And there's a bonus: it's lined and with inside pockets. 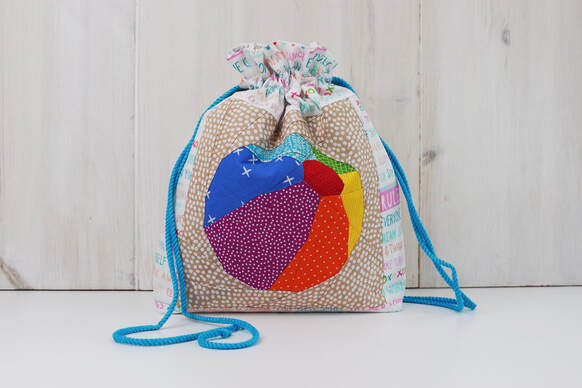
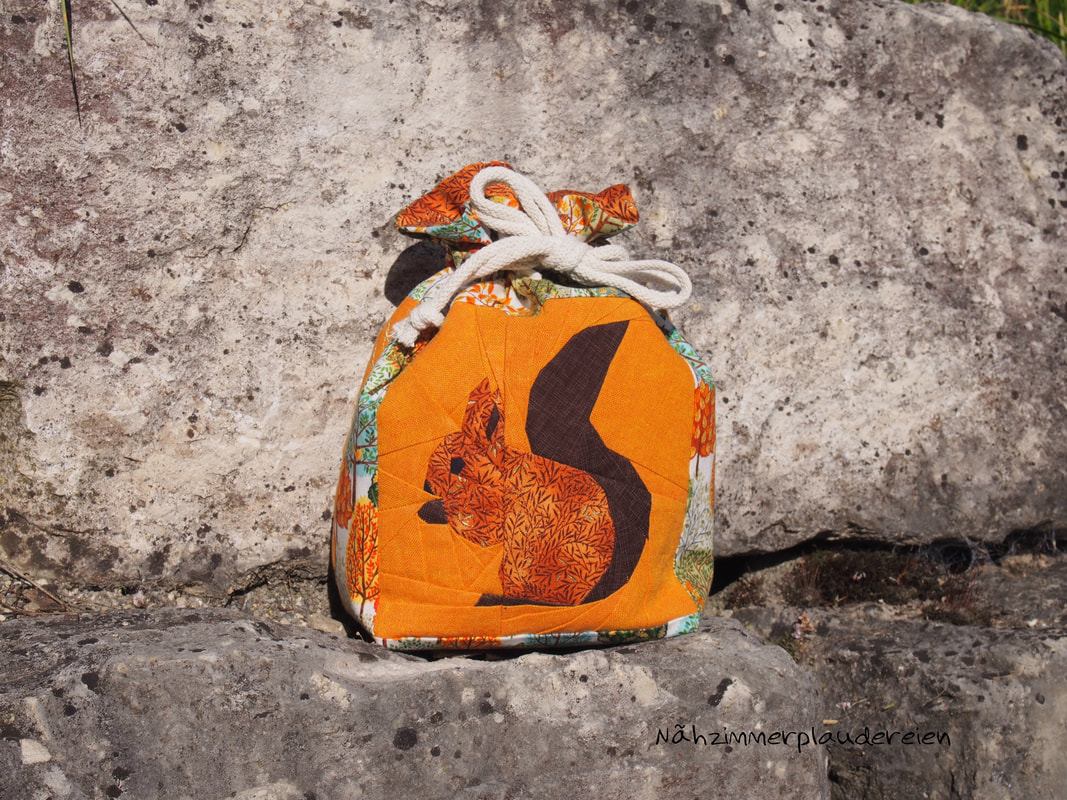
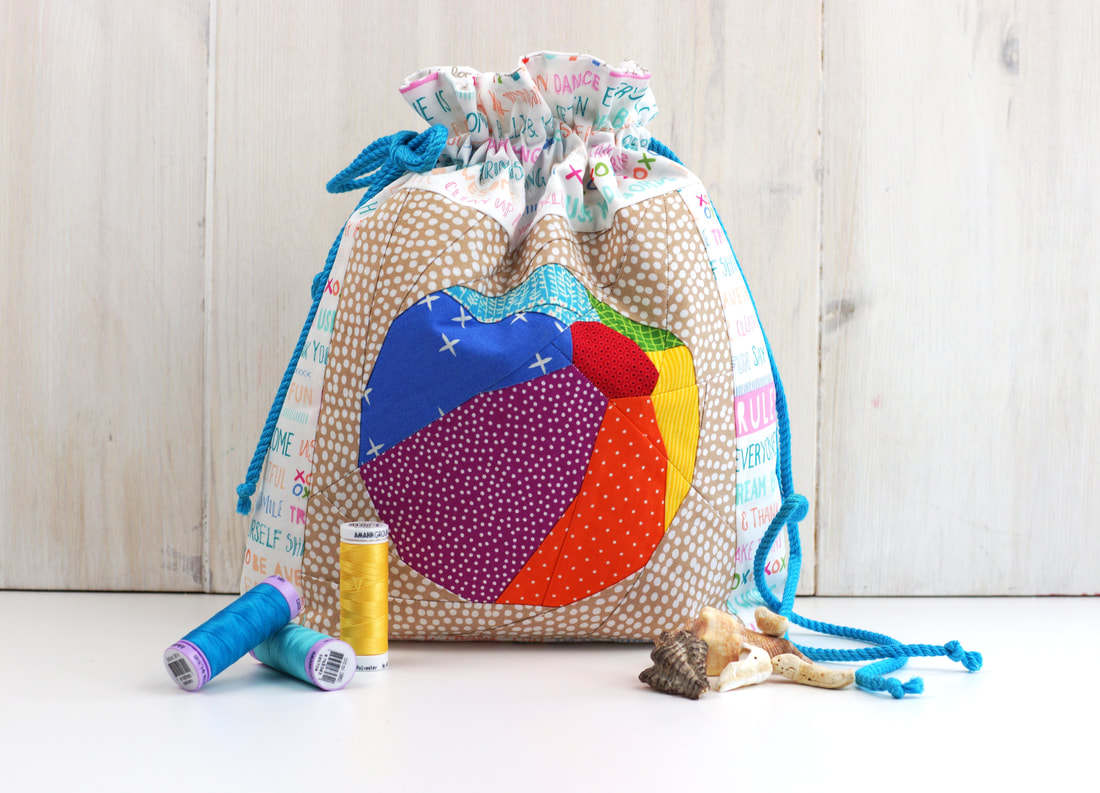
beachy summer drawstring bag
I mean seriously is there such a thing as too many drawstring bags?
I am sure we all agree ............ ABSOLUTLY NOT :-) You can use them for everything and everywhere. Use them for gifts or as storage, as a cute little decor, you name it. So let me show you how to sew a drawstring bag with any one of my quilt block patterns. 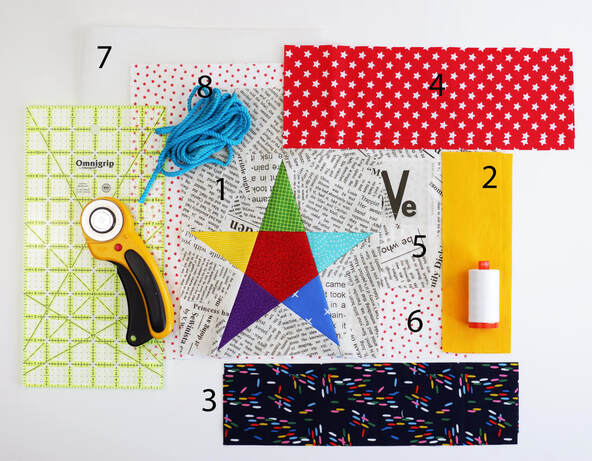
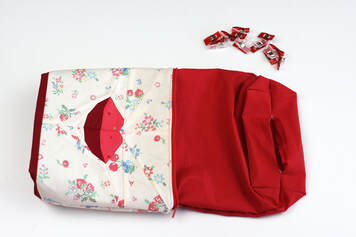
Fabrics and materials for a drawstring bag
Finished bag size : 9.5" wide, 11" high and 4" deep at the bottom
(Size small if you’re using a 6"x 6" quilt block: 7" wide, 8" high and 3" deep at bottom) Fabric/ Materials needed: (all measurements are width x height) > 1 1 FPP quilt block 8.5" x 8.5" (beach ball) (6.5"x 6.5") > 2 2 strips of fabric on each side of the FPP block 2.5"x 8.5" (2 1/4"x 6.5") > 3 2 strips of fabric for bottom panel 12.5"x 3" (10"x 2.5") > 4 2 strips of fabric for top panel 12.5"x 4"(10"x 4") > 5. 1 piece of fabric for back 12.5"x 8.5" (10"x6.5") > 6 2 pieces of fabric for lining 12.5"x 14.5" (10"x11.5") > 7 Fusible interfacing 1 piece 12.5"x 22" (10"x 17") > 8 2 pieces of rope, ½" twill, or ½" fabric tie (I used blue rope) 40" each. (30") > Optional: Inside pocket 1 piece of fabric 12.5"x 10" (10"x 7.5") Before you start: Read through the instructions, thats always best so you get a feel of the sewing beforehand. Seam allowance is always ¼" unless mentioned otherwise. One more note: The quilt block sizes are 8"x 8" ( 6"x 6") finished, they are 8.5"x 8.5" ( 6.5"x 6.5") unfinished. 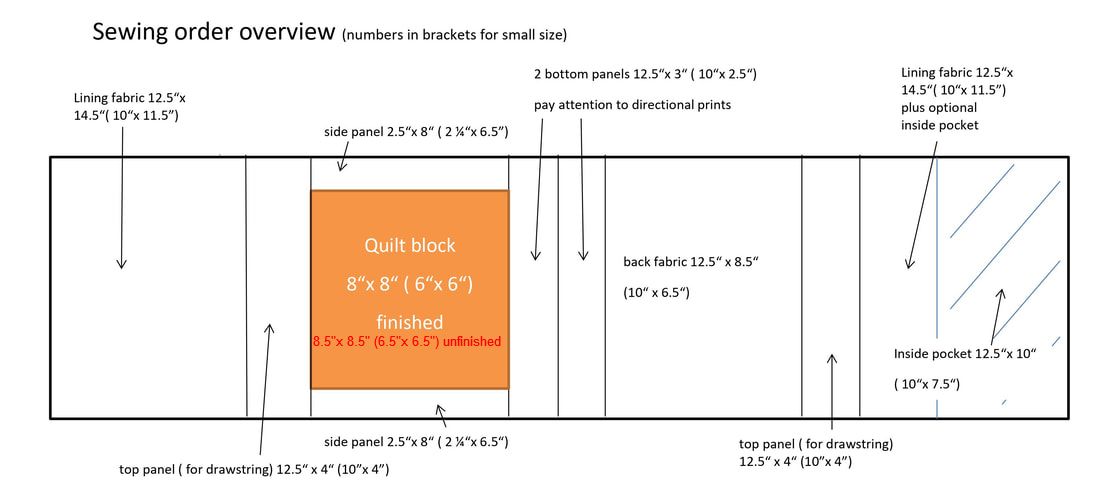
INSTRUCTIONS:
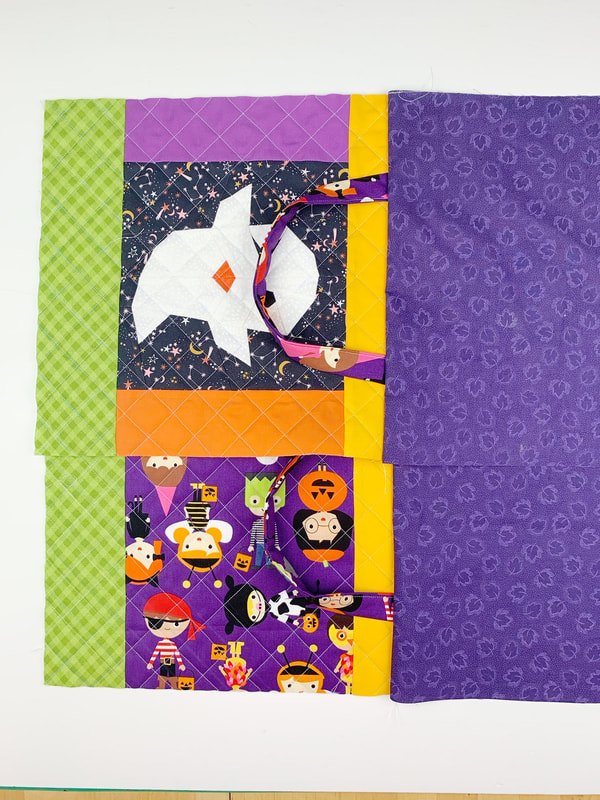
1. Lay out your pieces of fabric as shown in the chart above, and sew them together into one long piece. Start with sewing the two side strips (2.5"x 8.5") to the quilt block, then add the other pieces of fabric in the order above. Order from left to right: Lining, top panel, quilt block with 2 side panels, bottom panel, bottom panel, back (exterior), top panel and finally lining again. Press seam allowances open. 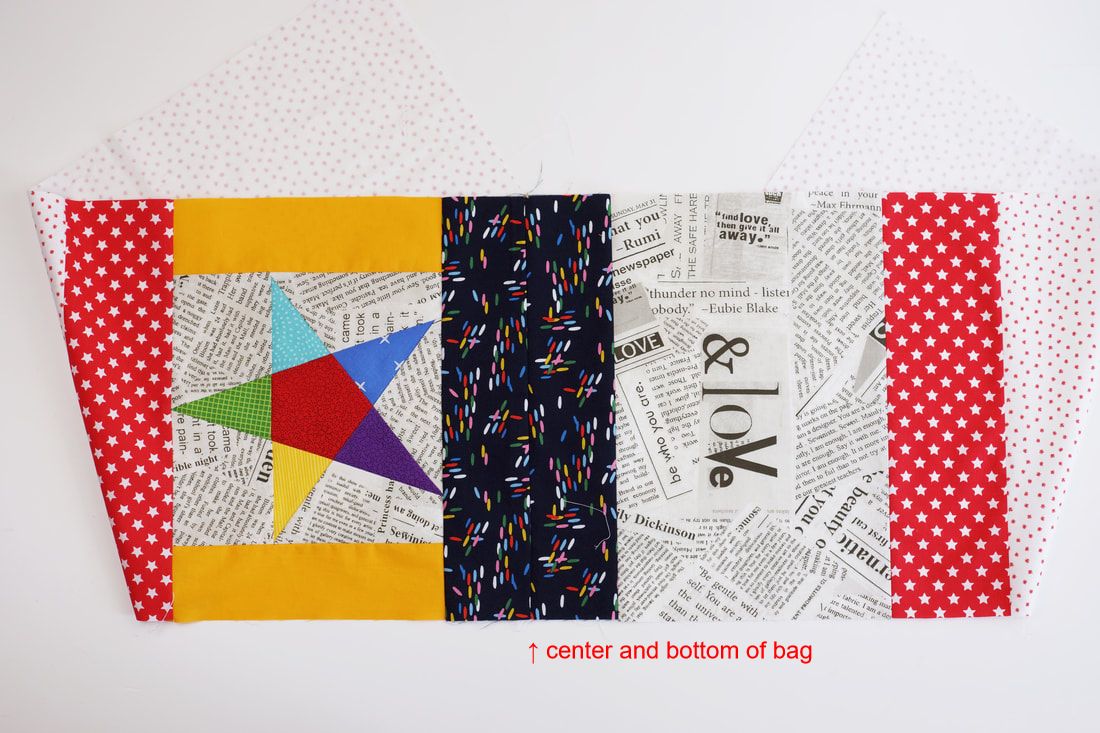
all the pieces sewn into one long strip of fabric
Here you see the whole long piece sewn together.
(I folded the lining pieces under for the photo.) Make sure you place directional prints with the 'top' of the print facing towards the top of the bag ,towards the drawsting- and lining pieces. The bottom of the drawstring bag is at the center of the bottom panels. 
fusable interfacing ironed onto the outer fabric of the bag
Interfacing gives your bag more structure and stand.
Iron on the fusable interfacing. Use interfacing only on the exterior main pieces. If you’re using it on the 4" drawstring panel, your drawstring might get caught in the material and it will not let you tie your bag as nicely. I measured the interfacing a little bit generous, so trim it down to where the drawstring panel starts. 
hand quilting the quilt block
Now you can quilt the front and/ or back outer fabric panel to your liking.
I would recommend to only quilt the paper pieced block and/ or the back fabric block. Not the bottom part or the drawstring panels. The bottom will have boxed corners anyways. And it’s best to leave the drawstring panel plain, as any stitching might interfere with the drawstring. I love hand quilting, so I decided to just stitch around the star. I will leave the back without Quilting, since the fabric with the letters is pretty busy as it is. But in general straight line machine quilting would look really nice on a less busy pattern. Plain lines, squares or diamonds always enhance solid fabrics.
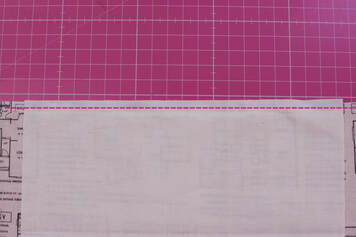
If you’re adding an inside pocket fold over the 12.5" ( 10") side of the inside pocket
fabric ¾" twice and clip or pin in place. And sew along the clipped edge. 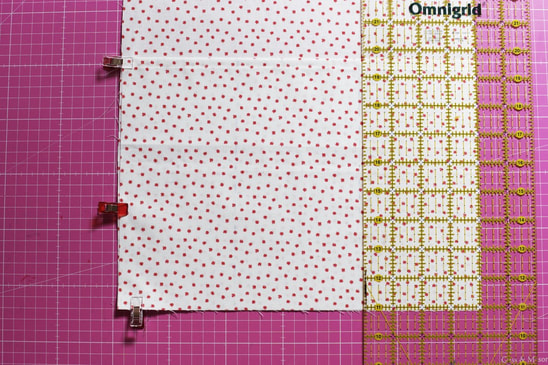
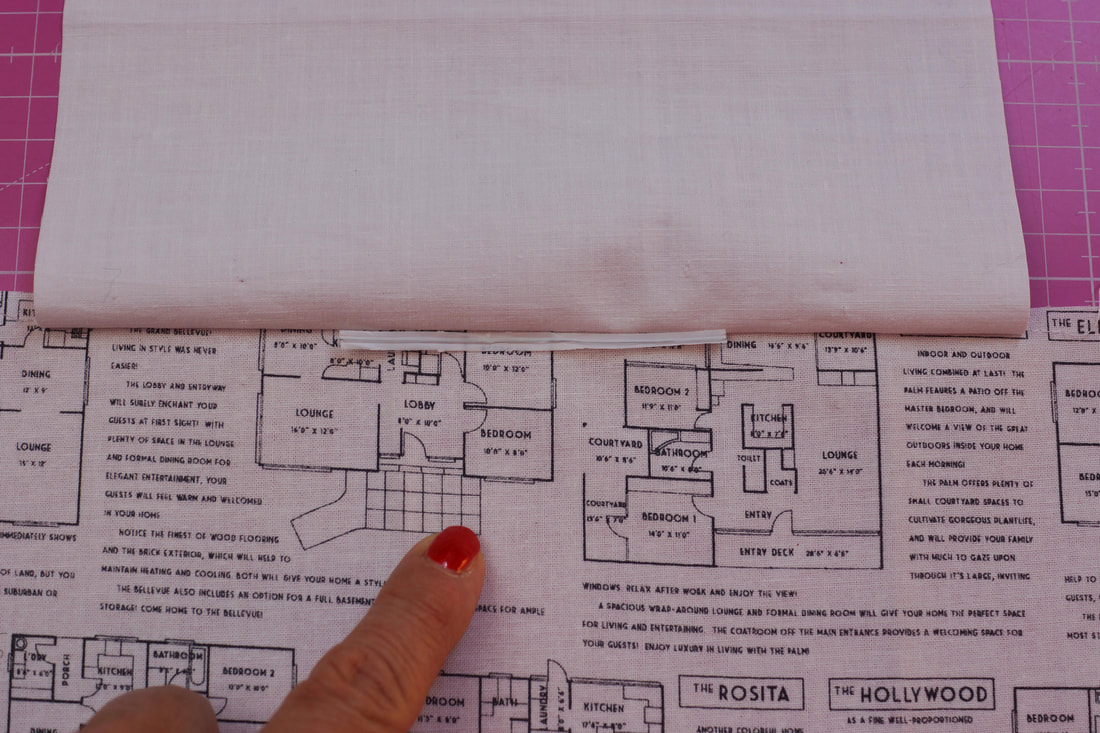
Place the pocket fabric panel onto the backside lining panel. Wrong side of pocket fabric
against right side of lining panel, matching the raw outside edges . Clip or pin in place. Draw two vertical lines 4"(3" for the small bag) from the outer edge with a water soluble pen or fabric marker. Then sew along those lines, backstitch at the beginning and at the end. These will be your three inside pockets. If you’d prefer two inside pockets, draw just one line in the middle and sew along that line. This gives you two inside pockets. 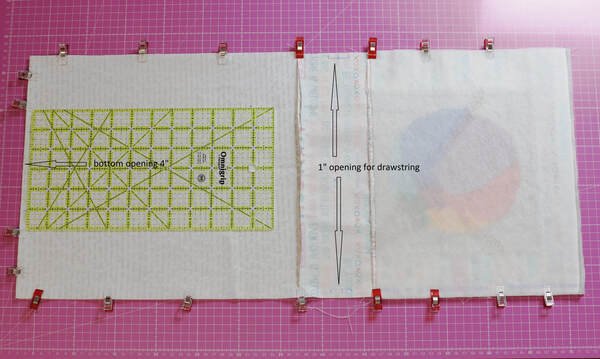
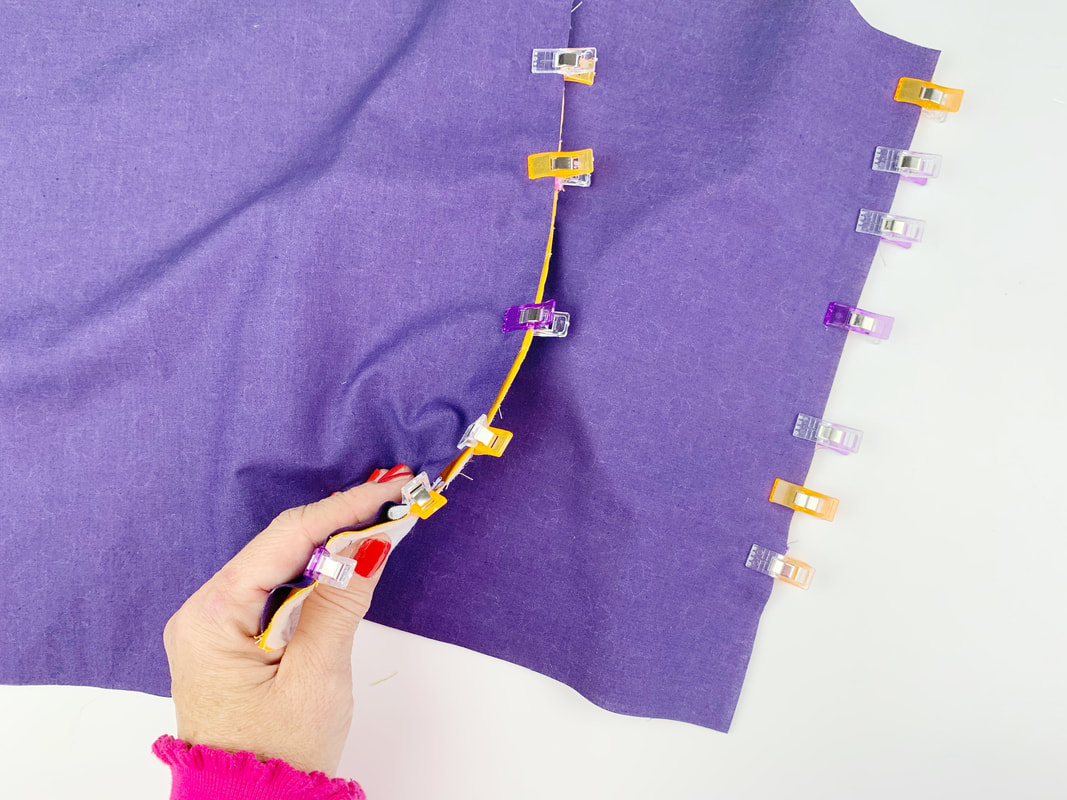
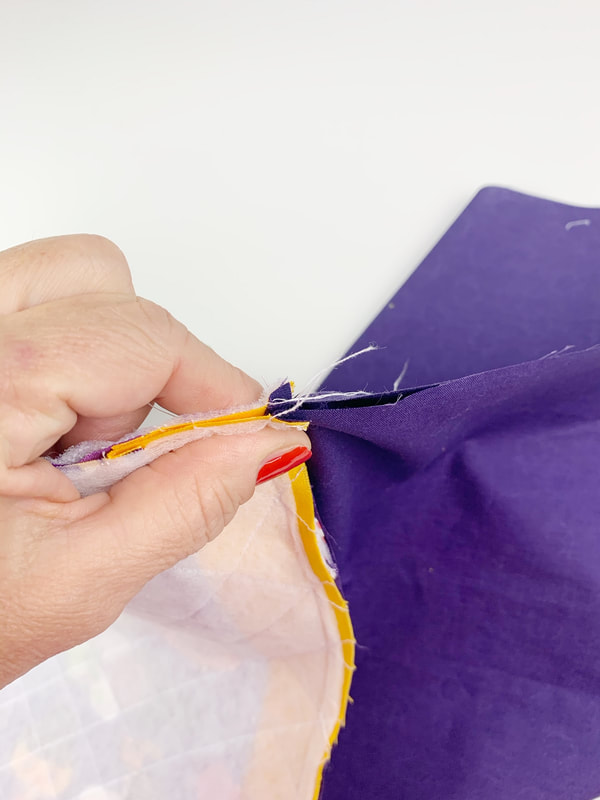
Fold your sewn strip in half, right sides together, matching the lining ends.
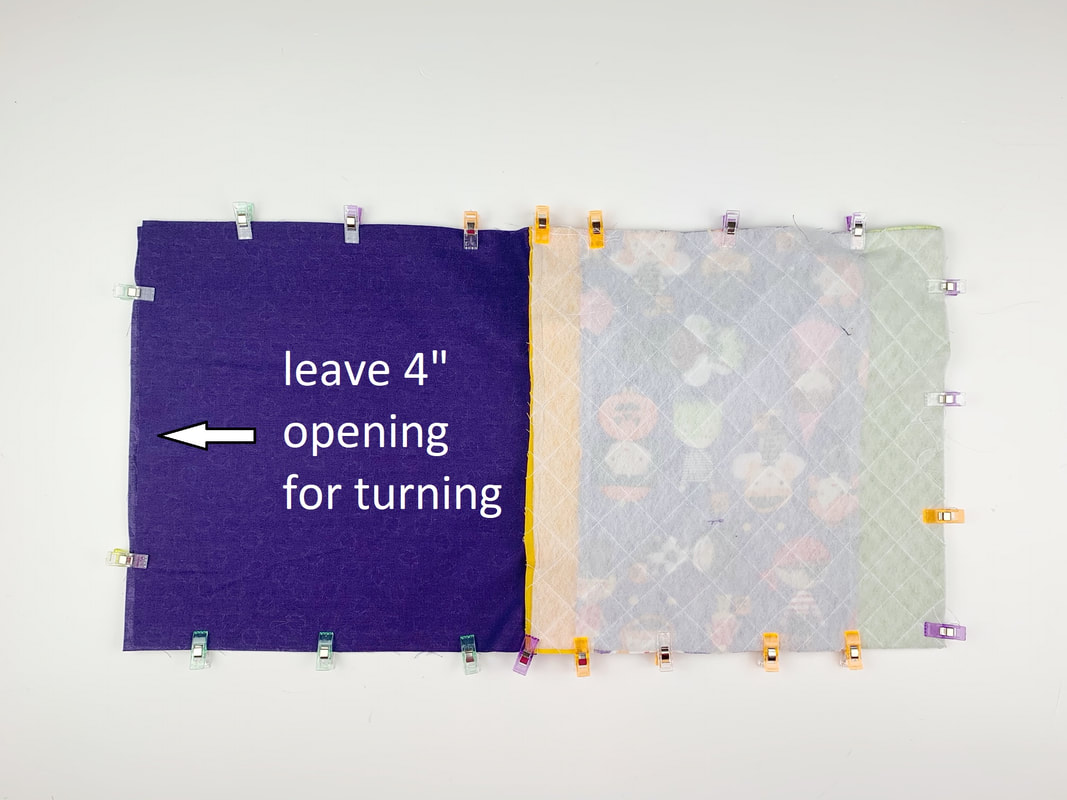
Clip or pin along the raw edges in place, matching up each seam and clipping or pinning the matched up seams. Leave a 4" space at the center of the bottom end of the lining, this is your opening for turning the bag later. 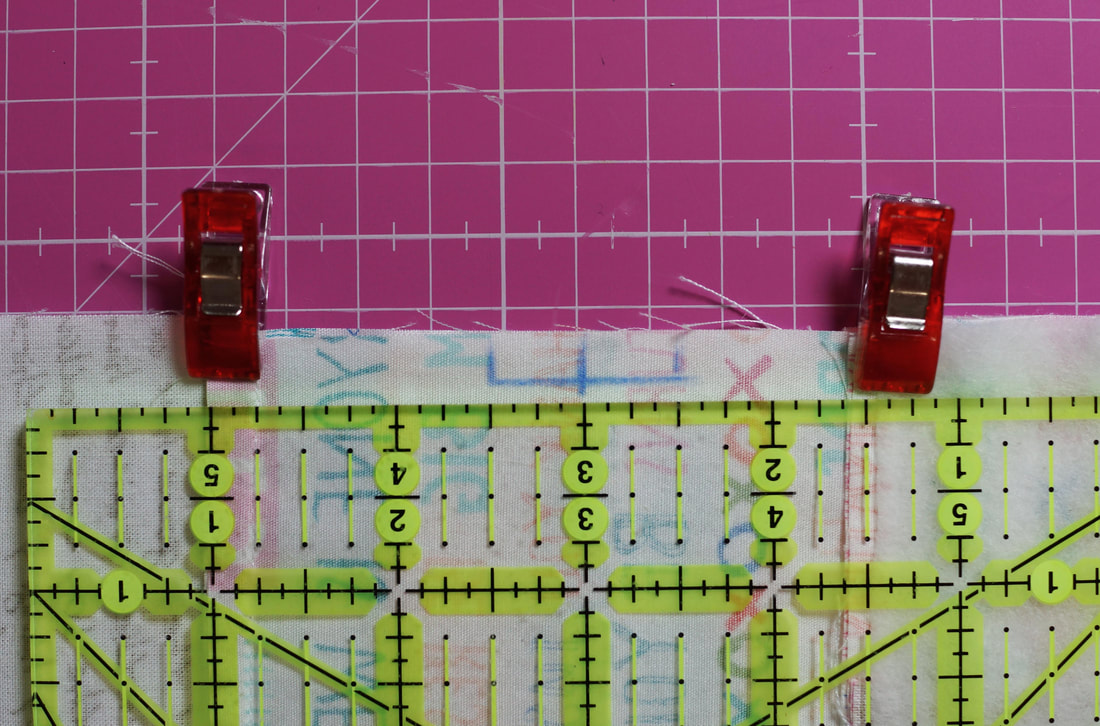
mark the center of the panel for the drawstring opening
On both sides, of the drawstring panel mark a 1" opening in the center of the panel.
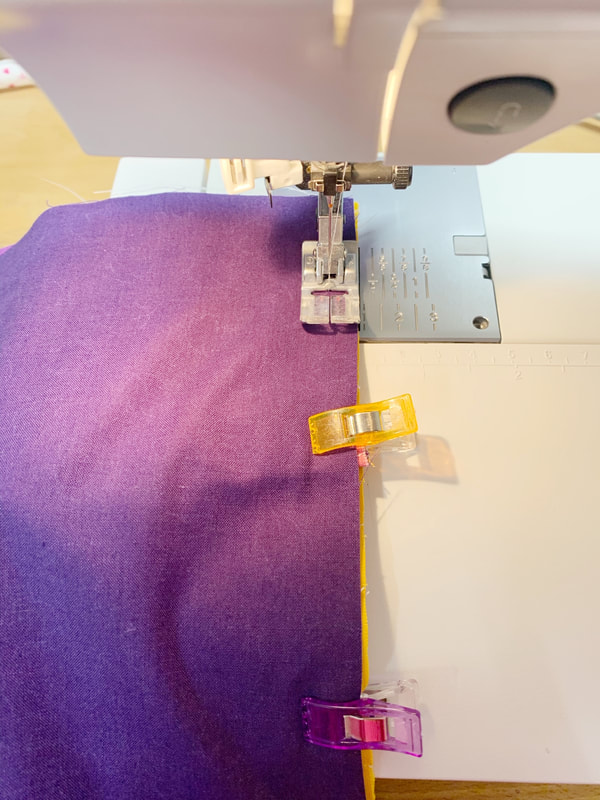
First mark the center of the panel and then mark ½" to both sides. This gives you small 1" opening sections on both sides, these will be left unsewn, creating the opening for the drawstrings. Then sew along the three open sides. Do not sew between the 1" opening you marked on both sides or the drawstring panel or the 4" opening at the end of the lining pieces.
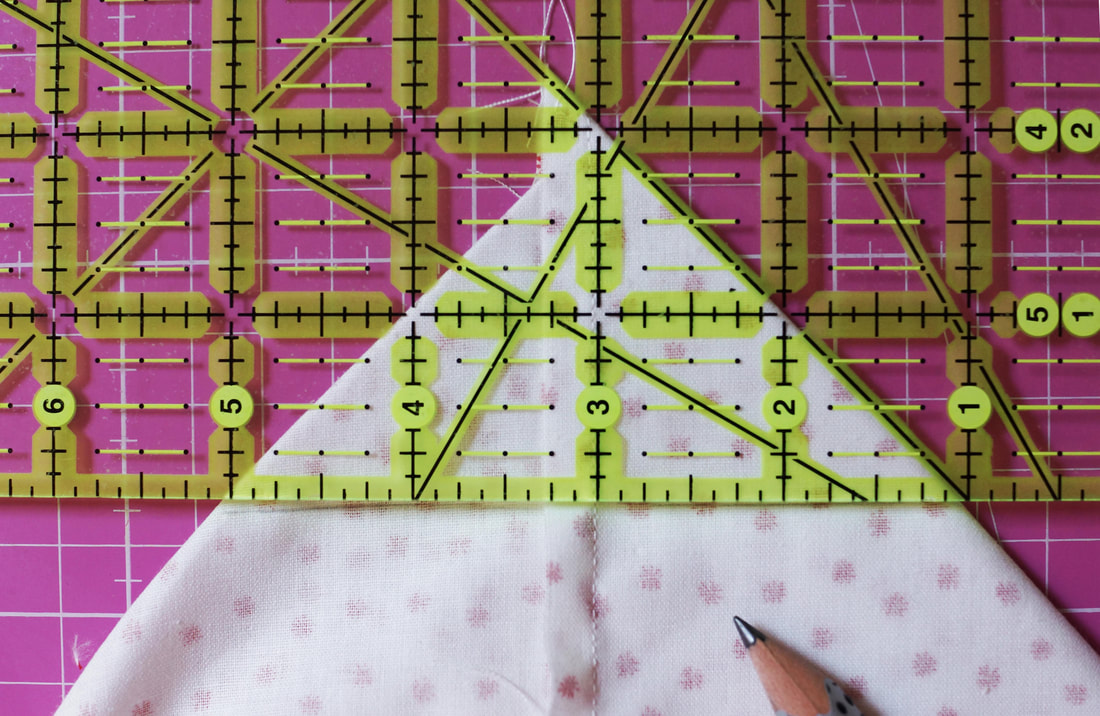
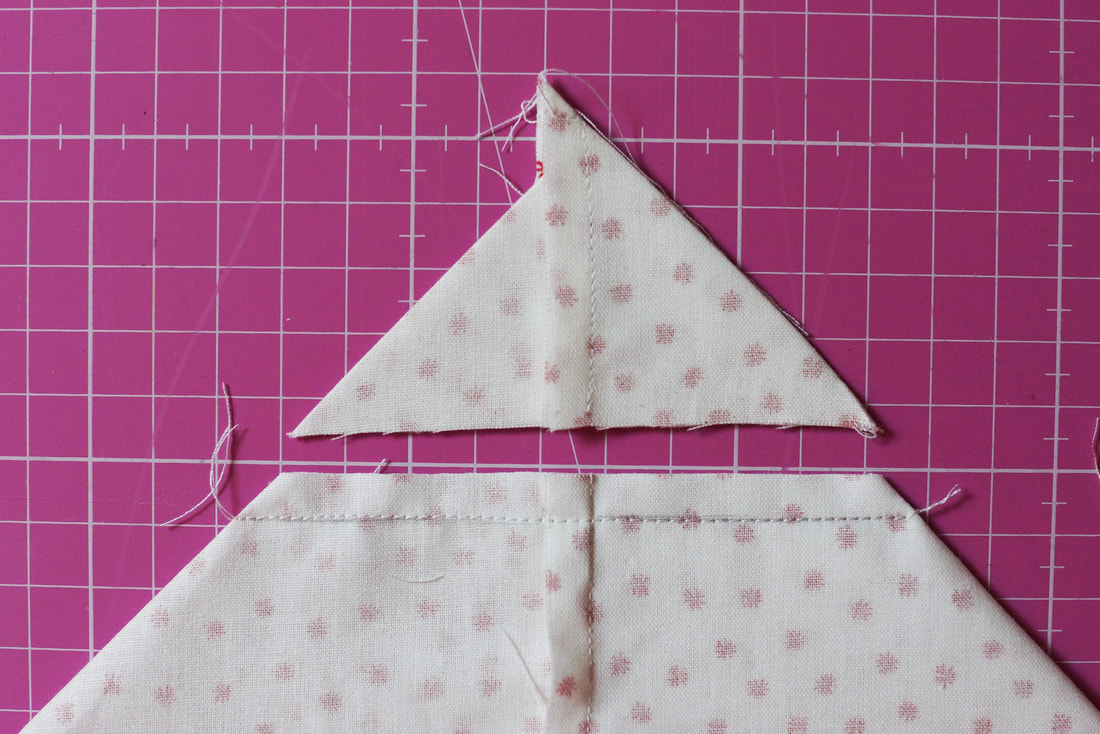
For a flat bottom of your bag, you need to box all four corners of the drawstring bag.
Two corners of the lining and two corners of the exterior fabric. Starting with flattening the corner, the seams, bottom seam and side seam should be on top of each other. Then measure 2" (1.5"for the small bag) from the top corner with an acrylic ruler and draw a line across with your fabric marker or a water soluble pen. Stitch along that line and trim off the corner, leaving a 1/4" seam allowance. (Repeat this for all four corners) 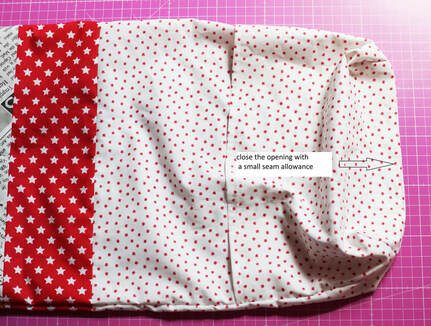
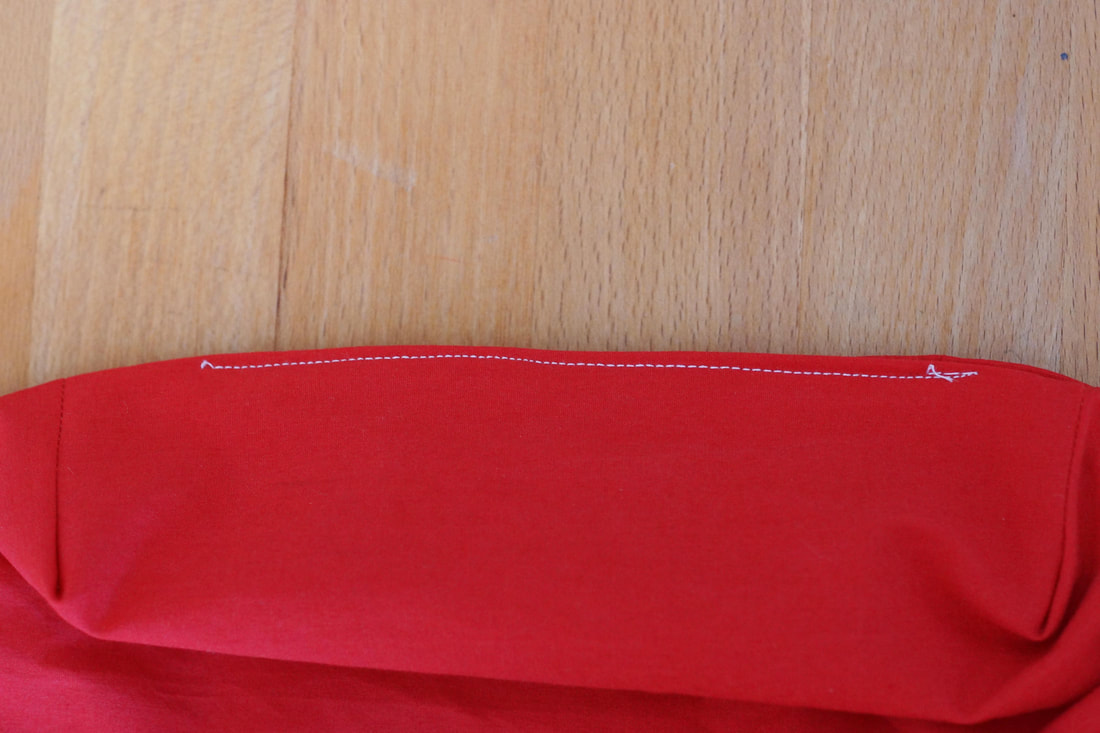
close the opening with a small seam allowance
Turn your bag by turning the pieces right sides out, pulling through the opening in the
lining. Push out the corners nicely. Press the lining opening under 1/4"and stitch closed with a small 1/8" seam allowance.
Fold the lining into the exterior of the bag. Press along the top edge.
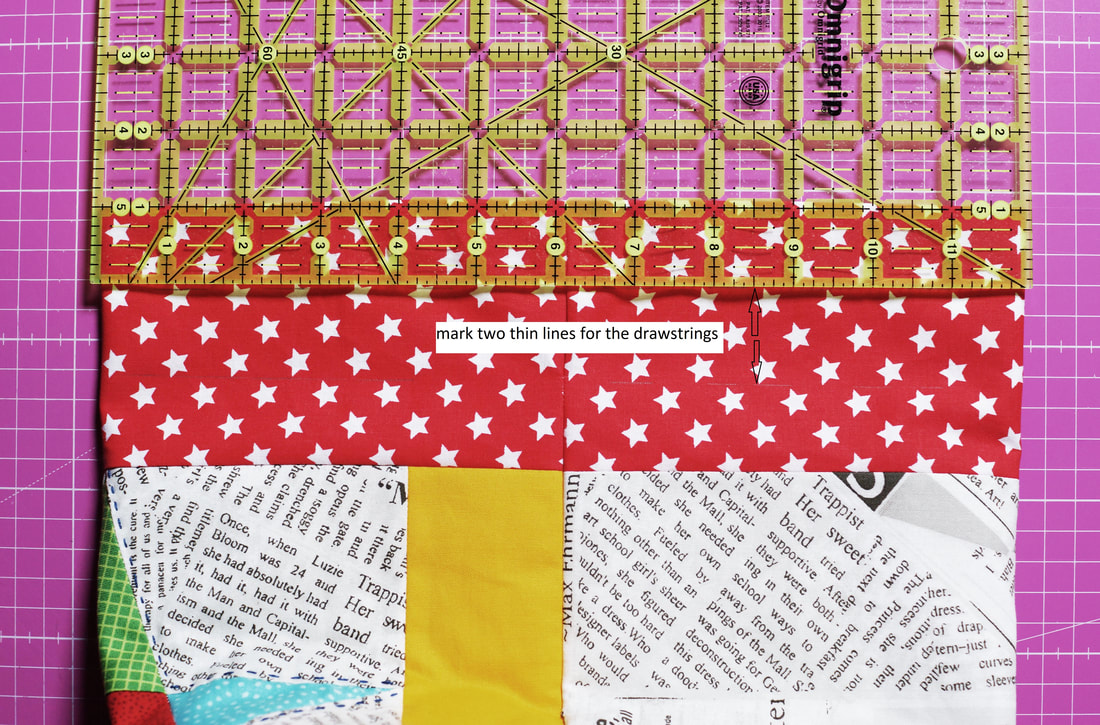
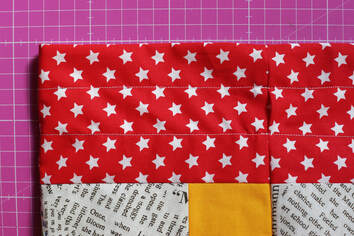
Mark two thin lines onto the drawstring panel with a fabric marker or a water soluble pen.
One line at the top of the 1" opening for the drawstrings, and a second line at the bottom of the 1" opening for the drawstings. Mark those line all the way around the top of the bag. This will be your drawstring casing. Sew along those two lines all the way around the bag.
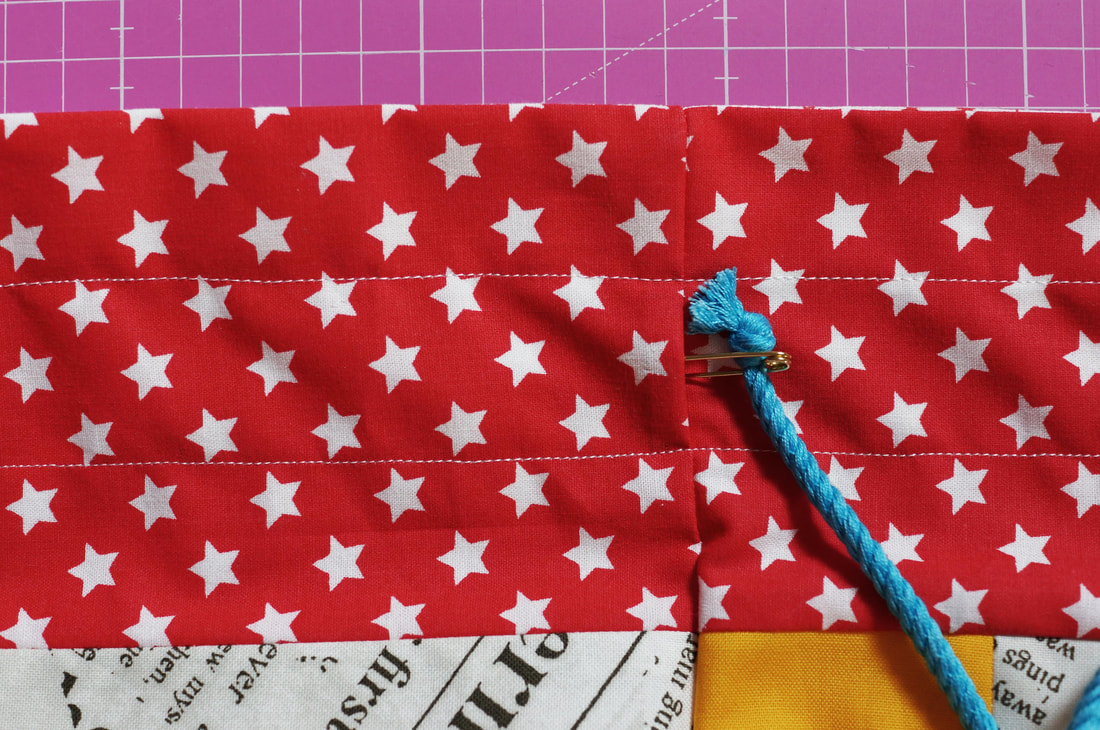
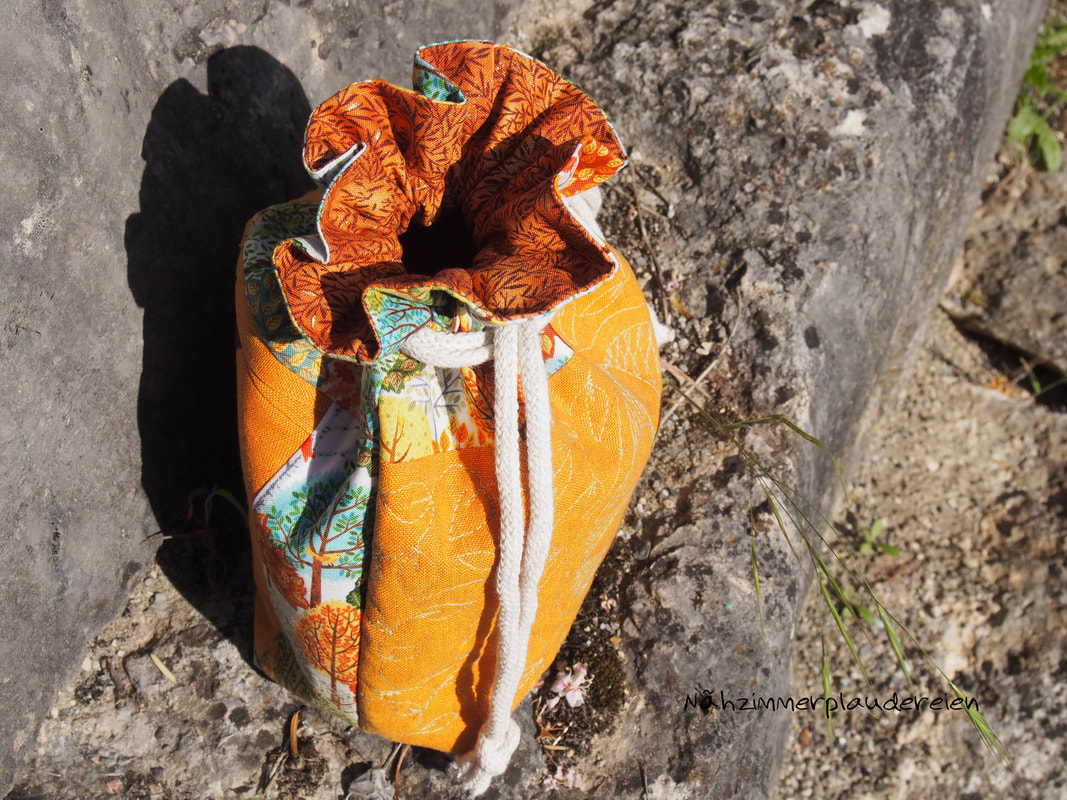
Attach a safety pin to one end of your rope, ribbon or fabric tie.
Insert the safety pin into one of the side openings. Work it through, pulling it all the way back around the whole bag and out the opening where you started. Even out your the ends and tie them into knots seperatly or together. Repeat with the other tie, starting at the opposite side opening. 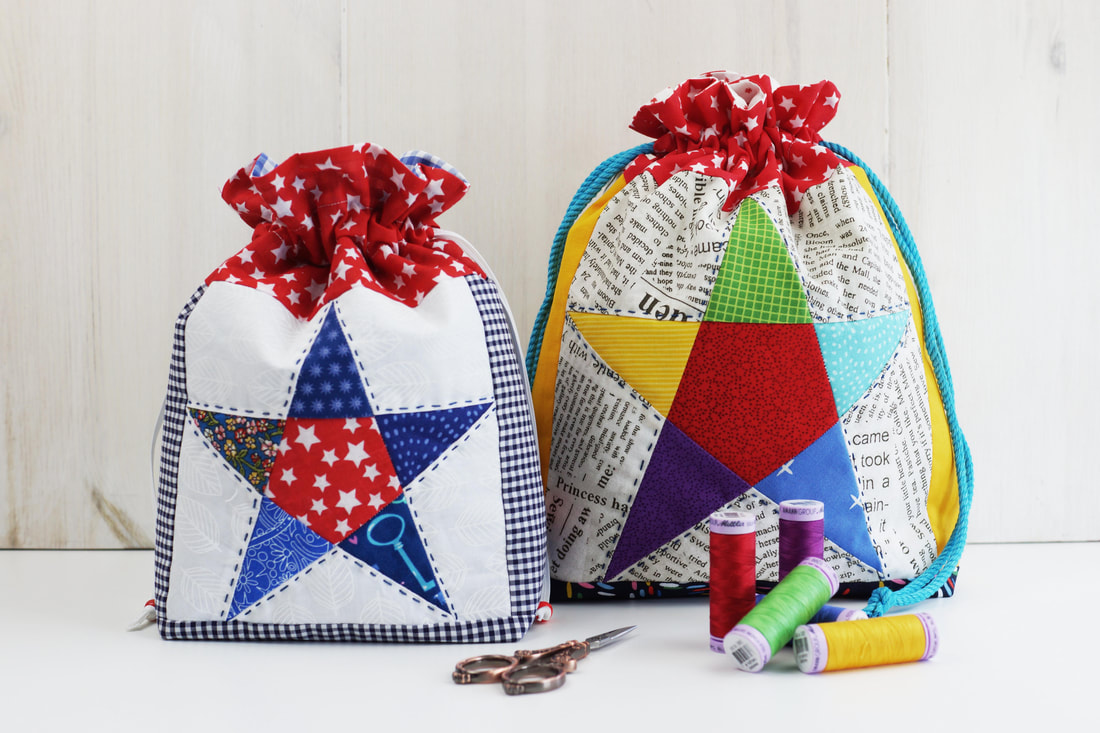
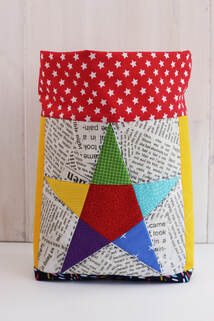
Aaaaaand YAAAAAY..... all done.

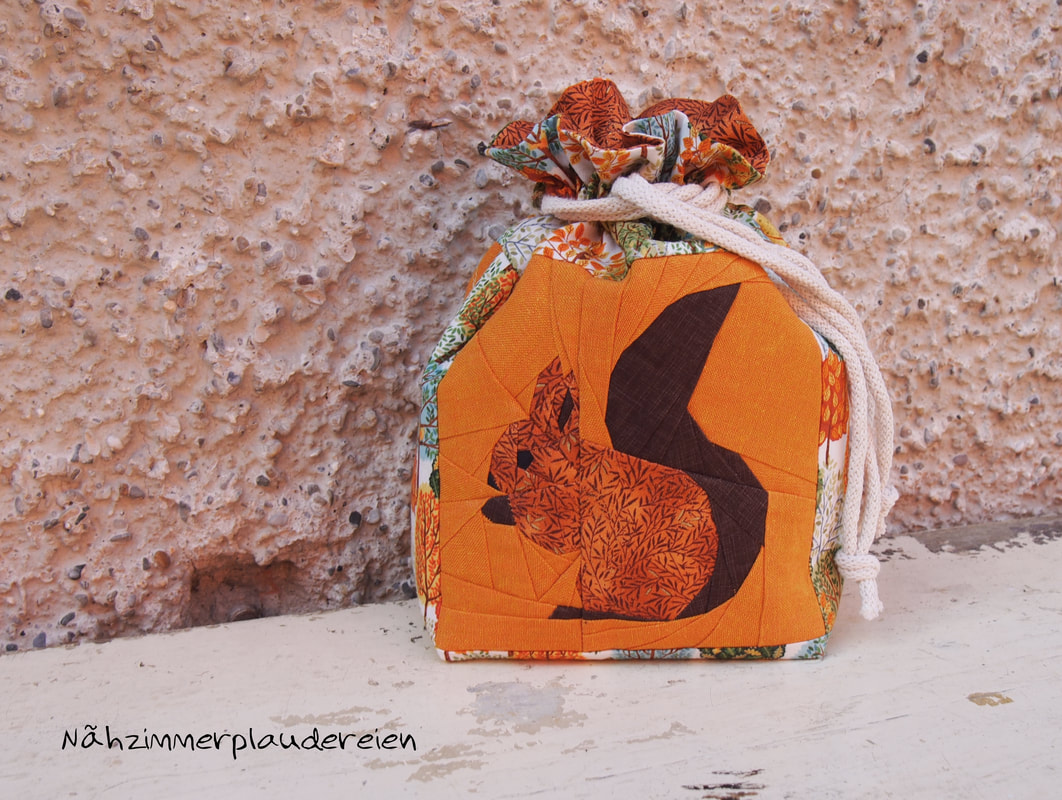
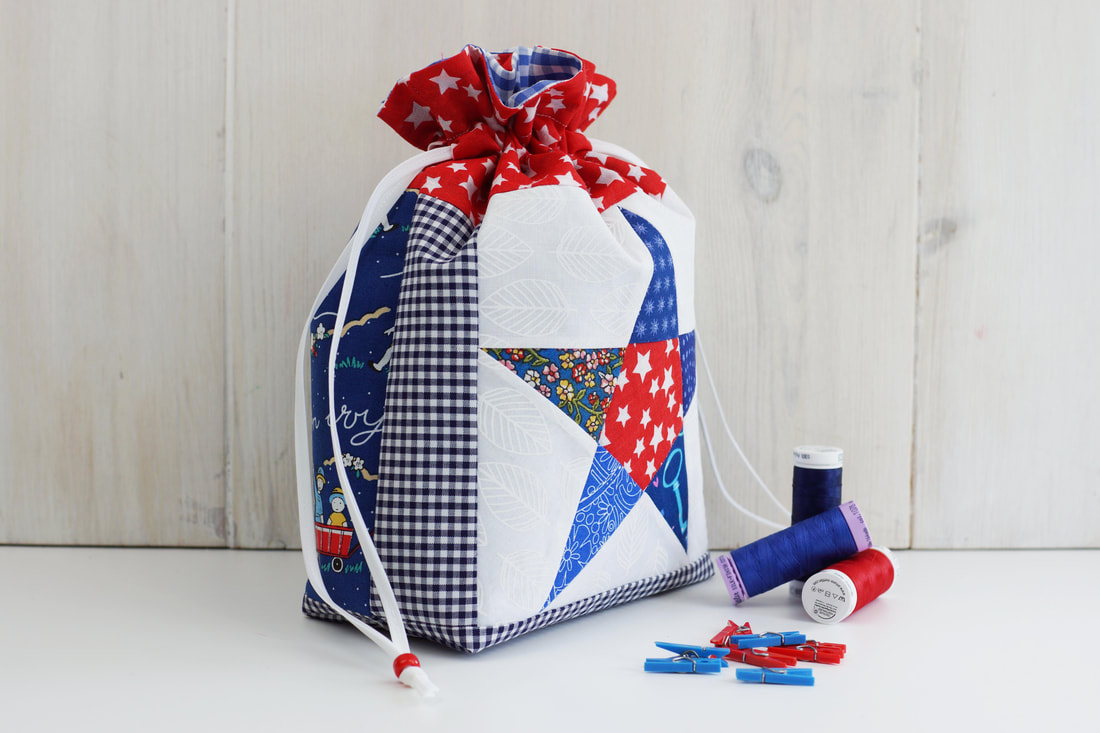
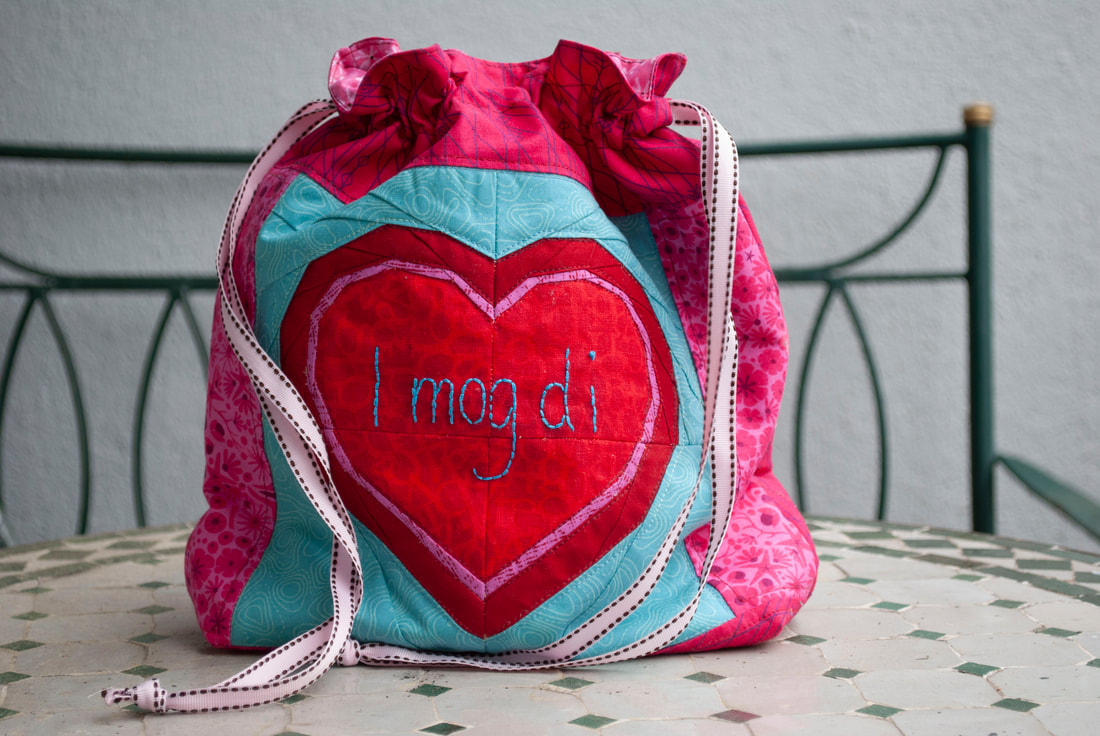
And here are some more inspirations on this bag, with all sorts of blocks from my small collection of quilt blocks ....
Share your makes on social media ... use #quilteddrawstringbag so I can cheer your creations, and if you want I can share them here on my blog. 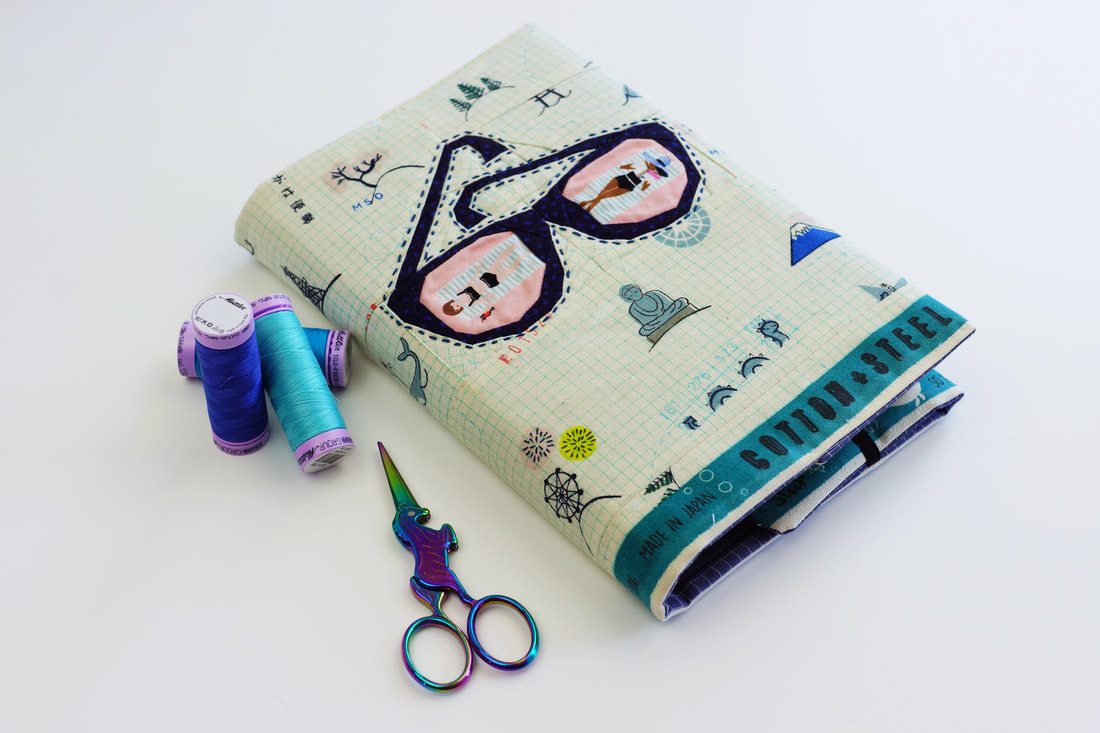
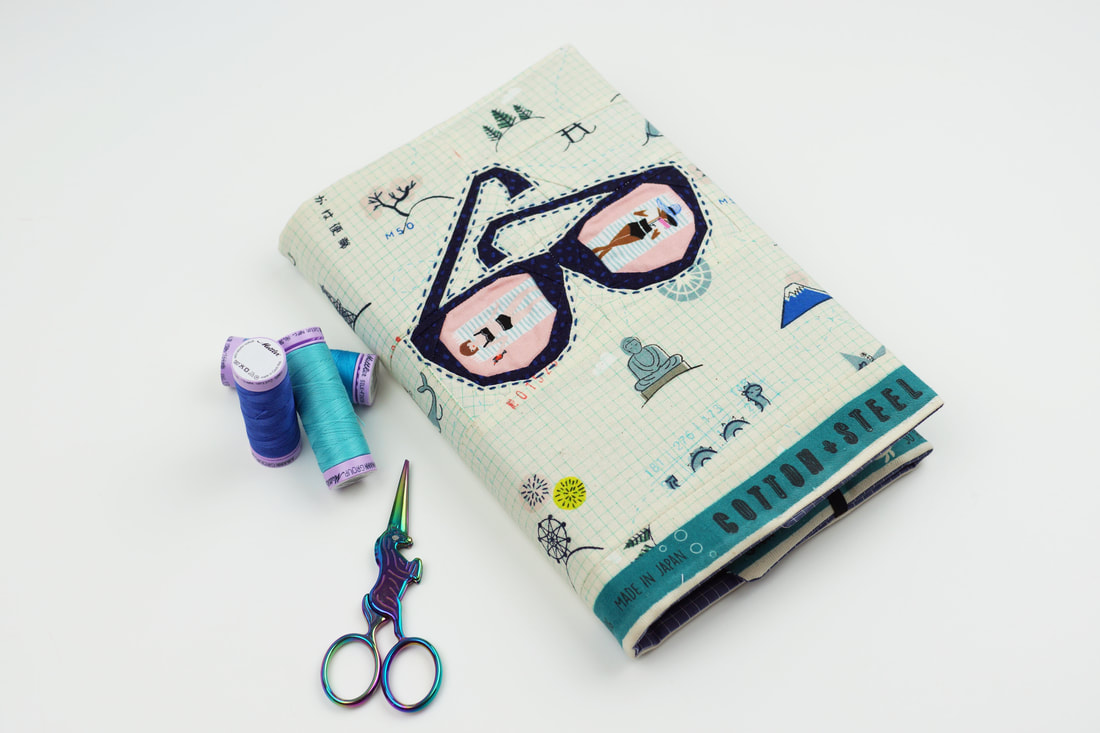
adjustable, quilted, fabric book cover
A quilted fabric book cover is not only extremly pretty on your coffe table,
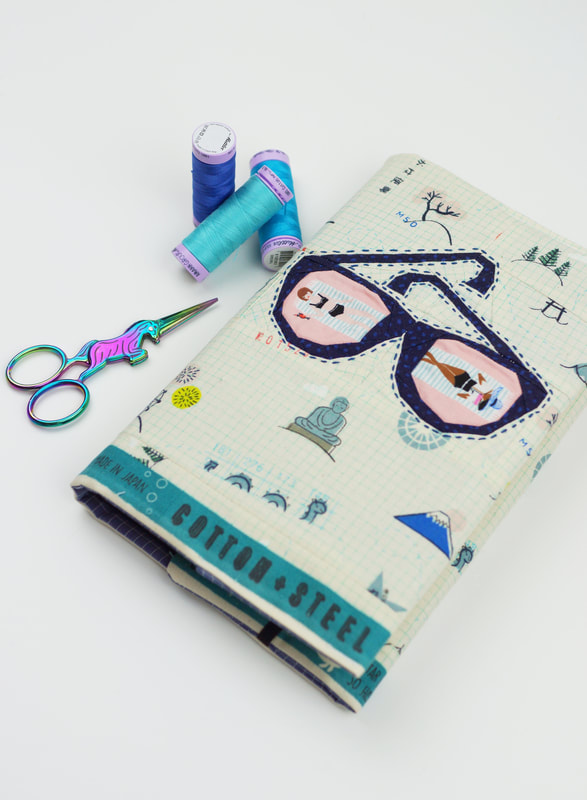
it also comes in very handy if your reading is as 'deep' as mine. Life is serious enough, so I sometimes enjoy 'easy' literature also called romance novels. Especially on holidays, or to wind down after a long day. But obviously not everyone needs to know what I'm reading, right? Literally no one needs to judge my book by it's cover :-) So why not sew yourself a fun and easy, adjustable, quilted fabric book cover with the sunglasses quilt block pattern of mine? Perfect right?
Materials/ fabrics needed:
> the finished sunglasses quilt block ( or any other ) > fabric for the outer book cover (approx. 10"x 20" including quilt block depending on book size) > fabric for the lining ( approx. 10"x 20" depending on book size) > fusable light weight batting ( 10"x 20" depending on book size) > 10" elastic band > ruler, clips, scissors, thread and sewing machine I use a 1/4" seam allowance unless noted otherwise. 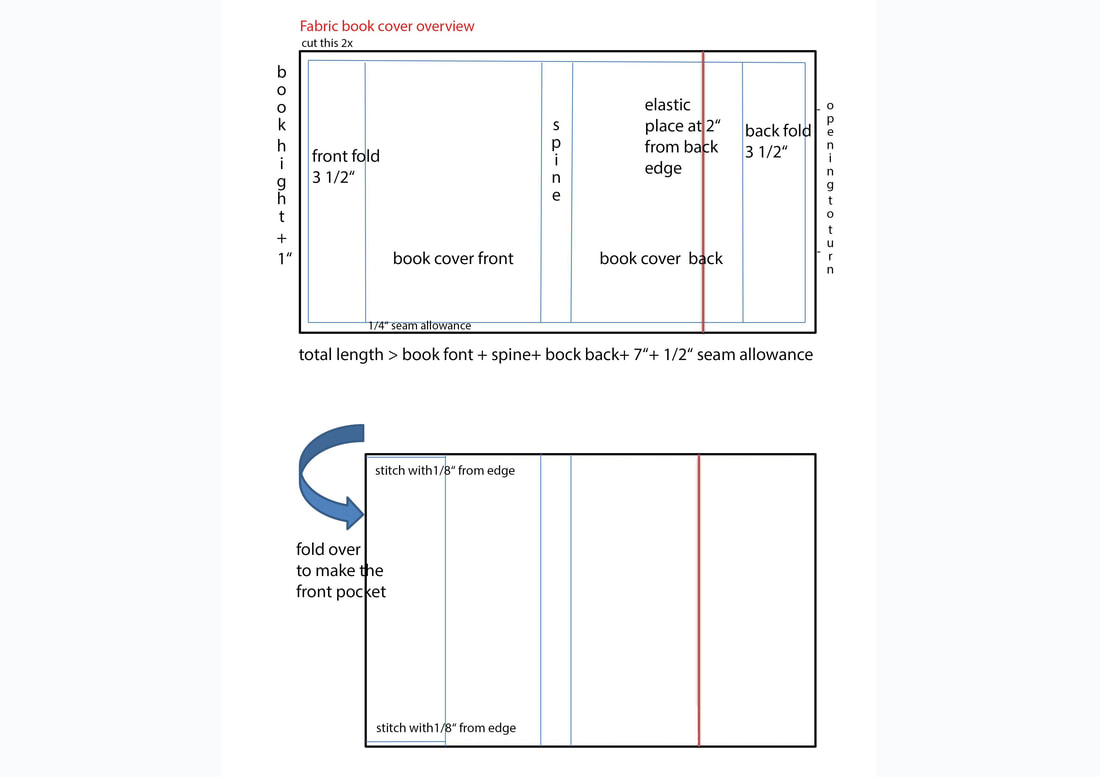
The size of your fabric depends on the size of your book.
I made my book cover to fit most average size hard cover novels, which is roughly 5 1/2 "x 8" with a 1" spine. The book cover is adjustable in length. This is how you calculate the total size of your fabrics and batting needed: > total length will be: book front + spine + book back + 2 x 3 1/2" fold + 1/2" seam allowance > total width (hight or top to bottom) will be: hight of book + 1" . 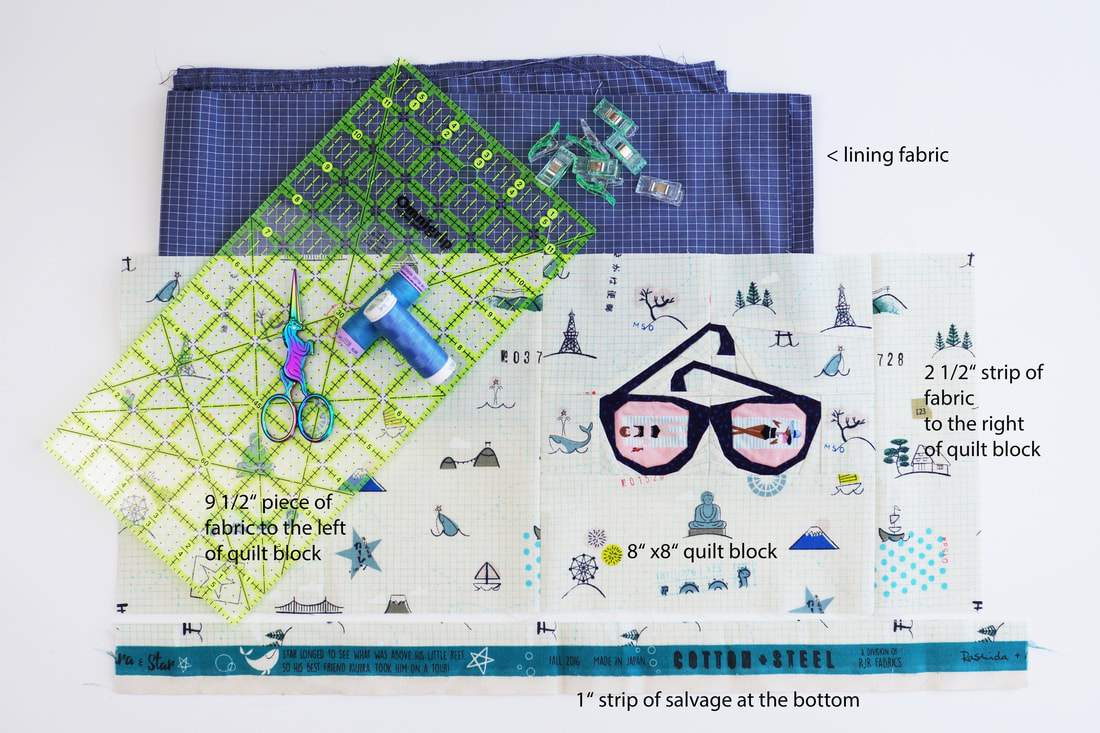
quilted, fabric book cover materials
The sunglasses quilt block I used is 8"x 8" finished, I added a strip of fabric 2 1/2"
to the right and a piece of fabric 9 1/2" to the left. I also added a 1" strip of some very cute selvage to the bottom. The finished piece of outer fabric is 9" x 19 1/2" , same size for lining and batting. 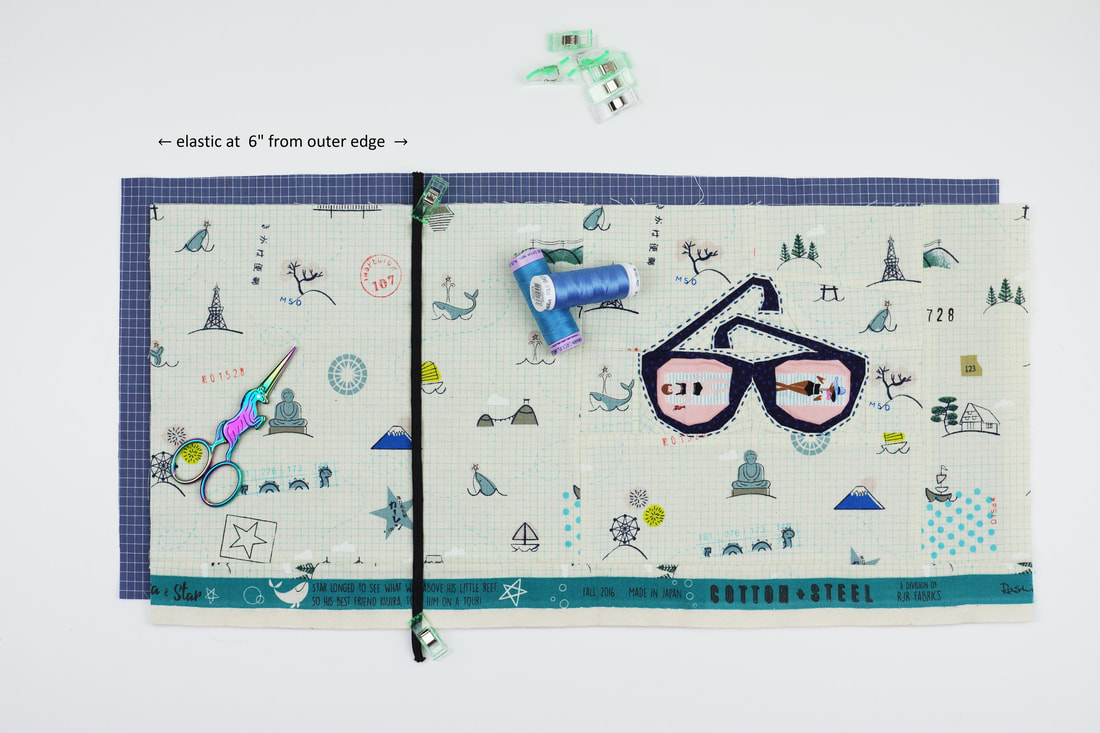
elastic placement
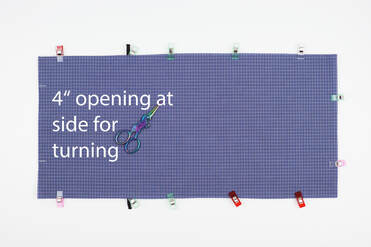
Iron on the fusable batting to the outer book cover fabric then clip the elastic band at about 2" from the back edge of the book (if your size is different then this one) or 6" from the outer edge ( the short side of the fabric).
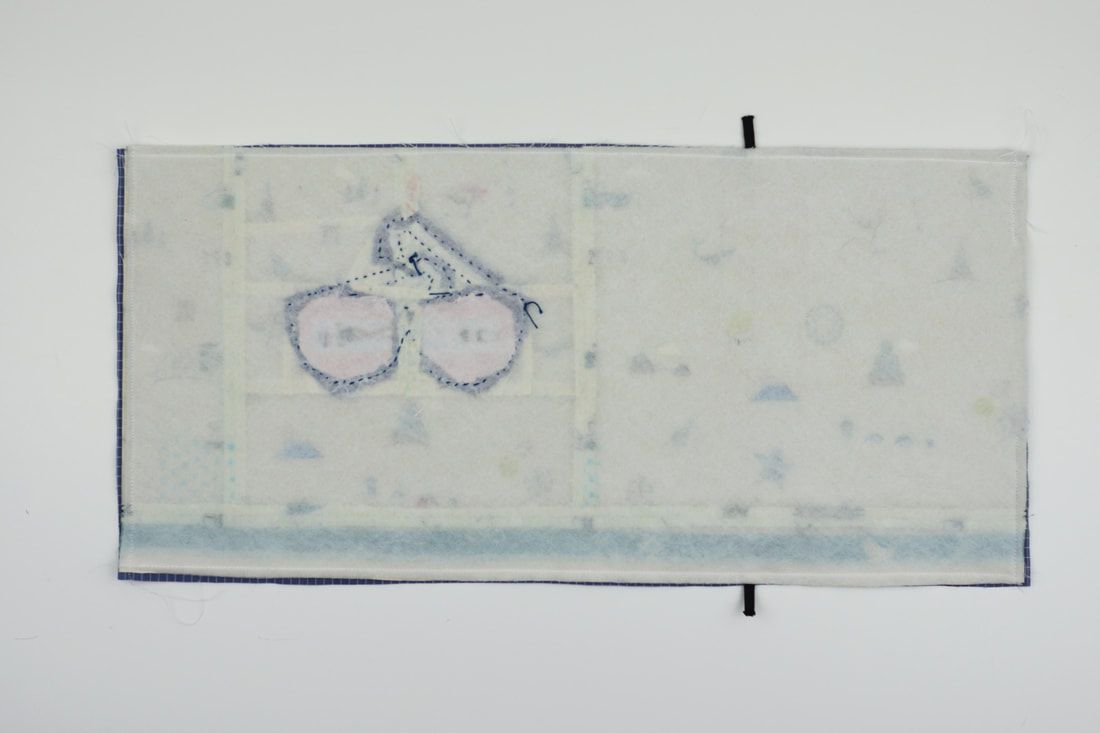
I did some hand stitching around my glasses, you could also quilt the outer fabric with simple straight line quilting, or what ever quilting you prefer. Now place outer fabric and lining, right sides together and clip or pin ( I prefer clips) in place.
Stitch all the way around and leave a 4" opening at the side (the one that will be folded into the book's back) for turning.
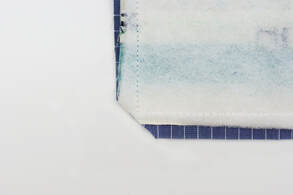
Cut off the edges for nicer corners.

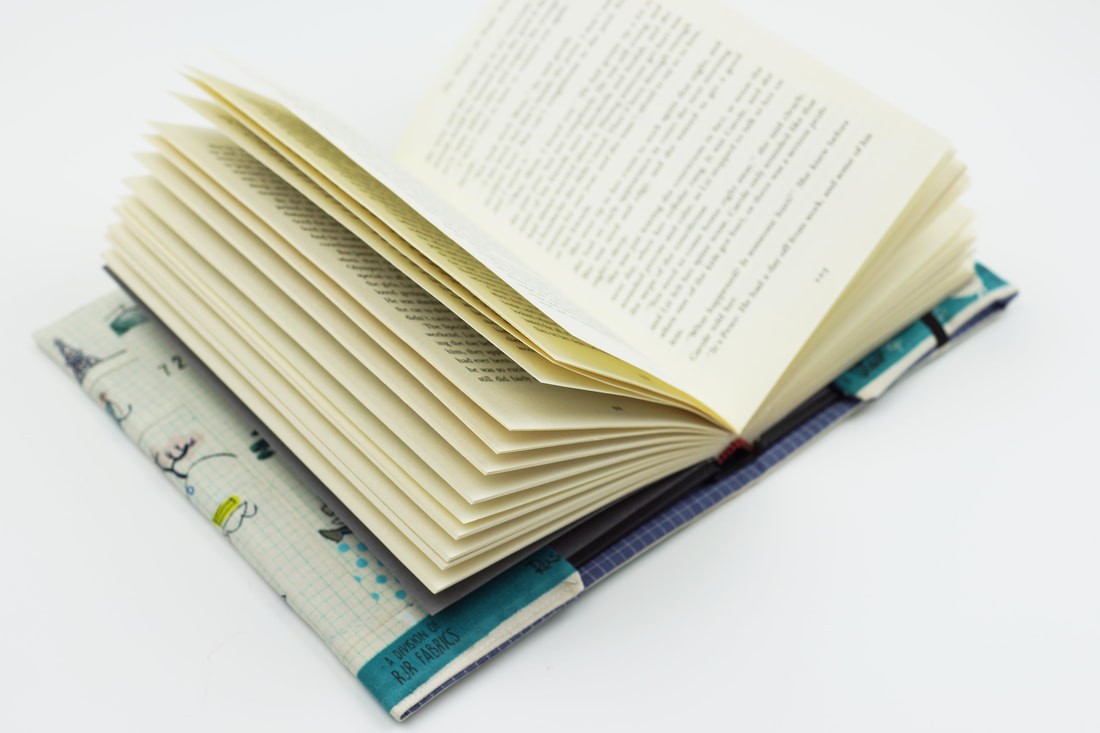
finished quilted fabric book cover
Turn the book cover through the opening on the side, and close the opening,
by folding the seam allowance inside and stitching the opening close with a 1/8" seam from edge. Fold in the front pocket 3" - 3 1/2" and stitch top and bottom with 1/8" seam. Fold the back pocket under the elastic. And well done your adjustable, quilted book cover is finished. 
This quilted book cover will be a wonderful addition if you're gifting a book
or will work just as well for a diary or note book. Any other ideas? Let me know. I cant wait to see what you guys come up with. Share your creations on social media and use #joejuneandmae so I can cheer your makes. happy sewing Ingrid xx 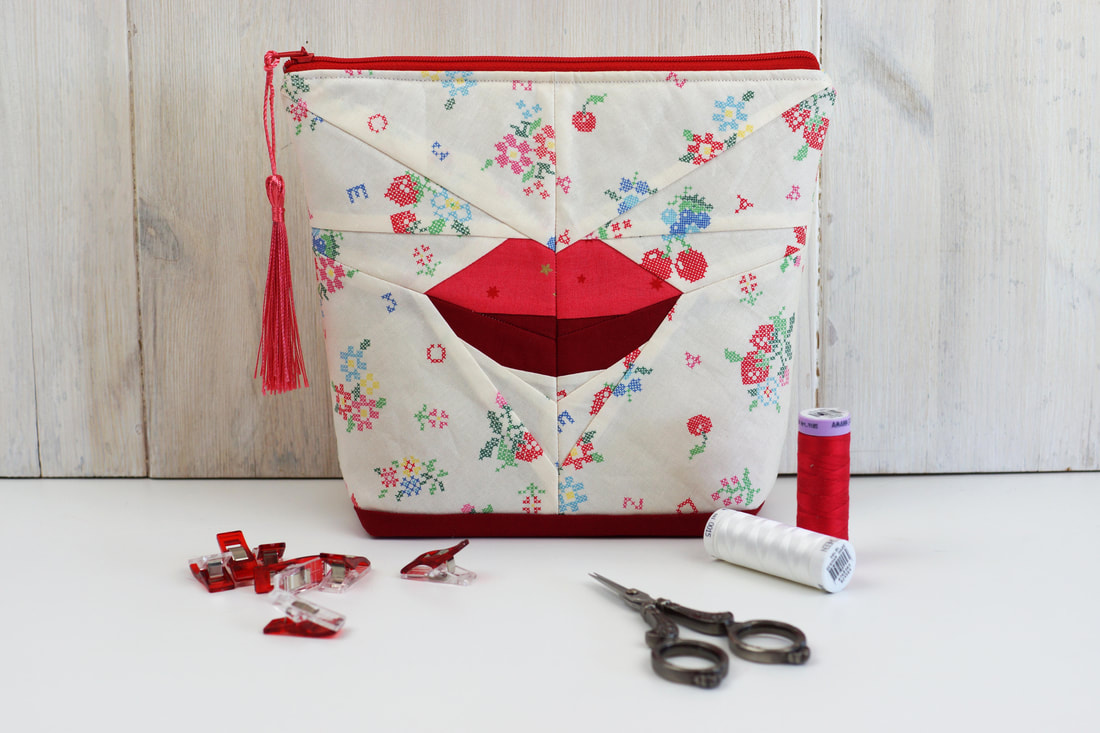
How to quickly sew a zippered pouch with flat bottom?
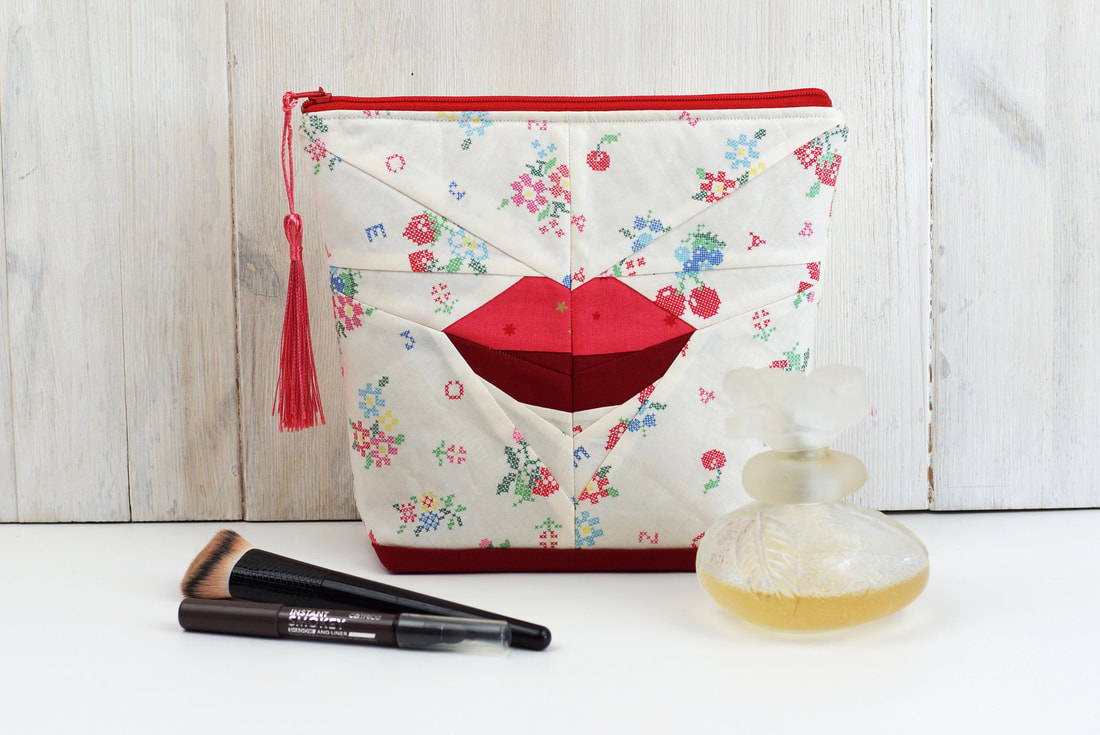
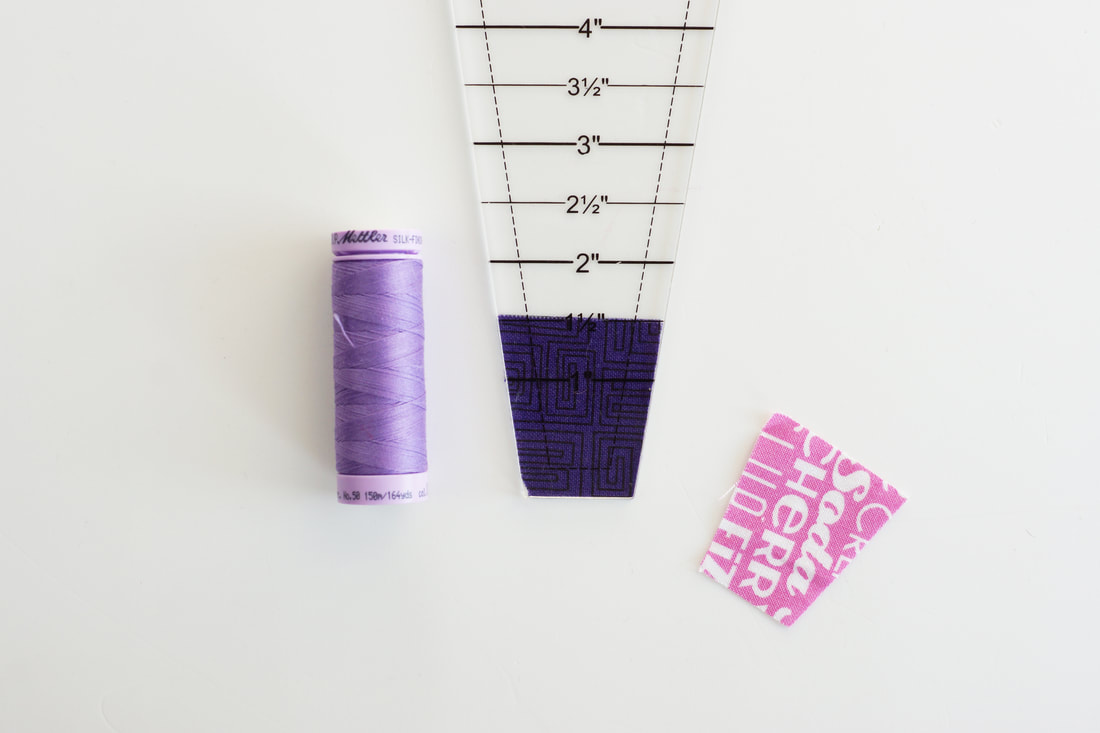
And a beautiful way to use the lips and/ or moustache quilt block pattern from my face mask ....... once you're masked out, like me :-) One can NOT have to many zippered pouches, it's like shoes... you can never ever have too many, right? Zippered pouches are super easy to make and you can use them for anything and everything literally all the time. I'll show you how quick and easy it is, to make one of these beauties using my lips quilt block pattern from the lips mask pattern. This pattern is kind of made for a pouch, because it has the perfect size. Fabric requirements and materials needed: - lips quilt block finished 9.5" x 7.5" - fabric for the back 9.5" x 7.5" - 2x strips of solid fabric 2.5" x 9.5" - lining fabric 2 x 9.5" x 9.5" - medium weight fusable interfacing 2 x 9.5"x 9.5" - 9 " zipper ( if your zipper is too long, check ou this post on how to quickly shorten a zipper ) - clips or pins - scissors or rotay cutter - ruler, thread and sewing machine. 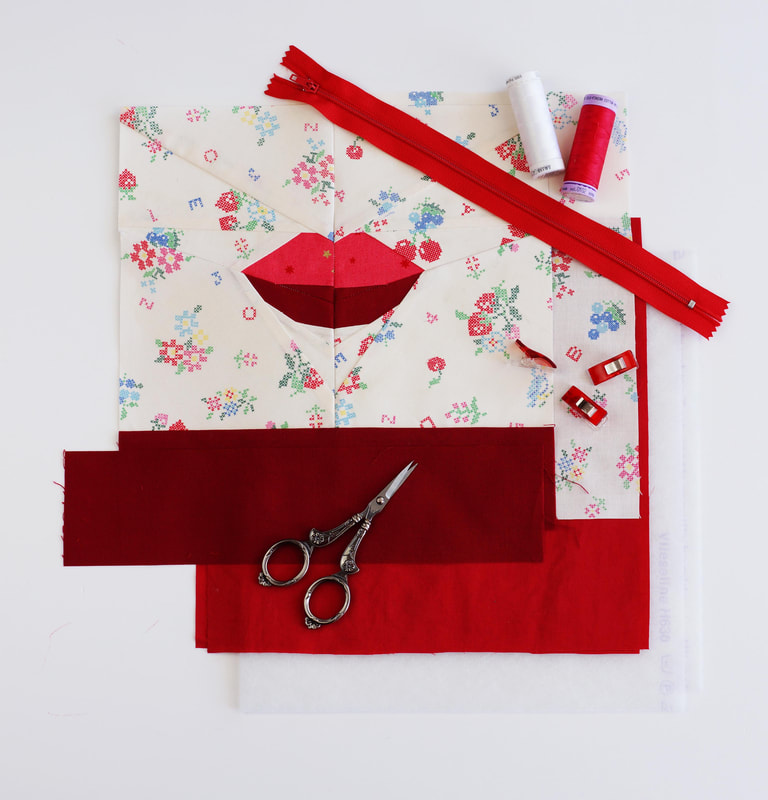
DIY ZIPPER POUCH with foundation paper piecing detail:
This completed zipper pouch measures approx. 8" at the top, 7" at the bottom and is about 3" wide at the bottom. This is a perfect size bag for make up, or sewing notions and would easily fit in you handbag . 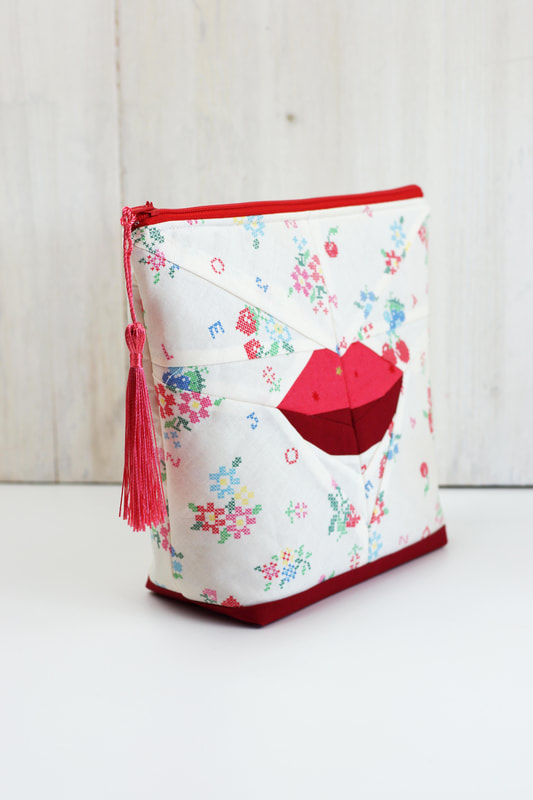
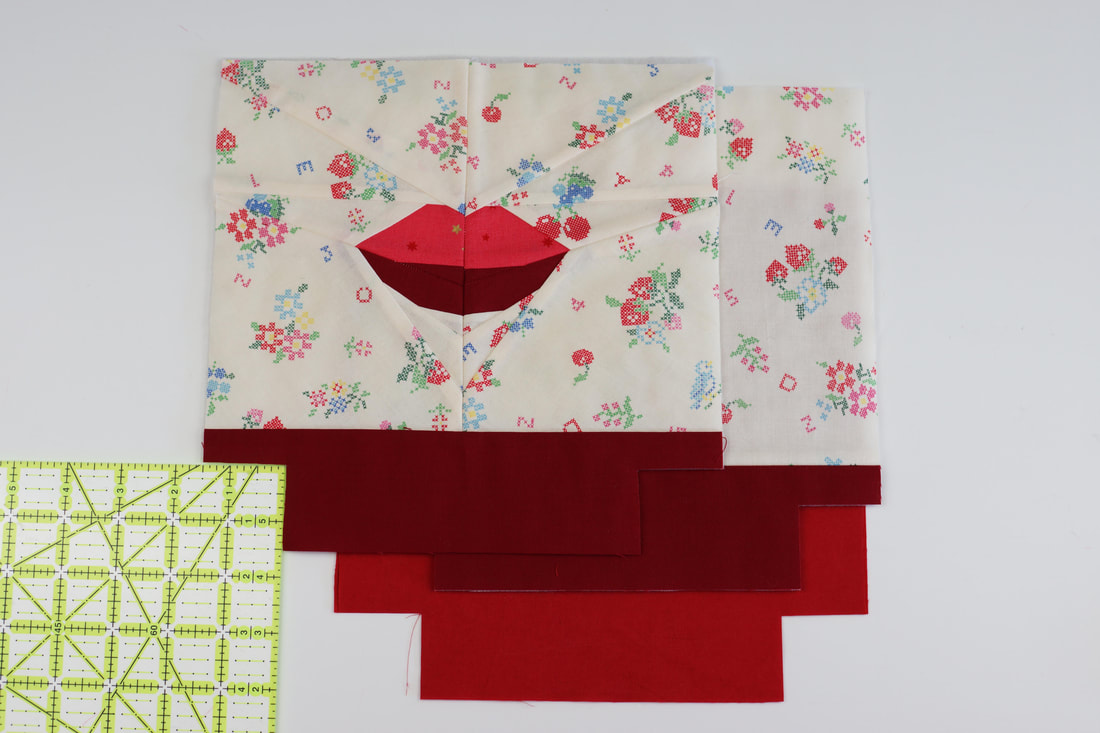
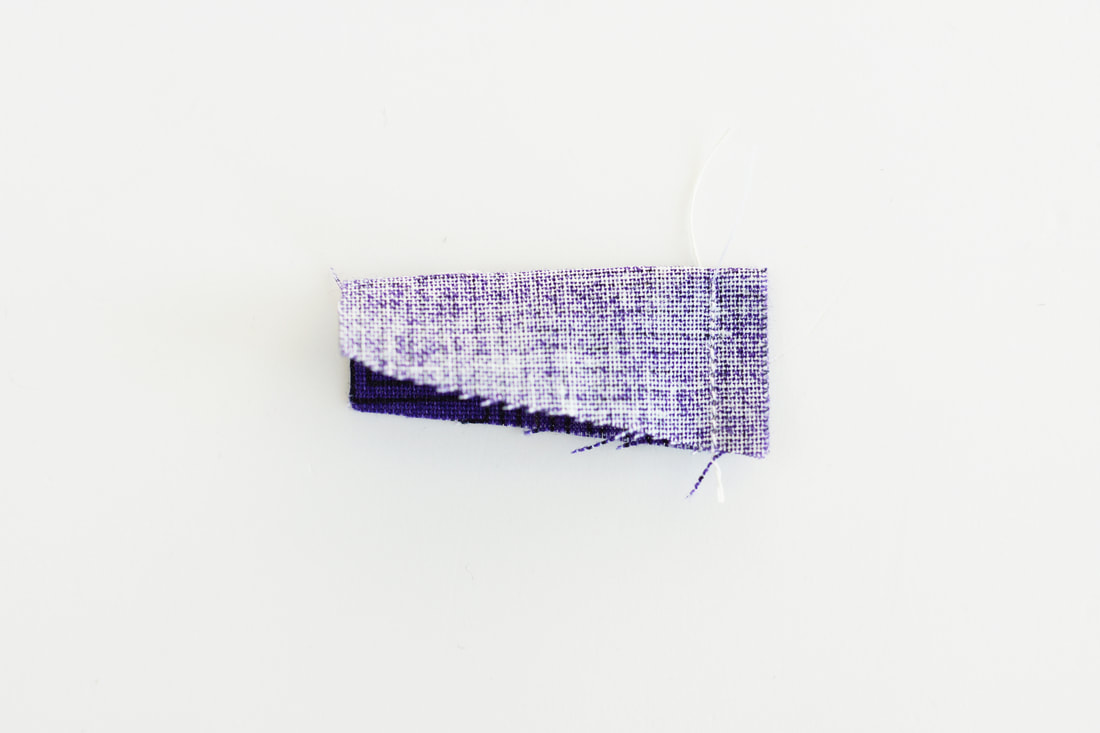
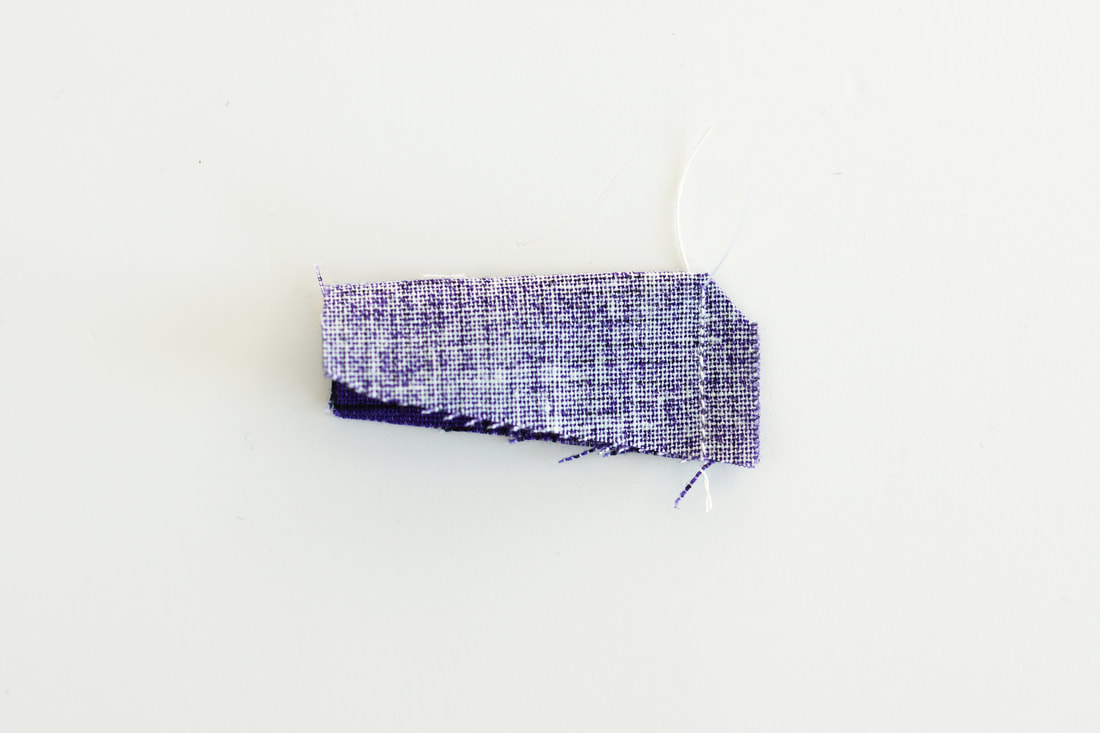
1. Sew the lips quilt block according to the pattern. It should mesure 9.5" x 7.5" when finished.
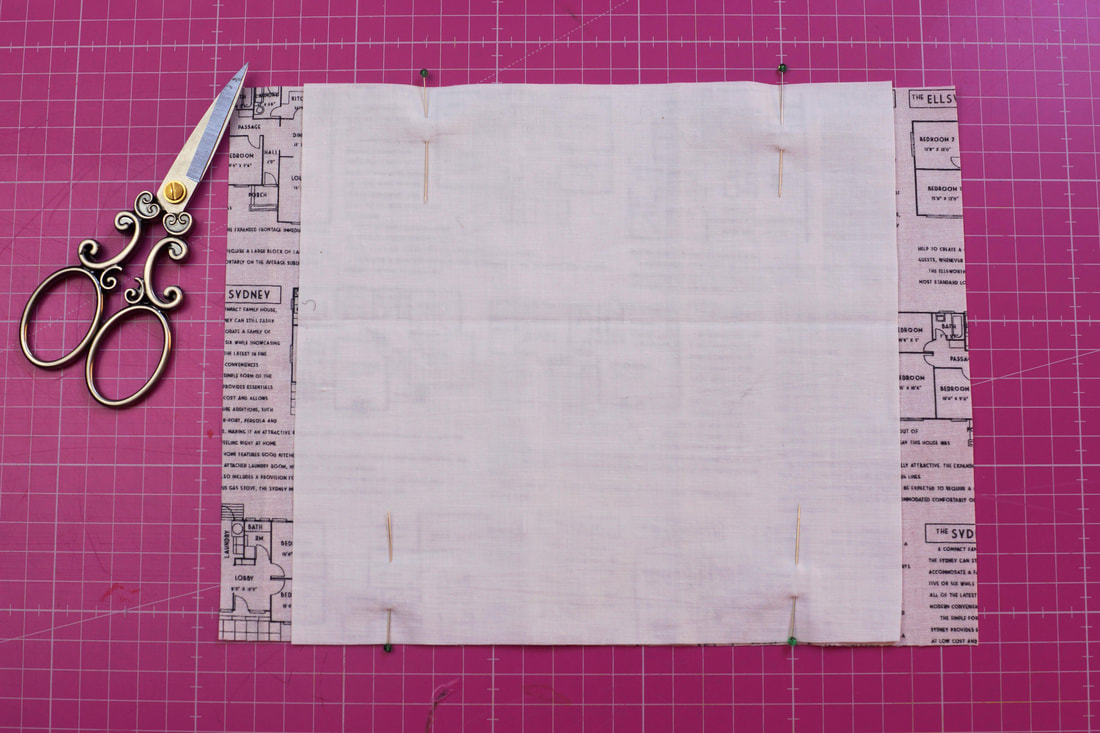
2. Cut your back fabric , lining fabric and fabric strips according to the mesurements given. 3. Stich the solid fabric strips to the bottom of the quilt block and to the bottom of your back fabric. 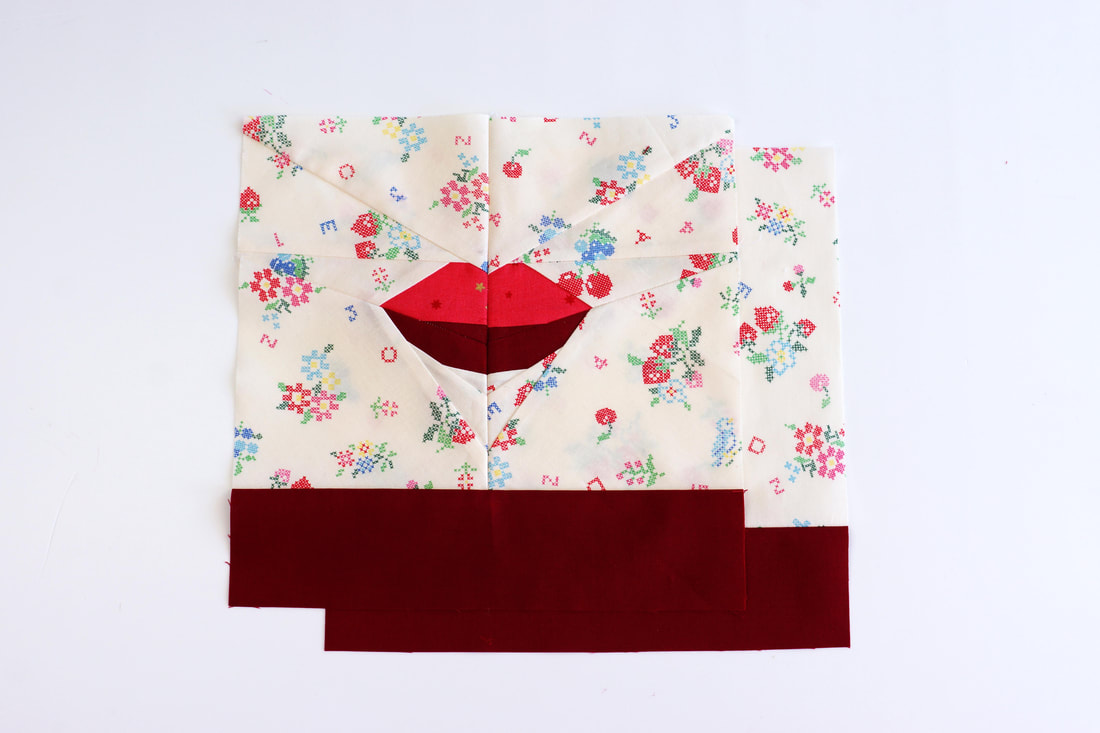
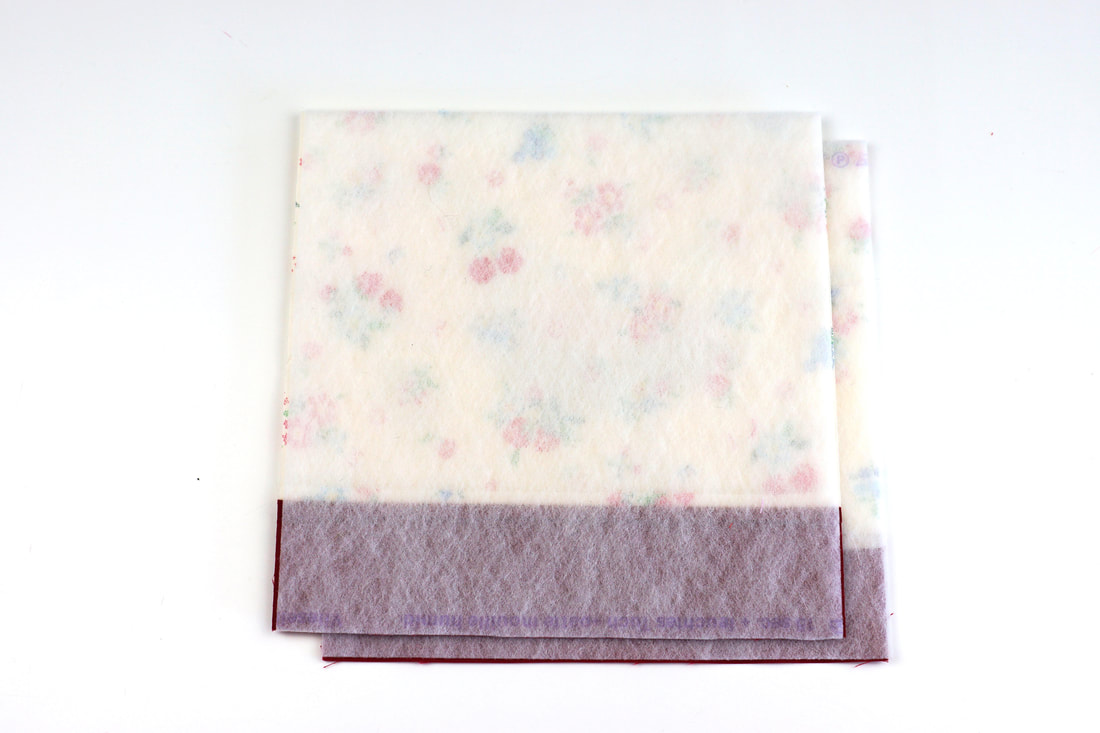
4. Iron on the fusable interfacing to your front and back panel.
5. Cut out 1.5"x 1.5" corners at the bottom of your outside panels and your lining.
This will give you your bottom corners of the pouch. 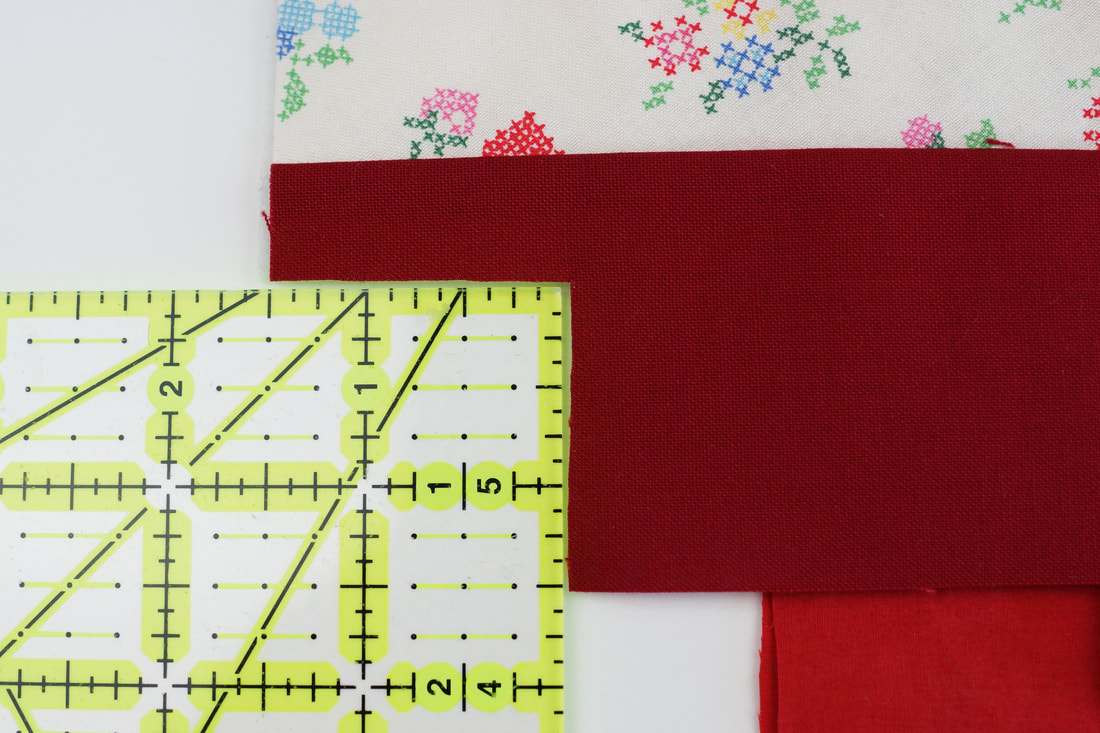
6. Fold the corners so the edges are facing each other and stitch along the 1.5" edge.
This creates a boxed corner. Sew all 8 corners like that.
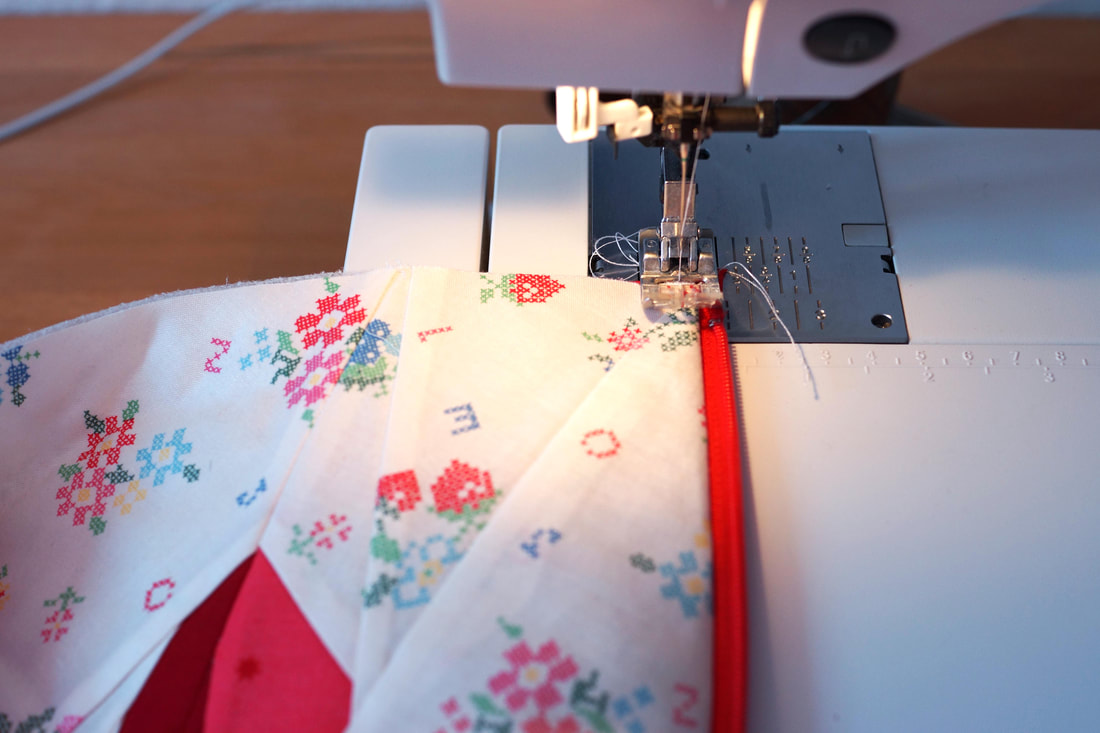
7. Attach the zipper to the front panel right side of front panel facing you and right side of zipper facing down.
Sew the zipper first to the front panel and then to the back, again right side of zipper against the right side of the fabric. 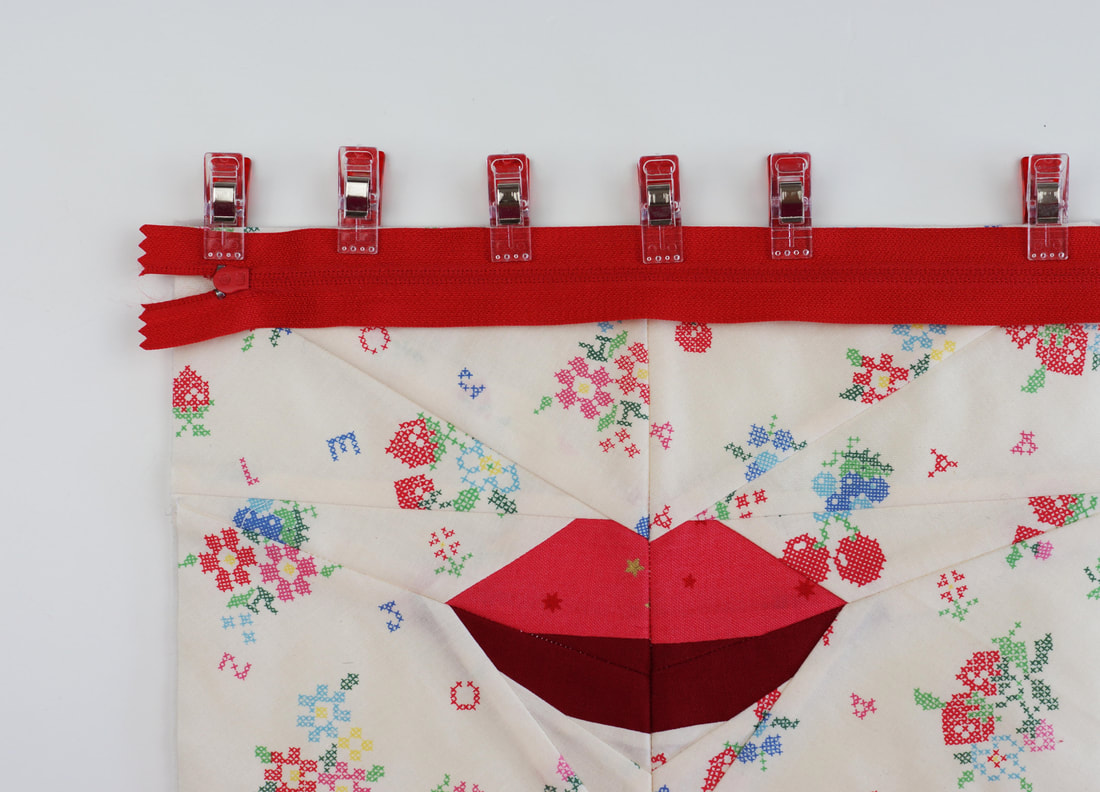
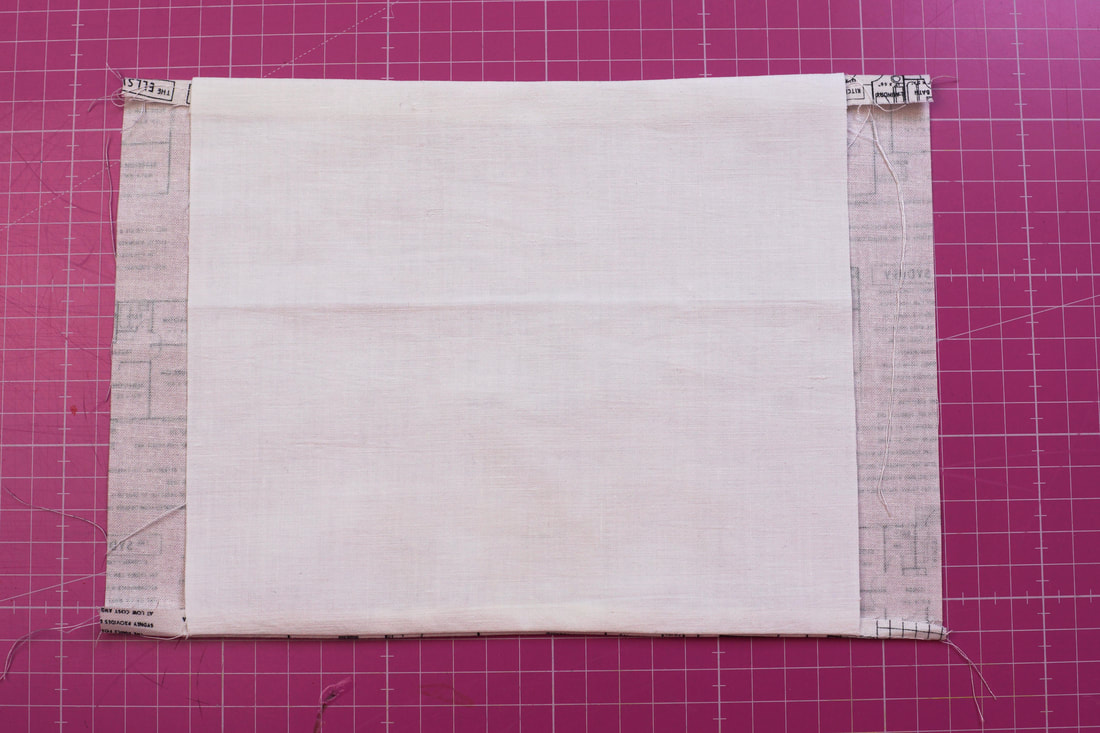
8. Place the lining right sides together on top of outside panel and sew along top edge.
Repeat for the back. 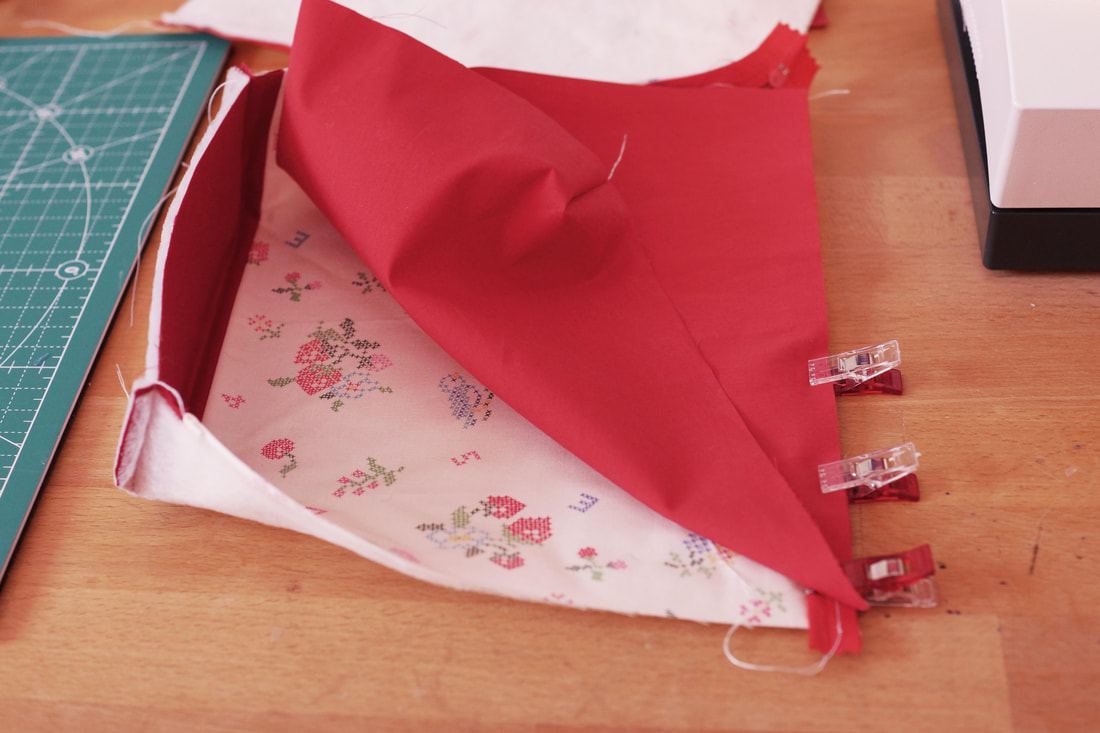
9. Optional: Stitch a top seam along the zipper from the outside,
10. UNDO THE ZIPPER ! This is important for turning the pouch later :-)
And stitch all the way around the pouch , except a 6" turning gap along the bottom of the lining using a 1/4" seam allowance. 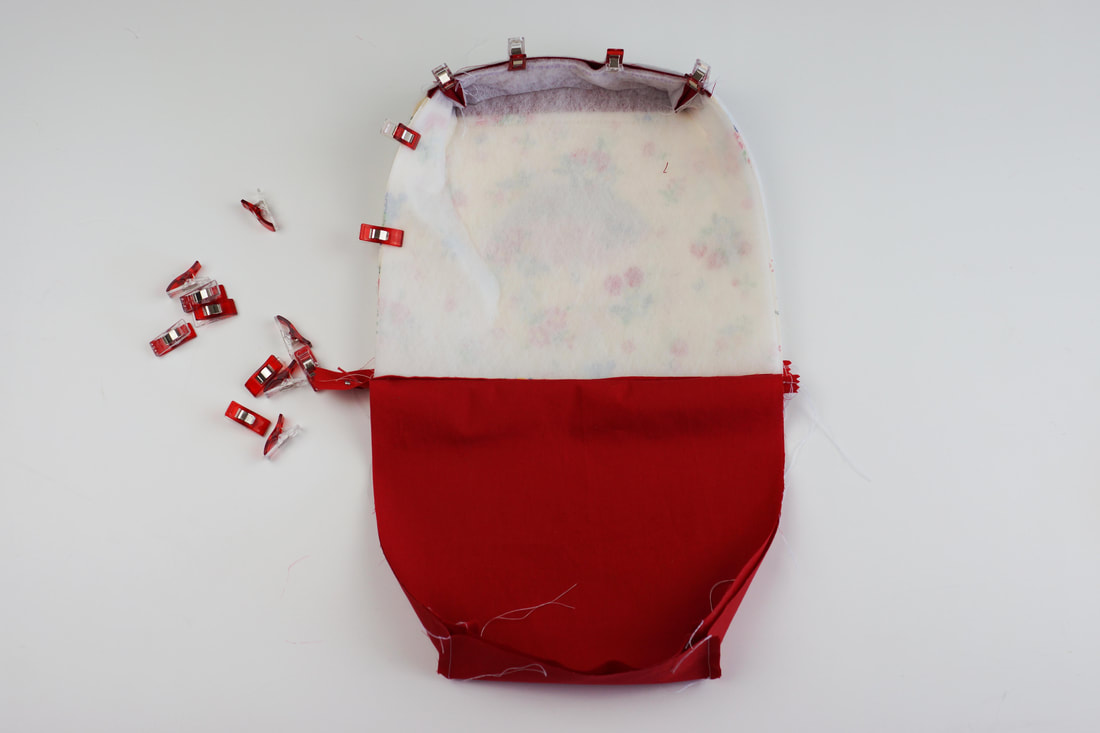
11. Turn the bag right side out. Fold the edges of your turning gap in and stitch to close.
12. Fold lining inside and..... TADAHHH :-)
What do you think?
Btw. if you're interested in News and Coupons for future pattern releases, subscribe to my Newsletter here on my site:-) Happy Sewing!
How to sew a quick and easy face mask at home?
As it becomes more and more evident that we will all be wearing face masks soon whenever we go out, I 'll show you a quick and easy way to make your own face masks. You'll probably want to make several face masks, as they should be washed frequently, preferably after each wear. This is a free face mask pattern. The CDC says homemade cloth masks can help slow the spread of the coronavirus. These fabric masks can help protect you in places like the grocery store, public transport, pharmacy and so on, where it's harder to keep a safe six-foot distance from other people. This works best if everyone wears them because people who don't have any symptoms can still be spreading the virus. 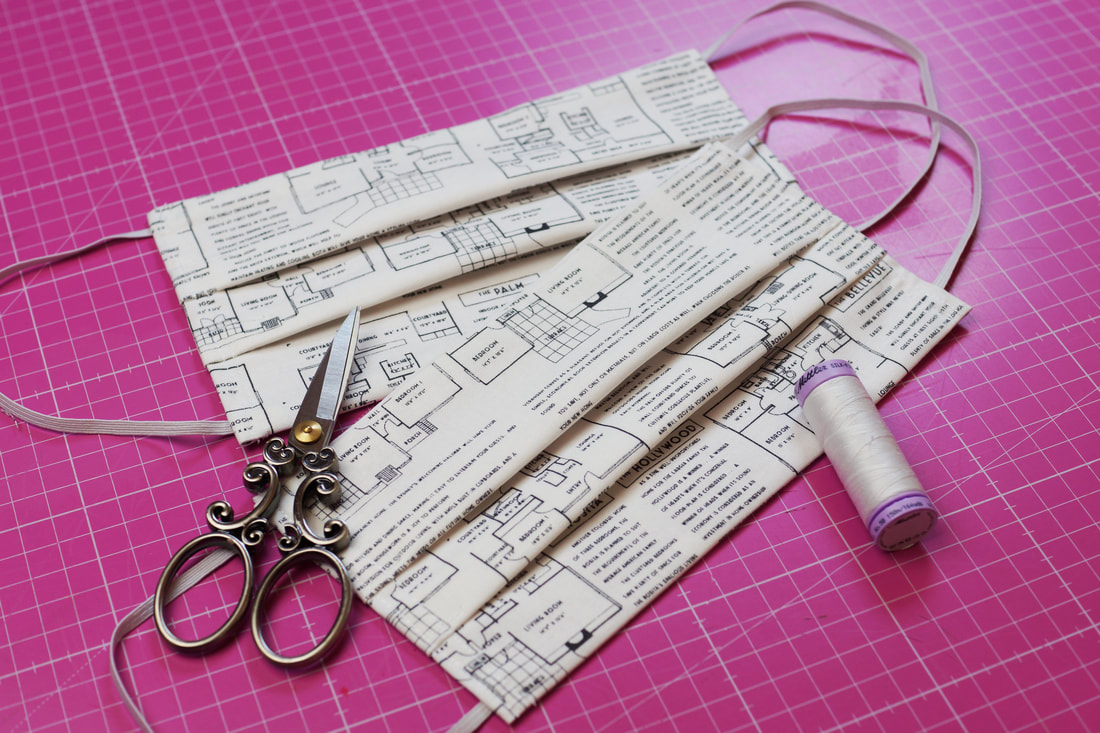
As more information about the coronavirus pandemic develops, some of the information in this blog may have changed since it was last updated. For the most up-to-date information on COVID-19, please visit the online resources provided by the CDC, WHO, and your local public health department.
Whats the best fabric to use for a home made face mask?
Researchers tested the effectiveness of a wide range of materials for homemade masks. They measured how well the materials you have in your household could capture and filter small particles. Test data shows that the best choices for DIY fabric masks are tightly woven cotton materials, such as sheets, or other cotton materials. Using a double layer of material for your DIY mask adds a small increase in filtration effectiveness. Other research found that the most effective masks were constructed of two layers of heavyweight “quilters cotton” with a thread count of at least 180, or had a thicker and tighter weave. As I am a quilter, and have a ‘small’ selection of quilters cotton in my home, this pattern is made with quilters cotton on the outside and cotton sheet as a lining. This face mask pattern has 2 layers of cotton fabric. Fabric and material requirements:
Men/ large : Outside fabric: 10”x 7,5” Lining fabric: 7”x 7,5” Elastic band approx.: 2 x 9” if you’re using cotton ties or ribbon, you need 4 strips of approx. 15”-18” length. If the ties are too long, just cut them down to the size you need. Women/ medium: Outside fabric: 9”x 7” Lining fabric 7”x 7” Elastic band: 2 x 7,5” Children/ small: Outside fabric: 8”x 6,5” Lining fabric: 6,5”x 6,5” Elastic band: 2 x 7” 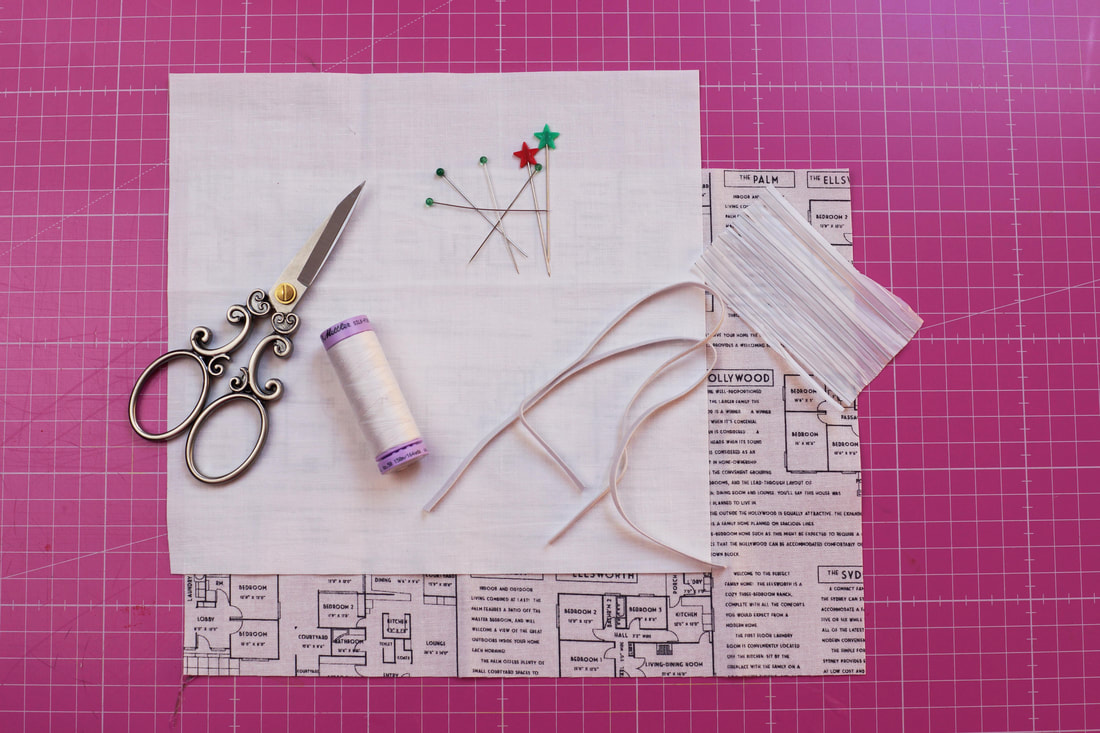
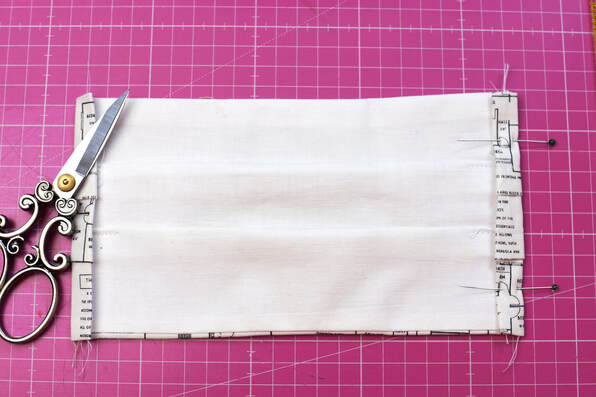
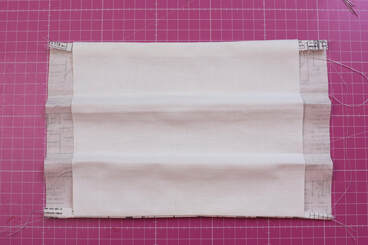
Cut the fabric and elastic depending on the size you want to sew.
Place your fabrics right sides together leaving a 1" seam allowance on each side.
If you want, pin or clip in place.
First you sew one seam about 1/4" from to edge. ( If you used pins or clips, you take them out now)
Then place the wire centered between the two layers of fabric against your seam. Fold the fabric back right sides together and sew a second sean about 1/8" from the previous seam. 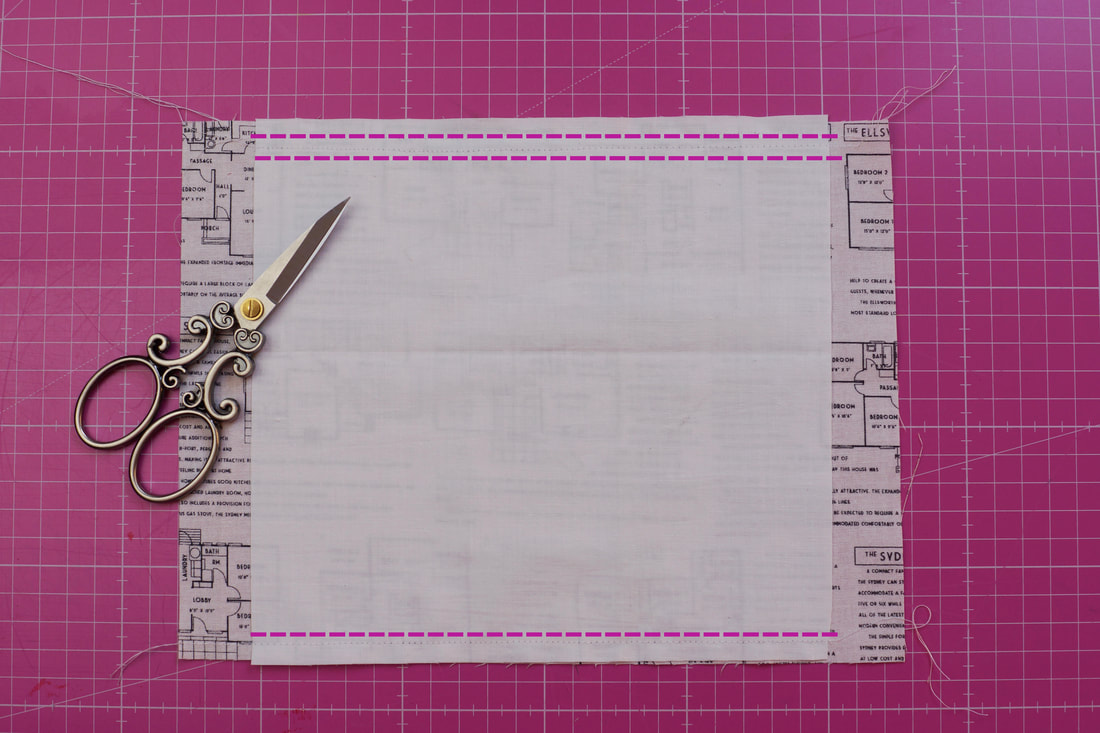
Then sew a third seam, again with a 1/4"seam allowance, along the bottom edge.
When you're done sewing, turn the face mask right side out and iron the seams.
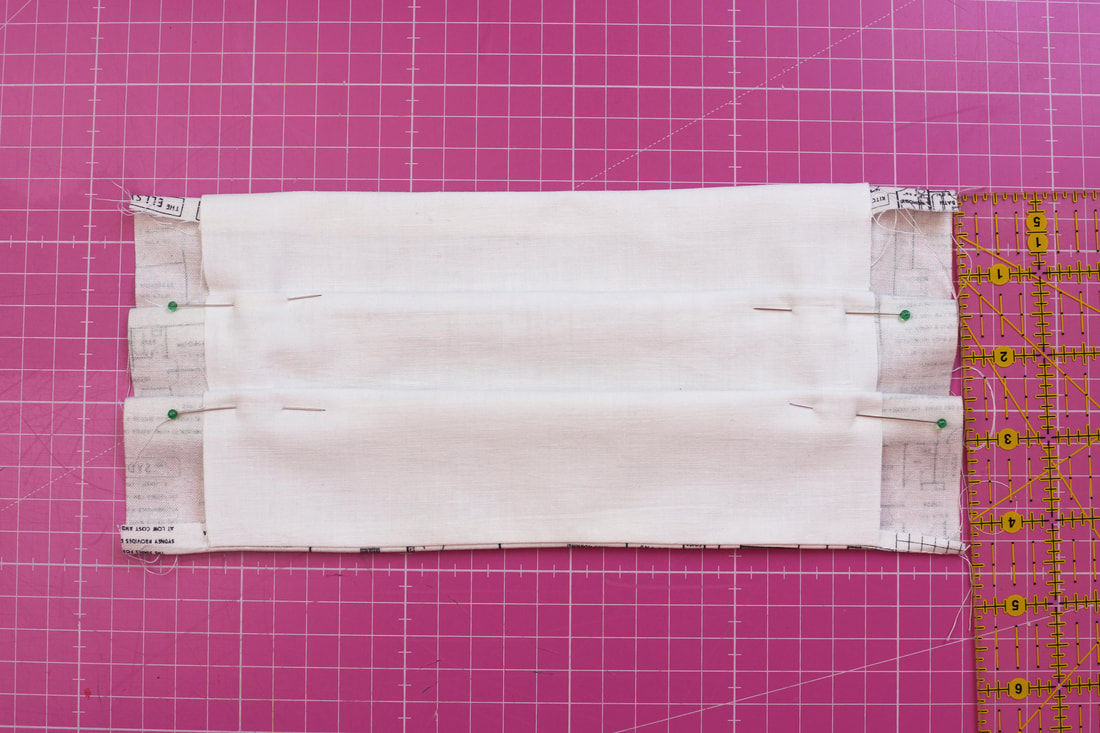
Fold 2 evenly-spaced 1/2" pleats. Pin or clip in place and sew to secure. the width of your mask should be about 4" for the large mask ( 3,5" for the medium mask and 3" for the small one.)
Fold over the seam allowance at the sides twice 1/2" and pin in place.
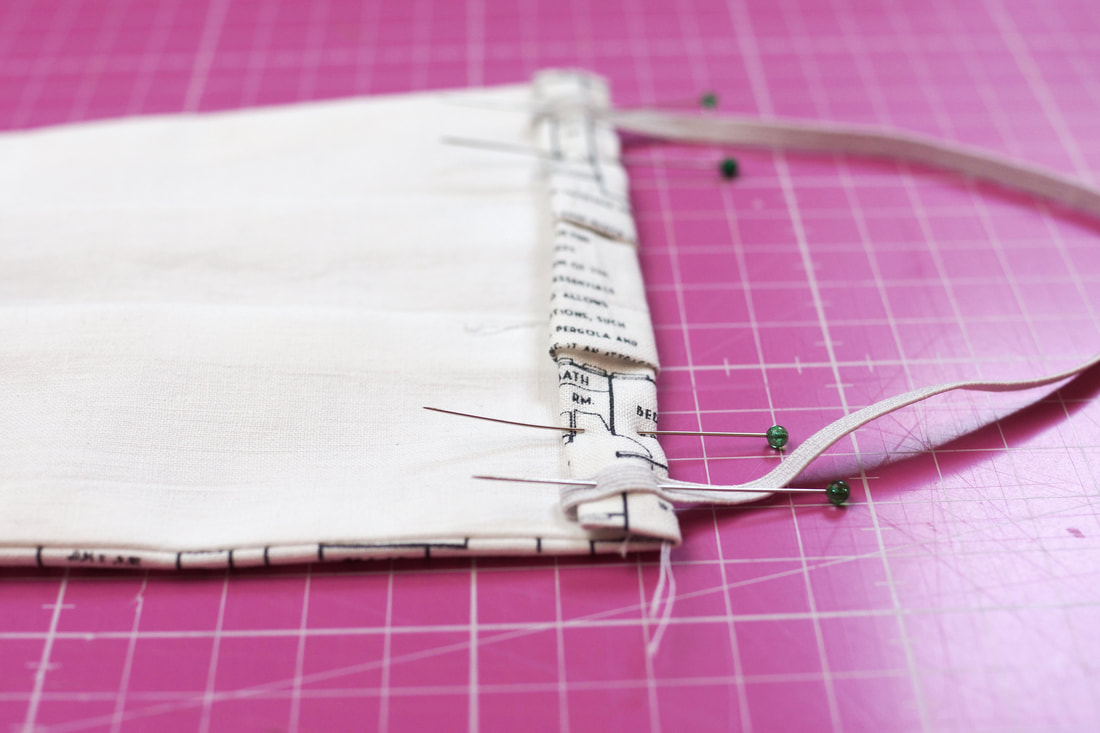
insert eleastic , or ribbon or cotton tie as shown above. In case your ribbon or cotton tie is too thick you can just attach it on top as well.
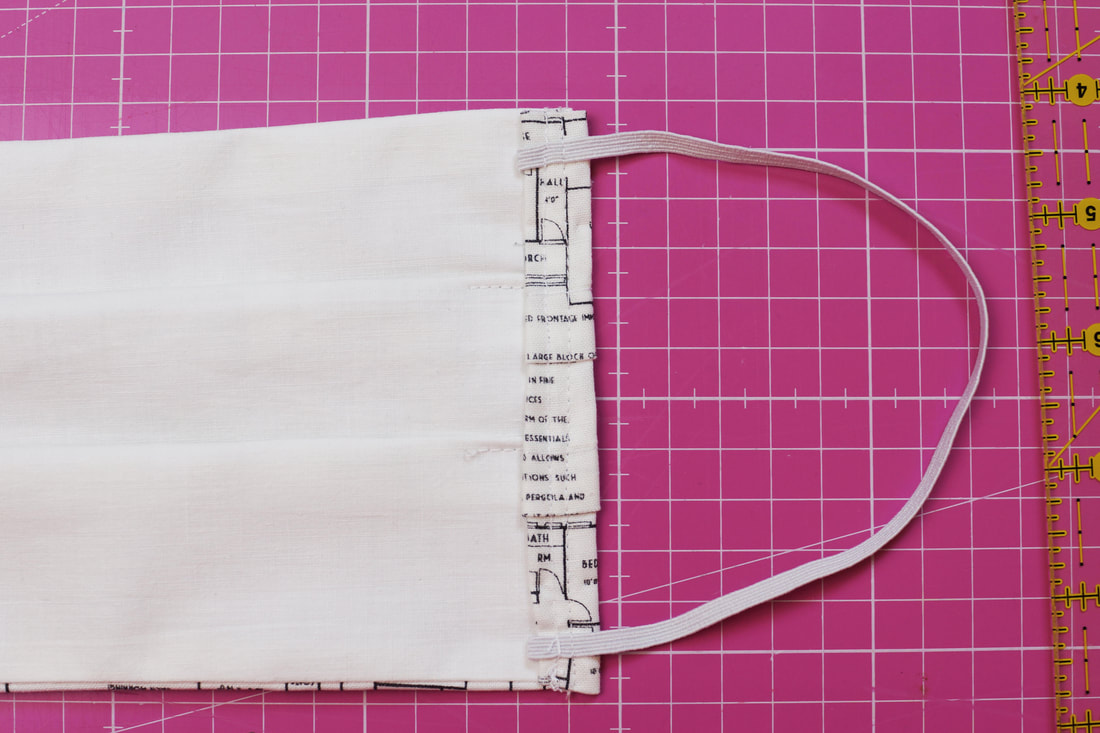
With a 3/8″ seam allowance, sew each side of the facemask with two seams. Backstitch over the elastic or fabric ties to secure them.
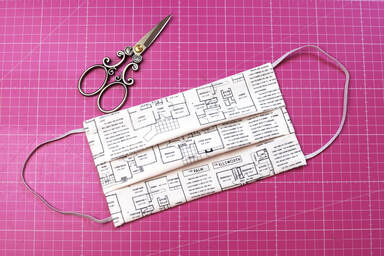
And there it is, all done :-)

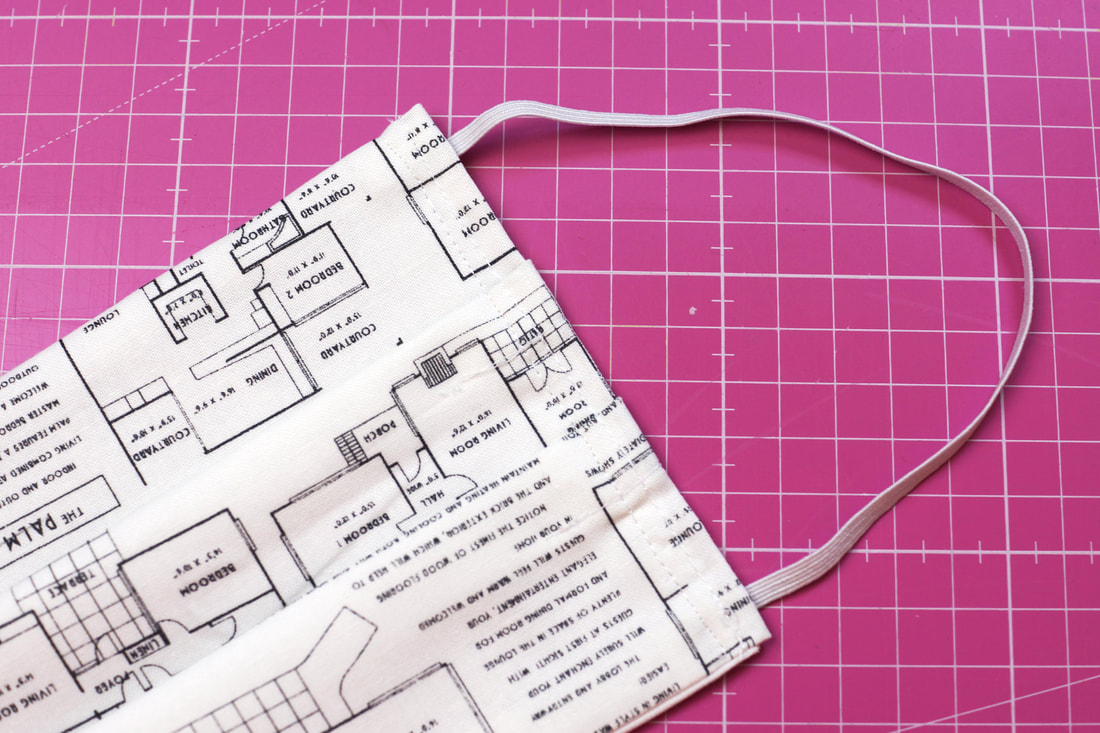
I made two of these masks for my husband and son,
Guess ( from the fabric used :-)) what kind of work my two men are doing? happy guessing :-)
Are you looking for something fun ?
How about these two beauties? Fun face masks for Mr. and Mrs :-) You can shop the pattern here. 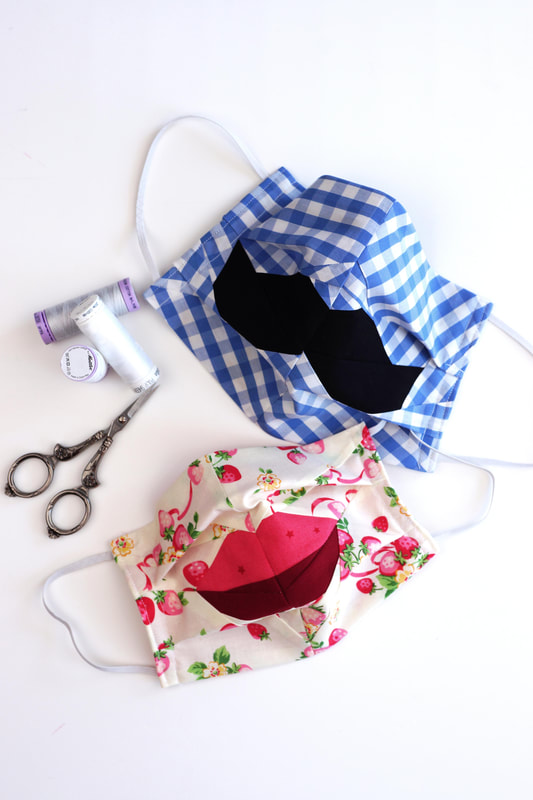
|

Author
Ingrid Alteneder Archive
March 2022
Categories
All
|


 RSS Feed

|
Visit us at
|