
|
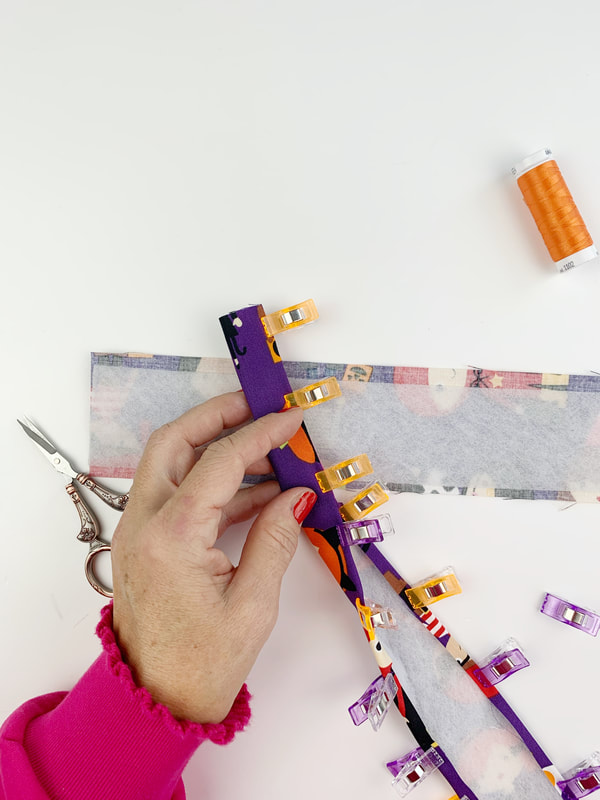
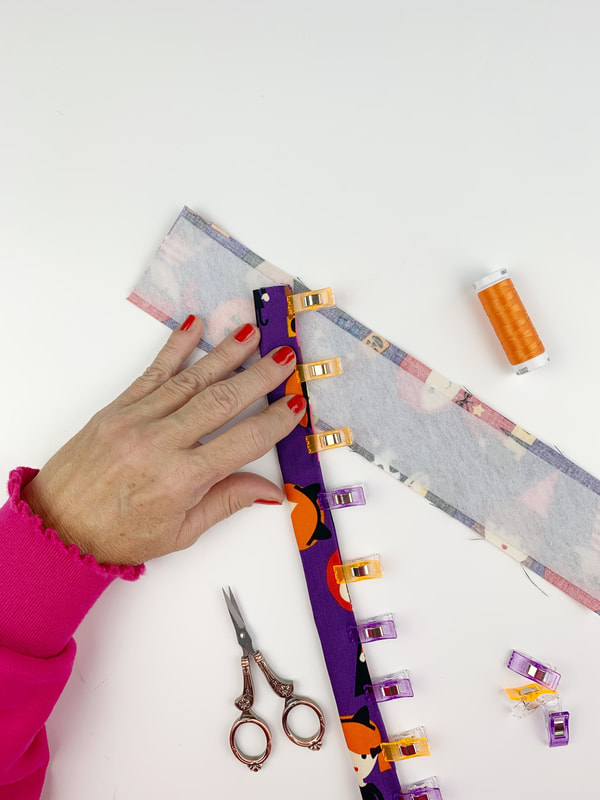
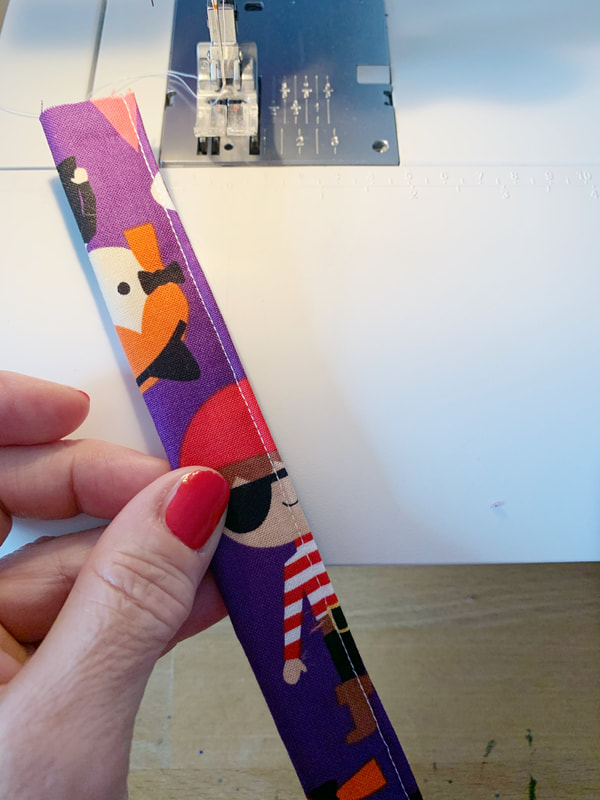
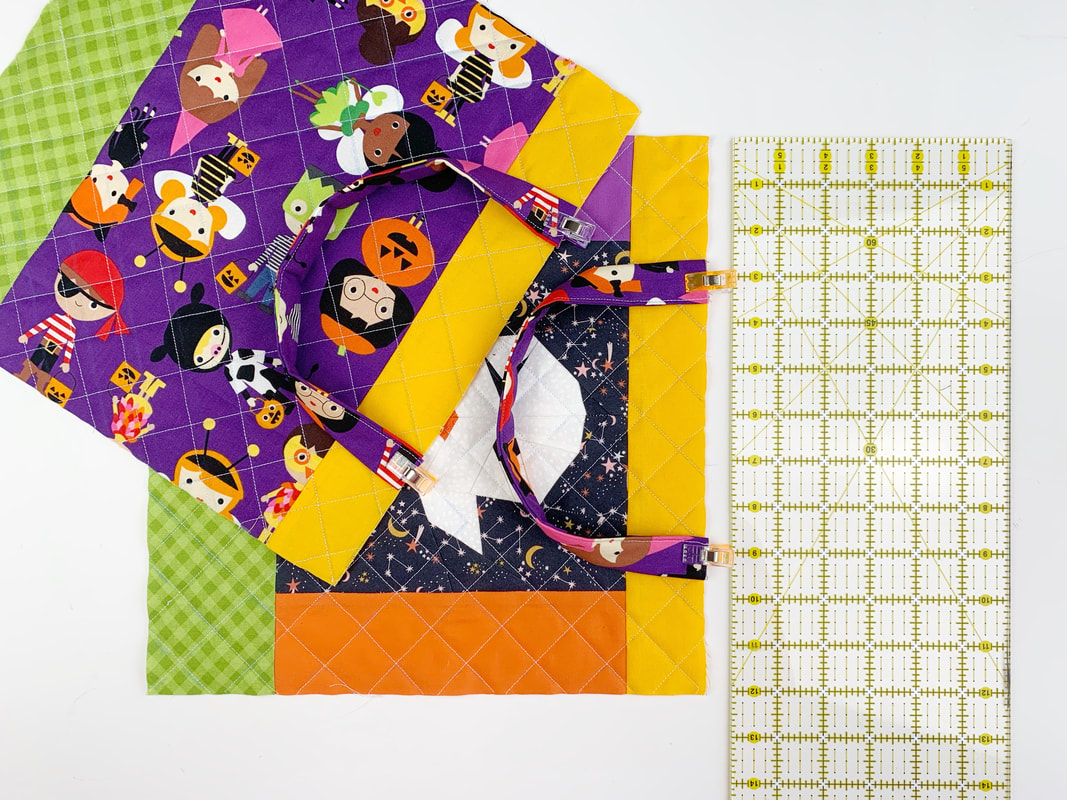
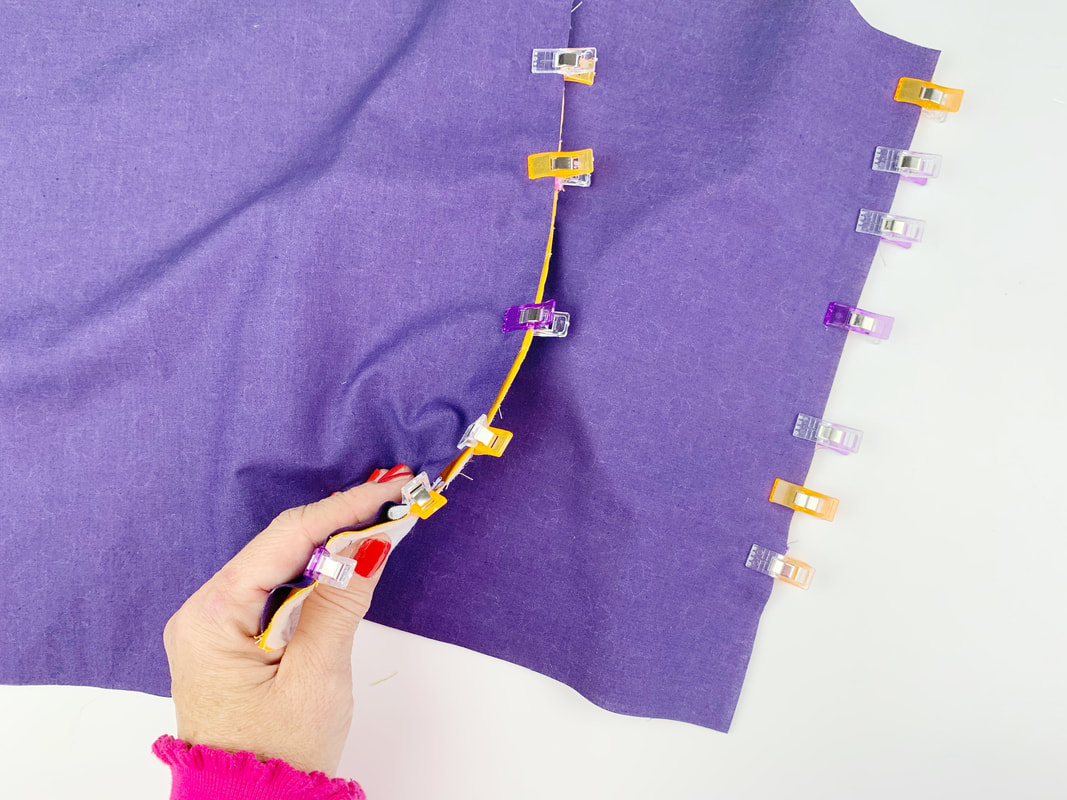
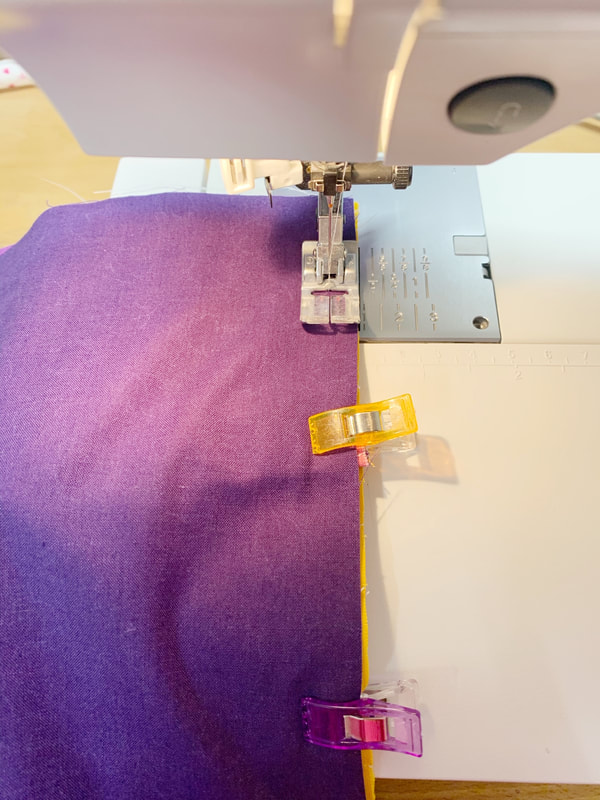
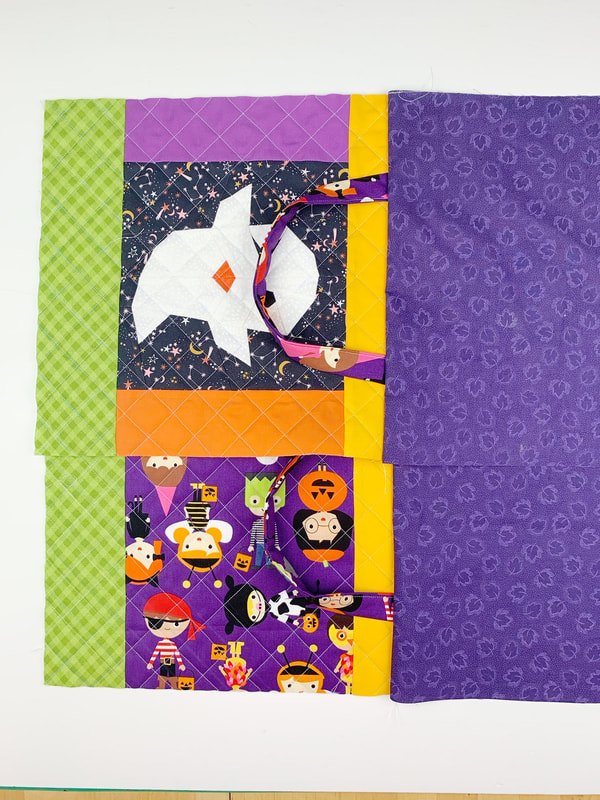
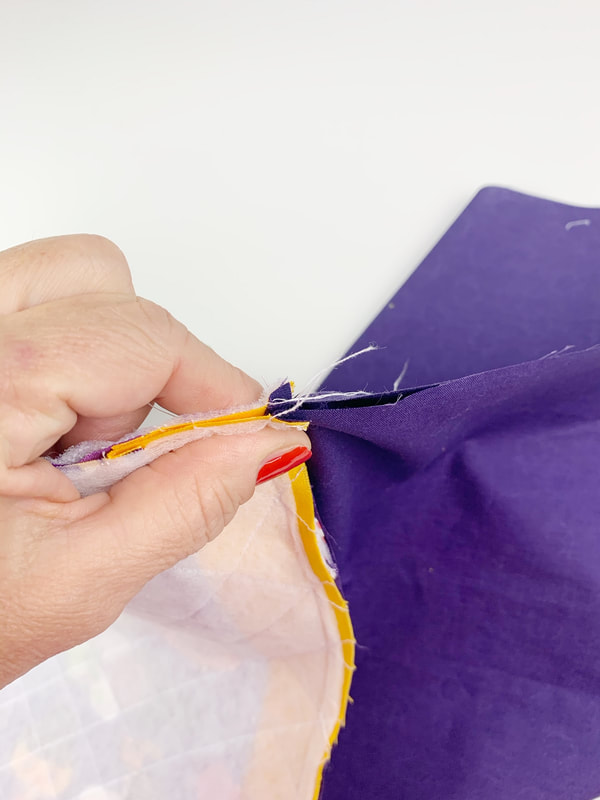
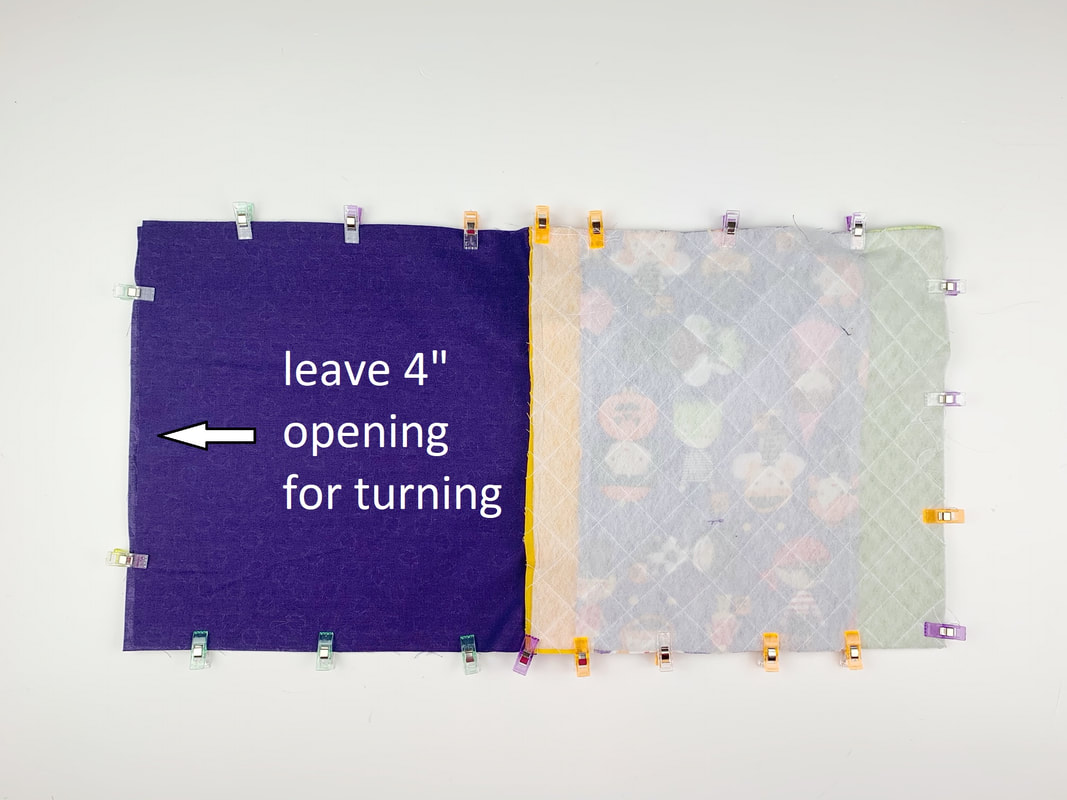
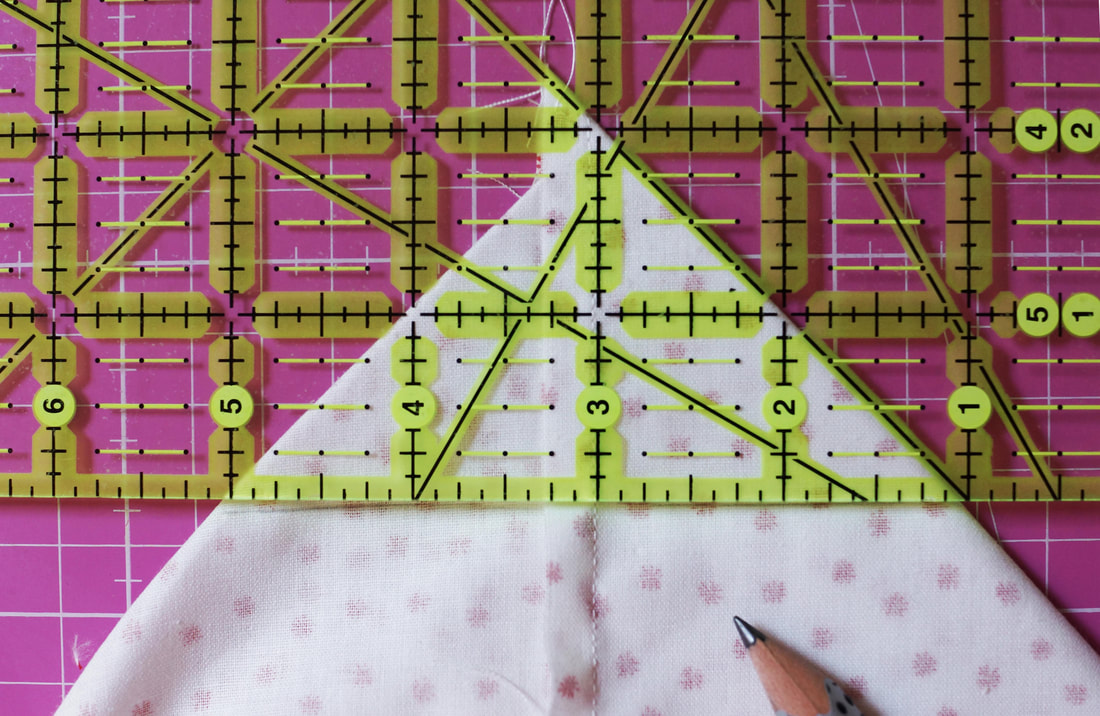
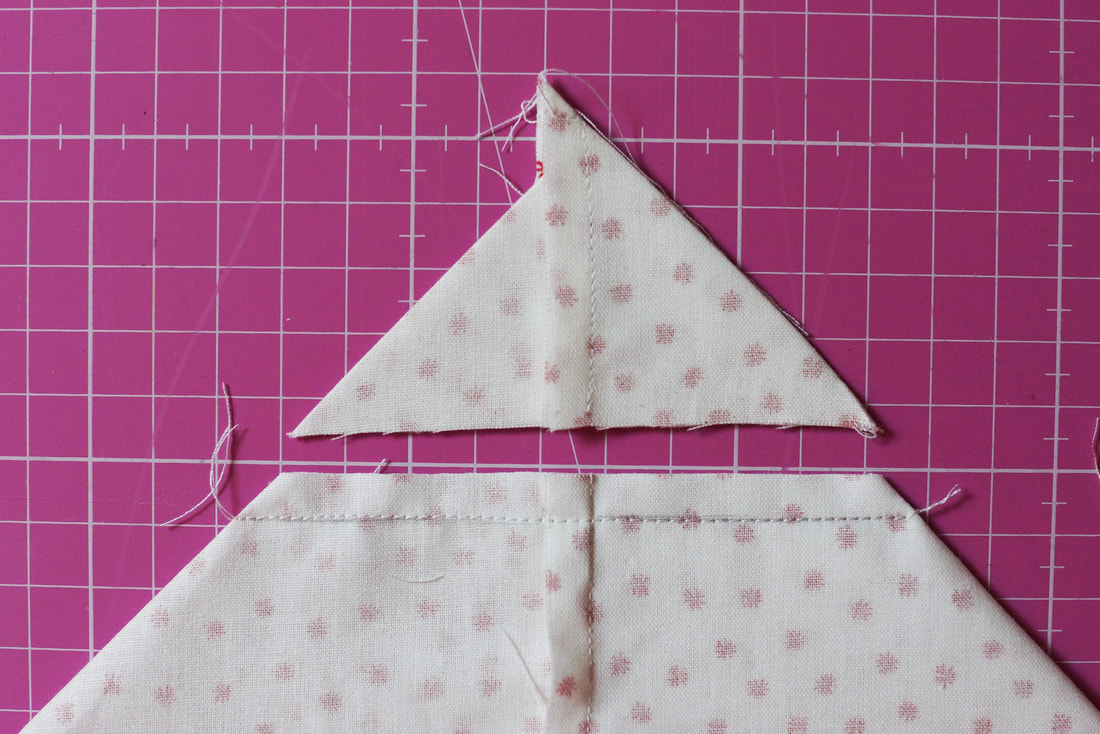
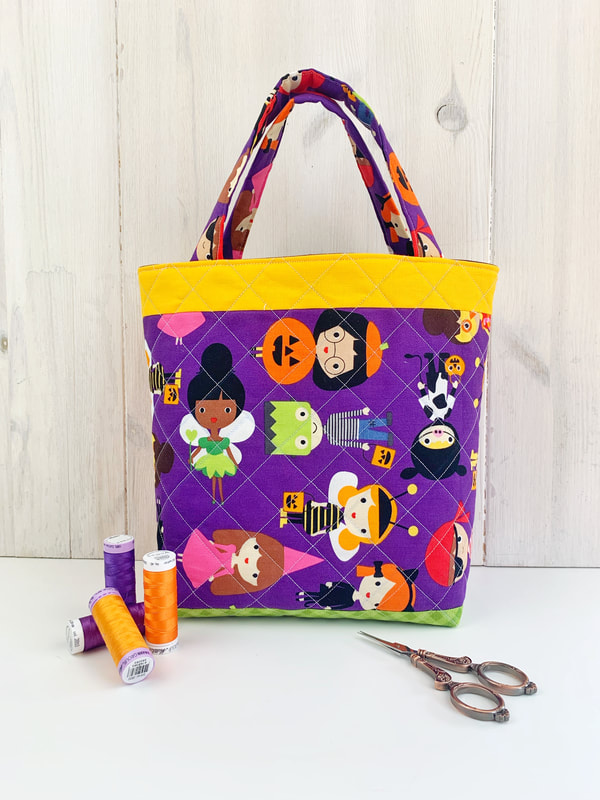
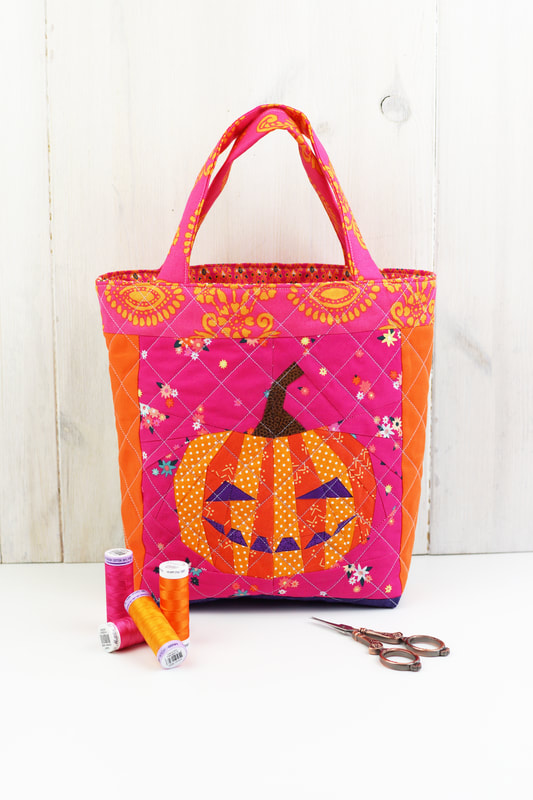
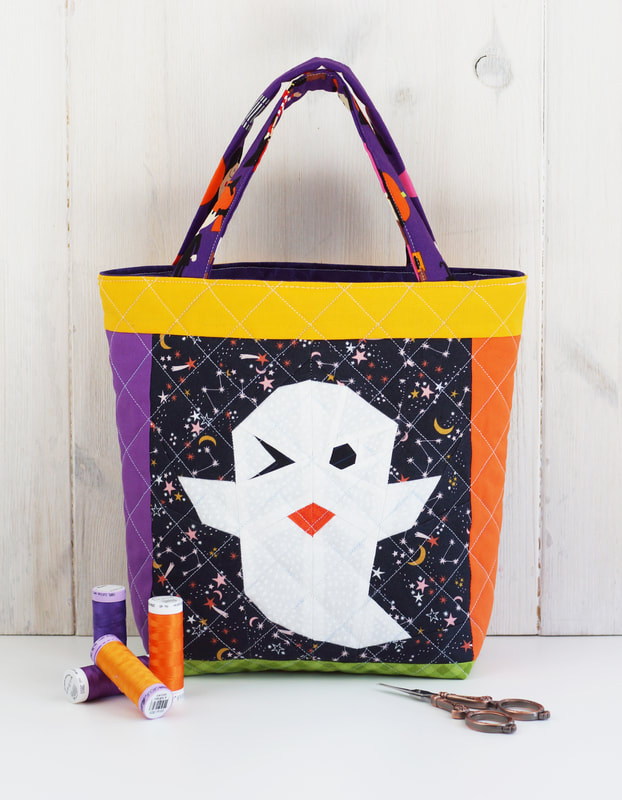
Halloween is approaching and I want to show you how to sew a stunning little Trick-or-Treat bag with one of my quilt blocks... and best of all its really easy. 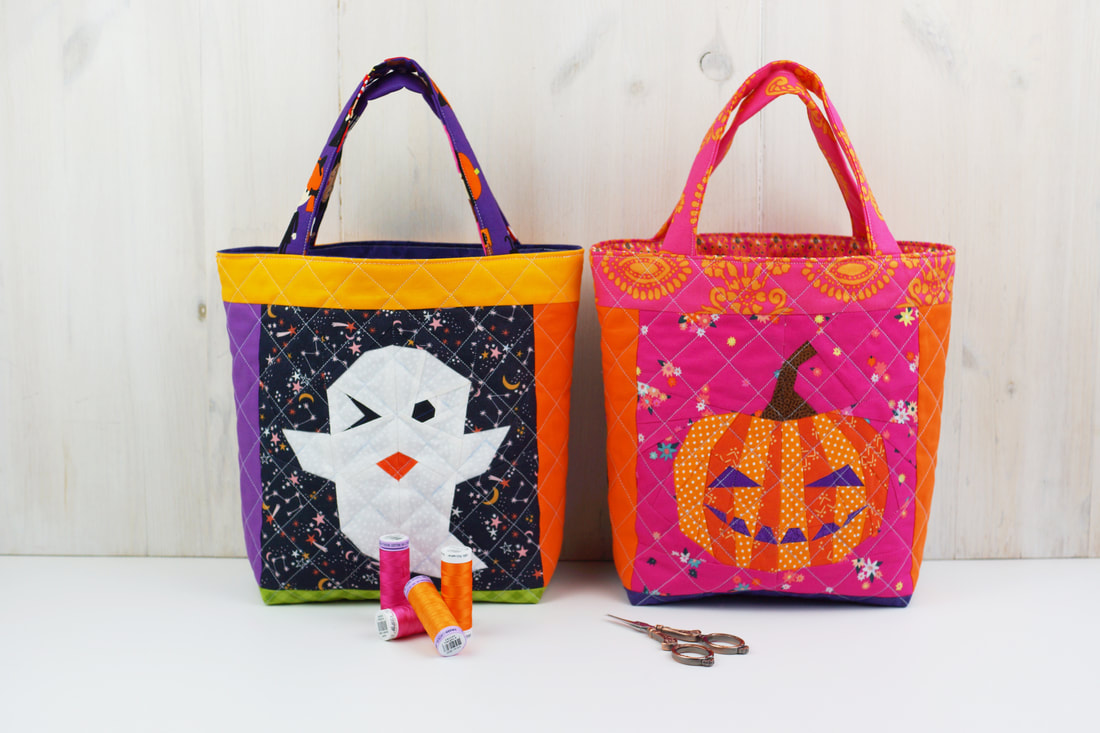 cutest ever trick-or-treat bags Finished bag size : 8.5" wide, 9.5" high and 4" deep at the bottom Fabric/ Materials needed: (all measurements are width x height) > 1 FPP quilt block 8.5" x 8.5" (ghost pattern shop here) > 2 strips of fabric on each side of the FPP block 2.5"x 8.5" > 2 strips of fabric for bottom panel 12.5"x 3" > 2 strips of fabric for top panel 12.5"x 2" > 1 piece of fabric for back 12.5"x 8.5" > 2 pieces of fabric for lining 12.5"x 12" > Fusible interfacing 2 pieces 12.5"x 12" > 2 strips of fabric for handles 2,5"x 12" > 2 strips of fusible interfacing 2"x 12" 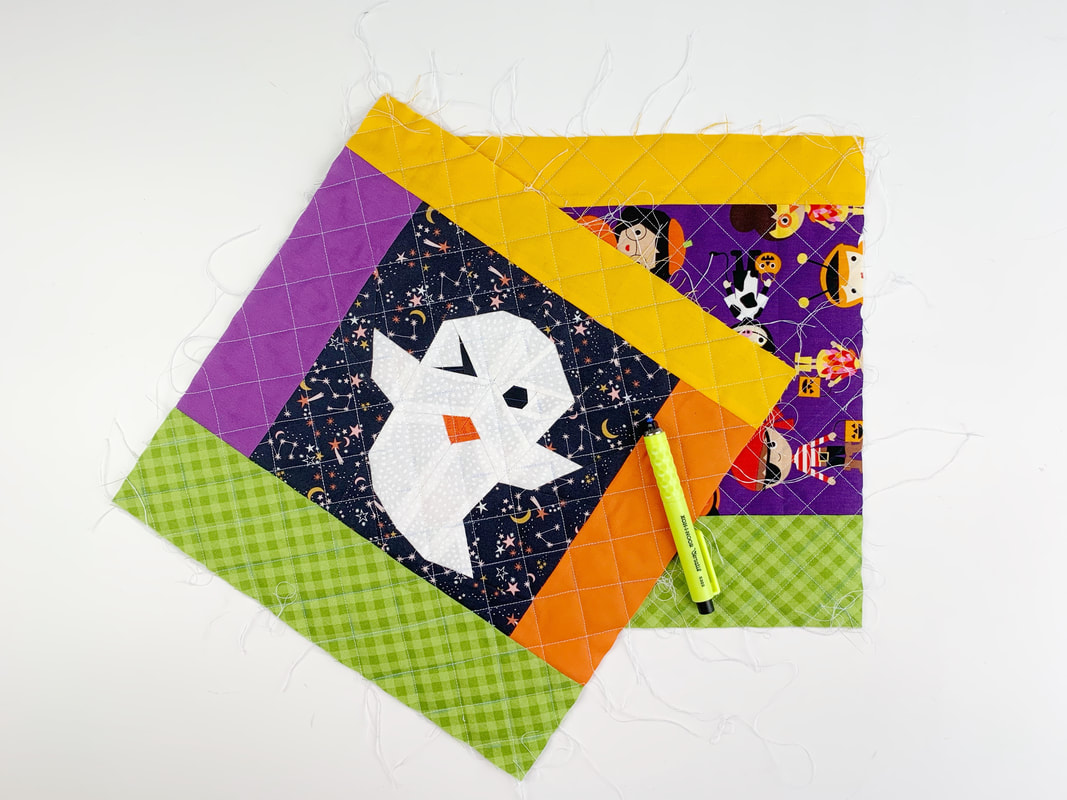 Front and back exterior fabric pieces of bag Instructions: -Sew your Foundation paper pieced quilt block - I chose the little ghost . ( shop Halloween patterns here ) the block will measure 8.5"x 8.5" when sewn together (unfinished- meaning not sewn into a project yet). -Cut out all the fabric, lining and fusible interfacing pieces. -Attach the side strips to the quilt block. Then attach the bottom and top panel to the quilt block and fabric for the back ( see picture above). Interfacing gives your bag more structure and stand. Iron on the fusible interfacing to your front and back exterior main pieces of your bag. 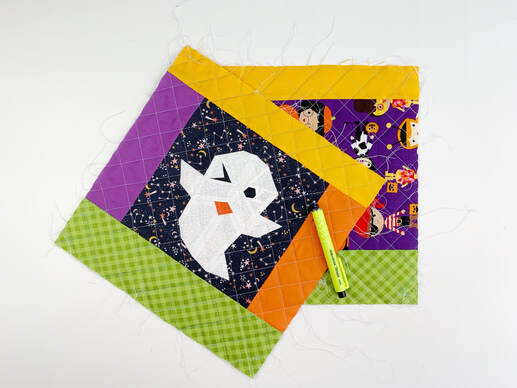 Trick or Treat bag exterior pieces quilted - Quilt your exterior pieces to your liking. - I did some diagonal straight line machine quilting. - I drew the lines with a washable fabric marker ( this one can actually just be dusted off, it's a dressmaking chalk pen, that comes with several different color refills) - Then I machine quilted the front and back exterior fabric pieces with diagonal 1" squares. Sewing the handles: - iron on fusible interfacing on fabric strips of handles, center to width of fabric, leaving 1/4" seam allowance on both long sides of the fabric strips. - Fold over 1/4" seam allowance on each side of the fabric strips and clip in place - (I use only orange and purple clips, to stay in the Halloween spirit :-) - Now fold the strip in half and clip in place again. Then sew along the clipped edge with a small seam allowance to finish off the handle strip. - Repeat for second handle. - Attach the handles at 3" from the outer edge to the top of exterior front and back fabric pieces. And clip in place. - Lay lining fabric right sides together on top of outer bag pieces and clip in place at top edge. Handles are now sandwiched between lining and outer piece. - stitch along top edge with 1/4" seam allowance. - fold exterior and lining pieces open. - lay both trick-or-treat bag pieces on top of each other, right sides together - Clip or pin the raw edges in place, matching up each seam and clipping or pinning the matched up seams. - Leave a 4" space at the center of the bottom end of the lining, this is your opening for turning the bag later. - Then sew along the four open sides. Do not sew the 4" opening at the end of the lining pieces. - For a flat bottom of your bag, you need to box all four corners. Two corners of the lining and two corners of the exterior fabric. Starting with flattening the corner, the seams, bottom seam and side seam should be on top of each other. Then measure 2" from the top corner with an acrylic ruler and draw a line across with your fabric marker or a water soluble pen. Stitch along that line and trim off the corner, leaving a 1/4" seam allowance. (Repeat this for all four corners) 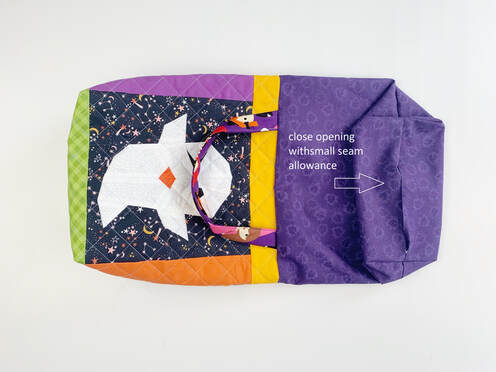 - Turn your bag by turning the pieces right sides out, pulling through the opening in the lining. Push out the corners nicely. Press the lining opening under 1/4" and stitch closed with a small 1/8" seam allowance. - Fold lining into bag and stitch along top edge of bag to secure handles and lining. Et Voila.... your cutest ever quilted Halloween TRICK-OR-TREAT bag is all done. How are you all celebrating Halloween this year? Let me know ....
Ingrid xo
3 Comments
Ines Sáenz
1/10/2023 15:35:02
M encanto Leave a Reply. |

Author
Ingrid Alteneder Archive
March 2022
Categories
All
|


 RSS Feed

|
Visit us at
|