
|
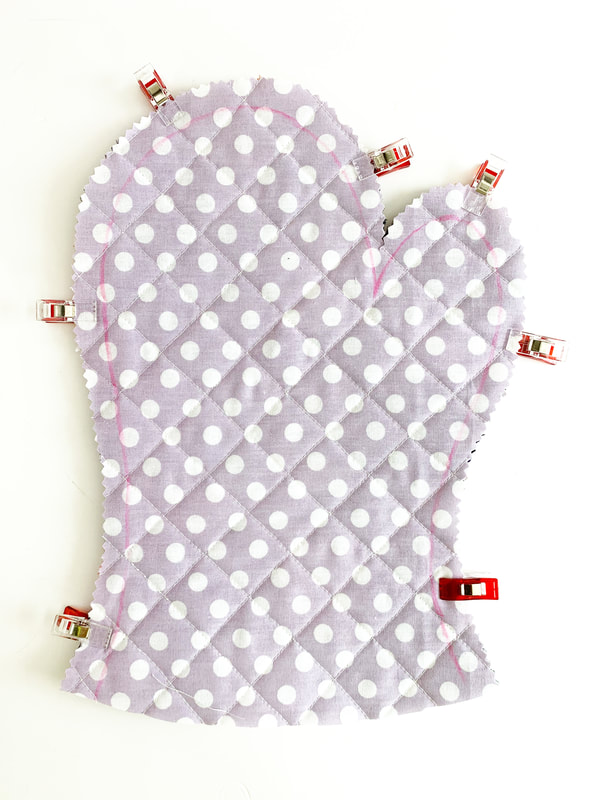
Are you all as hopeful as I am, that traveling season will start soon again? This was something I really missed in the last 15 months. I bet all of you as well? More and more people are getting vaccinated and this means for all of us, that we're slowly getting back to normal. I am sooo looking forward to this. After 15 months of lockdown, more or less strict and 15 months of homeschooling two teenage daughters, you know that I really miss getting away :-) Therefore I decided our passports need some dressing up and I made this cute little passport holder pattern. The Airplane pattern is a super quick and easy foundation paper piecing pattern and suits this passport wallet perfectly, don't you think. I used the 4"x 4" size for the outer piece of the passport cover. 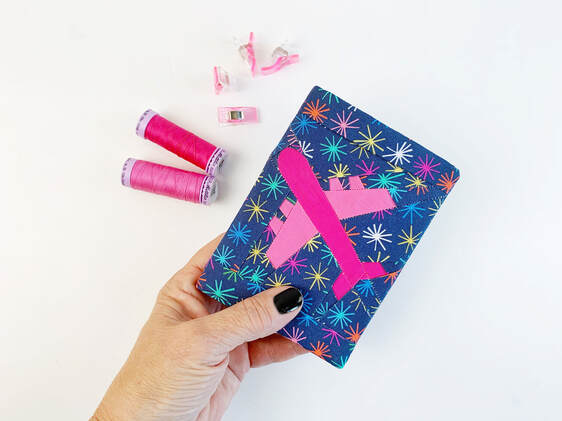 passport holder with paper pieced airplane I decided on a new sewing project to enhance our passports... this fabric passport holder looks just so much cuter going through passport control, don't you agree? So let's get to sewing this cute passport holder/ passport cover with the cutest paper pieced airplane quilt block. Materials needed: ( this is the size for a European Passport ) Most passports are very similar in size, (as you maybe know, we have a few nationalities in our family) the European passport is about 1/8" to 1/4" wider than the others. To double check the right size for your passport cover, fold the passport open add 1/8" all the way around the passport and then add 1/4" seam allowance, that will be the size of your lining and outer piece. 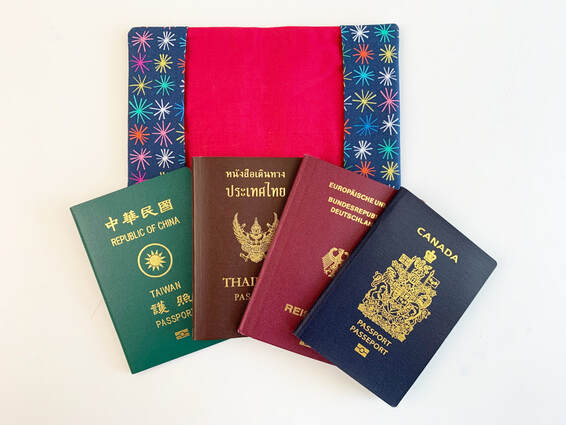 this size fits most passports 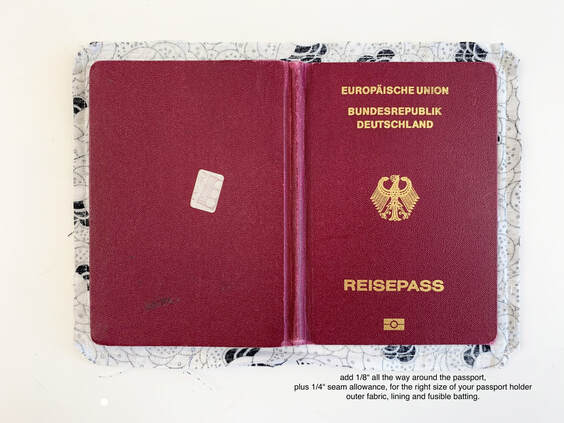 determine the right size for your passport outer piece: - 1 airplane quilt block size 4"x 4" - 1 piece of fabric 4.5"x 4.5" (same as the background fabric of the airplane block ) - 2 strips of fabric 1 1/4" x 8.5" (same as the background fabric of the airplane block ) - 8 1/4" x 5 7/8" for the lining - 2 x 4" x 5 7/8" for the pockets - 8 1/4" x 5 7/8" very thin fusible batting (optional but this gives a bit more stand I used Vlieseline H180) Instructions: 1. Sew your airplane quilt block in 4"x 4" size. Cut all your fabrics, lining and batting pieces. Stitch the fabric pieces for the outer piece together the way its shown here in the assembly photo. Join the two squares first, then add the two strips of fabric at the top and bottom.  assembly of the outer piece of the passport cover 2. Iron on fusible batting to the wrong side of the outer piece of the passport holder. Cut the outer piece to 8 1/4" x 5 7/8". ( check the size with your own passport as shown above) Fold the pocket pieces in half aligning the longer raw edges and press. Then place these two on the outer piece aligning the left and right raw edges. 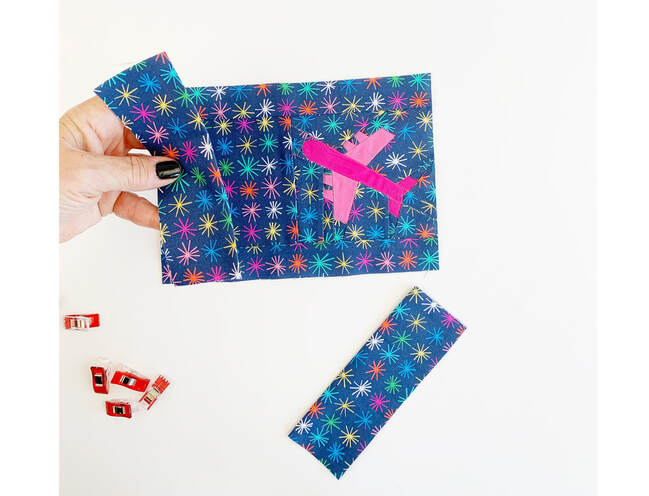 place the pocket pieces onto the outer piece 3. Place the lining piece on top of the outer piece with the two pockets, right sides together, pin or clip in place. 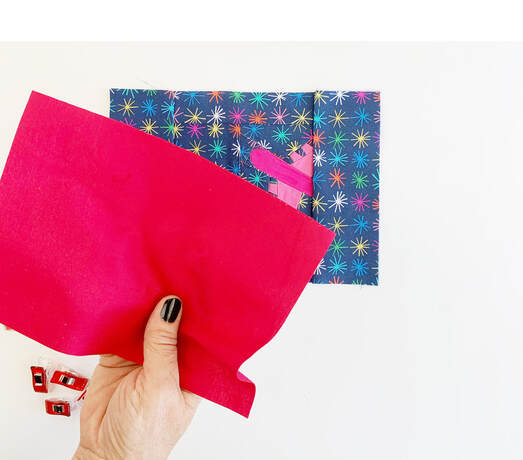 place lining on top of outer piece , right sides together 4. Stitch around the outer edge with 1/4" seam allowance leave a 3" opening at the bottom longer edge for turning your passport holder or passport wallet later. Cut the corners at a 45° angle, that gives you nice crisp corners when turning the passport holder inside out. Close the opening with a small seam allowance. And YAY you're all done . Happy and save travels everyone.... I'm off to stitch a few more in other colors. Ingrid x PS: let me know what colors you are making , can't wait to see your photos on social media.
4 Comments
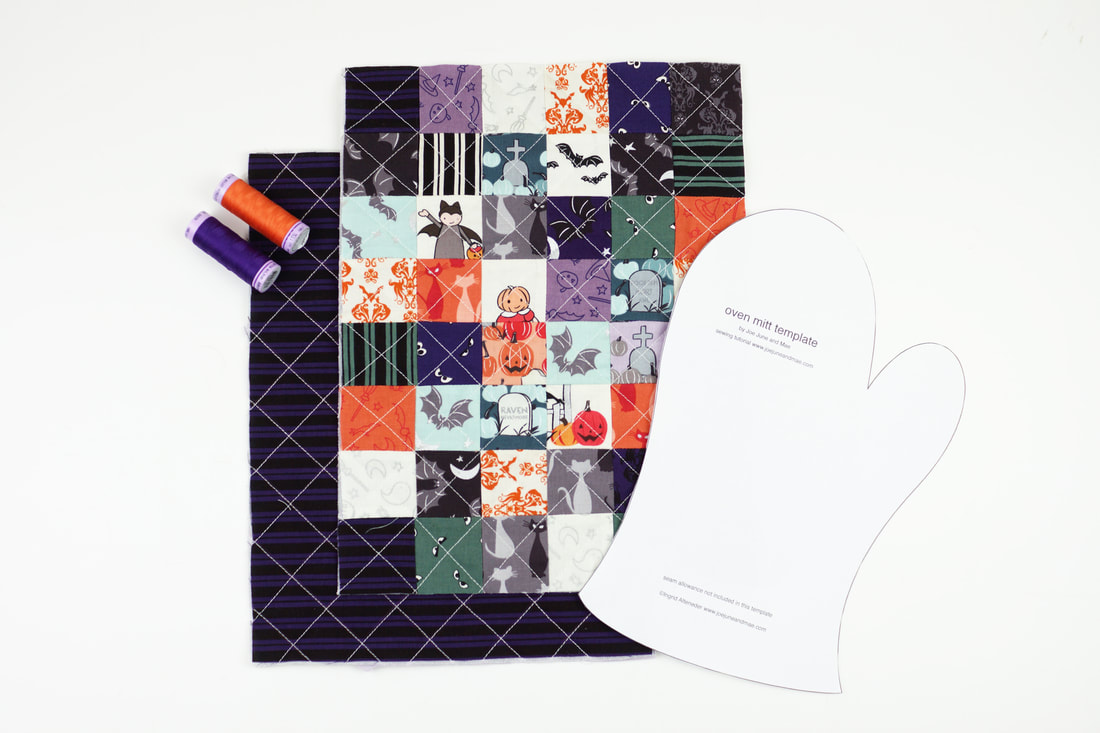
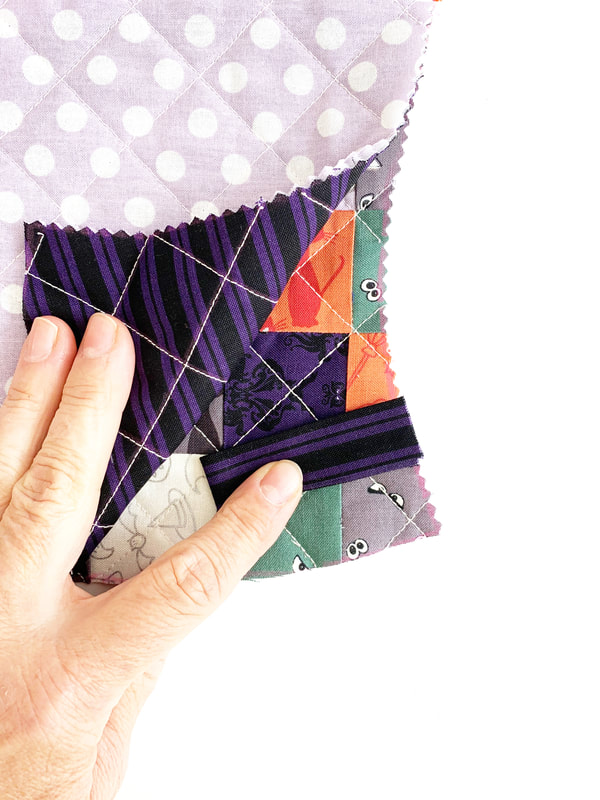
Doesn't this happen to you all the time as well? You have tons of the cutest fabric scraps left over? But of course you don't want to throw them out? I like quick and easy projects with these fabrics, so I don't end up collecting tons and tons of fabric pieces, which I do anyways, haha. So here is another super pretty and easy pattern... this time for quilted oven mitts. 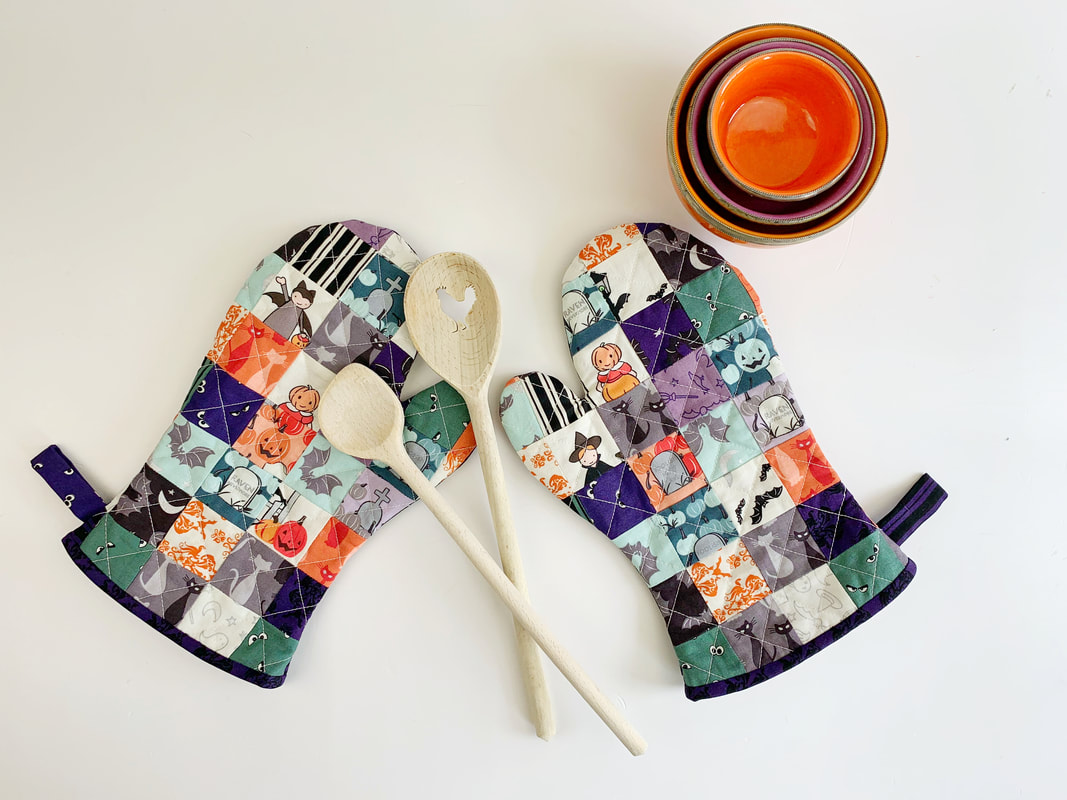 easy quilted oven mitts Materials needed: ( for one oven mitt) size aprox. 7" wide x 11" high. - 48 pieces of 2" fabric squares ( thank you Riley Blake Designs for this adorable fabric series 'spooky hollow' by Polkadotchair ) - 1 piece of fabric for the back 9.5"x 12.5" - 2 pieces of fusible batting ( or insul brite if you wanted to ) 9.5"x 12.5" - 2 pieces of lining fabric 9.5"x 12.5" - 1 strip of fabric 2"x 5" for the hanging tab. - 1 piece of bias cut binding strip 1.5" wide 17" long. - printed oven mitt template Instructions: 1. Cut all your fabric pieces. Cut 48 2" fabric squares. And cut out the oven mitt template which you will find here. 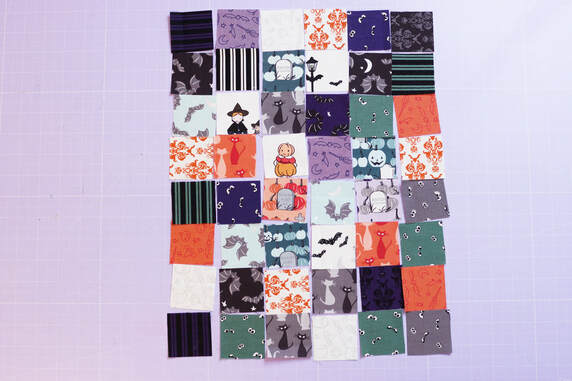 48 2" squares 2. Sew all the squares together. The easiest way, will be chain piecing the squares. Here's a quick video on how to do this. 3. Once you have all the squares sewn together, attach them to the fusible batting or insul brite. 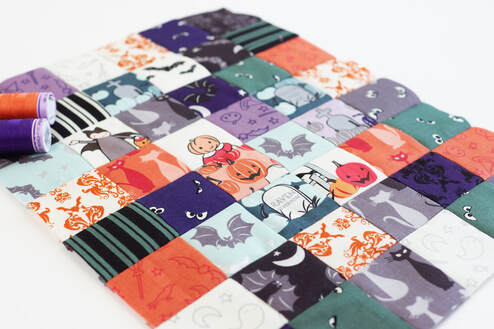 all 48 2" squares sewn together 4. Place the patchwork top on top the lining piece of fabric, wrong sides together. And quilt to your liking. I did quilt this with diagonal squares. 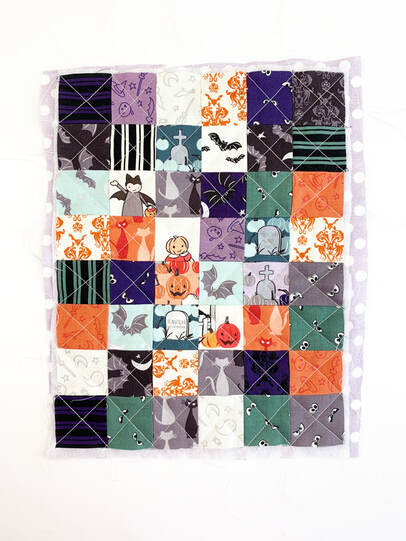 quilted top 5. Iron the back piece of fabric on to the fusible batting and place on top of the lining piece wrong sides together. Then quilt to your liking. I quilted diagonal squares here as well. I drew them onto the fabric with a fabric marker ( Koh-I-Noor Fabric pen, that can easily be dusted off after sewing). 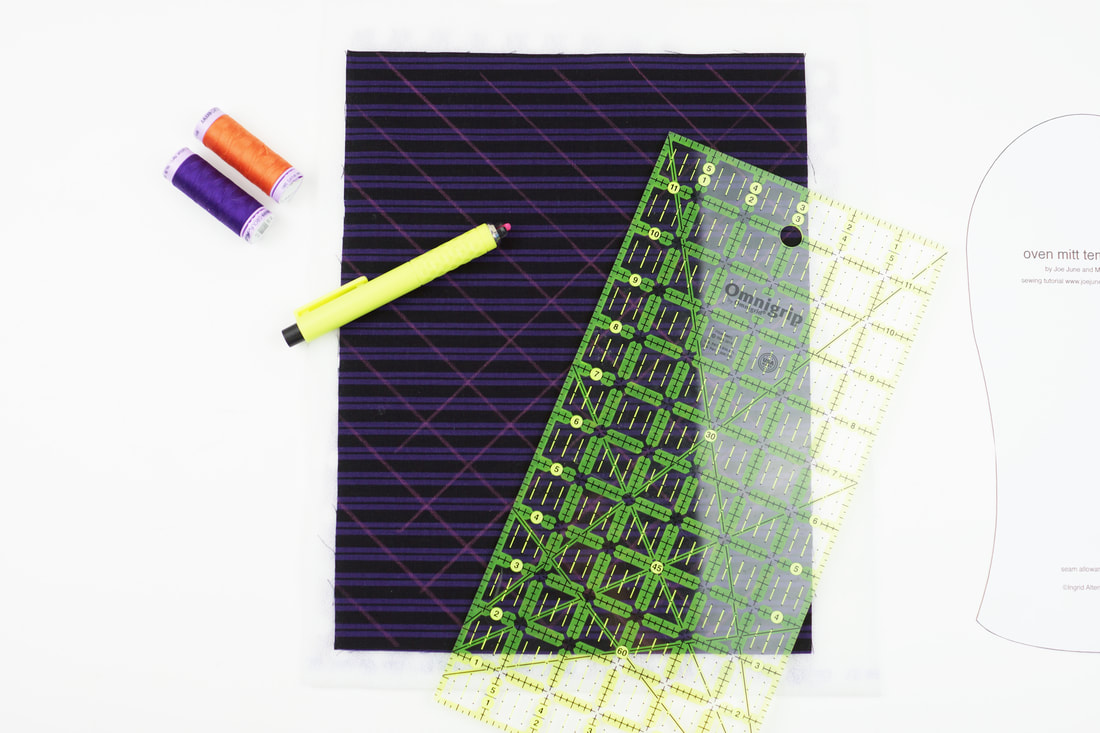 draw your quilting lines onto the fabric 6. Sewing the hanging tab: Fold the piece of fabric for the hanging tab in half, aligning the long edges. Sew along the long edge with 1/4" seam allowance and turn inside out. 7. Place the oven mitt template on the patchwork piece and draw around it with a 3/8" seam allowance. Turn the template around ( so the wrong side is now facing you) and place it on the back piece and draw around the template again with a 3/8" seam allowance. Cut out the oven mitt shape with zigzag shears, then draw the oven mitt shape on the lining side ( again I used the fabric pen, that can easily be dusted off) 8. Place front and back pieces wrong sides together . Place the hanging tab between the two layers at the bottom corner facing the inside of the oven mitt. Sew along the drawn line, securing the hanging tab in the seam, then cut back the seam allowance to 1/4 ". 9. Cut the seam allowance, between the hand and thumb part of the oven mitt, all the way to the seam. This makes sure you don't get weird pleats when turning the oven mitt inside out. 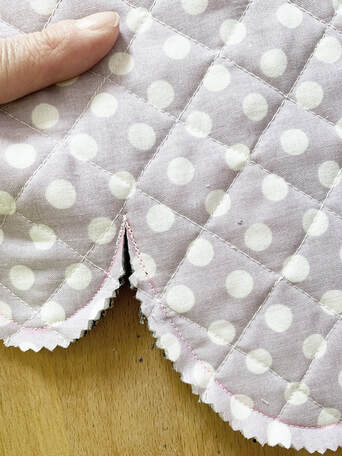 cut the seam allowance to the seam 9. Turn oven mitt inside out and clip the binding strip to the outside and stitch with 1/4" seam allowance. 10. Fold over the binding to the inside and hand stitch in place. 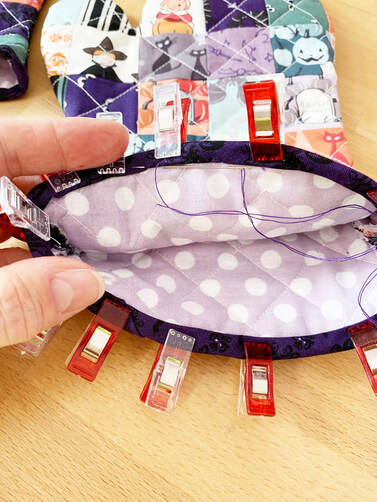 hand stitch the binding in place And here we go you're all done. So get your pots out and ... happy cooking. What do you think? These adorable oven mitts are a great gift for any one, don't you agree? 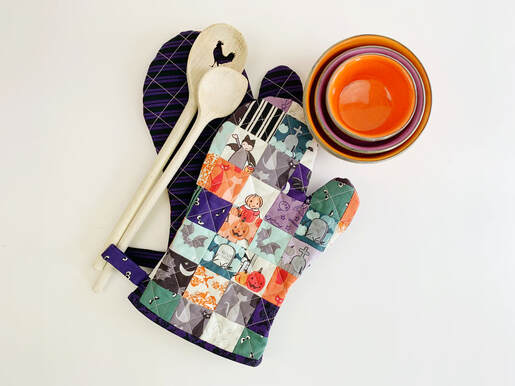 patchwork oven mitts Ingrid xx Halloween comes early this year, because Riley Blake Designs just released this super adorable fabric series called 'spooky hollow' designed by Melissa Mortenson of The Polka Dot Chair. 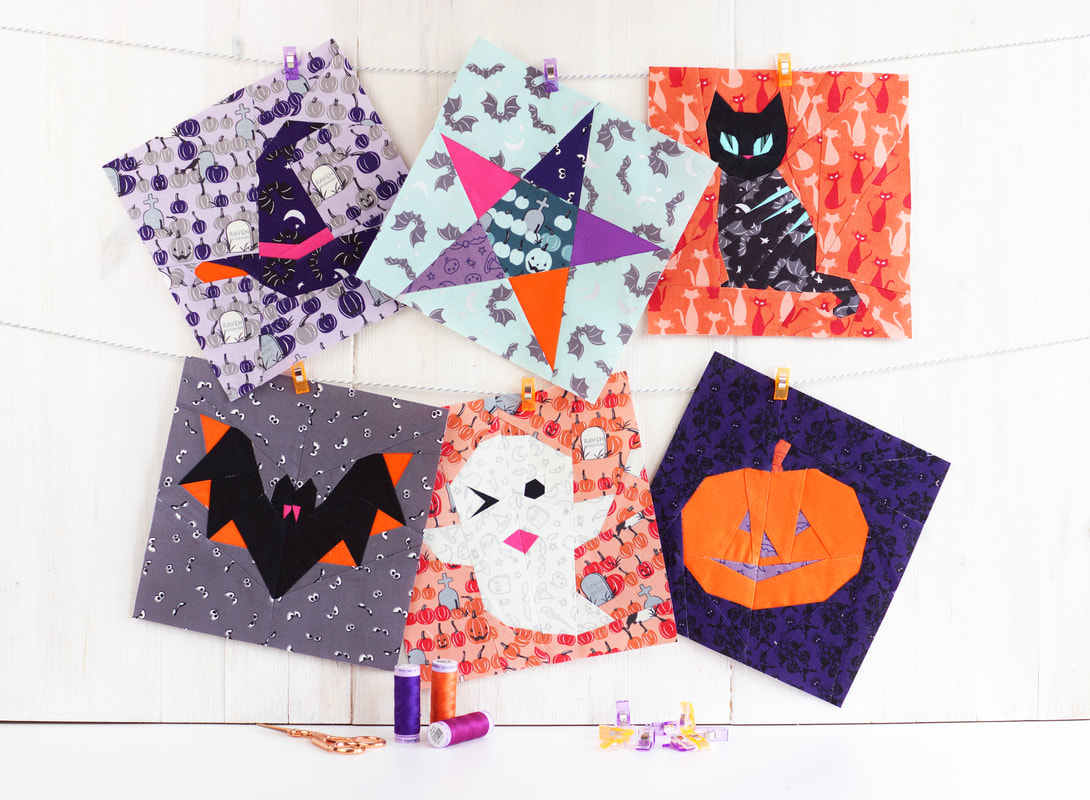 I decided to sew up all of my Halloween quilt blocks with this cute fabric series and I am over the moon with the results. The fabric patterns are small enough to work great as background fabrics, but are equally fun for fussy cutting. These quilt blocks will be perfect for these little trick-or-treat bags, it's a free pattern and tutorial. But let's see what all these Halloween symbols mean: The witch: 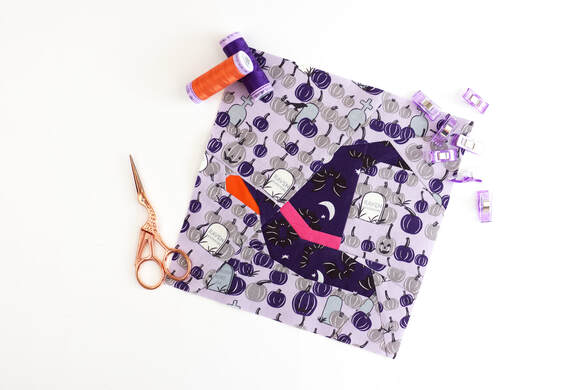 witch hat quilt block Halloween as we know it today, was celebrated by Celtic cultures as a feast for 'summer's end' and to honor the fall harvest. It was called Samhain, pronounced sow-in. It was celebrated on the evening of October 31. until sunrise on November 1. and is also known as the pagan New Year's Eve. It was a celebration for the deceased as much as for the beginning of the pagan New Year. Celebrations included bonfires and feasts. In the Middle Ages people who celebrated with bonfires were accused of being witches. And their power was believed to be greatest during Halloween night. So it's no surprise, that the witch, her hat or broomstick are still to this day, one of the most prominent symbols for Halloween. The bat: 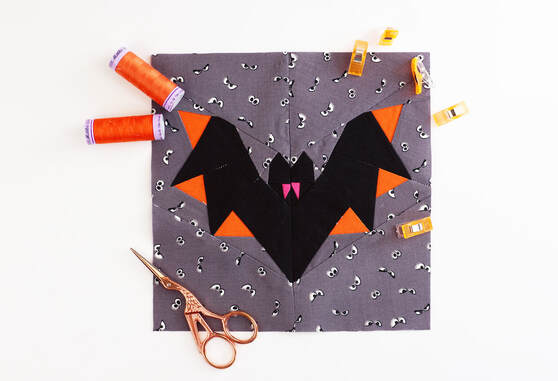 bat quilt block The original Celtic bonfires at Samhian would attract many bugs and flying insects. Which then caused bats to emerge at these festivals to have a little feast of their own. Therefore there's no Halloween without a bat. Halloween black cat:  Halloween cat quilt block The association of black cats with Halloween also comes form the Middle Ages. The women accused of witchcraft often fed wild cats or had pet cats themselves. Black cats were feared especially, since their dark black fur allowed them to roam through the dark undetected, leaving only their piercing eyes to be seen. And who doesn't agree, this is a little bit scary, right? The ghost: 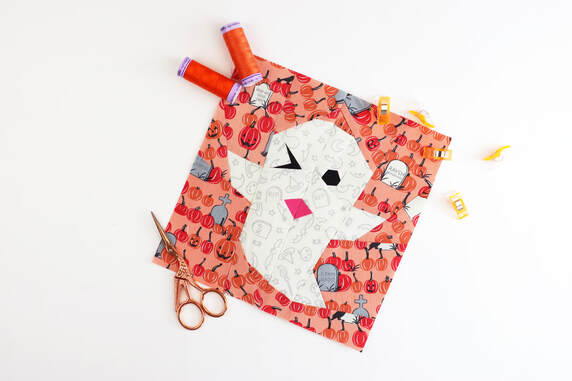 ghost quilt block Ghosts have always been a symbol for Halloween. Samhain and the Christian holiday 'All Hallow's Eve' or 'All Saints Day' are both celebrations for the deceased. During the night of Samhain it was believed, that the veil between the living and the dead is the thinnest and people are closest to the dead and their spirits. Making the ghost the most fitting symbol for this 'ghosty' holiday. The Jack-o-lantern: 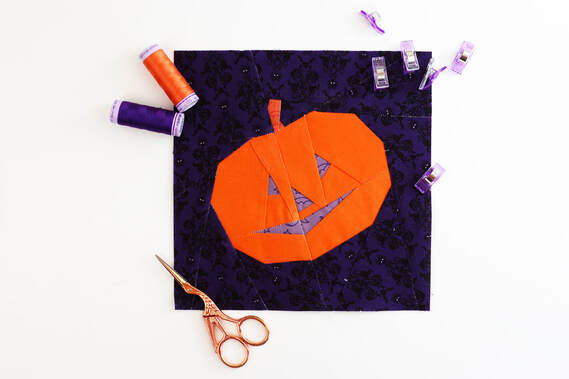 pumpkin quilt block The Celts would carve turnips on 'All Hallow's Eve' and would place and ember inside. This was done to keep evil spirits away. Funny enough pumpkins didn't exist in Ireland at that time that why turnips were used. The Pumpkin only became popular when the Irish migrated to America and were more popular and easier to carve that turnips. So what do you think? Are you in the mood to start Halloween sewing early this year ? 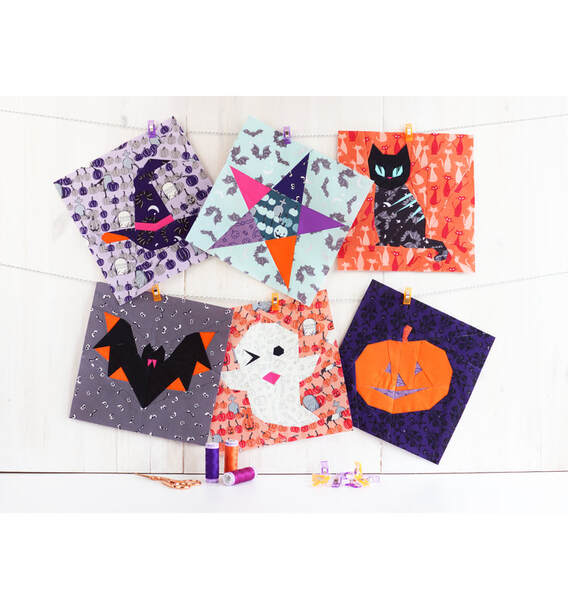 Halloween quilt block pattern Thank you so much to Riley Blake Designs for supplying the absolutely adorable Spooky Hollow fabric series designed by Melissa Mortenson that I used for these cute quilt blocks. Ingrid xx |

Author
Ingrid Alteneder Archive
March 2022
Categories
All
|

 RSS Feed

|
Visit us at
|