|
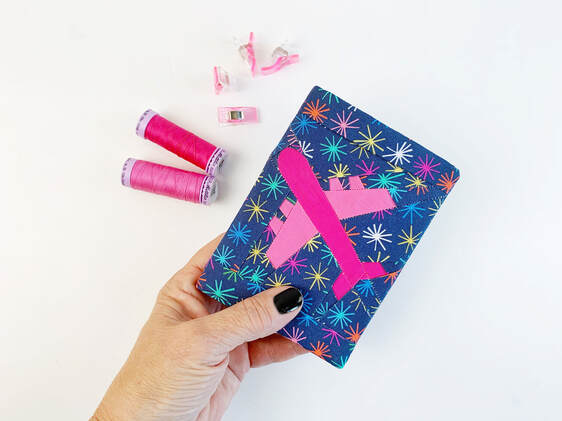
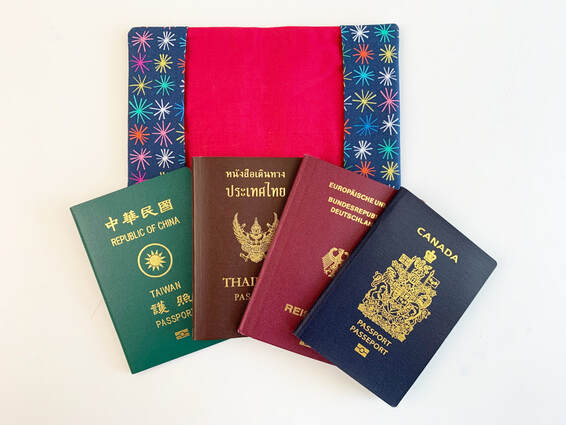
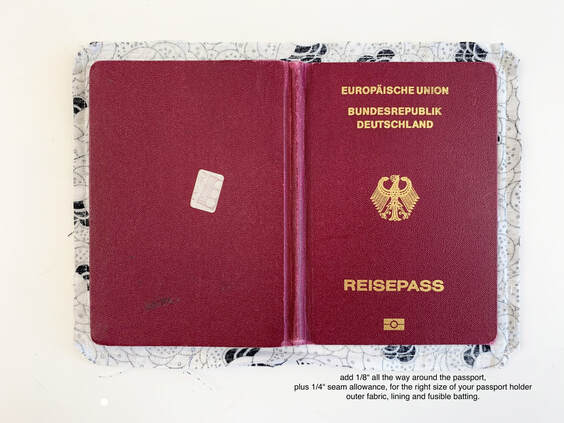
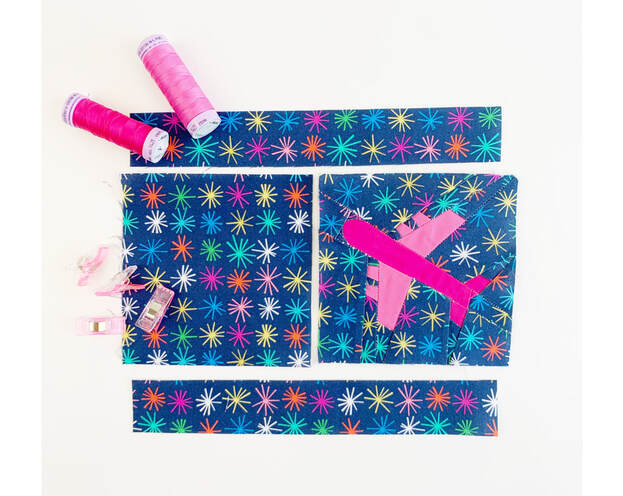
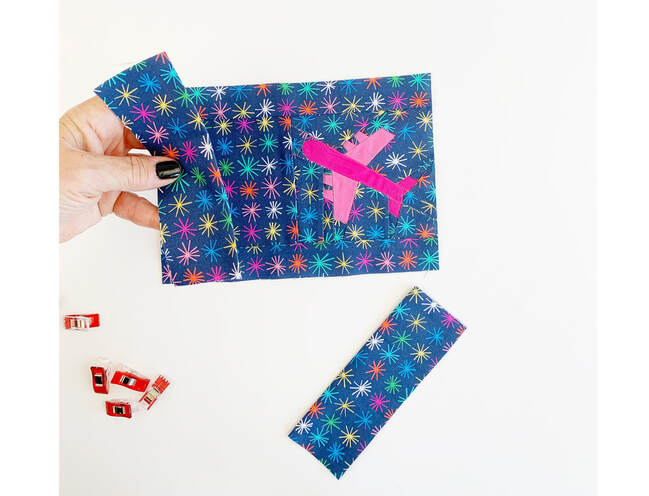
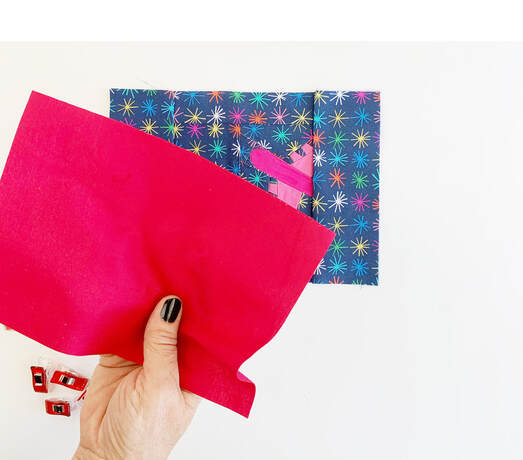
Are you all as hopeful as I am, that traveling season will start soon again? This was something I really missed in the last 15 months. I bet all of you as well? More and more people are getting vaccinated and this means for all of us, that we're slowly getting back to normal. I am sooo looking forward to this. After 15 months of lockdown, more or less strict and 15 months of homeschooling two teenage daughters, you know that I really miss getting away :-) Therefore I decided our passports need some dressing up and I made this cute little passport holder pattern. The Airplane pattern is a super quick and easy foundation paper piecing pattern and suits this passport wallet perfectly, don't you think. I used the 4"x 4" size for the outer piece of the passport cover. I decided on a new sewing project to enhance our passports... this fabric passport holder looks just so much cuter going through passport control, don't you agree? So let's get to sewing this cute passport holder/ passport cover with the cutest paper pieced airplane quilt block. Materials needed: ( this is the size for a European Passport ) Most passports are very similar in size, (as you maybe know, we have a few nationalities in our family) the European passport is about 1/8" to 1/4" wider than the others. To double check the right size for your passport cover, fold the passport open add 1/8" all the way around the passport and then add 1/4" seam allowance, that will be the size of your lining and outer piece. outer piece: - 1 airplane quilt block size 4"x 4" - 1 piece of fabric 4.5"x 4.5" (same as the background fabric of the airplane block ) - 2 strips of fabric 1 1/4" x 8.5" (same as the background fabric of the airplane block ) - 8 1/4" x 5 7/8" for the lining - 2 x 4" x 5 7/8" for the pockets - 8 1/4" x 5 7/8" very thin fusible batting (optional but this gives a bit more stand I used Vlieseline H180) Instructions: 1. Sew your airplane quilt block in 4"x 4" size. Cut all your fabrics, lining and batting pieces. Stitch the fabric pieces for the outer piece together the way its shown here in the assembly photo. Join the two squares first, then add the two strips of fabric at the top and bottom. 2. Iron on fusible batting to the wrong side of the outer piece of the passport holder. Cut the outer piece to 8 1/4" x 5 7/8". ( check the size with your own passport as shown above) Fold the pocket pieces in half aligning the longer raw edges and press. Then place these two on the outer piece aligning the left and right raw edges. 3. Place the lining piece on top of the outer piece with the two pockets, right sides together, pin or clip in place. 4. Stitch around the outer edge with 1/4" seam allowance leave a 3" opening at the bottom longer edge for turning your passport holder or passport wallet later. Cut the corners at a 45° angle, that gives you nice crisp corners when turning the passport holder inside out. Close the opening with a small seam allowance. And YAY you're all done . Happy and save travels everyone.... I'm off to stitch a few more in other colors. Ingrid x PS: let me know what colors you are making , can't wait to see your photos on social media.
4 Comments
Joyce
1/6/2021 20:38:01
I love this!!! Fabulous idea. I’m so looking forward to travel again.
Reply
Irene
7/6/2021 11:01:53
Hi, I would like to download this pattern, but apparently is not free. Is there any coupon I must apply in order to get it free?
Reply
Ingrid
7/6/2021 15:07:55
Hello Irene,
Reply
Leave a Reply. |
Author
Ingrid Alteneder Archive
March 2022
Categories
All
|
-
Shop
- New patterns
- All Patterns
- Appliqué Patterns
- Animals
- Baby
- Ballet
- Bear Cottage
- Beach/ Boats/ Nautical
- Buddha/ Mindfulness
- Chinese New Year
- Christmas
- Easter and Spring
- Fairytale
- Fall/ Autumn
- Flowers, Trees and Plants
- Food/ Drinks
- Halloween
- Oktoberfest
- Quilted items
- Stars
- Viva la Frida/ Dia de los Muertos
- Valentine's Day
- Village Patterns
- Mixed pattern
- Home
- About
- Blog
- Publications
- Etsy
- News
- Deutsch
|
Visit us at
|


 RSS Feed
