
|
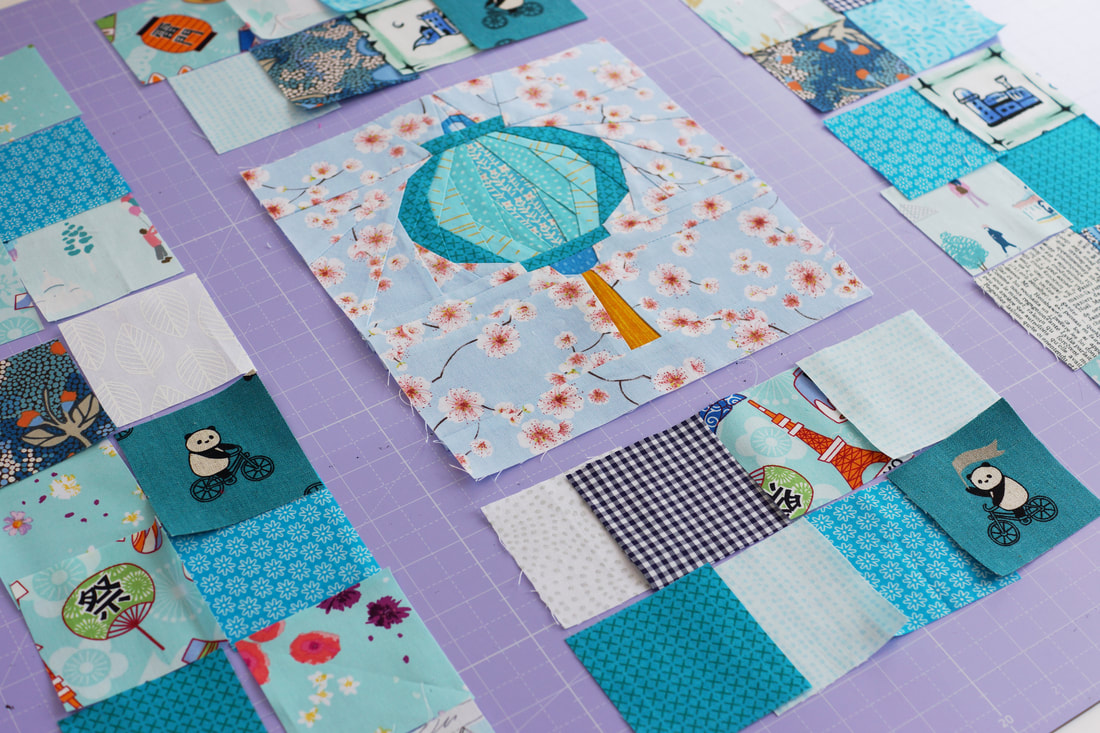
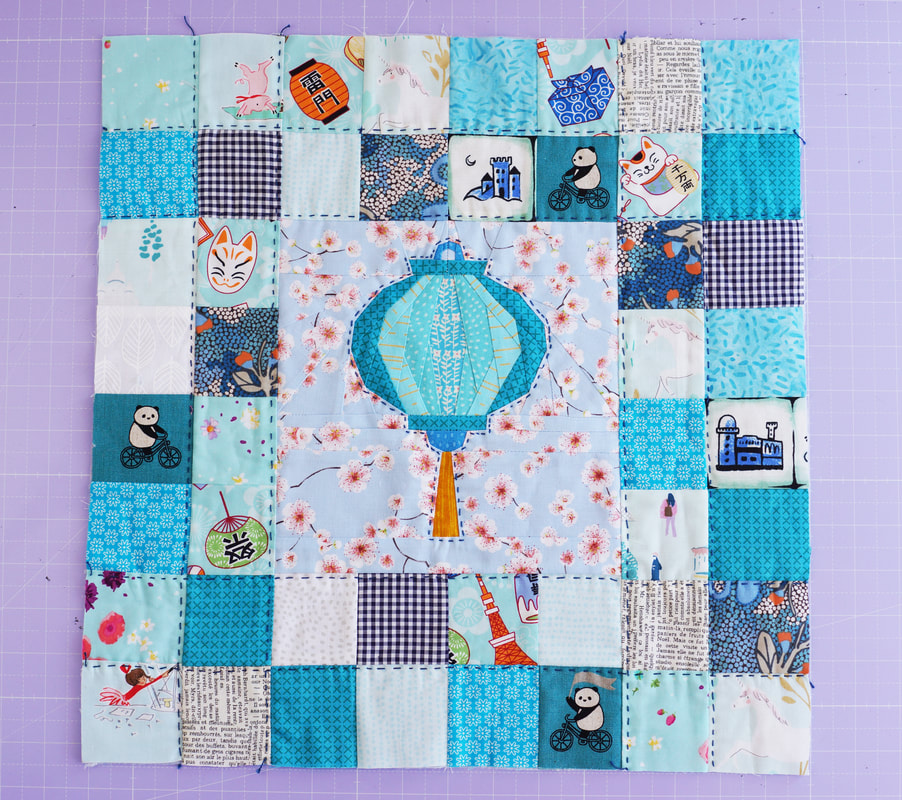
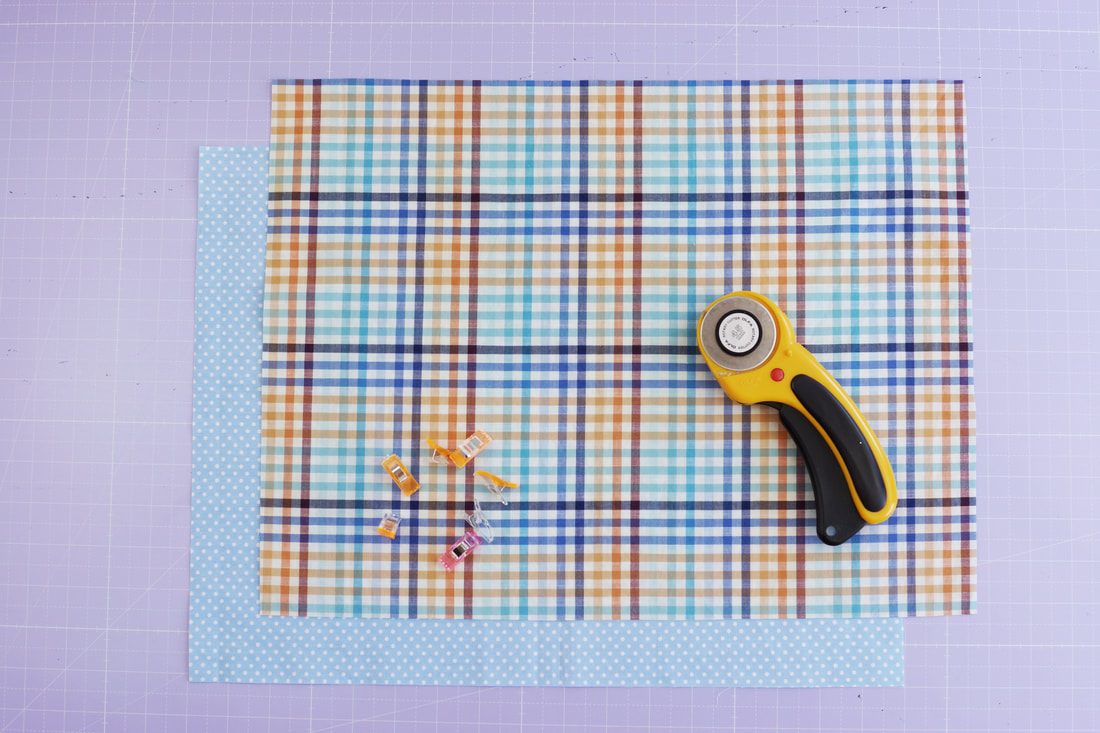
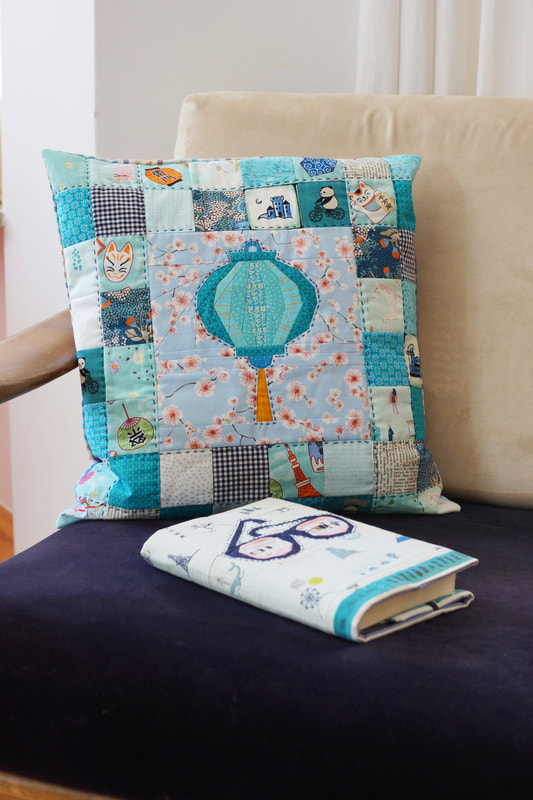
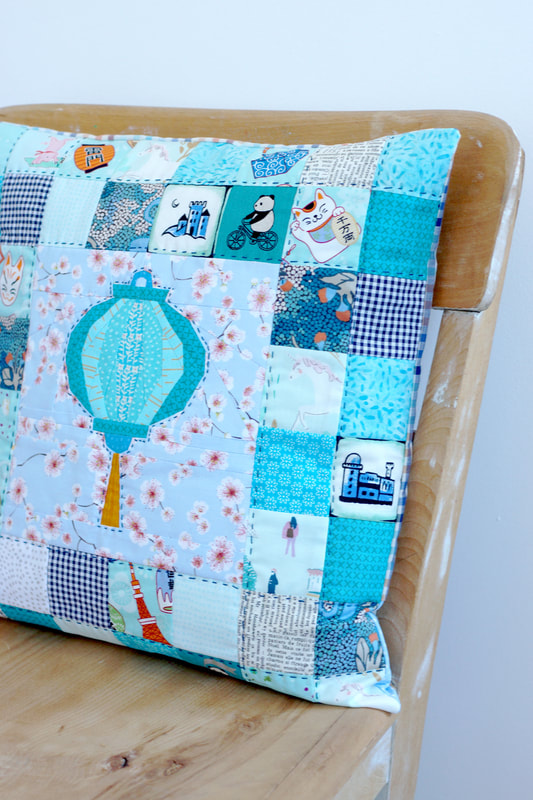
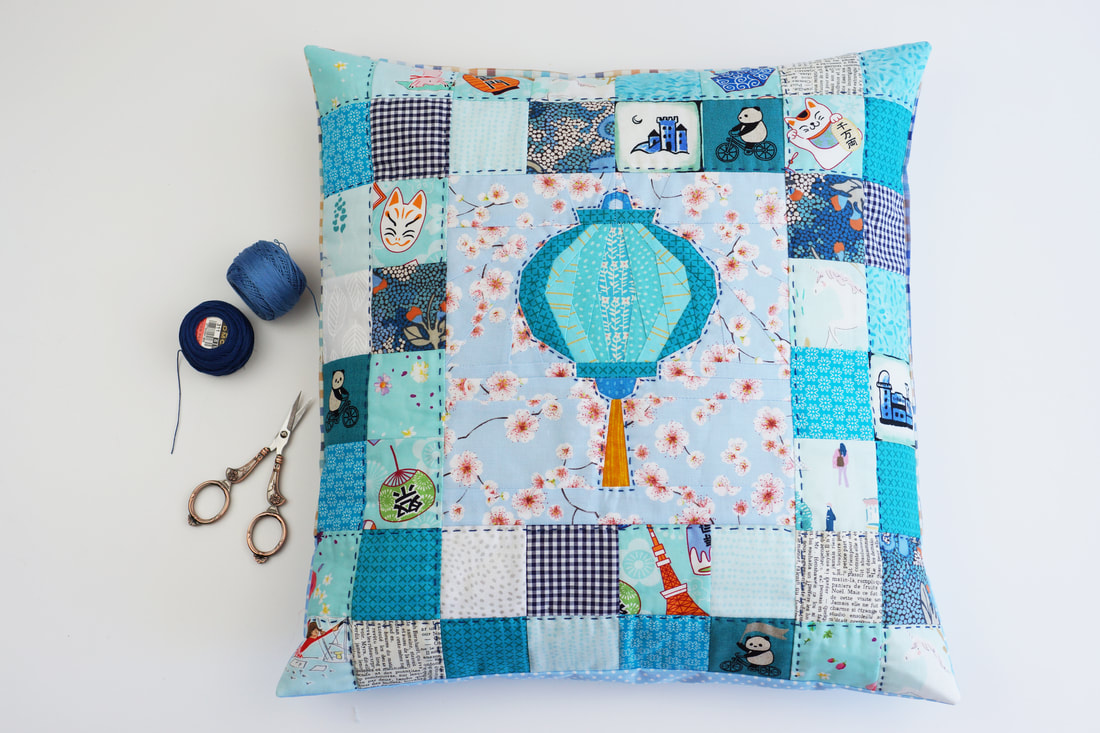
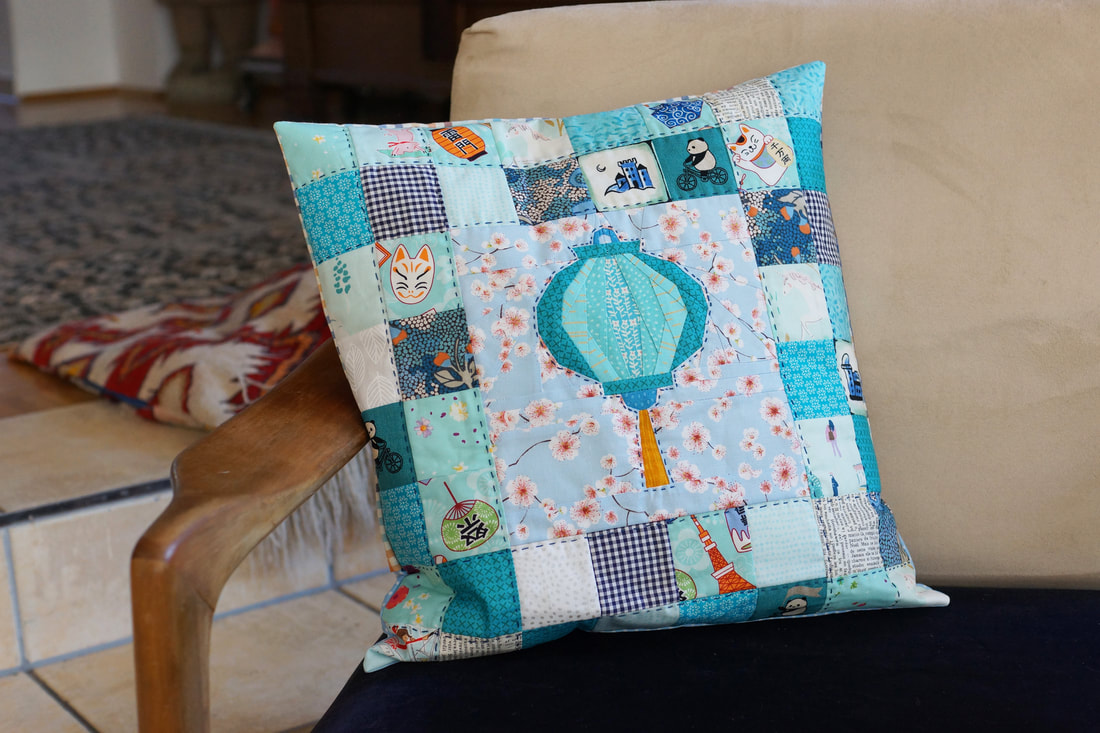
Pillowcases are easy and fun, and the perfect way to redecorate your home without having to invest a lot of money. Everybody that knows me personally, has seen, that I am a tiny bit of a color freak and also like to rearrange and redecorate things in my home. Especially seasonal changes, from spring to summer, fall and winter/ christmas. My patio and garden get a makeover every year. I love different 'looks' and love to play with fabrics and colors. 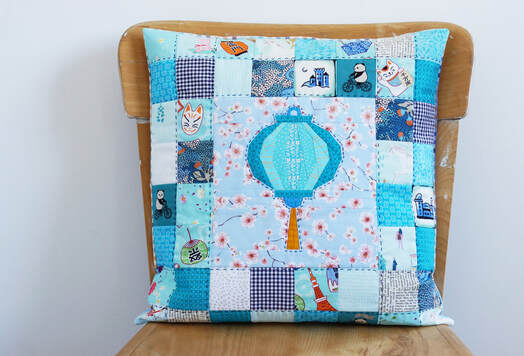 stunning quilted pillowcase I designed my Chinese Lunar New Year pattern series back in January but I think this series works all year around. Especially the lantern patterns are perfect for any patio decor. These are extremly easy and quick to make. And yes, the paper lantern pattern is easy to follow as well. Materials needed: - a 8" x 8" quilt block , paper lantern or any other ( 8 1/2" unfinished) - 48 2 1/2" squares ( the squares you cut will be 2 1/2" so they are 2" finished) - two pieces of fabric for the back 13" x 17" - low volume fusable batting 17" x 17" - thread and needle for handquilting if you decide to do that. Seam allowances are 1/4" unless mentioned otherwise. 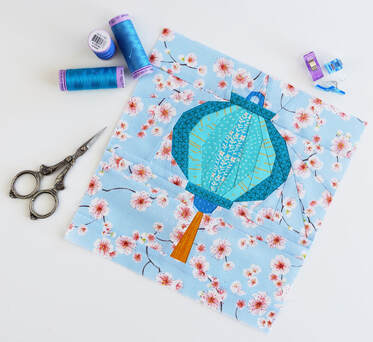 This is the quilt block that I will use for this pillowcase it's the 8" x 8" version of the balloon paper lantern pattern.
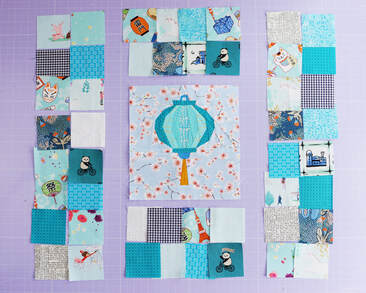
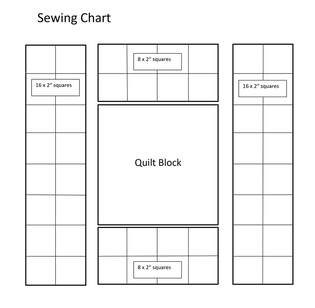
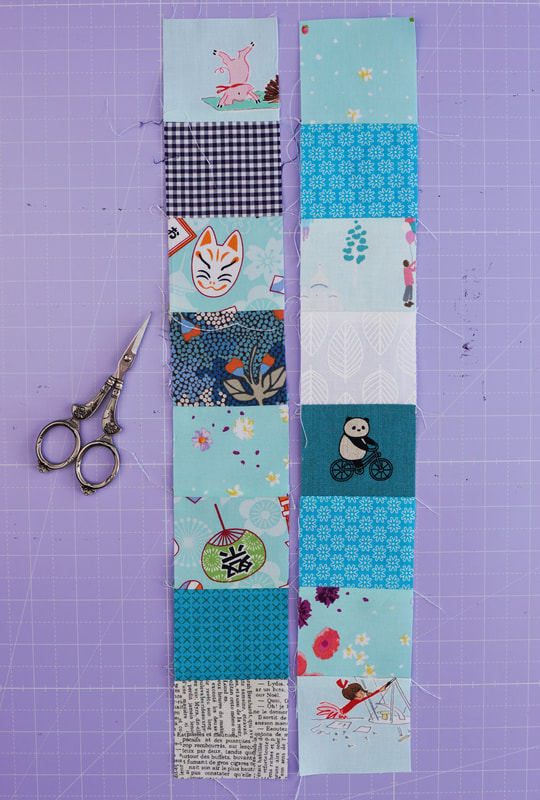
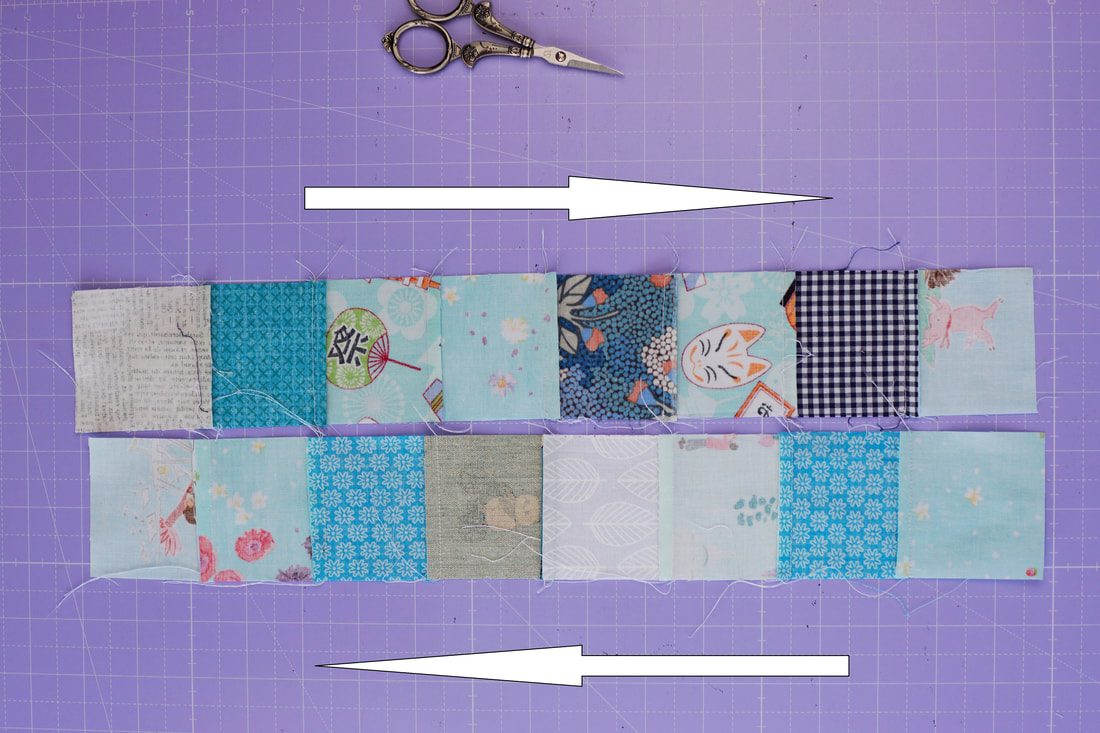
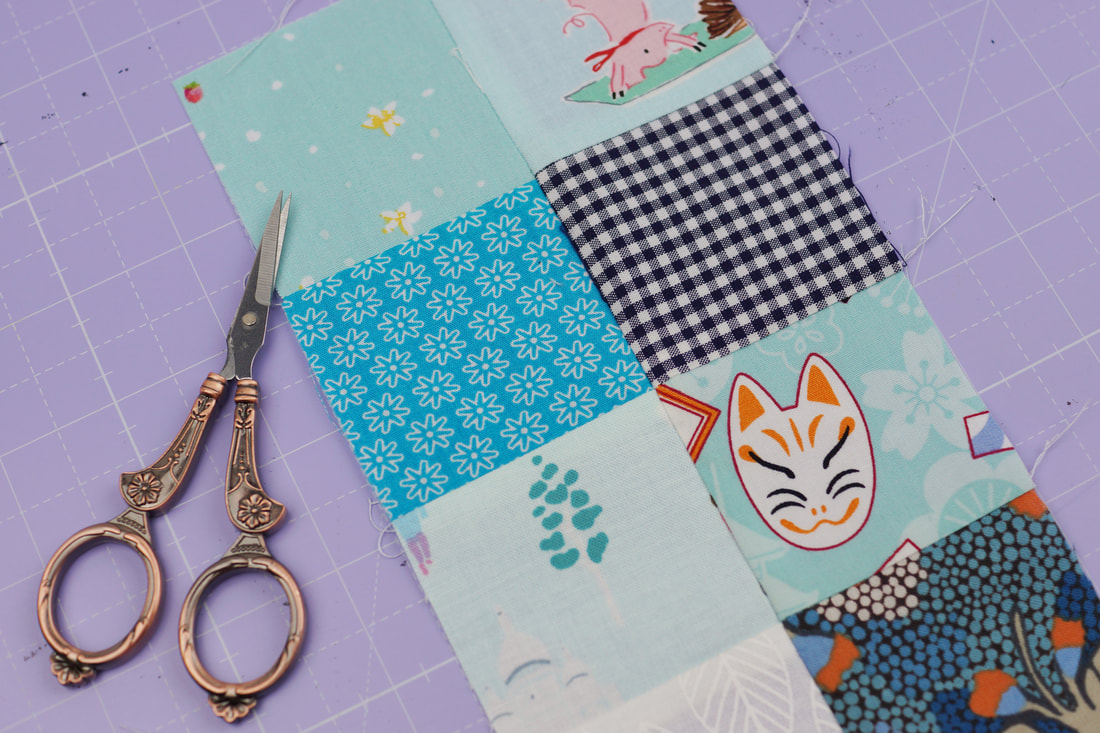
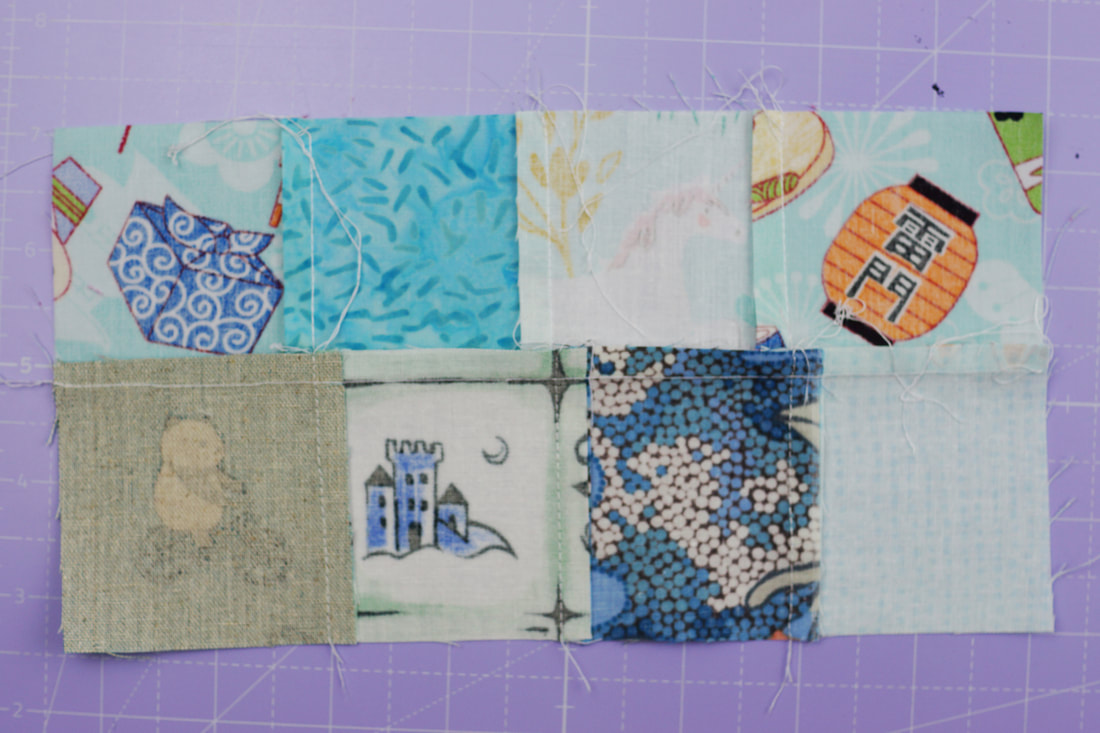
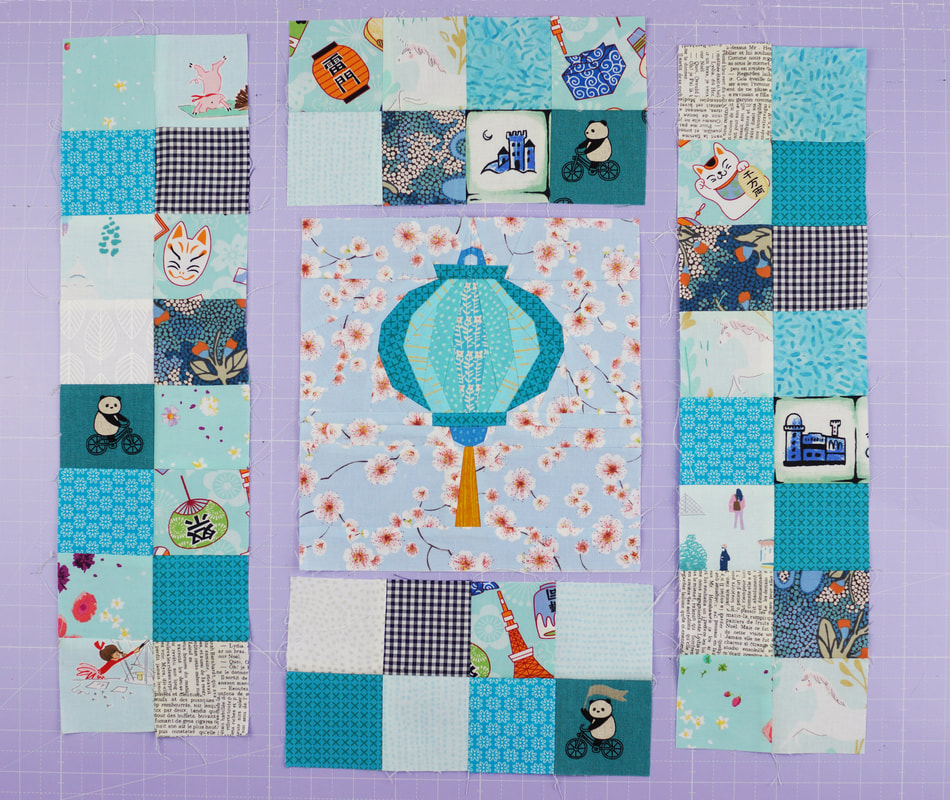
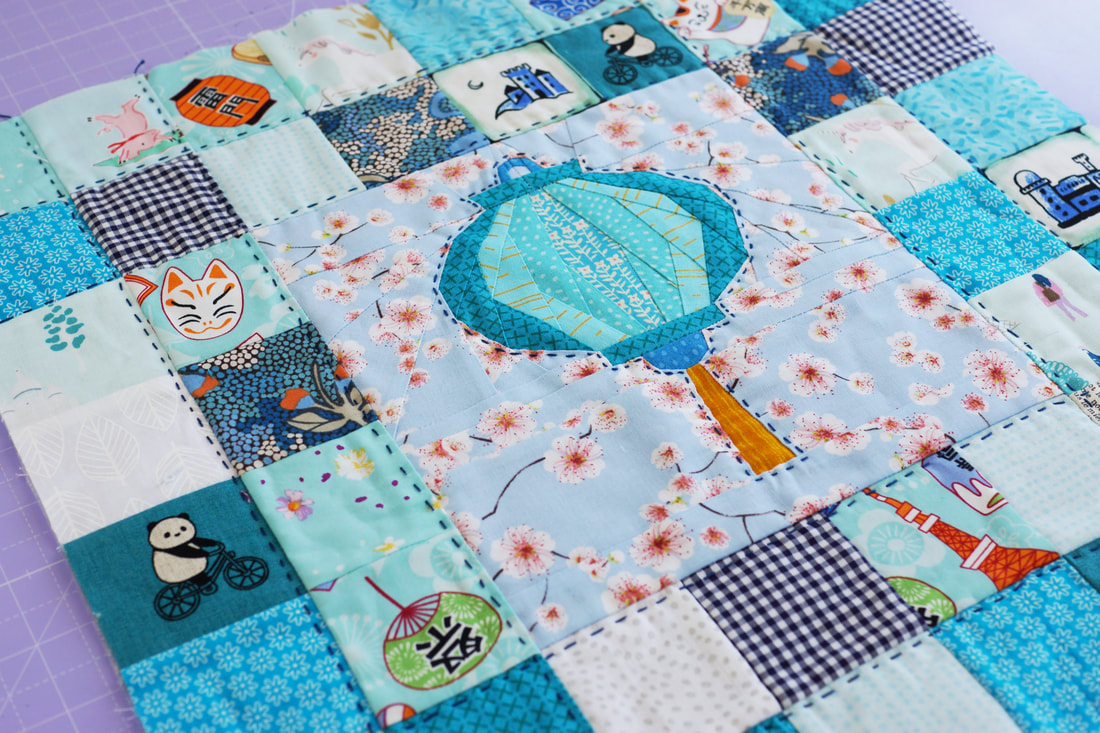
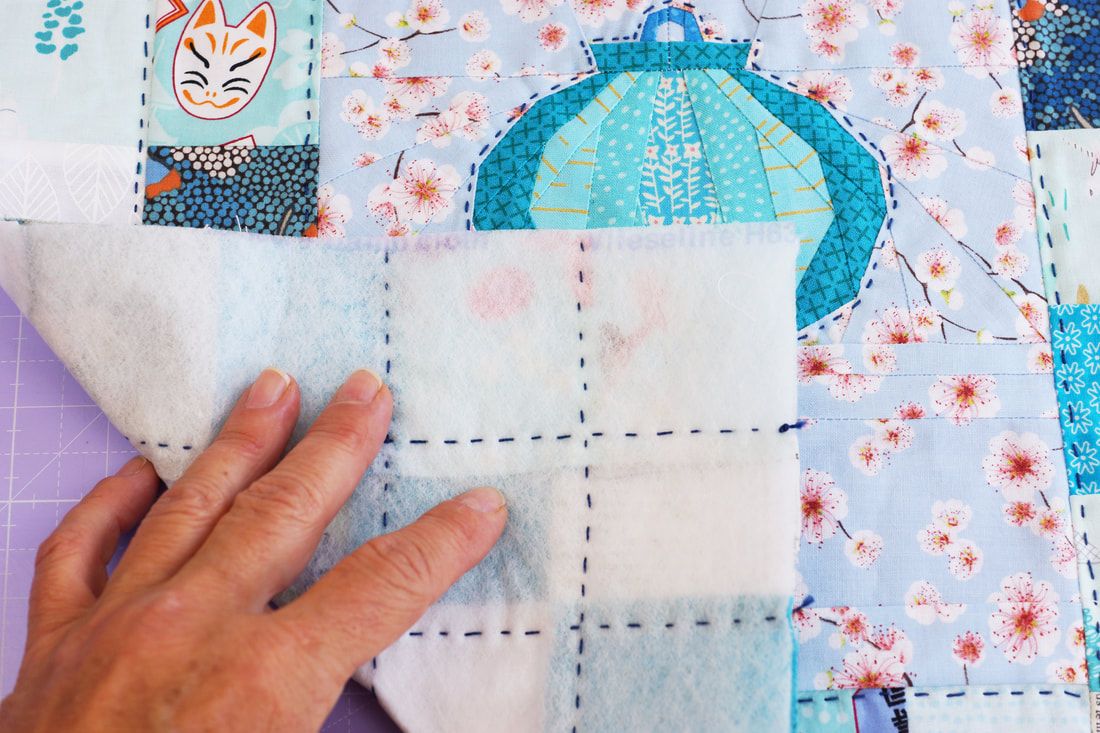
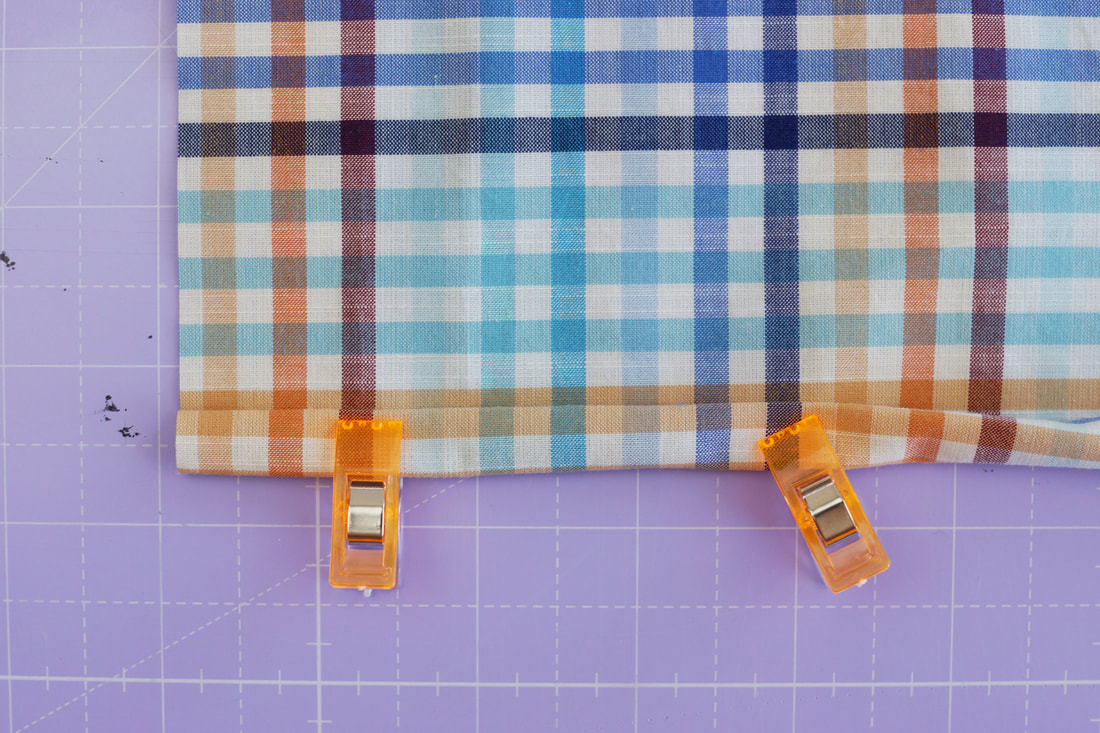
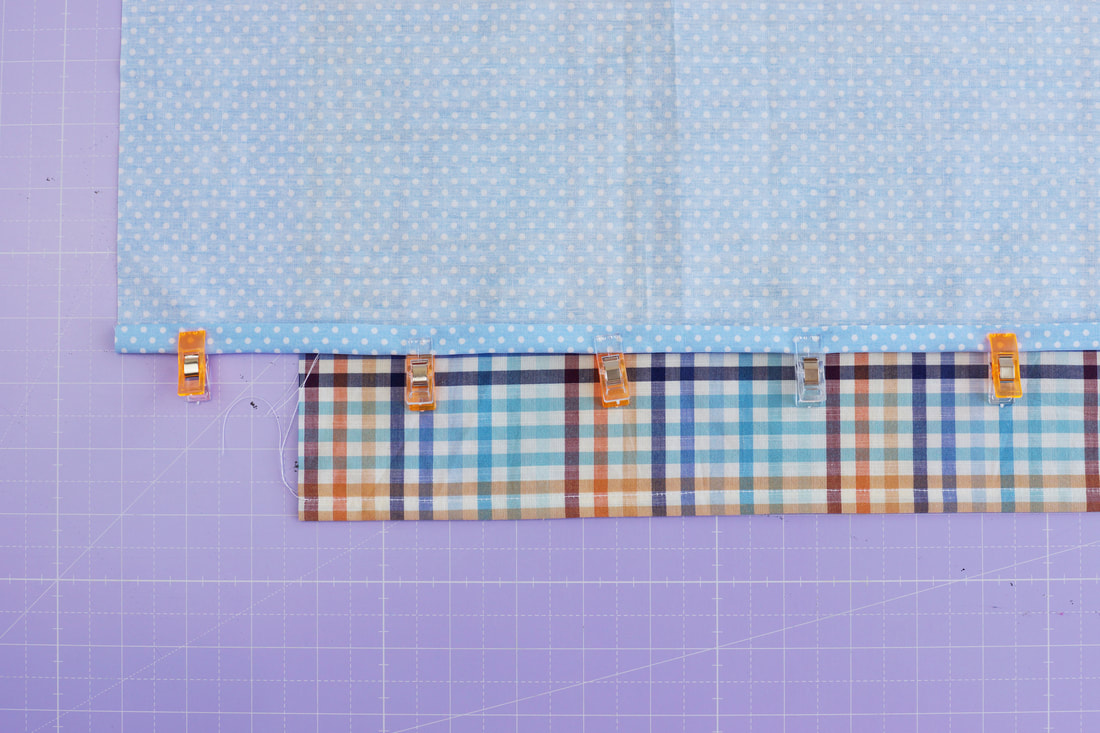
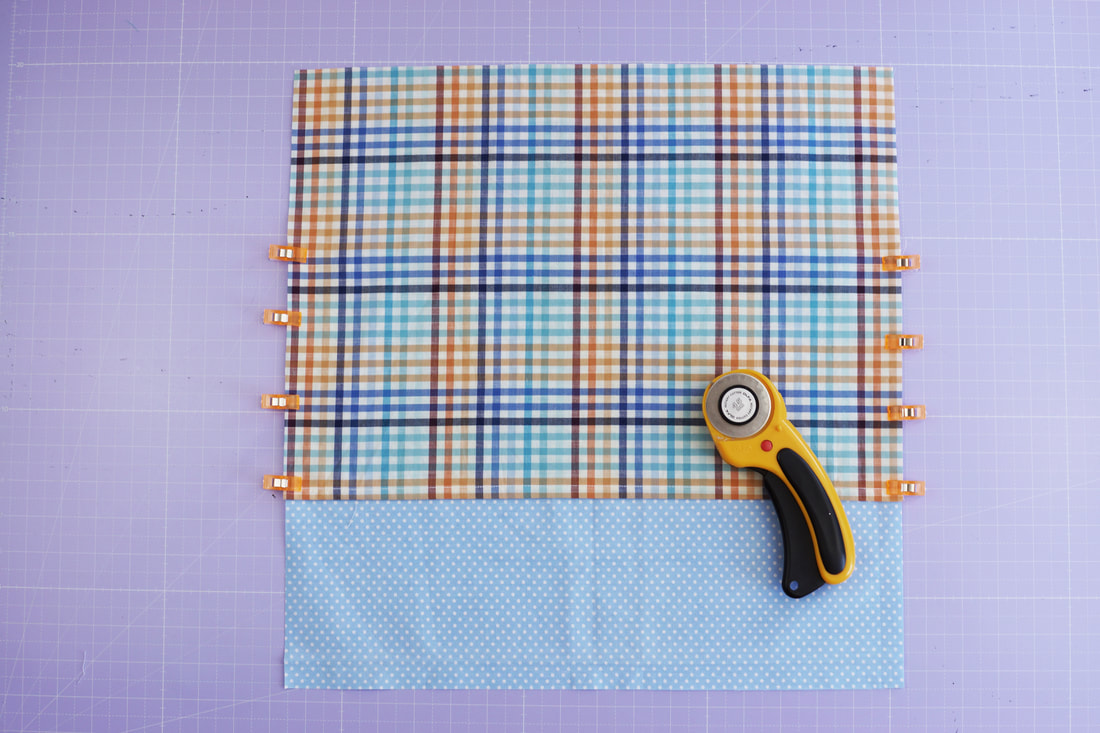
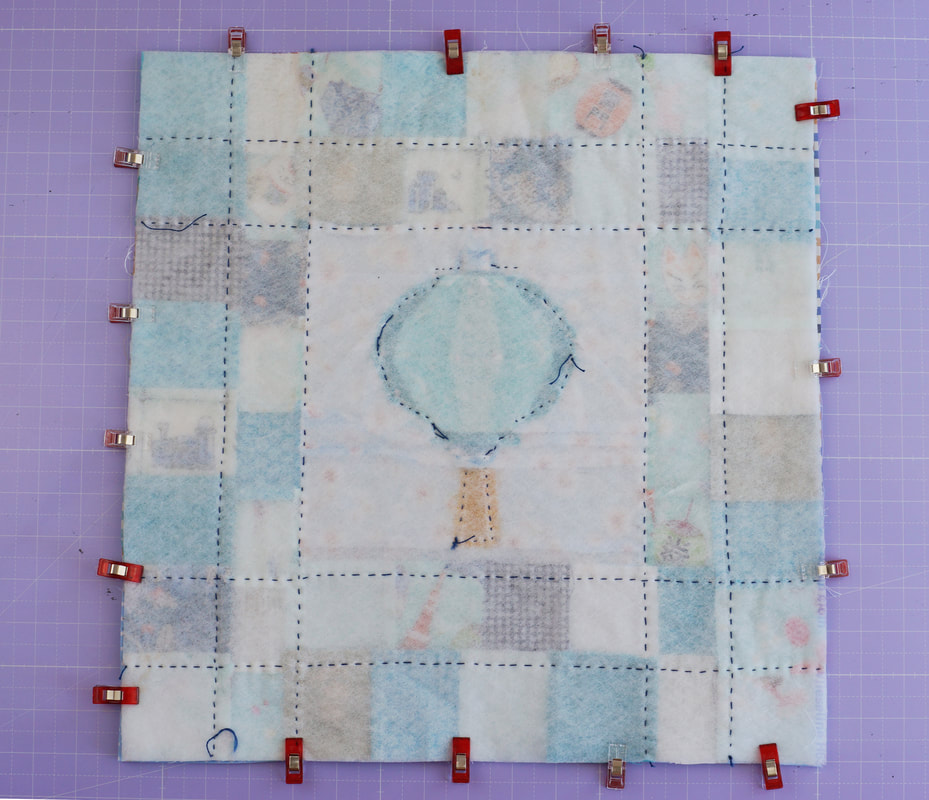
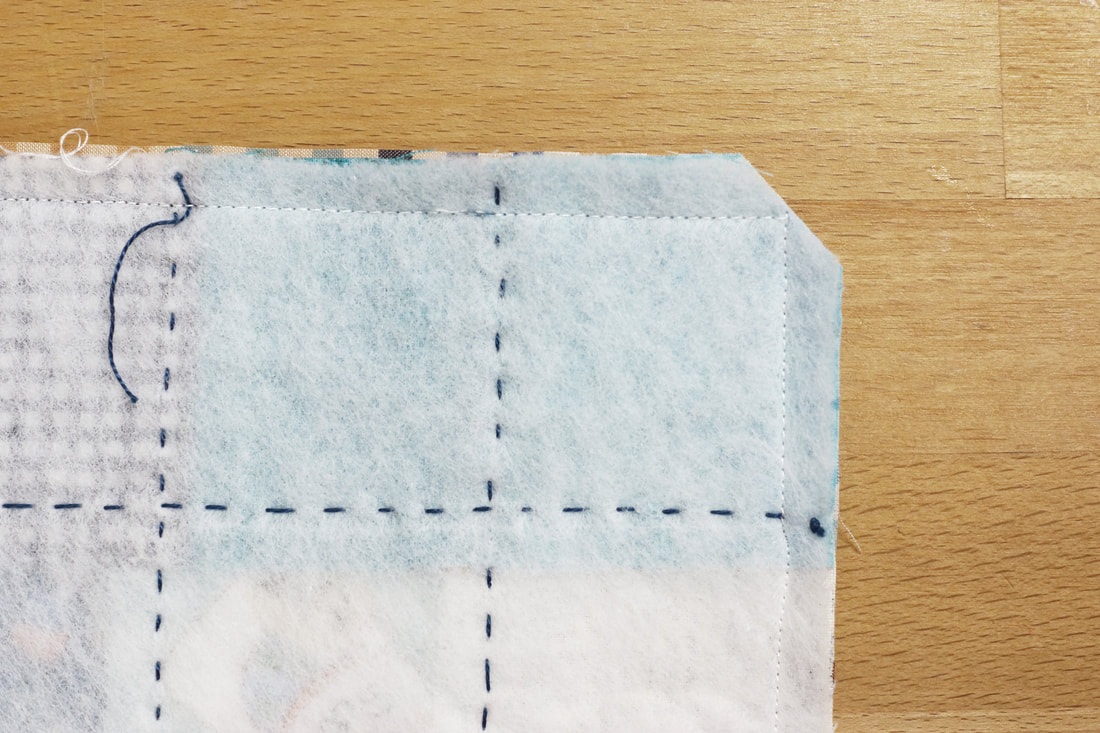
1> Place your squares around your quilt block the way you feel they will look good ( photo 1) This is a fab way to use up your fabric scraps and do some cute fussy cutting. Then sew together those squares. 2> I usually sew them into strips first and then join the strips.( photo 2 ) 3> Your can either seperate your seam allowances and press them each seperatly, or press the seam allowances in opposite directions before joining your fabric square strips. This is really easy and quick. (photo 3) You press one strip in one direction and the other in the opposite direction, this will help with nesting your seams and having accurate corners and matching points. 4> Nesting your seams is the easyest way to get accurate matching seams. if you pressed your seam allowances into opposite directions, this is quite easy. The seams sort of fit together automatically ( photo 4) 5> Sew the fabric strips together into four blocks . 16 x 2" squares sewn into two blocks to the left and to the right of the FPP quilt block. And 8 x 2" squares sewn into two blocks to the top and bottom of the paper lantern quilt block. 6> Join the 2" squares blocks with the foundation paper piecing quilt block. First attach the top and bottom 8 x 2" blocks to the paper lantern quilt block . Then you add the side panels of 16 x 2" squares to either side of the FPP quilt block. Press the seam allowances and iron on the fusable batting. Now is the perfect time to do some hand quilting if you want. You could also quilt some straight lines with your sewing machine, or machine quilt the entire pillowcase top. This is how I hand quilted this top, some 'straightish' lines and just one line of stitching around the paper lantern. 7> To make the back of the pillow, place one of the 13"x 17" fabric rectangles wrong side up, fold over the long edge ½” twice, press, clip and stitch in place. Repeat this to make the second one. Align the backing pieces, right sides up and raw edges aligned. The hemmed edges should overlap aprox 6". Trim to 16 1/2 " x 16 1/2" same size as pillowcase top. Clip the backing in place and machine baste ⅛″ from the edge on both sides. Have I mentioned, I like to recycle fabric? There are soo many beautiful fabrics out there and they do not belong in the garbage. Especially cotton woven fabrics such as shirts, sheets, douvet covers etc. My husband used to work in the fashion industry as well and still has tons of awesome shirts that are of great quality, so I use them as backings or linings for all sorts of sewing projects. ( here as well) 8> To finish the pillowcase place front and back right sides together and stitch these two together along the outer edges. Cut off the corners as shown in Photo 3 at a 45° angle. this gives you nice and crisp corners for your pillow. Turn inside out and VOILA..... Here it is all done and pretty :-)
What do you think? Especially pretty with the quilted book cover right?
7 Comments
Emily Henry
27/1/2021 09:32:55
What a great idea. I'm now 77 and live in a mobile home so space is at a premium. I no longer am able to work with large quilts but still love the process. This will be perfect. Thank you for sharing.
Lindsay
8/4/2021 21:37:27
Thank you for the tutorial! I've spent a while trying to find one making a paper-pieced item into a pillow. I knew I needed to use fusible web(?), batting, something, since I won't want the pillow form rubbing against my piecing seams when inserted/removed, and that batting must be anchored to fabric... This is helpful. I didn't know fusible batting existed. :)
Megumi
3/8/2022 06:59:13
Hi! We're currently in the process of making this and there's just something we still need. In particular, the fabric used as the background for the lantern (the blossom) and the one with the Japanese motifs. It'd be nice if you could tell us which ones they are and where we could purchase them? Thanks in advance! Leave a Reply. |

Author
Ingrid Alteneder Archive
March 2022
Categories
All
|


 RSS Feed

|
Visit us at
|