
|
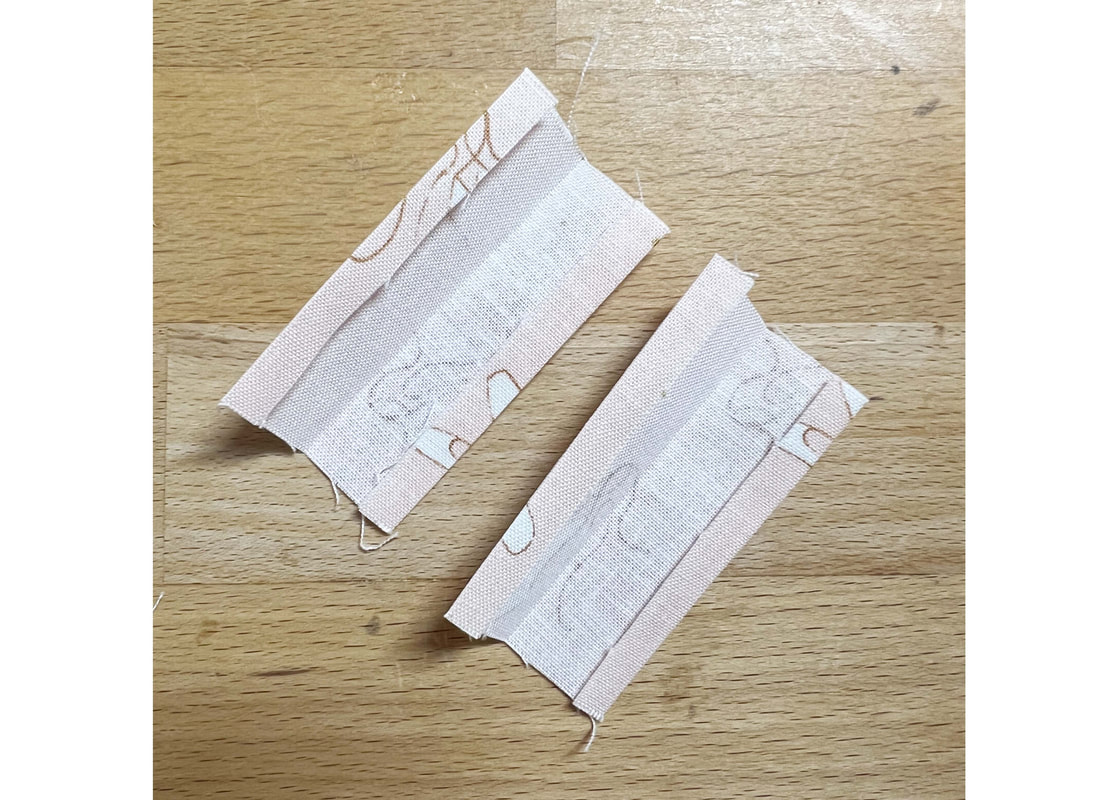
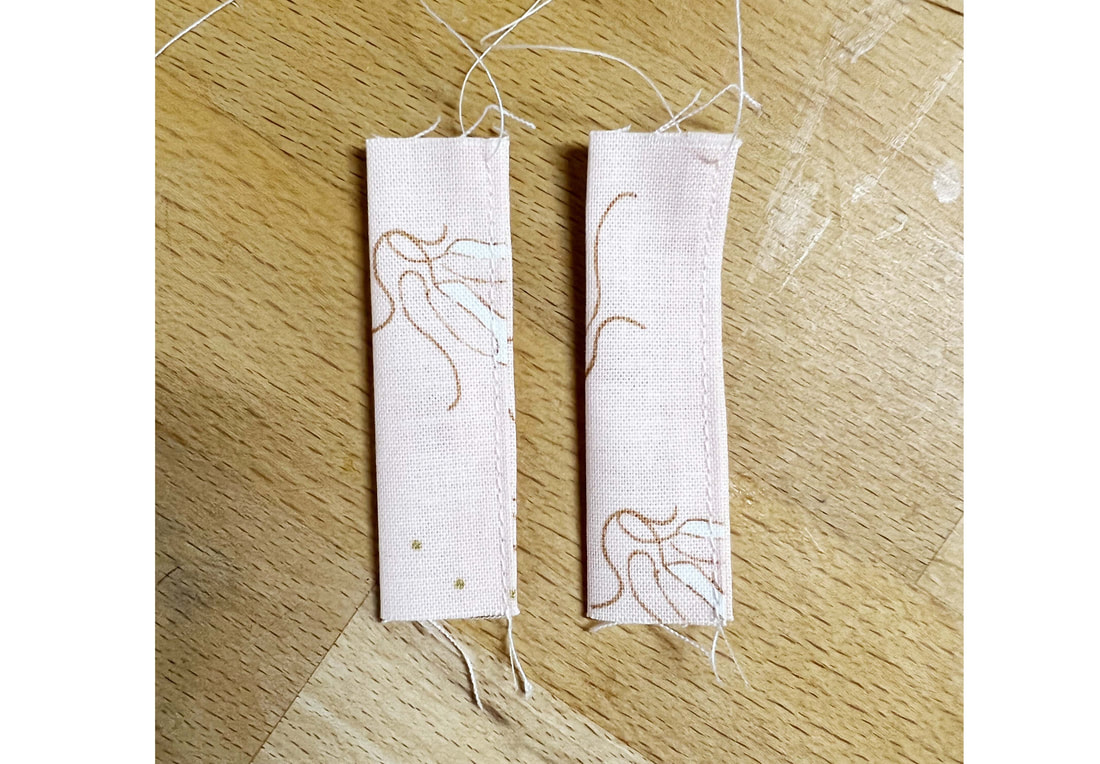
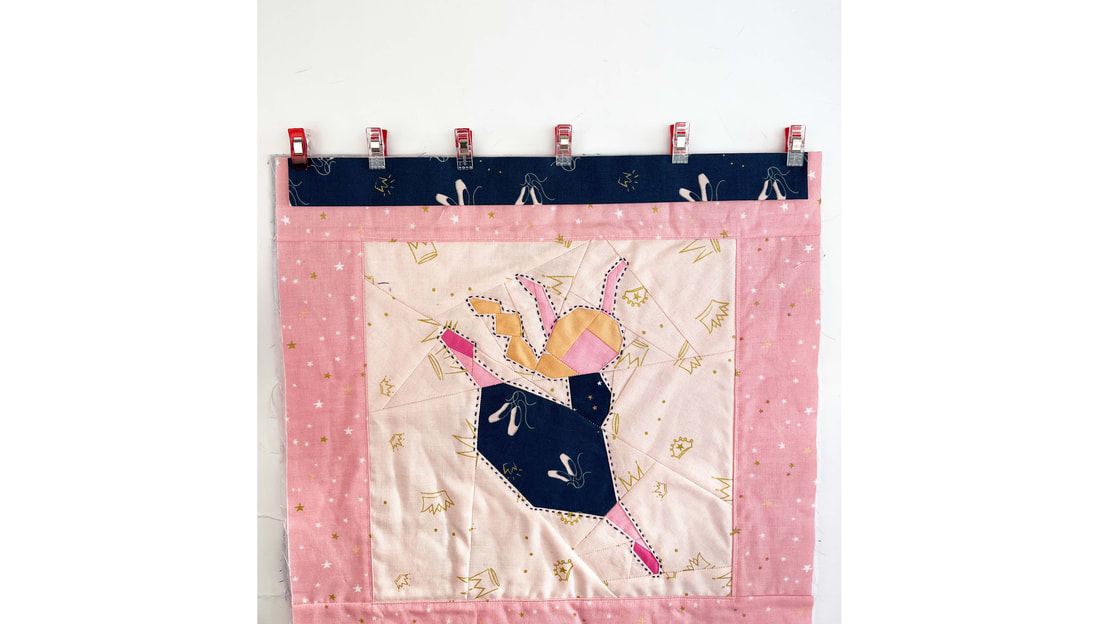
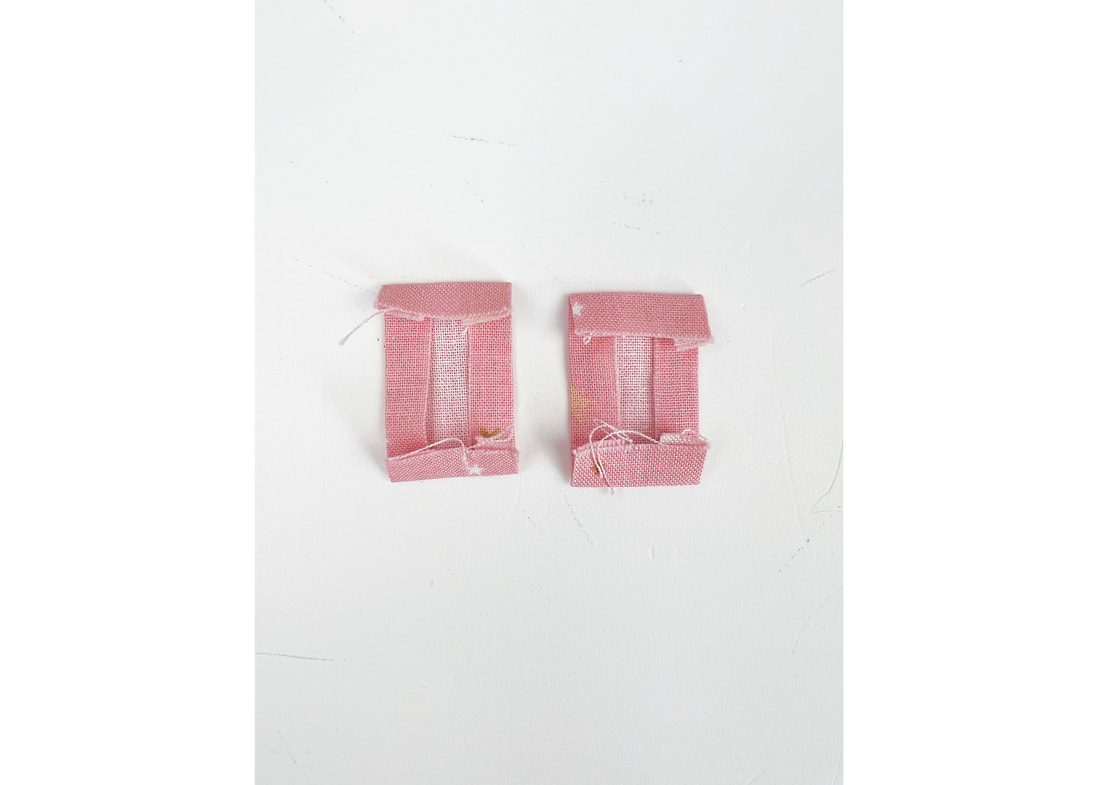
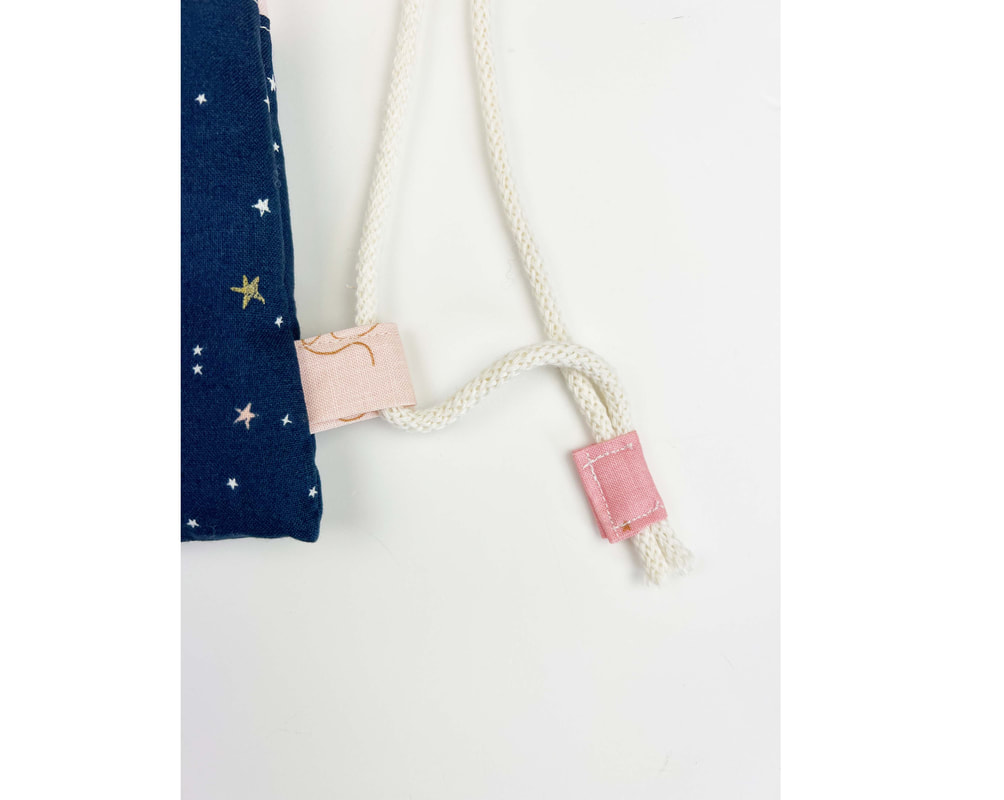
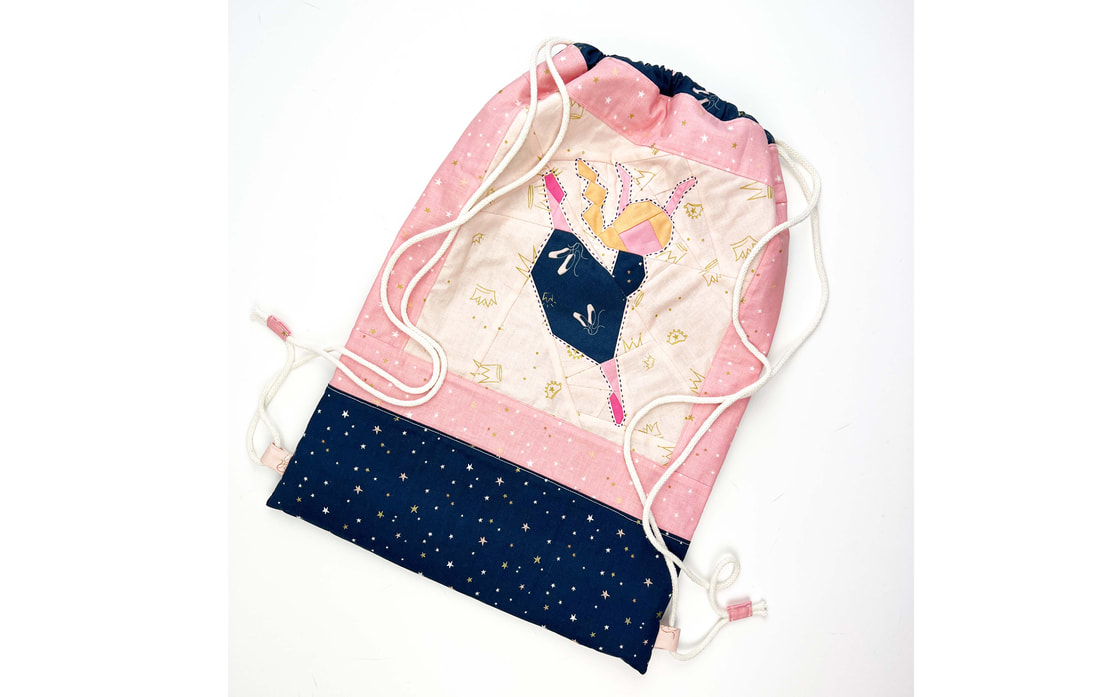
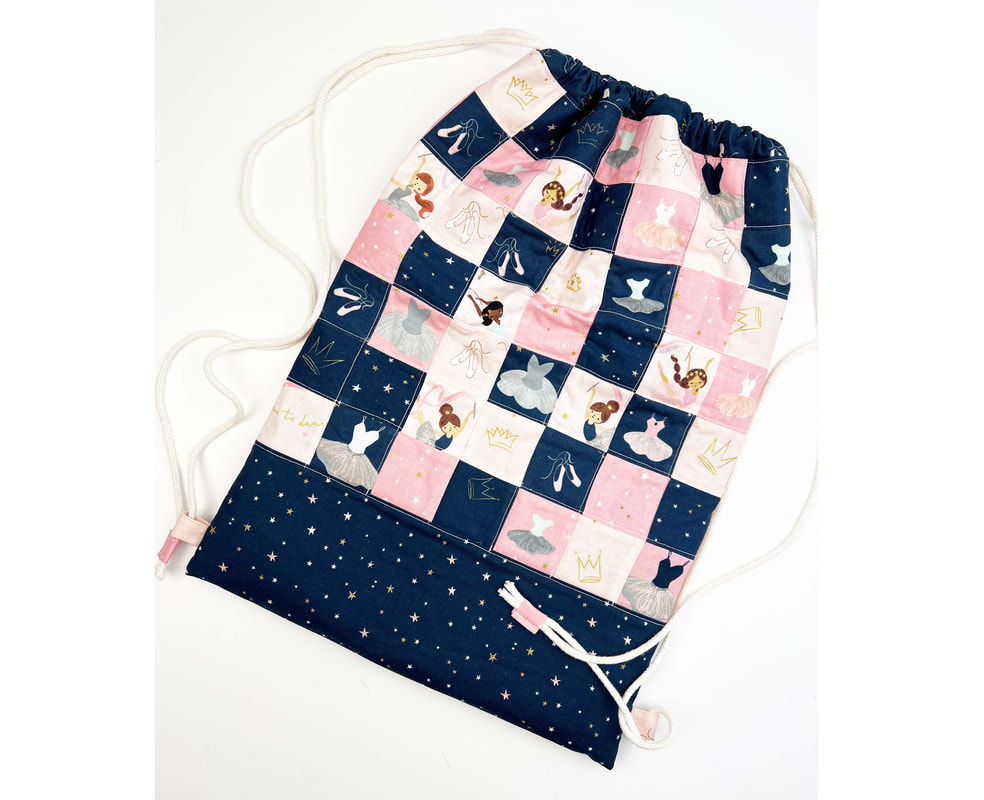
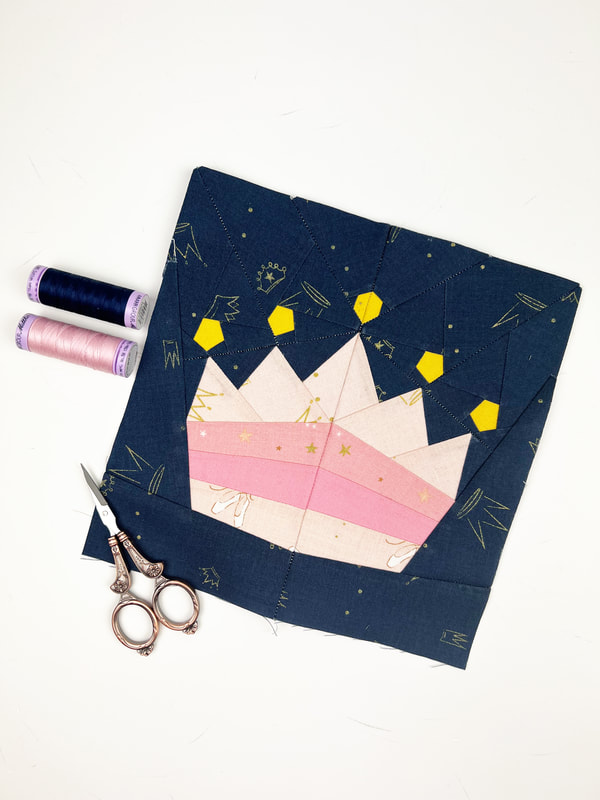
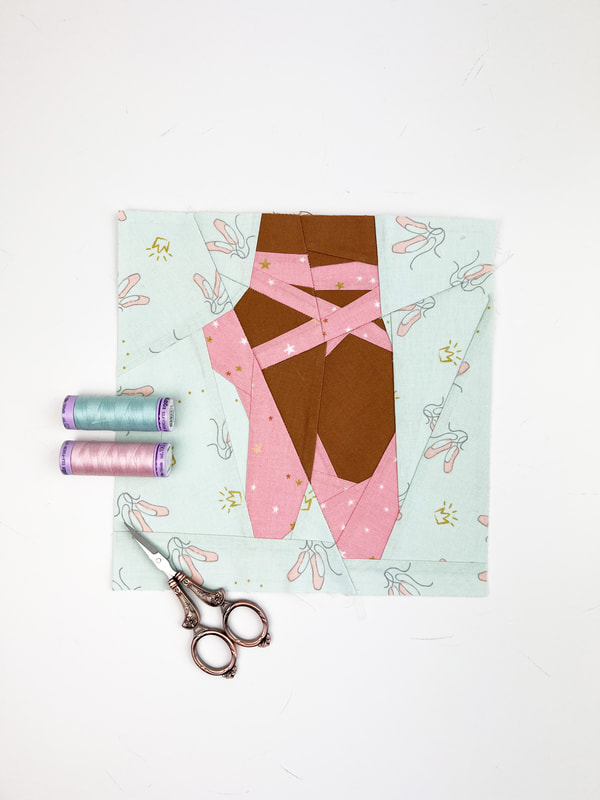
Do you have little dancer children? Do you want them to have the cutest ballet bag ever? You have come to the the right place. Riley Blake Designs just released this absolute perfect fabric series called 'Spin & Twirl' for stylish dancers. It's not too girly, of course it has pinks and whites, but the navy is such a perfect balance and gives this fabric series a classy touch. So let's get sewing, and let's make the best ballerina bag for our little dancer kids. 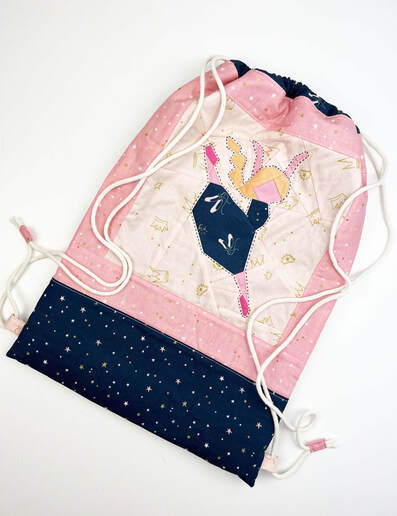 cutest ballet dancer bag ever Finished bag size: 14" wide x 18" high Materials needed: (width x hight) - 1 ballerina quilt block 10"x10" fabric around the quilt block: - 2x strips of fabric 2,5"x 10,5" - 2x strips of fabric 2,5" x 14,5" fabric for the bottom: - 1x 14,5" x 10" fabric for back: 49 squares of 2,5"x 2,5" ( or one piece of fabric 14,5"x 14,5") lining: - 1x piece of fabric 14,5" x 38" extras: - 1x piece of thin fusible batting (for example Vlieseline H630) - 2x pieces of fabric for the loops 2,5"x 2" - 2x pieces of fabric for the tabs ( cords) 2"x 1,5" - 2x pieces of fabric 14 1/4"x 2,5" for the casing at the top. - 2x pieces of 72" cord. Instructions: 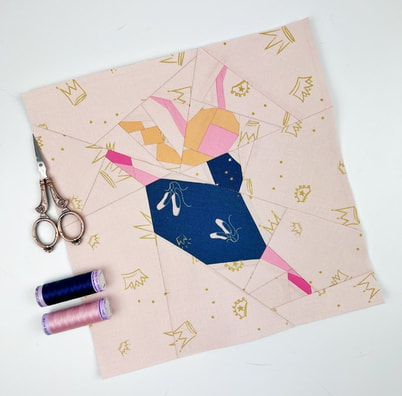 ballerina quilt block 10"x 10" 1. Sew the ballerina quilt block ( or any other quilt block of the ballet series) in the 10"x 10" size. The block will be 10,5"x 10,5" when you finish it. (10"x 10" refers to the block size when incorporated into a project) 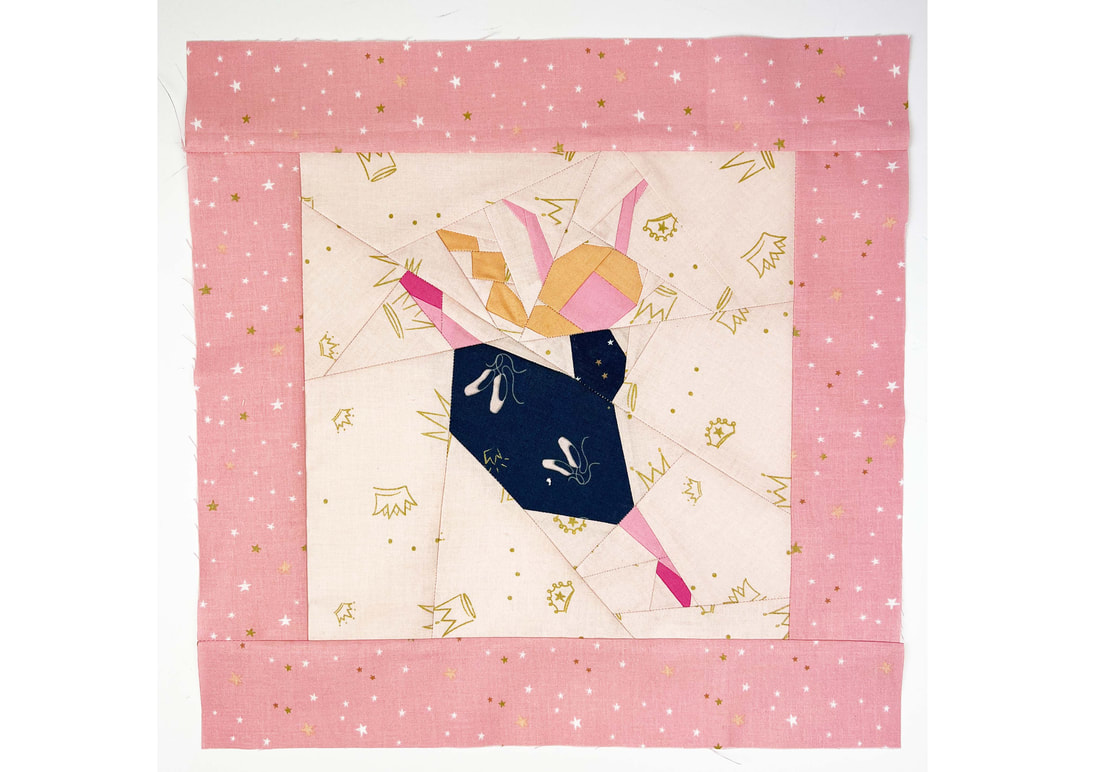 attach the fabric strips to the quilt block 2. Cut the fabric strips for the sides of the quilt block. (if you're using directional fabric, check the direction of the print before cutting) Attach the 2,5" fabric strips to the quilt block. First sew the two shorter strips to the sides of the quilt block, then attach the longer strips to the top and the bottom of the quilt block. If you're using directional fabric check the direction before attaching the strips. 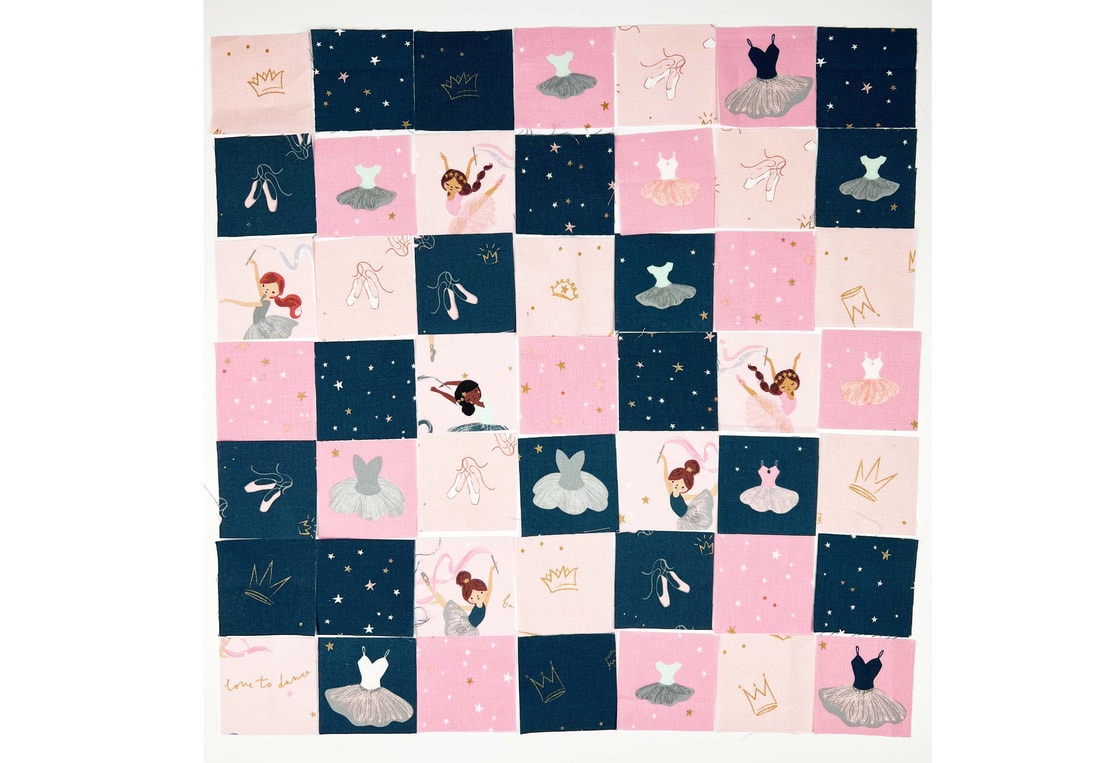 49 2,5" squares for the back of the ballet bag 3. Cut 49 pieces of 2,5"x 2,5" squares and place them the way you want them for the back of your bag. I love them to be totally random. This Riley Blake Designs 'Twist and Twirl' fabric line is absolutely perfect for fussy cutting, so I went a little crazy... LOL. 4. How to sew these small fabric squares together? There are several different ways to sew fabric squares together. For this ballerina bag I liked to sew the square together by rows. Then I pressed the seams in opposite directions, to get perfect nesting seams and therefore perfect corners. ( See video)  Ballerina bag fabric placement 5. Now that you're done with the back of your bag, it's time to place the fabric pieces in the right order and piece them together. You will need to place the front quilt block, then the bottom piece of fabric and the back piece in one row, as shown above. Beware of the directions of your quilt block and back piece, you want them facing each other, or facing the bottom of the ballerina bag. Now sew these 3 pieces together, press again and add fusible batting. 6. If you wish, you can either hand or machine quilt your outer ballerina bag piece. I did a combination of both. I hand quilted around the ballerina quilt block. Then I machine quilted the front and the back piece with simple straight line stitching. 7. Sewing the loops for the cord at the sides of the ballet bag. Cut the fabric pieces, fold them in half lengthwise and press in the 1/4" seam allowance. ( photo 1). Then stitch along the edge with a small seam allowance. ( photo 2). Fold in half so the short edges align and clip in place at 1" from the bottom edge of the bag on both sides. ( photo 3). 8. Making the casing: Cut the fabric pieces for the casing. Fold in the short ends 1/4" and stitch in place with a small seam allowance. Then fold the casing in half lengthwise. Clip or pin casing in place at the top edges of your ballerina bag so that it's centered and the raw edges align.( photo 2)  sew the side seams of outer fabric piece and lining 9. Preparing the outer piece of the ballerina bag and the lining. Fold the outer piece of the ballerina bag, right sides together in half, so the top edges align and stitch along the sides with 1/4" seam allowance. stitch the loops between these seams. You want to stitch across the loops twice for extra strength. Cut the lining piece according to the measurements given. Fold in half right sides together, so the top edges align and stitch along the sides with 1/4" seam allowance. Leave a 3-4" opening on one side for turning the bag later. 10. Turn the lining inside out and place it inside the outer piece, right sides together. Pin or clip the two pieces together so that the top raw edges align. I like to start at the side seams and place those on top of each other, then clip the rest. The casing will be between the two pieces. Now stitch along the top edge with a 1/4" seam allowance. Turn the bag inside out through the opening that you left in the side seam. Close the opening with a small seam allowance. Push the lining inside the bag.  stitch along the top edge of the ballerina bag 11. Stitch along the top edge of the ballerina bag. 12. Adding the cord to the bag. I love these little tabs on the cord, but you can also just tie the cord with a knot or add some beads. For the tabs, cut the fabric pieces as mentioned above and fold in a 1/4" seam allowance on the longer edges first, then fold in the shorter edges 1/4" and press. (photo 1) - How to put in the cord into the casing of the bag? You need to put the cord through the casing before you attach the tabs. Attach a large safety pin to one end of the cord and go through the front part of the casing onto the back part of the casing coming out at the same side you went in. I was going in from the right with the first cord, going through the back part of the casing and coming out on the right as well. Going in from the left with the second cord through the front part of the casing onto the back part of the casing coming out again at the left with the second cord. Go through the bottom loops with one end of the cord on either side of the bag. ( photo 2) Fold the tab in half and place both ends of the cord in the center and stitch in place. Repeat for the second cord. And here you go all done and finished, easy enough, right? Do you want to make another one? I absolutely think so :-) Here are three more quilt blocks, that I designed especially for this fabric series. Which one is your favorite? Thank you Riley Blake Designs for the opportunity to design this quilt block pattern series and for supplying the absolutely adorable fabric series 'Spin & Twirl' that I used in this quilt pattern series. Happy sewing everyone! Ingrid xx
2 Comments
Leave a Reply. |

Author
Ingrid Alteneder Archive
March 2022
Categories
All
|


 RSS Feed

|
Visit us at
|