|
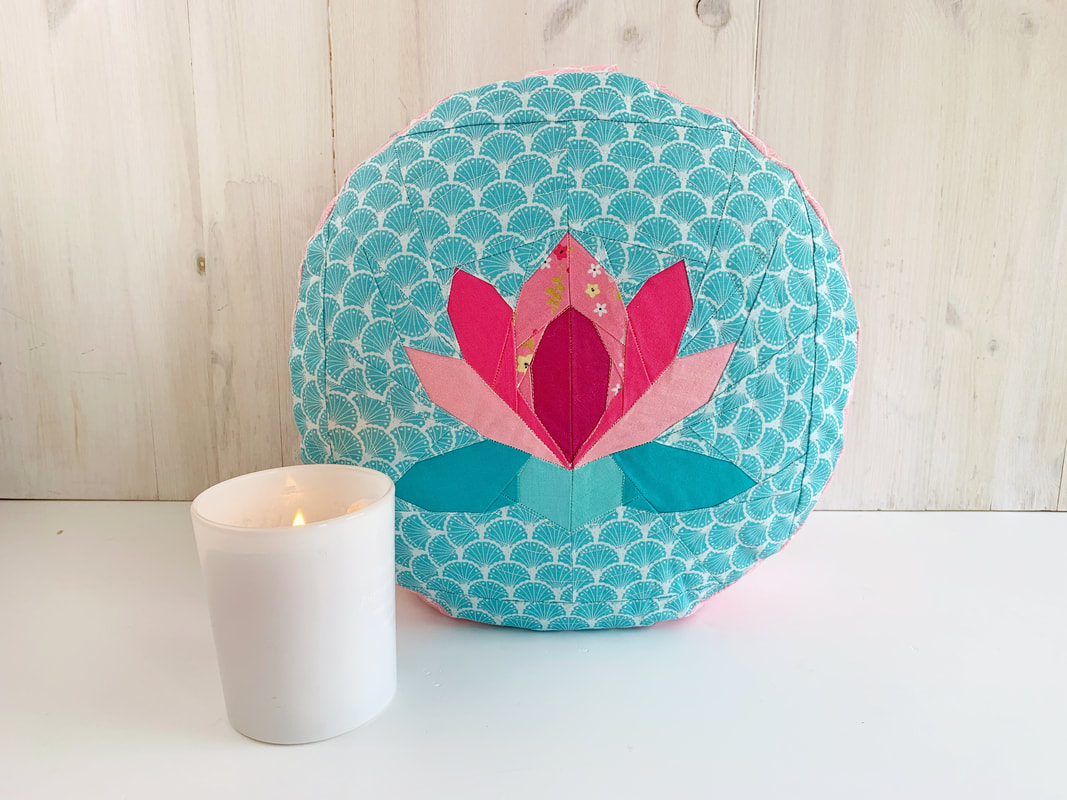
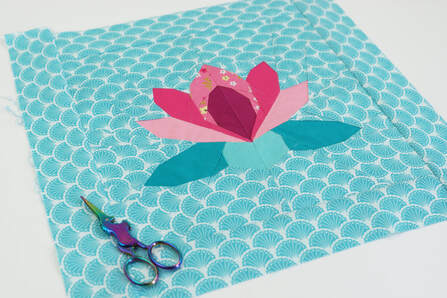
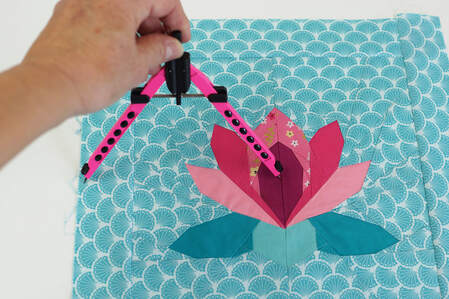
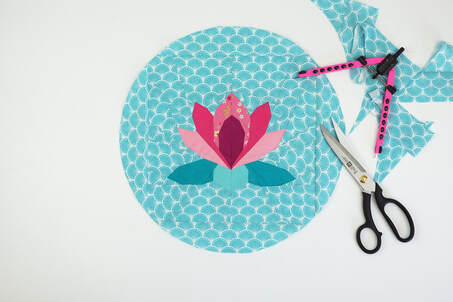
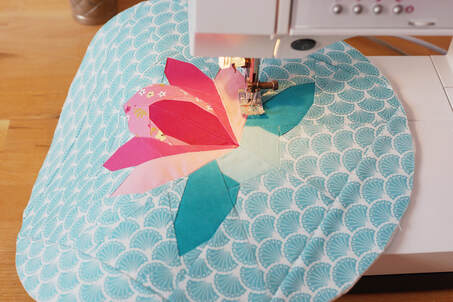
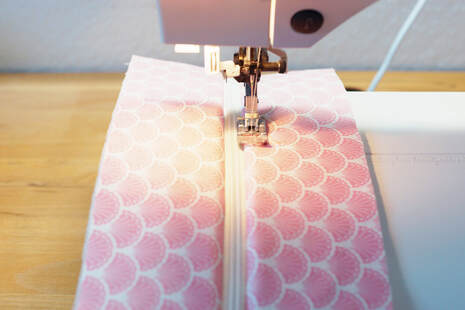
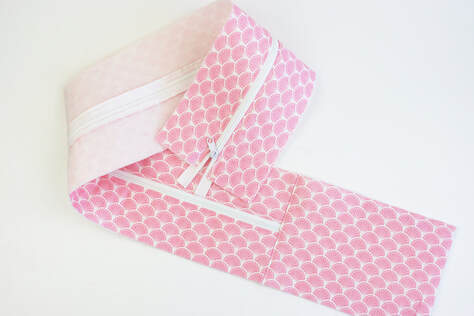
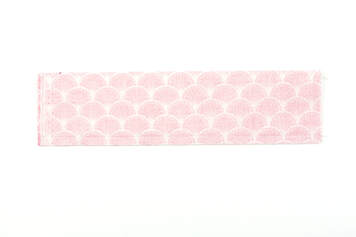
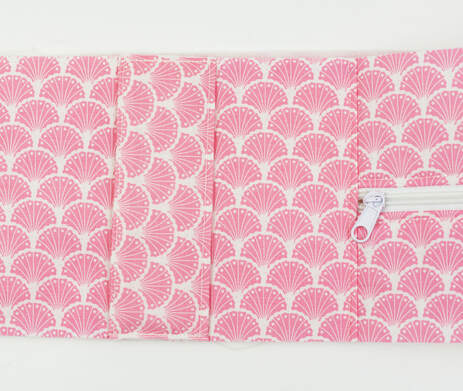
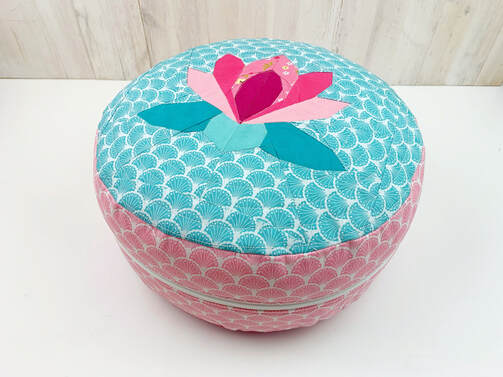
Materials needed: (all measurements are width x height) For the pillowcase top: > 1 FPP Block of lotus flower in 8”x 8” size (unfinished 8.5”x 8.5”) > 2 2 strips of fabric 3” x 8.5” > 3 2 strips of fabric 3”x 13” > 4 one piece of fusible interfacing 13” x13” For the side panel: > 1 2 strips of fabric 32.5” x 3” > 2 2 pieces of fusible interfacing 32.5” x 3” > 3 1 strip of fabric 7” x 5.5” > 4 1 strip of fusible interfacing 7”x 5.5” > 5 1 endless zipper + slider 32.5 ” length > 6 2 pieces of fabric (for the handle) 2.5” x 6” > 7 1 piece of fusible interfacing 2.5” x 6” For the bottom: > 1 one piece of fabric for bottom of pillow 13” x 13” > 2 one piece fusible interfacing 13” x 13” Before you start: Read the instructions carefully Seam allowance is always 1⁄4” unless mentioned otherwise. Instructions: 1. Cut out all your fabrics as mentioned above. 2. Sew your lotus flower quilt block, it will measure 8.5” x 8.5” 3. Attach the side strips to your quilt block 4. Draw a 13” diameter circle (or a 6.5” radius) 5. Cut out a 13” diameter circle 6. Iron on fusible interfacing and quilt to your liking 7. Attach the fusible interfacing to the side strips of fabric ( 2x 32.5”x 3” and 1x 7”x 5.5”) Sew the endless zipper to the long sides of the two 32.5” x 3” strips of fabric. And top stich along the zipper. 8. Stitch the 7”x 5.5” fabric to one end of the zipper part. Top stitch along the seam as well. 8. Lay the two pieces of fabric for the handle right sides together and attach fusible interfacing to one side. Stich along the long edge with a ¼” seam allowance. Then turn inside out and top stich along the long edge again with a small seamallowance. 9. Attach the handle to the side panel and cut to width of panel. 10. Now clip the side panel to the top circle till the side panel ends meet. This is where you stick your side seam, this way the side panel fits exactly to your yoga pillow top. Once the top piece is stitched in, repeat for the bottom circle. 11. Open up your zipper and turn your pillowcase inside out. Tadaaaa your yoga pillowcase is all done.... Now take your time for some mindful meditation and enjoy :-) Thank you so much to Riley Blake Designs for supplying the absolutely adorable Stardust fabric series designed by Beverly McCullough that I used for this amazing project. Ingrid xPs
0 Comments
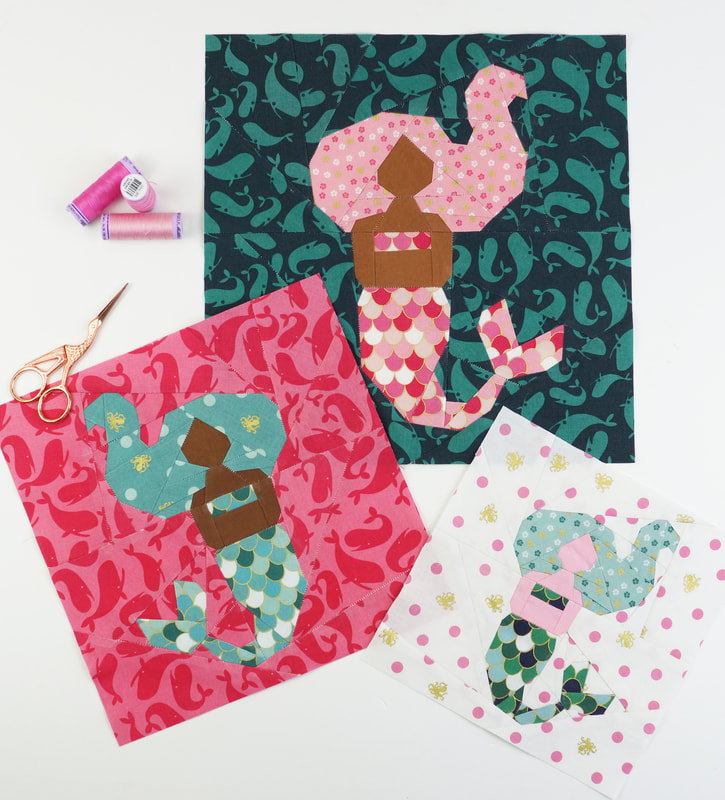
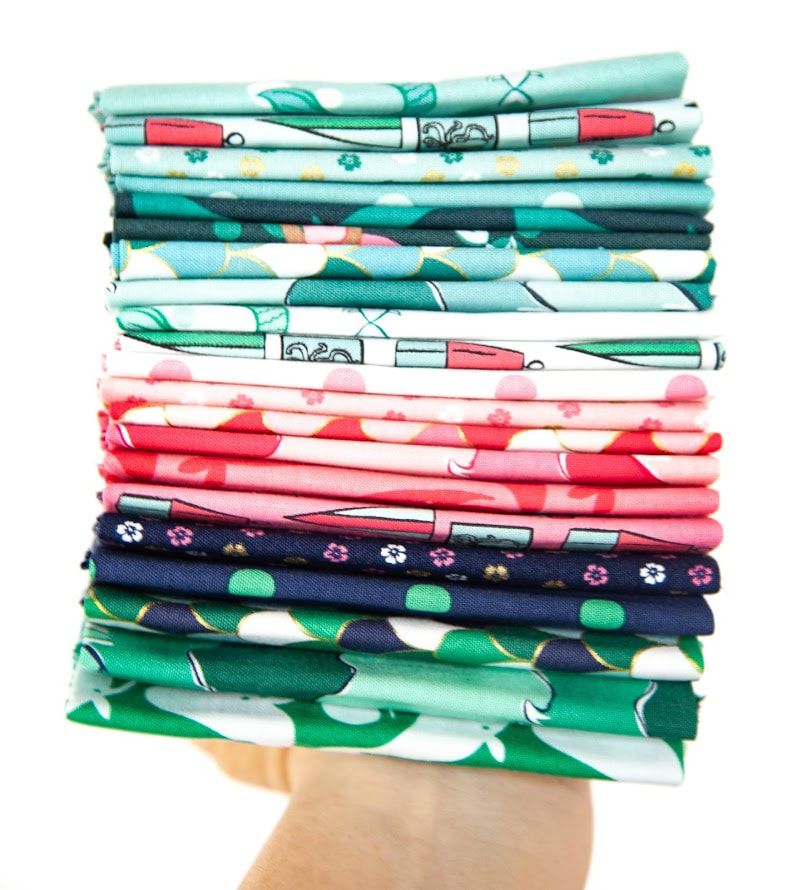
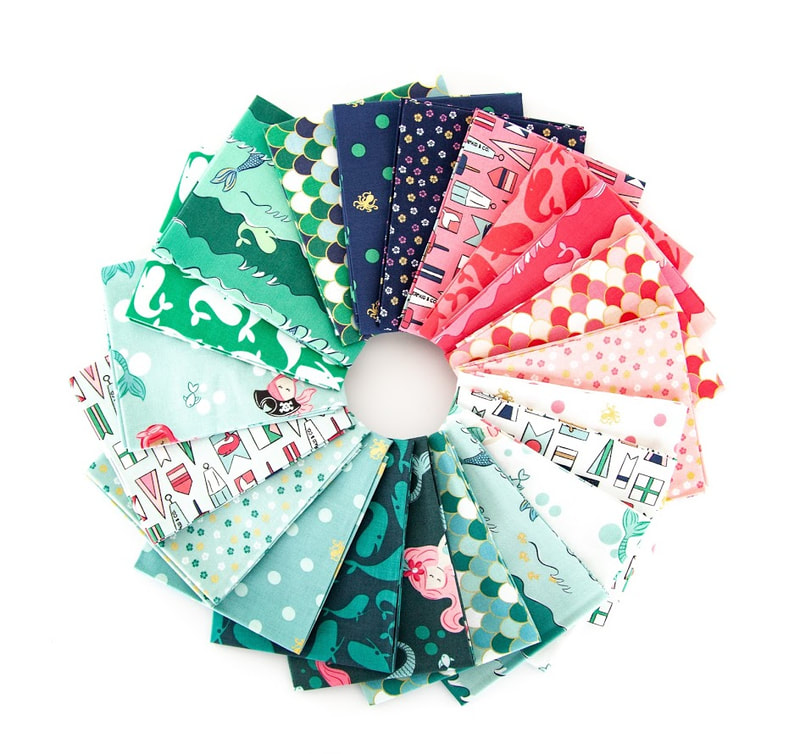
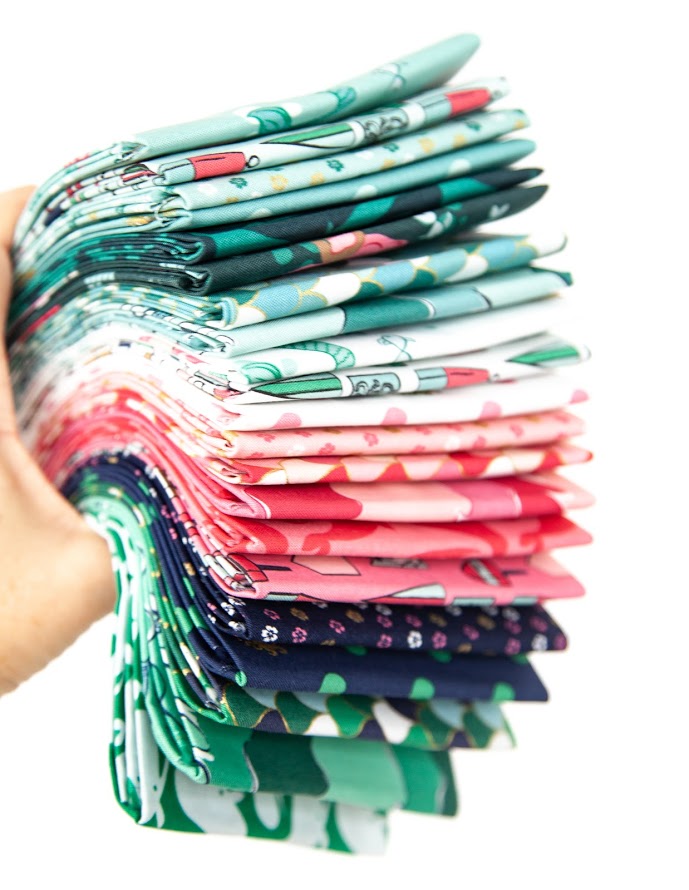
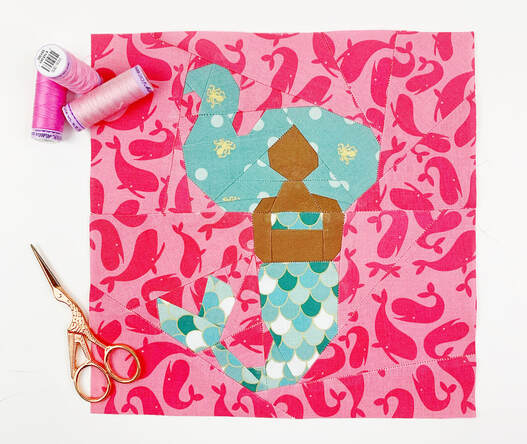
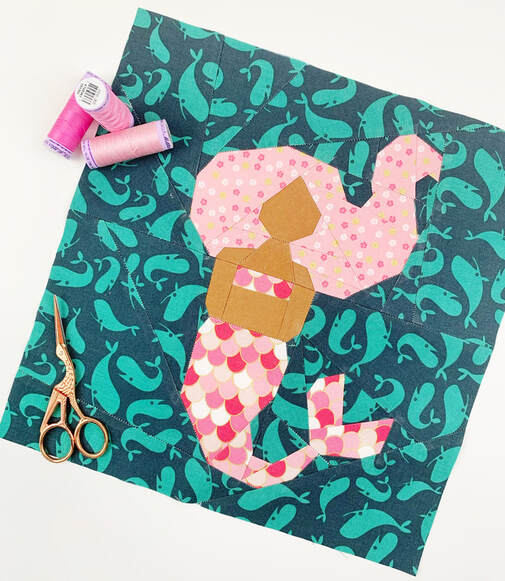
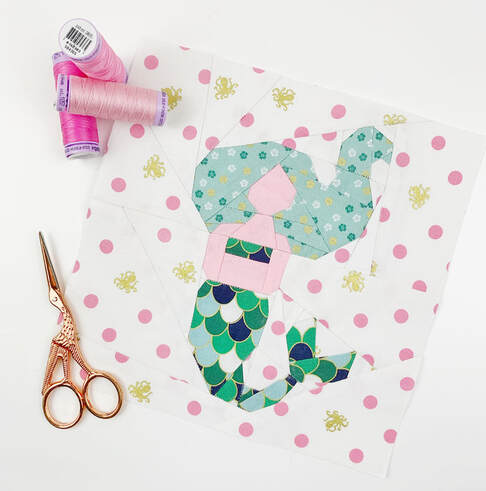
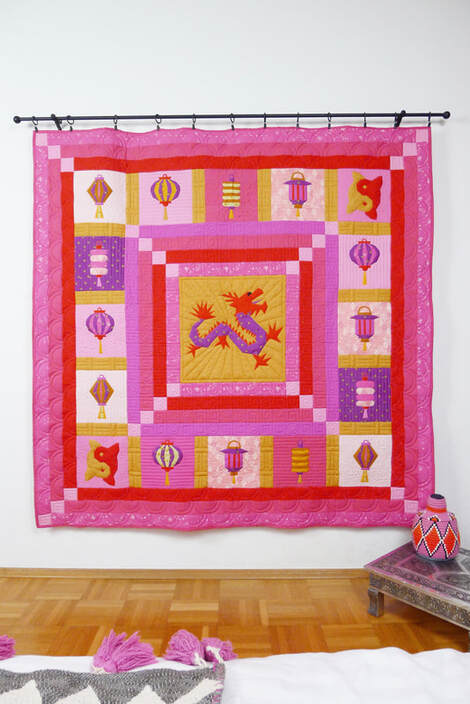
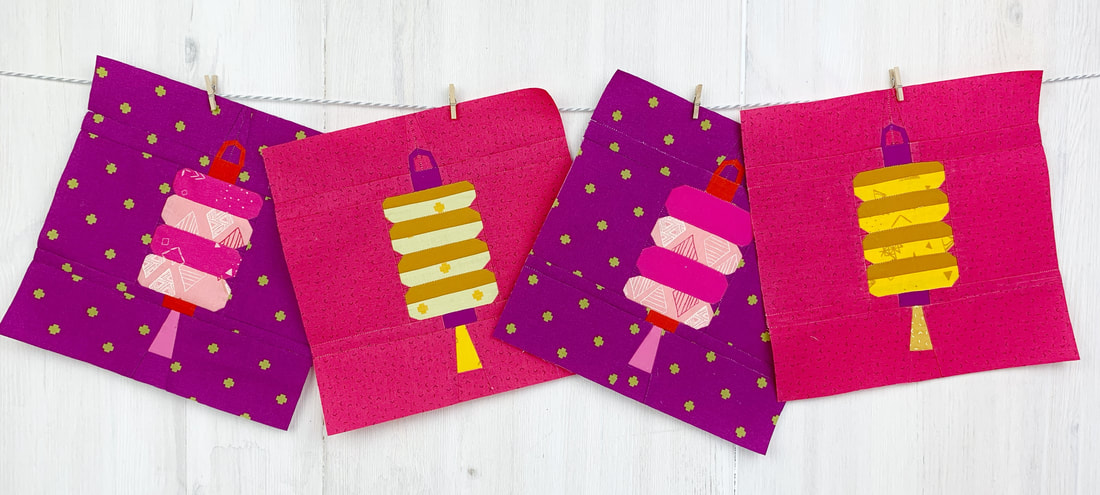
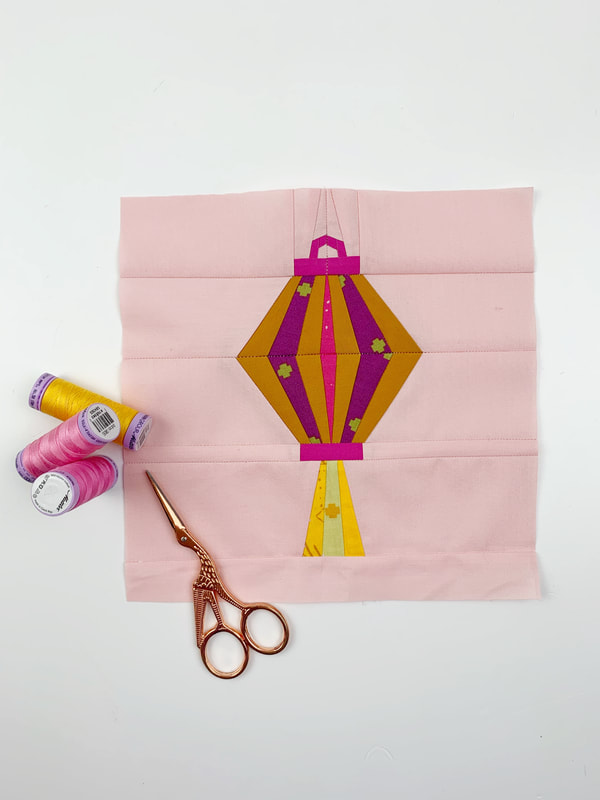
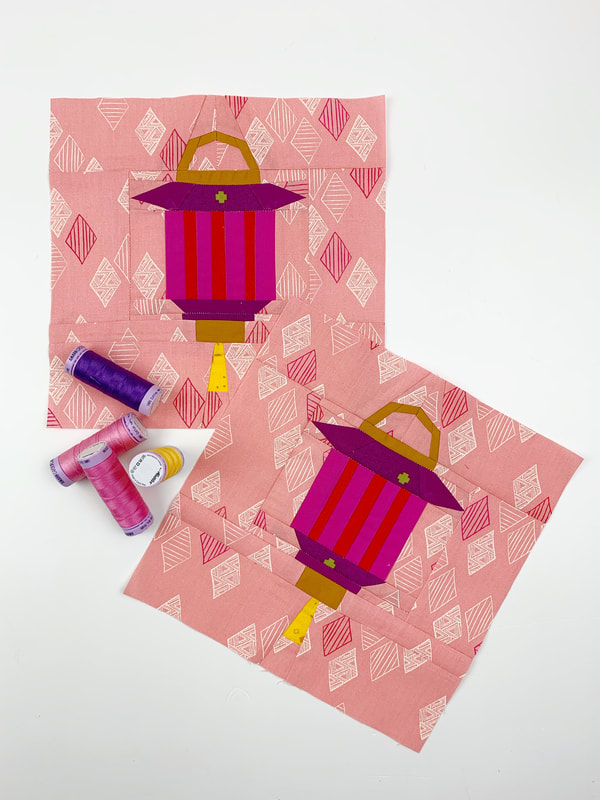
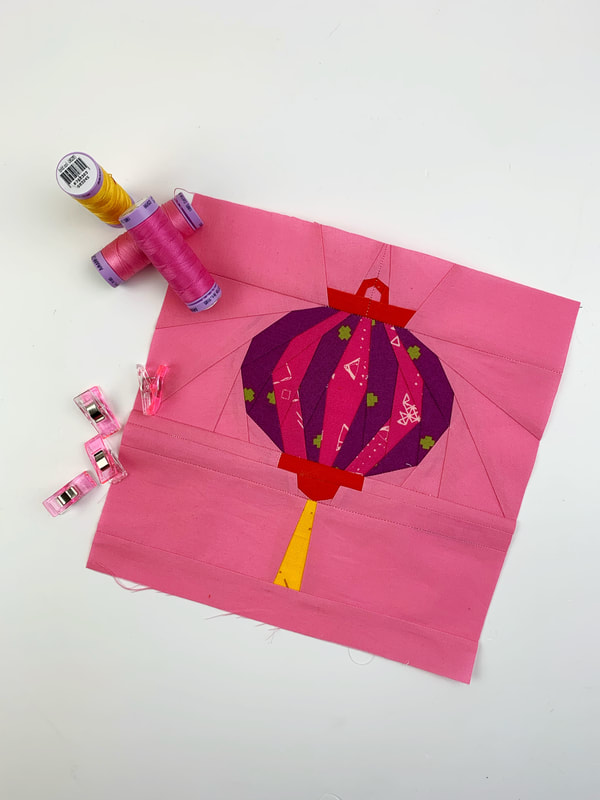
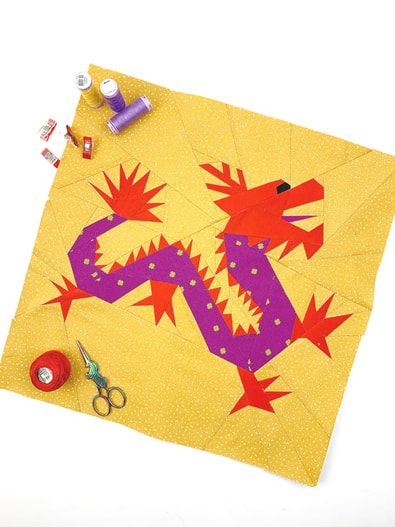
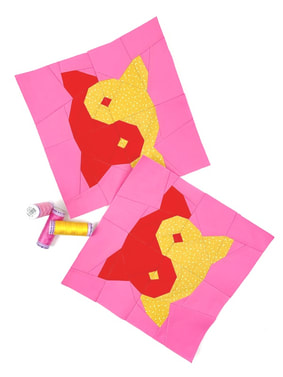
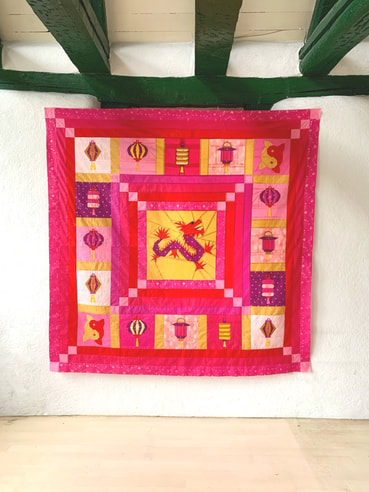
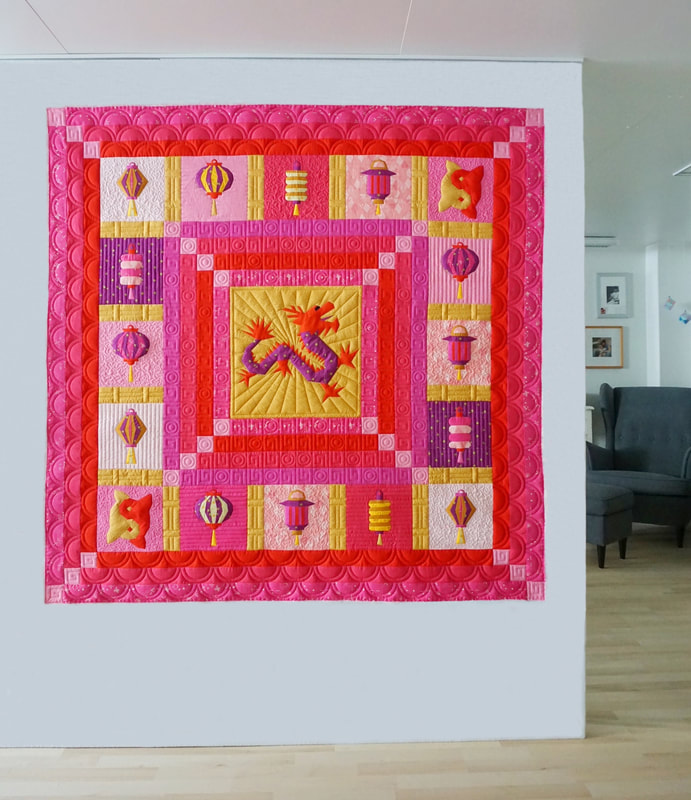
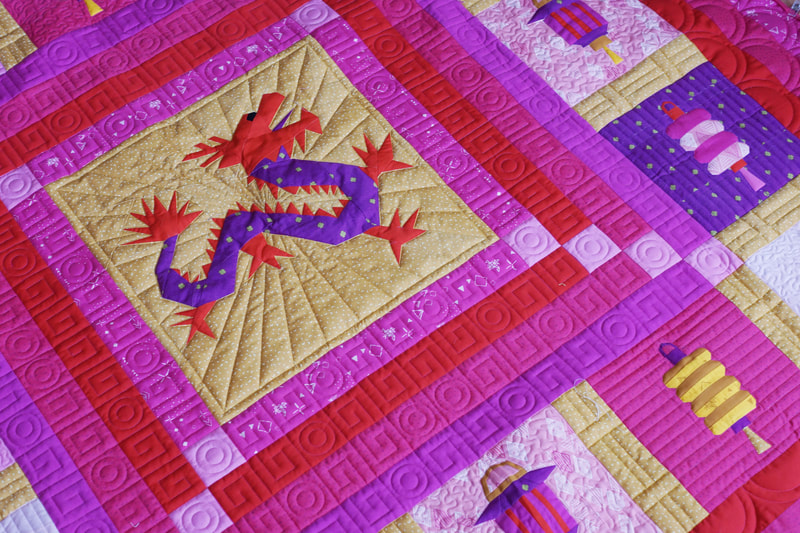
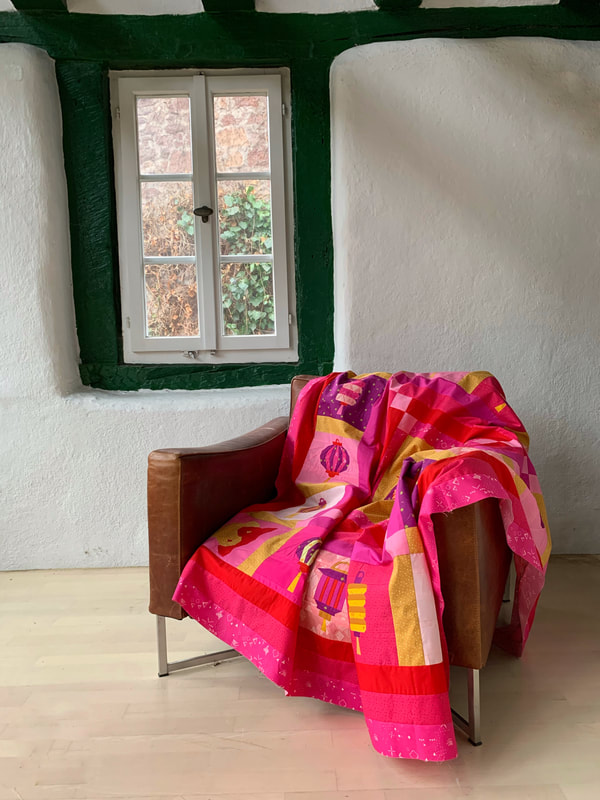
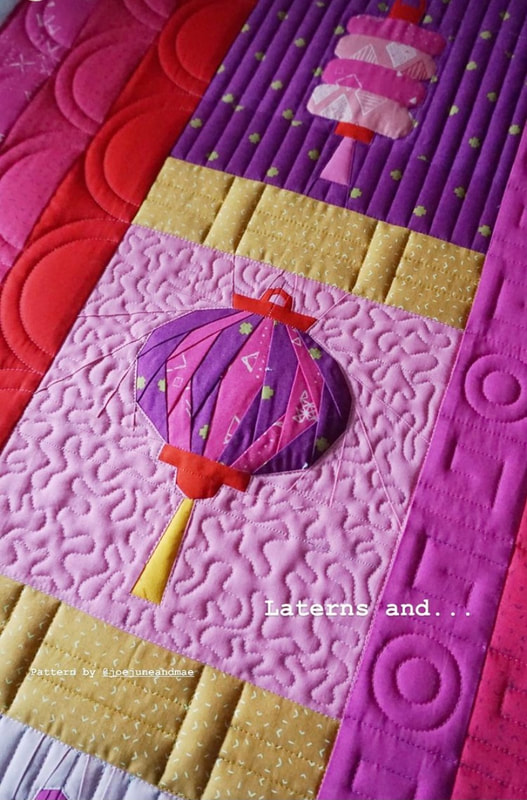
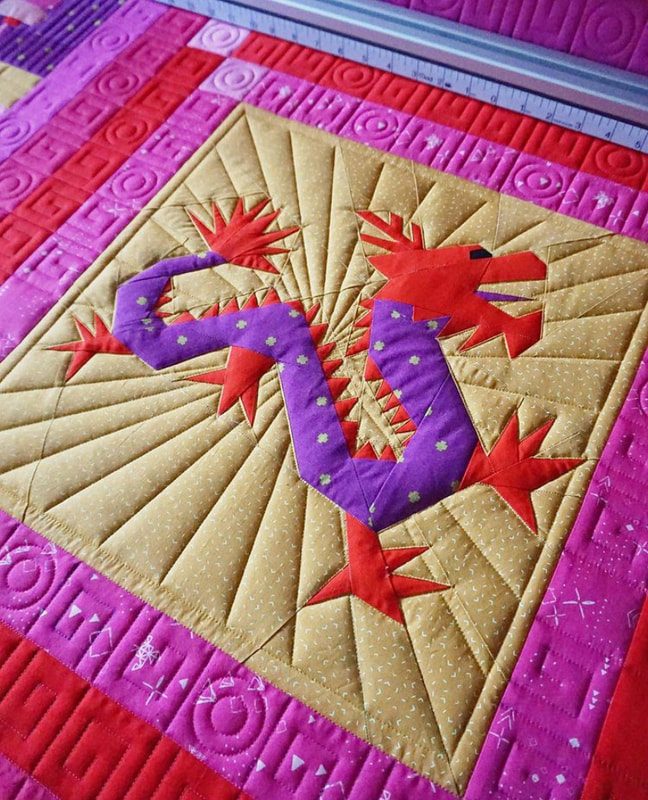
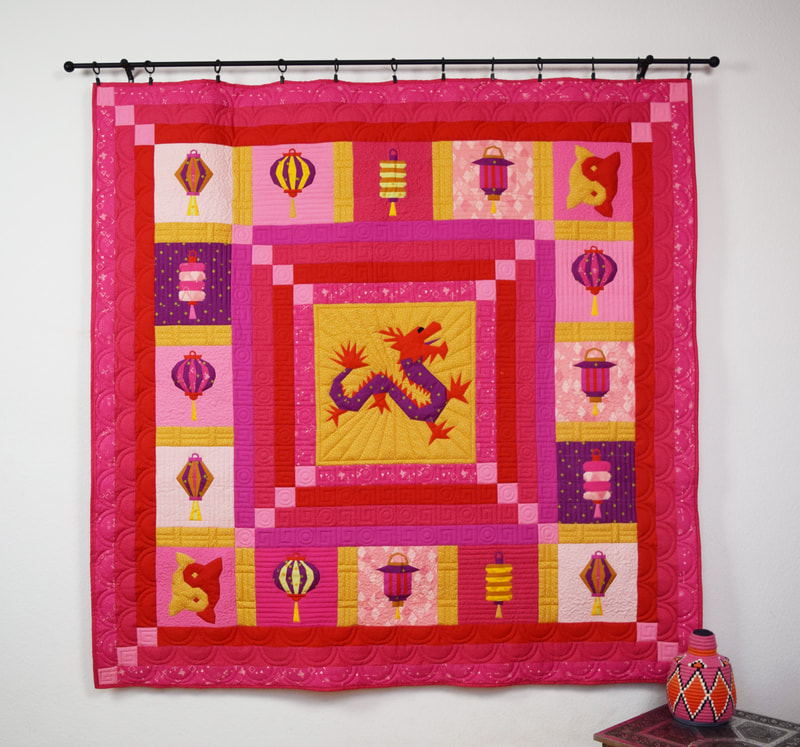
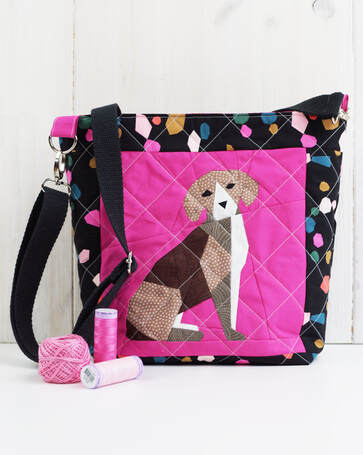
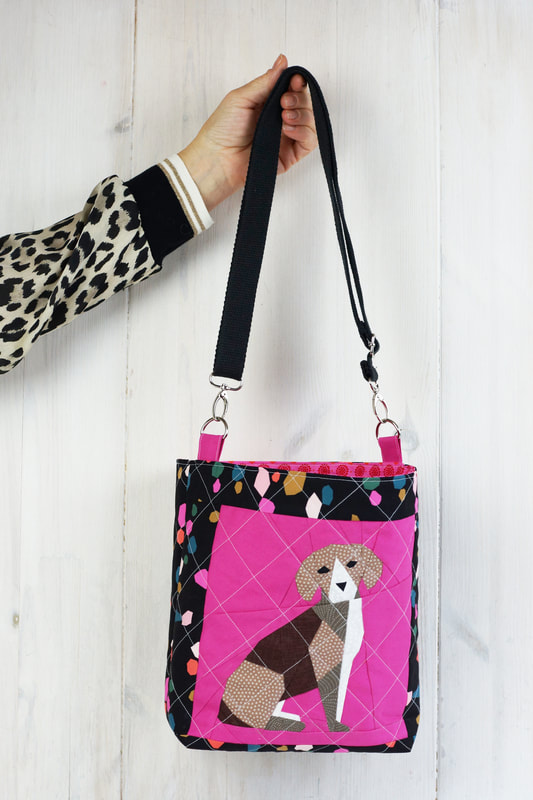
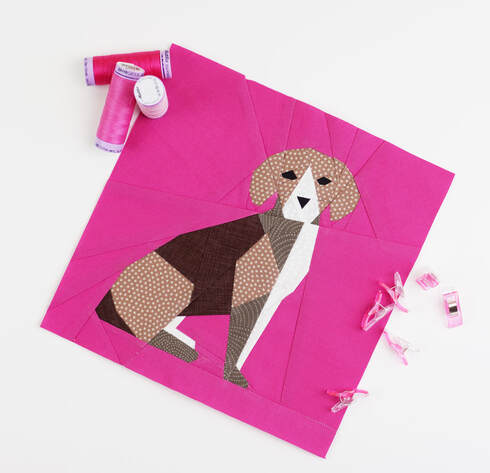
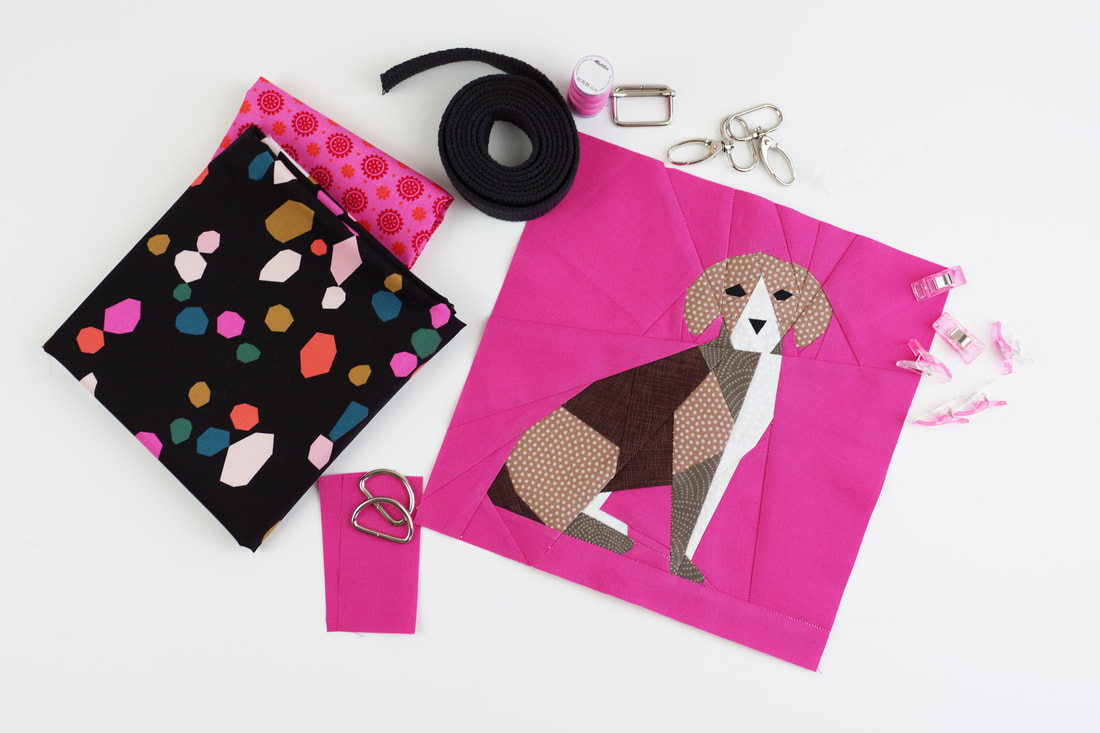
Oh, when I saw this new fabric line from Riley Blake Design called Ahoi Mermaids! by Melissa Mortenson, I just new I had to design a matching pattern. This mermaid pattern comes in three different quilt block sizes and it will be perfect for too many quilting projects. I think I need to make a mini quilt for my youngest daughter. And just because these Mermaids are so cute and pretty, here are some Mermaid facts or stories: 1. The earliest mention of a Mermaid legend comes from Syria. The woman's name was Atargatis. Apparently she was beautiful and powerful and fell in love with a shepherd boy. After she had his baby girl Semiranis the boy died and Atargatis became depressed and very , very sad. So she decided to throw herself in the ocean. But because of her beauty, the gods saved her and changed her into a Mermaid, with only her lower body being transformed into a fishtail. 2. The name Mermaid literally means 'woman of the sea' The old English word Mer means sea and maid means woman... There we go Mermaid, ahh woman of the sea :-) 3. The aquamarine is said to be made out of a mermaids tears 4. Seacows or Manatees were often mistaken for Mermaids. Many lonely and maybe drunken sailor saw these huge mammals and thought they were Mermaids. Christopher Columbus was said to have seen ' ugly and fat Mermaids'. I mean can you blame Christopher Columbus or the sailors? Months at a time at sea... but then again apparently only 5% of the ocean has been explored, so who knows for sure. 5. A Mermaids kiss gives you gills. According to an old folks tale, if you kiss a Mermaid you can breathe under water. 6. The color of a Mermaids tail depicts her mood. You be the judge, because whatever color a Mermaids tail is, is a clear sign of her mood. And of course it totally reflects her personality... well if was a Mermaid what color tail would I have ? Thank you so much to Riley Blake Designs for supplying the absolutely adorable Ahoi Mermaids! fabric series designed by Melissa Mortenson that I used for these adorable Mermaid quilt blocks. So what color tail will your Mermaid have? Happy swimming... ahh sewing Ingrid xThe story of my Chinese New Year quilt. Our youngest daughter was born in Taiwan. So we get to celebrate Chinese New Year as well as our regular New Year. Chinese New year is also called Spring Festival, as it falls at the end of the still very cold and wintry days, but marks the end of those days and welcomes spring, with all its new beginnings and fresh starts. You can also call it the Lunar New Year since its date is set according to the Lunar calendar. The Lunar calendar is still very important in China and South East Asia and all traditional holidays are still celebrated and many people calculate their birthdays according to the Lunar calendar as well. The idea for this quilt was born in January of 2020. I have to admit I always loved paper lanterns, they feel light, breezy and fun and always give a vibe of happiness, don't you think? So I started my Chinese New Year series with all sorts of different paper lanterns. There are 4 types of paper lanterns in this pattern. The longer skinny lantern as you can see in the photo above. A paper lantern that's shaped as a double trapeze. The prettiest lantern of them all, called the palace lantern. And of course the most popular paper lantern, the balloon lantern. A quilt just with lanterns was the first idea, but it needed something more dramatic, so I designed the dragon. The dragon is a symbol of power, strength and good luck in East Asian culture. They supposedly control water, rain, typhoons and anything that has to do with water. Dragons are everywhere all over East Asia - in legends, festivals, astrology, art, names and idioms. Dragons are definitely seen as LUCKY and good, quite different from the evil, dangerous fire breathing dragons of most Western stories. So here is my good luck dragon. Just a dragon and lanterns didn't feel right and complete, so I added another very important Asian sign, the Yin Yang koi fish symbol. It represents duality and harmony in life. In Feng Shui the Koi is tied to the Yin Yang symbol and it is said to represent two Koi, one female and one male and shows that all things in life are connected. How did I decide on the fabric and colors? First of all, I have always been a huge fan of Art Gallery Fabrics, because they are the nicest finest cotton fabric. And when it comes to detailed foundation paper piecing patterns a high quality cotton fabric is very helpful. A light weight cotton just makes your life so much easier when piecing small segments with many seams. It was an absolute joy to work with Art Gallery Fabrics for this quilt pattern. The fabric series 'Matchmade' by Pat Bravo was a real match made in heaven. And second of all my color choices depended heavily on traditional Chinese colors in general and for Chinese New Years in particular. Red is Chinas favorite color which represents luck, joy and happiness as well as it wards off anything evil. Yellow is an imperial color and represents power, royalty and prosperity. So how perfect was the 'Matchmade' series for this quilt project? I had to add a little more pink, since anything without a good splash of pink is just not me :-) Therefore I mixed in some Art Gallery Pure Solids to add some more of my favorite hues. I couldn't be happier with the fabric choices for this Chinese New Year quilt, I think it's the perfect combo. Don't you agree? It took me about two weeks to finish this quilt top. The paper lanterns are fairly quick and easy to sew, they took me about two hours each. The dragon was a great project for a Sunday afternoon. And while this quilt top looks really fabulous as it is, I knew I wanted something really special for it as far a quilting goes. I am usually very content with simpler straight line quilting, but I thought this quilt asked for more. So I called up Iva Steiner @schnigschnagquiltsandmore , and asked her if she would have the time to quilt this beauty. And yes thank goodness she did. So I drove down to Luzern/ Switzerland and brought her my quilt top. It 's about a five hour drive from Frankfurt, but I loved the nice change during our Covid lockdown. And all I can say, Iva did a fantastic job, her quilting is absolutely stunning and the icing on the cake of my Chinese New Year quilt, don't you agree? Thank you so much to Art Gallery Fabrics for supplying the fantastic 'Match-Made' fabric series designed by Pat Bravo that made this stunning quilt possible. And a special thank you to Iva Steiner for her stunning quilting in this Chinese New Year quilt. So who is ready for a Sew Along ? Let me know :-) Happy Lunar New Year.... Ingrid xHey dog lovers, this little dog walking bag is absolutely perfect for you... Our dogs are part of our family and we love them dearly. The kids love playing with the dog and also love walking the dog as long as the sun is shining. The excitement fades quickly if it's raining and when it's cold outside. And it gets worse if they need to look for all of the dog walking equipment before even getting to the front door. That's why you need a dog walking bag. So I decided to come up with a cute little bag pattern, to keep all the dog walking equipment handy. This adorable dog walking bag is small enough to grab quickly, even when just walking around the block. It is big enough to keep all your dog walking kit in one convenient place. And most importantly this dog walking bag is pretty enough to keep by the front door. So win, win, win! Keep all your dog walking items in one convenient bag , the leash, dog litter bags, paw wipes, treats etc. Attach a pretty hook close to your front door and keep this cute dog walking bag right there beside it. You will never leave the house again and forget your dog walking kit. This 'walk my dog' pattern includes a foundation paper pieced beagle quilt block as well as the full pattern for the bag. You will find the comlete pattern including step by step photos, in the newest 'Make Modern Magazine' issue 38. I hope you will enjoy the walks with you puppy with this pretty dog bag. Happy sewing Ingrid x
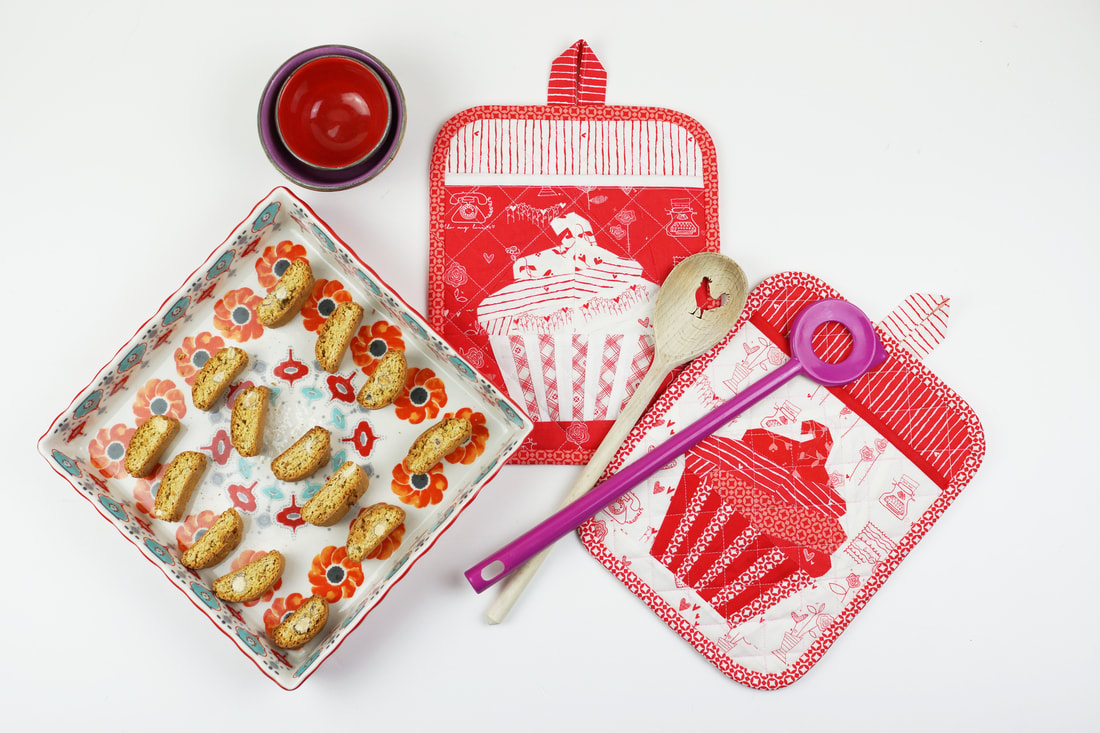
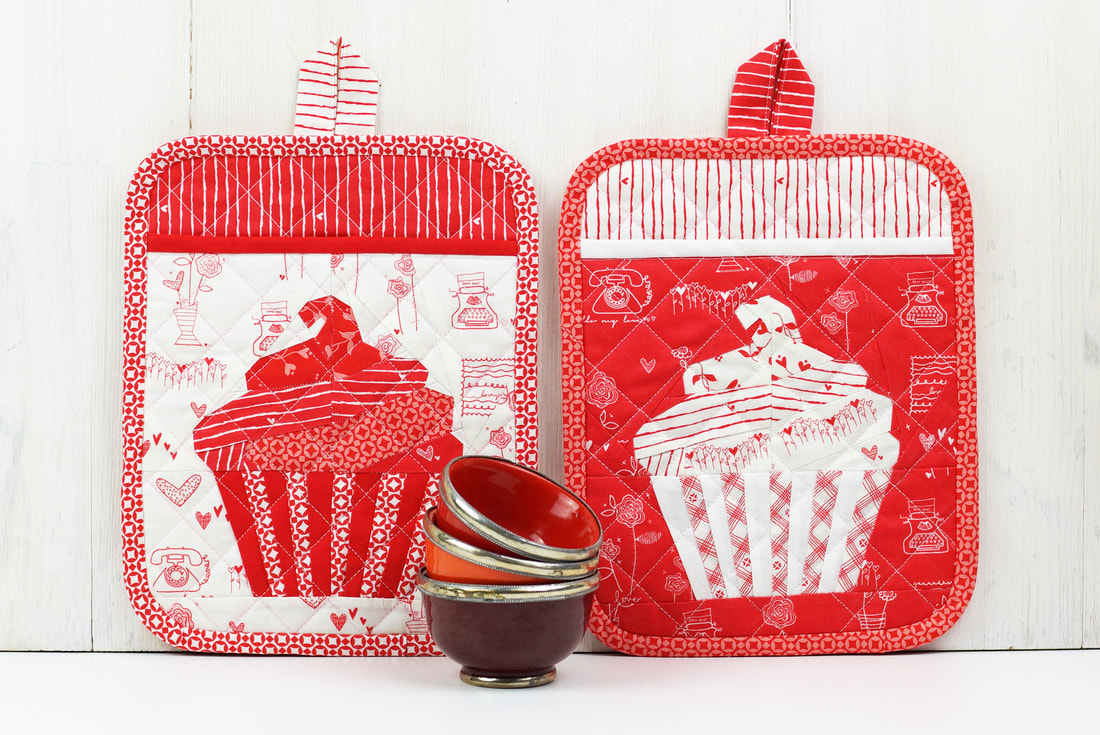
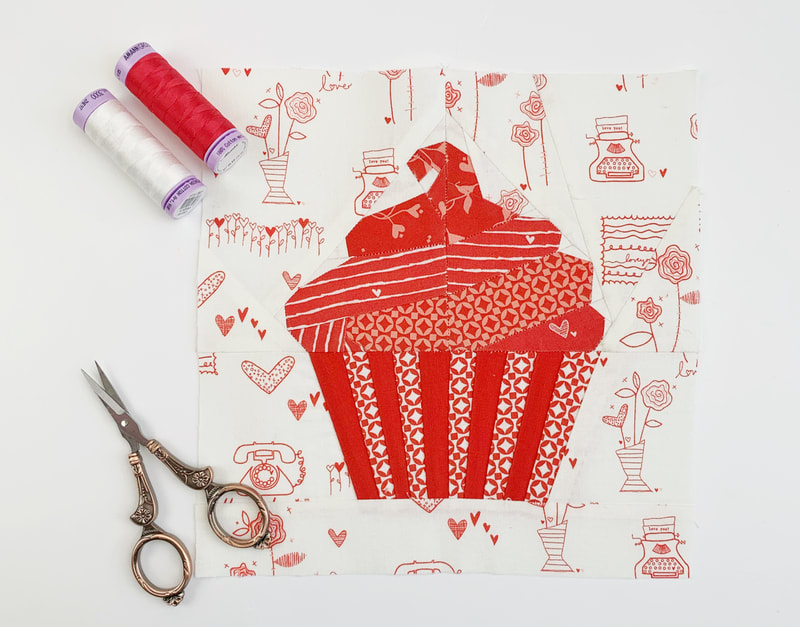
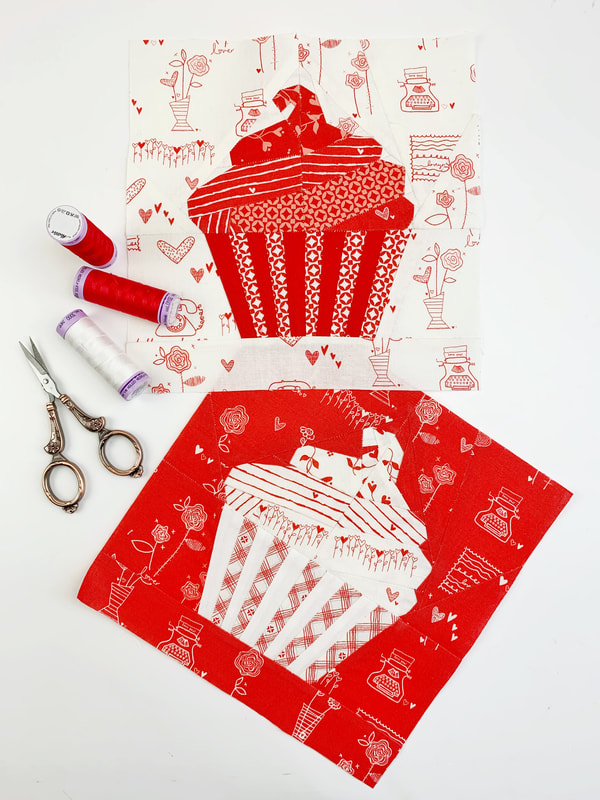
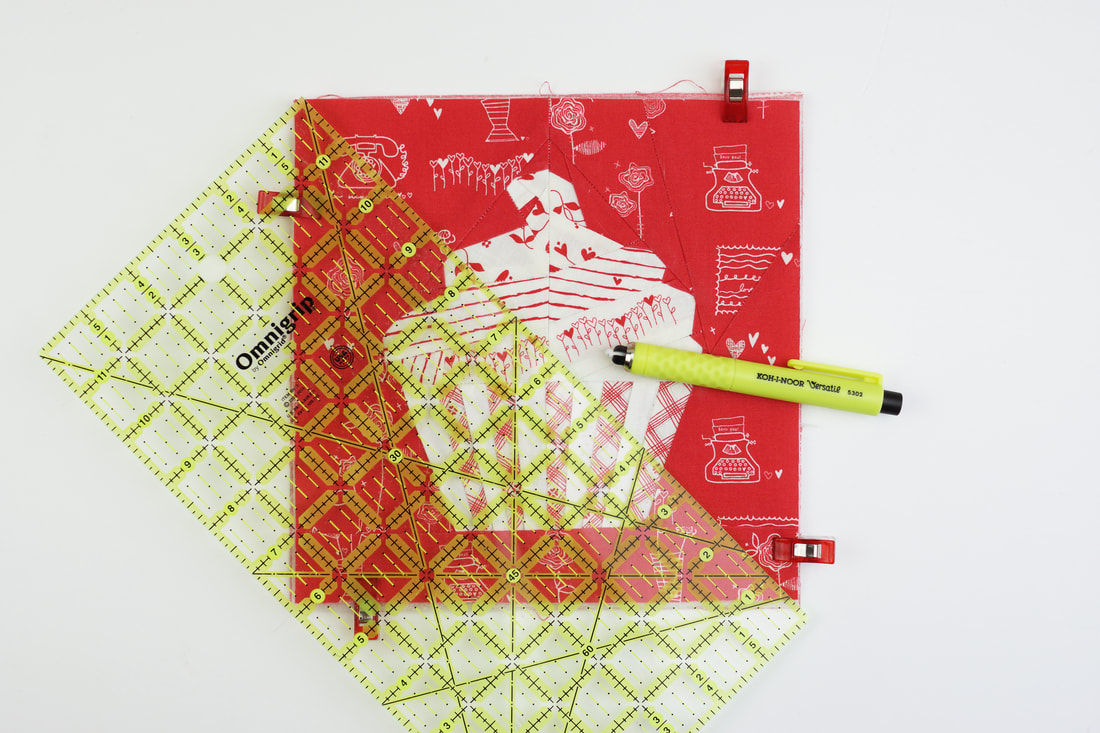
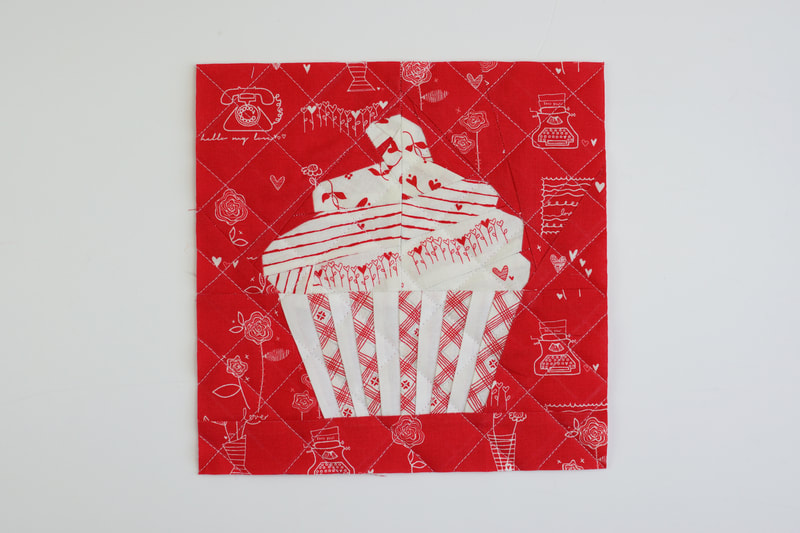
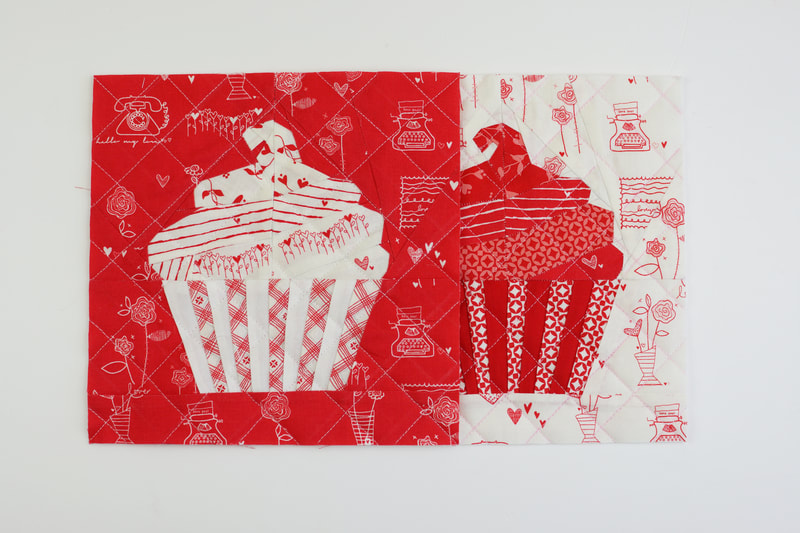
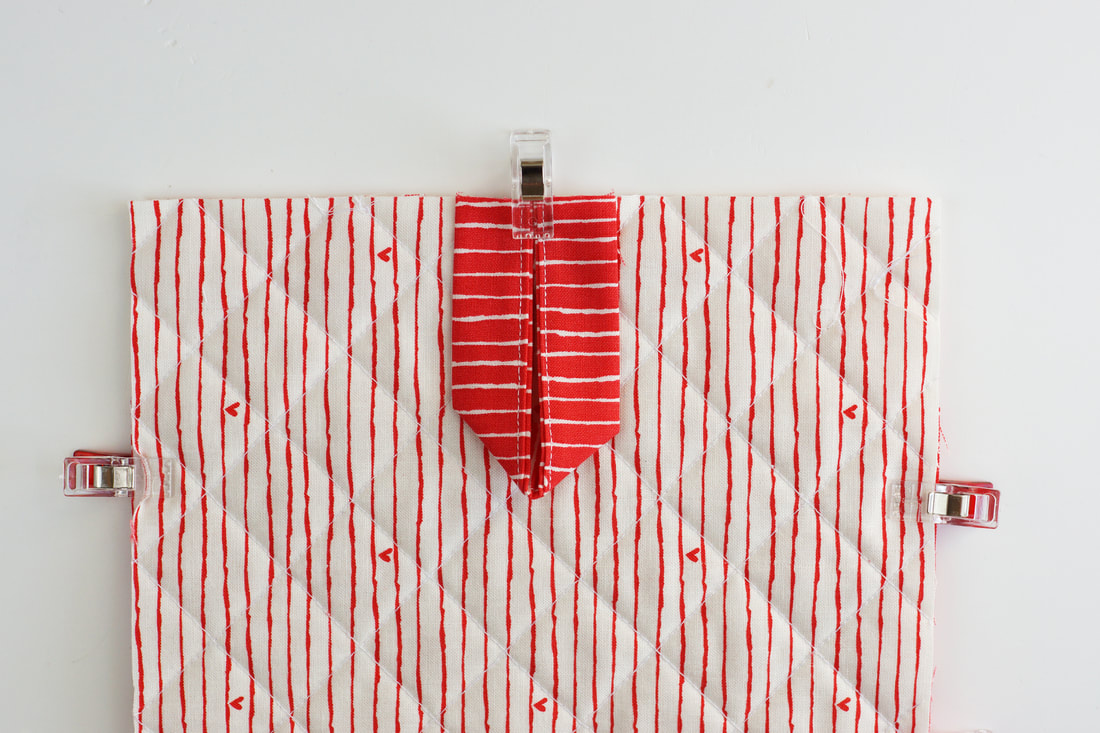
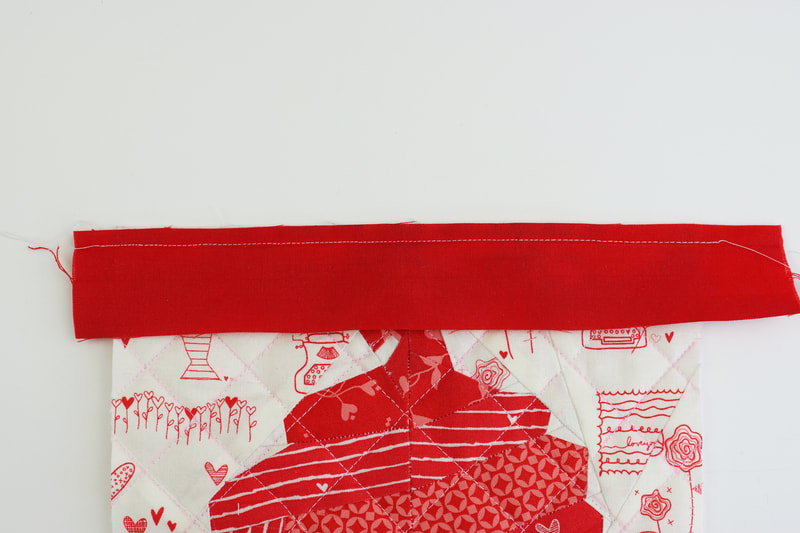
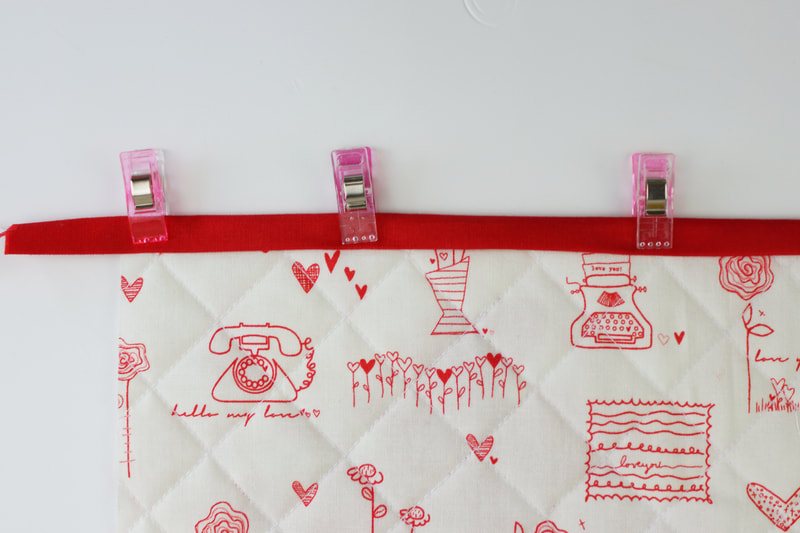
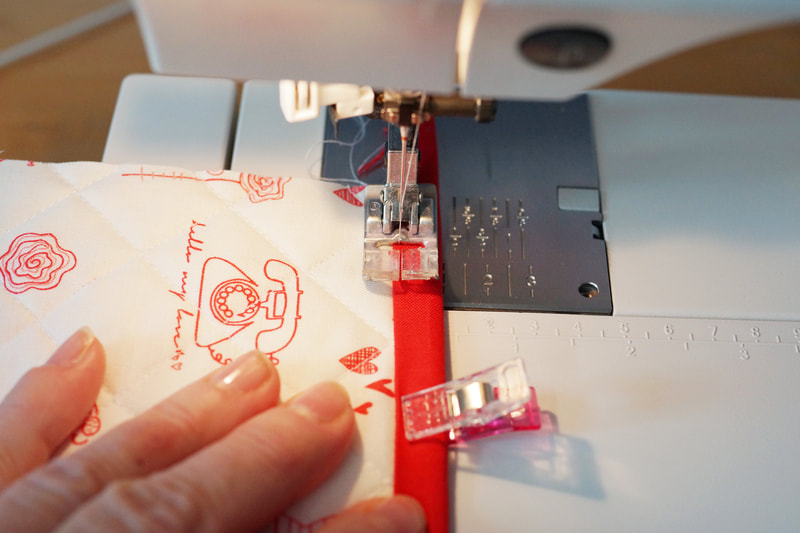
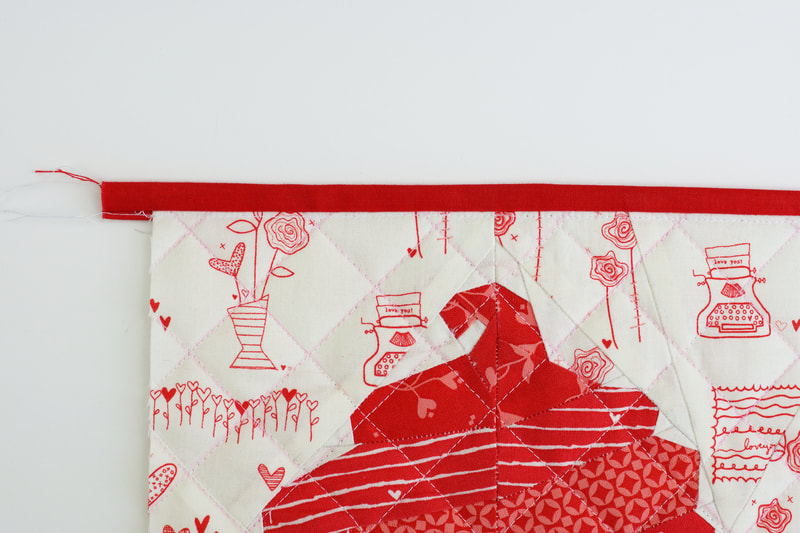
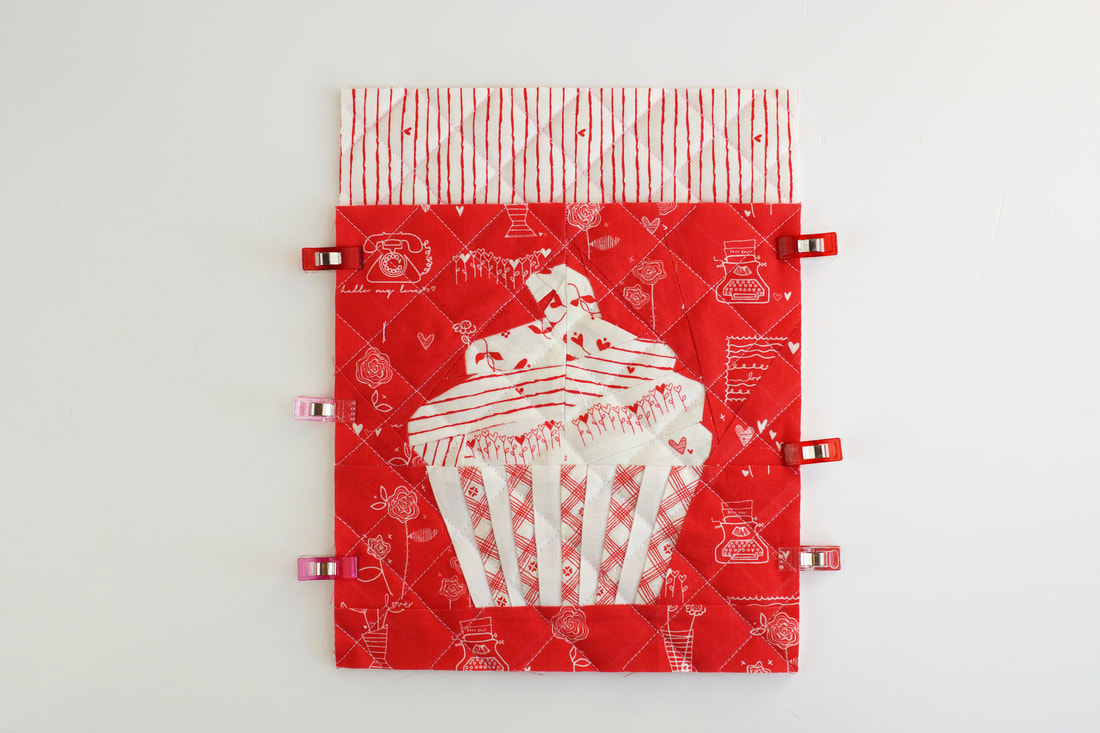
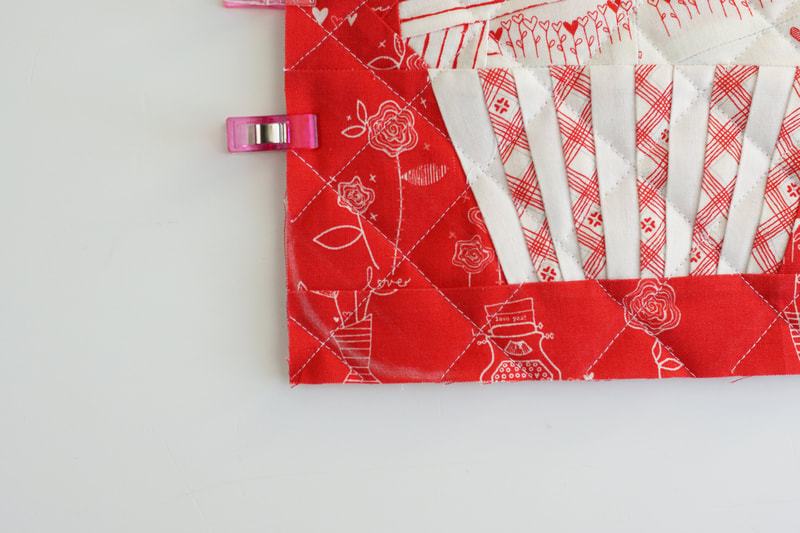
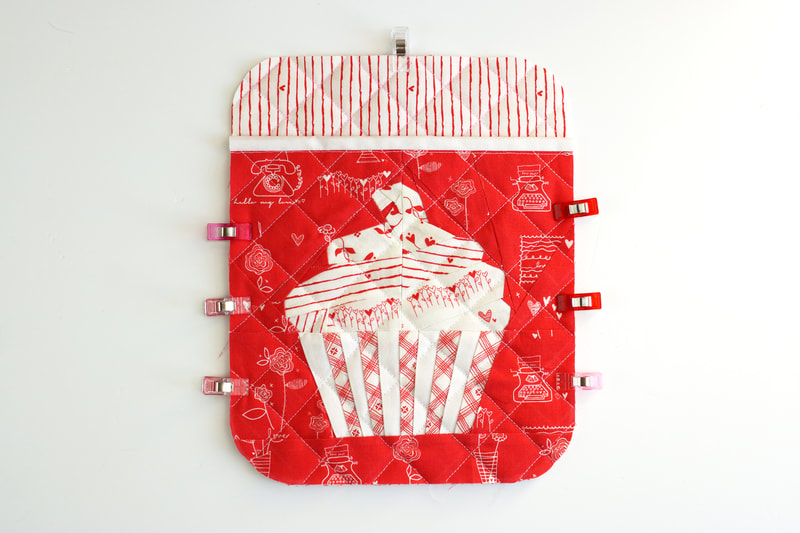
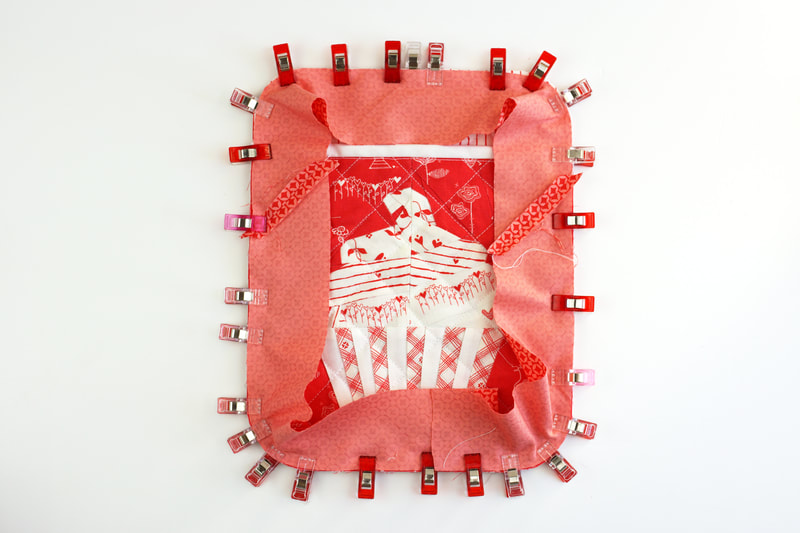
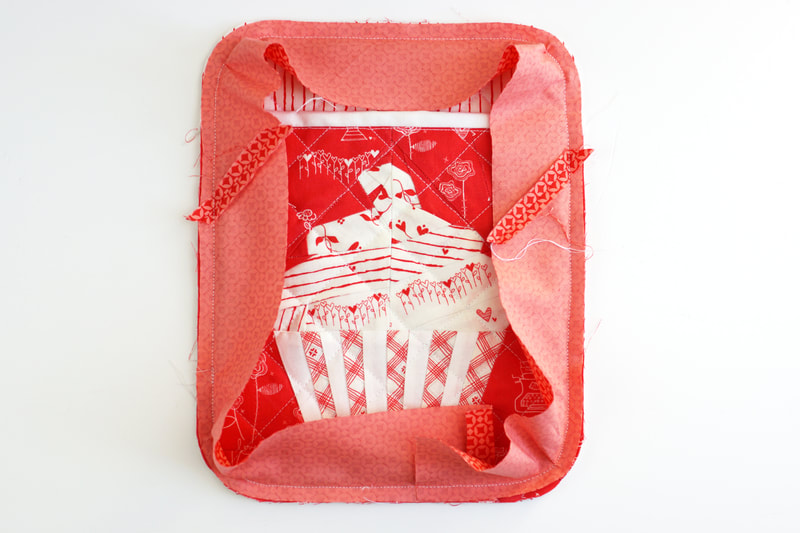
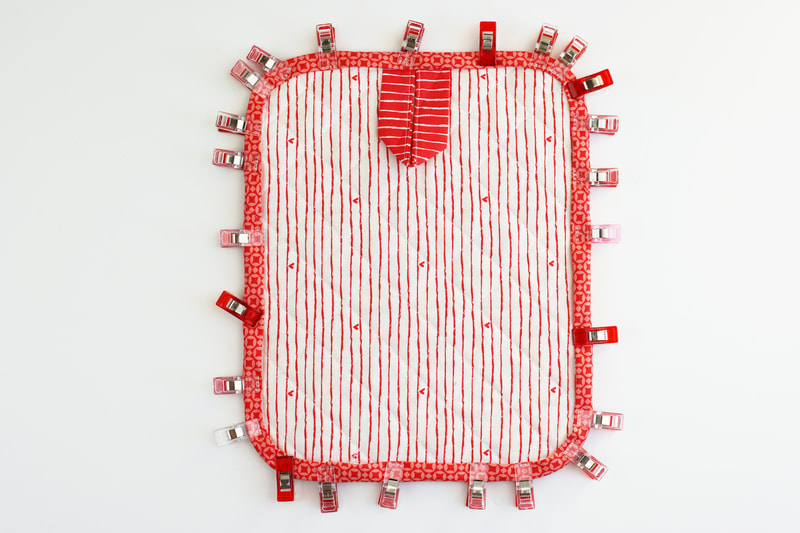
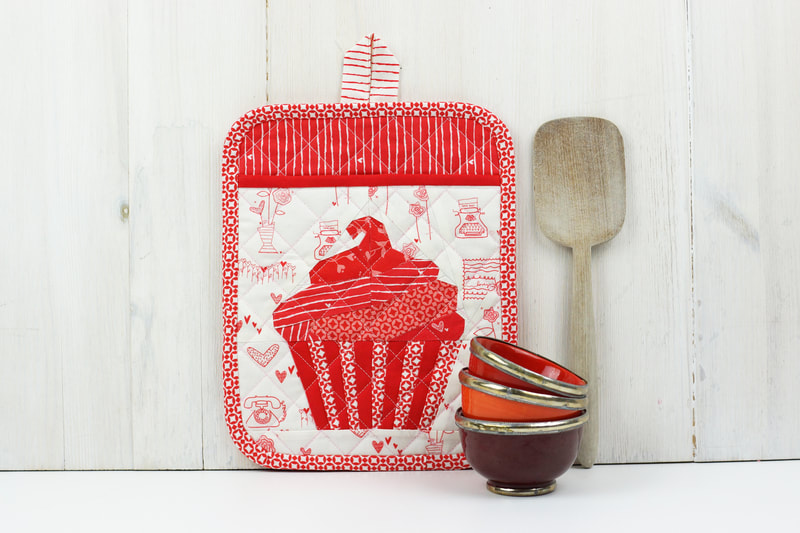
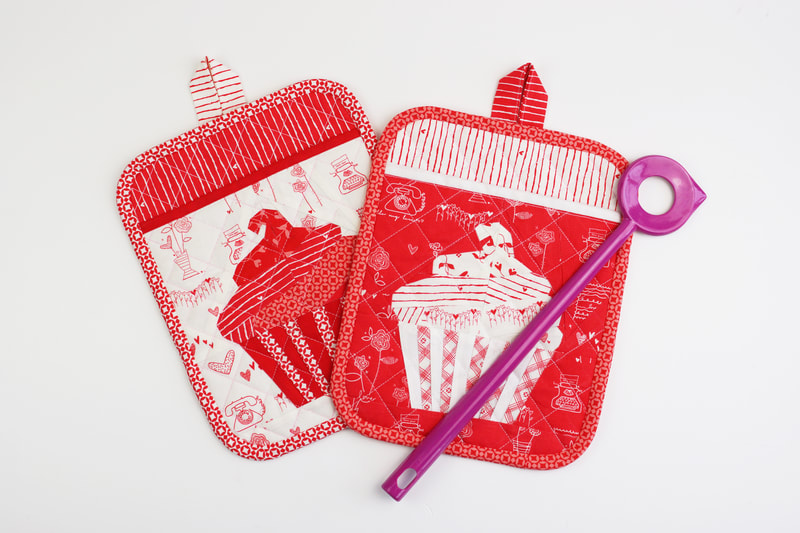
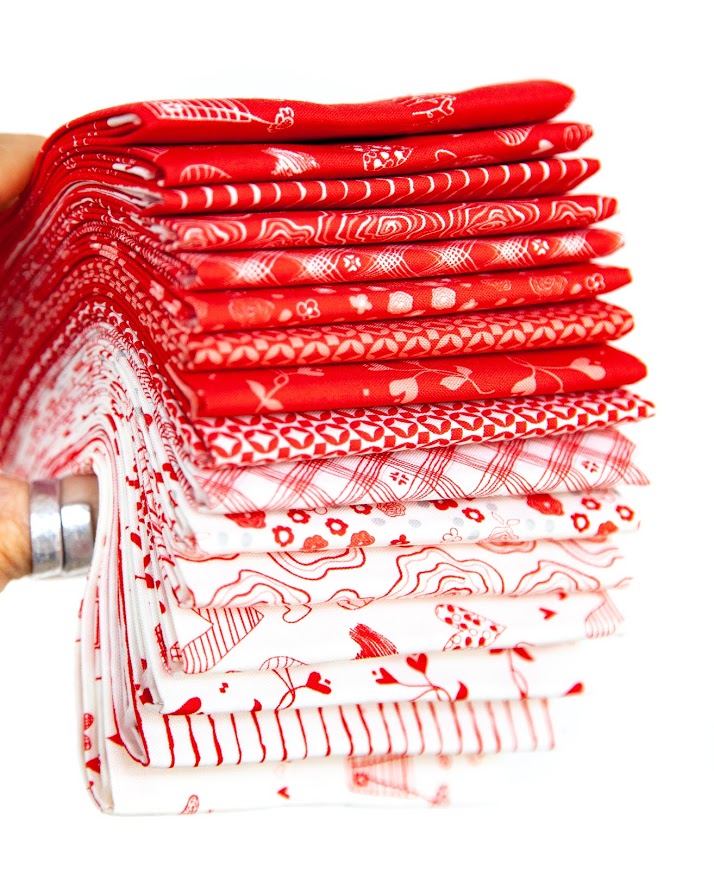
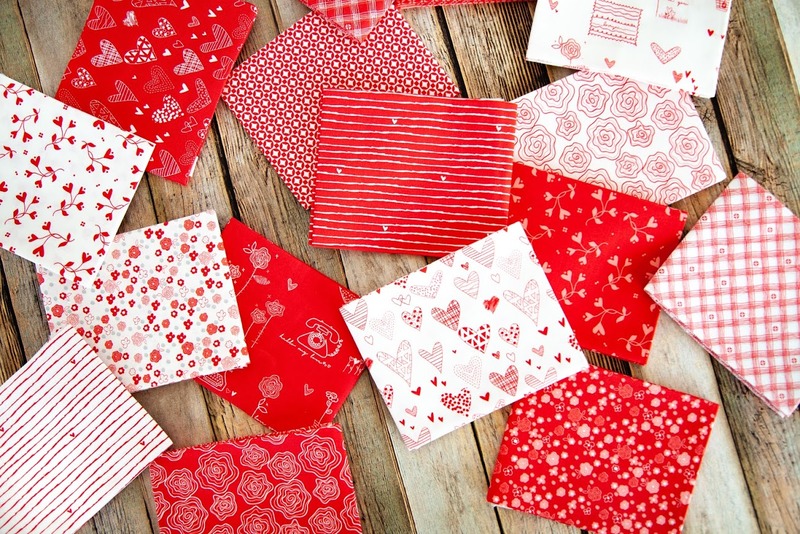
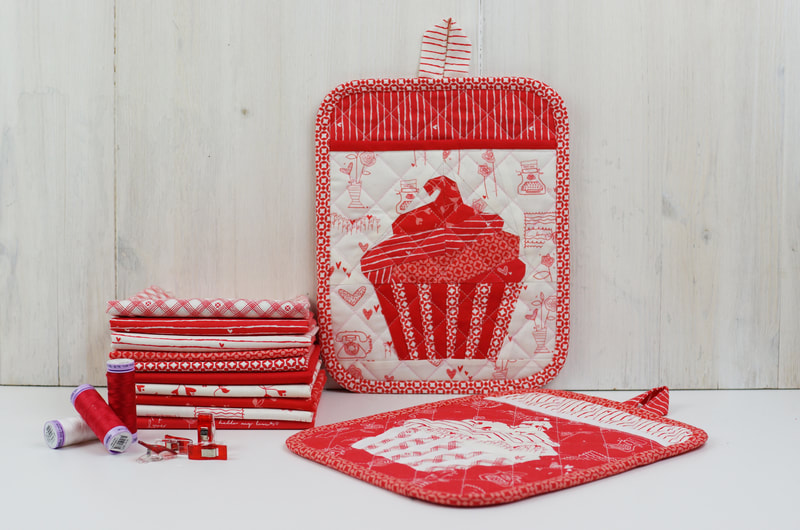
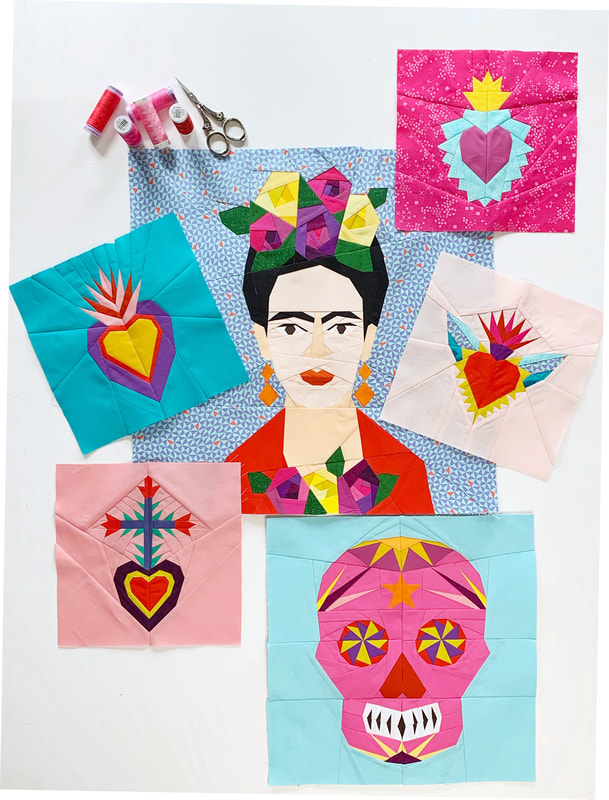
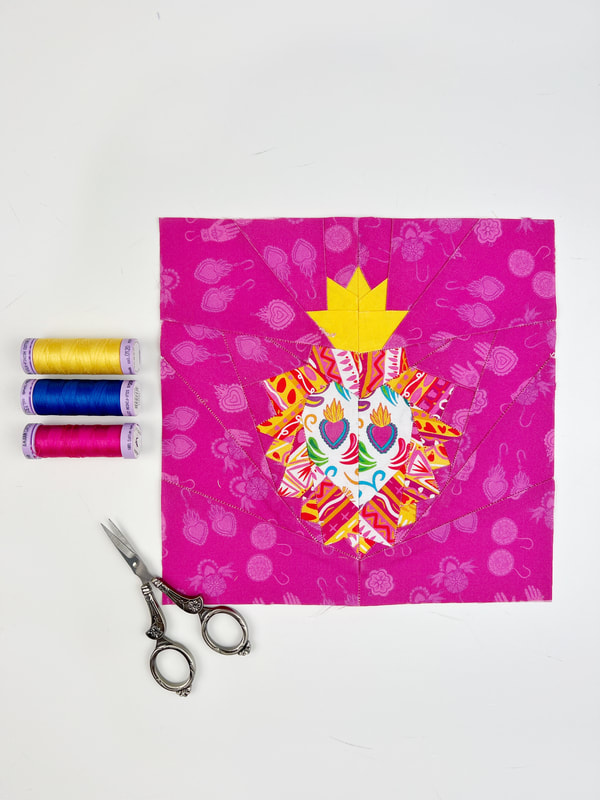
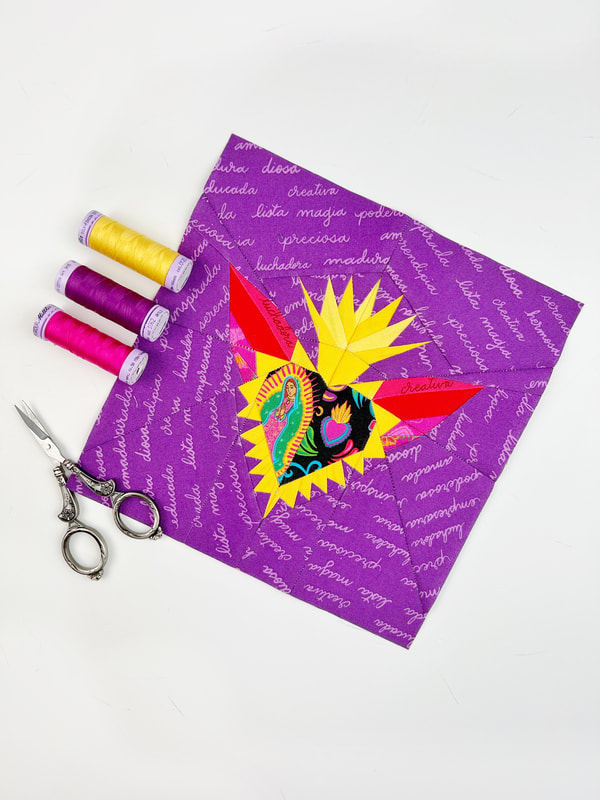
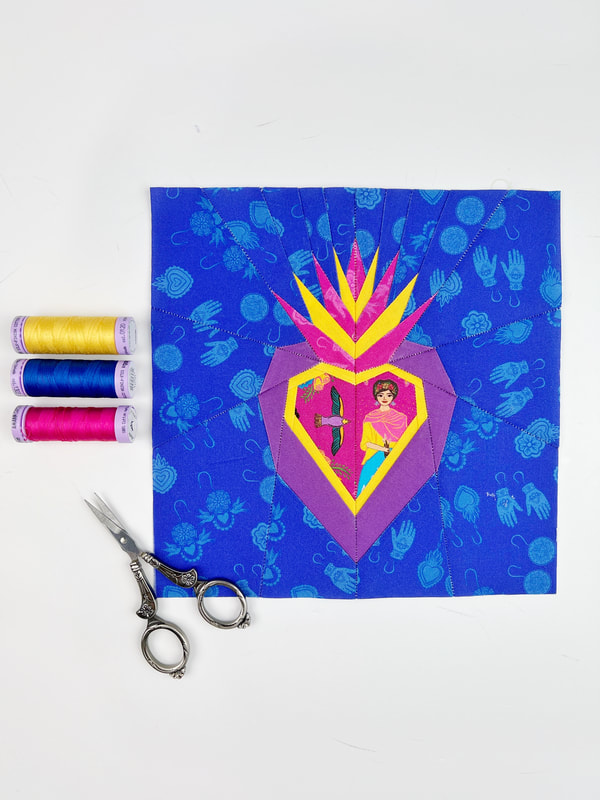
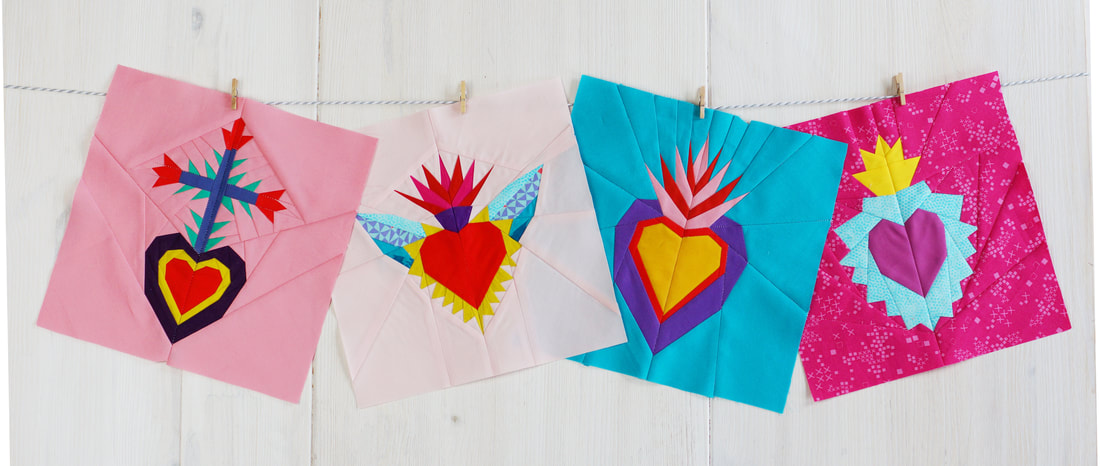
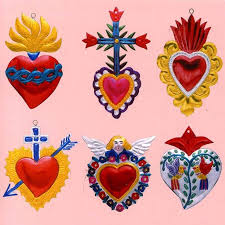
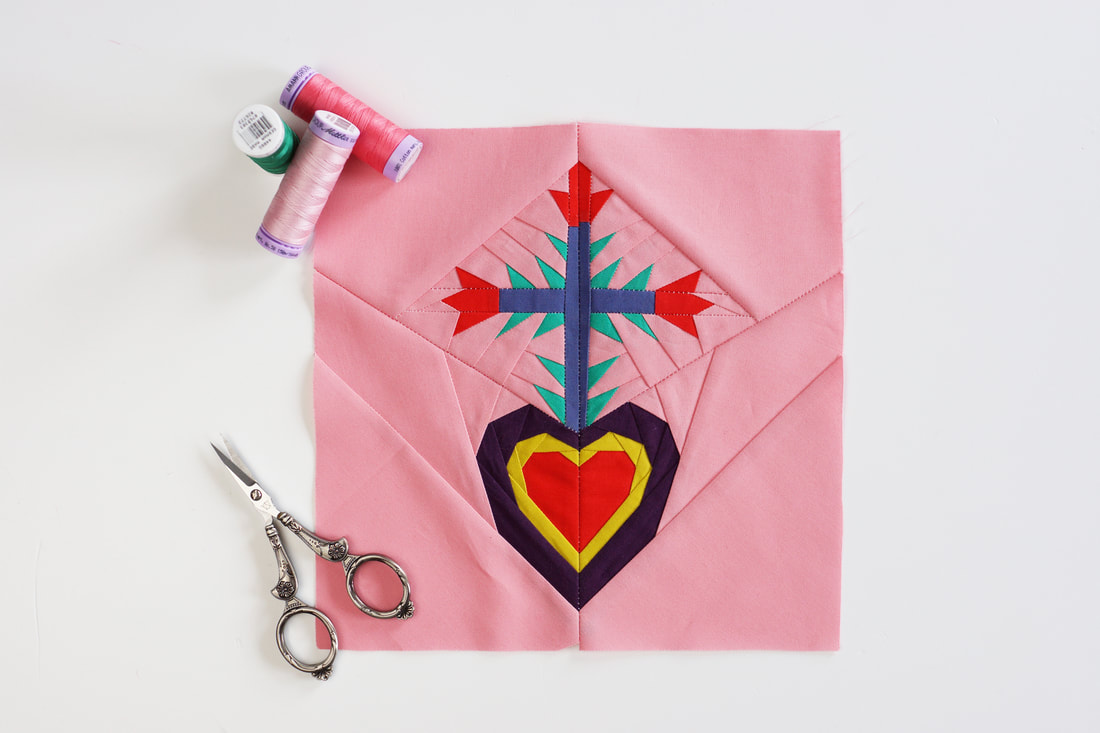
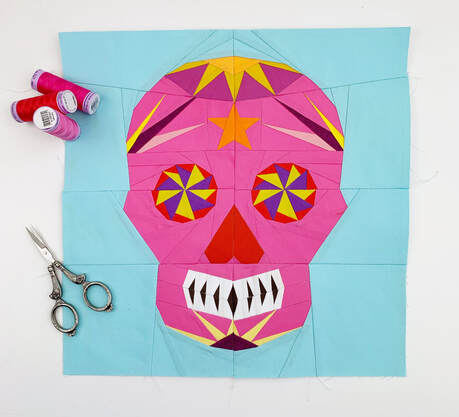
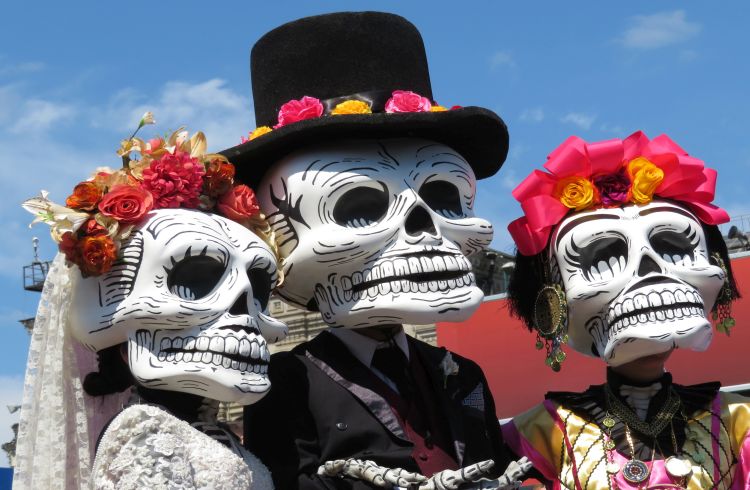
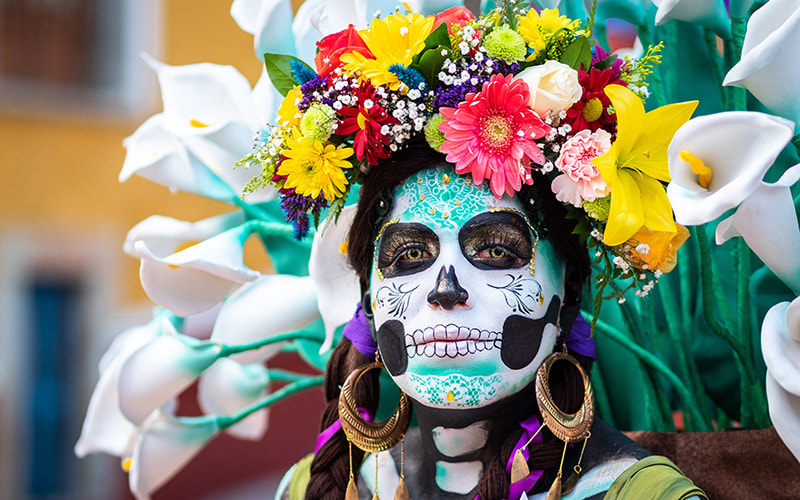
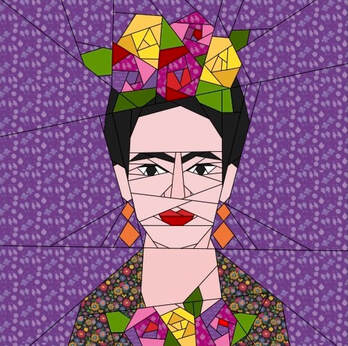
A design collab with Riley Blake Designs - 'From the heart' fabric collection by Sandy Gervais Everybody needs pot-holders in the kitchen, and if they're this cute, even better, right? So how about pulling out some fabric and getting started. These are super easy to make and will be a perfect gift for any passionate cook. 'You-are-my-cupcake' pot-holders finished size 8"x 10" Fabrics needed per pot-holder: - finished cupcake quilt block 8"x 8" - cut 2 pieces of fabric for backing 8 1/2"x 10 1/2" - cut 1 piece of fabric 8 1/2"x 8 1/2" for pocket lining - 1 piece of fusible interfacing 8 1/2"x 8 1/2" for pocket - 1 piece of fusible interfacing 8 1/2"x 10 1/2" for backing - 1 piece of insul-brite 8 1/2"x 10 1/2" for backing - cut 1 strip of fabric 1 1/2"x 10" as binding for pocket - cut 1 strip of fabric 2"x 6" or use ribbon for hanging tab - bias tape 2"x 40" for pot-holder binding Sewing the potholder: 1. Finish the cup cake quilt block ( shop pattern here ) in size 8"x 8" 2. Cut all of your fabric pieces as mentioned above. 3. Iron on fusible interfacing to your quilt block . Then lay pocket lining piece of fabric face down on flat surface and lay quilt block face up on top of it. Clip or pin in place. 4. Quilt as desired, to hold these layers together. I did 1" diagonal squares. I used my acrylic ruler and a fabric chalk pen to draw the lines. 5. Trim to 8"x 8" size. 6. Iron on the fusible interfacing to one of the backing fabrics. Place the other backing fabric face down on a flat surface. Position the insul-brite on top of it and finish off with the backing/fusable interfacing piece, face up. Pin or clip all three layers in place. Quilt as desired, I did 1" diagonal squares again, as with the pocket piece. Make the hanging tab: ( or use a strip of ribbon) - Fold the 2"x 6" strip in half lengthwise and press. Fold in 1/4" seam allowance on each long raw edge and press again. - Stitch with small seam allowance. - Fold the tab in half and clip in place at the center of the back of your pot-holder. 7. Binding for the pocket: Take the strip of fabric 1 1/2"x 10" and pin it to the top of the cupcake pocket with the raw edges aligned and stitch in place with 1/4" seam allowance. ( photo 1) Fold the binding over to the back ( photo 2) and stitch in place ( photo 3) Finished binding seen from the front ( photo 4) Trim the ends. 8. Place the quilted pocket piece on top of the backing , aligning the side and the bottom raw edges. Clip or pin in place. 9. Round the corners of your pot-holder. I drew a 1/4 circle at the corners first and then cut it. here's a template for the corners, cut it along the black line. 10. Fold the bias tape over 1/4" at one end of the binding strip and clip or pin in place around the pot-holder with the end overlapping about 1/2" ( photo 1 ) . Stitch in place. ( photo 2 ). Fold the binding over to the backof the pot-holder and then hand stitch in place. Et voila .... all done. Thank you so much to Riley Blake Designs for supplying the absolutely adorable 'From the Heart' fabric series designed by Sandy Gervais that I used in this super cute project. This pattern is perfect for any 8"x 8" quilt block. I can't wait to see your makes. How do you like these pot-holders? Happy sewing Ingrid x follow me on What's the difference between Halloween and Dia de los Muertos? The two are related somewhat, but Dia de los Muertos and Halloween differ greatly in traditions and tone. Whereas Halloween is a dark night of horror and mischief, Dia de los muertos festivities unfold over two days in an explosion of color and life affirming joy. The theme for the annual event is death that's true, but the point is to demonstrate love and respect for the deceased family members. And isn't that beautiful? These sacred heart quilt blocks were made with Riley Blake Designs Fabric line Eleanor by Kathy Cano-Murillo. This fabric line is absolutely perfect for these Dia de los Muertos quilt block patterns. The festivities of Dia de los Muertos are full with symbolic meaning. The more you know and understand about this feast for the senses, the more you will love it too. Here are 3 essential things about Mexico's most colorful annual event. History Several thousand years ago , Dia de los Muertos originated with the Aztec, Toltec and other Nahua people, who considered mourning the dead disrespectful. Death was a natural phase in life's long continuum, for theses pre-Hispanic cutures. I find this way of honoring the dead both reassuring and beautiful. The dead were still members of the community. They were kept alive in memory and spirit and during Dia de los Muertos ,they temporarily returned to Earth. Today's Dia de los Muertos celebration is a fusion of pre-Hispanic religious rites and Christian feasts. It takes place on November 1 and 2, which is also All Saint's Day and All Soul's Day on our Christian calendar. Altars Built in private homes and cemeteries the altar is the centerpiece of the celebration. These aren't altars for worshipping the way we know altars, they're meant to welcome spirits back to the living. Therefore they're loaded with offerings, water and food for hunger and thirst after the long journey, family photos and a candle for each dead relative. The sacred mexican heart is one of the most common motifs in religious folk art created in Mexico. The idea is that the physical heart of Jesus is a symbol of his devine love for humanity. The Mexican sacred heart comes in various forms. It comes with flames around it, with a crown and sometimes with a crown of thorns. They and all represent the same thing, Jesus' compassion for humanity. And of course, you know that almost everyone in Mexico is Catholic so these images are commonly seen throughout the country. Again you can see the blend of pre-Hispanic tradition and Christian beliefs. Calaveras/ Sugar Skulls Skulls go all the way back to pre-historic times, where the skull was a predominant figure in Mesoamerican ( todays central America )societies and cultures. These civilizations believed in a spiritual life after death so the skulls were offerings to the god of the underworld, Mictlantecuhtli -don't ask me how to pronounce this :-)-. He would then assure a safe passage into the underworld whee he ruled. With the arrival of the Spanish conquerors and Christianity, these traditions were lost in it's original form, and yet a part of them was kept alive by maintaining the figure of the skull in a sweet confection that can be placed on altars as part of the offerings to the deceased. Calavera means 'skull'. During the late 18th and early 19th centuries, calavera was used to describe short, humorous poems, which were often sarcastic tombstones epitaphs published in newspapers that made fun of the living. These were called literary calaveras. In the early 20th century, Mexican political cartoonist and lithographer José G. Posada created an etching to go with his literary calavera. Posada dressed his personification of death in fancy French clothes. In 1947 artist Diego Rivera ( Fried Kahlos husband) featured Posada’s stylized skeleton in his masterpiece mural “Dream of a Sunday Afternoon in Alameda Park.” Posada’s skeletal bust was dressed in a large feminine hat, and Rivera made his female and named her Catrina, slang for “the rich.” Today, the calavera Catrina, or elegant skull, is the Day of the Dead’s most prominent symbol. Frida Kahlo Who do we all associate with Mexico? Exactly, Frida Kahlo... the great mexican painter or better yet great Mexican artist. She's known for her many portraits and self-portraits. Her paintings often have strong autobiographical elements mixed with realism and fantasy. She was born in 1907 to a German father and a Mestizia Mother and spent most of her childhood and adult life in her family home in Coyoacan 'La Casa Azul' the blue house. Although the was disabled by polio as a young child Kahlo had been a great and promising student headed for medical school until she suffered a bus accident at the age of 18 which left her lifelong suffering and medical problems. In 1927 she met Mexican artist Diego Rivera, whom she married in 1929 and spent the next 20 years painting and travelling in Mexico and the United States together. Throughout the 1940s, Kahlo participated in many exhibitions in Mexico and the United States and worked as an art teacher. Her always fragile health began to decline in the late 1940s. She had her first solo exhibition in Mexico in 1953 shortly before her death in 1954 at the age of only 47. So what better way than to combine the two .... Dia de los Muertos and a Frida Kahlo inspired quilt block pattern .... in a stunning quilt, that features not only the bright colors of Mexico but also Frida and all the amazing Mexican symbols..... I am still working on mine, it might take a little while until I'm all finished, so stay tuned on news of this fun project..... Let me know what you would make with these patterns? I can't wait to see all of your fantastic creations. I made several sacred heart quilt blocks with Riley Blake Designs new fabric line Eleanor, its absolutely perfect for these patterns. Ingrid xx
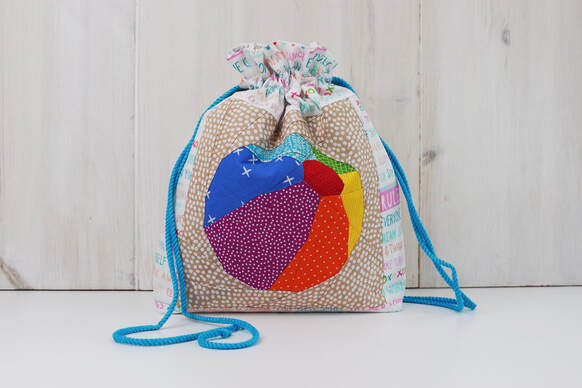
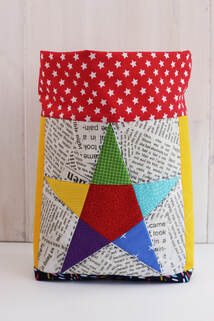
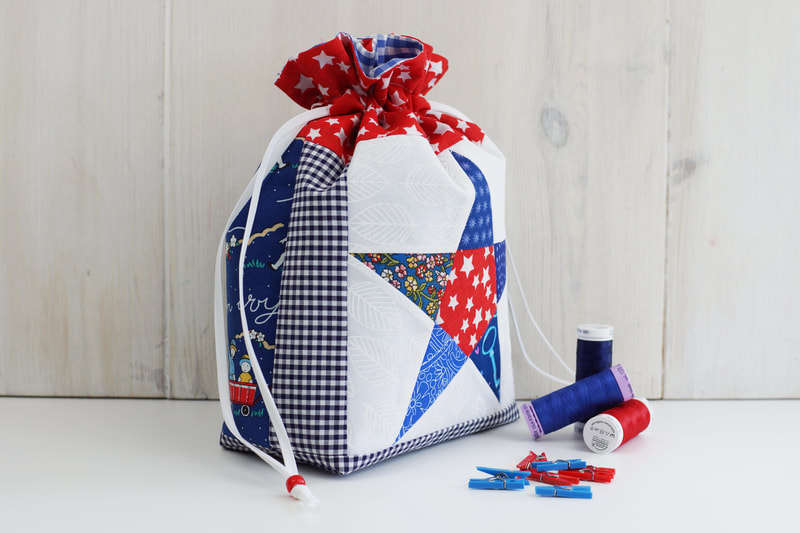
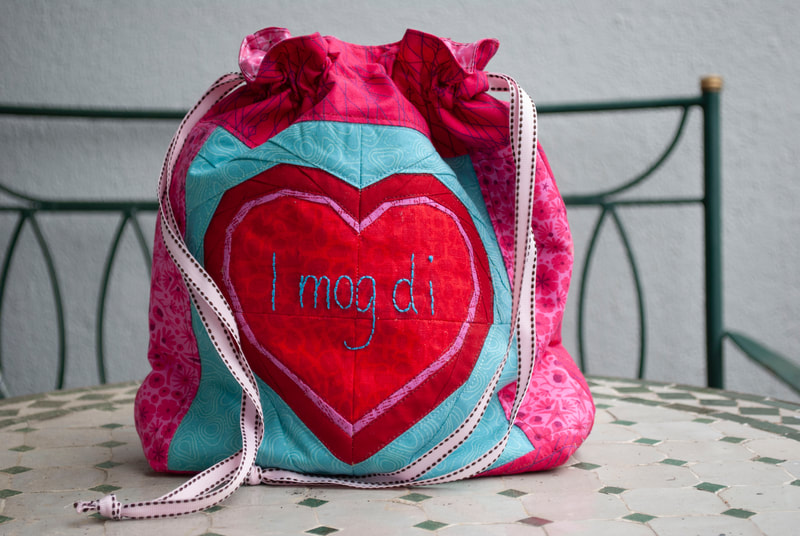
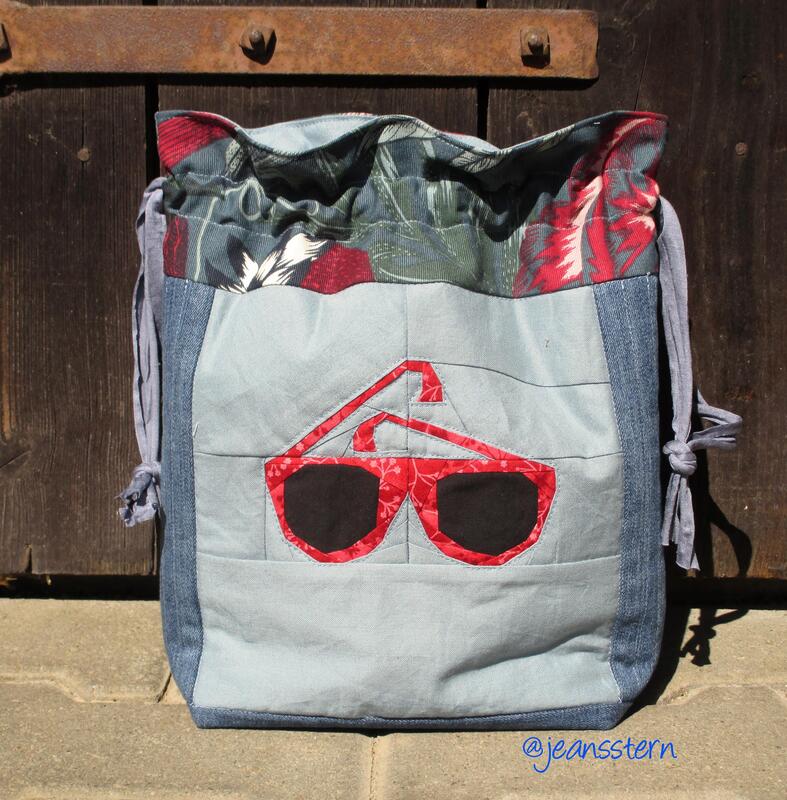
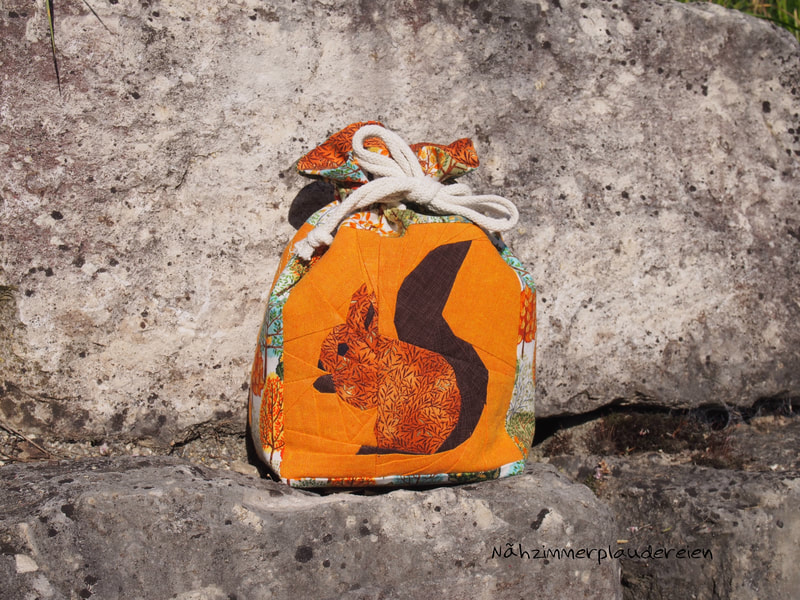
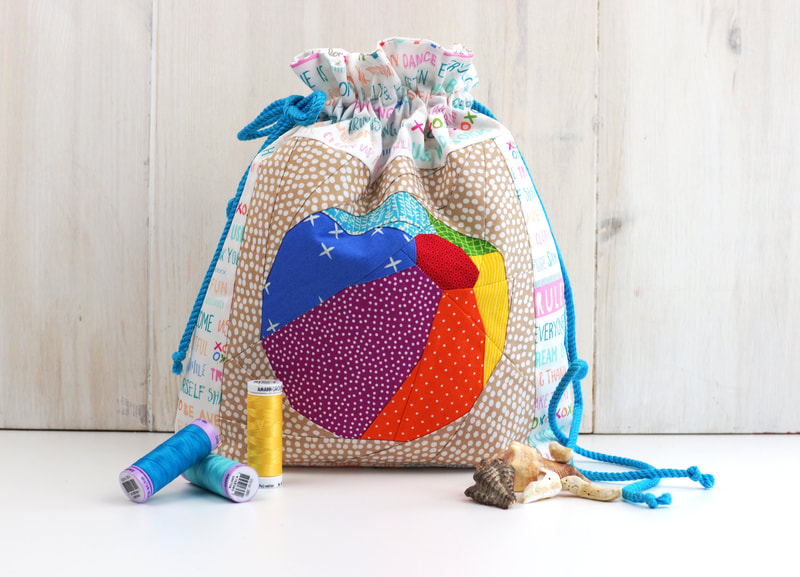
How to easily sew a simple, quilted drawstring bag with a paper pieced quilt block?
And there's a bonus: it's lined and with inside pockets.
I mean seriously is there such a thing as too many drawstring bags?
I am sure we all agree ............ ABSOLUTLY NOT :-) You can use them for everything and everywhere. Use them for gifts or as storage, as a cute little decor, you name it. So let me show you how to sew a drawstring bag with any one of my quilt block patterns.
Finished bag size : 9.5" wide, 11" high and 4" deep at the bottom
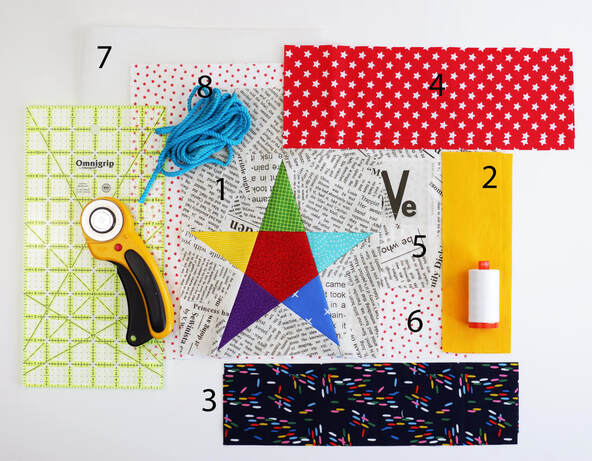
(Size small if you’re using a 6"x 6" quilt block: 7" wide, 8" high and 3" deep at bottom) Fabric/ Materials needed: (all measurements are width x height) > 1 1 FPP quilt block 8.5" x 8.5" (beach ball) (6.5"x 6.5") > 2 2 strips of fabric on each side of the FPP block 2.5"x 8.5" (2 1/4"x 6.5") > 3 2 strips of fabric for bottom panel 12.5"x 3" (10"x 2.5") > 4 2 strips of fabric for top panel 12.5"x 4"(10"x 4") > 5. 1 piece of fabric for back 12.5"x 8.5" (10"x6.5") > 6 2 pieces of fabric for lining 12.5"x 14.5" (10"x11.5") > 7 Fusible interfacing 1 piece 12.5"x 22" (10"x 17") > 8 2 pieces of rope, ½" twill, or ½" fabric tie (I used blue rope) 40" each. (30") > Optional: Inside pocket 1 piece of fabric 12.5"x 10" (10"x 7.5") Before you start: Read through the instructions, thats always best so you get a feel of the sewing beforehand. Seam allowance is always ¼" unless mentioned otherwise. One more note: The quilt block sizes are 8"x 8" ( 6"x 6") finished, they are 8.5"x 8.5" ( 6.5"x 6.5") unfinished.
INSTRUCTIONS:
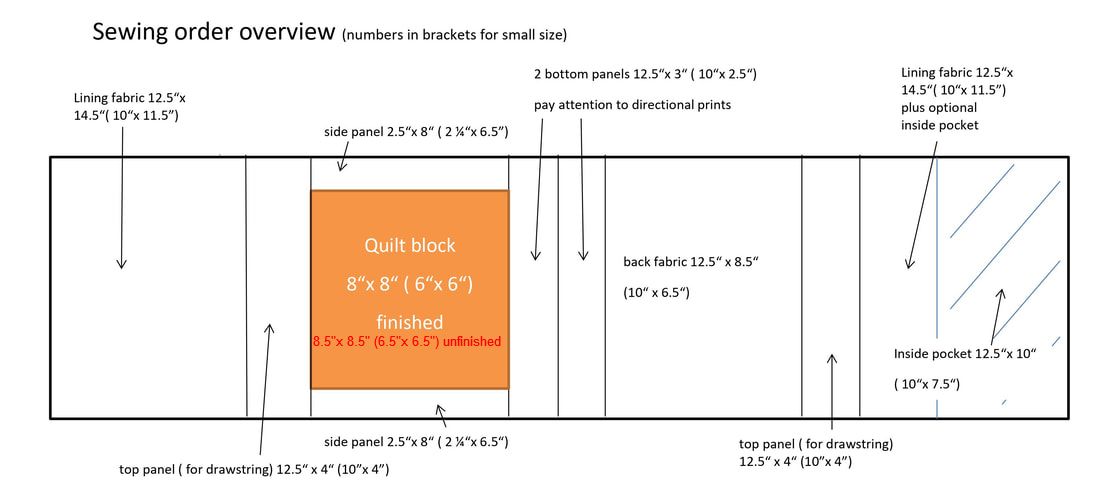
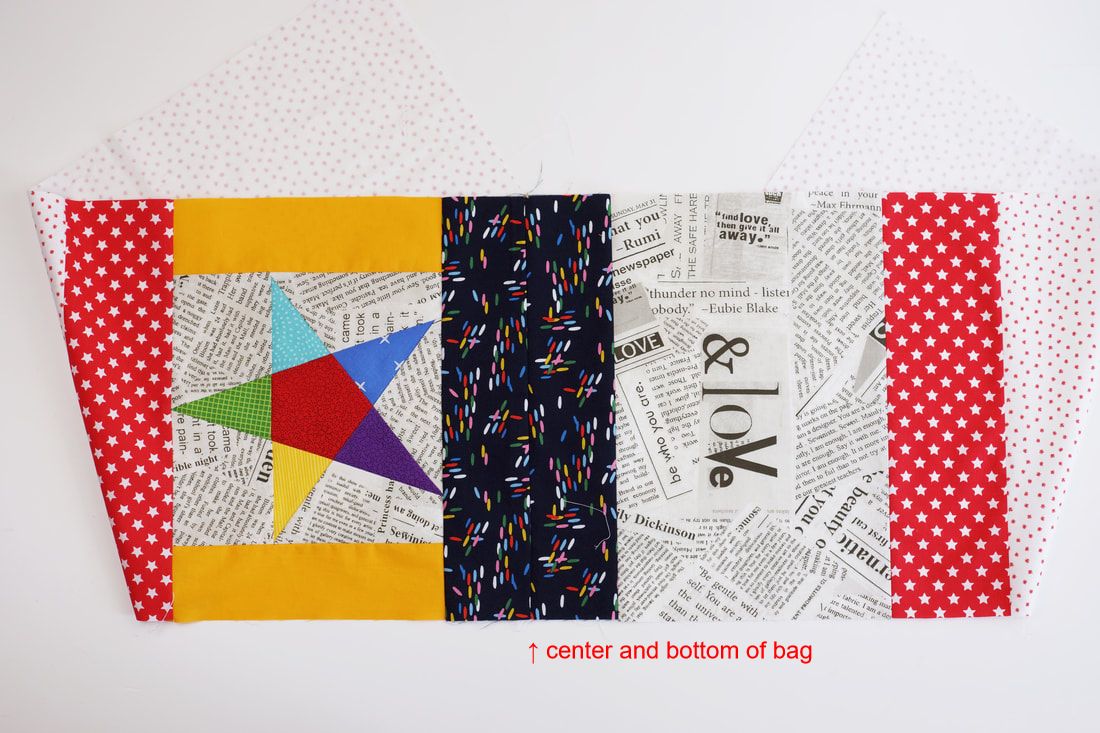
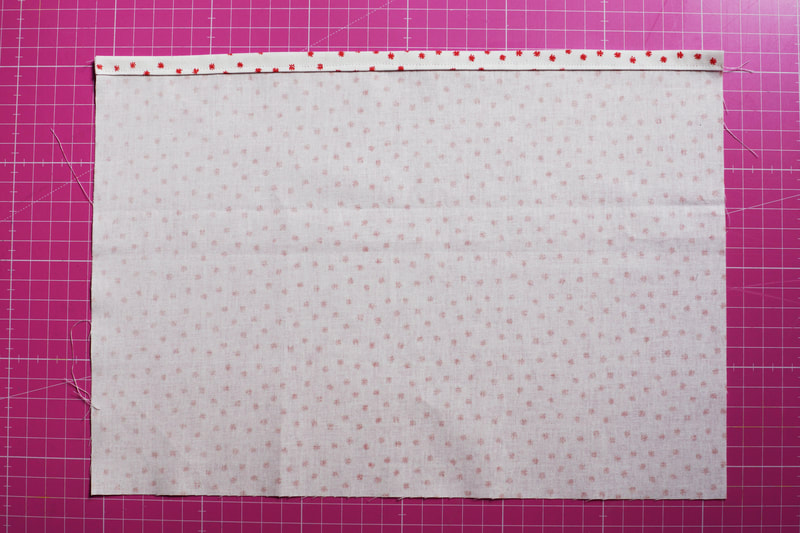
1. Lay out your pieces of fabric as shown in the chart above, and sew them together into one long piece. Start with sewing the two side strips (2.5"x 8.5") to the quilt block, then add the other pieces of fabric in the order above. Order from left to right: Lining, top panel, quilt block with 2 side panels, bottom panel, bottom panel, back (exterior), top panel and finally lining again. Press seam allowances open.
Here you see the whole long piece sewn together.
(I folded the lining pieces under for the photo.) Make sure you place directional prints with the 'top' of the print facing towards the top of the bag ,towards the drawsting- and lining pieces. The bottom of the drawstring bag is at the center of the bottom panels.
Interfacing gives your bag more structure and stand.
Iron on the fusable interfacing. Use interfacing only on the exterior main pieces. If you’re using it on the 4" drawstring panel, your drawstring might get caught in the material and it will not let you tie your bag as nicely. I measured the interfacing a little bit generous, so trim it down to where the drawstring panel starts.
Now you can quilt the front and/ or back outer fabric panel to your liking.
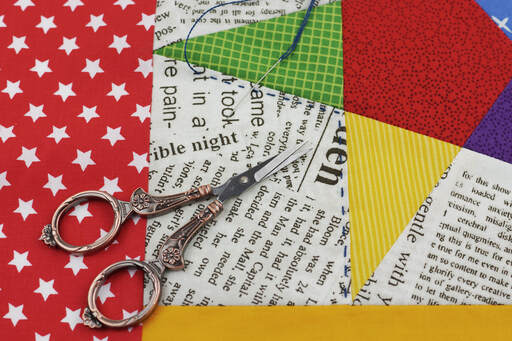
I would recommend to only quilt the paper pieced block and/ or the back fabric block. Not the bottom part or the drawstring panels. The bottom will have boxed corners anyways. And it’s best to leave the drawstring panel plain, as any stitching might interfere with the drawstring. I love hand quilting, so I decided to just stitch around the star. I will leave the back without Quilting, since the fabric with the letters is pretty busy as it is. But in general straight line machine quilting would look really nice on a less busy pattern. Plain lines, squares or diamonds always enhance solid fabrics.
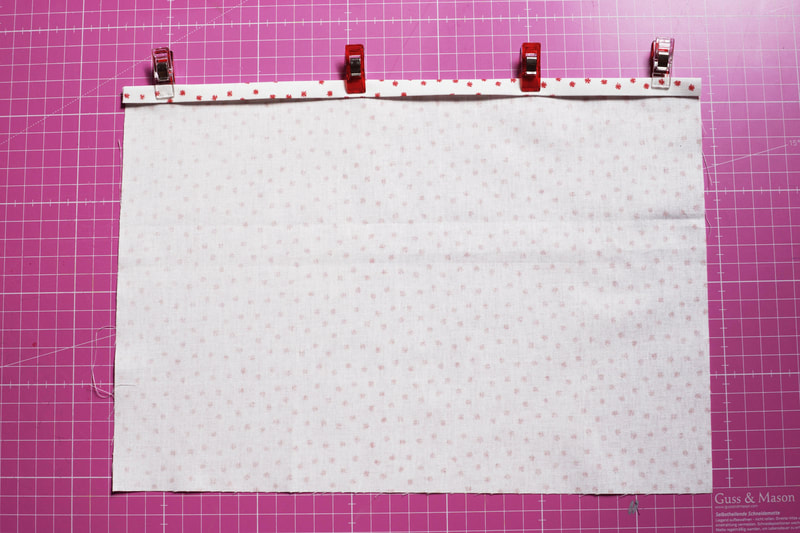
If you’re adding an inside pocket fold over the 12.5" ( 10") side of the inside pocket
fabric ¾" twice and clip or pin in place. And sew along the clipped edge.
Place the pocket fabric panel onto the backside lining panel. Wrong side of pocket fabric
against right side of lining panel, matching the raw outside edges . Clip or pin in place. Draw two vertical lines 4"(3" for the small bag) from the outer edge with a water soluble pen or fabric marker. Then sew along those lines, backstitch at the beginning and at the end. These will be your three inside pockets. If you’d prefer two inside pockets, draw just one line in the middle and sew along that line. This gives you two inside pockets.
Fold your sewn strip in half, right sides together, matching the lining ends.
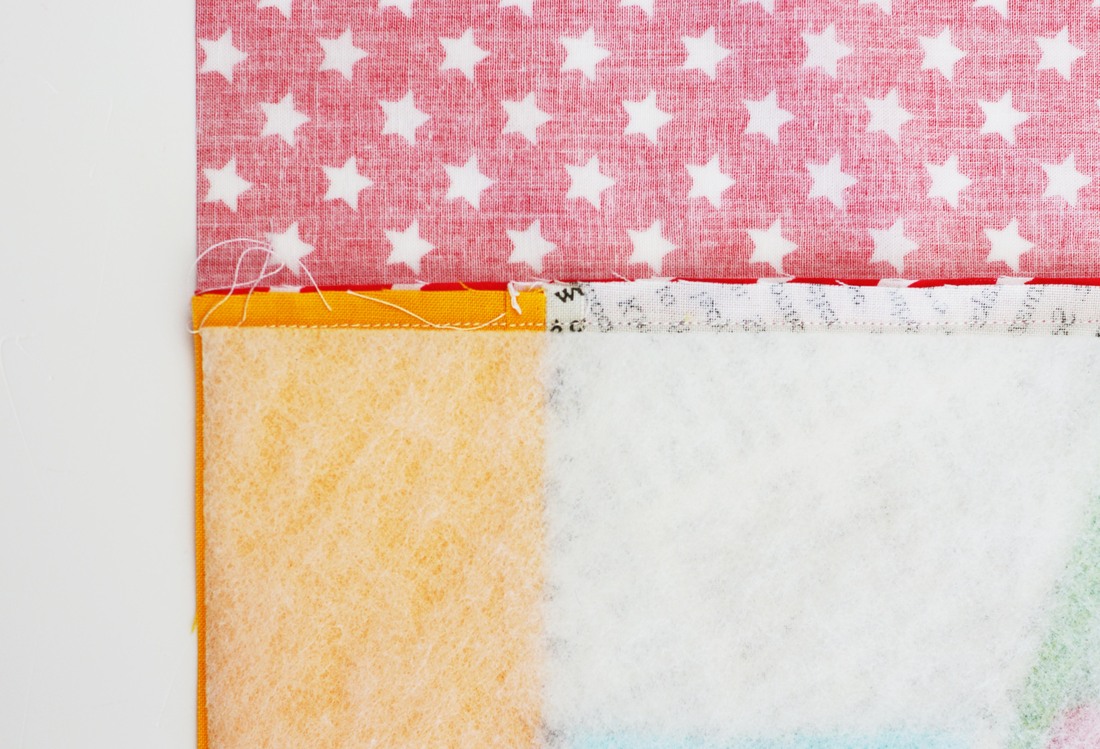
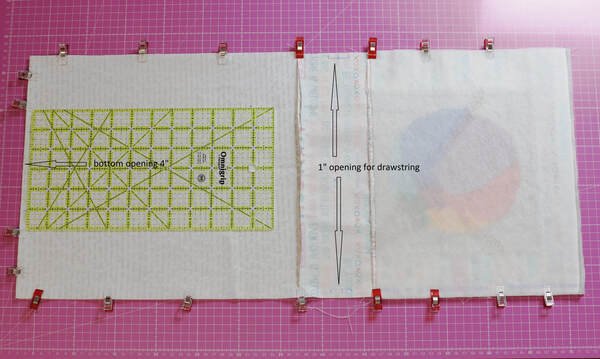
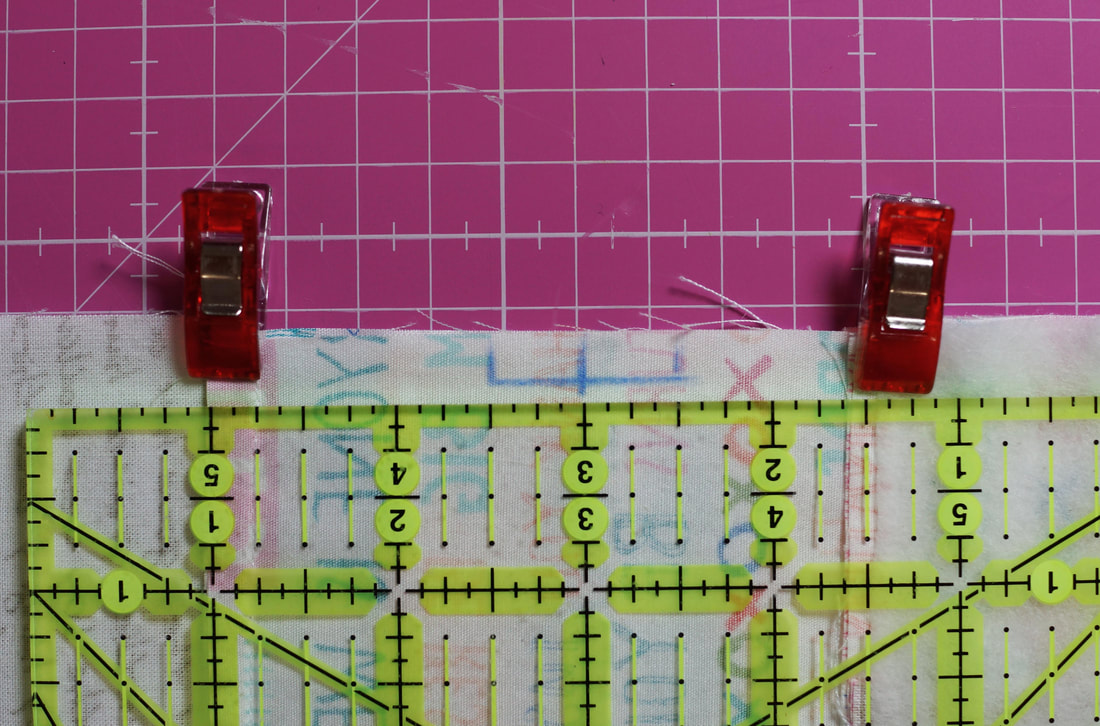
Clip or pin along the raw edges in place, matching up each seam and clipping or pinning the matched up seams. Leave a 4" space at the center of the bottom end of the lining, this is your opening for turning the bag later.
On both sides, of the drawstring panel mark a 1" opening in the center of the panel.
First mark the center of the panel and then mark ½" to both sides. This gives you small 1" opening sections on both sides, these will be left unsewn, creating the opening for the drawstrings. Then sew along the three open sides. Do not sew between the 1" opening you marked on both sides or the drawstring panel or the 4" opening at the end of the lining pieces.
For a flat bottom of your bag, you need to box all four corners of the drawstring bag.
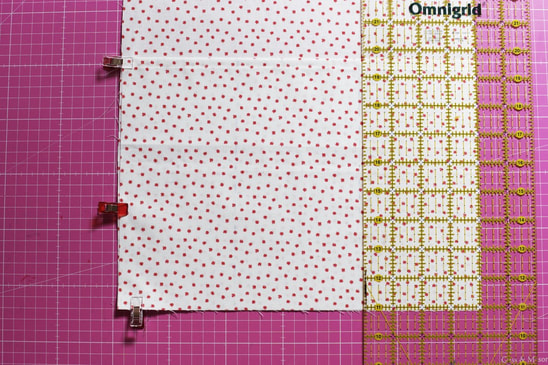
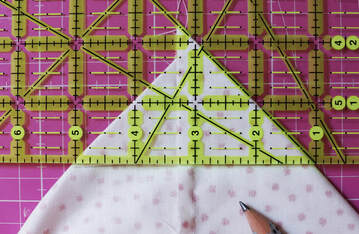
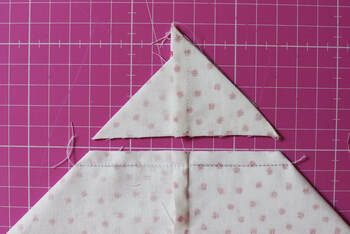
Two corners of the lining and two corners of the exterior fabric. Starting with flattening the corner, the seams, bottom seam and side seam should be on top of each other. Then measure 2" (1.5"for the small bag) from the top corner with an acrylic ruler and draw a line across with your fabric marker or a water soluble pen. Stitch along that line and trim off the corner, leaving a 1/4" seam allowance. (Repeat this for all four corners)
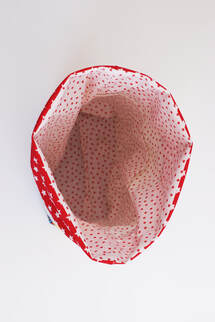
Turn your bag by turning the pieces right sides out, pulling through the opening in the
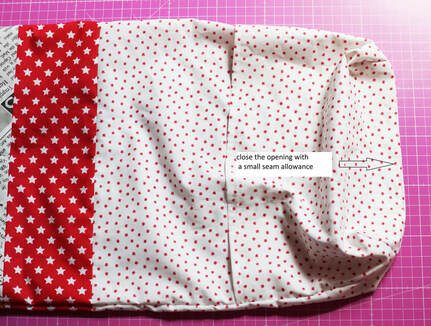
lining. Push out the corners nicely. Press the lining opening under 1/4"and stitch closed with a small 1/8" seam allowance.
Fold the lining into the exterior of the bag. Press along the top edge.
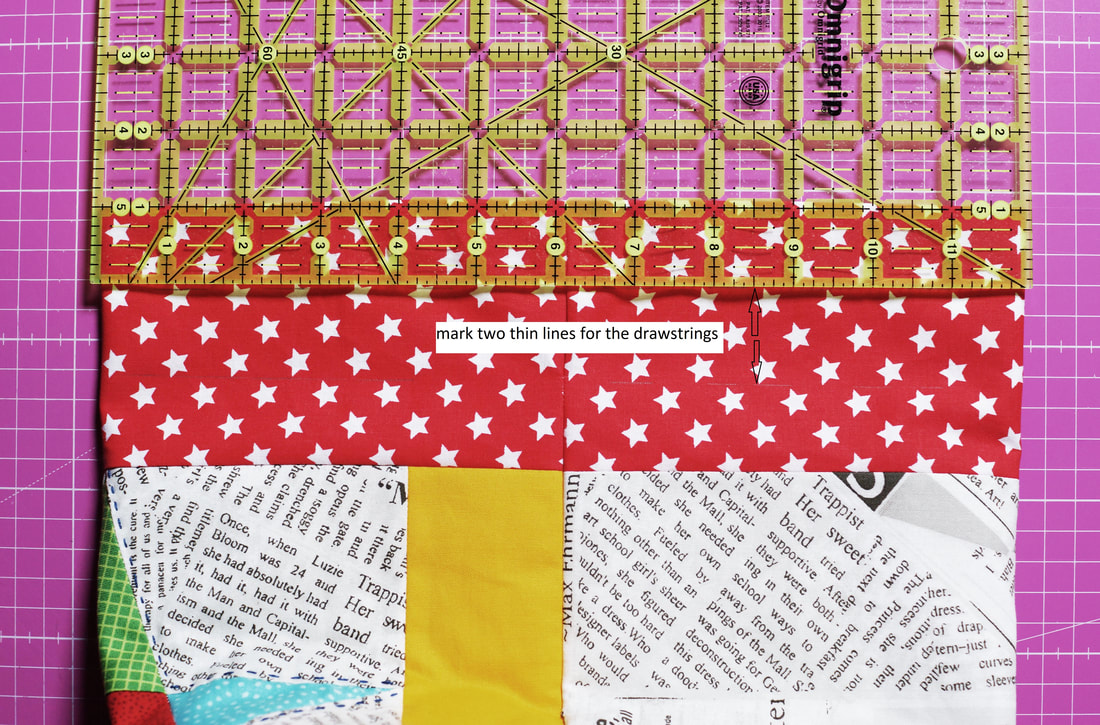
Mark two thin lines onto the drawstring panel with a fabric marker or a water soluble pen.
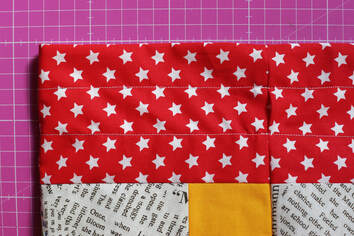
One line at the top of the 1" opening for the drawstrings, and a second line at the bottom of the 1" opening for the drawstings. Mark those line all the way around the top of the bag. This will be your drawstring casing. Sew along those two lines all the way around the bag.
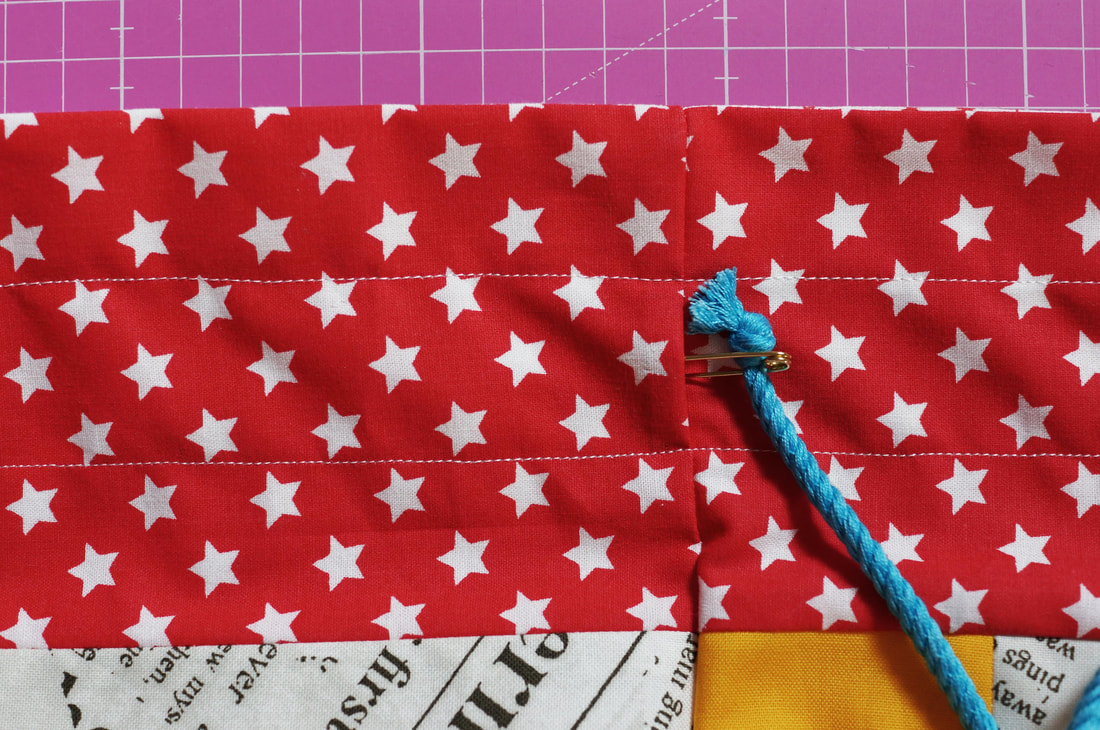
Attach a safety pin to one end of your rope, ribbon or fabric tie.
Insert the safety pin into one of the side openings. Work it through, pulling it all the way back around the whole bag and out the opening where you started. Even out your the ends and tie them into knots seperatly or together. Repeat with the other tie, starting at the opposite side opening.
Aaaaaand YAAAAAY..... all done.
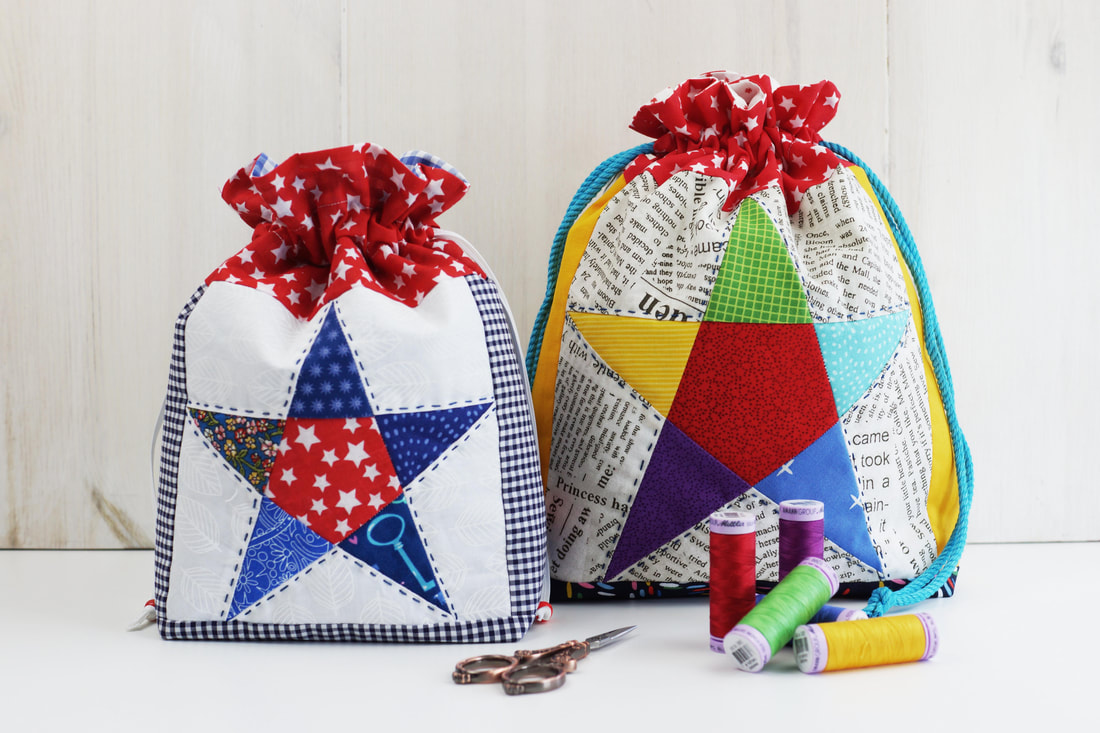
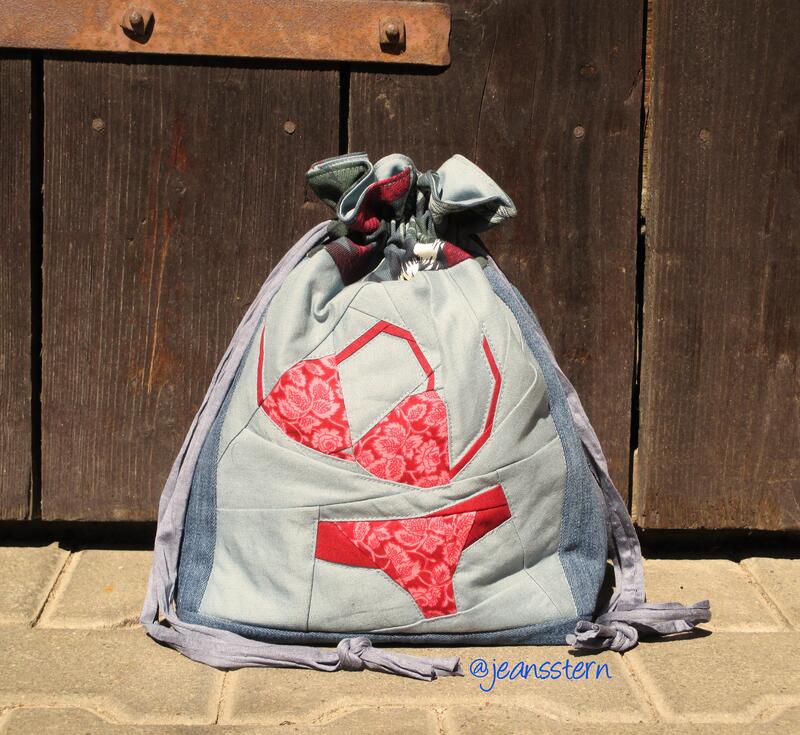
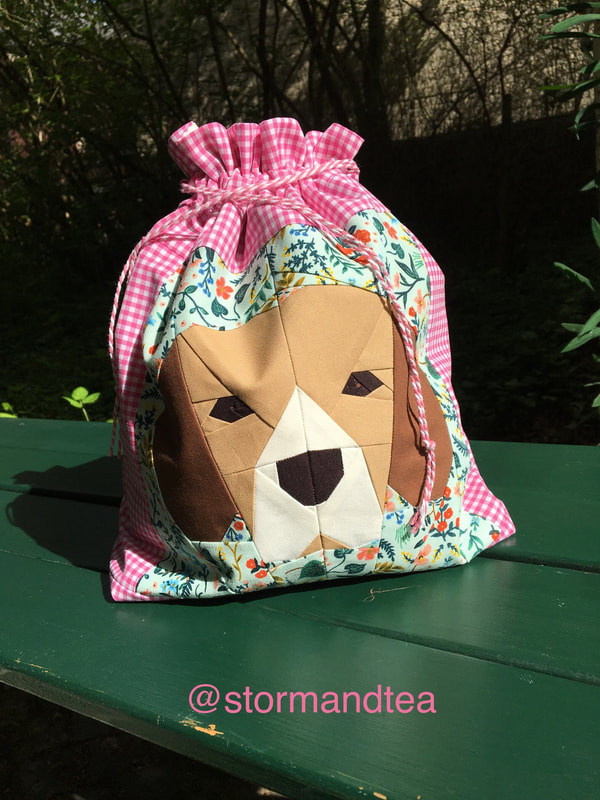
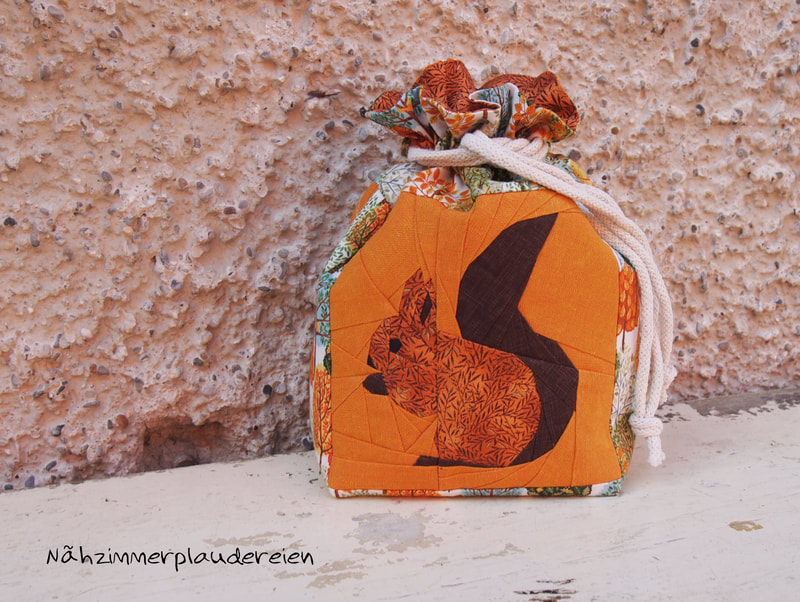
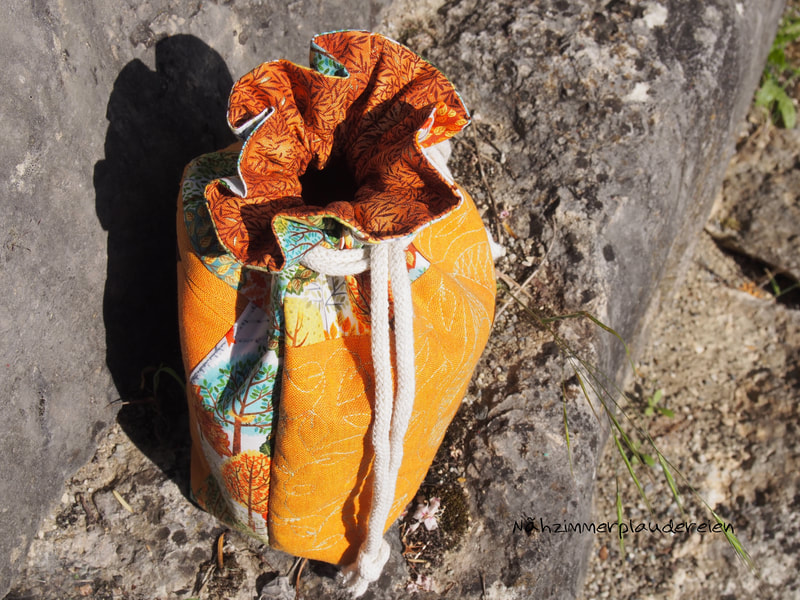
And here are some more inspirations on this bag, with all sorts of blocks from my small collection of quilt blocks ....
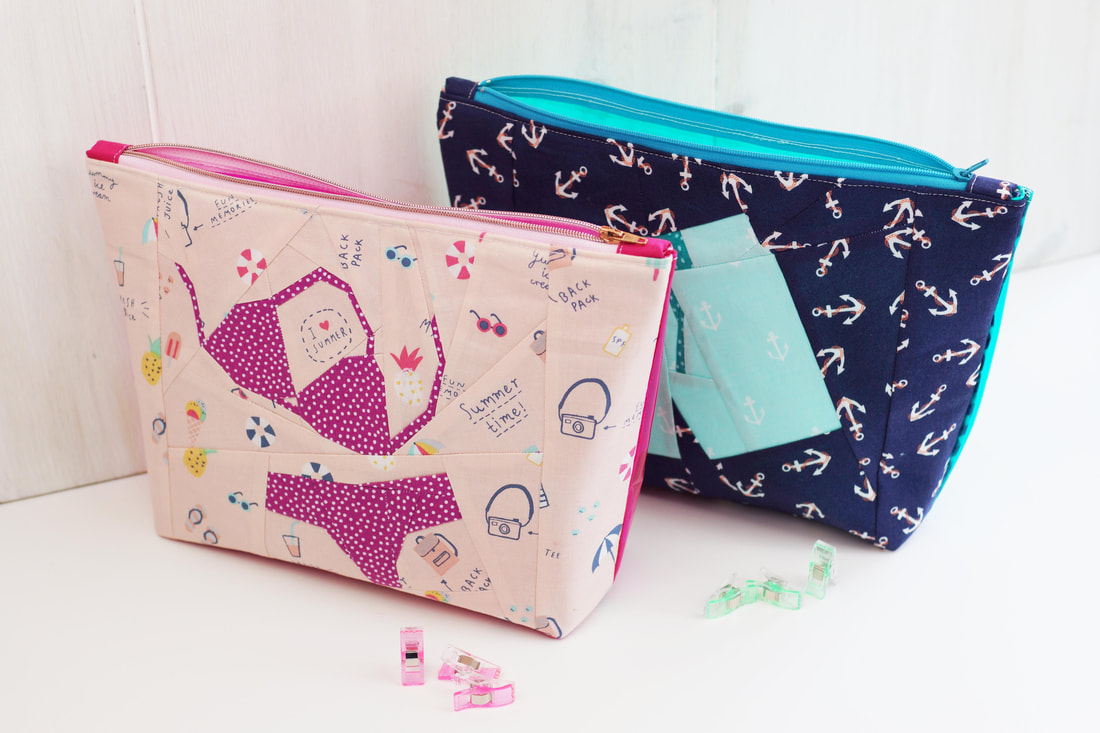
Share your makes on social media ... use #quilteddrawstringbag so I can cheer your creations, and if you want I can share them here on my blog. Sometimes connection happens in the most unexpected ways. This happened when I first saw Natalie Santini's profile on Instagram @sewhungryhippie you could even say it was love at first sight, literally. 'I believe we're all interconnected, to each other and to the Earth-more than we realize.'- this is Natalie's quote and she's 100% right. I love her quirky, fun and colorful sewing projects, photos, patterns and general approach to life. She has some fantastic items and projects in her shop, and the thing that really caught my attention are her fun and bright colored vinyls and patterns with them. So immediately there was a pattern idea that popped into my head and Natalie was on the same page right away. And we created the ' TWO PIECE POUCH' #twopiecepouch
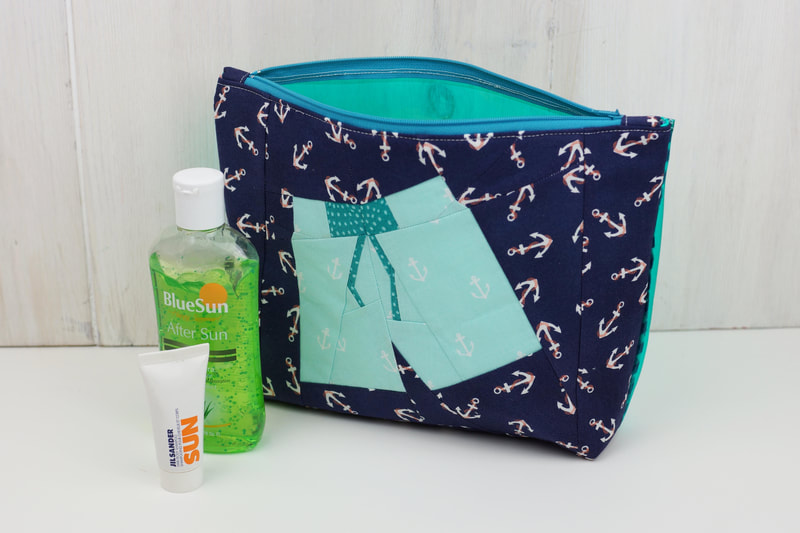
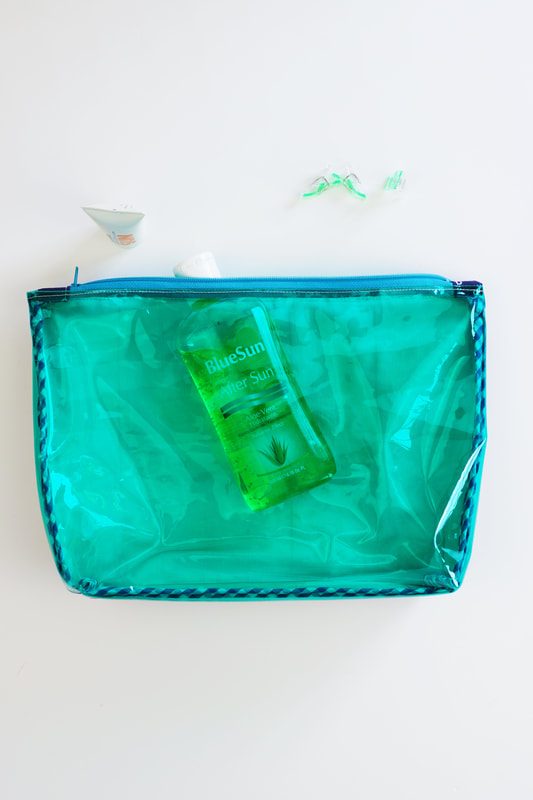
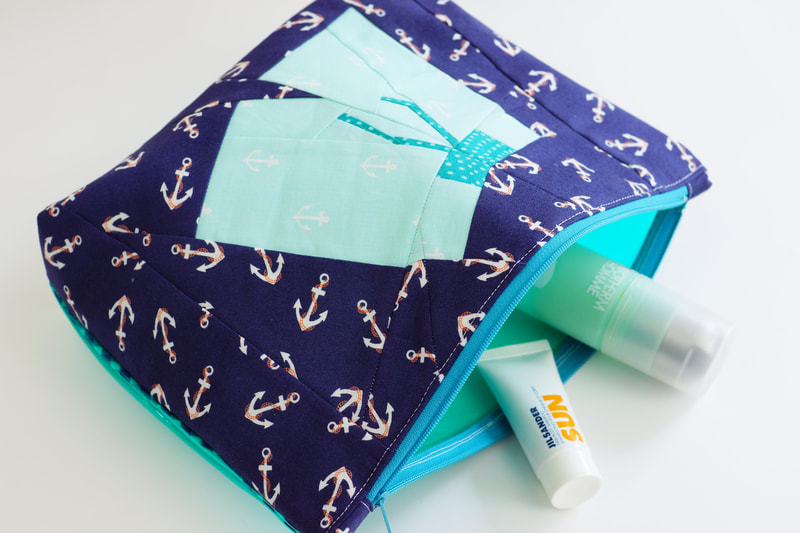
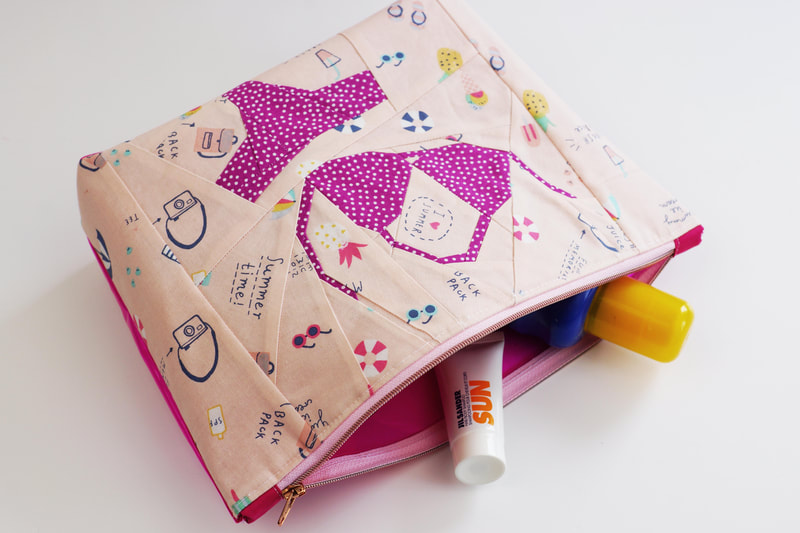
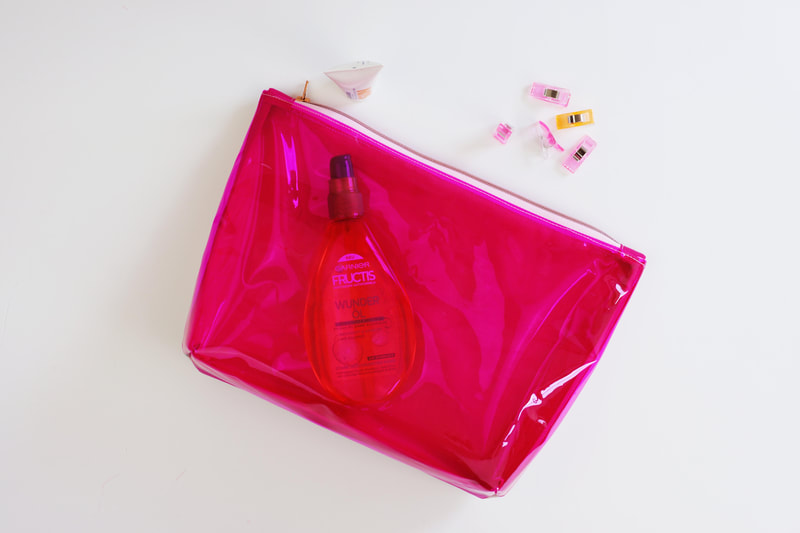
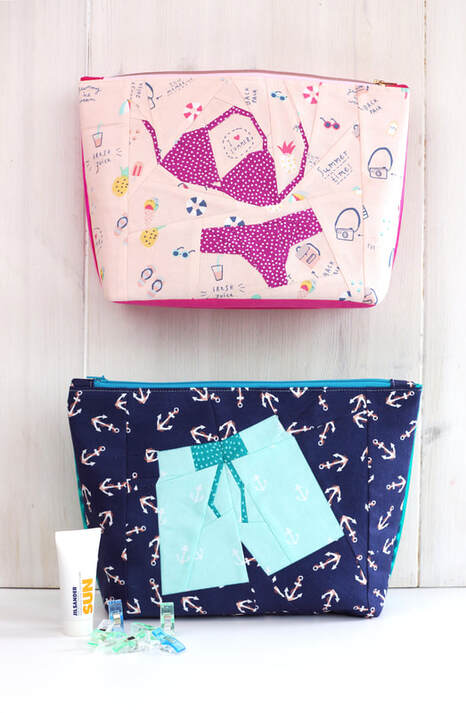
a super practical and pretty wet bag for BIKINI/SWIMMSHORTS
This is a fab combination of foundation paper piecing and vinyl.
Natalie's fantastic way of sewing a beautiful pouch with vinyl and two of my summer, beach quilt block patterns make some useful and fantastic pouches. I am sure it happened to you as well, you spend all day at the beach, want to pack your things but all the swimsuits are still wet, so you wrap them in the towels. When you get home, the towels are moist, the pages of your book or magazines are wet and roll themselves. And to top it all off, one of you ( I'm not pointing fingers :-) forgot to close the lid of your sunscreen all the way, so it's spilled nicely all over your beach bag.
Needless to say these problems will all be solved, when you store your wet bikini or shorts perfectly in this pretty vinyl pouch.
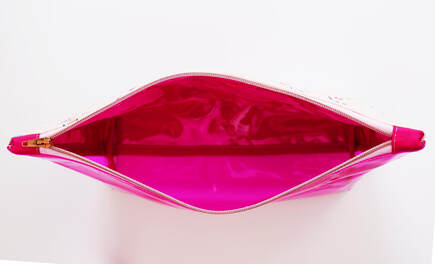
Your beach bag and all the rest of your stuff stays nice and dry, clean and safe. Plus you will be the hit at the pool or beach with this adorable #twopiecepouch. This pattern shows you step by step how to sew a vinyl pouch, as well as two unusual quilt blocks . The instructions are for two different quilt block sizes each, as well as two diffferent pouch sizes. The pouches don't have open vinyl seams, but awesome binding covered seams inside.
Get your sewing machine ready and make yourself some stunning
beach-bikini-swimmshorts wet bags. Shop the pattern here. And if you share them on social media why not use #twopiecepouch so we can cheer your makes :-) happy sewing Natalie and Ingrid xx
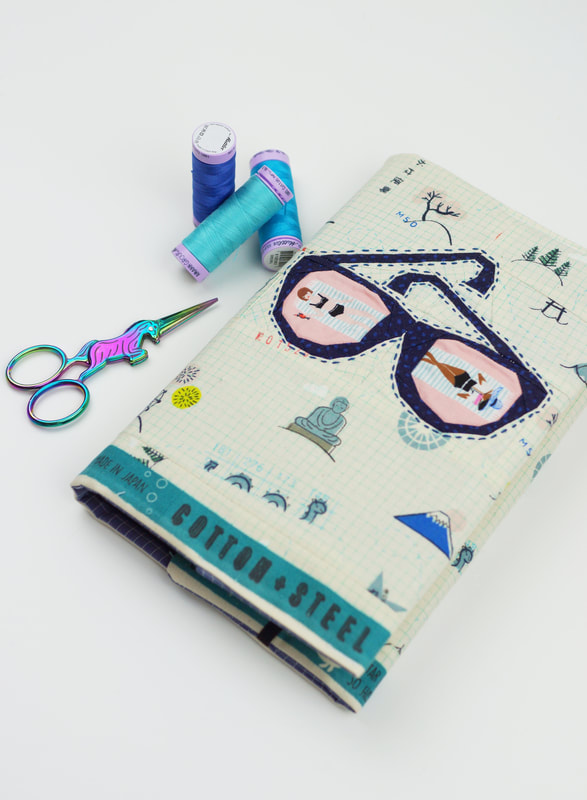
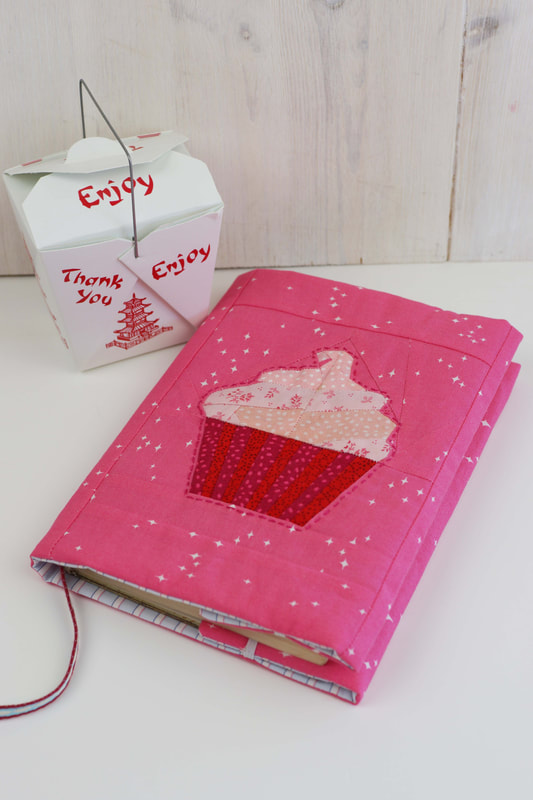
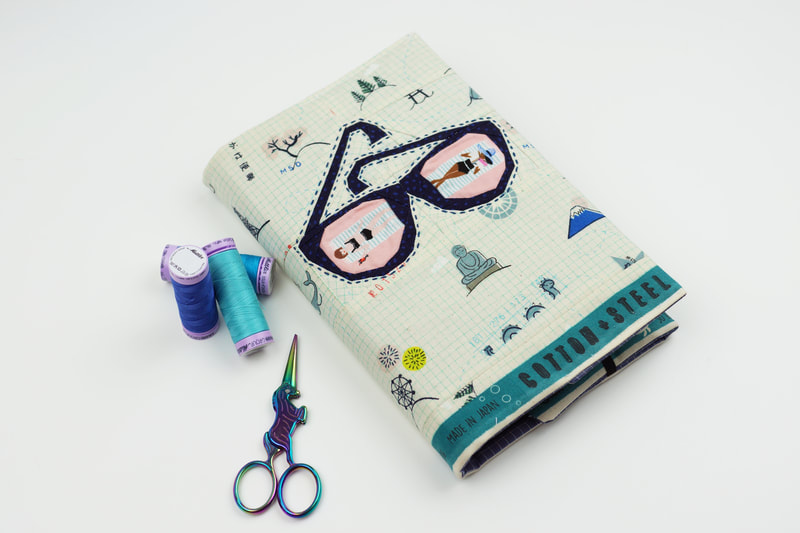
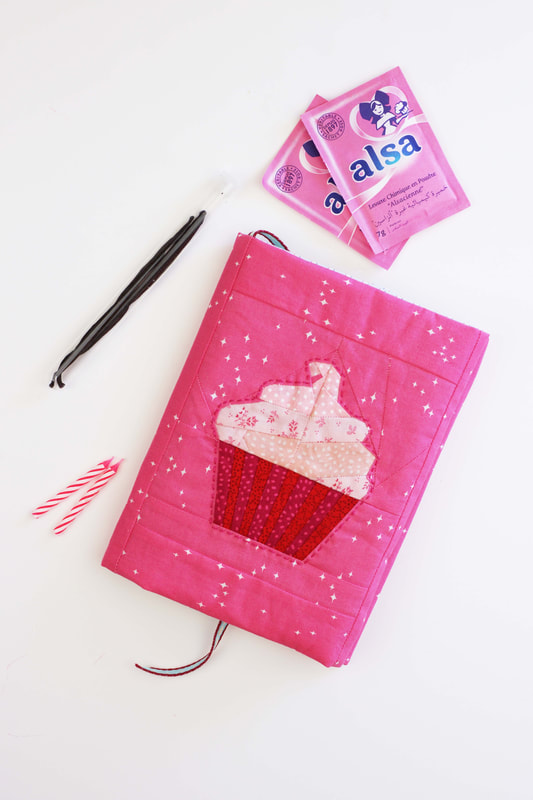
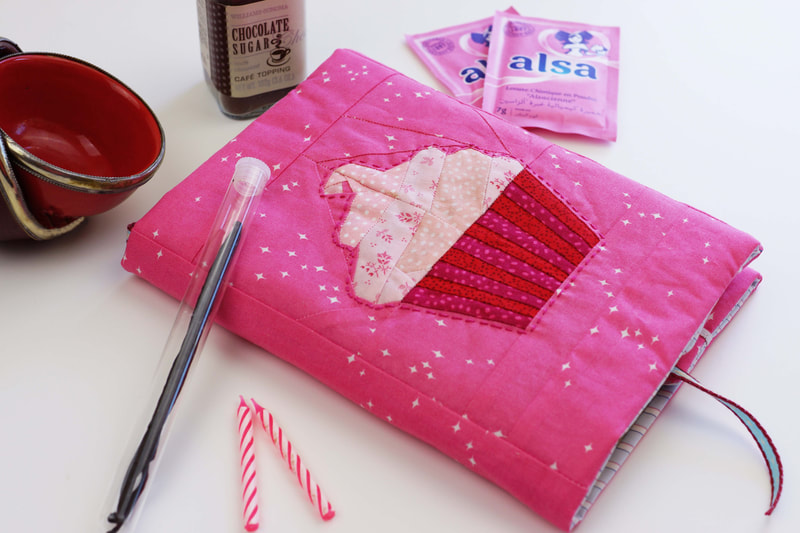
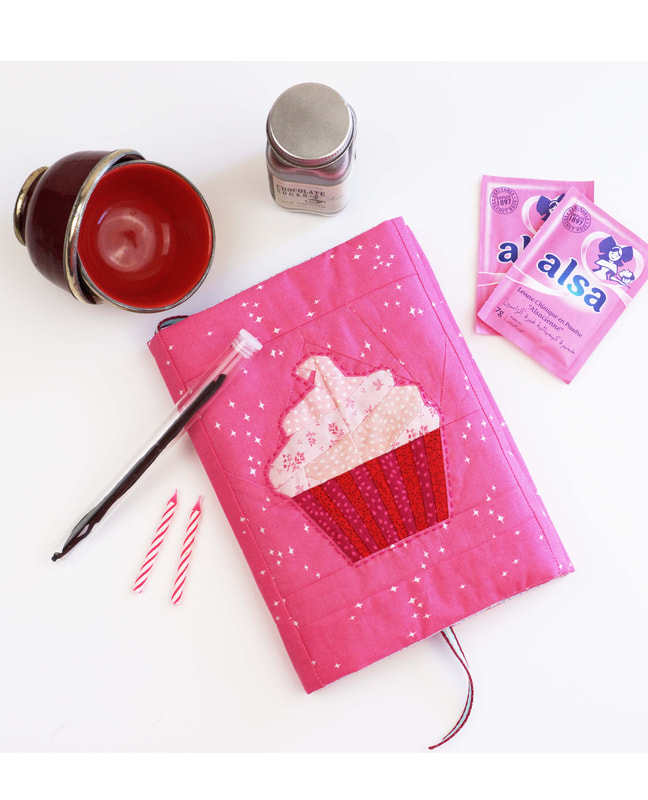
A quilted fabric book cover is not only extremly pretty on your coffe table,
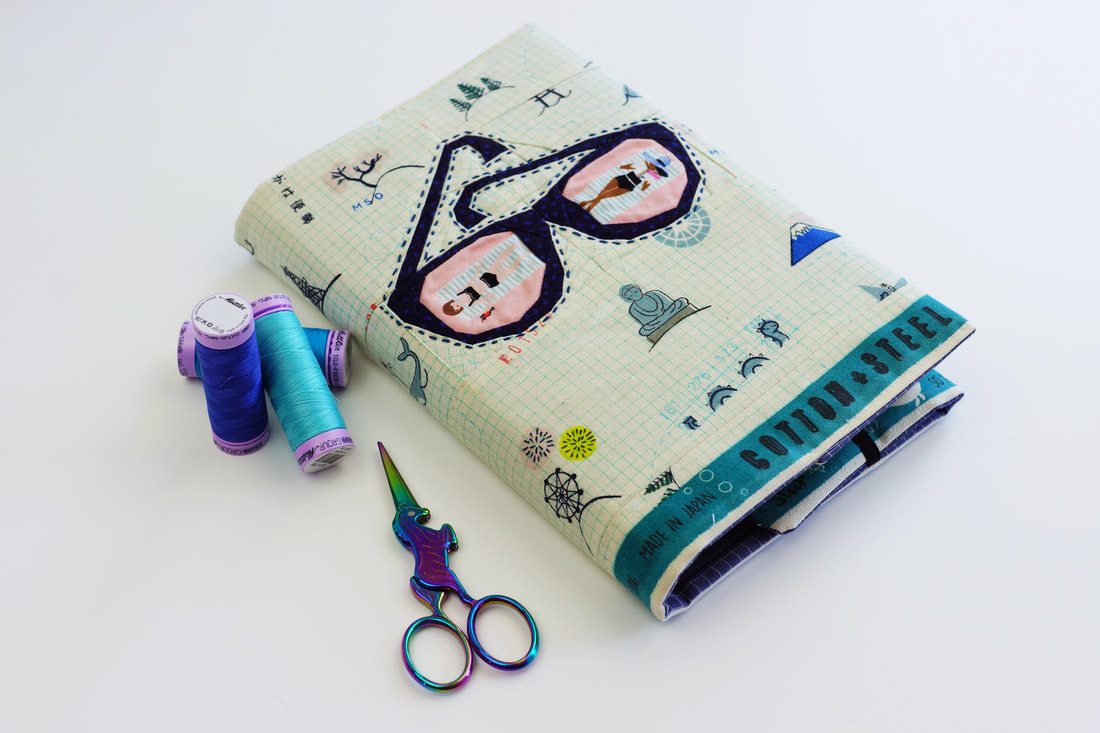
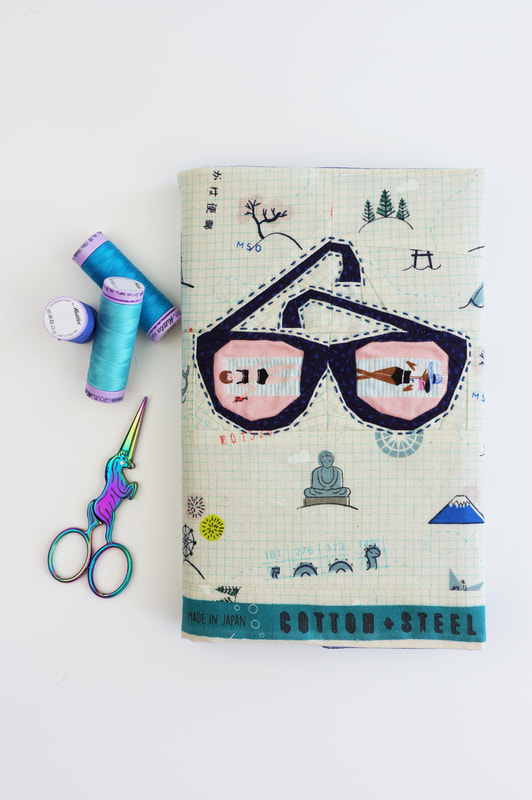
it also comes in very handy if your reading is as 'deep' as mine. Life is serious enough, so I sometimes enjoy 'easy' literature also called romance novels. Especially on holidays, or to wind down after a long day. But obviously not everyone needs to know what I'm reading, right? Literally no one needs to judge my book by it's cover :-) So why not sew yourself a fun and easy, adjustable, quilted fabric book cover with the sunglasses quilt block pattern of mine? Perfect right?
Materials/ fabrics needed:
> the finished sunglasses quilt block ( or any other ) > fabric for the outer book cover (approx. 10"x 20" including quilt block depending on book size) > fabric for the lining ( approx. 10"x 20" depending on book size) > fusable light weight batting ( 10"x 20" depending on book size) > 10" elastic band > ruler, clips, scissors, thread and sewing machine I use a 1/4" seam allowance unless noted otherwise.
The size of your fabric depends on the size of your book.
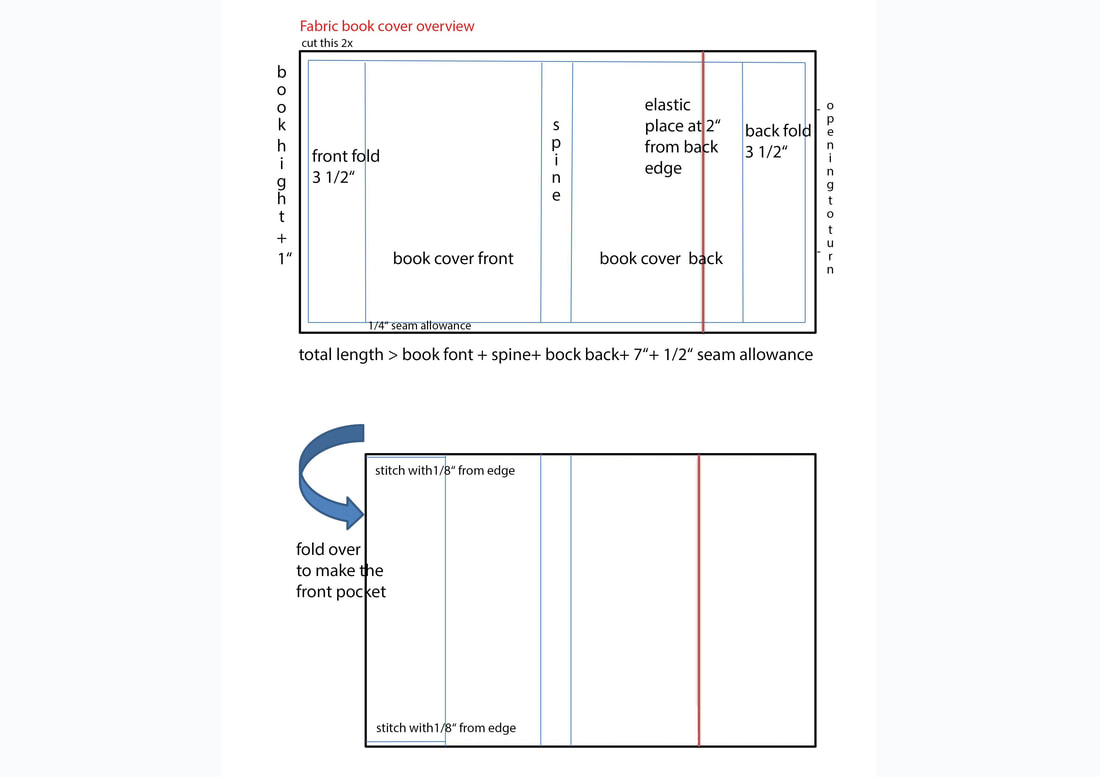
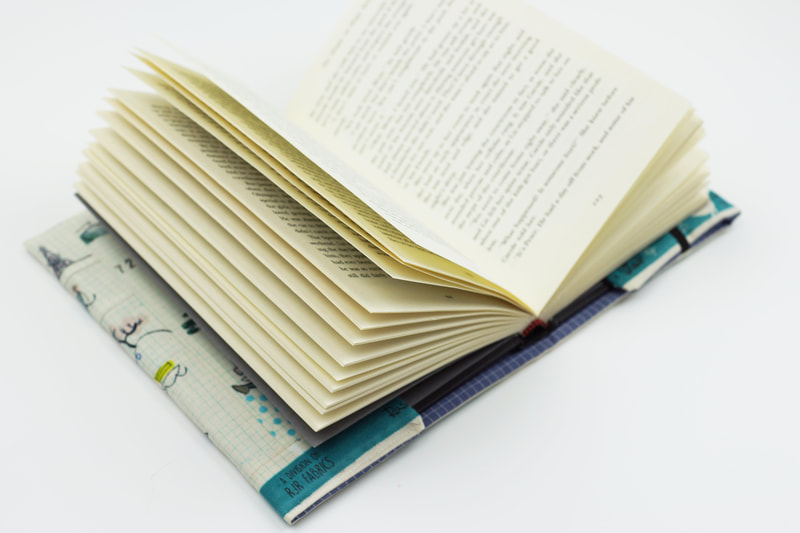
I made my book cover to fit most average size hard cover novels, which is roughly 5 1/2 "x 8" with a 1" spine. The book cover is adjustable in length. This is how you calculate the total size of your fabrics and batting needed: > total length will be: book front + spine + book back + 2 x 3 1/2" fold + 1/2" seam allowance > total width (hight or top to bottom) will be: hight of book + 1" .
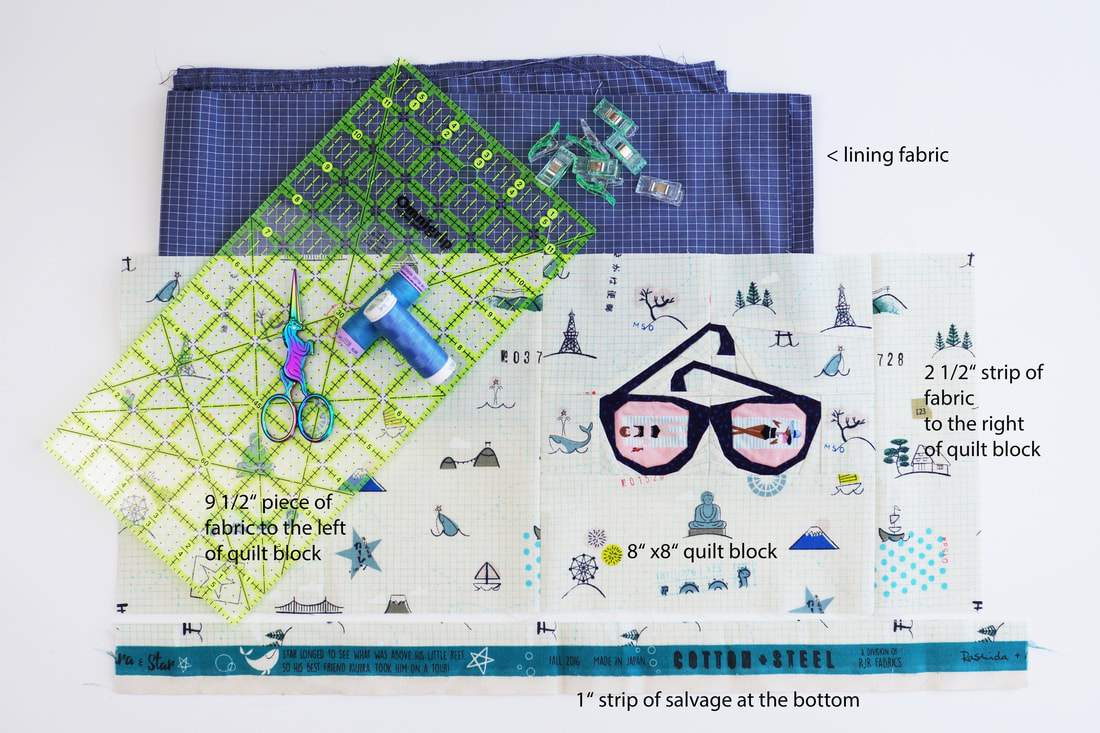
The sunglasses quilt block I used is 8"x 8" finished, I added a strip of fabric 2 1/2"
to the right and a piece of fabric 9 1/2" to the left. I also added a 1" strip of some very cute selvage to the bottom. The finished piece of outer fabric is 9" x 19 1/2" , same size for lining and batting.
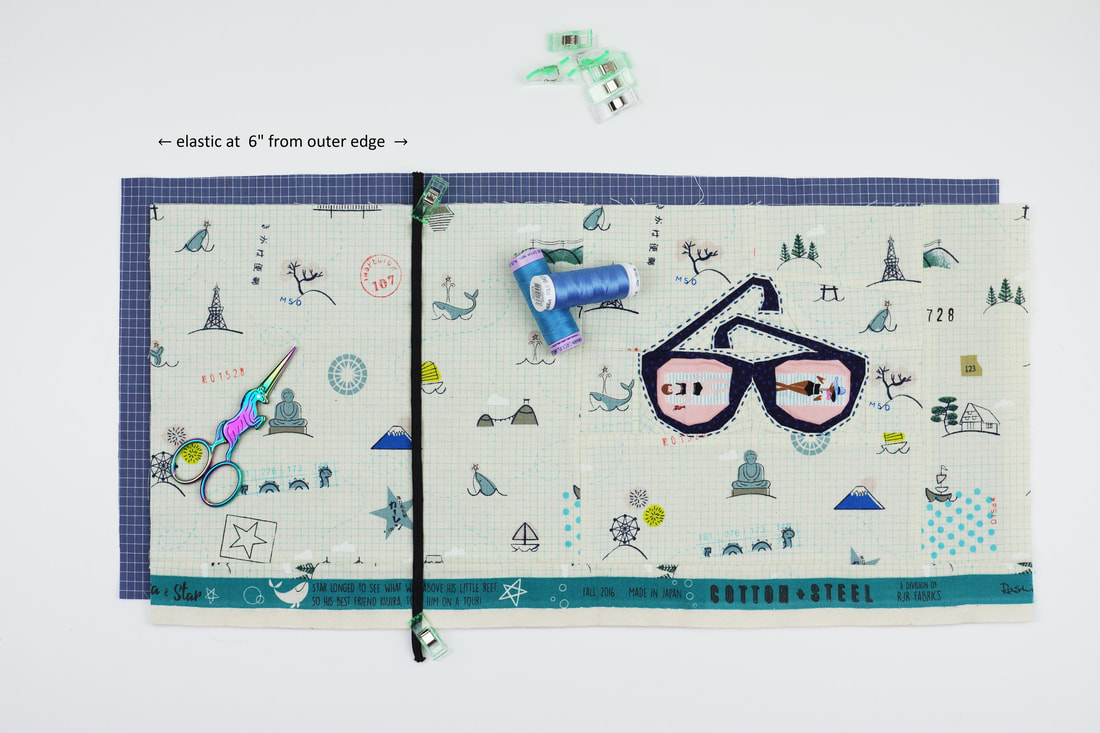
Iron on the fusable batting to the outer book cover fabric then clip the elastic band at about 2" from the back edge of the book (if your size is different then this one) or 6" from the outer edge ( the short side of the fabric).
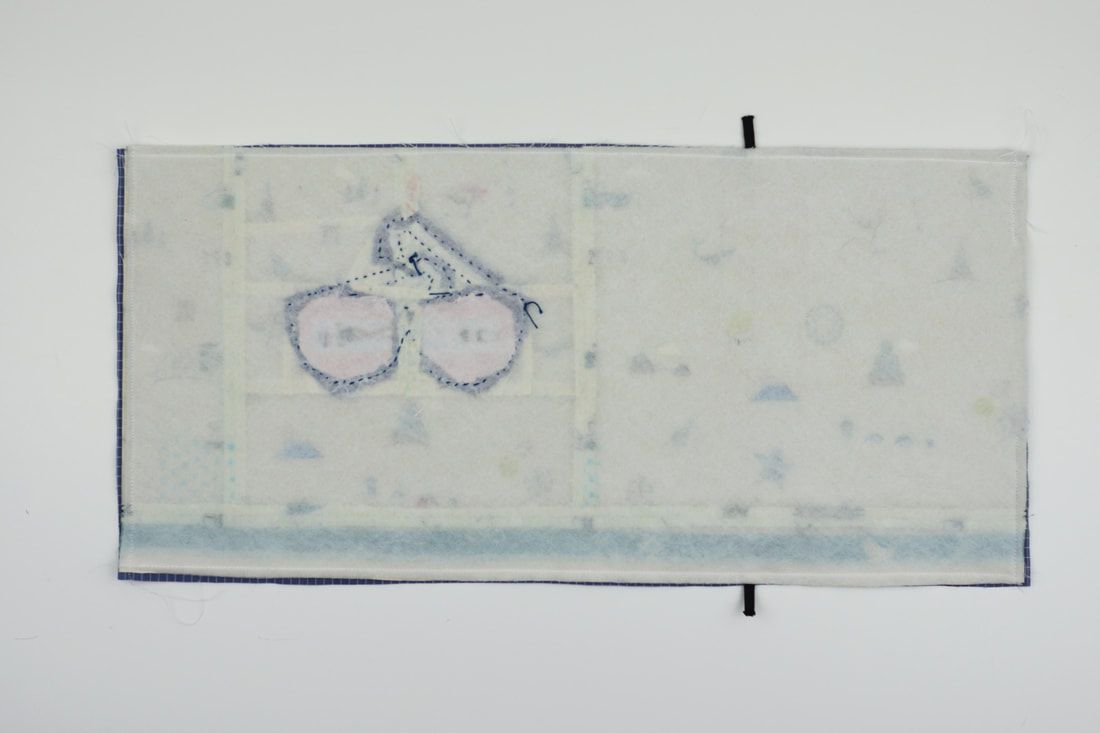
I did some hand stitching around my glasses, you could also quilt the outer fabric with simple straight line quilting, or what ever quilting you prefer. Now place outer fabric and lining, right sides together and clip or pin ( I prefer clips) in place.
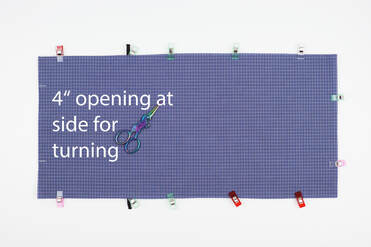
Stitch all the way around and leave a 4" opening at the side (the one that will be folded into the book's back) for turning.
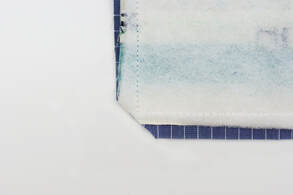
Cut off the edges for nicer corners.
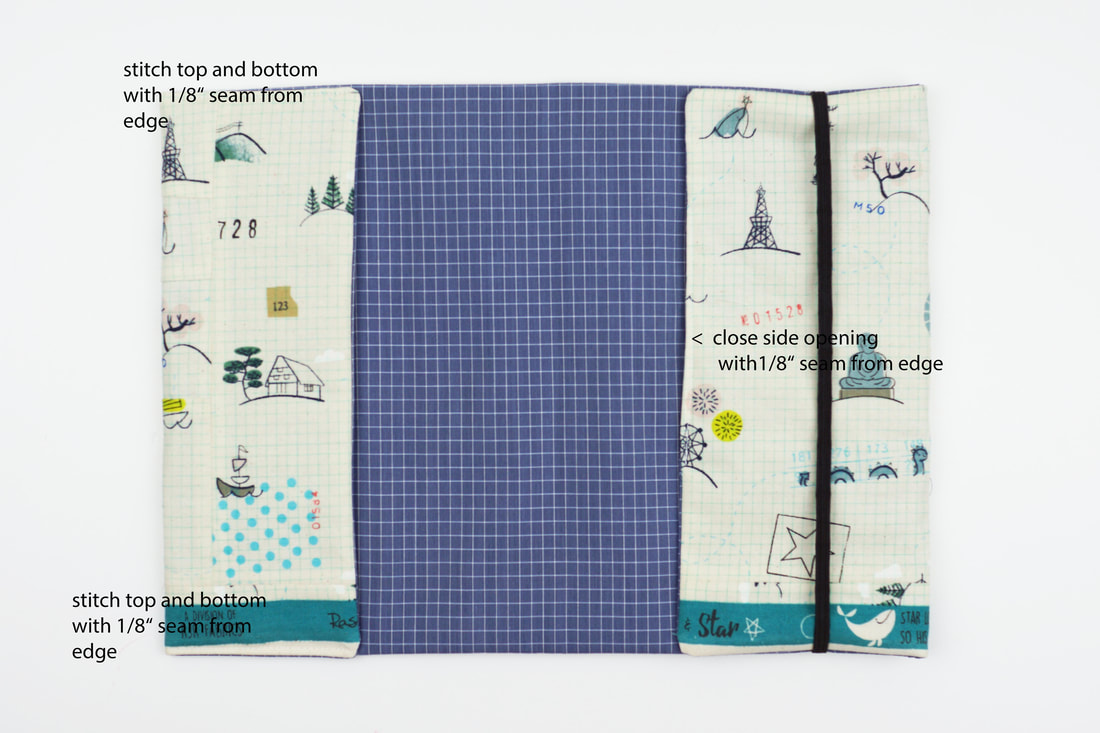
Turn the book cover through the opening on the side, and close the opening,
by folding the seam allowance inside and stitching the opening close with a 1/8" seam from edge. Fold in the front pocket 3" - 3 1/2" and stitch top and bottom with 1/8" seam. Fold the back pocket under the elastic. And well done your adjustable, quilted book cover is finished.
This quilted book cover will be a wonderful addition if you're gifting a book
or will work just as well for a diary or note book. Any other ideas? Let me know. I cant wait to see what you guys come up with. Share your creations on social media and use #joejuneandmae so I can cheer your makes. happy sewing Ingrid xx
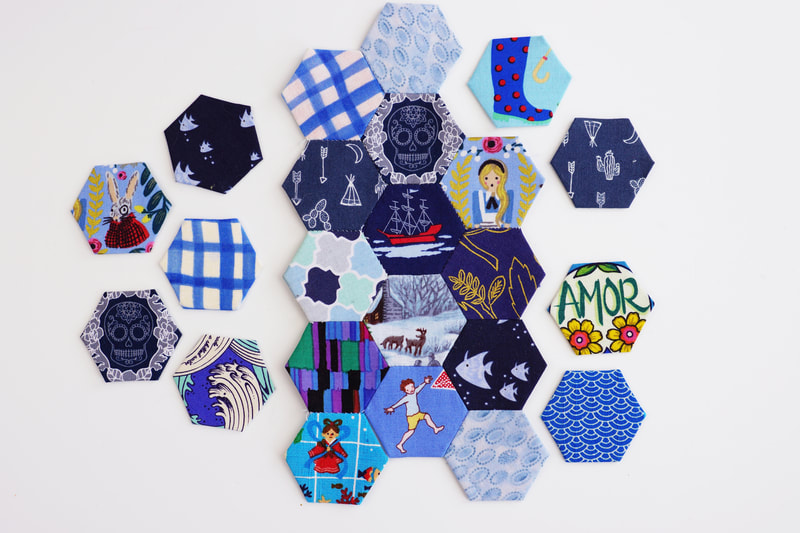
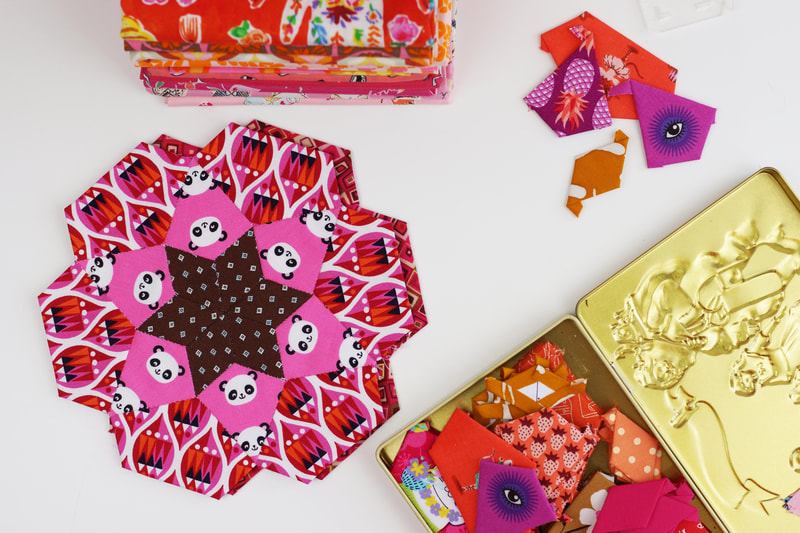
What is fussy cutting patchwork and how to use it in Foundation Paper Piecing, English Paper Picing or quilting in general?
I have been quilting for a long time, and I remeber the days when I was cutting fabric for a quilt and was giddy with joy when the pattern of the fabric ended up centered in the shape I was cutting. Little did I know back then, that this was actually 'a thing'. It's not only a thing, it also has a name........ It's called FUSSY CUTTING.
As I went on, on my quilting journey I noticed that some people were really 'lucky' and got their print centered all the time.... really lucky indeed.
I have to confess till then, I was still trying to use up as little fabric as possible and it didn't even occur to me, that someone would deliberatly just cut an image out of a piece of fabric.
So there is was, FUSSY CUTTING .
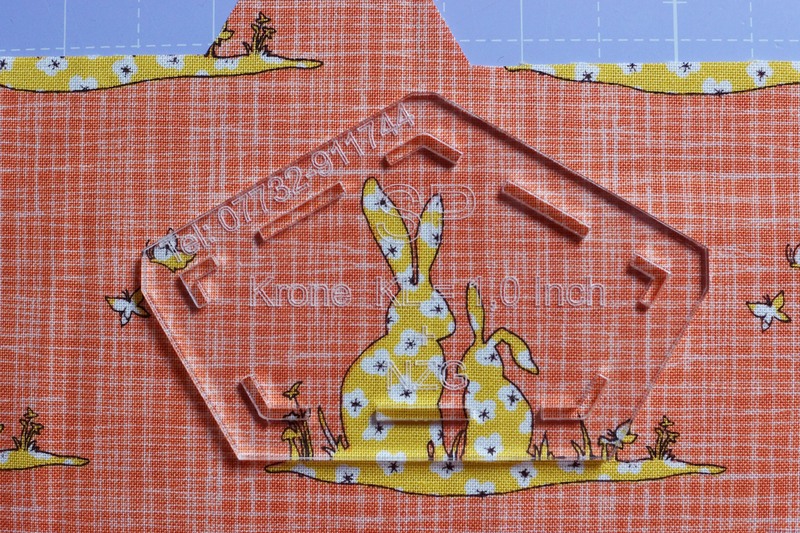
A whole new world opened up to me. Fussy cutting is when you cut your fabric to showcase a specific area of a print rather then cutting random pieces. There are different reasons for fussy cutting depending on your project or quilting technique. You use fussy cutting to: 1. Feature a particular part of a print or you 2. Use a specific part of a print in your quilt pattern to enhance the pattern. These reasons also determine the techniques and tools you use. So lets start with featuring a particular part of a print:
1. This method is usually used with English paper piecing, but also with squares, triangles or other geometrical shapes.
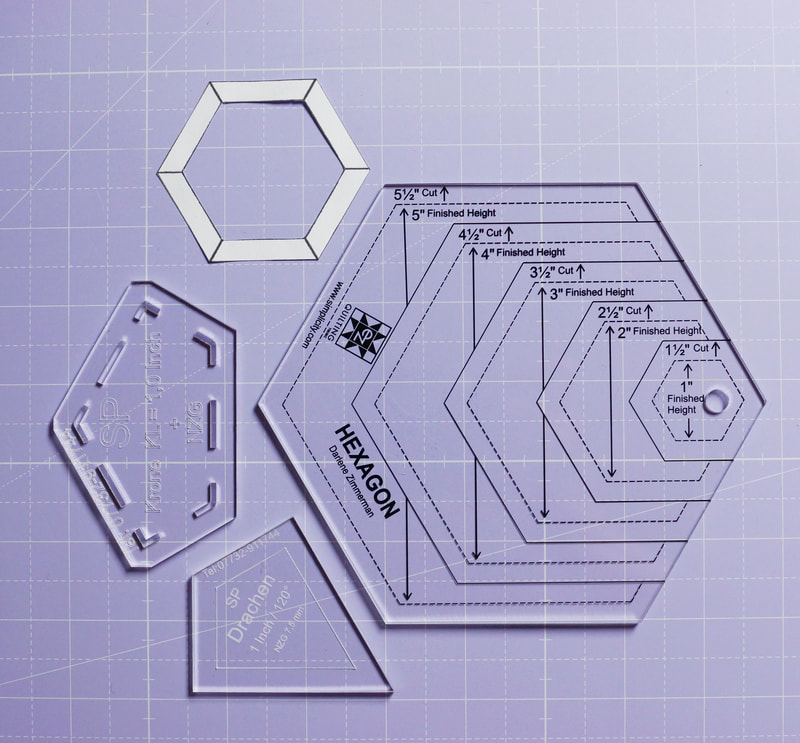
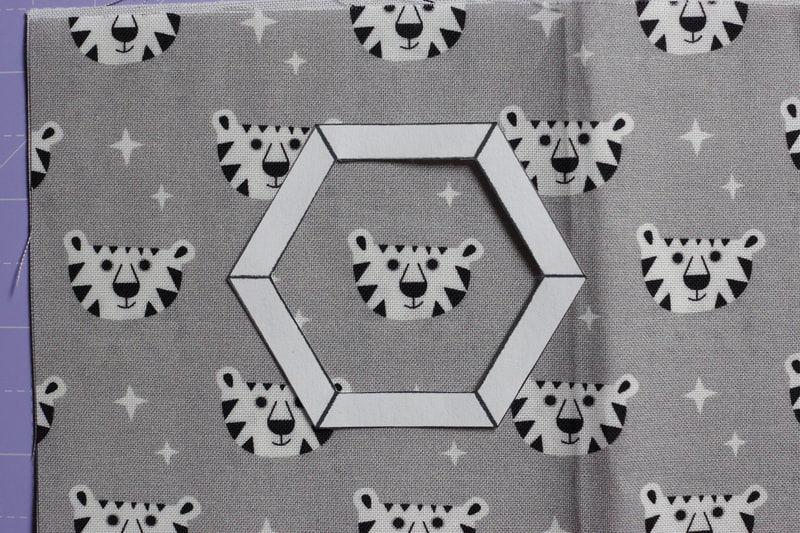
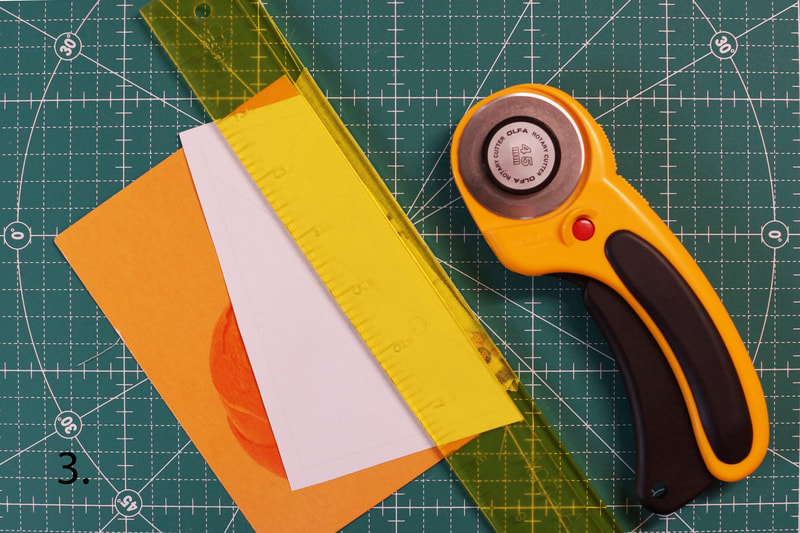
You can use acrylic templates to cut your shapes or make your own templates out of cardboard. The advantage of acrylic templates is, they're easy, reusable, see through and include a 1/4" seam allowance. If you make your own template, which is absolutly fine, draw your shape on cardbord and add 1/4" seam allowance, cut out the desired shape and you're left with the seam allowance 'frame' , which you then use to cut your fabric along the outside line. Either way, place your template on your particular part of your print and cut along the outside lines with your rotary cutter or fabric scissors. I prefer a rotary cutter, so the fabric can stay put on my cutting mat and I don't move the template by accident.
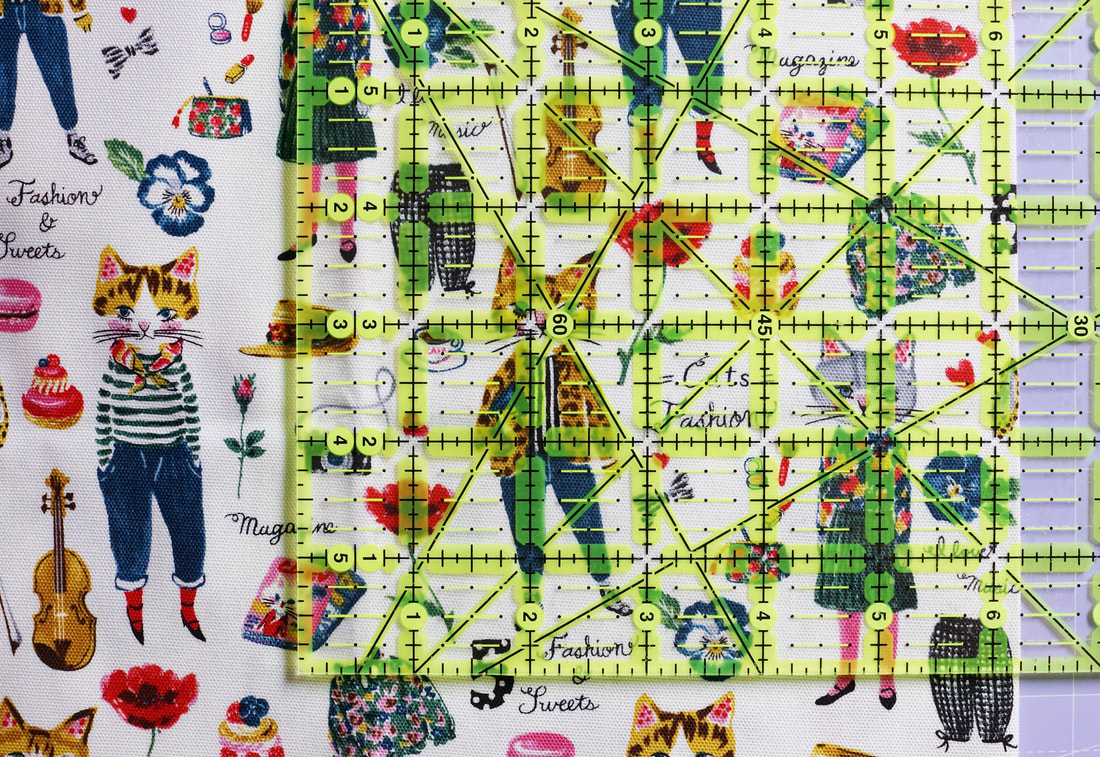
For geometrical shapes its best to use an acrylic ruler, these can be easily placed on top of your print and your design can be centered accordingly.
Make sure you don't forget the seam allowance, trust me it happened to me more than once, that I cut a cute image only to notice afterwards that I had fogotten the seam allowance.
Fussy cutting to enhance your foundation paper piecing pattern:
2. This is a bit more tricky , as you're not only working with a mirrored image, but also with weird angles in the pattern sometimes.
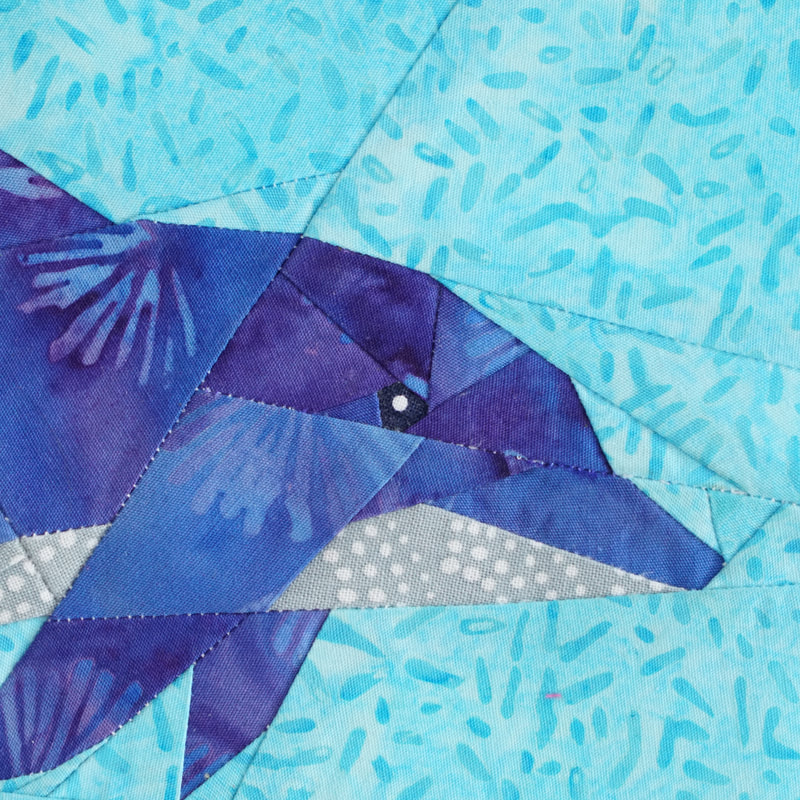
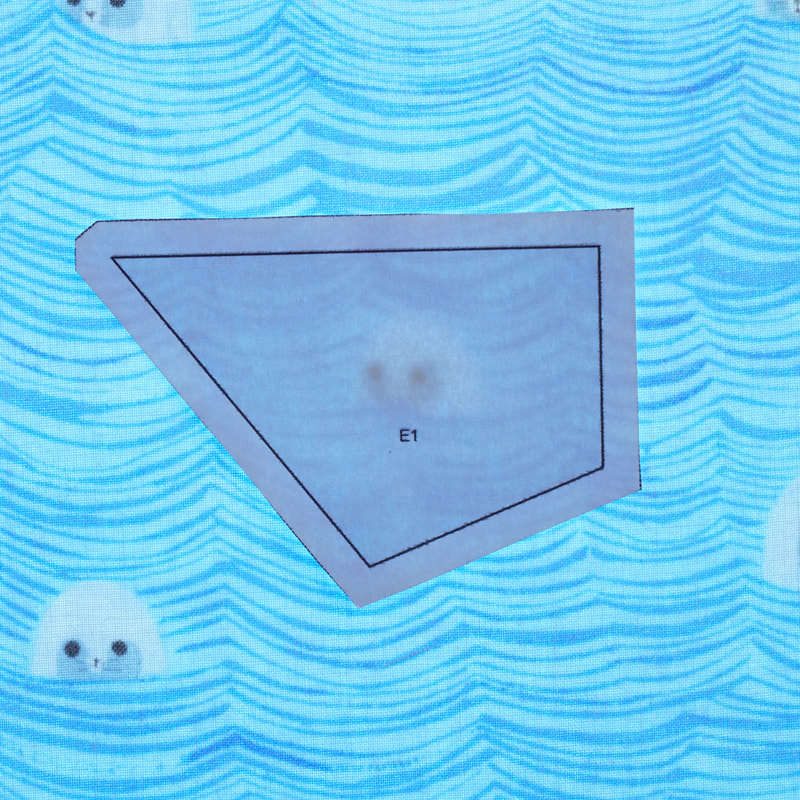
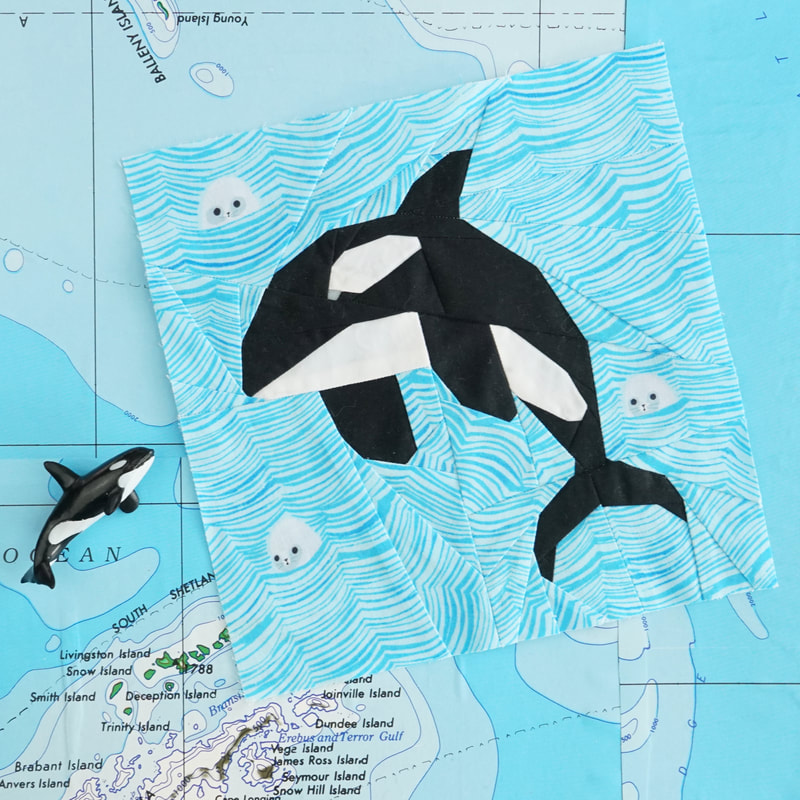
Let's start with the easier part placing a particular part of a print on your foundation paper piecing segment. This can be done to give an eye more life by using a dotted fabric, or by adding some print detail to an otherwise simpler background, as I did with the seals in the orca pattern. This is fairly simple if the part of the segment that you wish to place the print on is part 1, as shown in the photos below. I always use a fabric glue pen, it just makes your life so much easier. The dolphin and the orca pattern are featured in my new book. Which can be pre ordered here.
It becomes more challenging if it is any other number of a particular segment and has weird and pointed angles on top of it. But there are a few tricks.
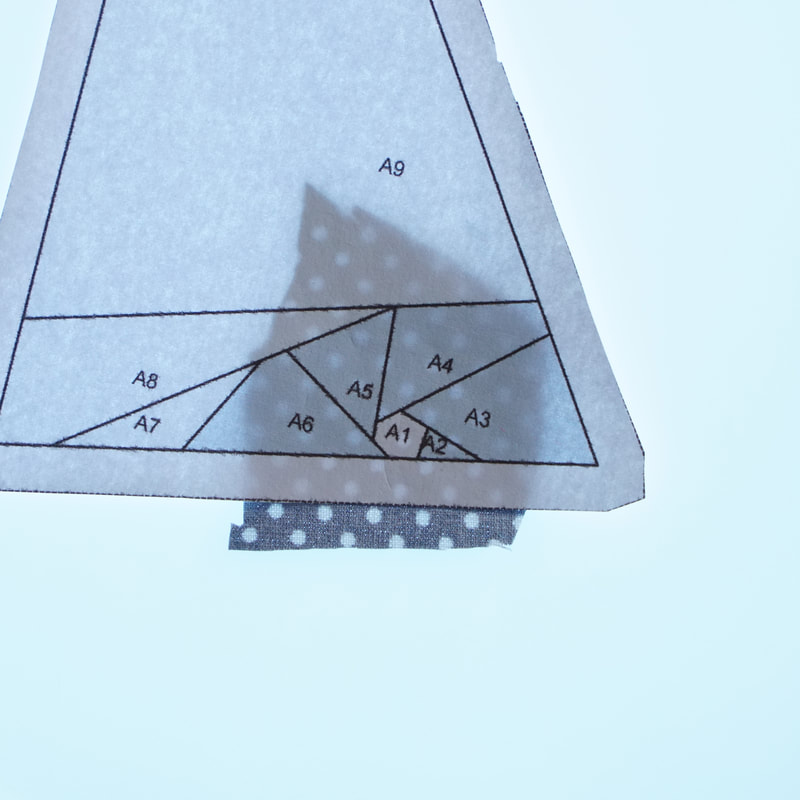
1. First you place your segment wrong side (unprinted ) on wrong side of fabric.
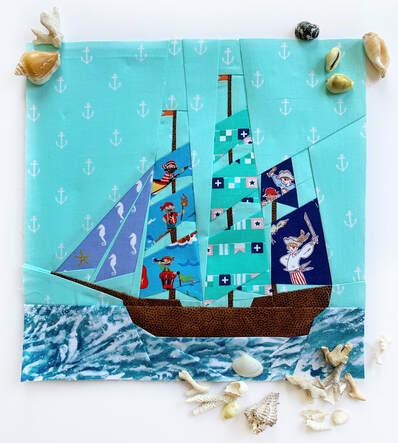
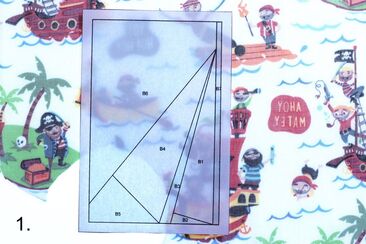
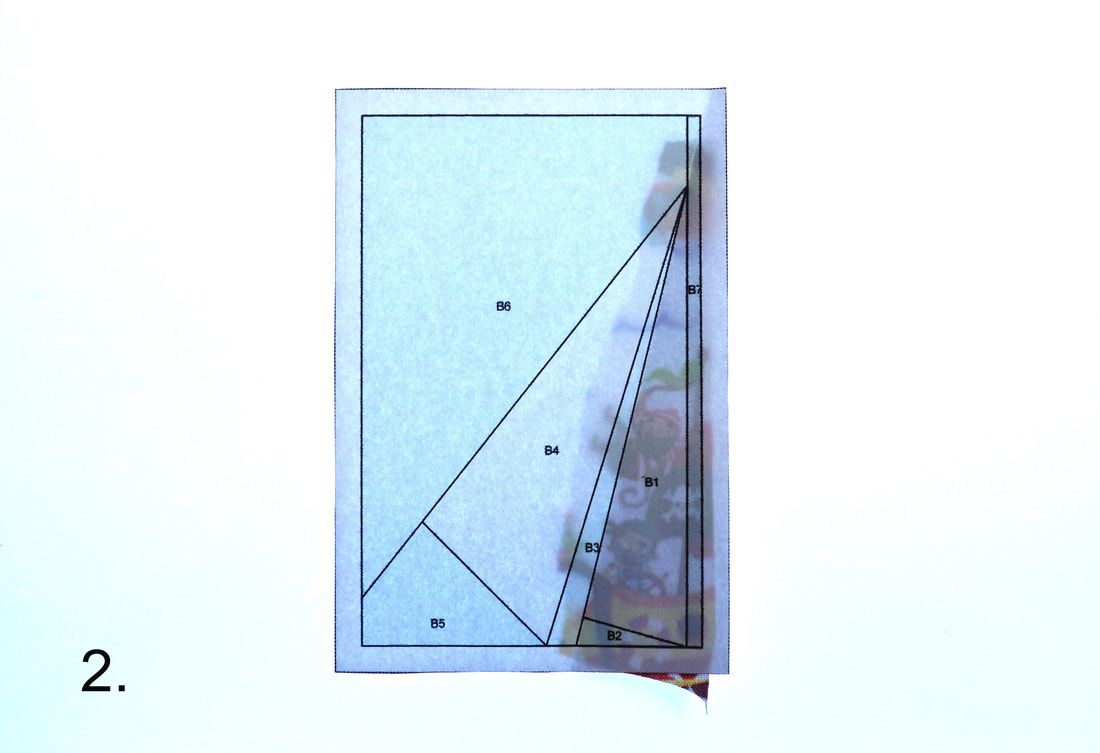
Here I chose the pirates for part B1. I use a fabric glue pen, and glue the segment onto the fabric (glue only B1). If you're planning on doing this a lot, a light box comes in very handy, but for starters just hold your segment and fabric against a light or your window. 2. Cut out, with aprox 1/4" seam allowance, around the perimeter of B1. You can use a ruler to do this and a rotary cutter, I usually just use fabric scissors and eye ball it. (I trim the seam allowance after sewing part 2 and 3.) Then sew part 2 and 3 with your chosen fabric for those parts.
3. Trim the seam allowance. I am using here the add-a-quarter-ruler, since I want this particular seam allowance to be super accurate.
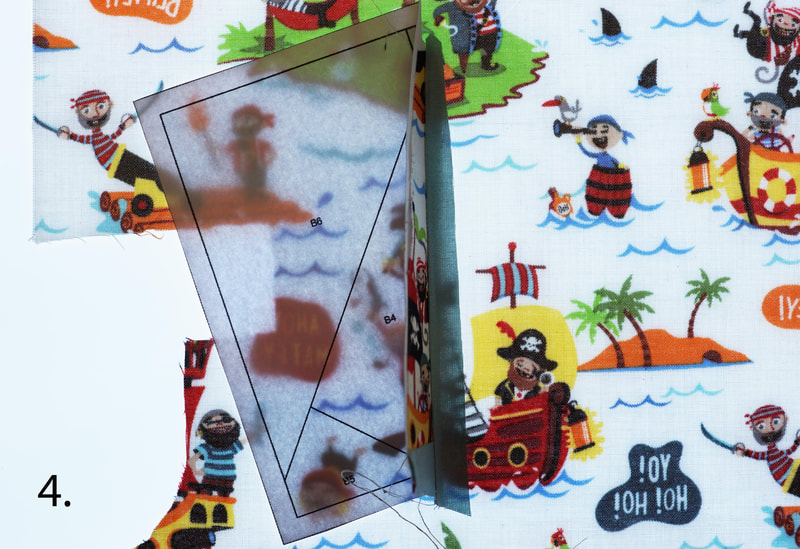
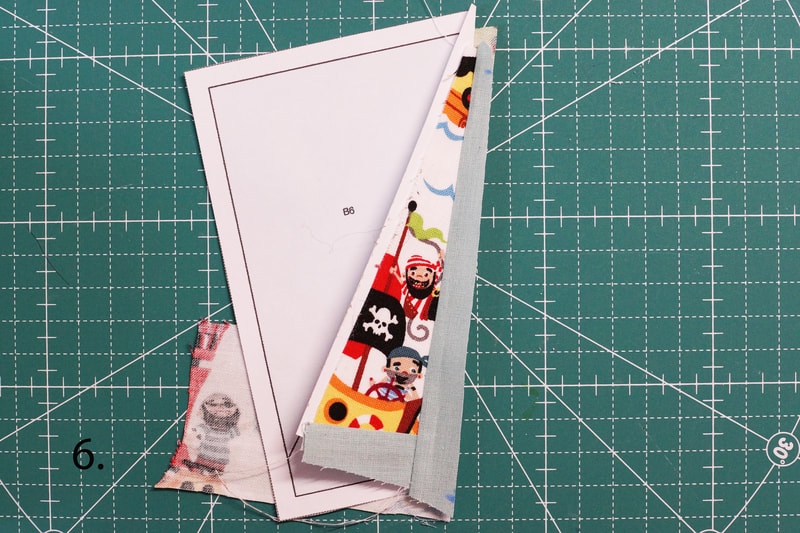
4. Now place the segment part B4 (wrong side of paper on wrong side of fabric) over your fabric folding back the seam allowance of B3 and glue in place. ( just glue B4, with just a little bit of glue, you'll remove it later)
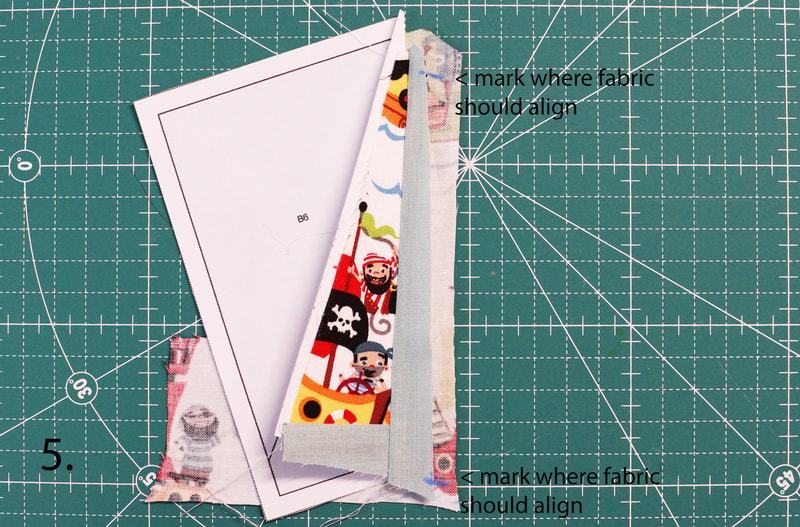
5. Cut out roughly and mark with water soluble pen, where fabrics should align.
6. Then trim along the raw edge of B3. Use a ruler and rotary cutter you want this to be accurate.
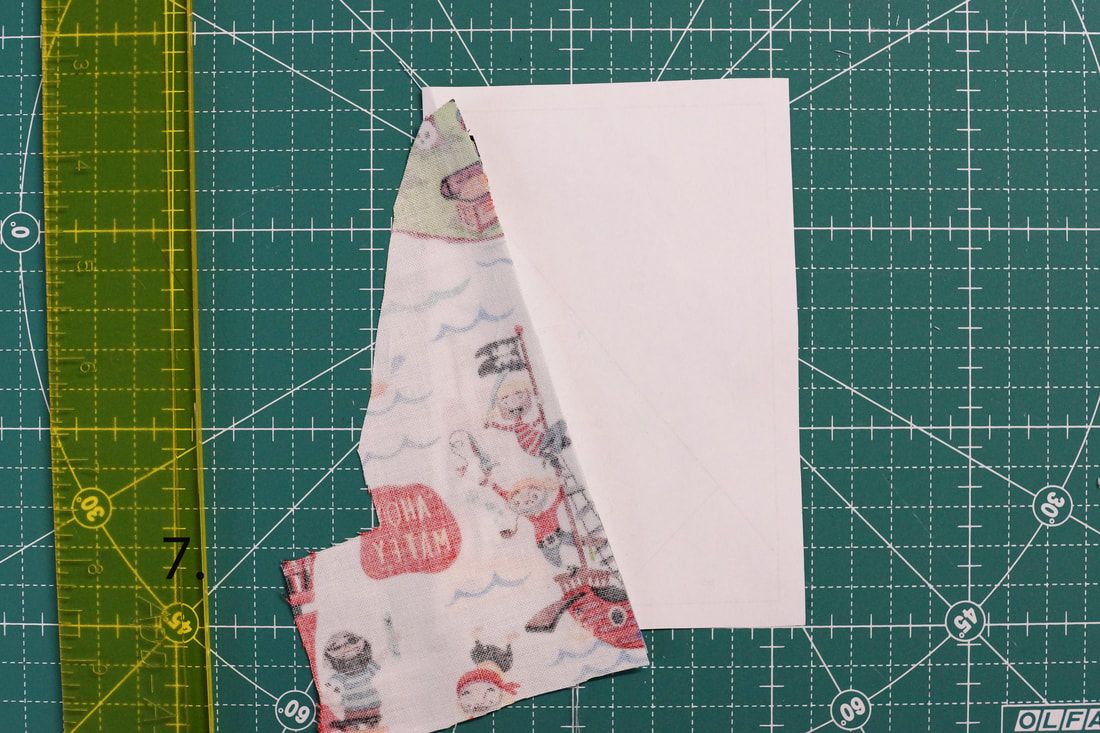
7. Place your pattern segment printed side down and flip the clued(yes un-glue!) fabric backwards. Right sides together with the previous fabric. Align raw edges and he marked lines. Then sew along the line between B3 and B4.
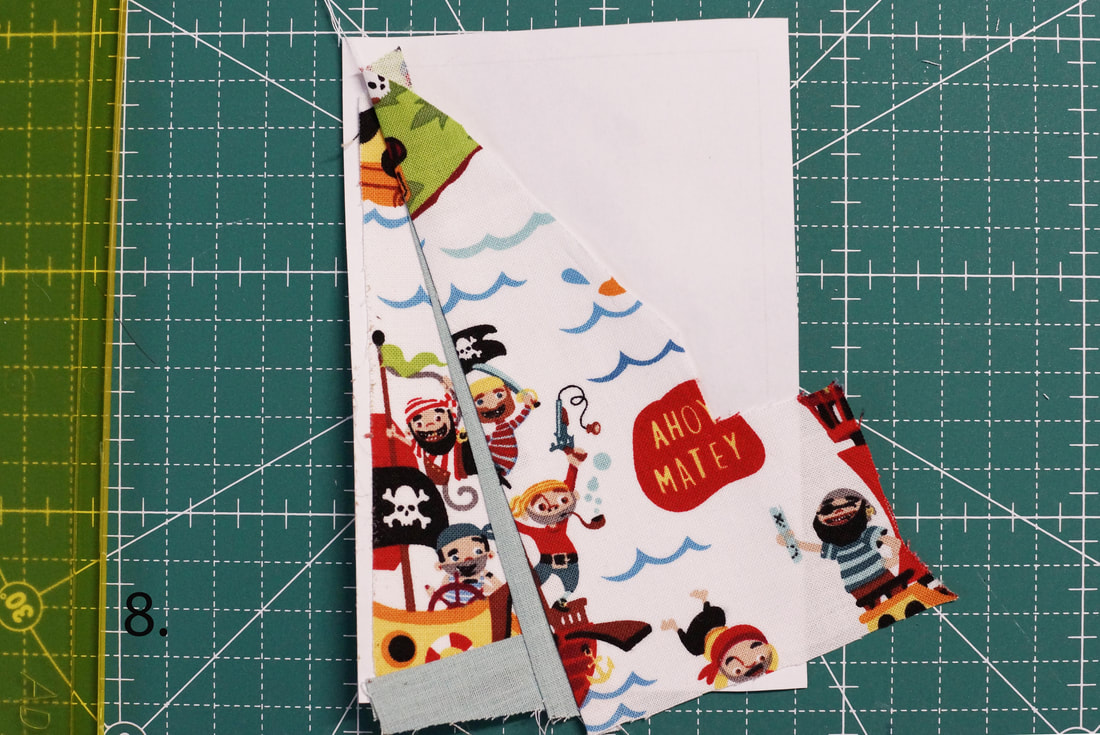
8. Fold the fabric over, an its exactly where you want it to be .
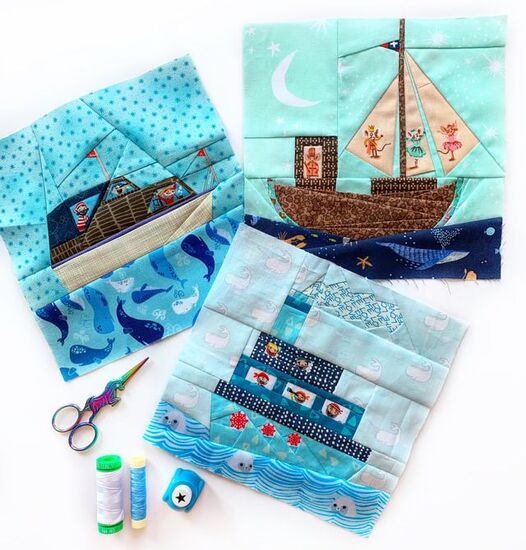
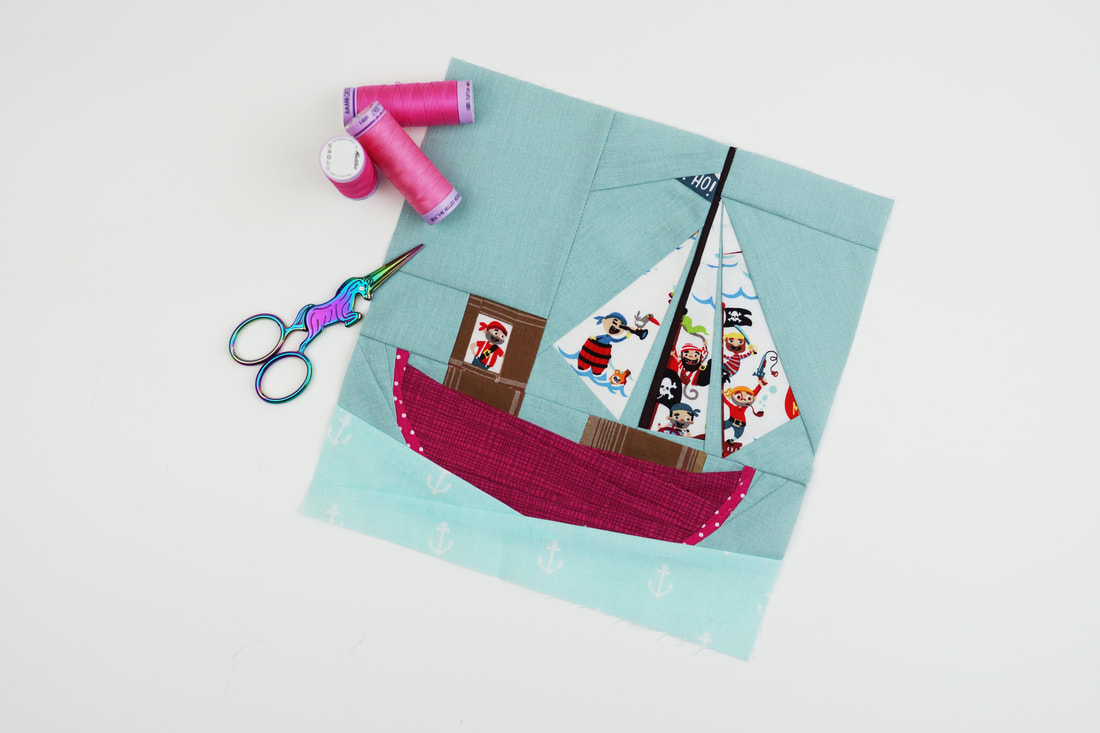
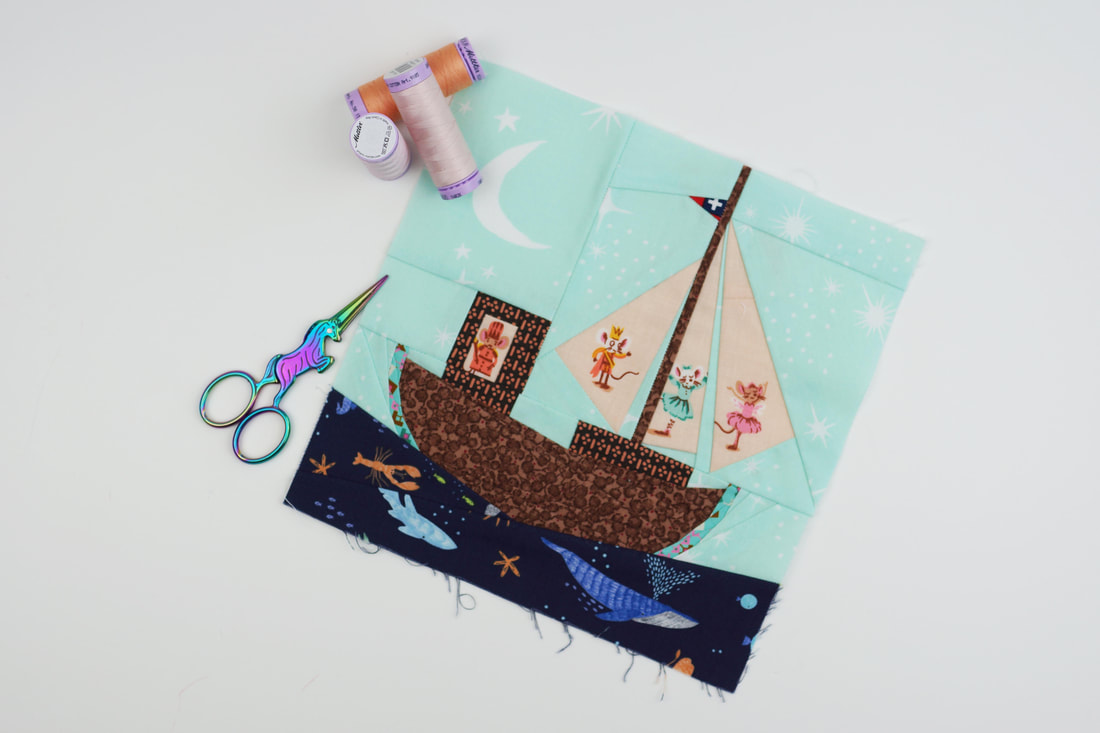
Finish this segment and then all the other segments, assemble your quilt block and voila your little happy boat isn't just a happy boat, it actually tells a story.
Fussy cutting in foundation paper piecing takes for some practice but it is extremly rewarding and turns a simple quilt block into a stunning make.
You find all the boat patterns including the little happy boat here. Is this something you guys would want to try? Or do you have other techniques for fussy cutting? I'm really curious so cant wait to hear from you all. Ingrid xx |
Author
Ingrid Alteneder Archive
March 2022
Categories
All
|
-
Shop
- New patterns
- All Patterns
- Appliqué Patterns
- Animals
- Baby
- Ballet
- Bear Cottage
- Beach/ Boats/ Nautical
- Buddha/ Mindfulness
- Chinese New Year
- Christmas
- Easter and Spring
- Fairytale
- Fall/ Autumn
- Flowers, Trees and Plants
- Food/ Drinks
- Halloween
- Oktoberfest
- Quilted items
- Stars
- Viva la Frida/ Dia de los Muertos
- Valentine's Day
- Village Patterns
- Mixed pattern
- Home
- About
- Blog
- Publications
- Etsy
- News
- Deutsch
|
Visit us at
|











 RSS Feed
