|
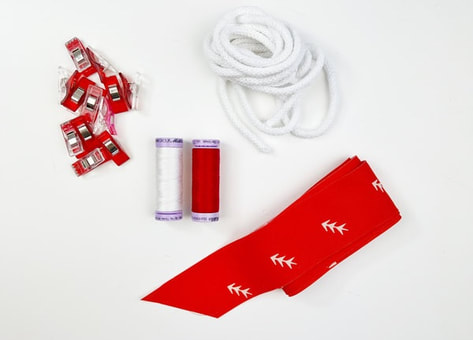
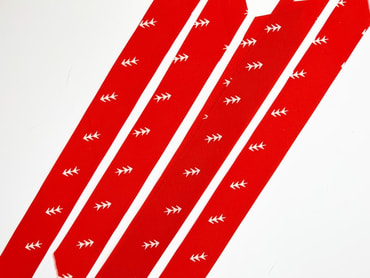
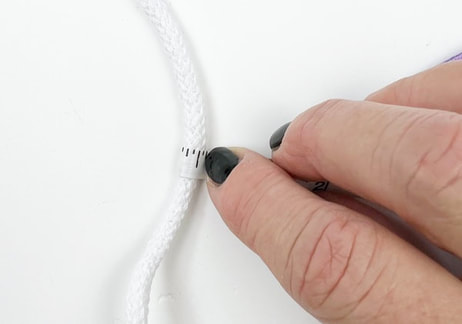
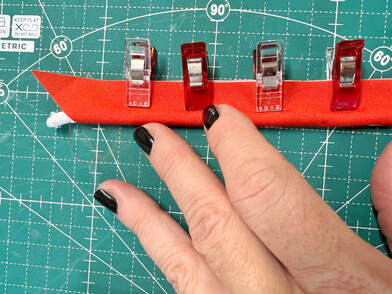
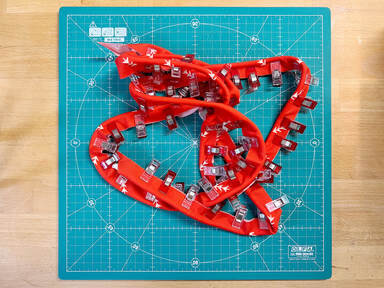
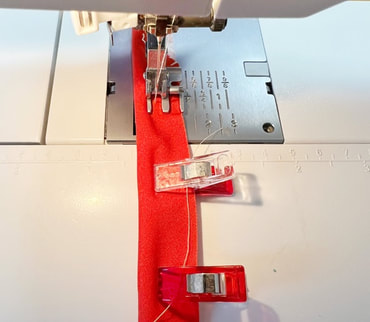
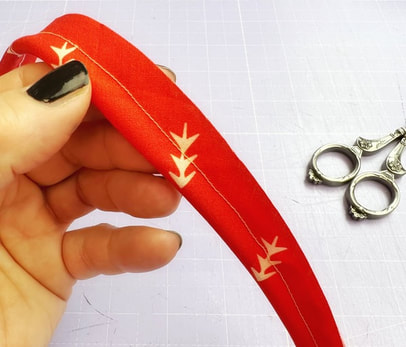
You know how to make your own bias tape, but you always wondered how to make your own piping? You're asking yourself how can I make my own corded piping? What is piping for sewing? Or what kind of piping do I refer to here? I am talking about a trim or edging around a pillowcase or bag, that typically consists of a thin strip of fabric, usually a bias tape with a cord inside. This narrow tube is attached to the edges of decorative items such as pillowcases, garments or bags to enhance the edges or give the items a more defined or professional look. Materials needed: - Bias tape - cord - clips or pins - sewing machine, zipper foot, needle and thread The piping cords come in all different sizes and qualities and most importantly thicknesses. So depending on your project you can choose a very thin cord or a really thick one. I used a medium cord for this tutorial it's 1/4" (6mm) diameter. You will be sewing very close to the cord, so a zipper foot is extremely helpful. 1. To start you will need diagonal ( 45° angle) fabric strips, also called bias tape. The fabric will be wrapped around your cord so the bias tape has to have the width according to the circumference of your cord. This means, you need to measure the circumference of your cord ( not diameter of your cord) then add the seam allowance twice and that gives you the width of your bias strips. 2. You need to measure the circumference of your cord, mine was 5/8" in circumference (not to be confused with diameter!) Then you add your seam allowance (1/4" in my case) twice, and there you have your width of the bias tape: FORMULA: circumference of cord + 2 x seam allowance = width of bias tape In my case: 5/8" + 2 x 1/4" = 9/8" or 1 1/8" 3. Fold your bias tape in half, aligning the raw long edges. Place your cord in-between the folded bias tape. As you know, I prefer clips so here you can see, I clip this cord/ bias tape sandwich in place, but you can also use pins. If you're using pins you can either pin along the cord or you can place your pins vertically, depending on your personal preferance. If you want to be very neat, you can now hand baste along the piping with large running stitches, before you machine stitch your piping. I have to admit, when I first learned how to sew, from my Mum ( she was a home economics teacher) I had to hand baste everything. I wasn't very happy about that , as you can imagine, since it took so much time. But it helped immensely and my sewing was a lot straighter and neater than in would have been without the hand basting. As you can see, these days I am not as neat and prefer a couple more clips. 4. Now stitch along the cord with a zipper foot. This allows you to get as close as possible to the cord. This tutorial is with a zipper foot, since most machines come with a zipper foot or most people have a zipper foot for their machines. Side note here: I turned the zipper foot of my PFAFF sewing machine the other way around so I can see more of my stitches. I wish this foot would come in clear acrylic, that would be perfect. (If you have a piping foot for your sewing machine, that's a different story. Then you place the cord under the round part of your piping foot and move your needle the side so you can stitch along the edge of the cord.) 5. And here it is, your very own individually hand made piping. This was easy peasy, right ? And here is a tutorial on how to use this piping in a project, and how to sew it into a pillowcase the super easy way. Check out this quick video with the full instructions.... Happy sewing Ingrid xCheers to a successful making of your piping :-)
0 Comments
Leave a Reply. |
Author
Ingrid Alteneder Archive
March 2022
Categories
All
|
-
Shop
- New patterns
- All Patterns
- Appliqué Patterns
- Animals
- Baby
- Ballet
- Bear Cottage
- Beach/ Boats/ Nautical
- Buddha/ Mindfulness
- Chinese New Year
- Christmas
- Easter and Spring
- Fairytale
- Fall/ Autumn
- Flowers, Trees and Plants
- Food/ Drinks
- Halloween
- Oktoberfest
- Quilted items
- Stars
- Viva la Frida/ Dia de los Muertos
- Valentine's Day
- Village Patterns
- Mixed pattern
- Home
- About
- Blog
- Publications
- Etsy
- News
- Deutsch
|
Visit us at
|



 RSS Feed
