
|
Now we all want to save plastic, no question about that. The easiest way to do this, is to start in our own home. I don't even want to think about the amount of little bags or foil I used to quickly wrap my kids lunch. Many years ago I made reusable lunch wraps and they are still in constant use. I experimented with lots of different materials and patterns for reusable sandwich wraps over the years. Here, I 'll show you my sandwich wrap pattern, that I like best at the moment .... and it totally helps, that it is SUUUUPER cute. 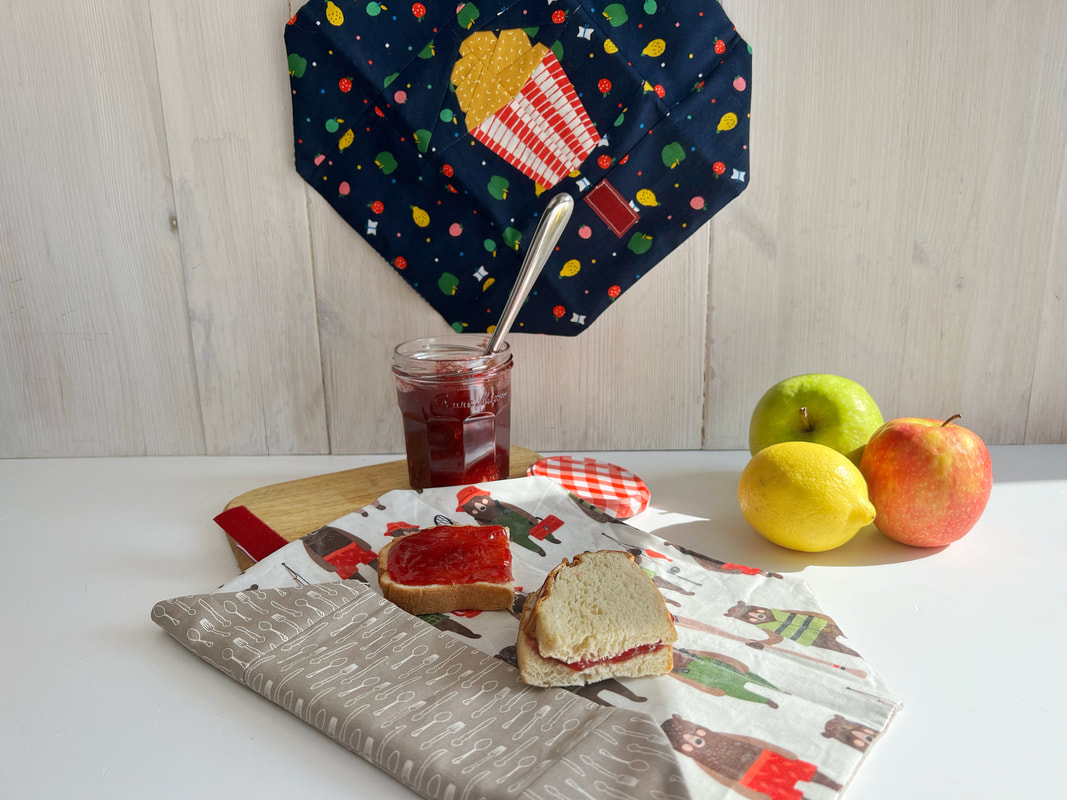 DIY lunch wrap pattern I'm sure you can't wait to start sewing, so how to make a reusable lunch wrap? It's a lot easier than you think. Reusable lunch wrap pattern : please read through the instructions first ( finished size aprox. 12"x 12") Tools needed: -sewing machine -cutting mat/ rotary cutter and acrylic ruler -pins or clips and iron optional tools to make your life easier: -spray baste -fabric glue pen for your foundation paper piecing Materials needed: -one of the food quilt blocks in size 6"x 6" (will be 6 1/2" square when sewn together) I used the pretzel, ice cream cone, and pop corn. - 2 strips of fabric for the side of the quilt block 3,5"x 6,5" - 2 strips of fabric for the top and bottom of the quilt block 12,5"x 3,5" - 2" velcro strip (I cut the 'hooked' part a little shorter 1,5") for the lining: - a piece of fabric 12,5"x 12,5" - Heat'nBond vinyl 12,5"x 12,5" (or a piece of clear vinyl 12,5"x 12,5")  cut the side strips of the lunch wrap Step 1: Sew the quilt block of your choice in size 6"x 6" (the finished block will be 6,5"x 6,5" when sewn together, that includes the 1/4" seam allowance) Then cut the fabric strips for the sides and top and bottom of the quilt block. What fabrics can I use for reusable snack bags and sandwich wraps? You want fabric that is water resistant or waterproof. That's the reason why I used Heat'nBond Vinyl to cover the lining fabric. You could also use oilcloth ( typically cotton) that's coated in linseed oil to make it waterproof. You could also use beeswax covered fabric or coat your fabric with beeswax yourself.  front of the sandwich wrap Step 2: Attach the side strips of fabric and the top and bottom strip to the quilt block. Sewing the side strips on first and then the other two fabric strips. Square off the sandwich wrap top with your ruler, so it measures 12,5"x 12,5". Then cut the lining piece of fabric and the Heat'nBond to 12,5"x 12,5". Step 3: Attach the Heat'nBond to the lining fabric. This is done by peeling off the paper of the vinyl and putting the 'sticky' side towards the fabric. You can still correct it, it will only melt into the fabric once you press it. lay the paper on top and press it with medium heat. If you're using clear vinyl, you just cut the vinyl the same size as the lining piece and lay it on top of the lining fabric. *HeatnBond Iron-On Vinyl contains no BPA or lead. However, Iron-On Vinyl does utilize a plasticizer, DID in the manufacturing process. At this time there is no data testing regarding Iron-On Vinyl on children's toys, bibs, food storage, etc. since this product was not intended for children. 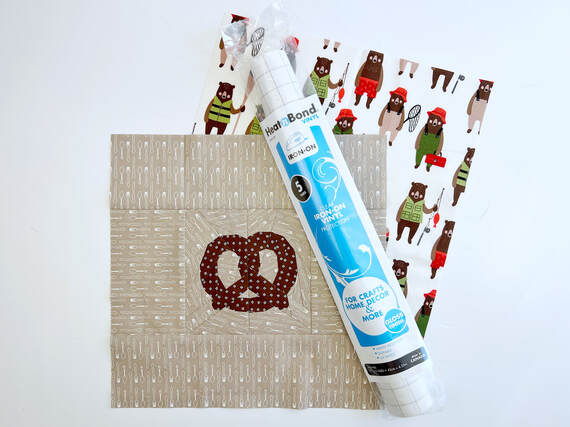 Heat'nBond for your lining piece of fabric of the lunch wrap Step 4: Cut the VELCRO strips. I did cut the 'hooked' part to 1,5" and the velvet part a little longer to 2". Btw. here is a little fun fact about VELCRO that you probably didn't know. VELCRO was invented by a gentleman in Switzerland named George de Mestral in the 1950s. In Switzerland French is one of the official languages of the country. So VELCRO got its name from the French words “velour” (velvet) and “crochet” (hook), de Mestral created the iconic VELCRO® trademark to identify his brand of hook and loop fastener. 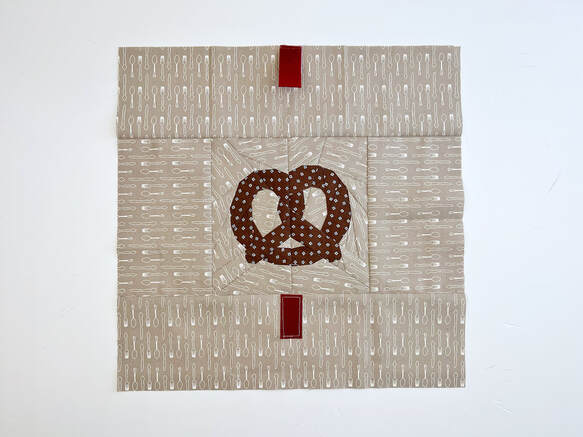 attach the velcro strips to the sandwich wrap top Stitch the 'hooked' part of the VELCRO right underneath the quilt block in the center of the bottom fabric. Stitch the 'velvet' part to the center of the top edge of the sandwich wrap, with the velvety side facing up. (I placed a small 'JoeJuneandMae' logo underneath it as well) 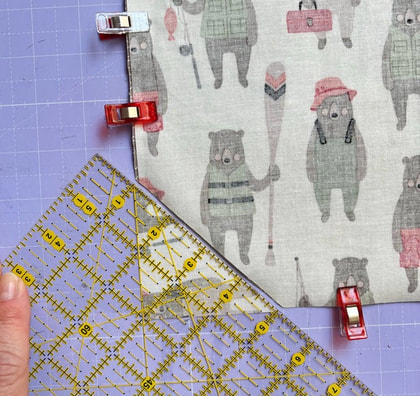 place top and lining pieces right sides together Step 5: Place top fabric and lining fabric of your lunch wrap, right sides together and pin or clip in place. (if you're using clear vinyl, the vinyl will now be placed between lining and top of your lunch wrap.) Then cut off the corners at a 45° angle. Measure 2" from the corner edge and align your clear ruler at the 45° line, as shown in the photo. The long side of the cut off triangle will be 4". Then pin or clip the corners in place as well. 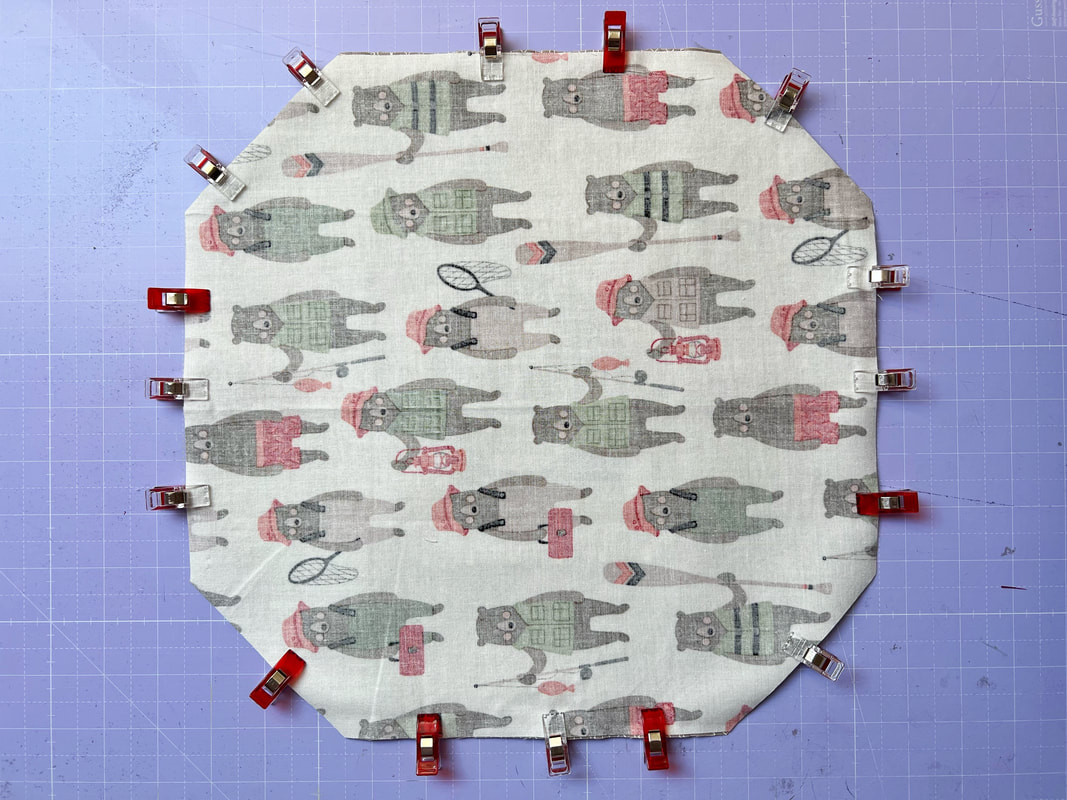 lunch wrap with 45° corners Step 6: Stitch all the way around it with 1/4" seam allowance leaving a 3" opening on one side for turning your sandwich wrap later. 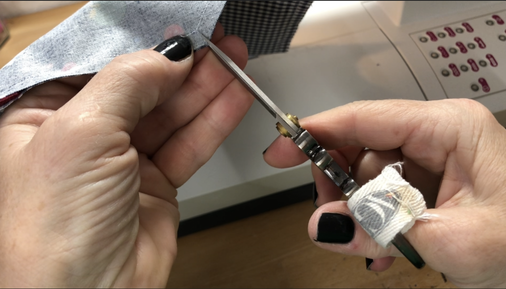 clip the corners carefully Before turning the sandwich wrap inside out, clip the corners carefully , this gives you nice sharp edges when turned inside out. Now turn the lunch wrap inside out and push out the edges carefully. 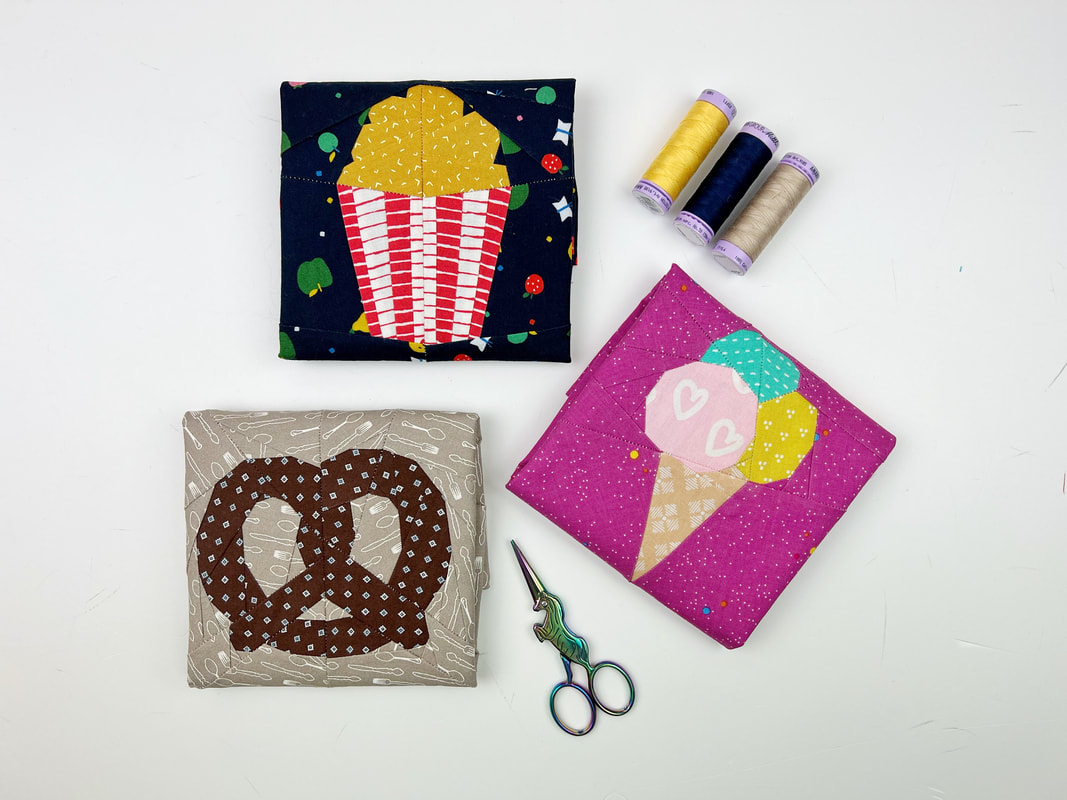 three super cute DIY reusable sandwich wraps Step 7: Fold in the seam allowance at the opening and stitch close with a very small seam allowance. And here we go ... You are all done and you are now the owner of the cutest reusable sandwich wrap.  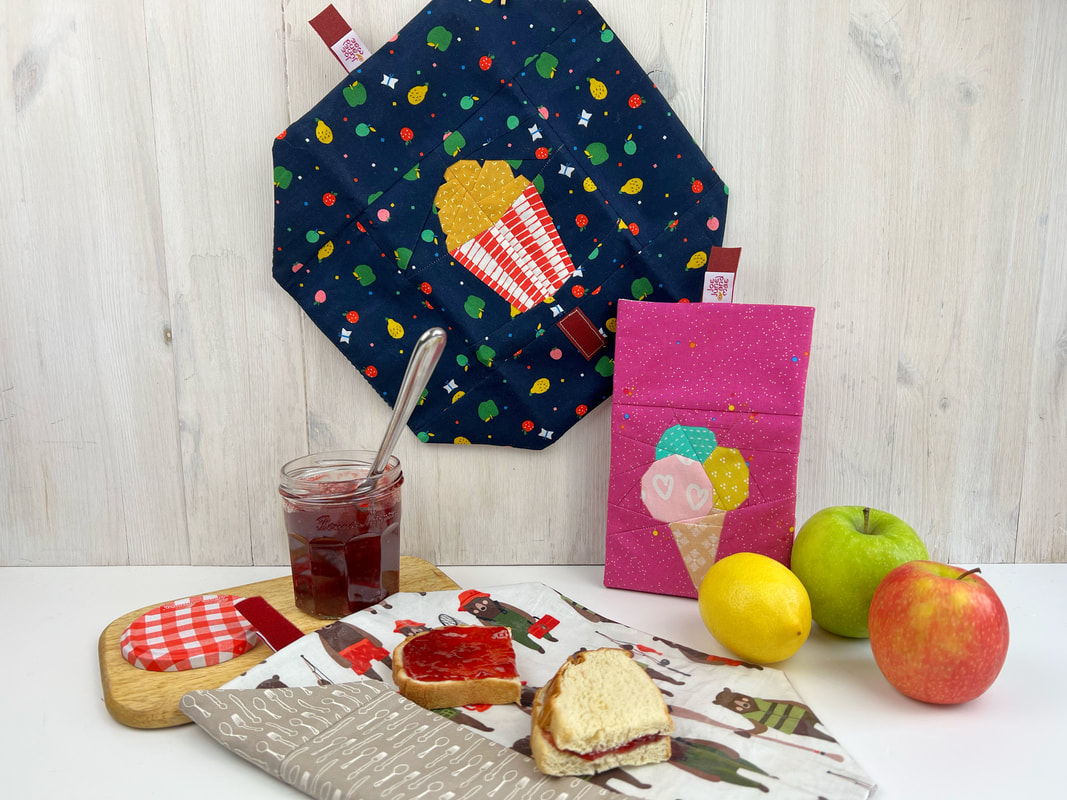 DIY lunch wrap pattern Aren't these the best? Which one is your favorite? I know you want to pull out all your cute fabrics right now and start sewing a reusable lunch wrap right away, am I right? Happy sewing Ingrid xx
2 Comments
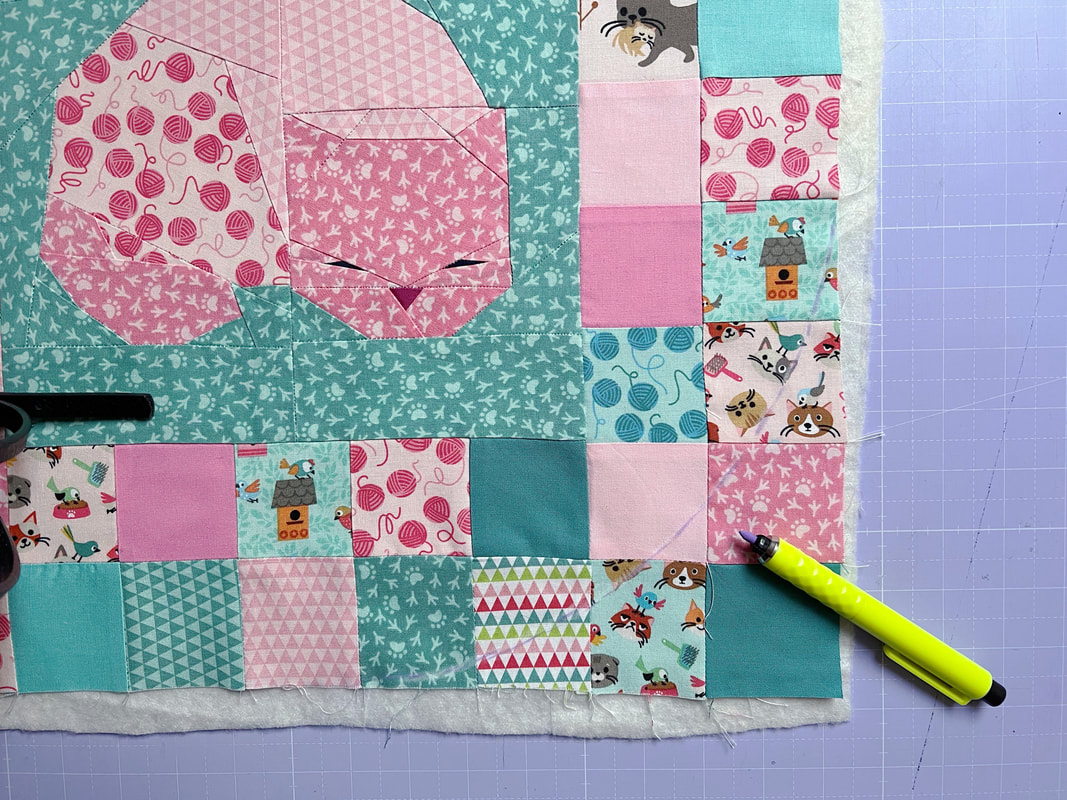
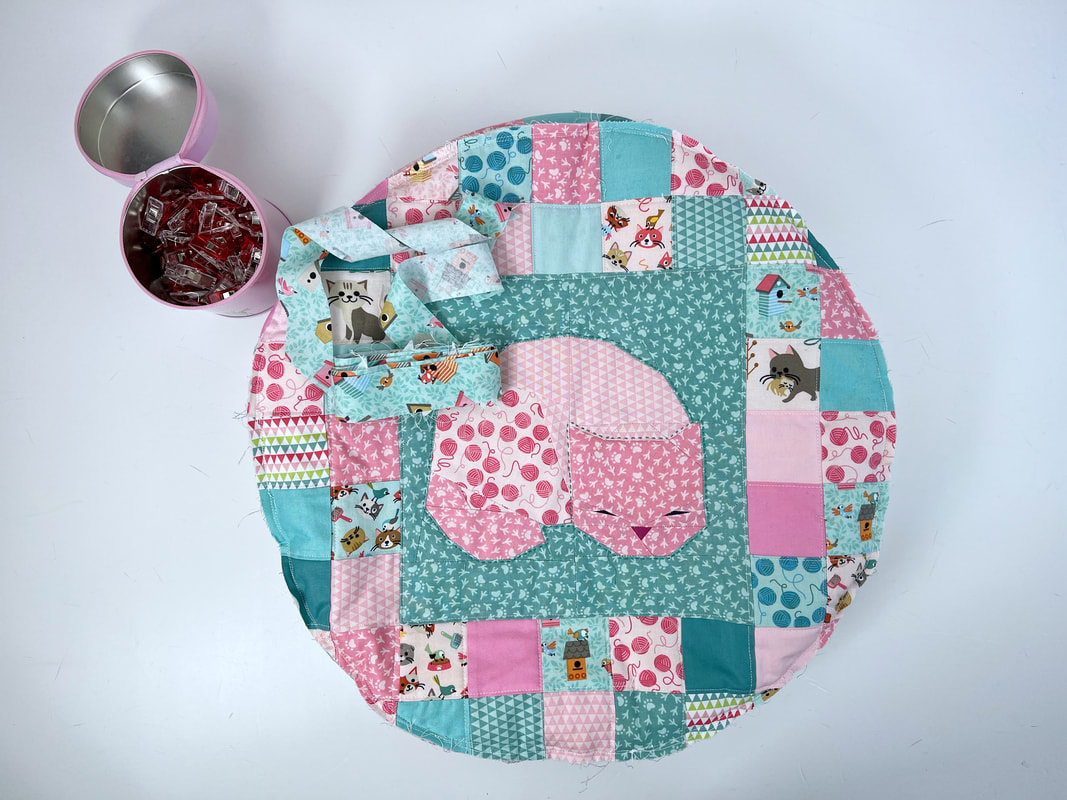
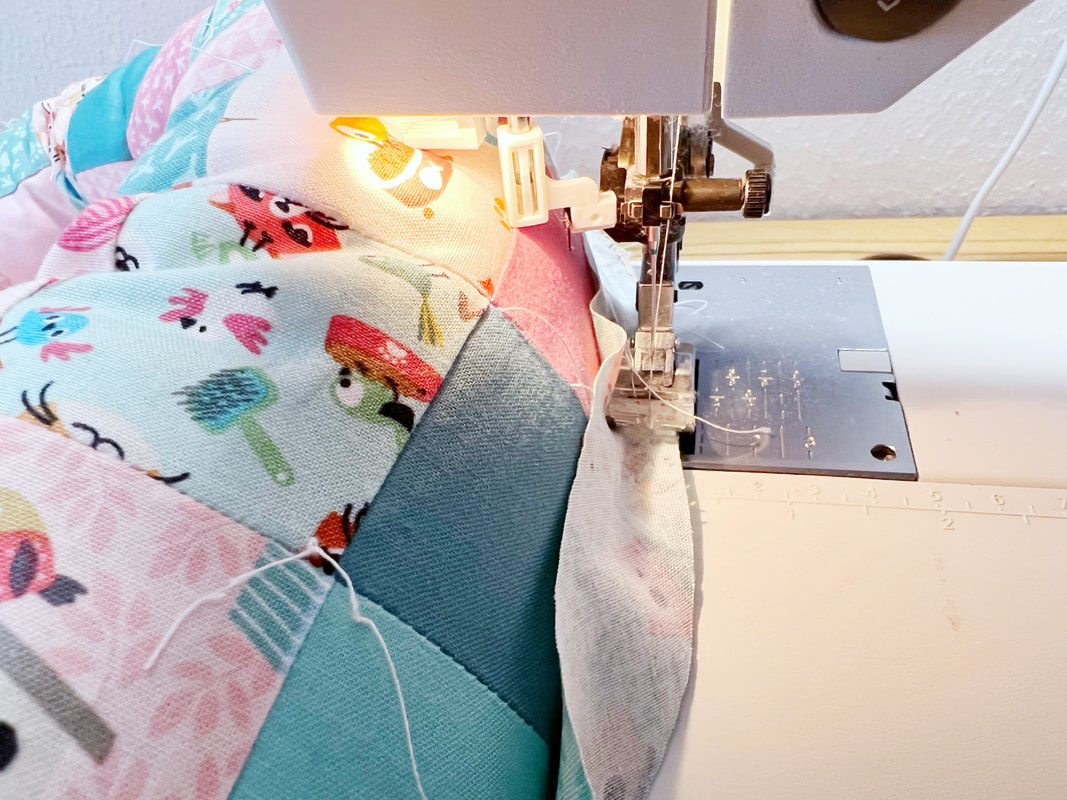
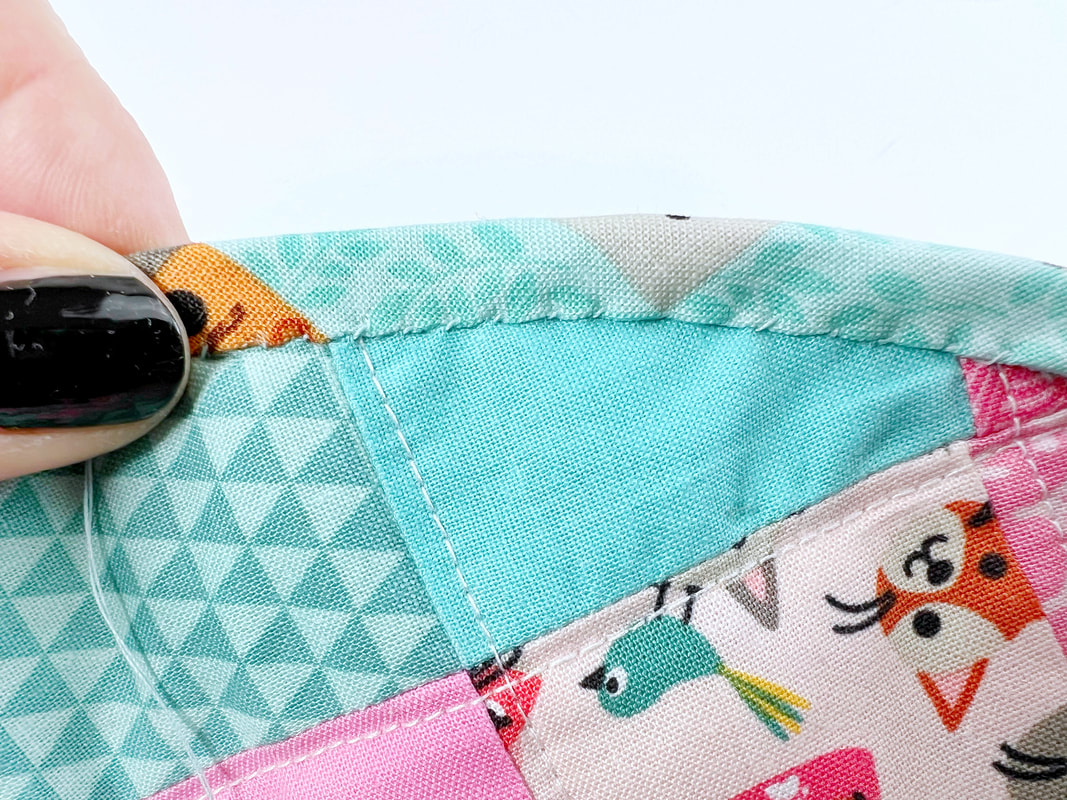
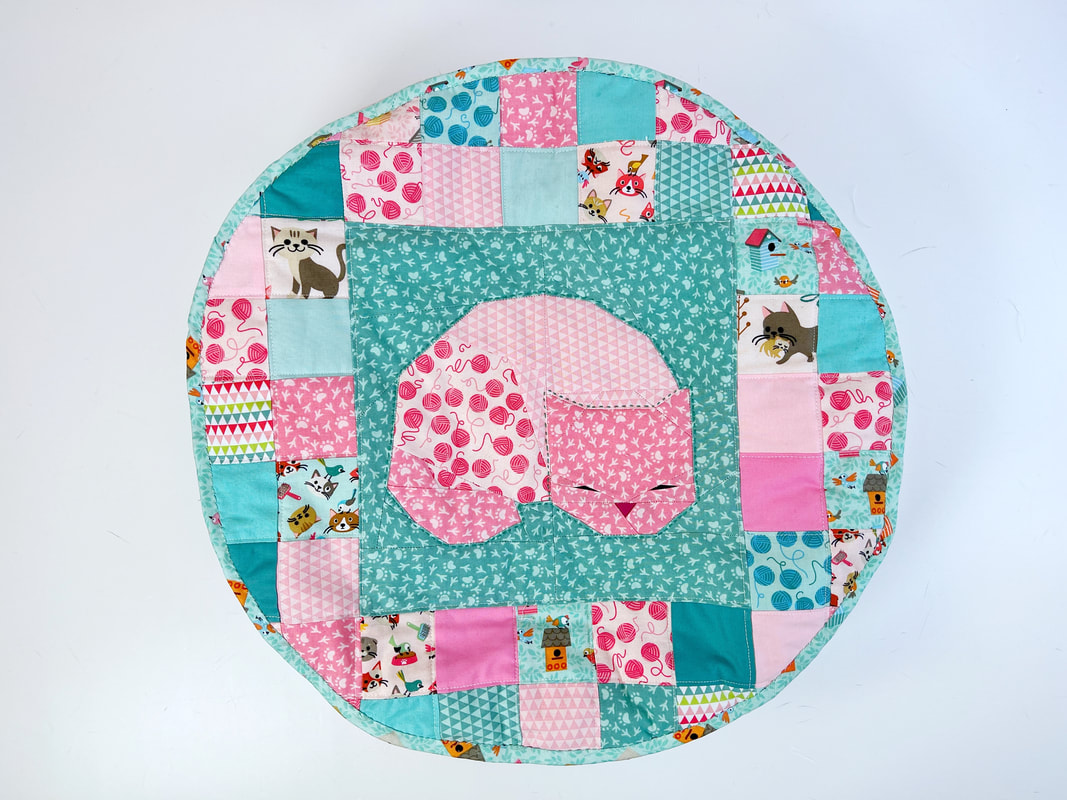
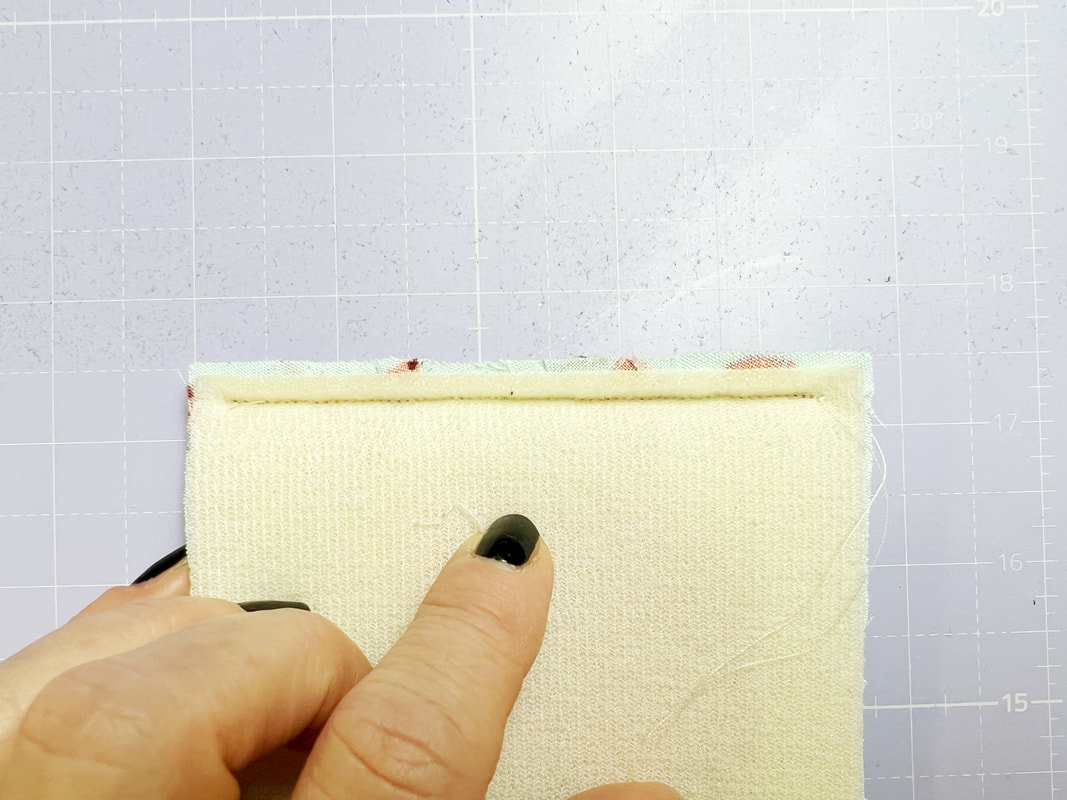
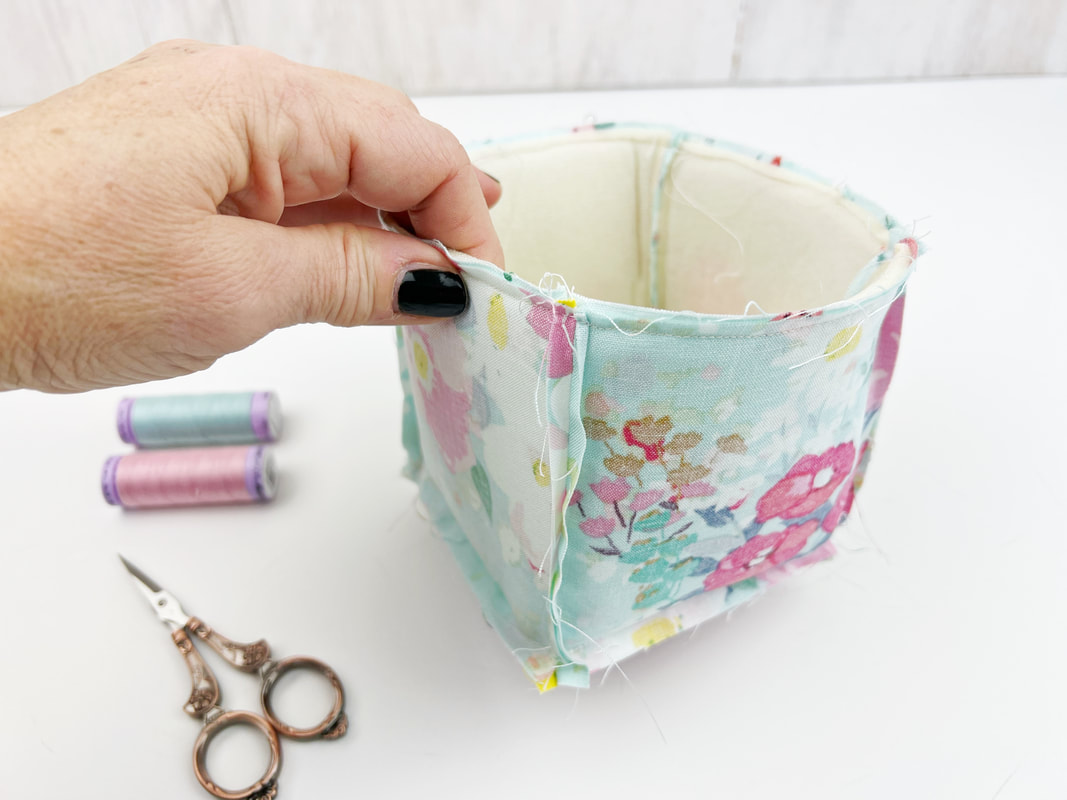
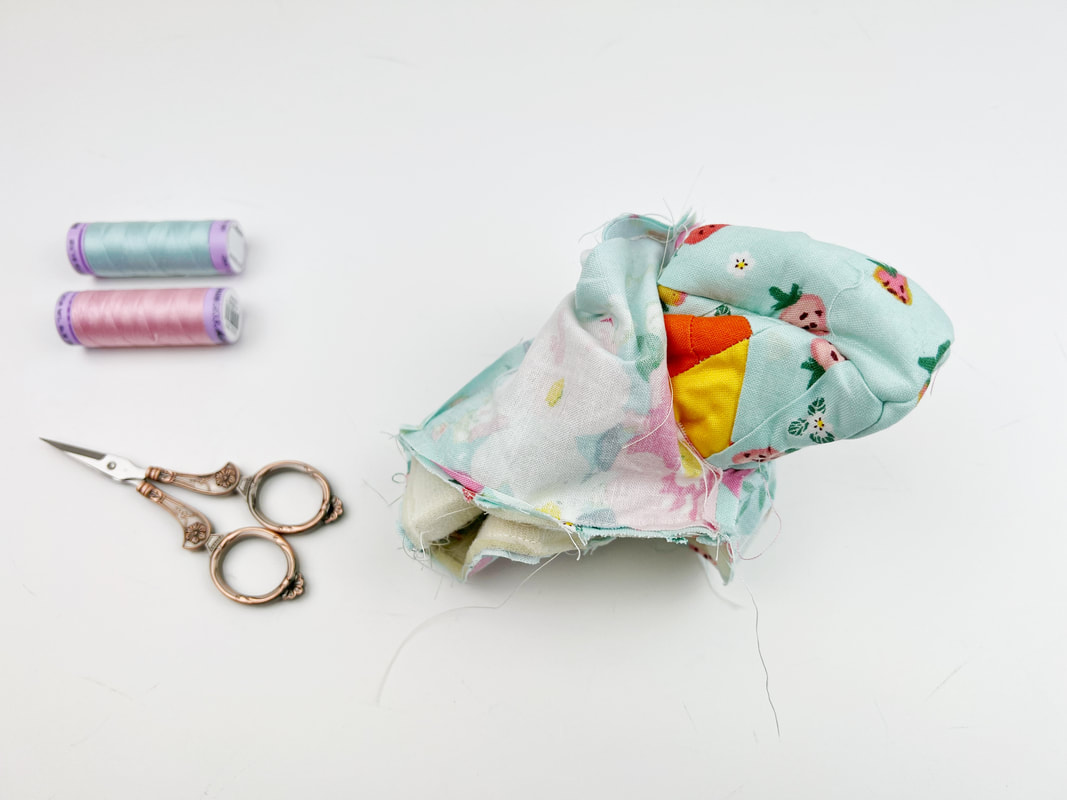
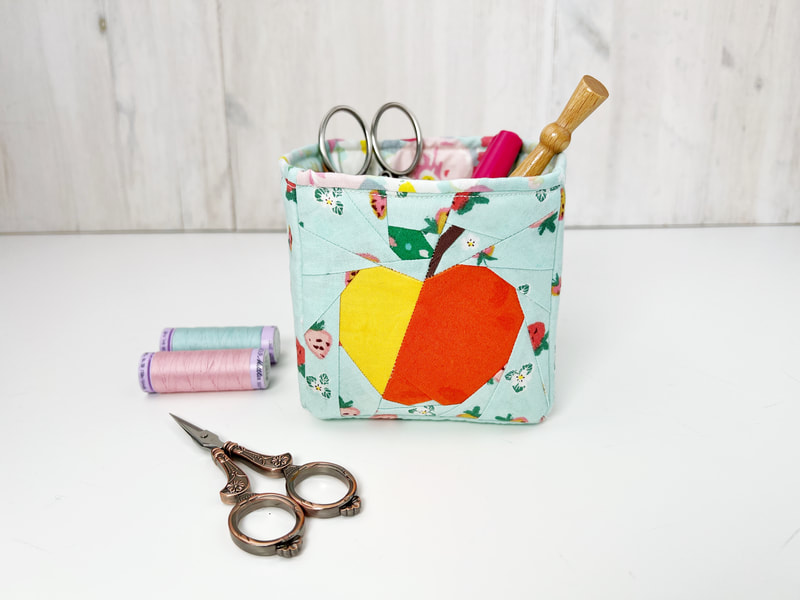
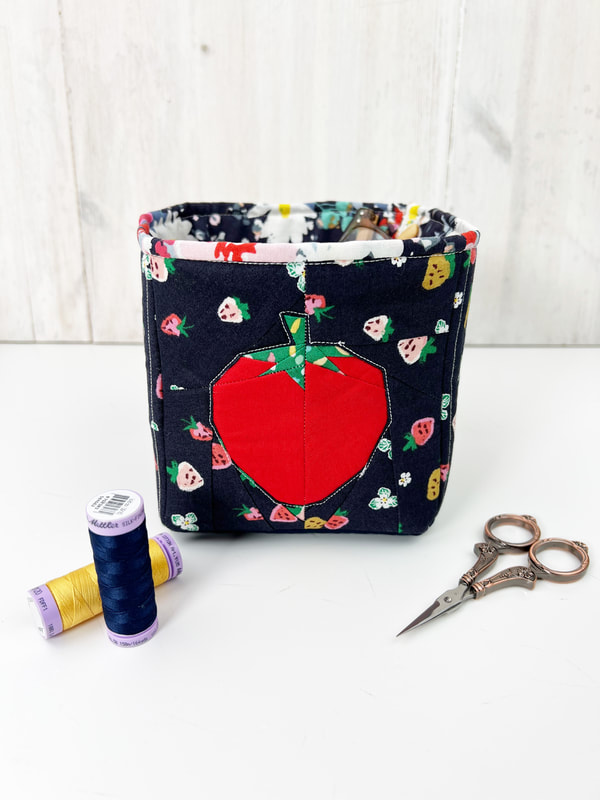
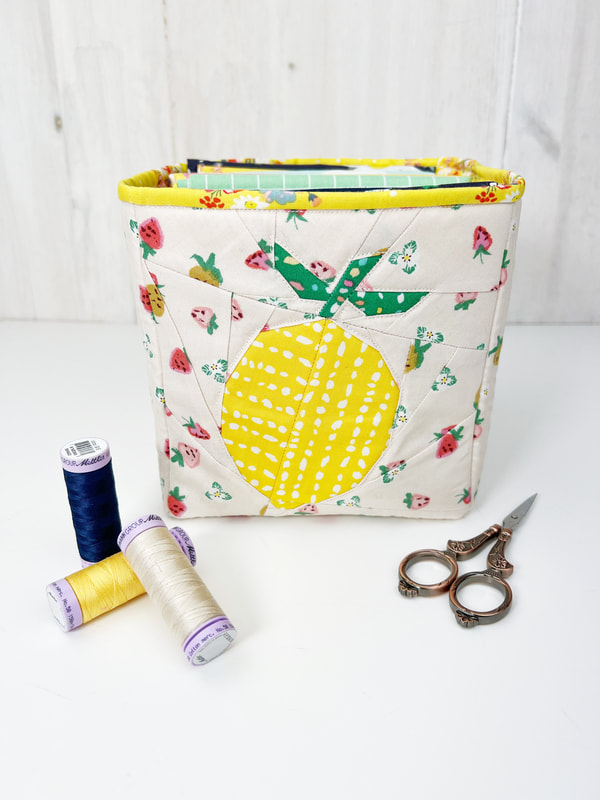
There is something to be said about quilters and cats, right? At least it seems like every quilter has a cat, or is it just me? This super adorable fabric line called 'Cats Meow' from Riley Blake Designs had me thinking about my cats immediately. I mean doesn't a quilter's cat , deserve a quilted cat bed? I sure would think so. So here we go, I made the cutest quilted cat bed pattern... 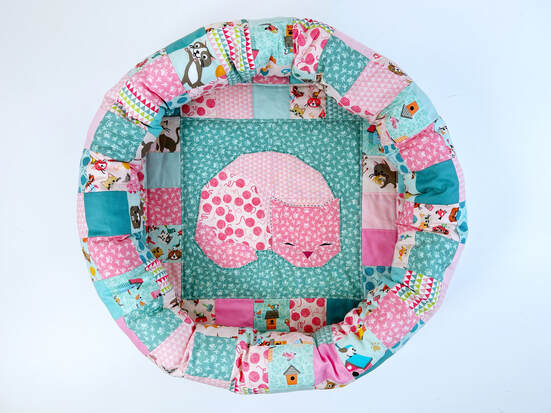 quilted cat bed How to sew a quilted cat bed? Quilted Cat Bed: please read through the instructions first ( finished size aprox. 18" diameter and 4" high) Tools needed: -sewing machine -cutting mat/ rotary cutter and acrylic ruler -pins or clips and iron optional tools to make your life easier: -spray baste -fabric glue pen for your foundation paper piecing Materials needed: - the sleeping cat quilt block in size 10"x 10" (will be 10 1/2" square when sewn together) or the Cat's Back or Yarn Ball quilt block or any other quilt block of your choice. - 56x 2.5" squares for the bottom of the cat bed to surround the quilt block (note, you will cut off 4 of the corner squares when cutting the bottom of the cat bed into a circle, but it's easier to sew with these 4 corner squares in place) - 135x 2.5" squares for the edge of the cat bed. - a piece of fabric about 18"x 18" for the bottom backing of the cat bed - a piece of batting about 18"x 18" (I used a thicker wool batting I had left over from a quilt) - stuffing for the edge of the cat bed - a 56" bias binding strip 1 1/4" wide Instructions: 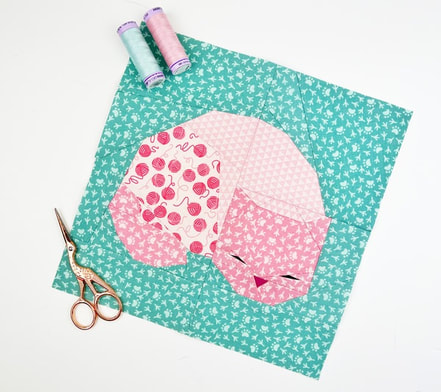 sleeping cat quilt block 10"x 10" Step 1: Sew the sleeping cat quilt block in size 10"x 10". The quilt block will be 10.5"x 10.5" when sewn together, this includes the 1/4" seam allowance. 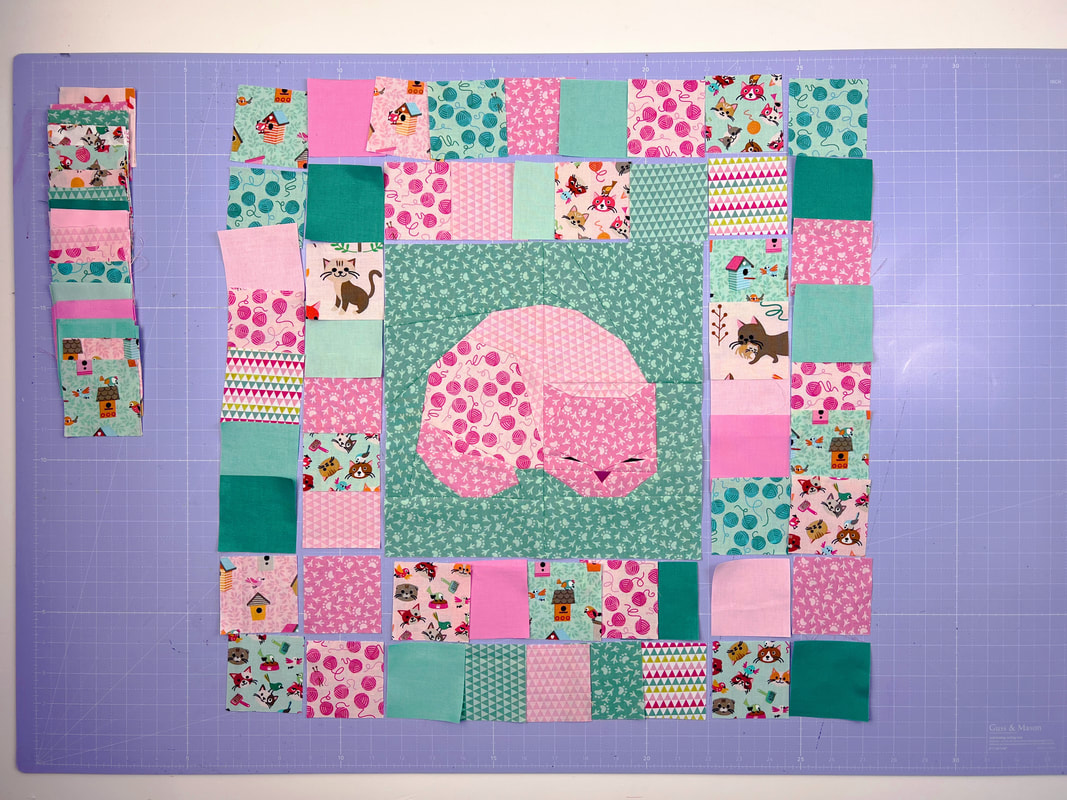 Step 2: Cut all the fabric squares. There are 56 fabric squares around the sleeping cat quilt block for the bottom of the cat bed and another 135 fabric squares for the edge of the cat bed. (which we will get to later) Place the squares around the quilt block to your liking, I like to place them totally random, and as you can see, I love fussy cutting. So as with some of my other sewing projects I used parts of these super adorable prints to highlight my fabric squares. Start by sewing the squares together into rows. Begin with the inner squares and then do the outer squares. I like to sew the squares at the top and bottom of the quilt block together first and attach them to the quilt block, that's 5 blocks at the top and 5 at the bottom. Then sew the squares at the sides together into a row, that's 7 squares on each side and attach them to the quilt block. Repeat for the blocks of the outer row. 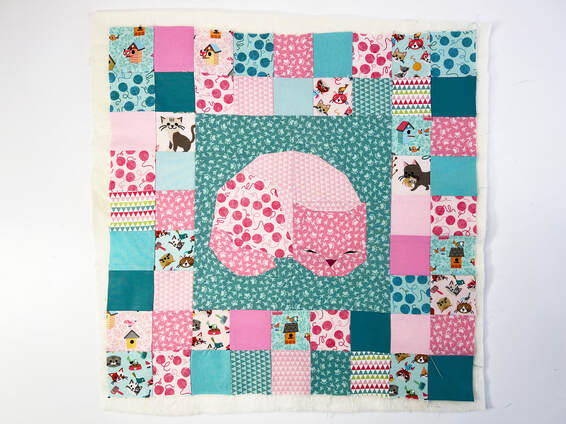 'quilt sandwich' for the bottom of the cat bed Step 3: Place the piece of fabric for the bottom backing in from of you, with the wrong side facing you. Place the batting on top of the back piece of fabric then add the patchwork top of the cat bed bottom on top of the batting, the right side facing you. Essentially you have a 'quilt sandwich', backing, batting and quilt top. I like to use spray baste (ex: Odif Temporary Adhesive Spray) to keep the layers together. But you can just as easily use safety pins or use basting stitches. Step 4: Draw a circle on the square. I measured 9" from the center of the square ( as shown in photo 1) and drew a circle on the square for the bottom of the cat bed. Sew along that circle for extra support. Now quilt the bottom of the cat bed to your liking. I did some hand quilting around the shape of the cat in the sleeping cat quilt block, and added some straight line quilting to the squares. Then cut the bottom of the cat bed along the circle line that you drew/sewed onto the square. My circle ended up being a little less than 18" diameter through the quilting. 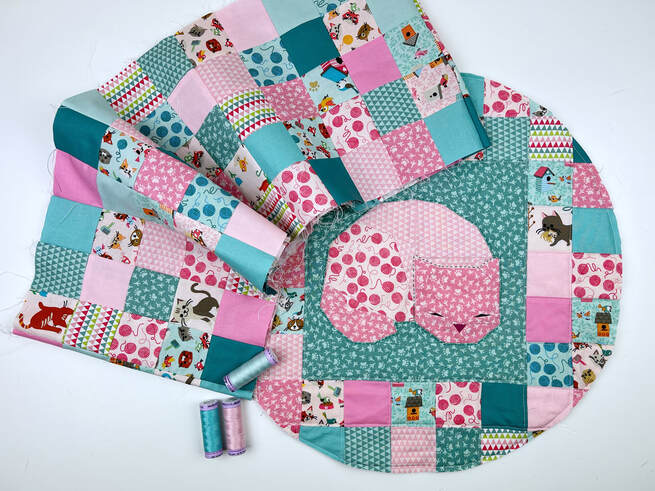 bottom and edge of the cat bed Step 5: Sew the squares for the cat bed edge into one long rectangle of 5 squares high and 27 squares long. (it should now be 10" high and 54" long) Again I placed the squares totally random, it's up to you, just let your creativity run wild. Then fold the rectangle for the edge in half, right sides together so the two short ends align and stitch them together. You now have a circle for the edge of the cat bed. Then fold the rectangle in half lengthwise, wrong sides together. This will be the edge 'tube' of your cat bed. 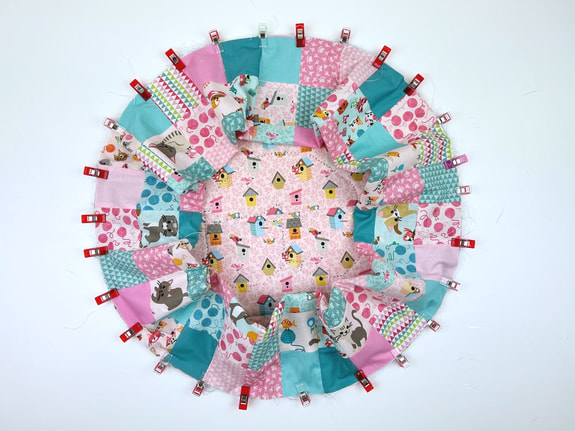 clip the tube for the edge of the cat bed to the bottom of the cat bed Step 6: Clip the 'tube' rectangle of your cat bed edge to the bottom of the cat bed. Right sides together to the right side of the bottom of the cat bed. (as shown in the photo, not the quilted top!) Stitch in place with a 1/4" seam allowance but leave two 3" openings for stuffing your 'tube'. If your 'tube' rectangle and base are not 100% the same length, it's not a problem at all. Let the fabric gather a little bit as you sew. This will not be visible at all after you stuffed the edge of the cat bed. Leave the two 3" openings on opposite sides of the tube. This makes stuffing the tube easier. Stuff your tube pretty full, as stuffing tends to settle with use. Then sew the two gaps closed. Step 7: I like to finish the inside seam of the cat bed with a bias binding. If you want, you could also just use pinking shears and cut along the edge. This seam or edge won't be visible, since it's under the edge tube. I personally think a bias binding just gives your cat bed the deserved finishing touch. Clip or pin the bias binding, right sides together, in place. I did this from the 'tube' side. So when you fold the binding over, you have more room to sew it in place. Fold over the beginning of your binding for a 1/4". Then stitch the binding all around with 1/4 " seam allowance, when you get to the end, just let it overlap. Step 8: Fold over the binding towards the 'cat' side and clip or pin in place. Then hand stitch the binding to the bottom of the cat bed. It's very tight to machine stitch here, since the 'tube' is already stuffed. It's much easier to sew the binding by hand. Once you're done turn the cat bed, so the binding edge is tucked in on the inside of the cat bed. The clean finish is now on the outside of the cat bed. 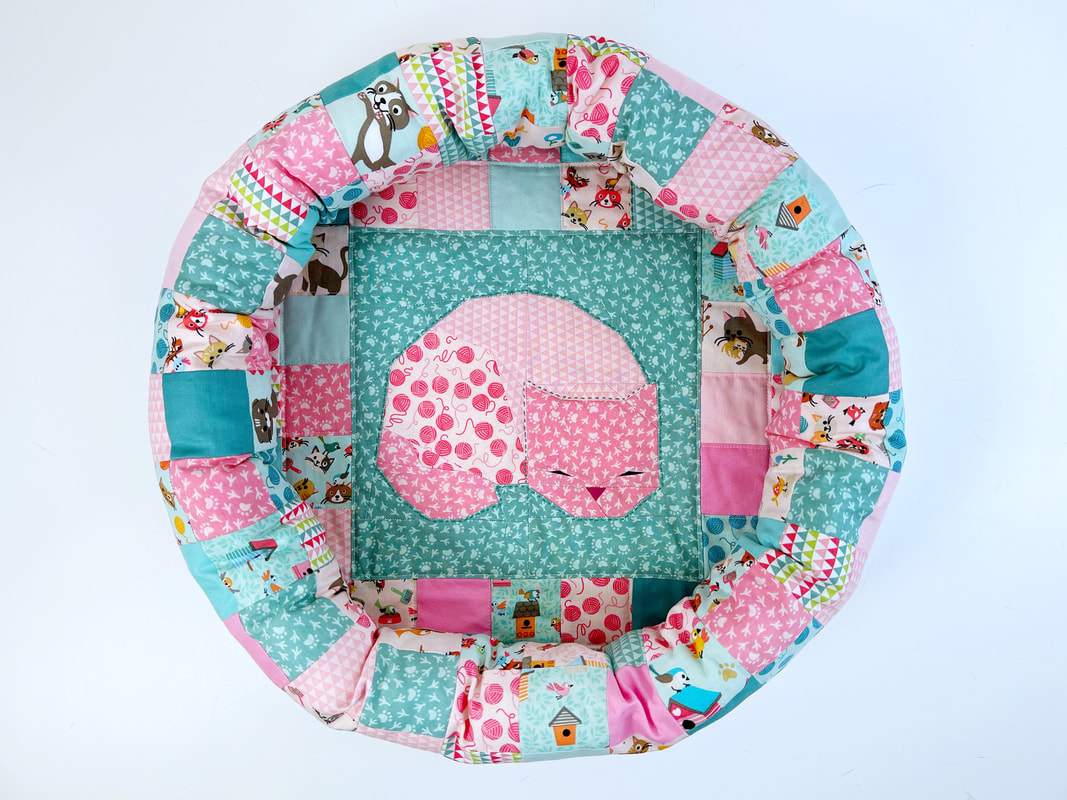 the cutest quilted cat bed And there we go, it's all done. And I think you have to agree, this is the cutest quilters cat bed ever, right? Thank you so much Riley Blake Designs for the opportunity to design this cat bed pattern and this small quilt block pattern series to match it. Thank you for supplying the super pretty fabric series 'Cat's Meow' designed by Shawn Wallace, that I used in this quilt pattern series.  Isn't this cat bed an absolute jewel? I'm sure any cat would just love to cuddle up inside this beauty. Ohh hey, go figure, my cat just did... :-) 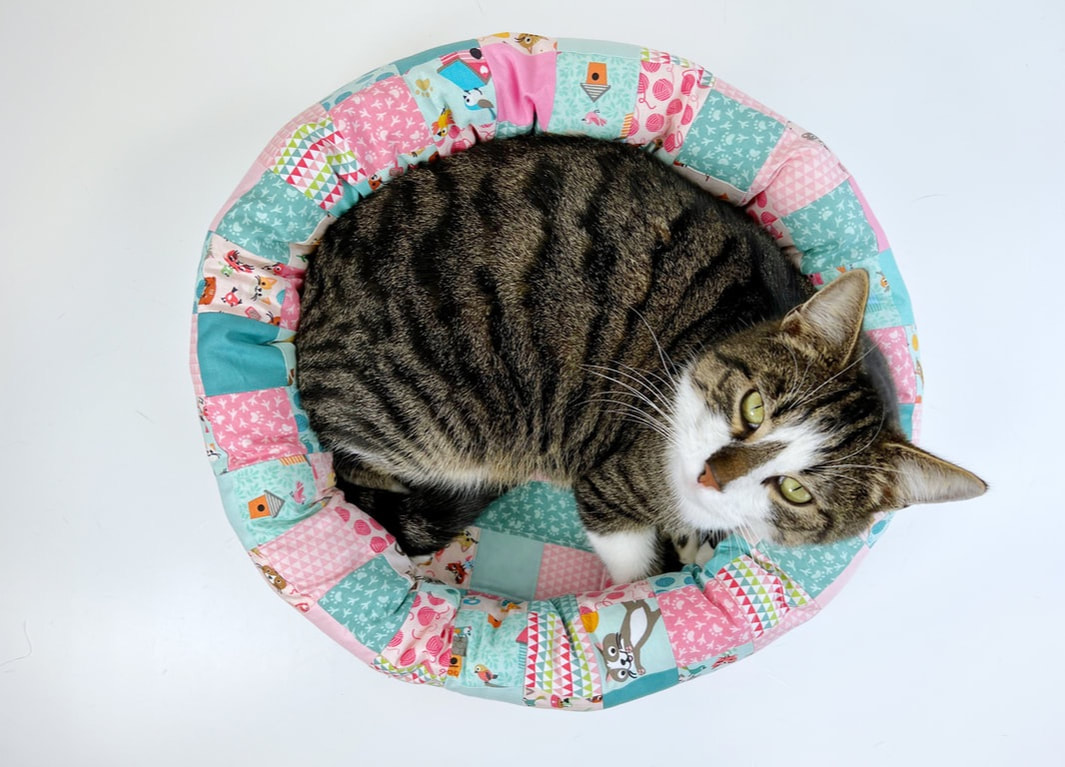 Happy sewing.... Ingrid xx  Square fabric boxes Do you love boxes and baskets as much as I do? I have to admit I am a little bit obsessed. I love storing things in little boxes, baskets and containers, especially if they're square shaped. So I decided it's high time I made a free pattern for some little square fabric boxes. When I saw this new fabric line from Minkie Kim for Riley Blake Designs I thought fruits, fruits and some more fruits. And these delicious fruits needed to go somewhere special, don't you agree? So I made some cute little square fabric containers. These are really easy to make. 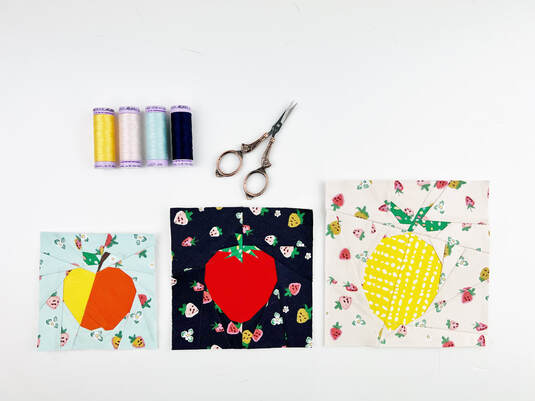 fruit quilt blocks Fabric square boxes: please read through the instructions first Tools needed: -sewing machine/ thread and fabric -cutting mat/ rotary cutter and acrylic ruler -pins or clips and iron optional tools to make your life easier: -spray baste -fabric glue pen for your foundation paper piecing Materials needed: box sizes: S - 4"x 4"x 4" , M - 5"x 5"x 5", L - 6"x 6"x 6" ( width x hight x depth) S: quilt block apple in 4" size (will be 4 1/2" when sewn together) 4 squares 4 1/2" of fabric for exterior 5 squares 4 1/4" of 'soft and stable' @byAnnie or Pellon Fusible Flex foam stabilizer 5 squares 4 1/2" of fabric for lining. M: quilt block strawberry in 5" (will be 5 1/2" when sewn together) 4 squares 5 1/2" of fabric for exterior 5 squares 5 1/4" of stabilizer (see above) 5 squares 5 1/2" of fabric for lining L: quilt block lemon in 6" (will be 6 1/2" when sewn together) 4 squares 6 1/2" of fabric for exterior 5 squares 6 1/4" of stabilizer (see above) 5 squares 6 1/2" of fabric for lining  Materials for fabric box 1. Sew your apple quilt block ( size 4"x 4") and cut your fabrics and foam stabilizer according to the measurements given above.. 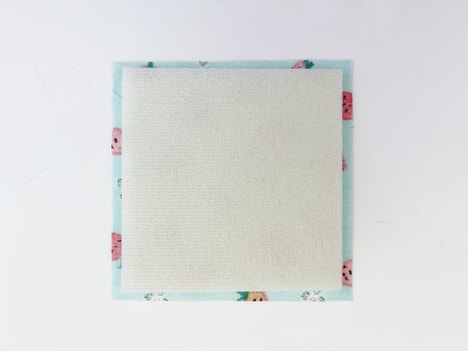 add foam stabilizer to your fabric squares 2. Add the foam stabilizer to your fabric squares. If you have fusible stabilizer you will need to iron it on your squares. If you're using 'soft and stable' @Byannie like me, you can attach it to your fabric squares with glue baste spray. Your foam stabilizer will be 1/8" smaller than your squares. 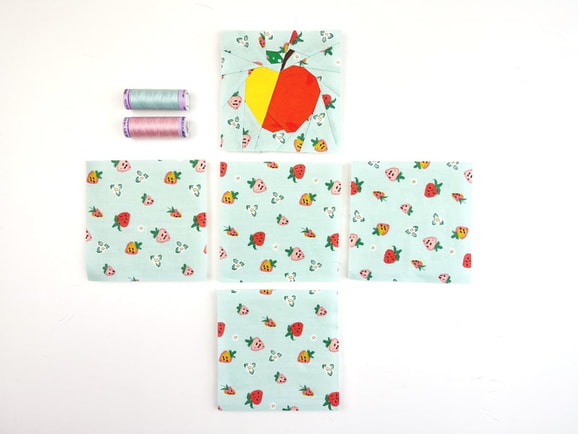 fabric squares for your fabric square box 3. Assemble the exterior of your fabric square box. Place your squares as shown above. First start with sewing your apple quilt block to the center square. Before you start sewing, mark 1/4" cross from both edges at the corners. Start sewing at the point of the cross with 1/4" seam allowance, back stitch at the beginning and the end of your seam. Then sew the opposite square of your quilt block to the center square the same way. Then add the two side squares. Sew all 4 squares to your center square the same way. The center square will be the base of your fabric cube. 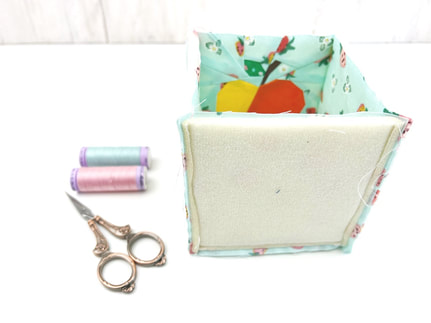 join the side edge seams of your fabric cube Next you will need to lay the adjacent side pieces together (right sides together). And sew them the same way, with a 1/4" seam allowance, start right at the top, but stop 1/4" from the end. Repeat for all 4 sides till your cube is all sewn together, like shown above. 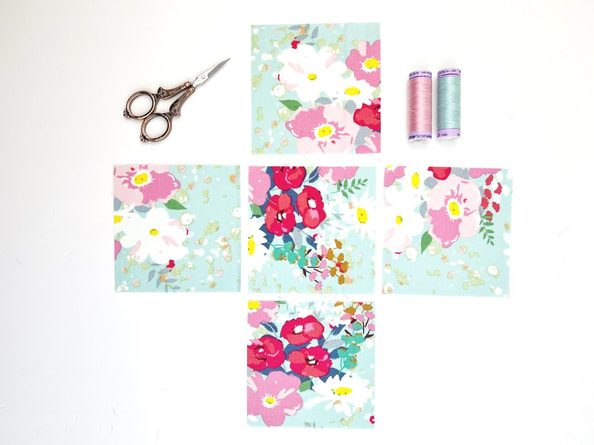 place lining squares as exterior squares 4. Sewing the lining of your fabric cube Place your lining squares the same way you placed your exterior squares. Stitch them together the same way too. Attach the side squares to the bottom square first. Then sew the side seams. Leave a 3" gap in one of the side seams for turning your cube later. 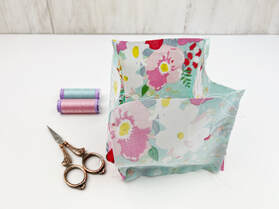 leave a 3" opening in one of the side seams of the lining 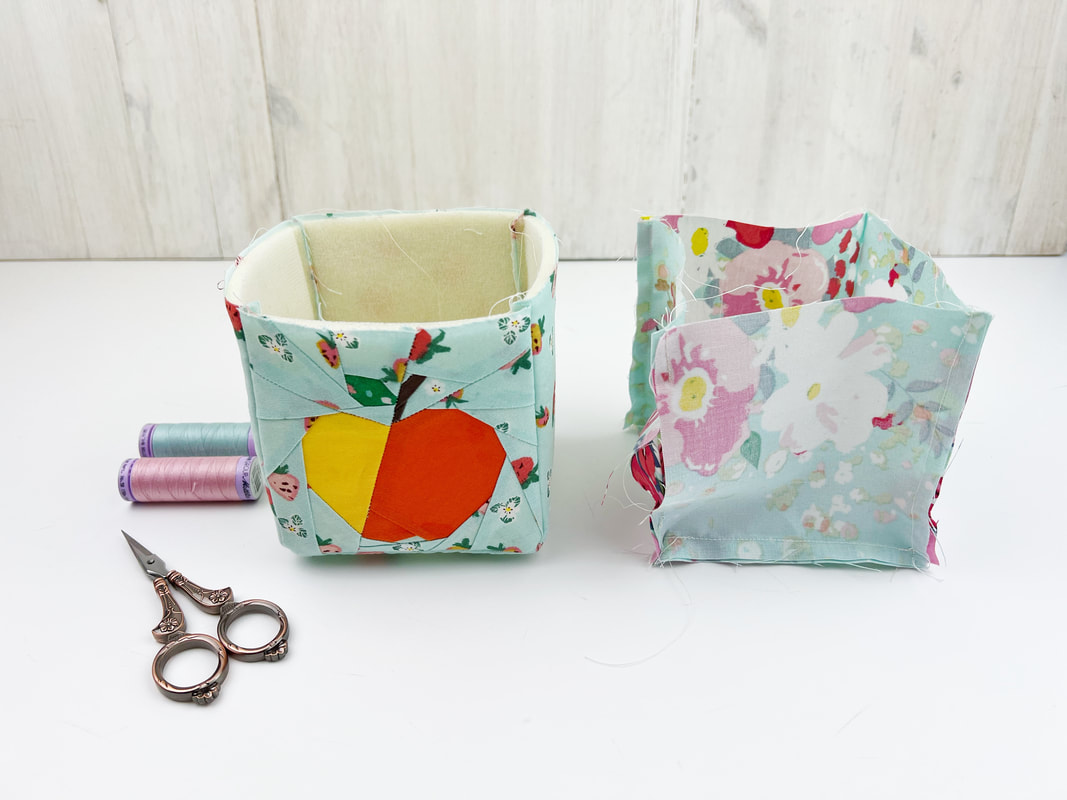 turn the exterior cube right sides out, leave lining cube as is. 5. Put the square fabric box together. Turn your exterior box right sides out, but leave your lining cube the way it is, insides out. Now place your exterior box inside the lining box. Align the side seams and pin or clip in place, make sure the top edges align. 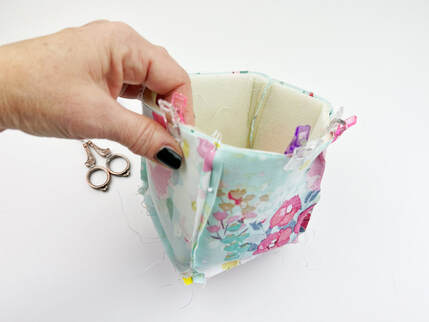 place the exterior box inside the lining and clip in place Sew along the top edge with 1/4" seam allowance. To finish your fabric basket/ box, turn the box right sides out through the opening in the side seam of the lining. Press the lining at the top edge into the box. Do not press down the foam stabilizer, this way you get a cute trim of your lining fabric at the top edge. Stitch along the top edge with a small seam allowance. 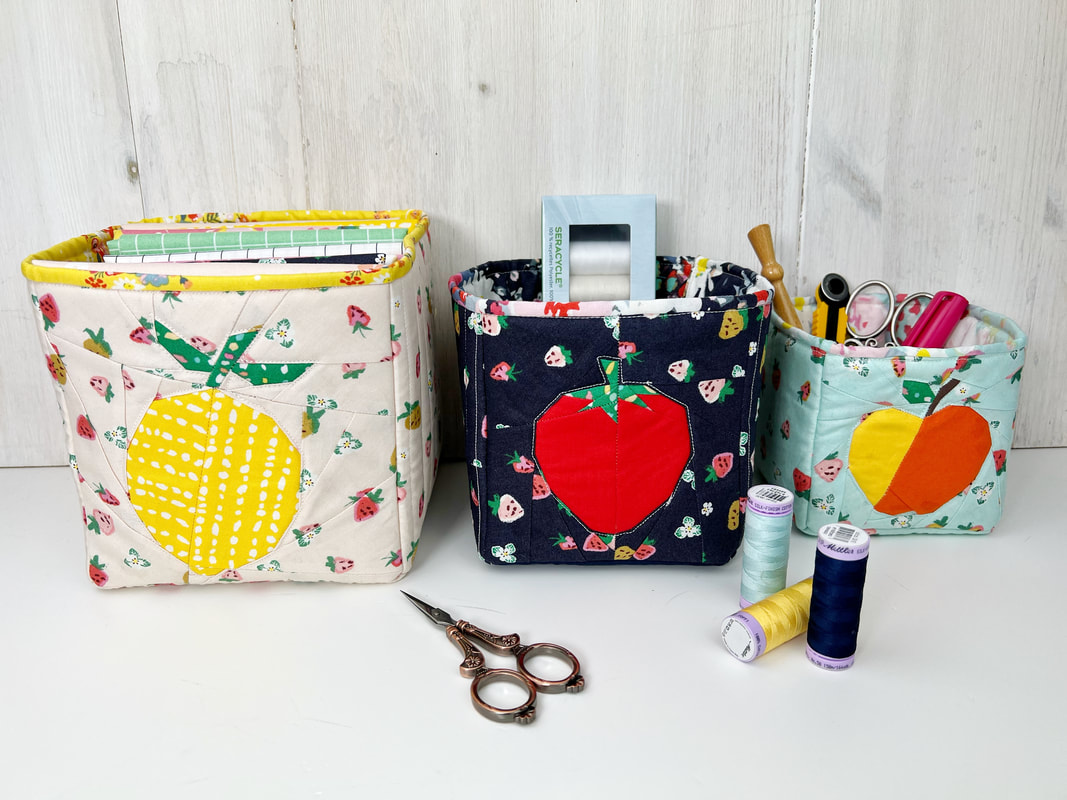 square fabric boxes Thank you Riley Blake Designs for the opportunity to design these fruity quilt block patterns and for supplying the super pretty fabric series 'misty morning' designed by Minkie Kim that I used in this quilt pattern series. Happy sewing everyone Ingrid x
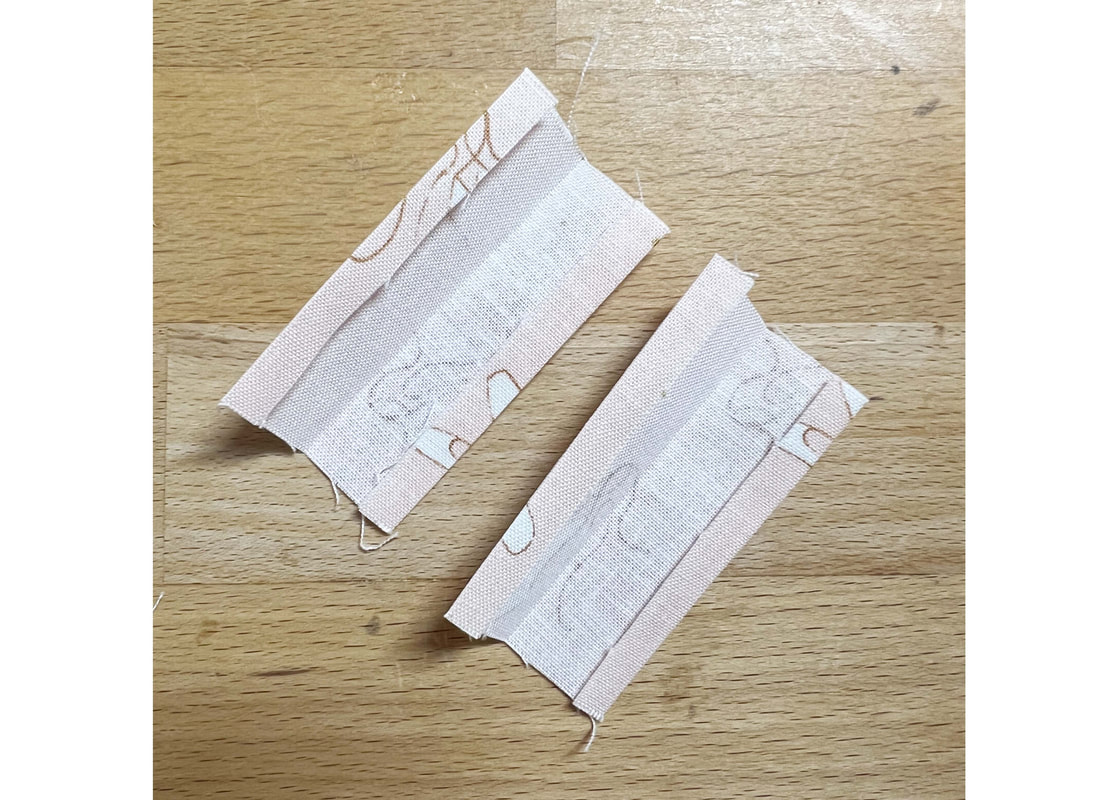
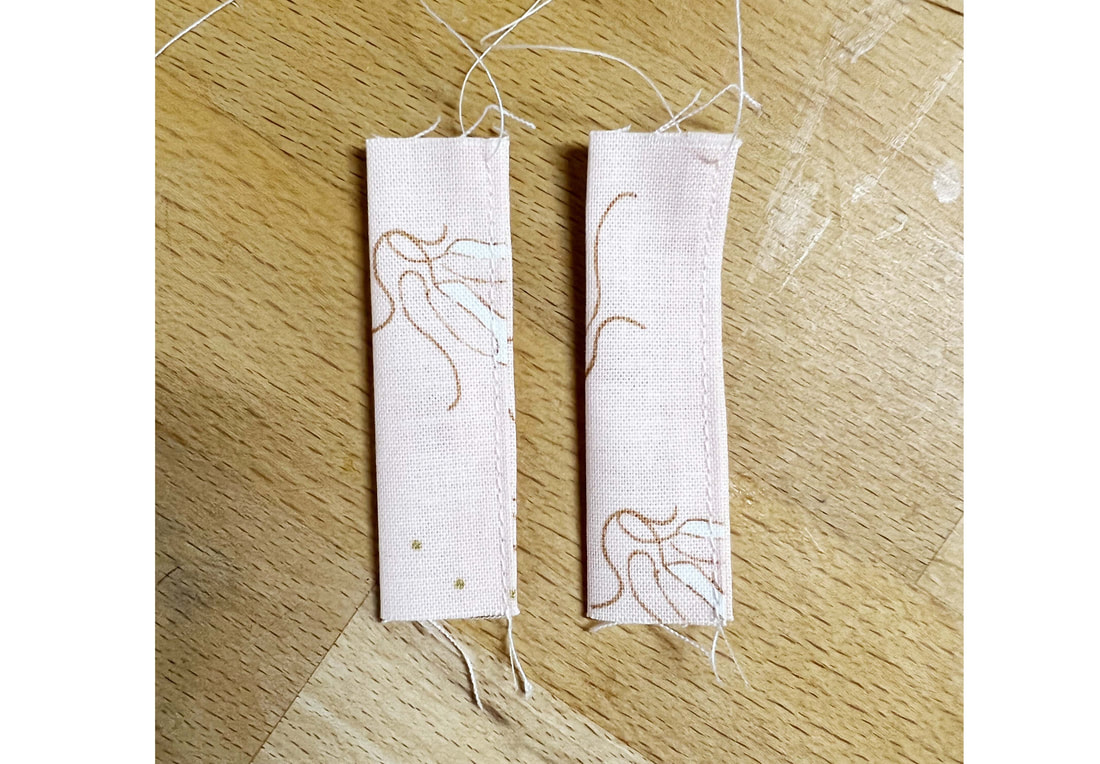
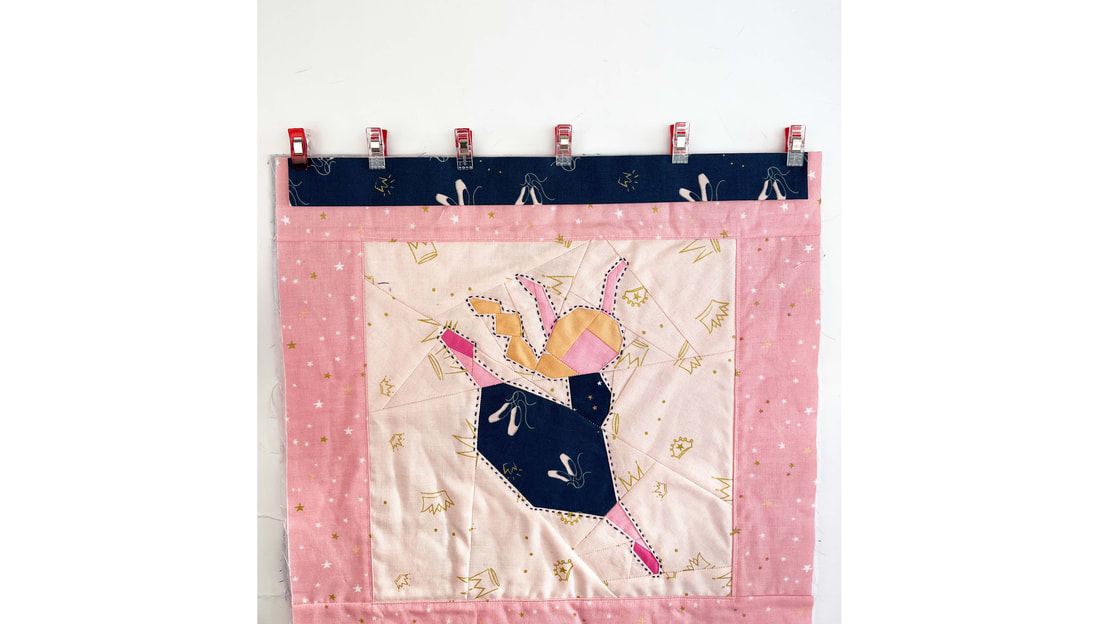
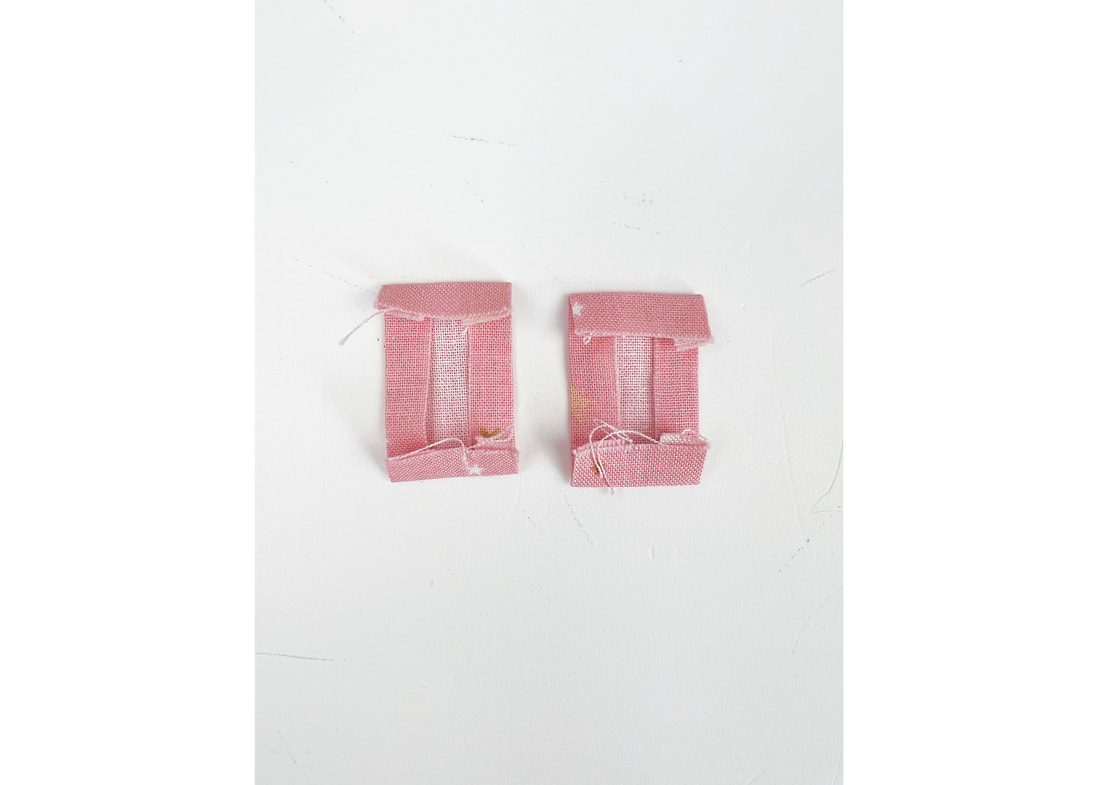
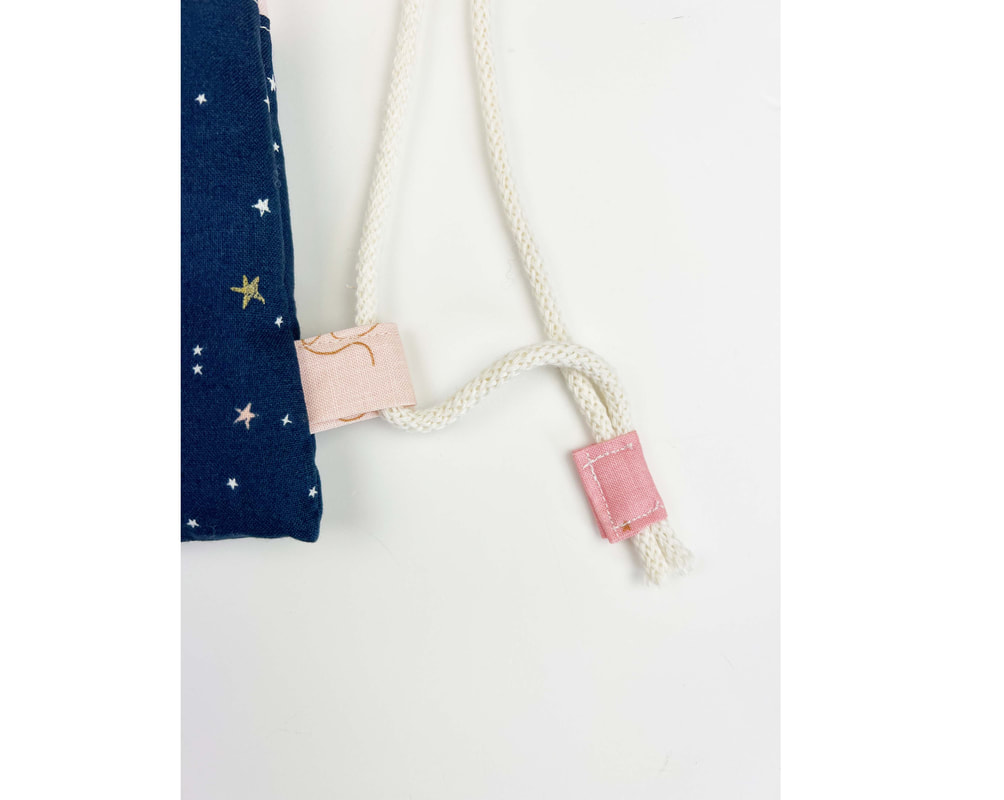
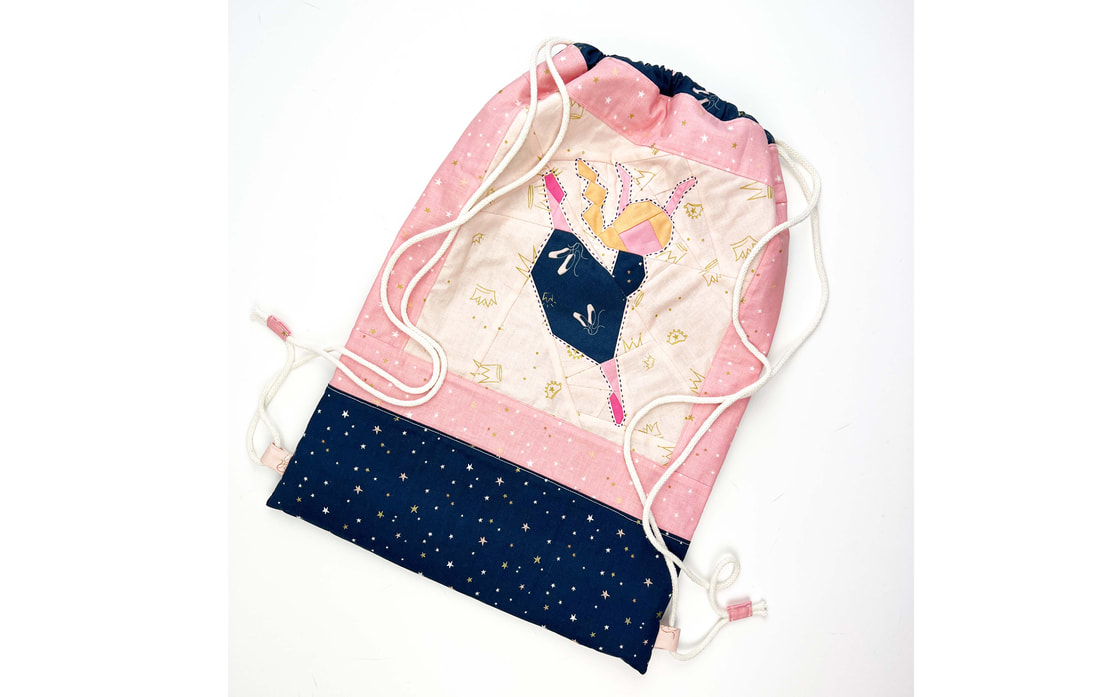
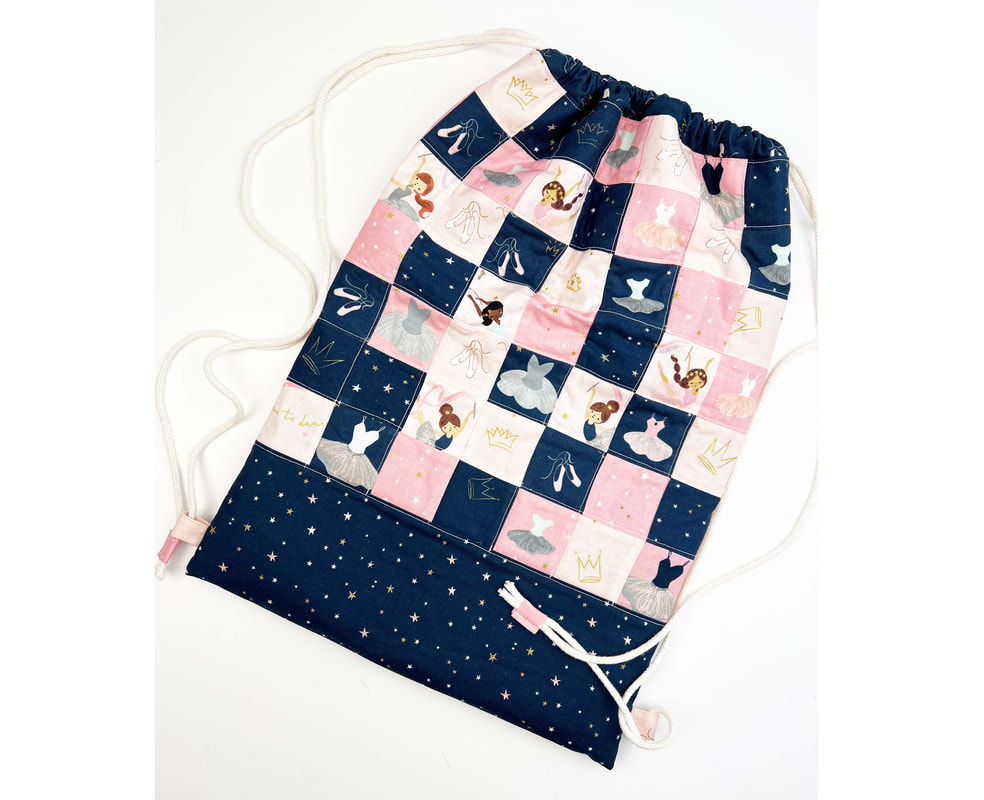
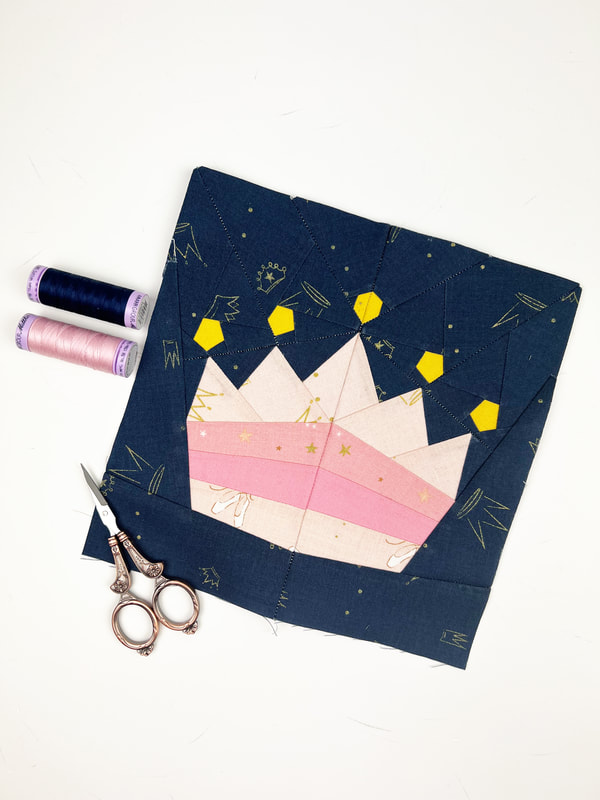
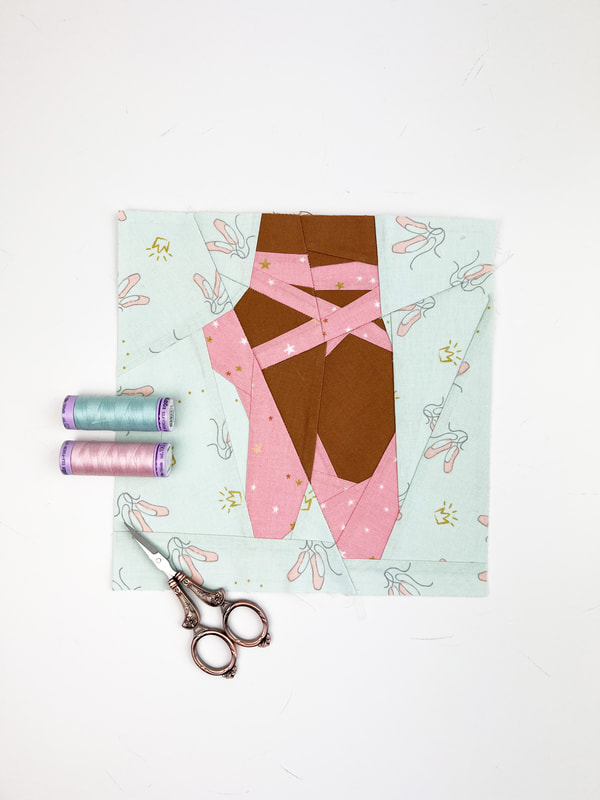
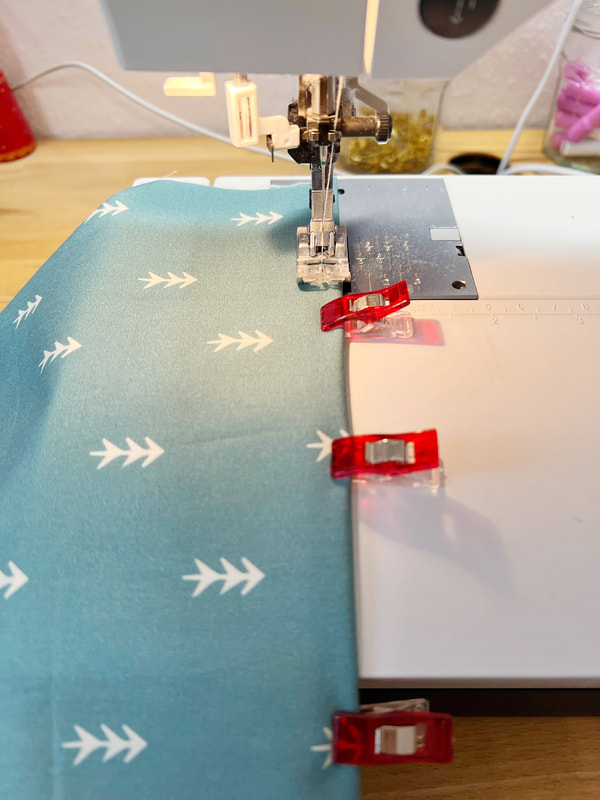
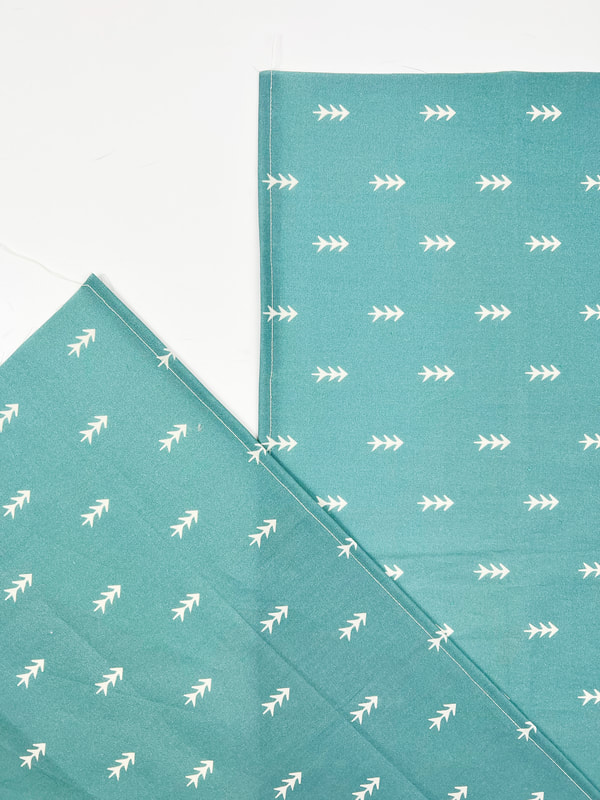
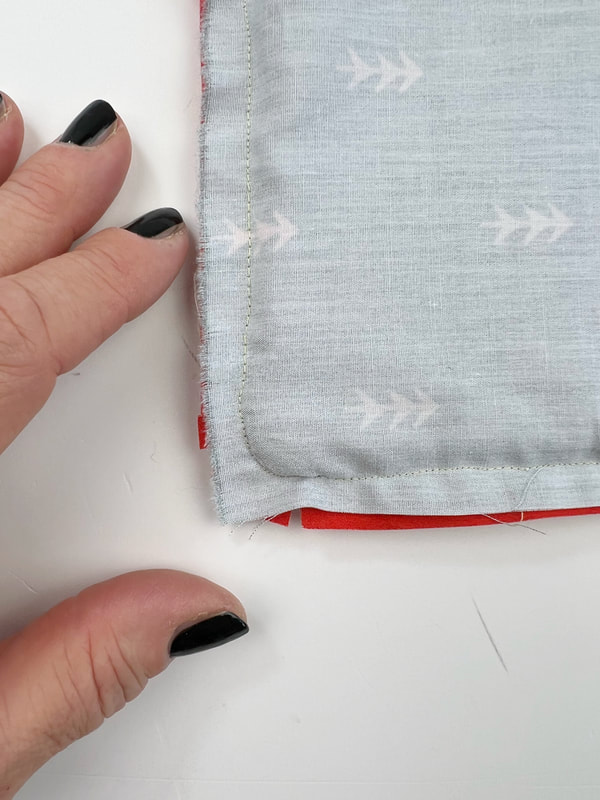
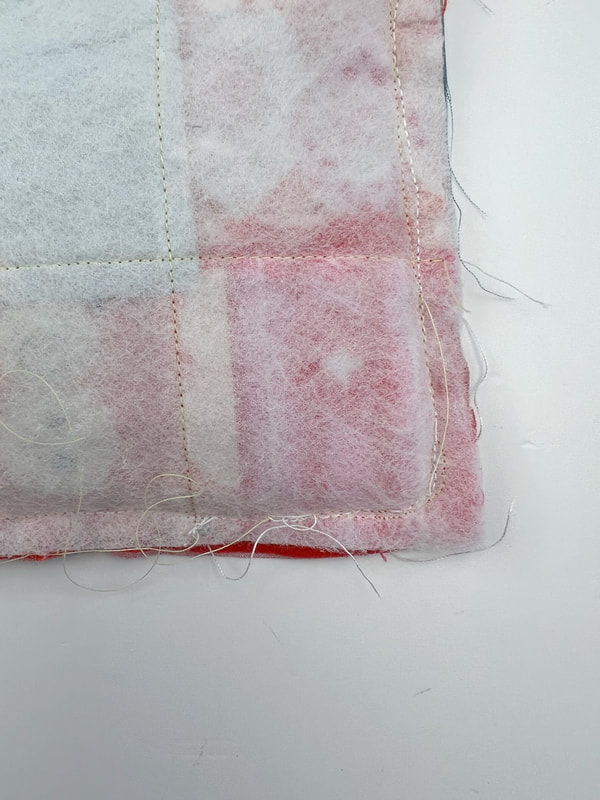
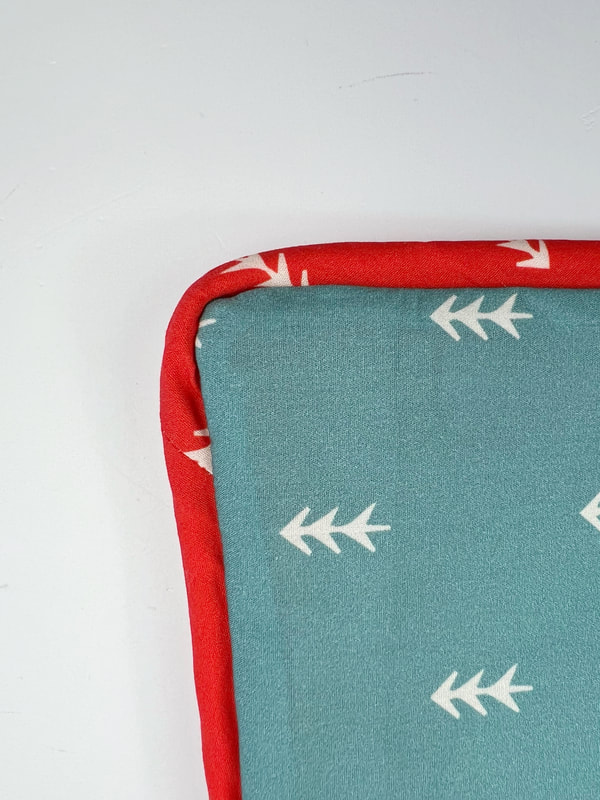
Do you have little dancer children? Do you want them to have the cutest ballet bag ever? You have come to the the right place. Riley Blake Designs just released this absolute perfect fabric series called 'Spin & Twirl' for stylish dancers. It's not too girly, of course it has pinks and whites, but the navy is such a perfect balance and gives this fabric series a classy touch. So let's get sewing, and let's make the best ballerina bag for our little dancer kids. 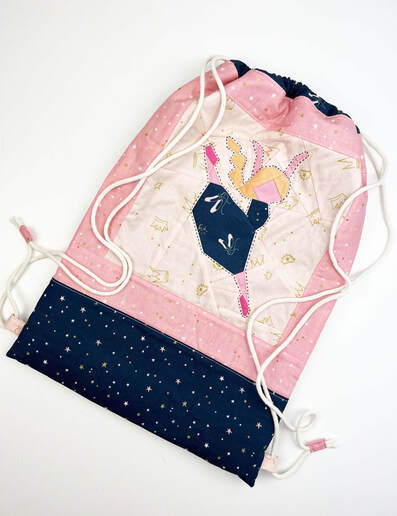 cutest ballet dancer bag ever Finished bag size: 14" wide x 18" high Materials needed: (width x hight) - 1 ballerina quilt block 10"x10" fabric around the quilt block: - 2x strips of fabric 2,5"x 10,5" - 2x strips of fabric 2,5" x 14,5" fabric for the bottom: - 1x 14,5" x 10" fabric for back: 49 squares of 2,5"x 2,5" ( or one piece of fabric 14,5"x 14,5") lining: - 1x piece of fabric 14,5" x 38" extras: - 1x piece of thin fusible batting (for example Vlieseline H630) - 2x pieces of fabric for the loops 2,5"x 2" - 2x pieces of fabric for the tabs ( cords) 2"x 1,5" - 2x pieces of fabric 14 1/4"x 2,5" for the casing at the top. - 2x pieces of 72" cord. Instructions: 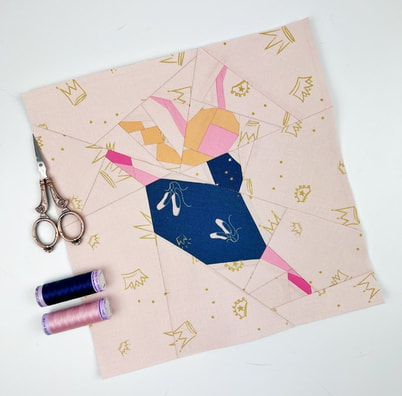 ballerina quilt block 10"x 10" 1. Sew the ballerina quilt block ( or any other quilt block of the ballet series) in the 10"x 10" size. The block will be 10,5"x 10,5" when you finish it. (10"x 10" refers to the block size when incorporated into a project) 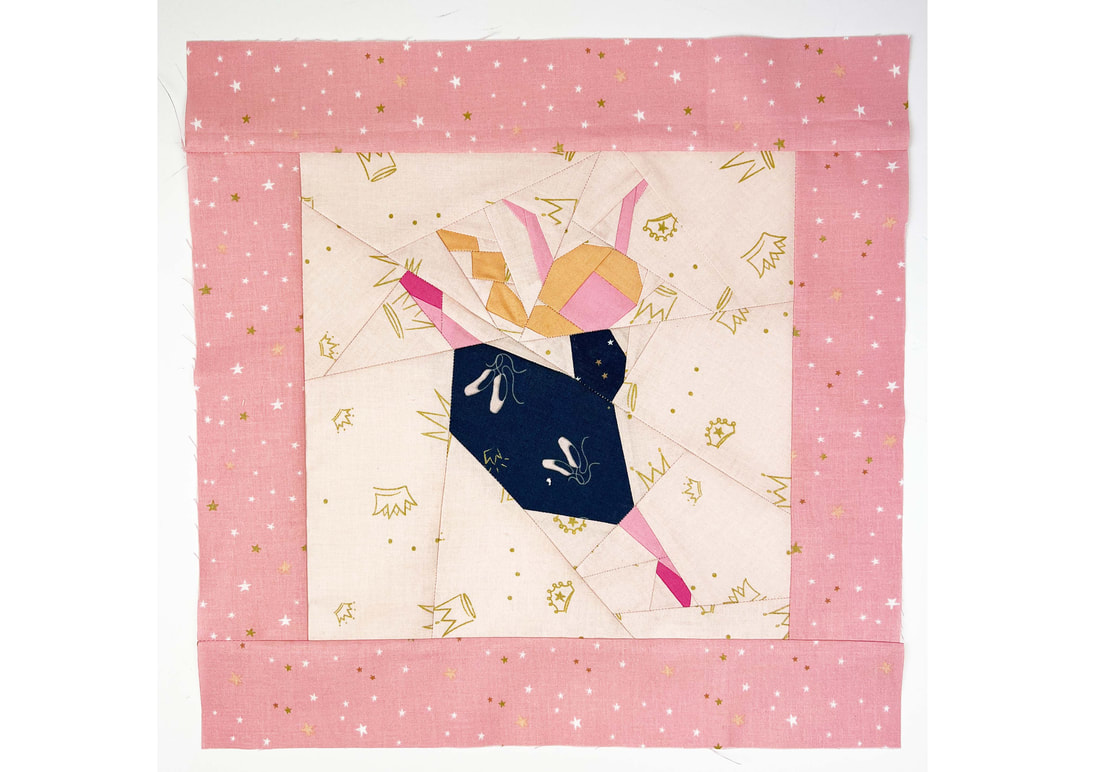 attach the fabric strips to the quilt block 2. Cut the fabric strips for the sides of the quilt block. (if you're using directional fabric, check the direction of the print before cutting) Attach the 2,5" fabric strips to the quilt block. First sew the two shorter strips to the sides of the quilt block, then attach the longer strips to the top and the bottom of the quilt block. If you're using directional fabric check the direction before attaching the strips. 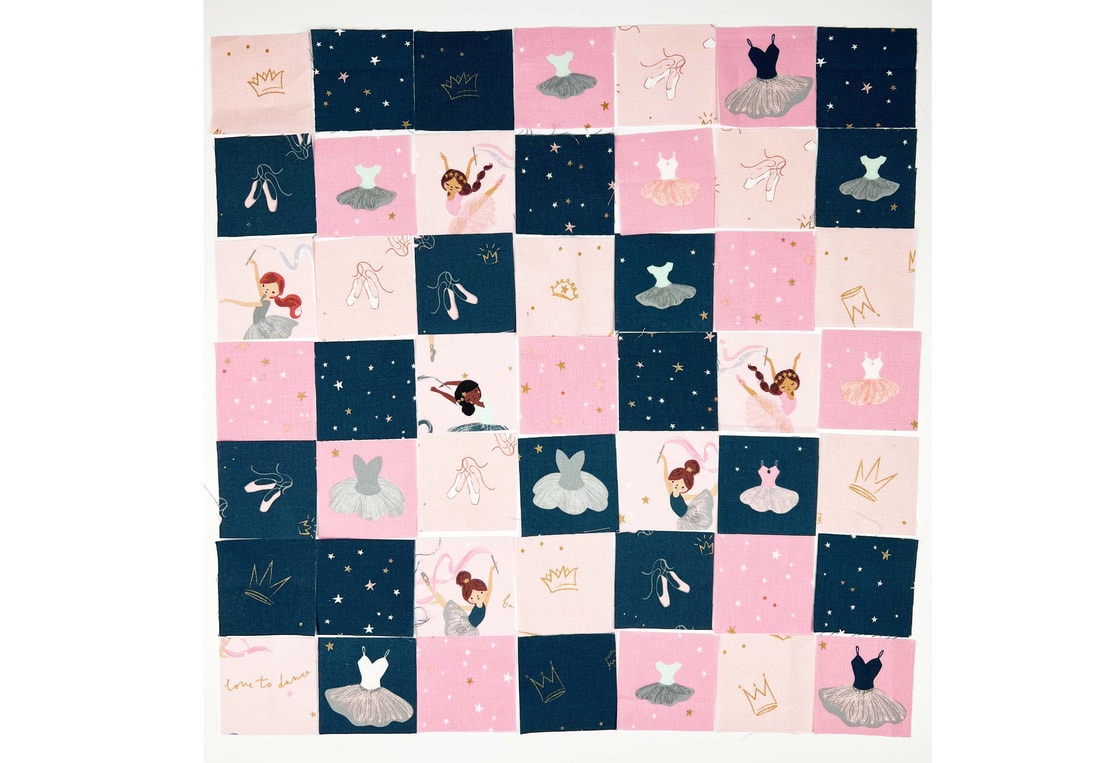 49 2,5" squares for the back of the ballet bag 3. Cut 49 pieces of 2,5"x 2,5" squares and place them the way you want them for the back of your bag. I love them to be totally random. This Riley Blake Designs 'Twist and Twirl' fabric line is absolutely perfect for fussy cutting, so I went a little crazy... LOL. 4. How to sew these small fabric squares together? There are several different ways to sew fabric squares together. For this ballerina bag I liked to sew the square together by rows. Then I pressed the seams in opposite directions, to get perfect nesting seams and therefore perfect corners. ( See video)  Ballerina bag fabric placement 5. Now that you're done with the back of your bag, it's time to place the fabric pieces in the right order and piece them together. You will need to place the front quilt block, then the bottom piece of fabric and the back piece in one row, as shown above. Beware of the directions of your quilt block and back piece, you want them facing each other, or facing the bottom of the ballerina bag. Now sew these 3 pieces together, press again and add fusible batting. 6. If you wish, you can either hand or machine quilt your outer ballerina bag piece. I did a combination of both. I hand quilted around the ballerina quilt block. Then I machine quilted the front and the back piece with simple straight line stitching. 7. Sewing the loops for the cord at the sides of the ballet bag. Cut the fabric pieces, fold them in half lengthwise and press in the 1/4" seam allowance. ( photo 1). Then stitch along the edge with a small seam allowance. ( photo 2). Fold in half so the short edges align and clip in place at 1" from the bottom edge of the bag on both sides. ( photo 3). 8. Making the casing: Cut the fabric pieces for the casing. Fold in the short ends 1/4" and stitch in place with a small seam allowance. Then fold the casing in half lengthwise. Clip or pin casing in place at the top edges of your ballerina bag so that it's centered and the raw edges align.( photo 2)  sew the side seams of outer fabric piece and lining 9. Preparing the outer piece of the ballerina bag and the lining. Fold the outer piece of the ballerina bag, right sides together in half, so the top edges align and stitch along the sides with 1/4" seam allowance. stitch the loops between these seams. You want to stitch across the loops twice for extra strength. Cut the lining piece according to the measurements given. Fold in half right sides together, so the top edges align and stitch along the sides with 1/4" seam allowance. Leave a 3-4" opening on one side for turning the bag later. 10. Turn the lining inside out and place it inside the outer piece, right sides together. Pin or clip the two pieces together so that the top raw edges align. I like to start at the side seams and place those on top of each other, then clip the rest. The casing will be between the two pieces. Now stitch along the top edge with a 1/4" seam allowance. Turn the bag inside out through the opening that you left in the side seam. Close the opening with a small seam allowance. Push the lining inside the bag.  stitch along the top edge of the ballerina bag 11. Stitch along the top edge of the ballerina bag. 12. Adding the cord to the bag. I love these little tabs on the cord, but you can also just tie the cord with a knot or add some beads. For the tabs, cut the fabric pieces as mentioned above and fold in a 1/4" seam allowance on the longer edges first, then fold in the shorter edges 1/4" and press. (photo 1) - How to put in the cord into the casing of the bag? You need to put the cord through the casing before you attach the tabs. Attach a large safety pin to one end of the cord and go through the front part of the casing onto the back part of the casing coming out at the same side you went in. I was going in from the right with the first cord, going through the back part of the casing and coming out on the right as well. Going in from the left with the second cord through the front part of the casing onto the back part of the casing coming out again at the left with the second cord. Go through the bottom loops with one end of the cord on either side of the bag. ( photo 2) Fold the tab in half and place both ends of the cord in the center and stitch in place. Repeat for the second cord. And here you go all done and finished, easy enough, right? Do you want to make another one? I absolutely think so :-) Here are three more quilt blocks, that I designed especially for this fabric series. Which one is your favorite? Thank you Riley Blake Designs for the opportunity to design this quilt block pattern series and for supplying the absolutely adorable fabric series 'Spin & Twirl' that I used in this quilt pattern series. Happy sewing everyone! Ingrid xx 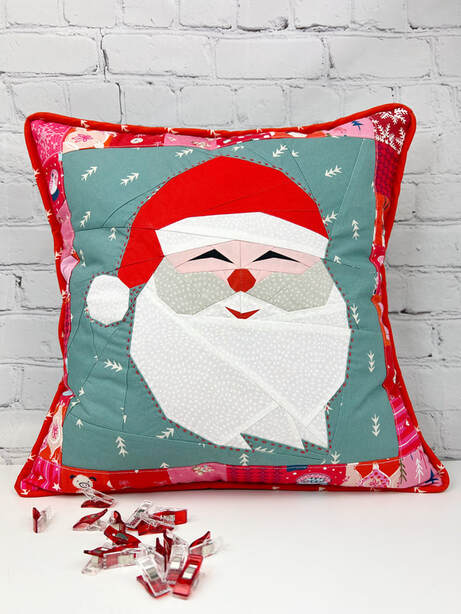 Santa pillowcase Did you ever wonder how to sew a fancy cushion cover with piping? You want a professional-looking pillowcase with piping on the edges? Here is a super easy step step by step tutorial. Since 'tis is the season' I will use my happy Santa Head quilt block for this tutorial. 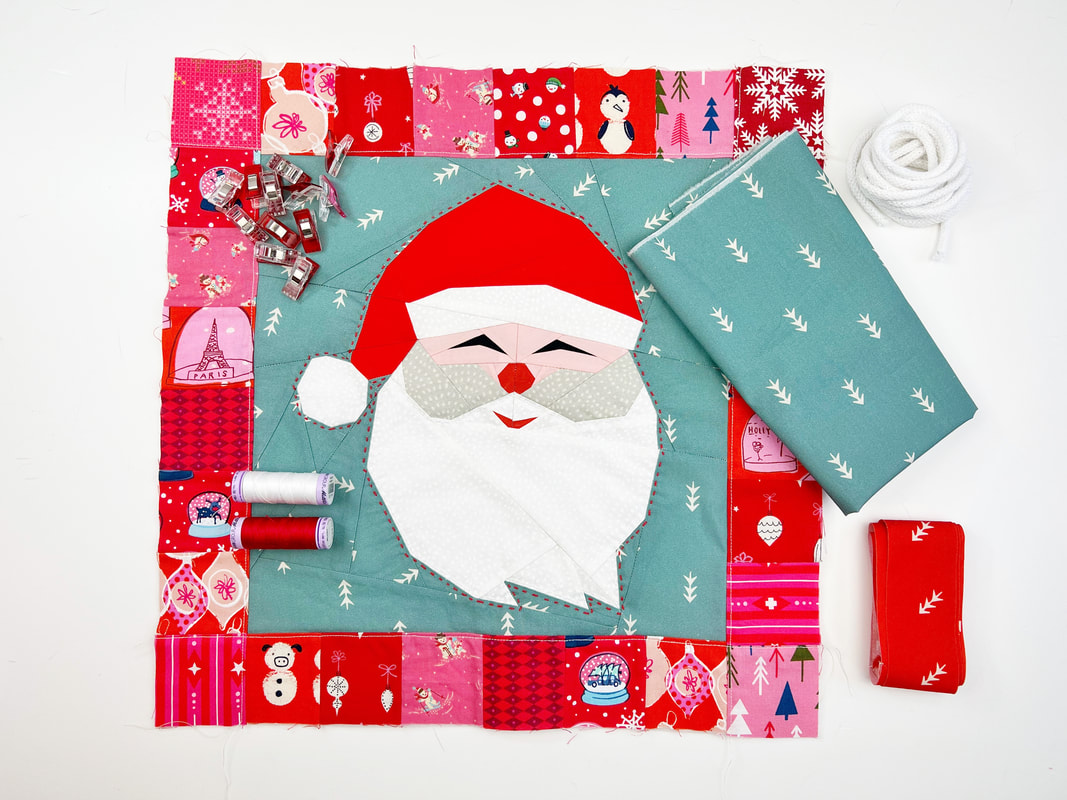 Materials for Santa pillowcase Materials needed: (for a pillowcase aprox. 15.5"x 15.5" finished) - quilt block 12"x 12" plus 28 2 1/2 " squares around the quilt block or a 16"x 16" quilt block (or of course a 16"x 16" piece of fabric if you don't want to use a quilt block as pillowcase front) - for the back 2 pieces of fabric 16"x 13" - 70" piping - either store bought piping or you can make your own piping. - square shaped cushion insert. Either you purchase a new insert or reuse one of your existing pillow inserts. - Sewing machine, acrylic ruler, scissors, pins or clips. Instructions: 1. Sew your quilt block , or cut your fabric for the pillowcase front accordingly. 2. Attach the 2 1/2" squares to your quilt block ( if you're making a pillowcase like the one I am using here. You will find a full tutorial on a pillowcase with fussy cut squares like this one here and I also made a little quick video) 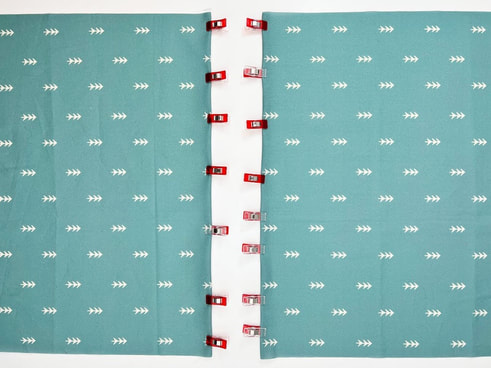 backing of envelope pillowcase 3: Preparing the back Fold over one of the 16" edge on each of the fabric pieces for the back. Fold over 1/2 " twice and clip in place. Then stitch along the edge with a small seam allowance. If you have directional fabric, make sure the fabric pieces are both facing the same direction, and that you fold in the edges that face each other. 4. Stitch the hem in place with a small seam allowance. 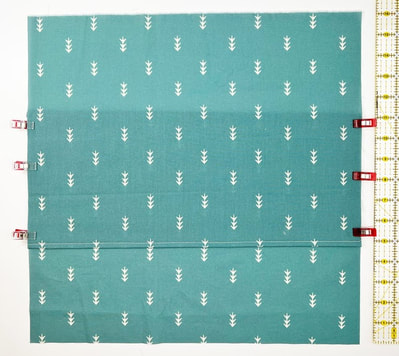 overlap the hemmed edges for the envelope pillowcase backing 5. Overlap the hemmed edges so that the back becomes the same hight as the front ( 16" in this case here) and clip the overlapping edges in place and stitch with 1/8" seam allowance to hold it in place. Attaching the piping: 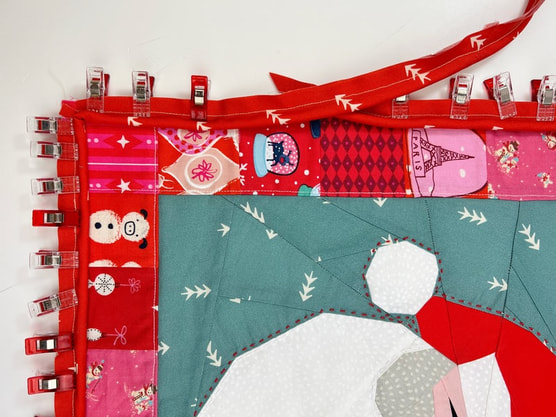 Clip the piping in place 6. Now you start pinning or clipping the piping in place, I definitely prefer clips. I always hurt myself using pins. So clips it is. Take the front of your pillowcase and start clipping the piping to the edge. I like starting a couple of inches from the corner roughly at the center of one side. The stitching of the piping should be in line with your seam allowance. Since this will be the line that you will sew on. Tweet this: In my case it's 1/4" seam allowance. The seam allowance of my piping is also 1/4" ( from the edge of the tape to the stitching) so align the raw edges of the pillowcase front and the piping. 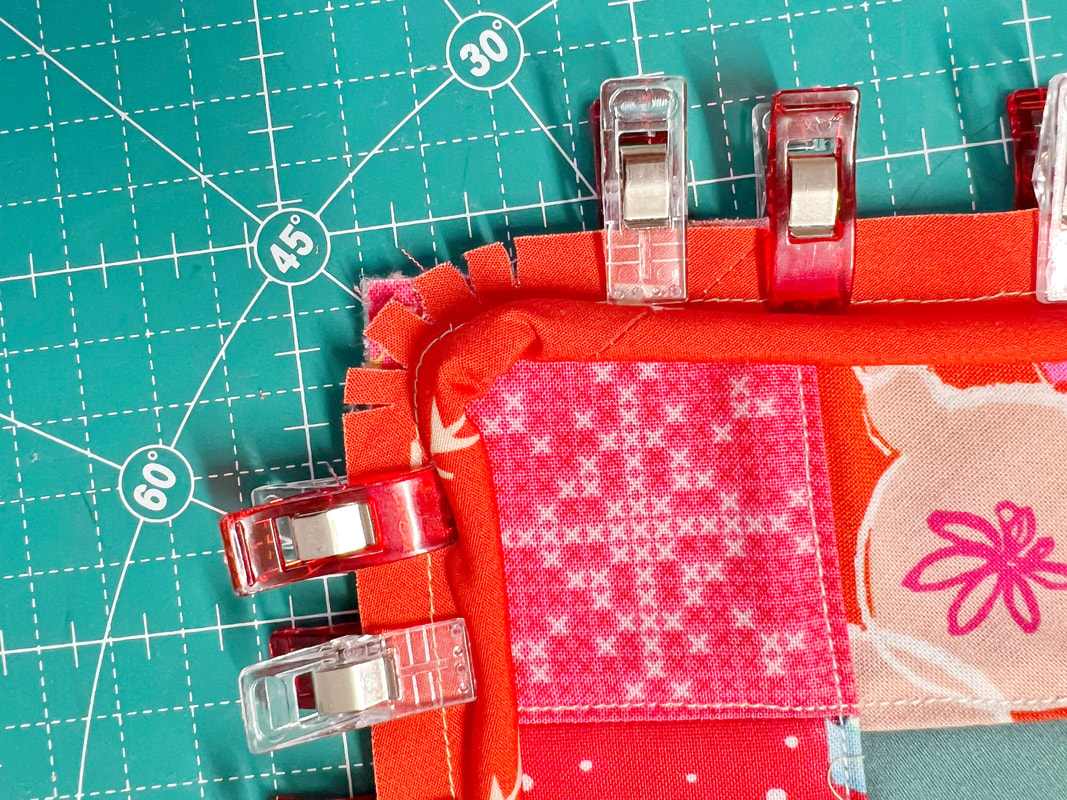 Clip the edge of the piping for the corners 7. Work the corners. In order to avoid wobbly crooked corners, carefully clip the edge of the binding to help it bend around the corner. Make sure you do not cut into the stitching line of the piping. You can see in the photo, that the inner piping wrinkles slightly, this will straighten once you turn your pillowcase inside out.  piping clipped in place 8. Clip the piping all the way around the pillowcase front until you get to where you started there you overlap the ends of the piping for about 2"-3" and leave it open. 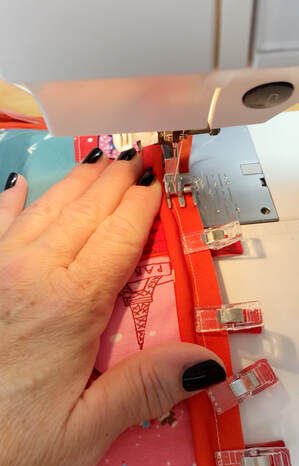 attach the piping to the pillowcase front, stitch on the same stitch line 9. Stitch the piping to the pillowcase front. Make sure you stitch on the same line as the stitch line of the piping. This ensures a perfect looking piping once you turn the pillowcase inside out. This way you won't see the stitches of the piping on the outside of your pillow. So I can not stress enough: ALWAYS STITCH ON THE SAME STITCH LINE! Leave the ends of the piping loose, meaning you don't stitch these in place yet. How to join the ends of the piping properly? There are different ways to joining the ends, I personally like this one the best, and find it the easiest. 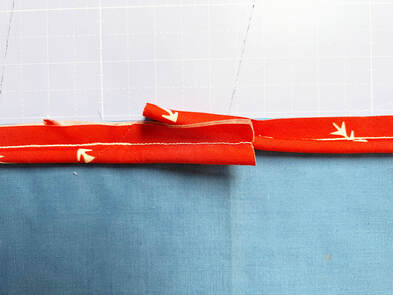 let the piping overlap for about 2 " 10. Leave the piping to overlap about a 2"-3". Leave these ends loose. 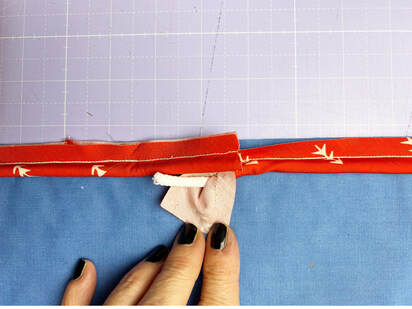 remove the stitch of the piping on one end and expose the cord 11. Open the stitching of the piping on one of these ends (I will call them left and right end in this tutorial to make life easier, but it really doesn't matter which end you take) So again, open the stitching of the right piping and expose the cord. 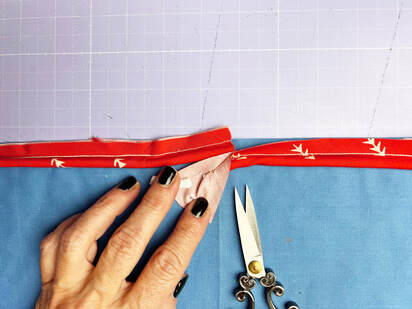 cut the extra cord 12. Cut the extra piece of cord on the right, that you exposed. Your goal is to lay the left end of the piping inside the bias tape on the right and wrap it inside the bias tape. 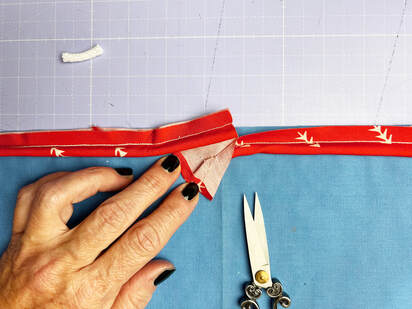 Fold in the bias tape for about 1/4 " 13. Fold in the bias tape on the right about 1/4". 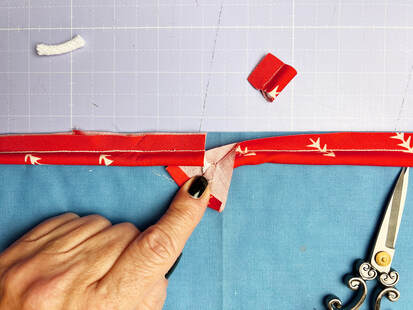 cut the other end to where the cord ends 14. Now cut the left end of the piping to where the cord ends. So that the two ends of the cord touch. 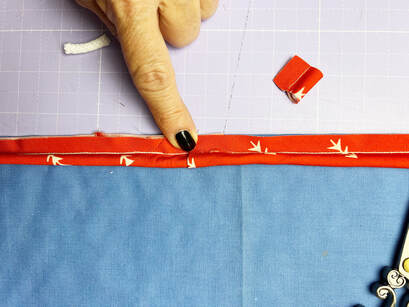 wrap one end of the bias tape around the other. 15. Wrap this end into the left bias tape and clip or pin in place. 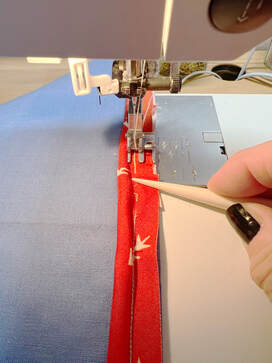 stitch piping end in place 16. To finish your piping, stitch the piping in place. Again make sure you are stitching on the stitch line of the piping. Perfect, now you stitched the piping in place.  All you need to do now, is attach the backing of the pillowcase and you're all done. 17. Clip the backing to the pillowcase front. I like the opening of the back to be the top overlapping the bottom, but some people want the left overlapping the right, or the other way around. You decide for yourself, it's a square so it doesn't matter which way you place the backing to the front of the pillowcase size wise. 18. Stitch the backing to the front, and again...don't laugh please, you will thank me later.... Stitch on the same stitching line again! Then turn your pillowcase inside out... and YAYYY all finished! 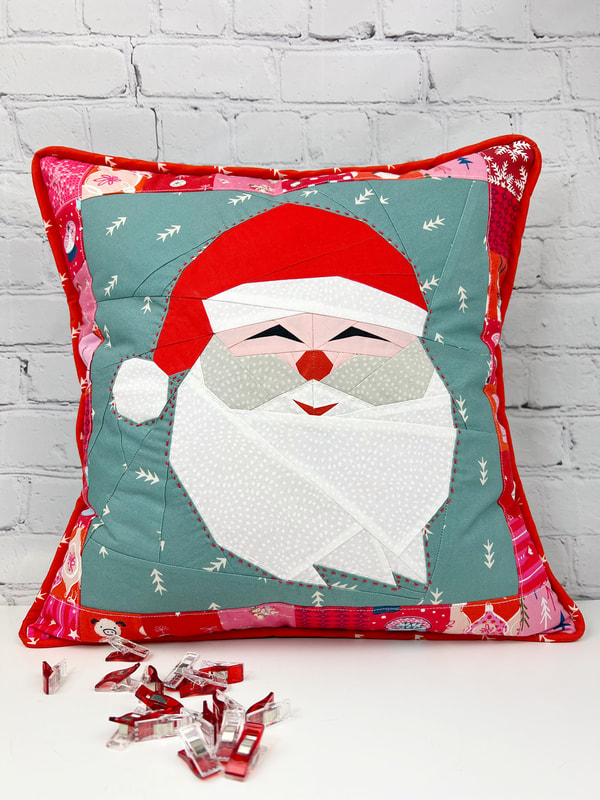 What do you think? Doesn't this look fabulous? And it's super easy, right? Just in case you are wondering, you will find the Santa Quilt block here. Happy sewing and Happy Holidays Ingrid xx You know how to make your own bias tape, but you always wondered how to make your own piping? You're asking yourself how can I make my own corded piping? What is piping for sewing? Or what kind of piping do I refer to here? I am talking about a trim or edging around a pillowcase or bag, that typically consists of a thin strip of fabric, usually a bias tape with a cord inside. This narrow tube is attached to the edges of decorative items such as pillowcases, garments or bags to enhance the edges or give the items a more defined or professional look. 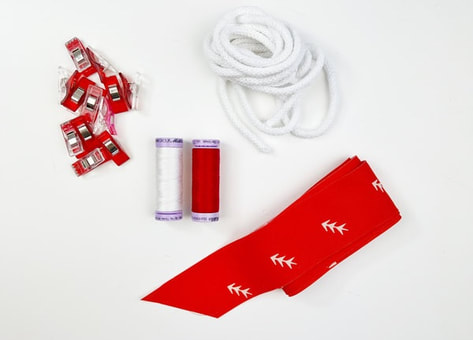 materials needed to make your own piping for sewing Materials needed: - Bias tape - cord - clips or pins - sewing machine, zipper foot, needle and thread The piping cords come in all different sizes and qualities and most importantly thicknesses. So depending on your project you can choose a very thin cord or a really thick one. I used a medium cord for this tutorial it's 1/4" (6mm) diameter. You will be sewing very close to the cord, so a zipper foot is extremely helpful.  cut diagonal fabric strips 1. To start you will need diagonal ( 45° angle) fabric strips, also called bias tape. The fabric will be wrapped around your cord so the bias tape has to have the width according to the circumference of your cord. This means, you need to measure the circumference of your cord ( not diameter of your cord) then add the seam allowance twice and that gives you the width of your bias strips.  measure the cord circumference 2. You need to measure the circumference of your cord, mine was 5/8" in circumference (not to be confused with diameter!) Then you add your seam allowance (1/4" in my case) twice, and there you have your width of the bias tape: FORMULA: circumference of cord + 2 x seam allowance = width of bias tape In my case: 5/8" + 2 x 1/4" = 9/8" or 1 1/8" 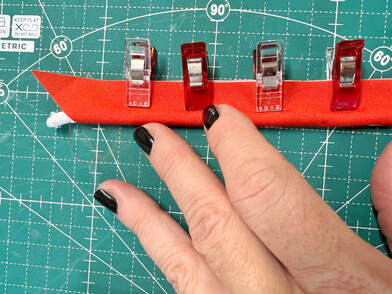 place cord inside of bias tape 3. Fold your bias tape in half, aligning the raw long edges. Place your cord in-between the folded bias tape. As you know, I prefer clips so here you can see, I clip this cord/ bias tape sandwich in place, but you can also use pins. If you're using pins you can either pin along the cord or you can place your pins vertically, depending on your personal preferance. If you want to be very neat, you can now hand baste along the piping with large running stitches, before you machine stitch your piping. I have to admit, when I first learned how to sew, from my Mum ( she was a home economics teacher) I had to hand baste everything. I wasn't very happy about that , as you can imagine, since it took so much time. But it helped immensely and my sewing was a lot straighter and neater than in would have been without the hand basting. 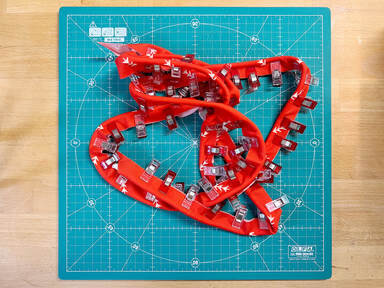 piping all clipped in place As you can see, these days I am not as neat and prefer a couple more clips. 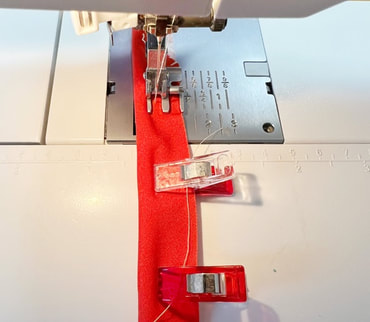 stitch along the cord with a zipper foot 4. Now stitch along the cord with a zipper foot. This allows you to get as close as possible to the cord. This tutorial is with a zipper foot, since most machines come with a zipper foot or most people have a zipper foot for their machines. Side note here: I turned the zipper foot of my PFAFF sewing machine the other way around so I can see more of my stitches. I wish this foot would come in clear acrylic, that would be perfect. (If you have a piping foot for your sewing machine, that's a different story. Then you place the cord under the round part of your piping foot and move your needle the side so you can stitch along the edge of the cord.) 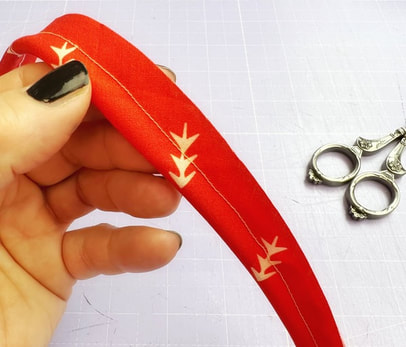 finished piping for sewing 5. And here it is, your very own individually hand made piping. This was easy peasy, right ? And here is a tutorial on how to use this piping in a project, and how to sew it into a pillowcase the super easy way. Check out this quick video with the full instructions.... Happy sewing Ingrid xCheers to a successful making of your piping :-) 
Do you ever wonder where certain Christmas traditions come from?
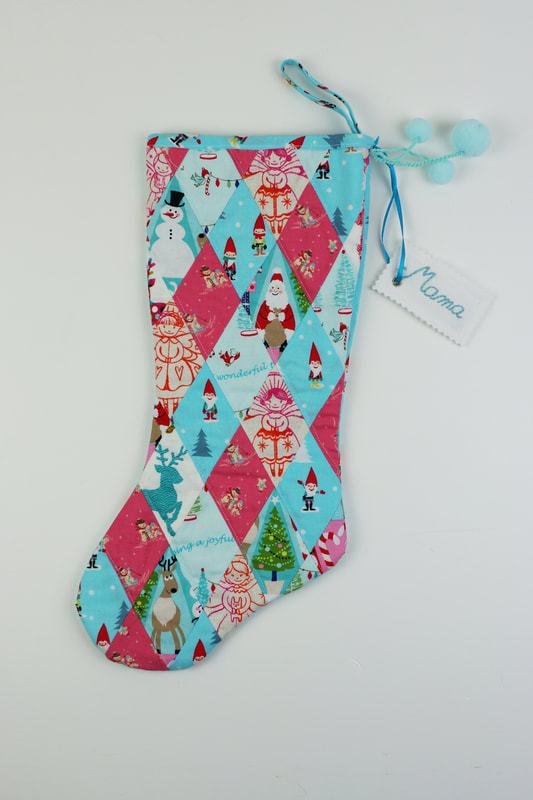
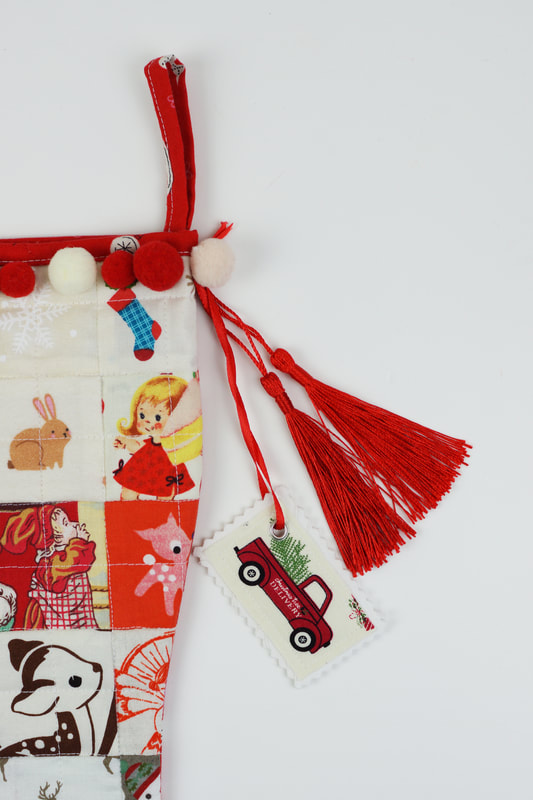
Well if you do and want to know more about Christmas stockings here is the story: The Christmas stocking tradition started in Europe, I have to add, a lot of Christmas traditions have, not sure why though, I have to get into that some other time. Christmas stockings traditionally have the owners name written on them, makes sense, otherwise Santa wouldn't know where to put the presents, right? " The stockings were hung by the chimney with care, in hopes that St.Nicholas soon would be there." - a visit from St. Nicolas 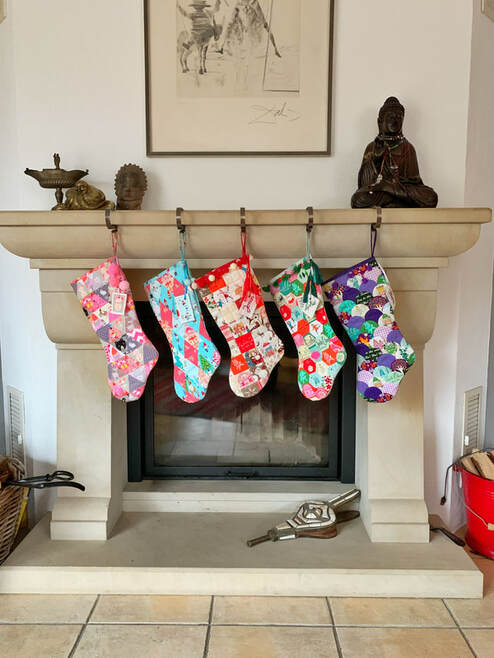
Quilted Christmas stockings
Why People Hang Stockings
The Christmas stocking tradition is said to have started with the good deeds of a king noble man named Nicholas, who was born 280 AD, in Patara a city on the Mediterranean coast of Turkey. ( If you ever visit Turkey , you have to visit that coast, it's beyond beautiful).
Nicholas became a priest and used all his money to help the poor, the needy, sick or suffering. He was very religious and was made Bishop of Myra at a young age. He never married or had children. But he loved children and gave gifts often, this is why he also became known as the gift giver of Myra. He was a rich man and traveled all over the country and gave his gifts generously. He didn't want his identity to be known, so he gave his presents late at night. Children were told to sleep early, otherwise Nicholas wouldn't come. He became known as Saint Nicholas the patron saint of children and sailors. The most popular legend about why stockings are hung on Christmas is this: A very poor widowed father of three girls was worried his daughters weren't able to get married because of their impoverished status. St. Nicholas heard the story of the man and wanted to help, but he knew the father wouldn't accept any charity. So he slid down the chimney of the family's house and filled the girls' recently washed stockings, which were drying by the fire, with gold coins. When the girls woke up in the morning, overjoyed with the generous gift, they were now eligible to marry and they all were happy ever after... And there you have it, the Christmas stocking tradition was born. 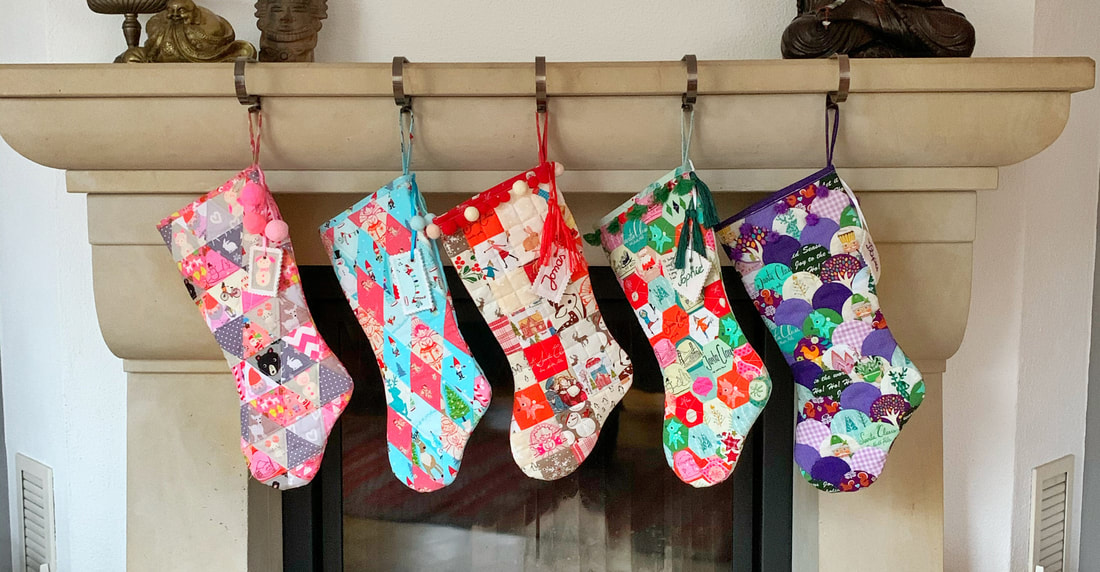
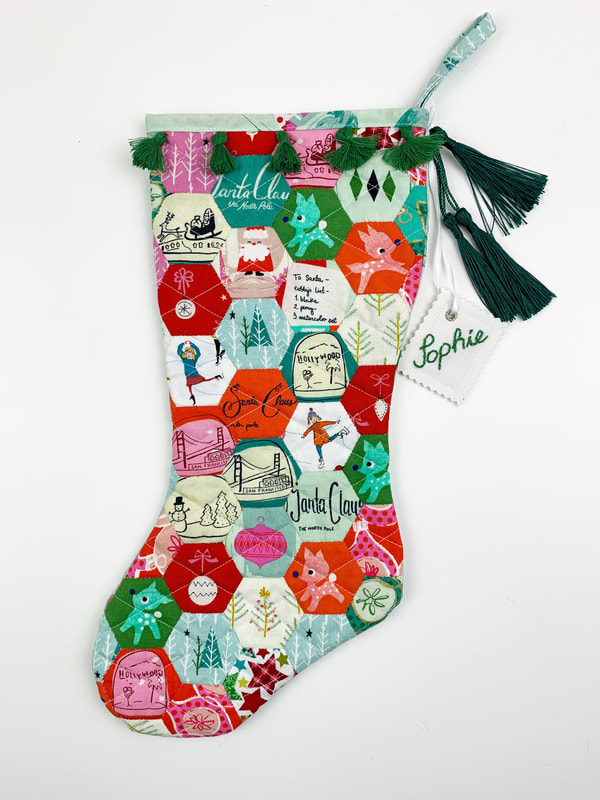
How To Make a Christmas Stocking From Hexies
Now lets make some great Christmas stockings ourselves:
Fabrics needed for a Hexie stocking: - fabric scraps for about 42 - 1" hexies - 2 pieces of fusible interfacicing 16"x 9" - 2 pieces of fabric 16"x 9" for front and back lining - 1 piece of fabric 16"x 9" for the back - 1 strip of fabric 2"x 28" for binding - optional: tassels, fabric hangtag To make this process easier, you can download our Christmas stocking template. 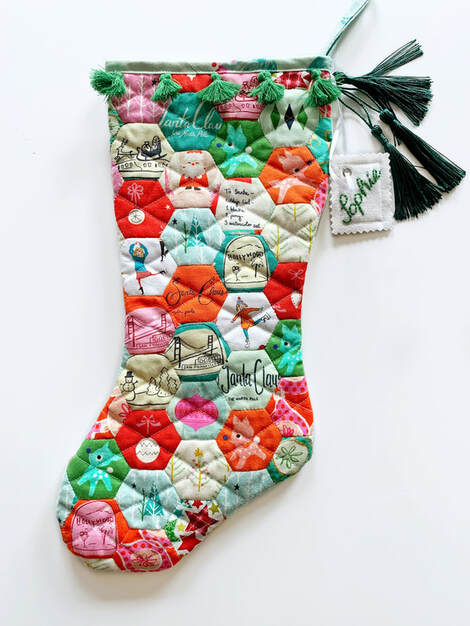
Sewing the hexie Christmas stocking:
1. Print the stocking template and glue the two pages together and cut out the template. Find the PDF to the template here . 2. Baste about 42 - 1" sized hexies and place them on your stocking template. Depending on how you place them, you'll only need half hexies on the sides. This is a perfect way to use up all your adorable Christmas fabric scaps and do some fussy cutting.
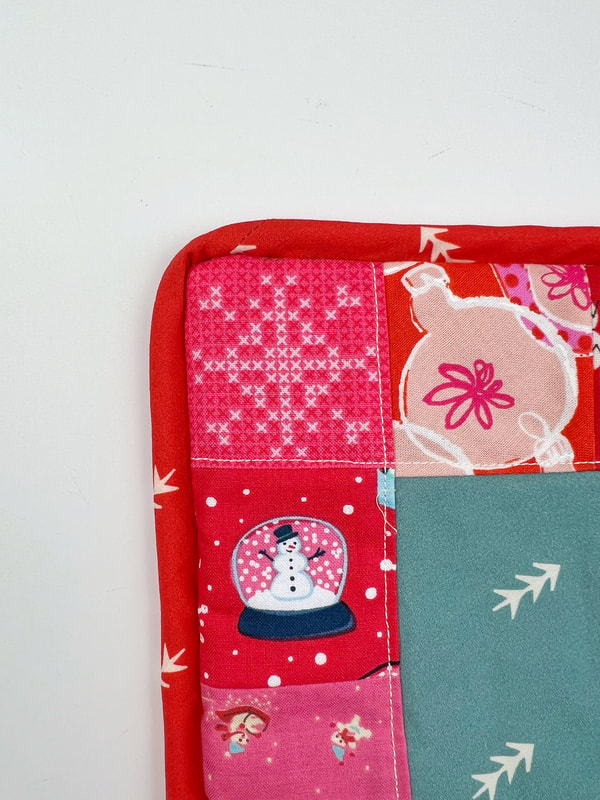
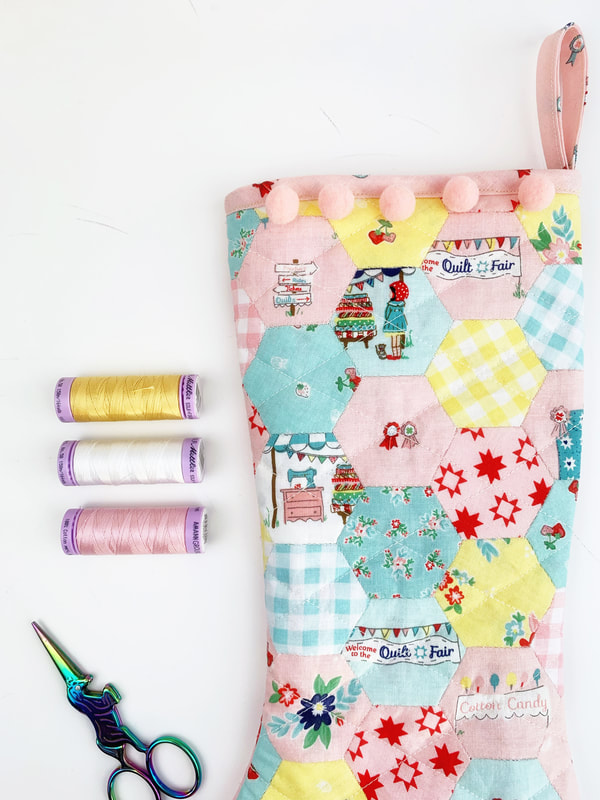
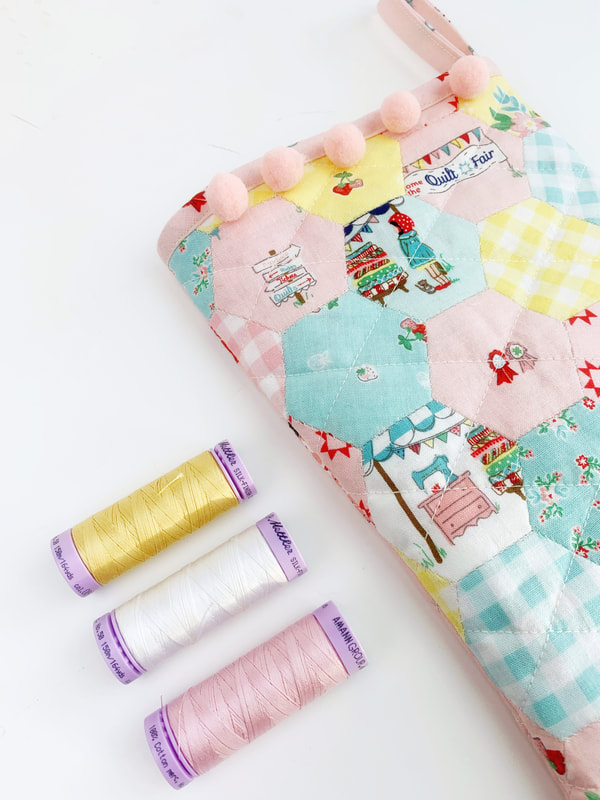
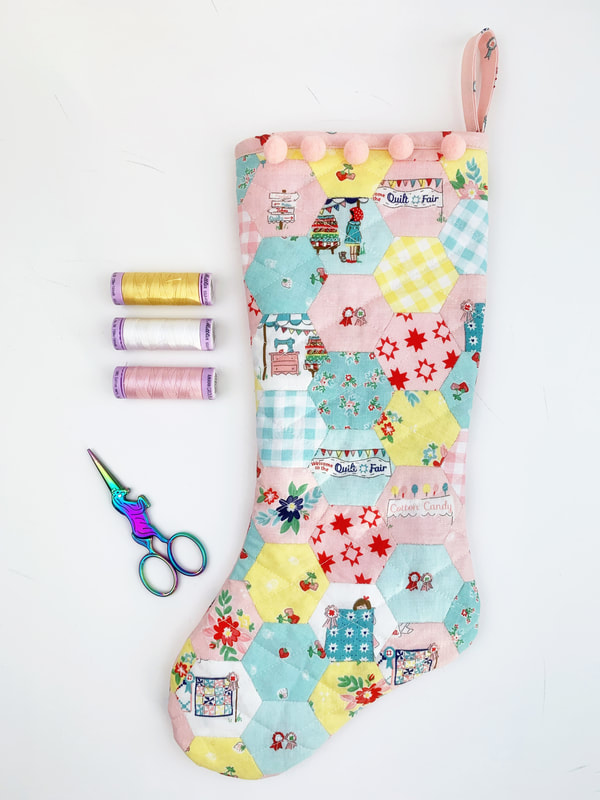
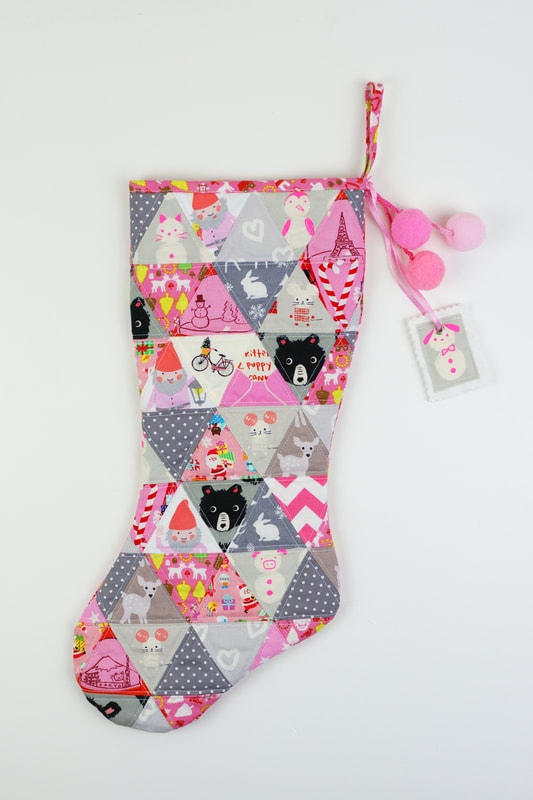
Even if you don't feel like using Christmas fabrics for your Christmas stockings, they look especially cute with all sorts of other fabrics too. I could not resist and had to make some with this uber adorable fabric line from Riley Blake Designs called 'Quilt Fair' by Tasha Noel.
Don't you agree, Christmas stockings in 'non-Christmas-fabrics' are equally cute? But let's get on with our sewing. 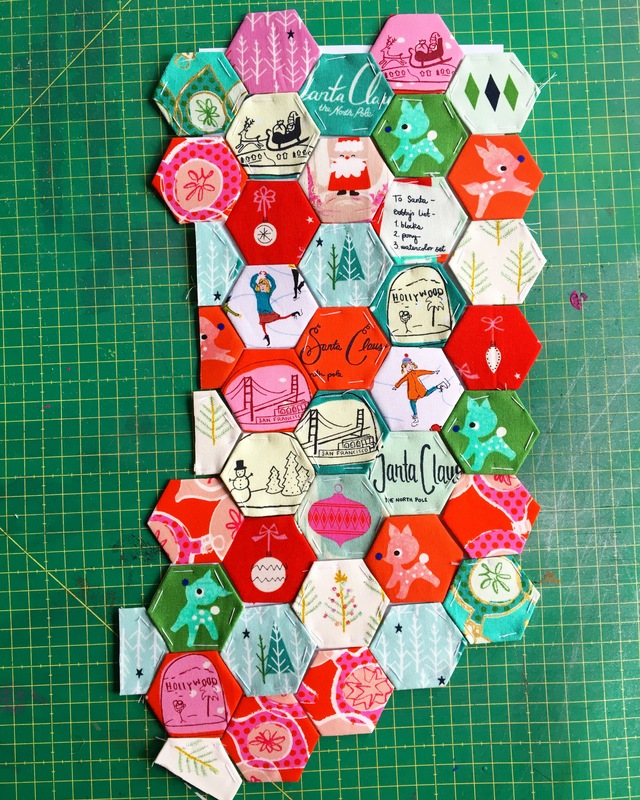
3. Sew together your hexies.
Add the fusible interfacing to your 'hexie fabric' piece and add the lining as well, wrong sides together and quilt as desired. I quilted diamonds. Repeat the same for the back of the stocking. Add the fusible interfacing to the back fabric, add the lining fabric wrong sides together and quilt as desired. 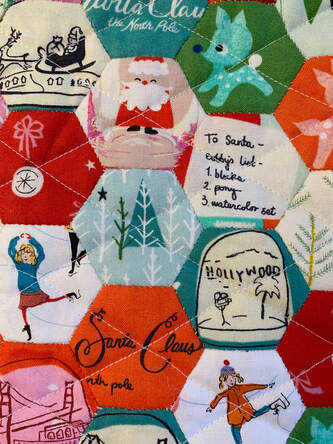
Quilted hexies
4. Now cut your quilted pieces into stocking shapes , use the stocking template.
5. Place front and back of your Christmas stocking right sides together and stitch along the outside edge using a 1/4" seam allowance. 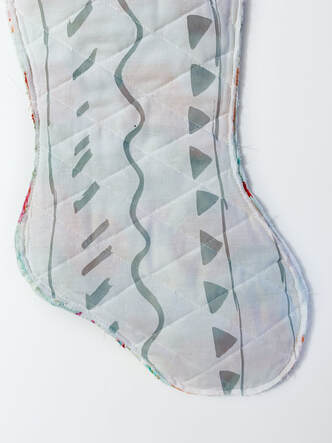
stitch along the outside edge
6. Turn your stocking inside out.
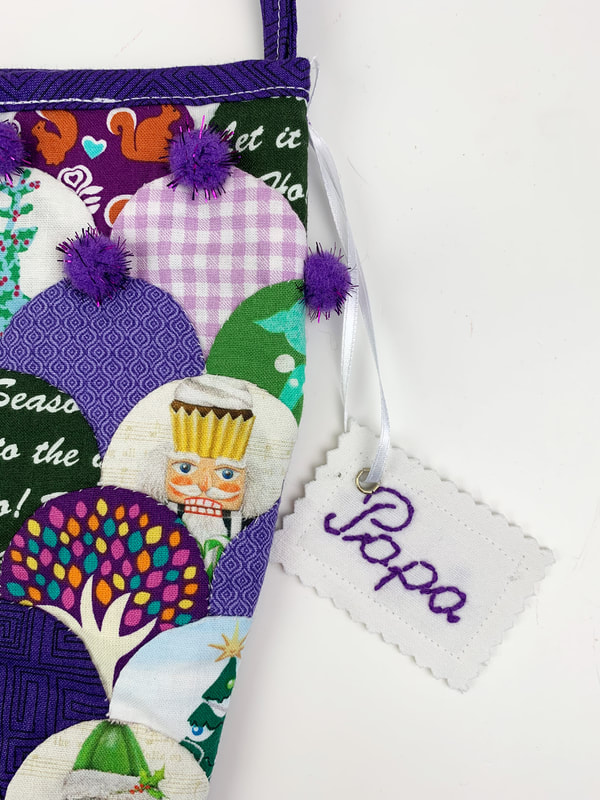
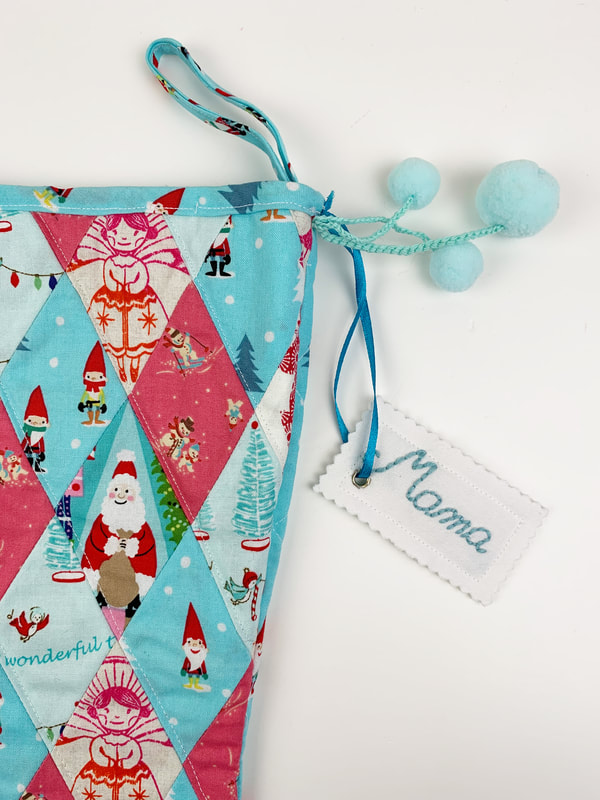
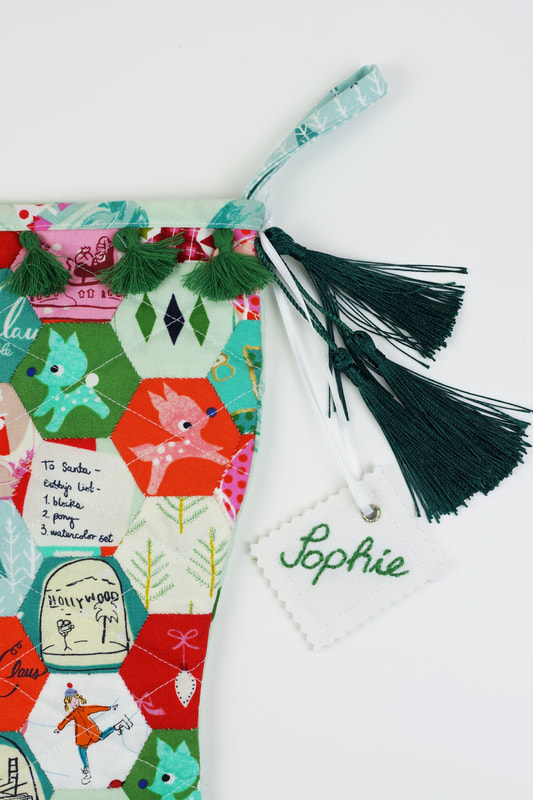
Attach the binding strip to the top edge of your stocking right sides together and raw edges aligned. Add a little hanging tab to the back of your stocking made out of the same binding strip. Clip or pin in place and stitch along the top edge with a 1/4" seam allowance. Fold over to the inside and stitch in place by hand. 7. optional: Add pompoms and/or tassels. 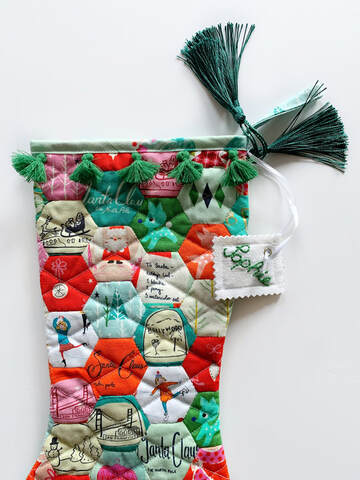
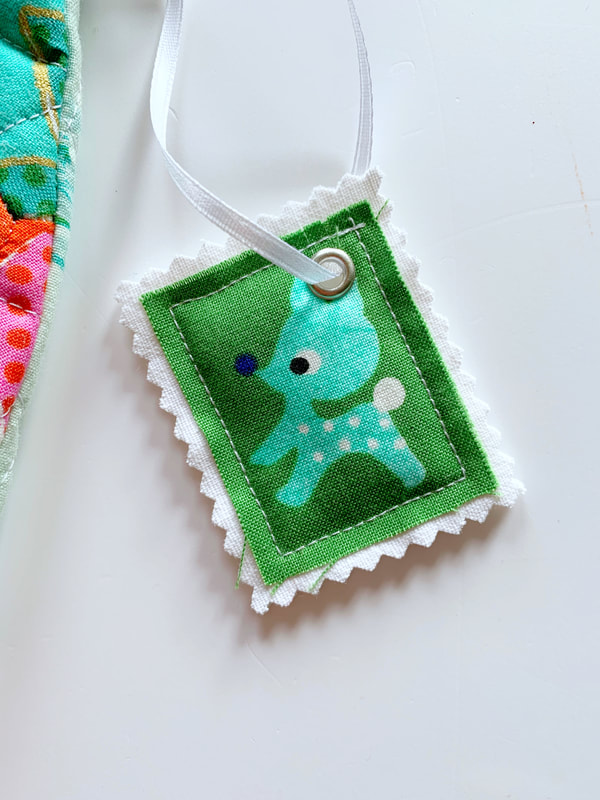
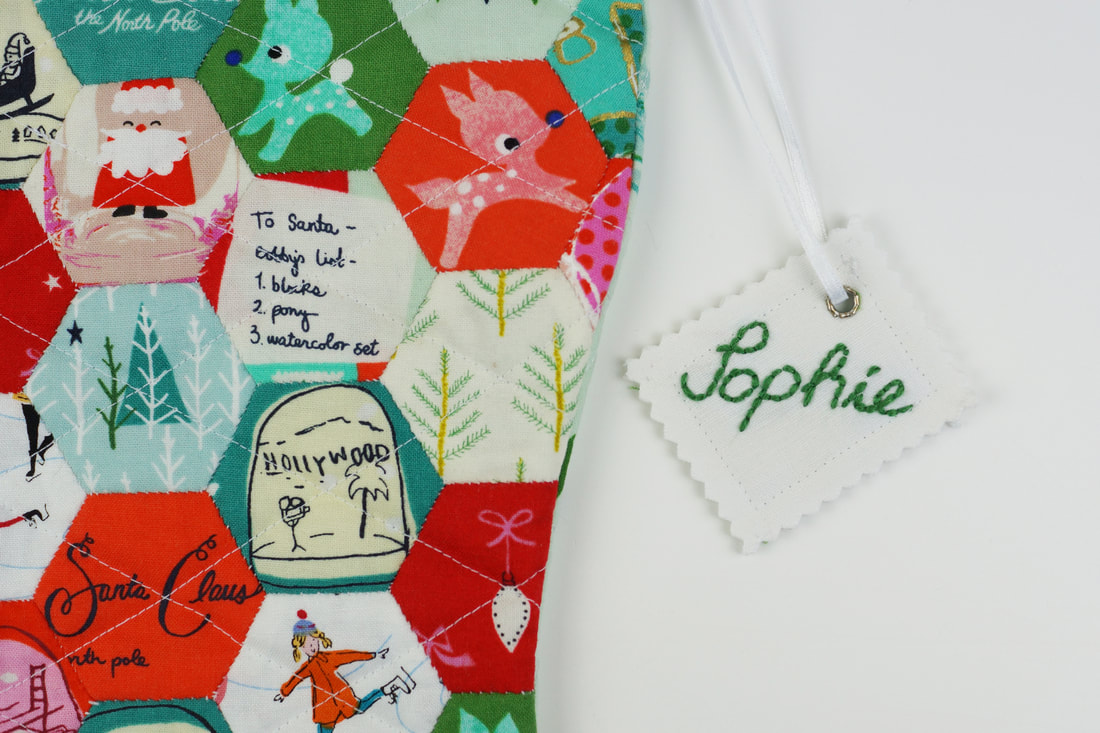
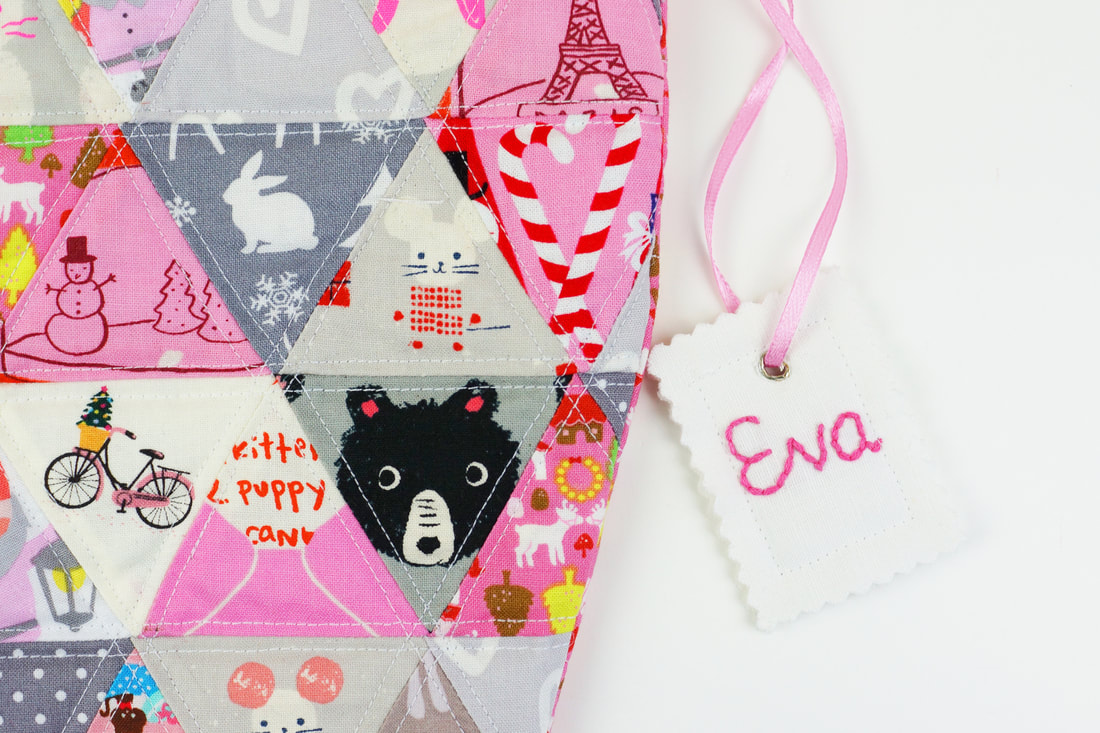
8. Make a little name tag.
I used white fabric and embroidered the name on it. I added some fusible interfacing, to give it a little volume and topped it off with another piece of white fabric. I stitched the 'sandwhich' in place with a small piece of fussy cut motif and cut the outer edge of the white fabric with zig zag shears. Add a metal eyelet, or just use a hole punch and thread a little ribbon. Attach your name tag to your stocking. Et Voila .... all done! Now let your phantasie go wild and create stockings with all sorts of different patchwork techniques and styles. Whether you're using clamshells, triangles, hexies or just simple squares, these Christmas stockings will definitely make a lasting impression. If you are celebrating Christmas, What's your choice of Christmas stocking? Are you making one yourself? let me know in the comments. happy sewing Ingrid x
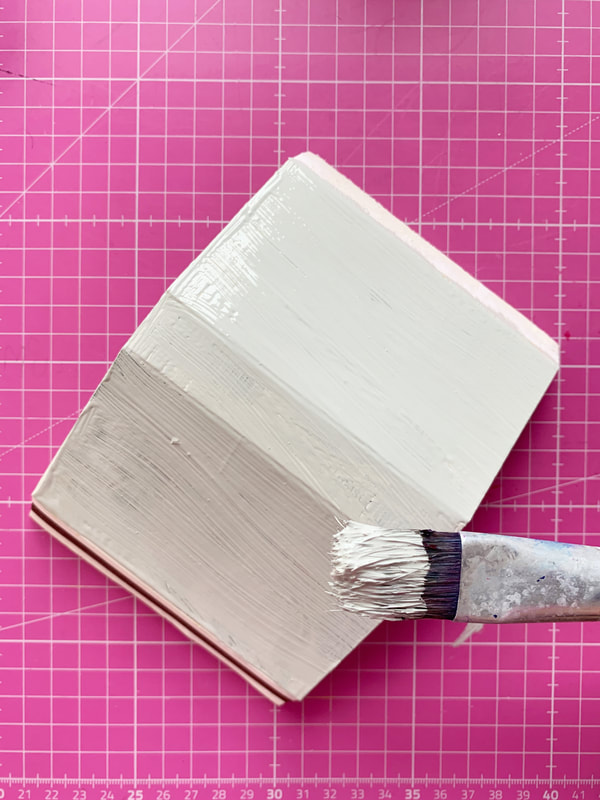
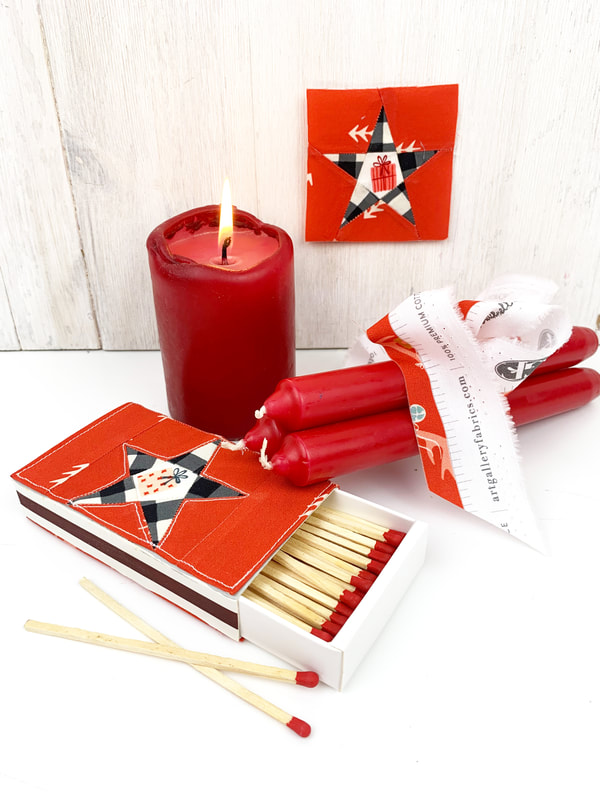
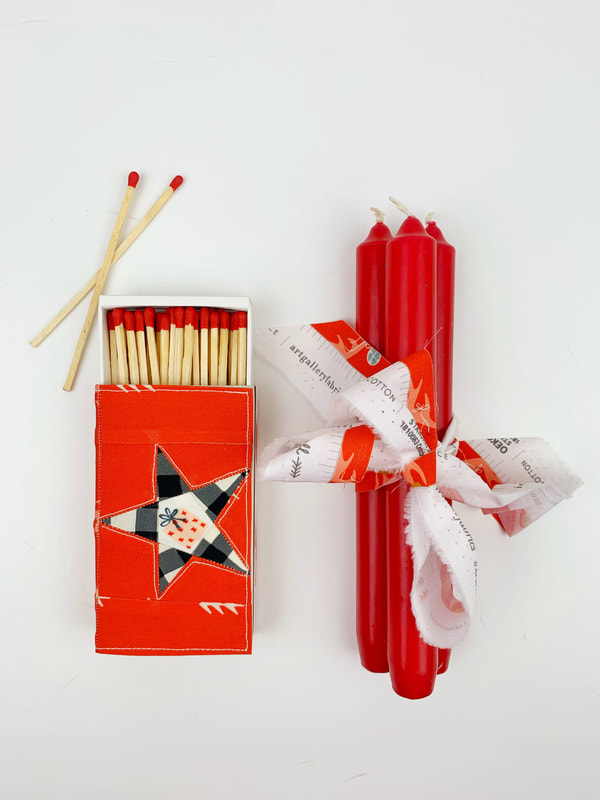
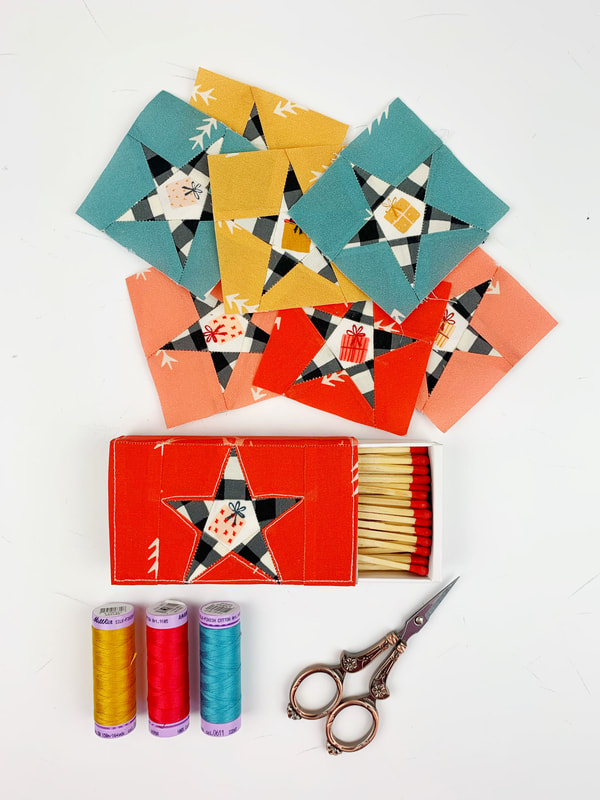
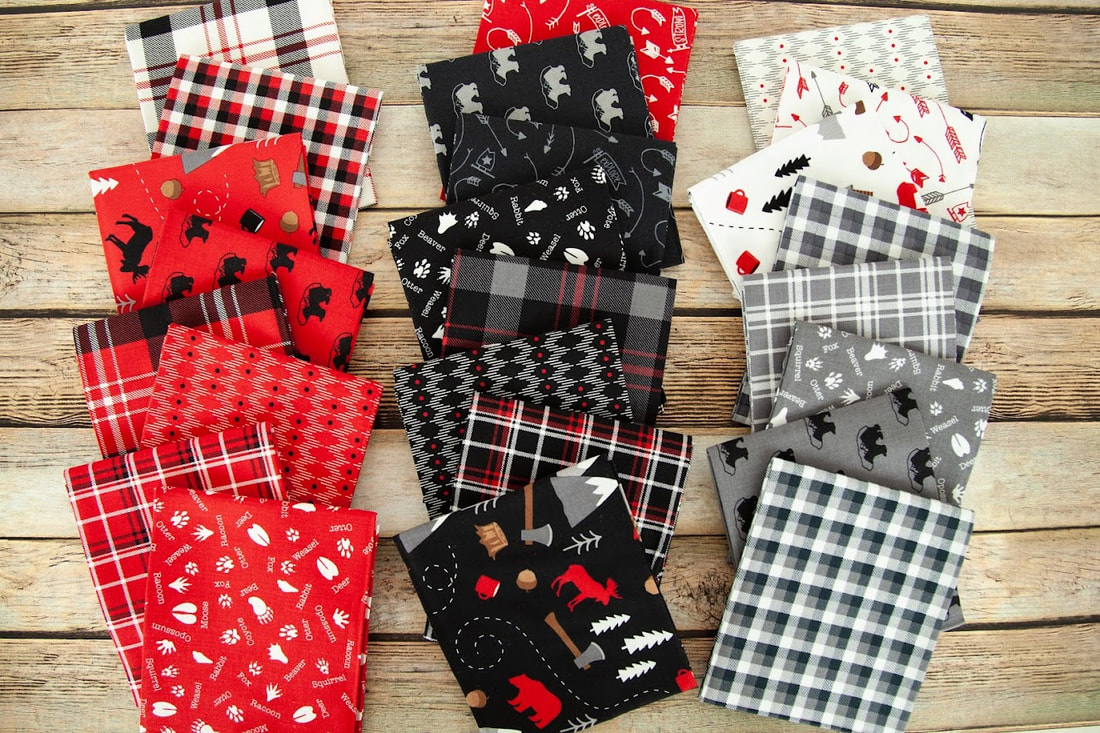
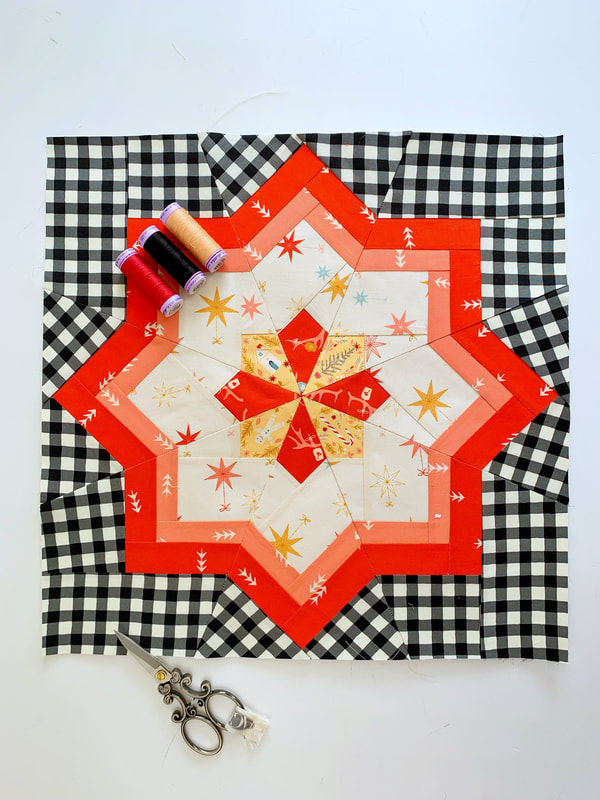
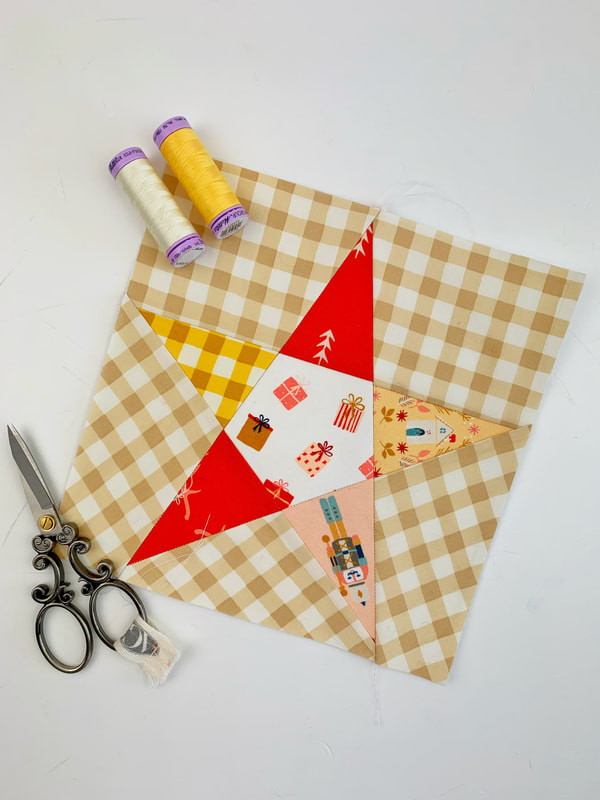
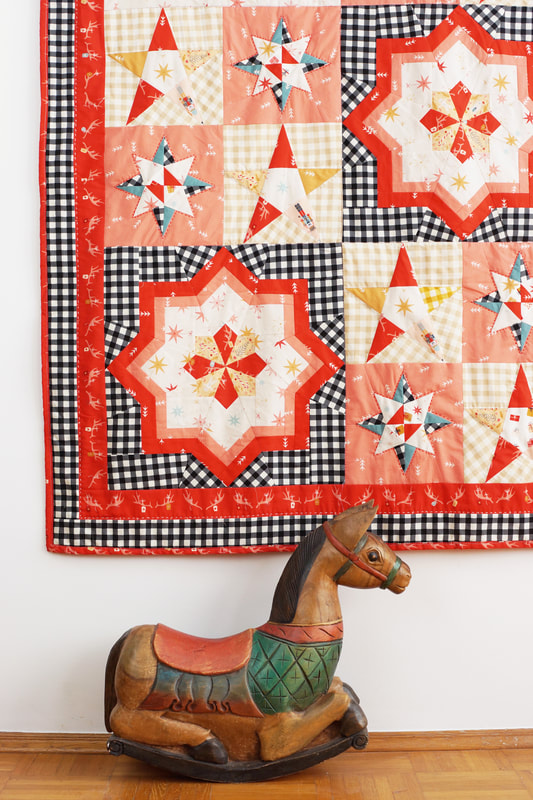
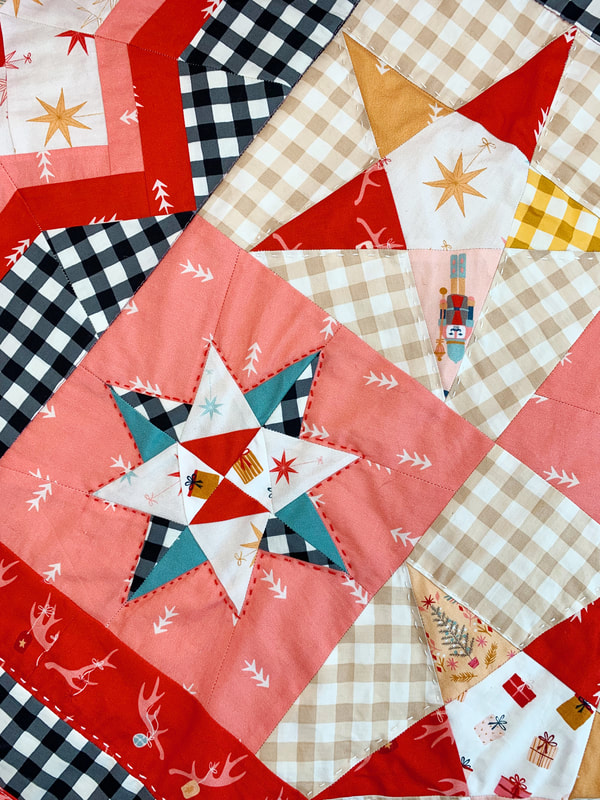
c Are you always as short on Christmas gift ideas as I am? I am trying to collect all sorts of ideas all year around, so when it gets close to Christmas I have a few DIY projects lined up. This is one of those projects, a DIY fabric matchbox cover. It's a perfect Christmas gift for him or her .... a fabric matchbox cover is super decorative and who doesn't need matches? It's actually a very nice gift for all year around. Best of all, these decorated matchbox covers are super easy and quick to make, and a perfect scrap buster. So lets get started... 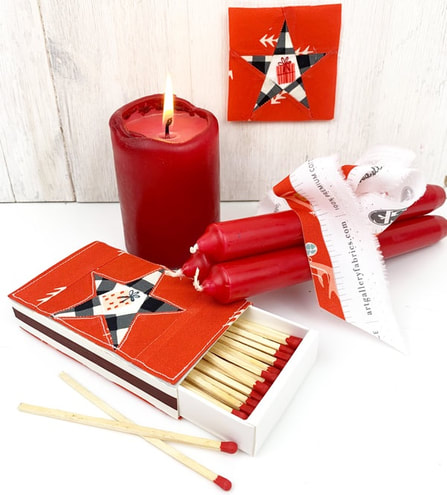 DIY fabric matchbox cover Materials needed: - an assortment of large matchboxes ( the ones I used are 2.5" wide, 4.3/8" long and 3/4" deep ) - fabric scraps for the Star quilt block and the side and the back of the matchbox ( depending on the size you're making, of course) For the matchbox size that I used, it is - 2 strips of 1.5"x 3" of fabric for the sides of the quilt block. - I piece of fabric 5"x 4" for the back Sewing machine and thread. Instructions: 1.Open the side Open the side of your matchbox where it's glued together. I used a sharp knife. That way you can easily sew your fabric onto the cardboard matchbox. Glueing it to the matchbox is an alternative, but I find that the glue shines through the fabric and stains it sometimes, especially when you're using solid fabrics. So the decorative matchboxes look much nicer, when you sew the fabrics onto the matchbox. 2. Sew the star quilt block in size 2.5"x 2.5" 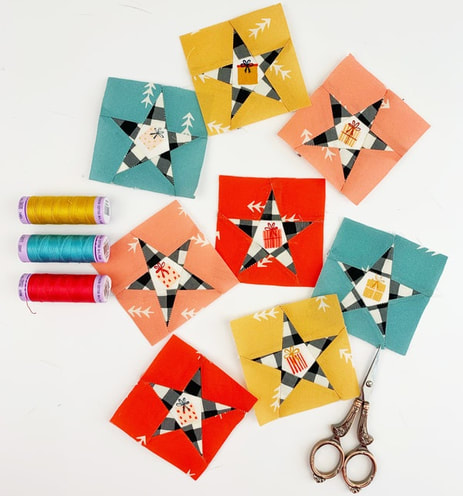 a whole bunch of 2.5"x 2.5" star quilt blocks 3. Prepare your matchbox In case you have printed matchboxes like the ones I am using, I suggest painting the matchbox with a light colored acrylic paint, just so the print of the matchbox won't shine through your fabric cover. The painting does not have to be perfect, do just one coat of paint so the print of the cardboard box is covered. And let it dry. 4. Cut your fabrics for your matchbox cover As I mentioned above, I cut two strips of fabric 1.5"x 3" for the sides of the quilt block. And I cut a piece of fabric 5"x 4" for the back of the matchbox. And this piece of fabric is 5" wide and 4" long, in case you have directional fabric , like I do. 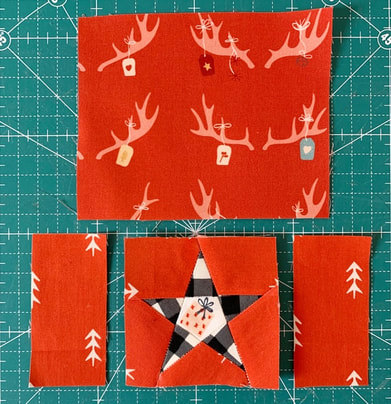 fabrics for your matchbox 5. Sew the fabric pieces together First add the two side strips to the quilt block to the left and to the right, then add the backing piece of fabric and press. I used spray starch to press the fabric. So it stays really nice and flat. Fold over the front edge 1/4" and press. Fold in the side edges 1/4" as well, so the width of the fabric matches the width of your matchbox. This might be a tiny bit more than 1/4", you might want to adjust it a little bit as you clip your cover to the matchbox. 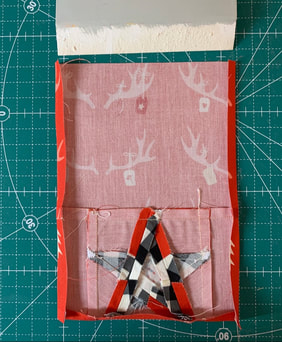 matchbox cover with folded in edges 6. Clip the cover to the matchbox Clip the fabric cover onto the matchbox. Start at the front edge, at the strip for striking the matches, and work your way to the other end. Adjust the side edges if needed. Fold in the end edge under as well and clip in place. 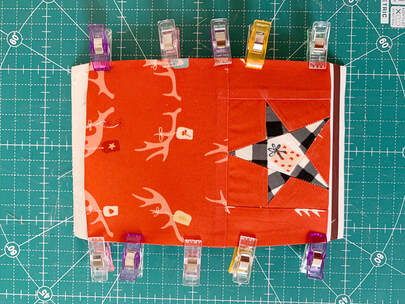 Clip the matchbox cover in place 7. Stitch the matchbox cover to the matchbox Starting at the front edge, stitch the matchbox cover in place. I sewed all the way around the outside edge first and then stiched straight lines to the back side. Then I stitched all the way around the star as well.  stitch matchbox cover in place 8. Glue the matchbox cover back together 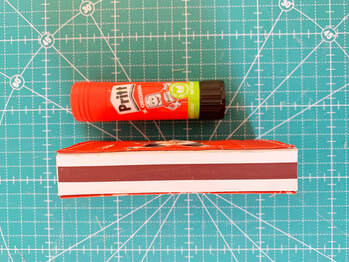 glue matchbox cover together again 9. Et voilà.... all done. Fabrics used in this project Art Gallery Fabrics Cozy and Magical. Isn't this DIY matchbox cover a super cute Christmas gift? Combine the matchbox with a set of candles or some essential oils and you have the perfect Christmas gift for him or her. What do you think? Which color of the star quilt block is your favorite? Ingrid xx Here are the cutest bear quilt block patterns that are super easy to make..... I got to participate again in Riley Blake Designs blog tour for this new fabric series called 'Into the woods' by Lori Whitlock. I totally saw myself in a wooden cottage with a fireplace. The cottage standing in the middle of the mountains, bears roaming through the forest, a Hot Cocoa in my hands while I read a book in front of the fire place. Doesn't this sound Devine for the autumn weather we're having right now? As some of you know I used to live in Vancouver for quite some time and this fabric series brings back some of my best memories in Whistler or on Vancouver island. But Aspen and Lake Tahoe come to mind as well, right? 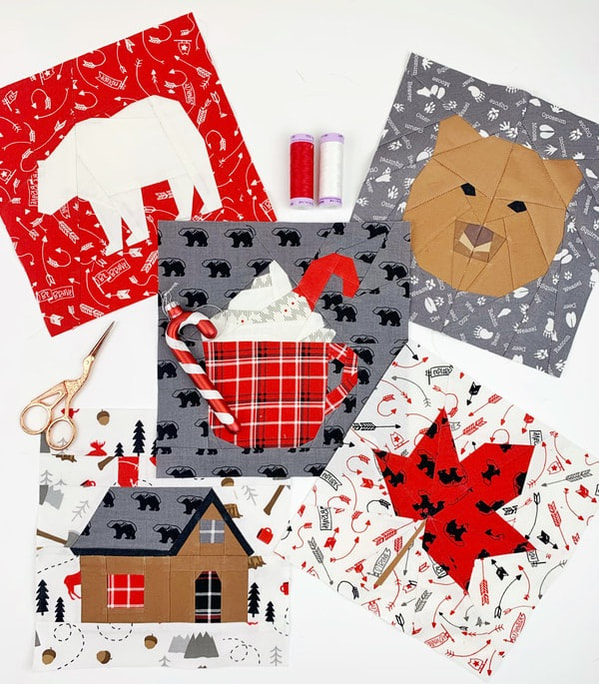 bear cottage quilt block pattern series This quilt block pattern series consists of 2 bear quilt blocks, a bear paw quilt block, a little cottage quilt block, a hot cocoa quilt block and I added my maple leaf quilt block just because it completes this series so perfectly. I designed it especially for this Riley Blake Designs fabric series and called it 'Bear cottage'. All of these quilt blocks will be stunning by themselves, but will make up very nice 'cottage themed' projects as well, such as pillowcases, table runners, mini quilts, apron and much more. Actually this would be a beautiful full on quilt as well, wouldn't it? 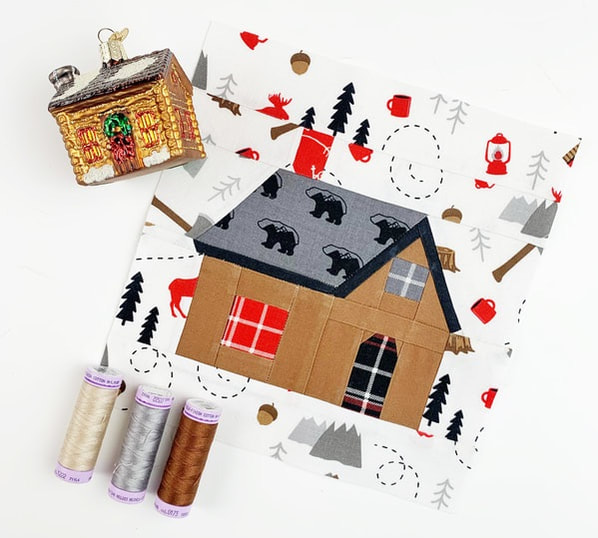 bear cottage quilt block The little bear cottage: This super simple but cute cottage quilt block pattern is perfect for fussy cutting. I placed the plaid pattern in the windows, so they look like window frames. But you could also place little faces in those windows and make a super sweet little cottage with this cottage quilt block pattern. 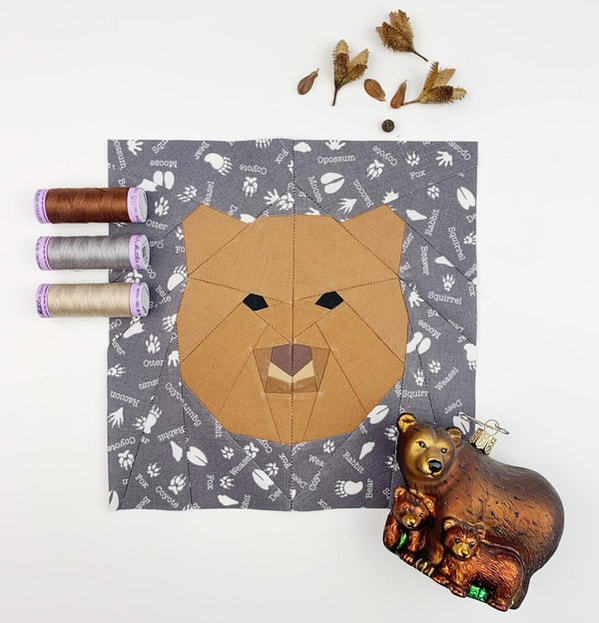 bear portrait quilt block The bear portrait: A bear portrait quilt block is a a great quilt block for a pillowcase. I especially love it if you add some hand quilting to the outline of the bear quilt block. I do have a whole series of animal portraits in my shop, and they would look adorable on a kids bed, don't you think? 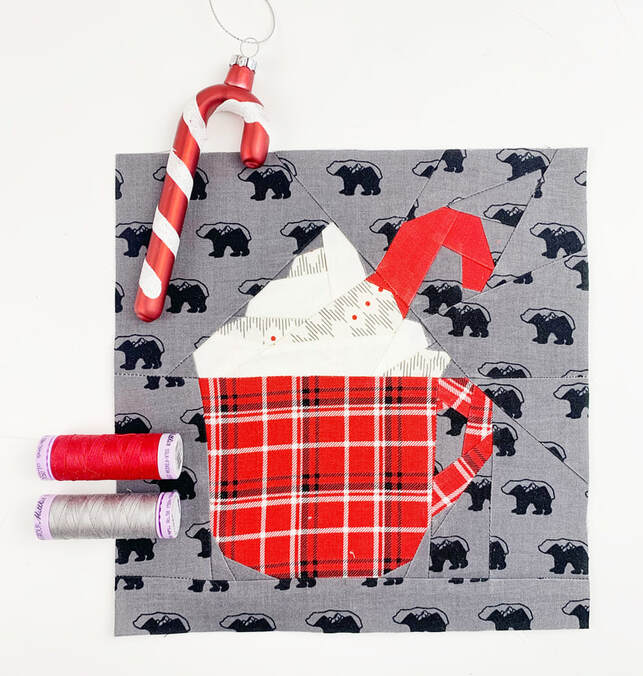 cup cocoa quilt block Hot cup of cocoa quilt block: A hot cup of cocoa is the epitome of coziness, right? And a red plaid cup with some sugar cane beats even that, isn't it so? Can't you just see yourself in some plaid onesie sitting in front of the fire place drinking your hot chocolate with lots of whipped cream? This hot chocolate quilt block pattern will be perfect for all sorts of kitchen related sewing projects. Think apron for Christmas, tea towel, oven mitt and much more. Let me know what other ideas you have for this cup cocoa quilt block pattern. 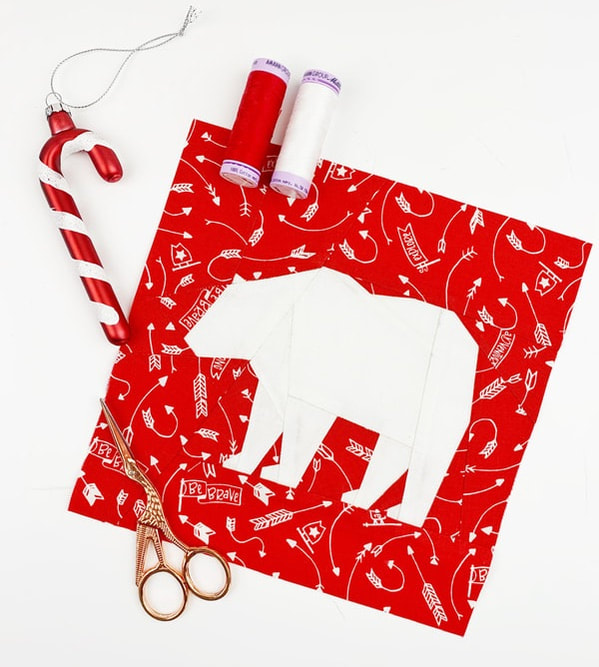 bear quilt block The bear: I always wanted to design a bear quilt block, that wasn't as cute as my Barney the Bear quilt block. This fabric series was the perfect inspiration for that. I made this bear quilt block into a polar bear quilt block. Just because the colors matched so perfectly. But this bear quilt block is perfect as a brown or black bear as well. Now he needs a name as well, don't you think? 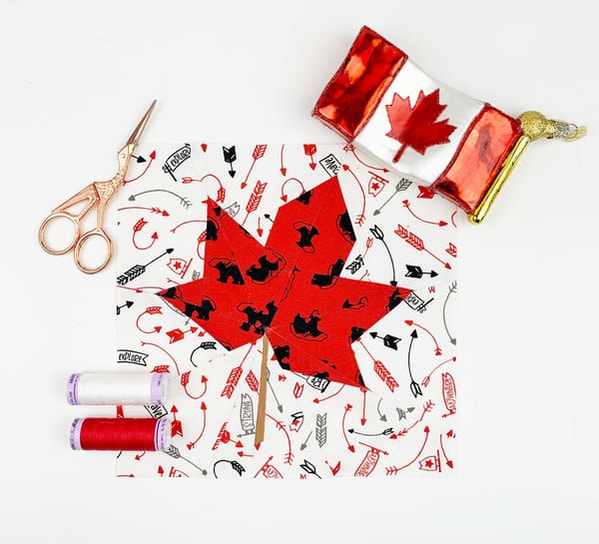 maple leaf quilt block The maple leaf: I just couldn't resist and add this maple leaf quilt block pattern to this 'Bear cottage' series. The fabric series just asked for this maple leaf quilt block to be added. Having lived in Canada for so long adds a little bit of home to this fabric series. 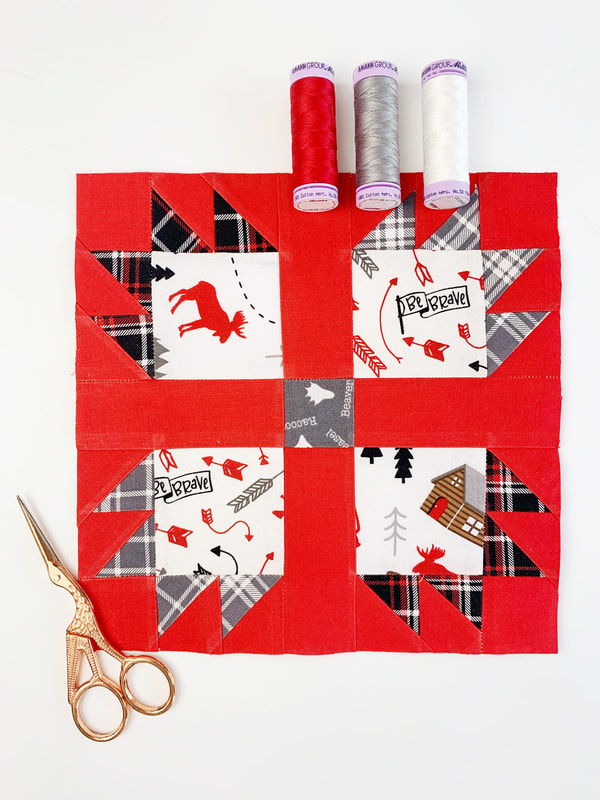 bear paw quilt block pattern The bear paw quilt block pattern: No 'Bear cottage' quilt block pattern series without the bear paw quilt block, right? The bear paw quilt block is an absolute classic. Usually the bear paw quilt block is made out of squares and half square triangles (HST). And sewing this bear paw quilt block in its classic way will make up a whole sewing tutorial by itself. It's a beginner friendly traditional piecing quilt block pattern. But you know me for being foundation paper piecing addicted, so I decided to make this classic pattern in to a paper pieced pattern. This has some advantages. You do not need to do complicated calculations for the squares and HST in order to figure out how to get a 8"x 8" or 10"x 10" quilt block. Just print the bear paw pattern, and you will get the perfect size. This bear paw quilt block pattern is also beginner friendly in its foundation paper piecing version. It's actually a pattern that doesn't take much longer than half an hour to sew. No pre cutting the fabric, just start sewing right away. And precision is a given with foundation paper piecing. You will get the bear paw quilt block pattern for free with the purchase of the bear cottage quilt block pattern series. 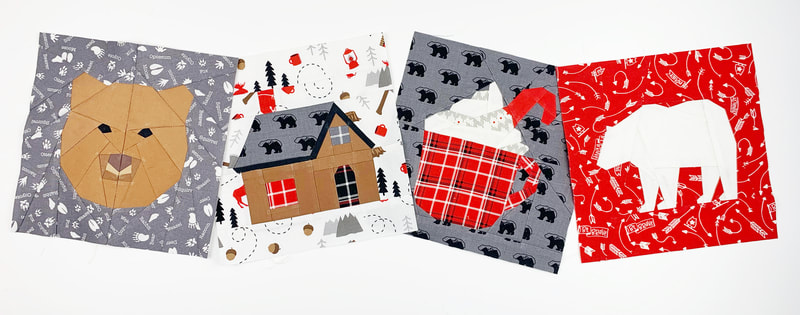 bear cottage quilt block patterns Thank you Riley Blake Designs for the opportunity to design a quilt block pattern series and for supplying the absolutely adorable fabric series designed by Lori Whitlock 'Into the woods' that I used in this quilt pattern series. What do you think? Ready to cozy up in front of the fire place? Let me know in the comments the projects you would love to sew with these quilt block patterns. Happy sewing Ingrid xx Rocking around the Christmas tree, is the name for my newest Christmas quilt pattern. 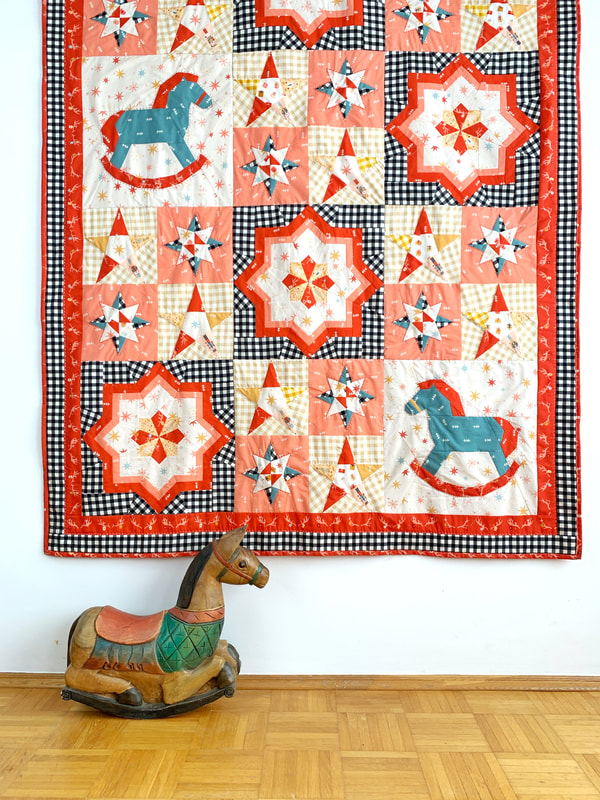 Christmas quilt 'Rocking around the Christmas tree' You think it's still a little early for Christmas sewing? Well that's what I thought when I started this Christmas quilt 3 weeks ago. Little did I know, I just turn around and it's September.... So I guess it's the perfect time to start Christmas projects for the favorite season of the the year. Christmas quilts are always special and remind us of cozy winter evenings with a hot cup of coco, right? Snow outside makes this picture even more perfect. So let's get into the Christmas spirit a little early this year. 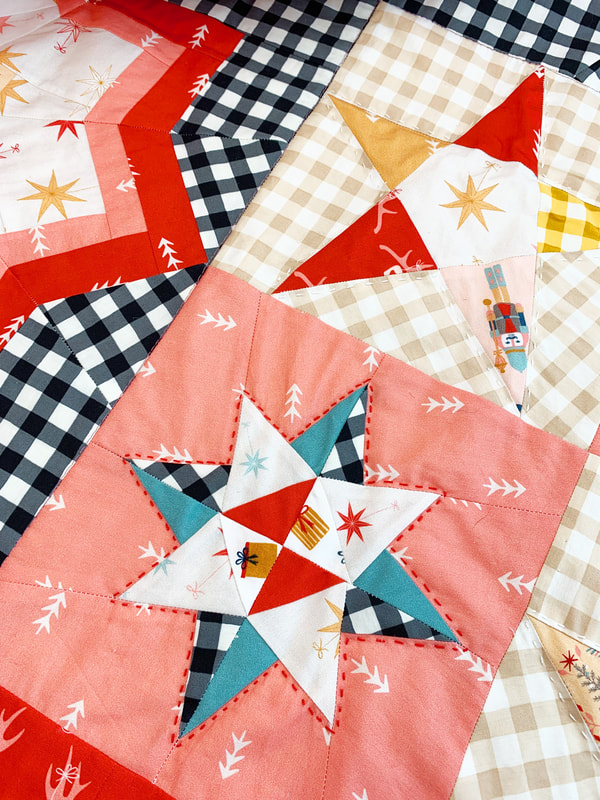 Star quilt blocks This Christmas quilt pattern includes some of my favorite quilt block patterns. The best thing about this pattern is, that the quilt blocks that I used for this Christmas quilt are super easy and quick to make. This quilt pattern is a simple patchwork pattern for a stunning Christmas quilt. And while I really love traditional Christmas quilts with simple shapes for cute fabric scraps, I really think this Christmas quilt pattern is simple enough, but gives you stunning results. And you can use fabric scraps as well as a whole Christmas fabric series. Here I show you all the quilt blocks , that are needed for this Christmas quilt. As you can see there are several different star quilt blocks, all of them super easy to make, and two rocking horses. The rocking horses are 16"x 16" in size and therefore also not difficult at all, since no small pieces are involved. These are the three star quilt block patterns, that make up for most of this Christmas quilt pattern. I made one of the stars quilt blocks after another. I started with sewing all the sections of each star quilt block first, then I assembled the sections for each star quilt block pattern. That way you get a little bit of a chain workflow. The 5-point star quilt block is my favorite quilt block for fussy cutting. The Christmas fabric series that I got to use for this quilt pattern by Art Gallery Fabrics features an adorable nutcracker print. The print size is perfect for my 8"x 8" 5-point star quilt block. So I used the little nutcrackers in each one of these 5-point stars. A light box is not necessary, but if you're fussy cutting a lot, like me, than it sure makes your life a lot easier. You can place the fabric onto the light box, wrong side up, and just place the segment on top of the desired part of your print. I use a fabric glue pen from sew line, so the image stays perfectly in place. My Lightbox has a clear cutting mat, so I can cut right there on the light box, which makes my quilting even more simple. As you can see, the sunny star quilt block is just as fun and simple to make. Make sure you remove the paper from the seam allowance and press often. This guarantees a perfect 8"x 8" size of your quilt block, and straight side seams and corners. This large star quilt block is 16"x 16" in size and you only need 4 for this Christmas quilt pattern. It is also a perfect pattern for Christmas pillowcases. I called it blowing in the wind star, because it reminds me a little bit of small pinwheels. This star quilt block pattern is brilliant for a quick Christmas gift. 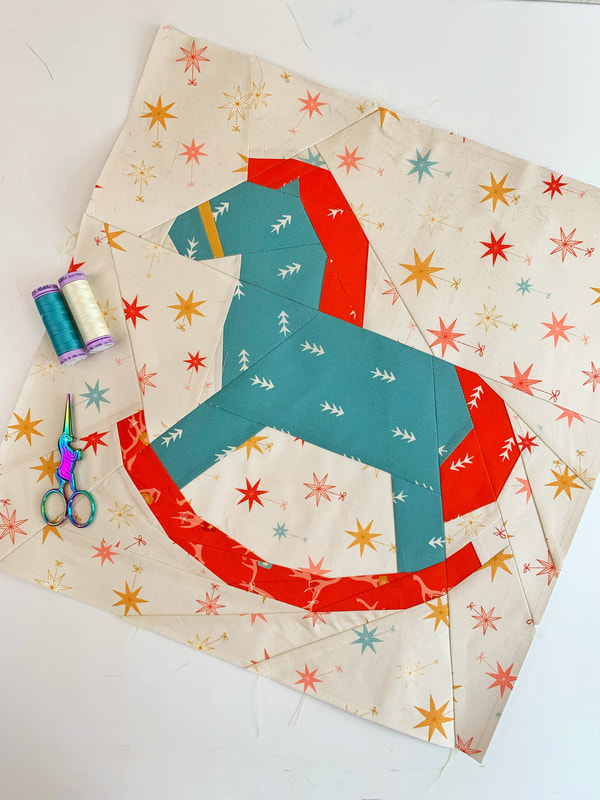 rocking horse quilt block And last but not least the cutest little rocking horse that inspired me to the name of this Christmas quilt.... ROCKING AROUND THE CHRISTMAS TREE.... I finished this quilt with some hand quilting. In this video I show you how to bury the know while hand quilting. Tie a knot at the end of your thread. Enter your quilt with the needle at any random place inside the batting in the center of your quilt sandwich and come out where you want to start your quilting. Pull the thread slowly till the knot gets to the fabric. Now you give your thread a little tug that way it slips nicely inside of your quilt sandwich. In case it doesn't, you can spread the threads of your fabric a tiny bit, so the knot can get through, and use your nails to push them back together again.  'Rocking around the Christmas tree' Christmas-quilt-pattern Thank you so much to Art Galley Fabrics for supplying the absolutely adorable Cozy and Magical fabric series designed by Maureen Cracknell that I used in this quilt pattern. I hope you are now slowly getting into the Christmas spirit, and you like this Christmas quilt pattern as much as I do. Happy Christmas sewing Ingrid xxx |

Author
Ingrid Alteneder Archive
March 2022
Categories
All
|


 RSS Feed

|
Visit us at
|