
|
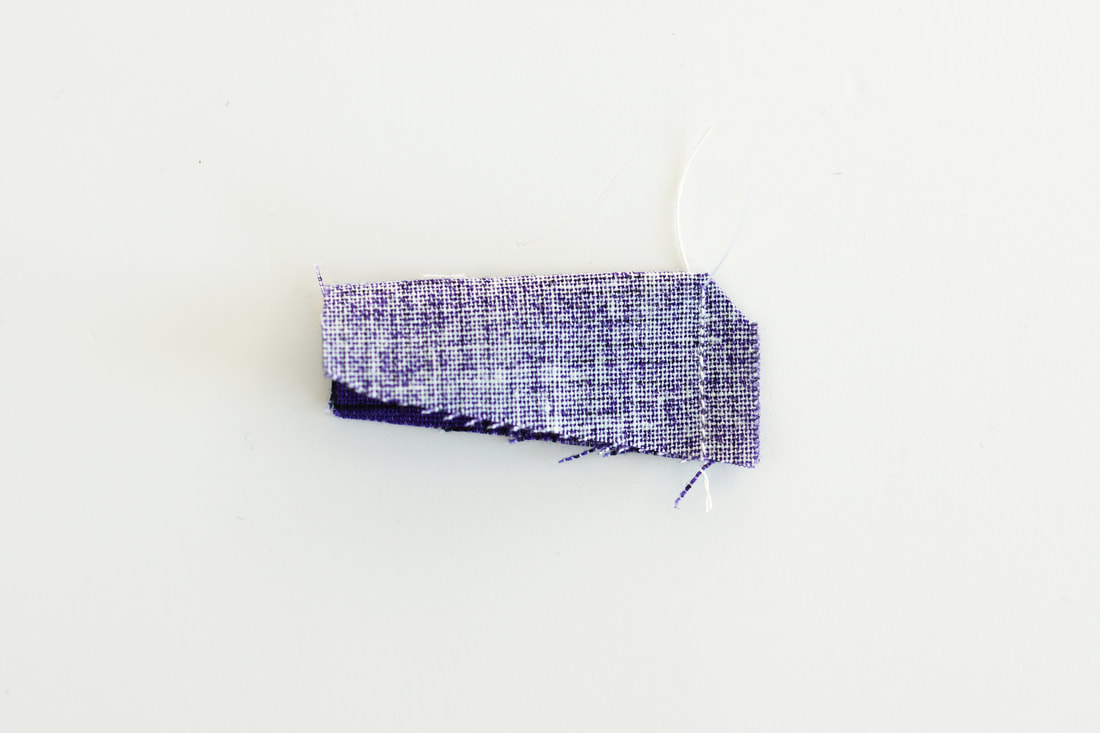
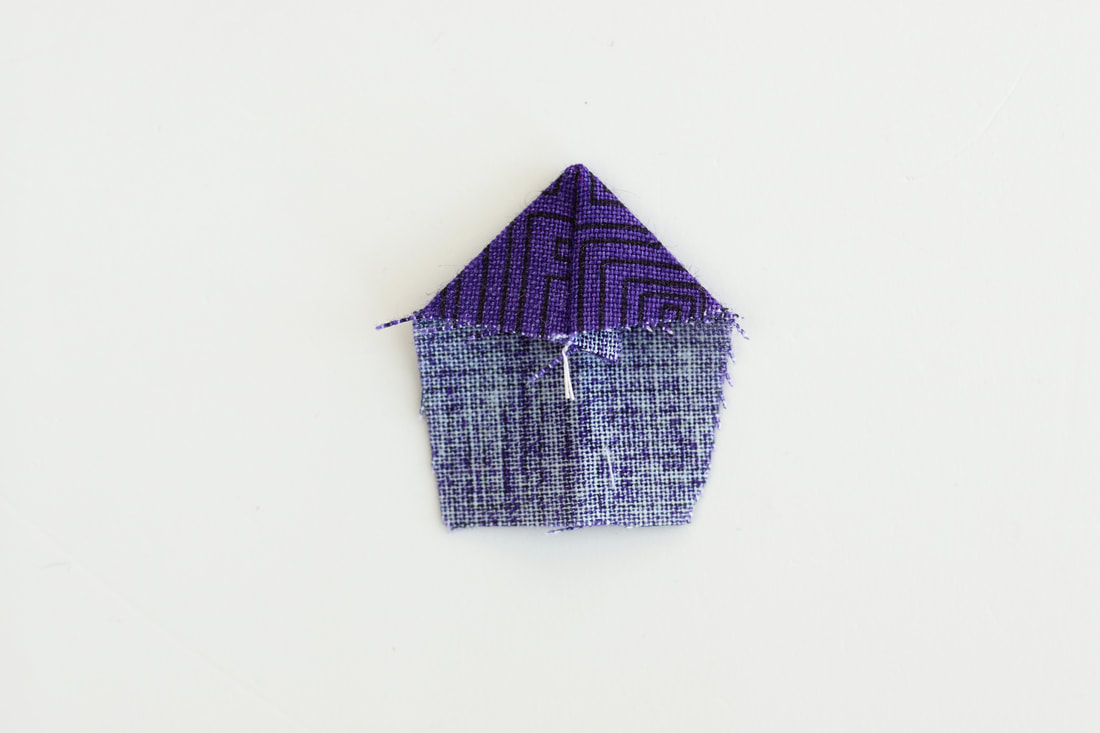
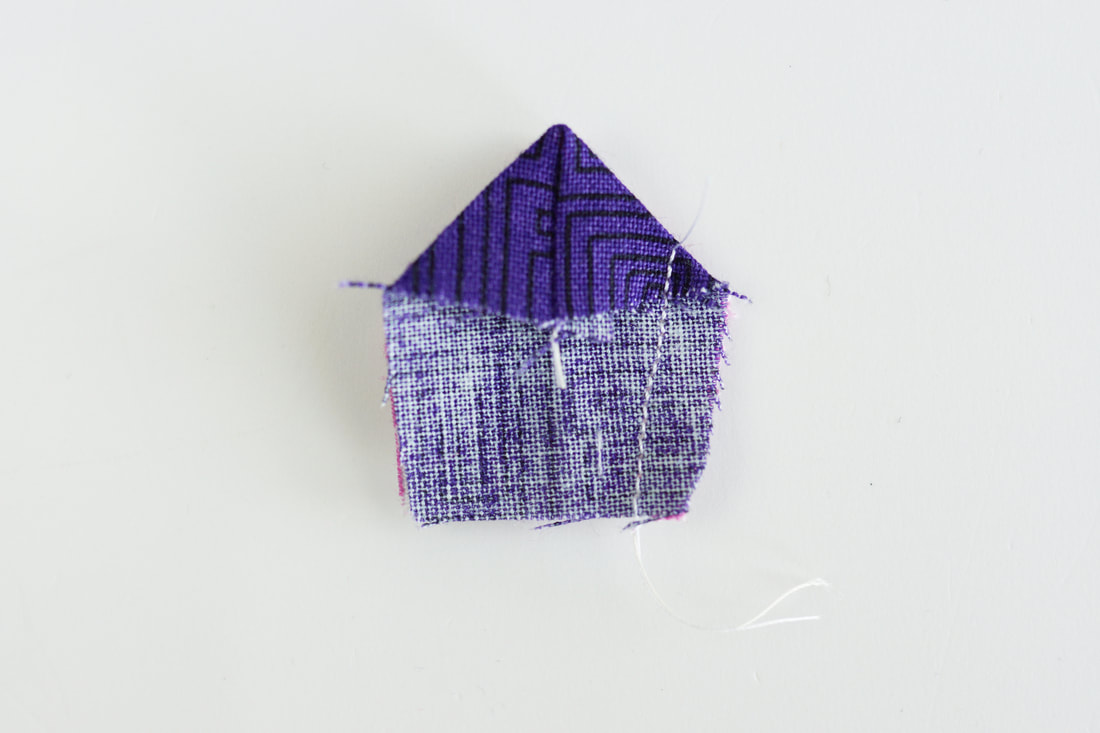
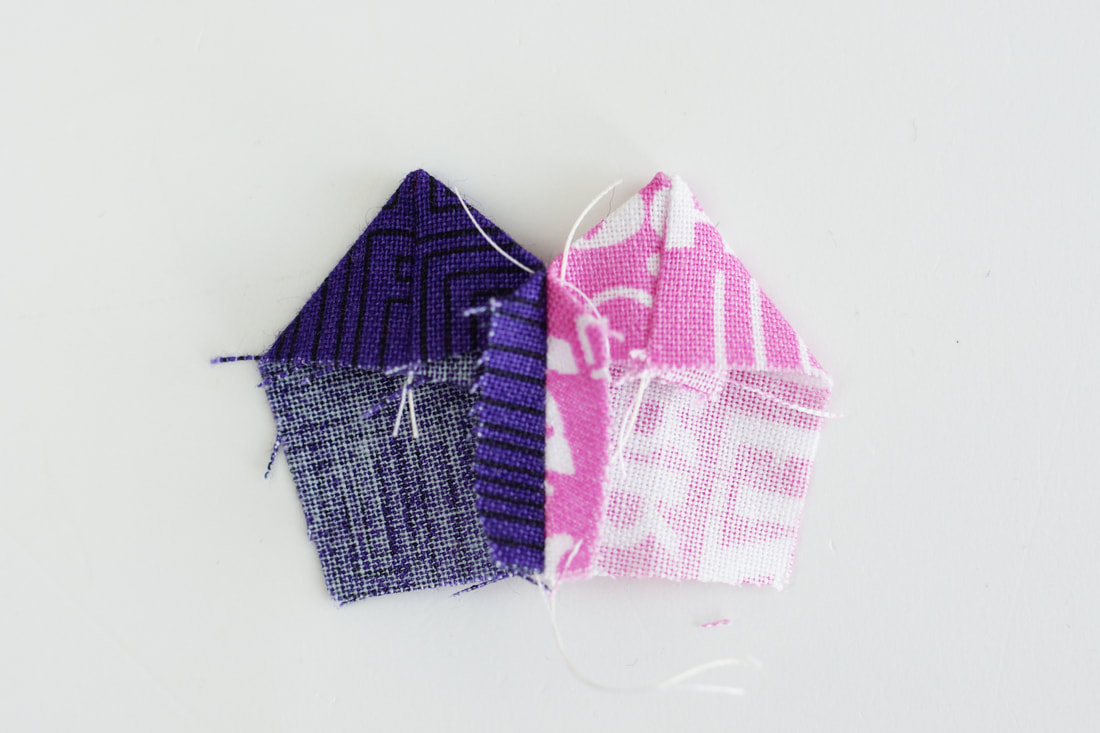
Hey dog lovers, this little dog walking bag is absolutely perfect for you... 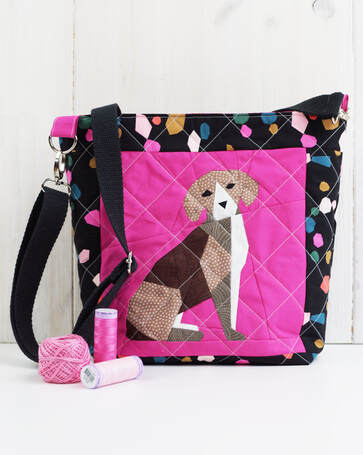 'Walk my dog' bag Our dogs are part of our family and we love them dearly. The kids love playing with the dog and also love walking the dog as long as the sun is shining. The excitement fades quickly if it's raining and when it's cold outside. And it gets worse if they need to look for all of the dog walking equipment before even getting to the front door. That's why you need a dog walking bag. 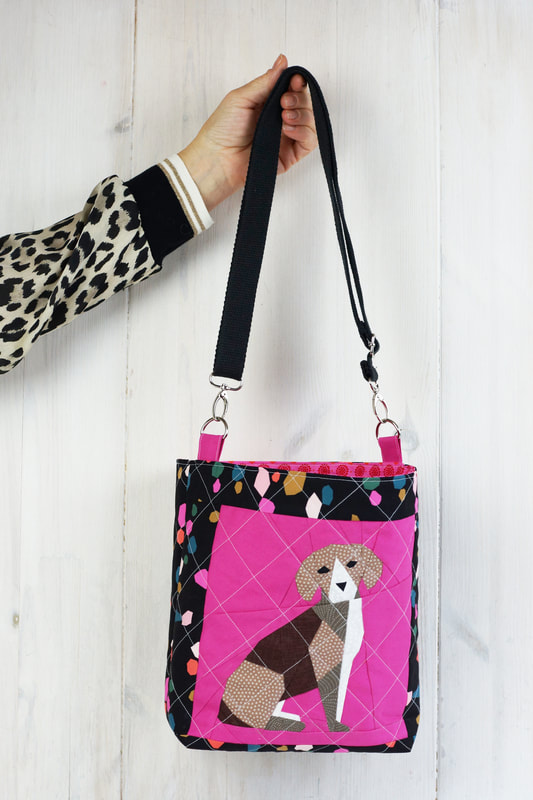 So I decided to come up with a cute little bag pattern, to keep all the dog walking equipment handy. This adorable dog walking bag is small enough to grab quickly, even when just walking around the block. It is big enough to keep all your dog walking kit in one convenient place. And most importantly this dog walking bag is pretty enough to keep by the front door. So win, win, win! 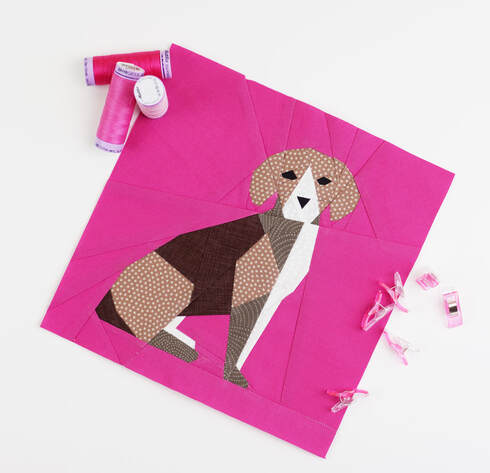 beagle quilt block Keep all your dog walking items in one convenient bag , the leash, dog litter bags, paw wipes, treats etc. Attach a pretty hook close to your front door and keep this cute dog walking bag right there beside it. You will never leave the house again and forget your dog walking kit. 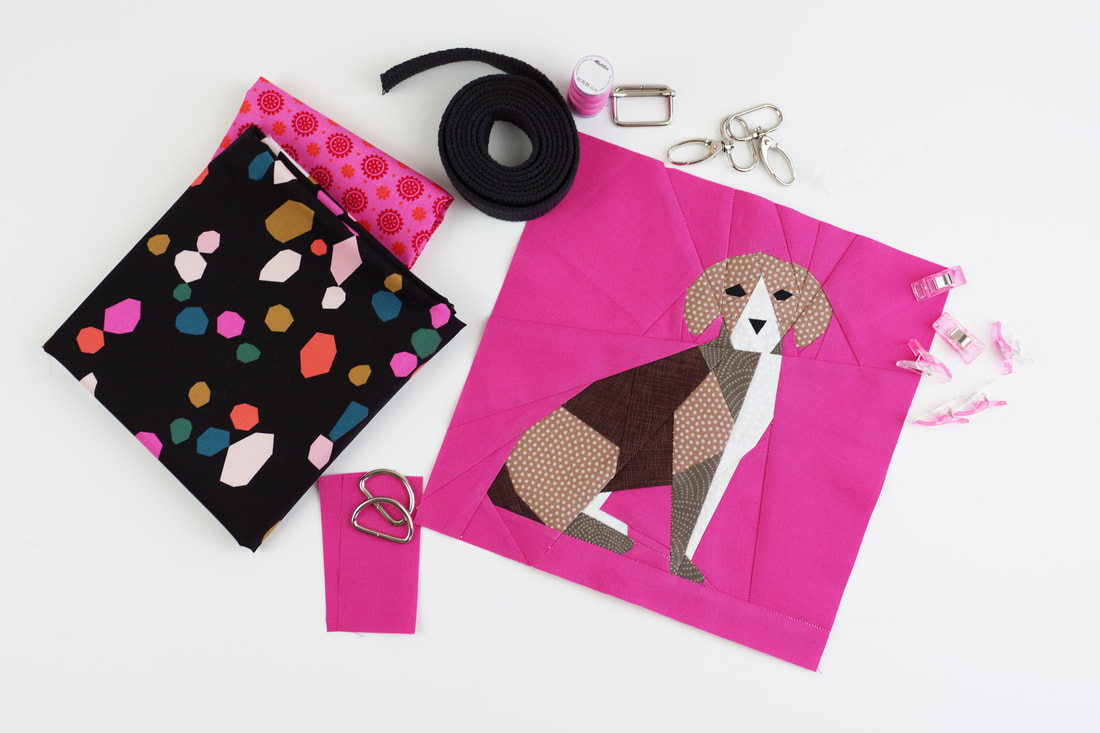 materials needed for the 'walk my dog' bag This 'walk my dog' pattern includes a foundation paper pieced beagle quilt block as well as the full pattern for the bag. You will find the comlete pattern including step by step photos, in the newest 'Make Modern Magazine' issue 38. I hope you will enjoy the walks with you puppy with this pretty dog bag. Happy sewing Ingrid x
1 Comment
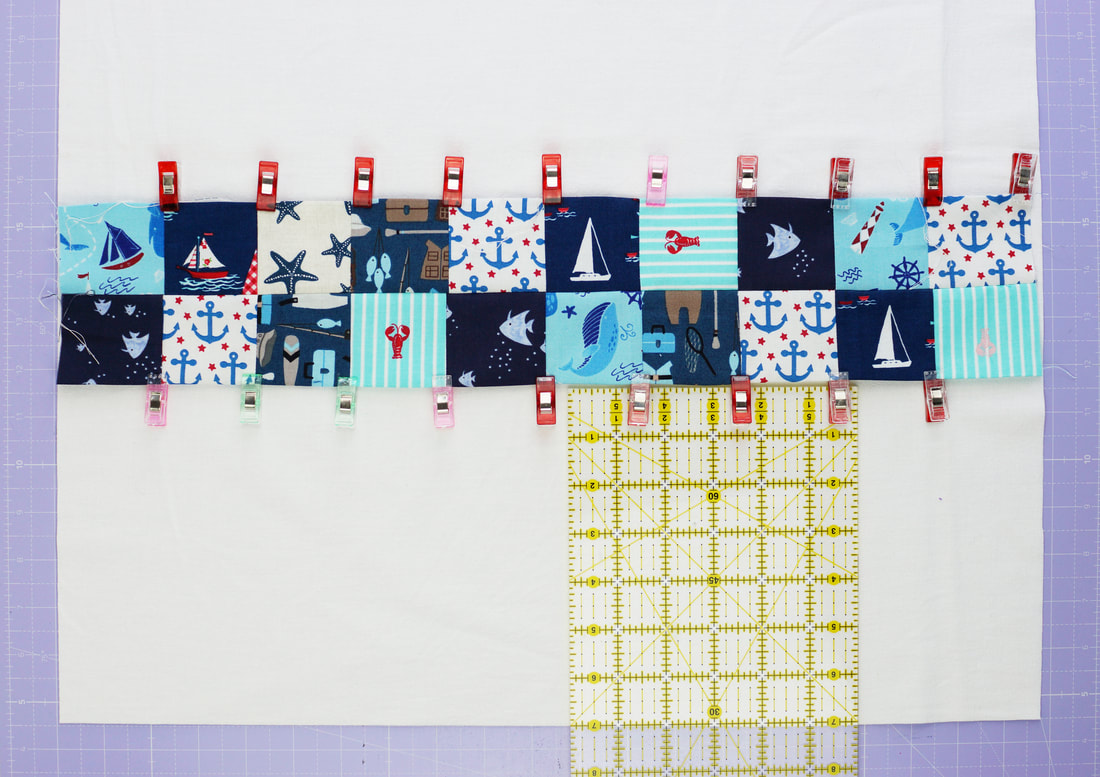
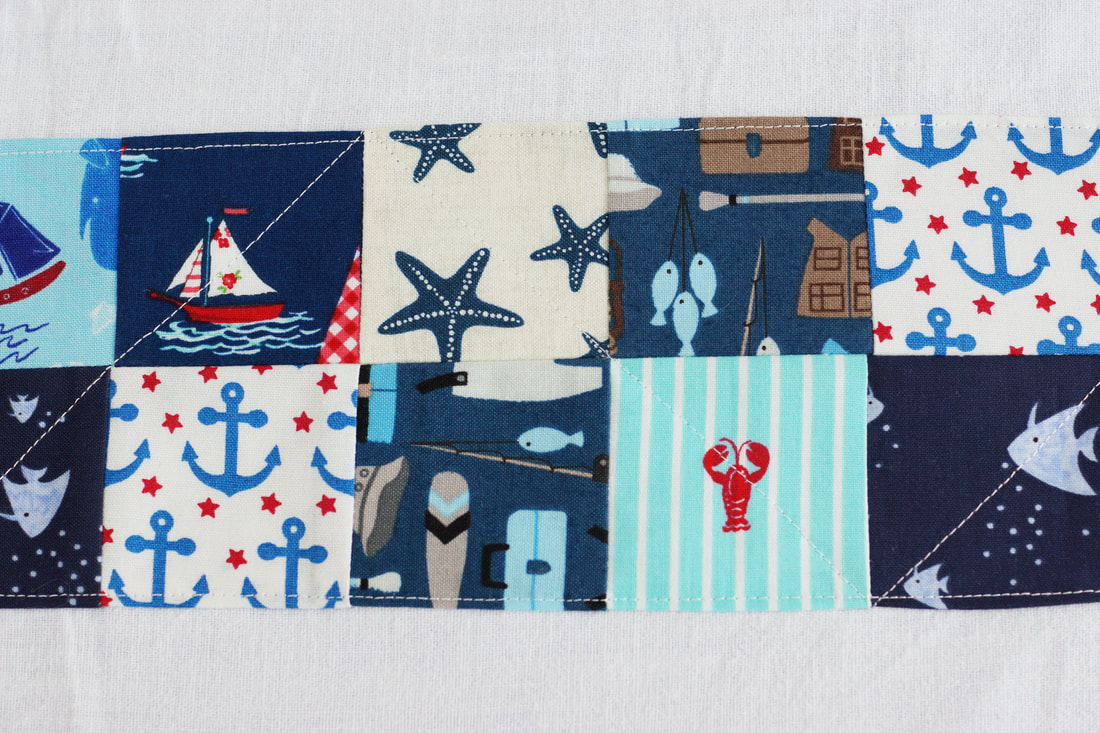
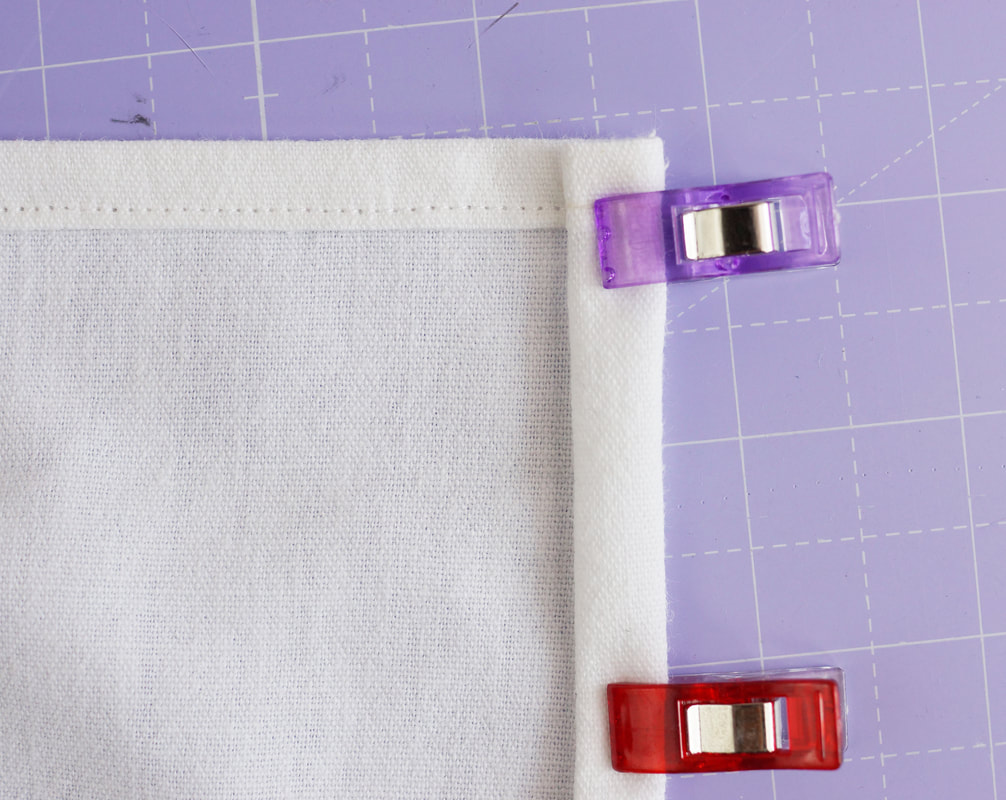
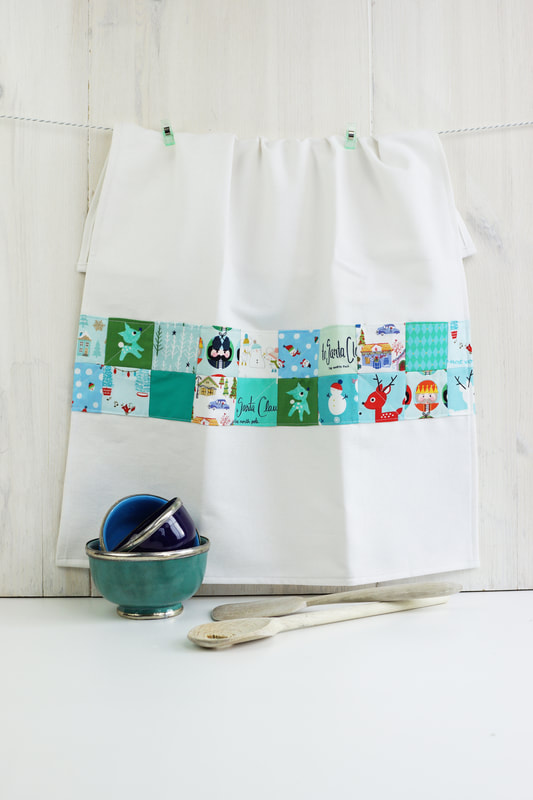
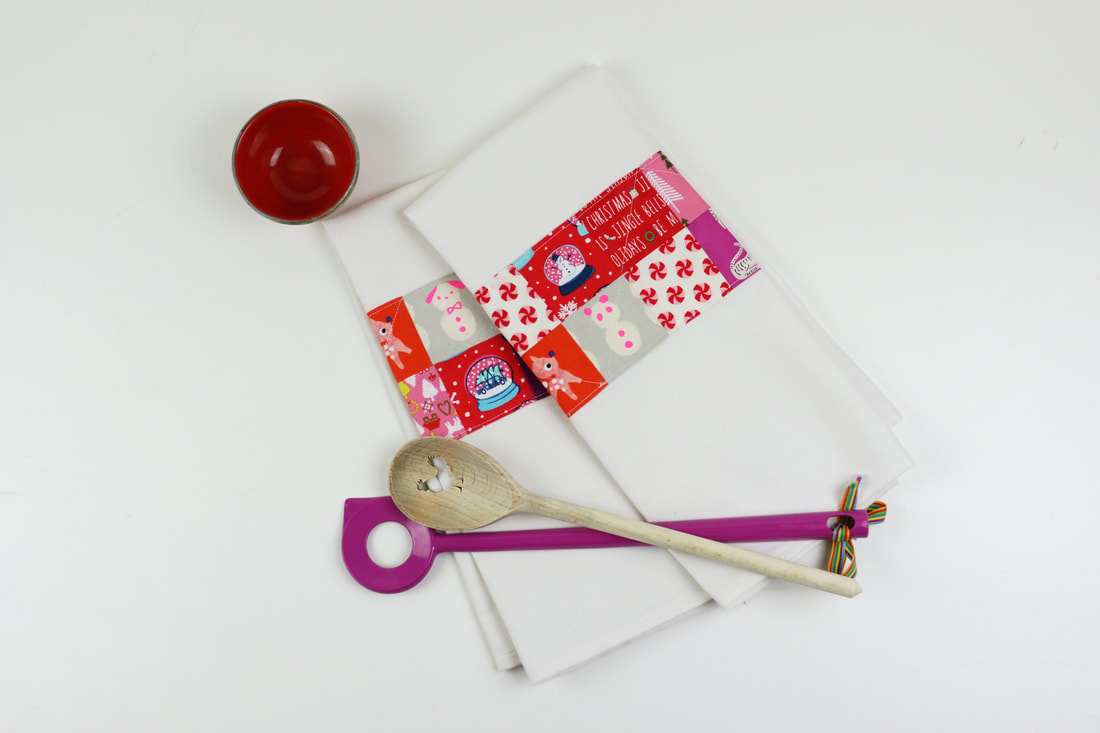
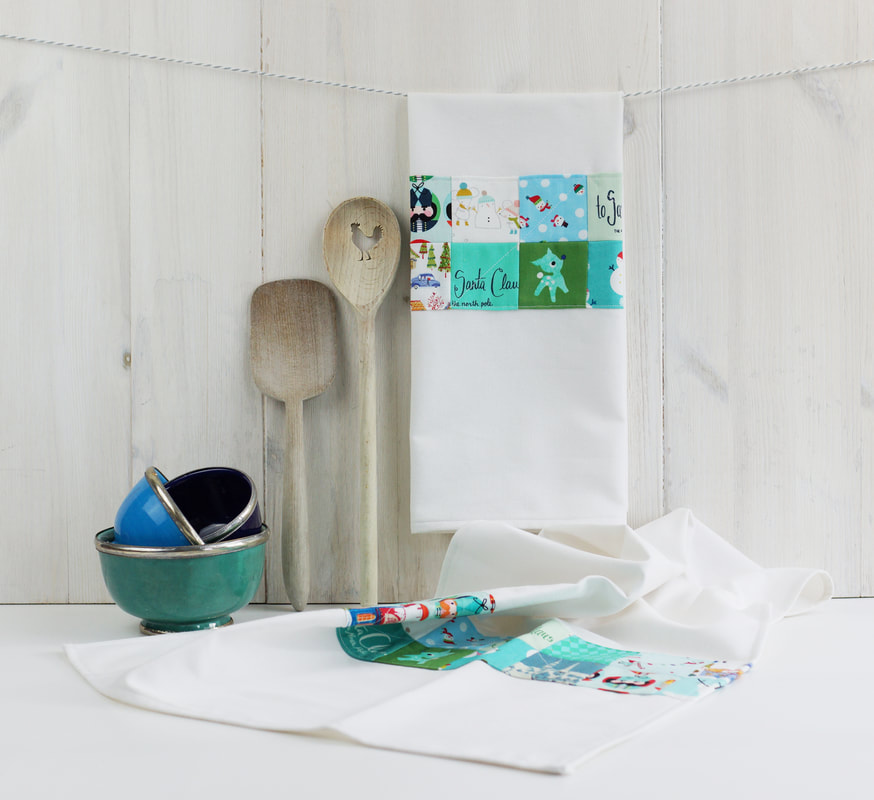
You know I love recycling and reusing. And you know I looove recycling and reusing fabric. I roam through flea markets, garage sales, second hand and thrift stores and almost always find some pre-loved piece of fabric. 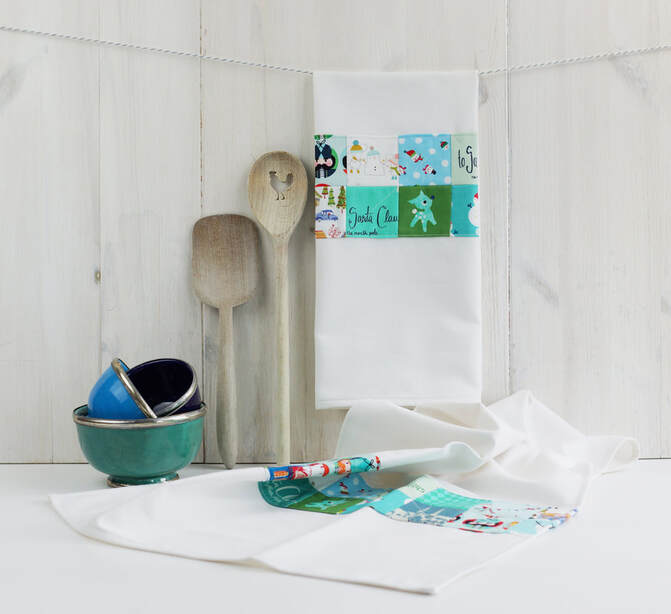 #dryinstyletowel And I always buy old fashioned flat sheets, they're most often made of really thick cotton, or a cotton/linen mix, which is absolutely perfect for all sorts of sewing projects. Especially dish cloths or napkins, but I also use them in quilts, key fobs, pouches and much more. I wrote a whole blog on fabric recycling in case you want to know more. Today I want to show you how to make the cutest dish towels with recycled cotton sheets and left over fabric scraps. Materials/fabrics needed for 2 dish towels: - 2 pieces of white fabric ( I use cotton table cloth or flat sheets for this, they're pre-washed so many times, that they work perfectly as dish cloths as they dry dishes very nicely) 20.5"x 27". - 40 pieces of 2.5"x 2.5" fabric squares. - 2 strips of fabric 2"x 5" for the hanging tab 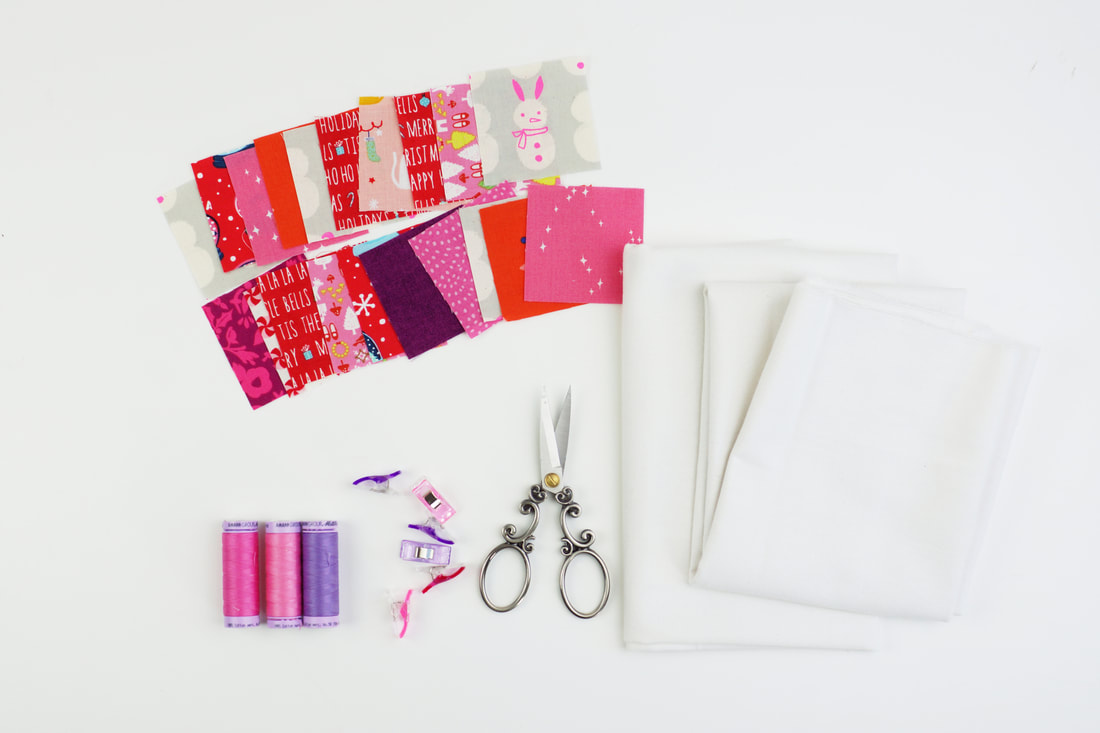 materials needed for #dryinstyletowel Sewing the dish towels: 1. Cut your fabrics as mentioned above. 2. Sew your fabric squares into 4 strips of 10 squares each ( two strips per towel) 3. Press your seam allowances. You can either seperate your seam allowances and press them each seperatly, or press the seam allowances in opposite directions before joining your fabric square strips. This is really easy and quick. (photo 1) You press one strip in one direction and the other in the opposite direction, this will help with nesting your seams and having accurate corners and matching points. The seams sort of fit together automatically ( photo 2). You end up with a perfectly flat fabric square panel. ( photo 3) 4. Fold over the long raw edges of your square panel 1/4" and press again then pin or clip in place. 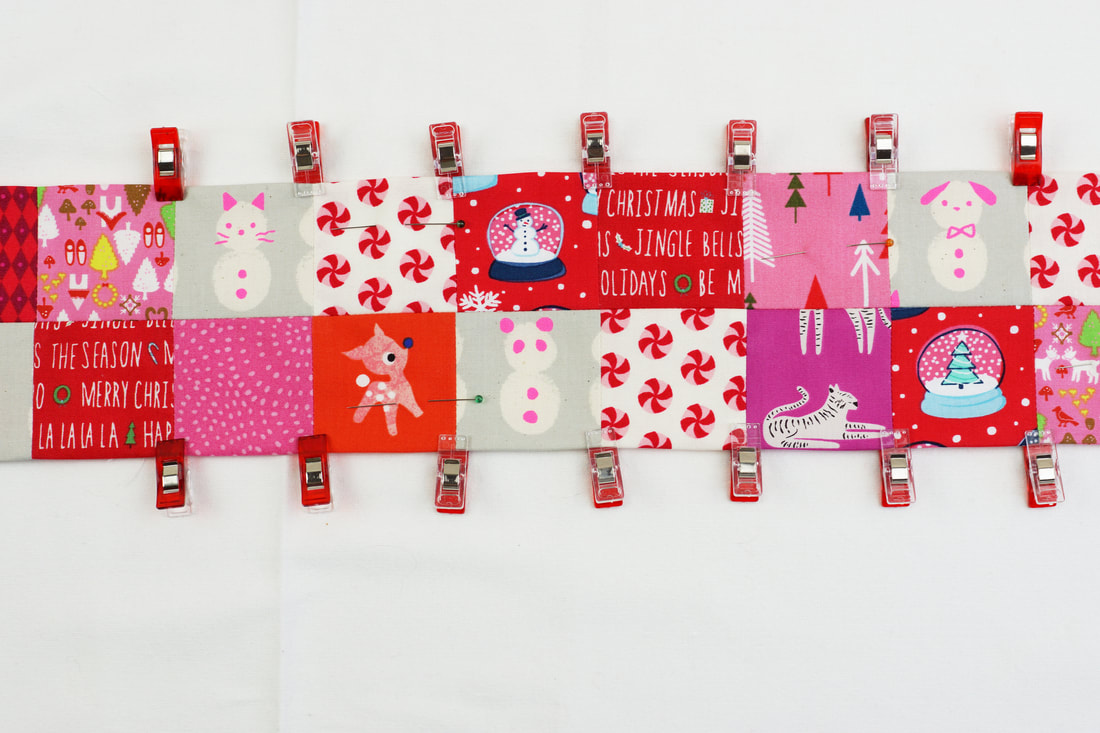 pin 'square panel' in place 5. Place this panel on one of your white fabric pieces at 7", mesured from the bottom raw edge of your kitchen towel and pin in place. 6. Stich this panel in place with a small seam allowance. I also added some diagonal seams. 7. Sewing the hanging tab for the tea towel: - Fold the 2"x 5" strip in half lengthwise and press. Fold in 1/2" seam allowance on each long raw edge and press again. - Stitch with small seam allowance. - Fold the tab in half and clip in place at the center of the back of your kitchen towel top edge. 8. Fold over the raw edges of your dish towel 3/8" twice and pin or clip in place. I did just simple corners on these tea towels, but if you want to get really fancy you could do mitered corners as well. 9. To finish stitch all the way around your kitchen towel. What do you think about these kitchen towels? Don't you agree they're ...... :-)?  Now I cant wait to see all of your tea towel versions... use #dryinstyletowel on social media, so I can find your makes .... happy sewing. Ingrid xx
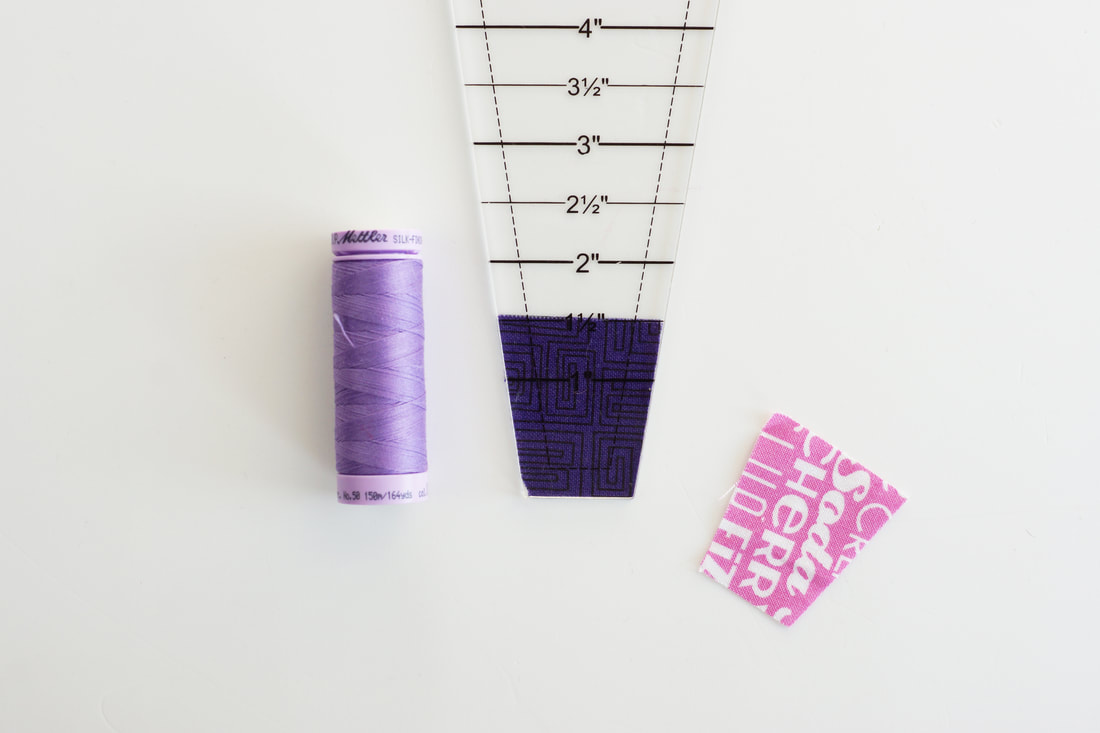
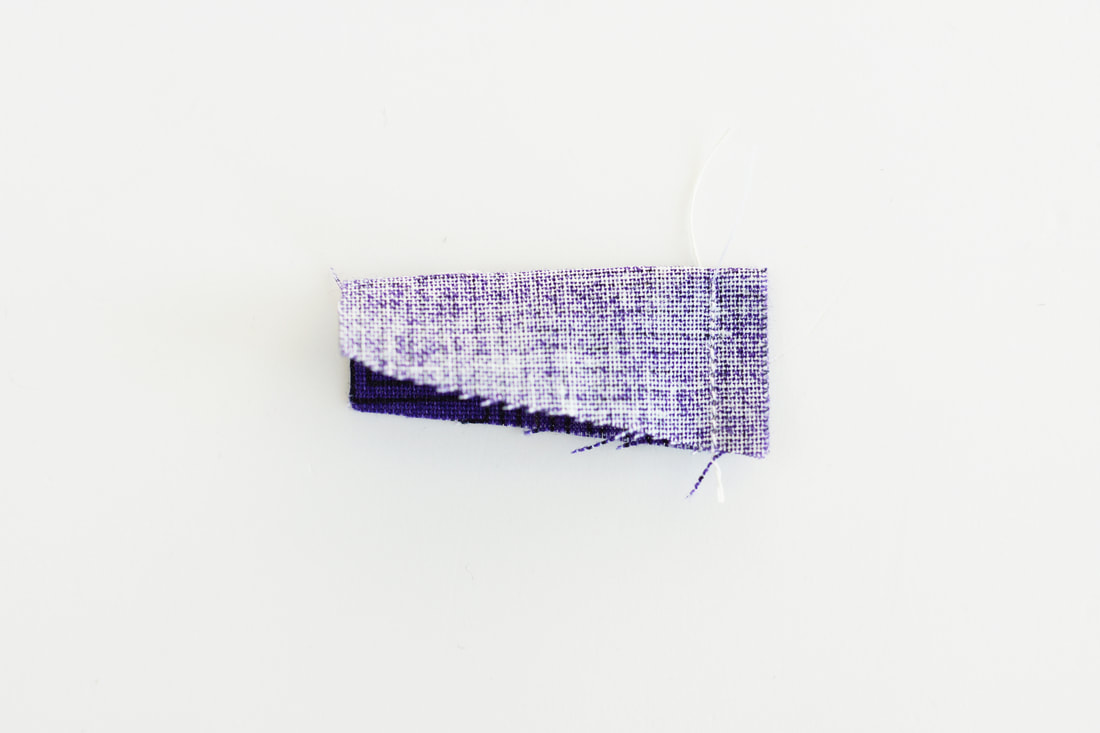
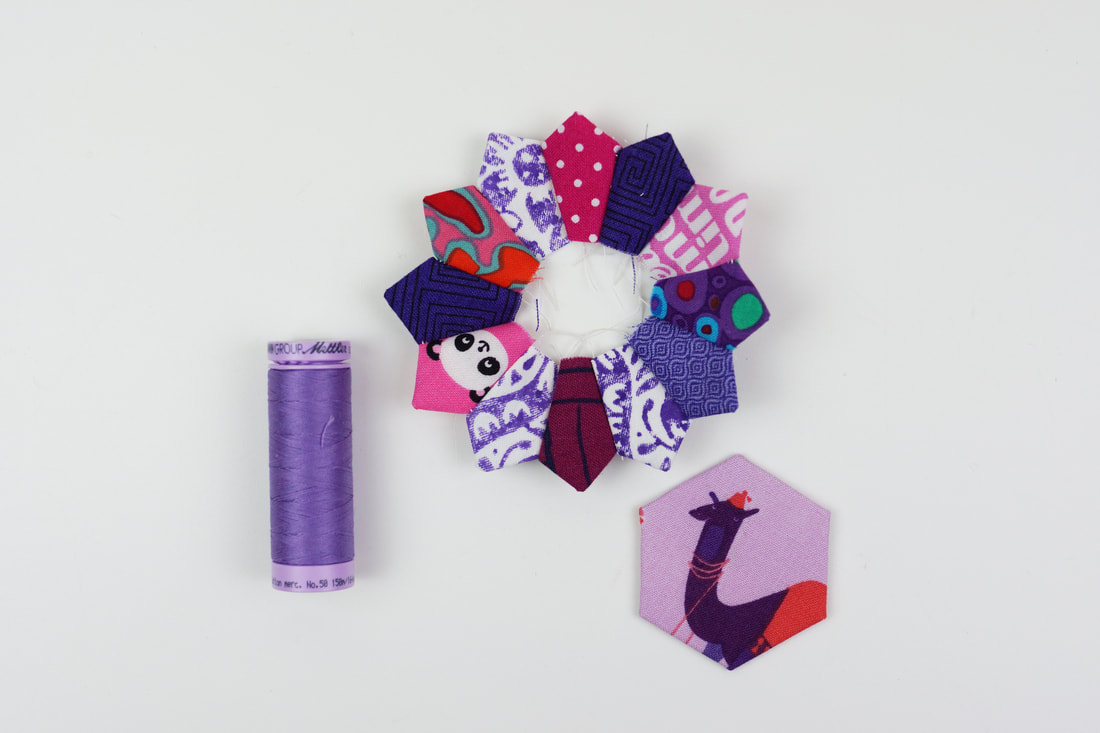
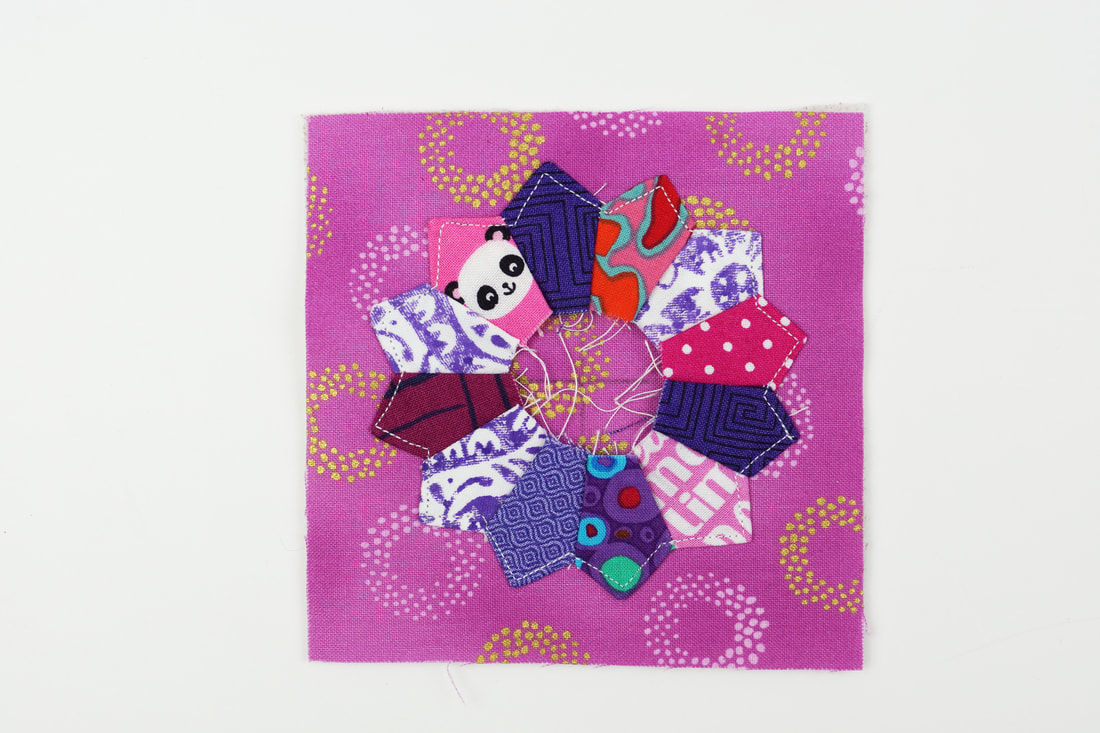
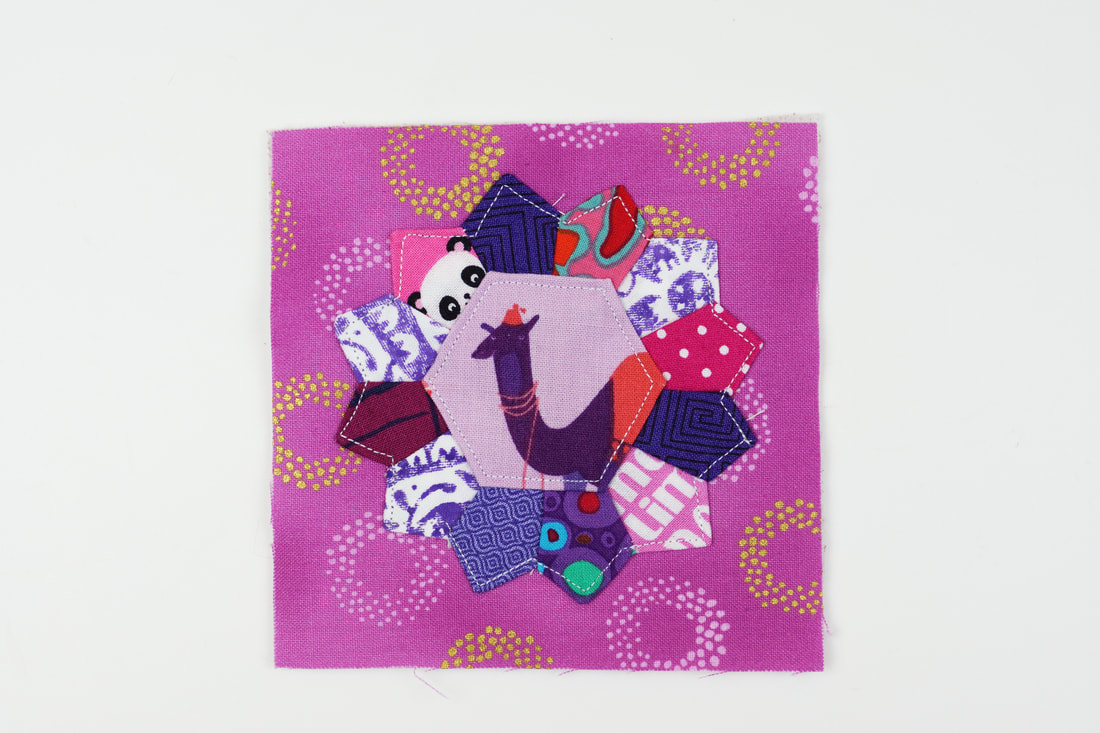
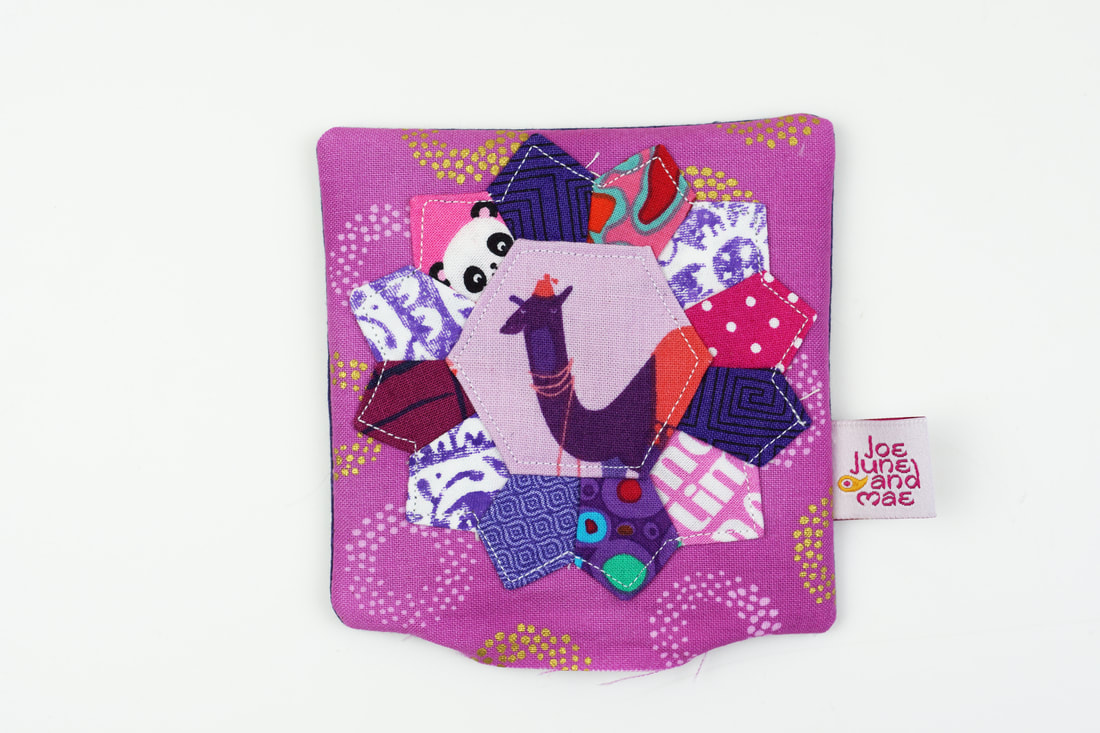
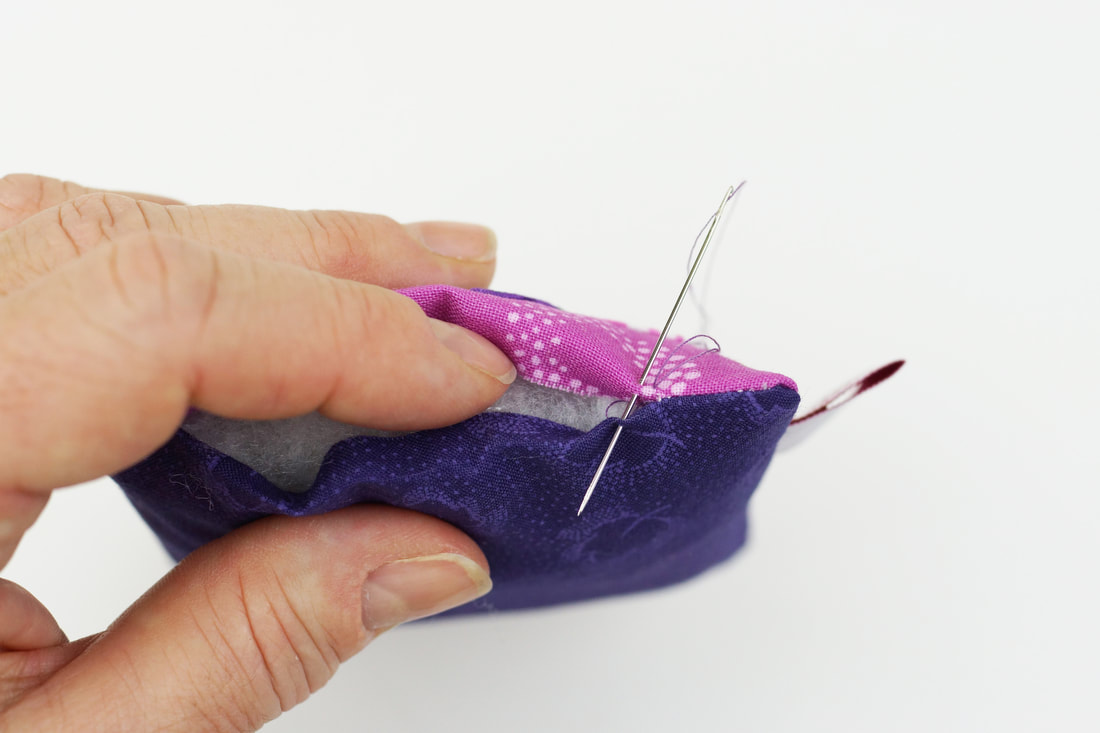
Do you ever wonder what to do with all those super cute fabric scraps that are left over from your sewing projects? Well, here are a couple of pincushion ideas for you to sew up with the smallest fabric pieces. 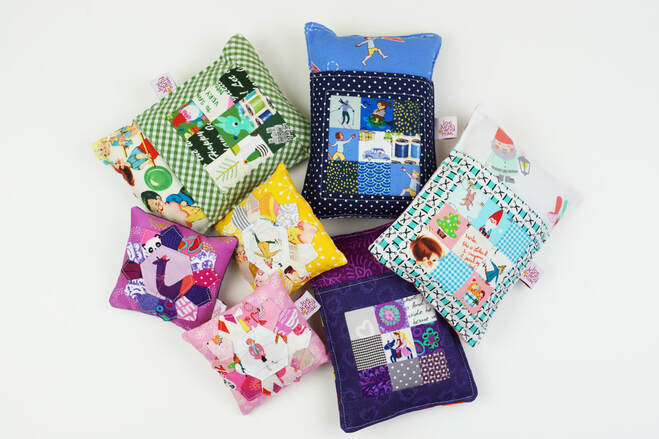 pincushion party Now you might wonder how I get those fabric scraps color coordinated, and how I will find them when I need them. Here's a simple trick, I make it a habit to cut up the cutest scraps right away into 1.5" squares and sort them by color into a simple acrylic organizer box. That way, I have them handy when I need them for fabric stamps, hang tags or smaller sewing projects like these pincushions. Plus that box is really pretty to look at, don't you think? 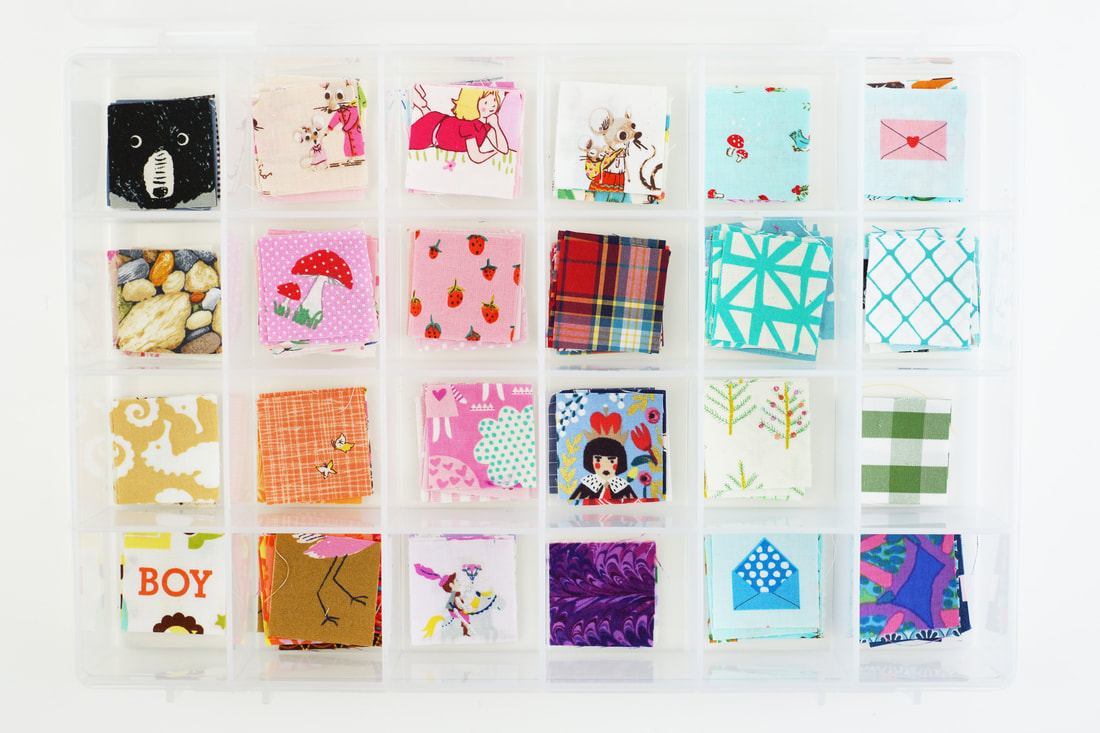 1 1/2" squares sorted by color I also cut up some Dresden plate pieces every once in a while and keep them in another box sorted the same way. I like making these tiny Dresden plates, just because they're so super cute, and I can really make use of the smallest fabric pieces. For cutting Dresden plate pieces I use the Darlene Zimmerman Dresden Acrylic Ruler. 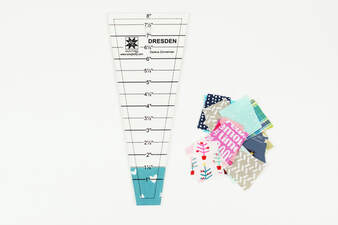 Darlene Zimmerman Dresden Ruler This awesome pincushion is also called Deluxe pincushion and is a super cute pattern from the book Sew organized for the Busy girl by Heidi Staples. It's a great pattern and a quick and easy make. This is an absolutely perfect pattern for all kinds of fabric scraps. You can use them color coordinated or by theme, make a little fairytale pincushion, or one with just flowers, a Christmas themed one or use very modern little scraps. I'm sure you will find tons of inspiration when you go through you fabric. 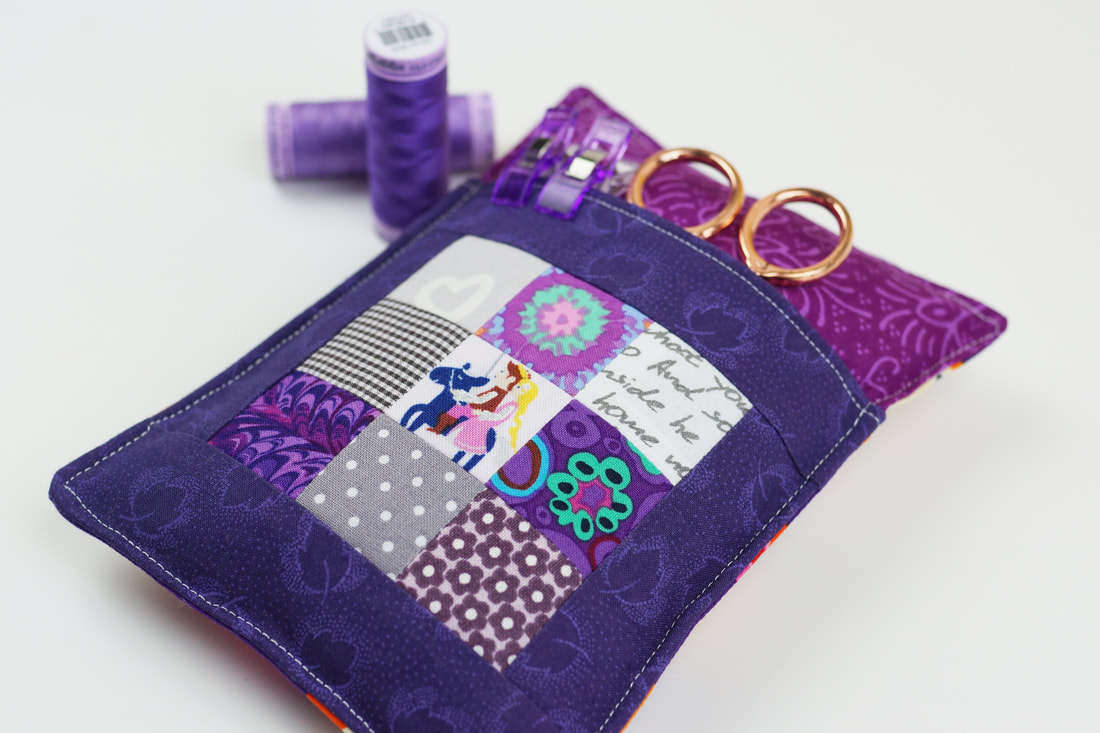 Deluxe pincushion with pocket Mini Dresden plate pincushion: finished size aprox 4"x 4" Fabrics/ materials needed: - 12 1.5" Dresden plate pieces - 2 pieces of fabric 4.5"x 4.5" - 1 basted 1" hexie, paper taken out. - 1 piece 4.5"x 4.5" fusible interfacing -a hand full of fiberfill, or your prefered pincushion stuffing material Sewing the pincushion: 1. Cut all the fabrics as mentioned above. Cut 12 1.5" Dresden plate pieces. (photo 1) 2. Fold the Dresden plate pieces in half , lengwise , right sides together and stitch along the top edge ( wider part of blade) with a 1/4" seam allowance. (photo 2) Chain piecing these blades makes this step super easy. 3. Cut off the corners (as shown in photo 3) at a 45° angle, this gives you nice, sharp points. 4. Turn each blade's sewn end right sides out. It usually just takes a finger to create a sharp point as you make that turn, but if necessary use a pencil to push the point outward. Be careful not to push too hard or cut through the fabric. Then press these. 5. Sew the Dresden Plate blades together by aligning the side edges right sides together with a 1/4" seam allowance from top to bottom, then press seam allowance open. After sewing the full circle, press the entire Dresden plate. Note: Most Dresden Plates are made with a 18° wedge ruler ( like the one I used), this means technically to form a full circle it would require 20 blades ( 18 x 20 = 360), but I use only 12 for this pincushion. Otherwise the full Dresden Plate would be too big and wouldn't fit on a small 4.5" square. The Dresden plate is so small, that it works just fine after pressing the full circle with 12 blades . And there will be a hexie placed on top anyways. Or you could us a 30° wedge ruler ( 30 x 12 = 360) 6. Stitch the Dresden plate onto one of the 4.5" x 4.5" pieces of fabric. Mark a cross in the center of the square to make placing the Dresden plate easier. 7. Place basted hexie ( paper taken out! ) on top and stitch in place. 8. Iron on fusible interfacing and place back 4.5"x 4.5" piece of fabric on top, right sides together and stitch around along the raw edges leaving a 2" opening for turning the pincushion. Cut the corners at a 45° angle, this gives you nice and sharp corners after turning. 9. Turn your pincushion right side out, and fill the pincushion with fiberfill or your preferred pincushion stuffing material. Press the opening under 1/4" and stitch closed by hand. The cutest little pincushions made entirely from fabric scraps, are all done ..... Aren't they just darling? 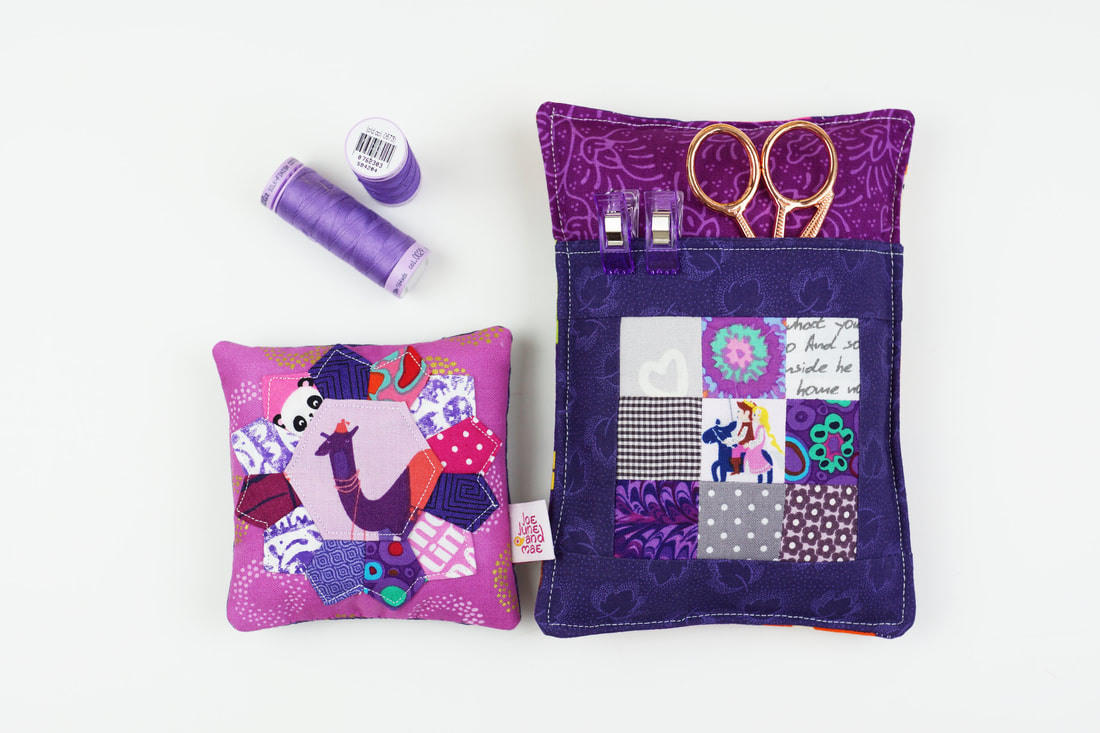 Have lots of fun sewing up all your fabric scraps. Ingrid x
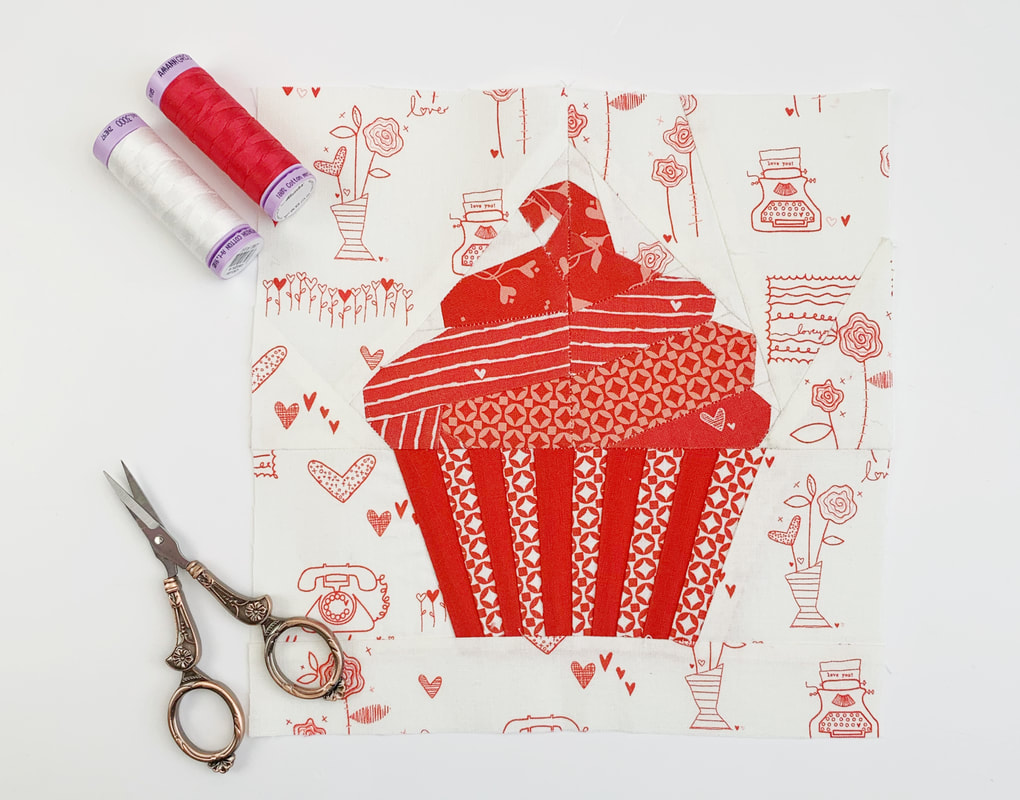
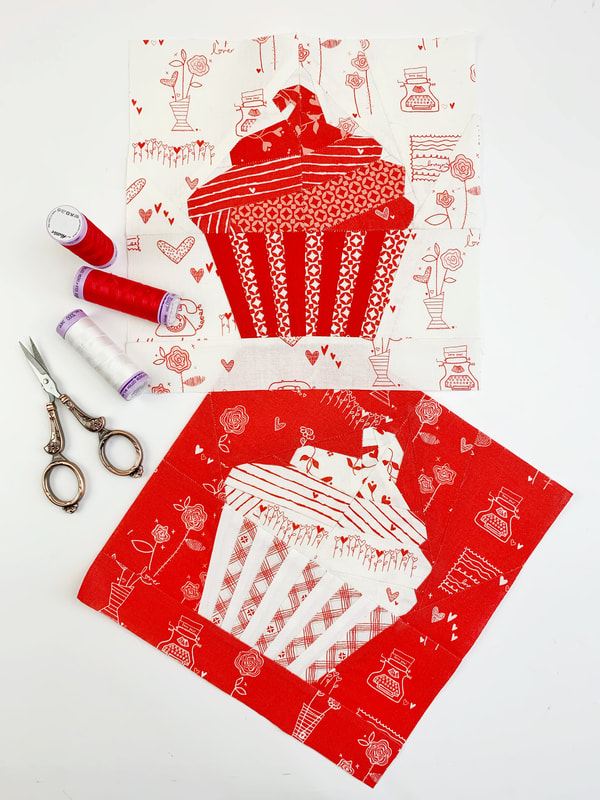
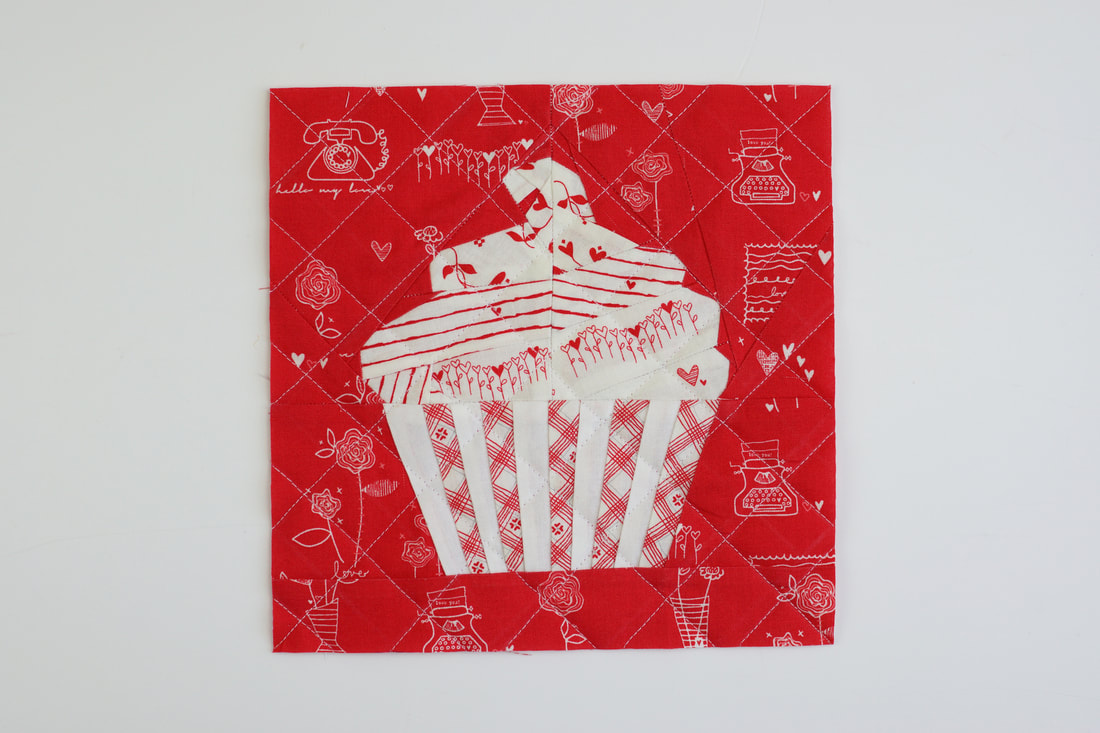
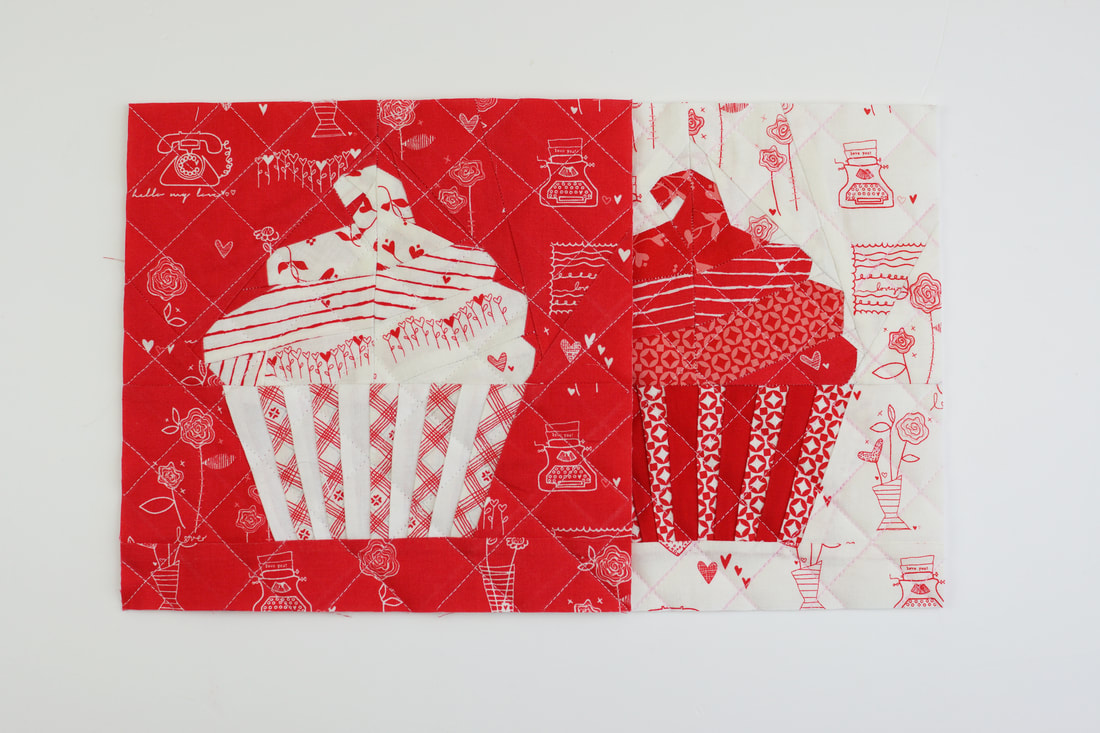
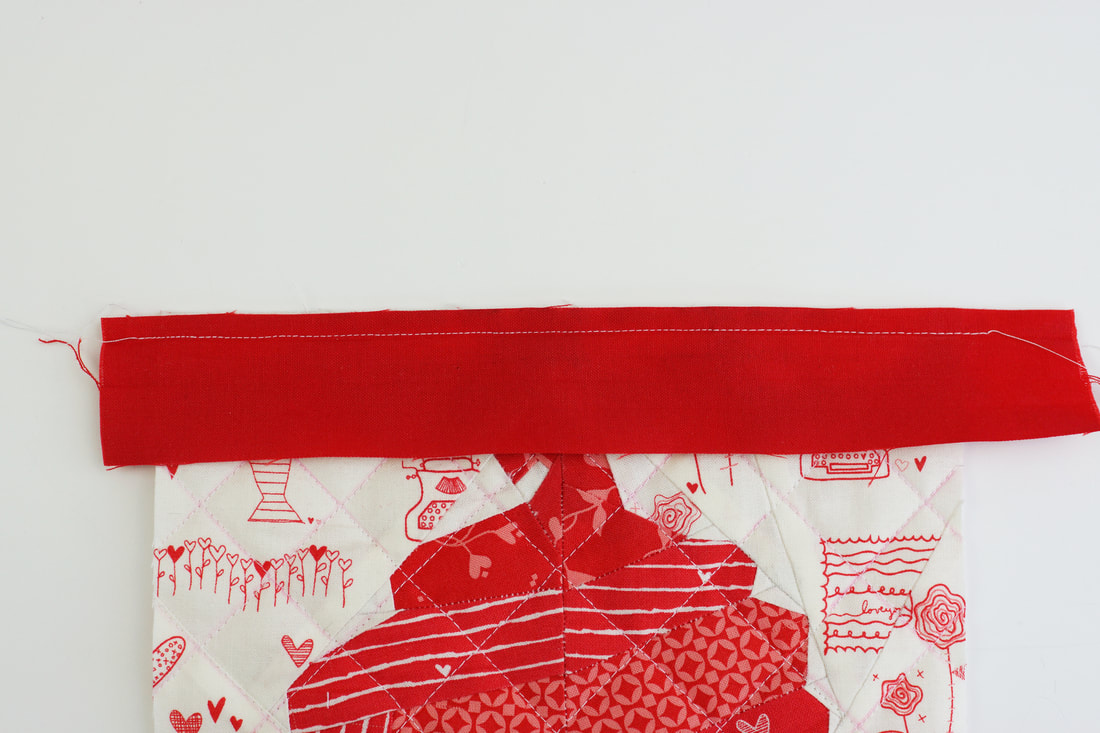
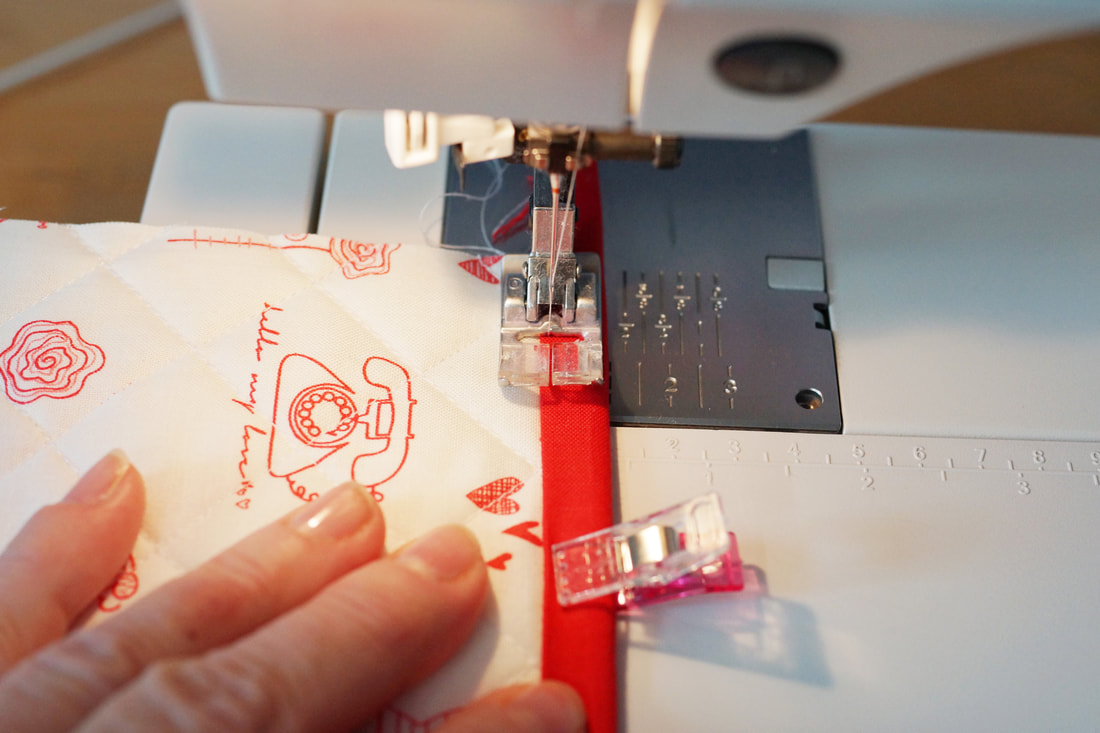
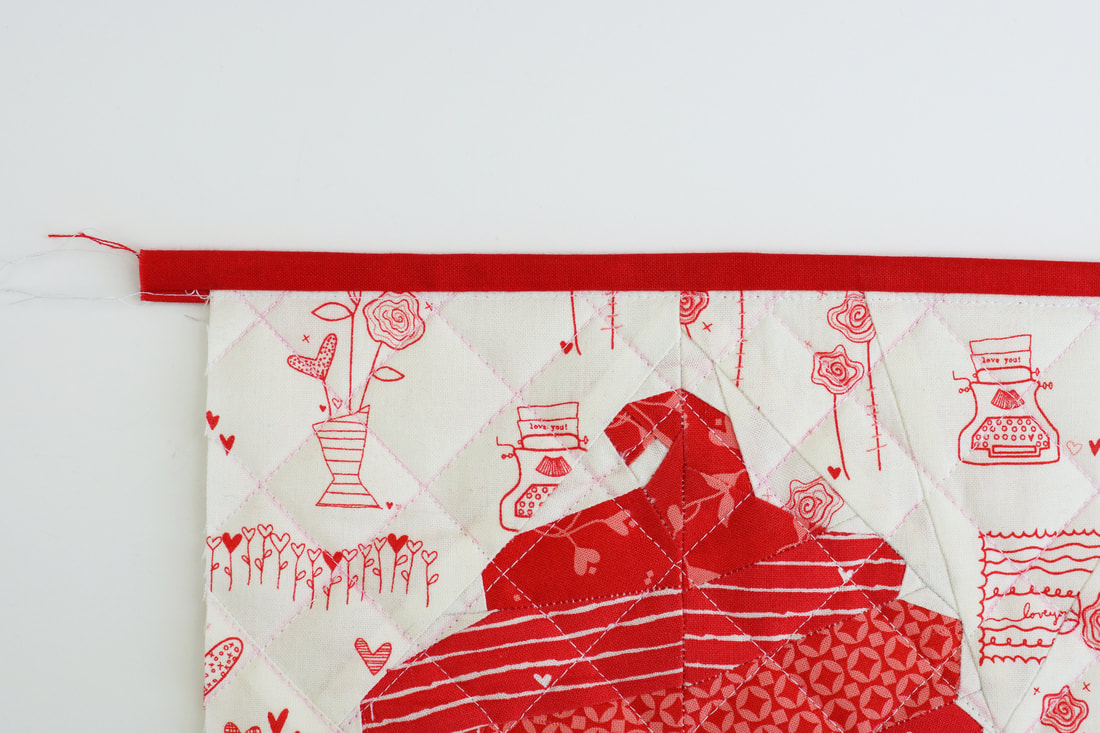
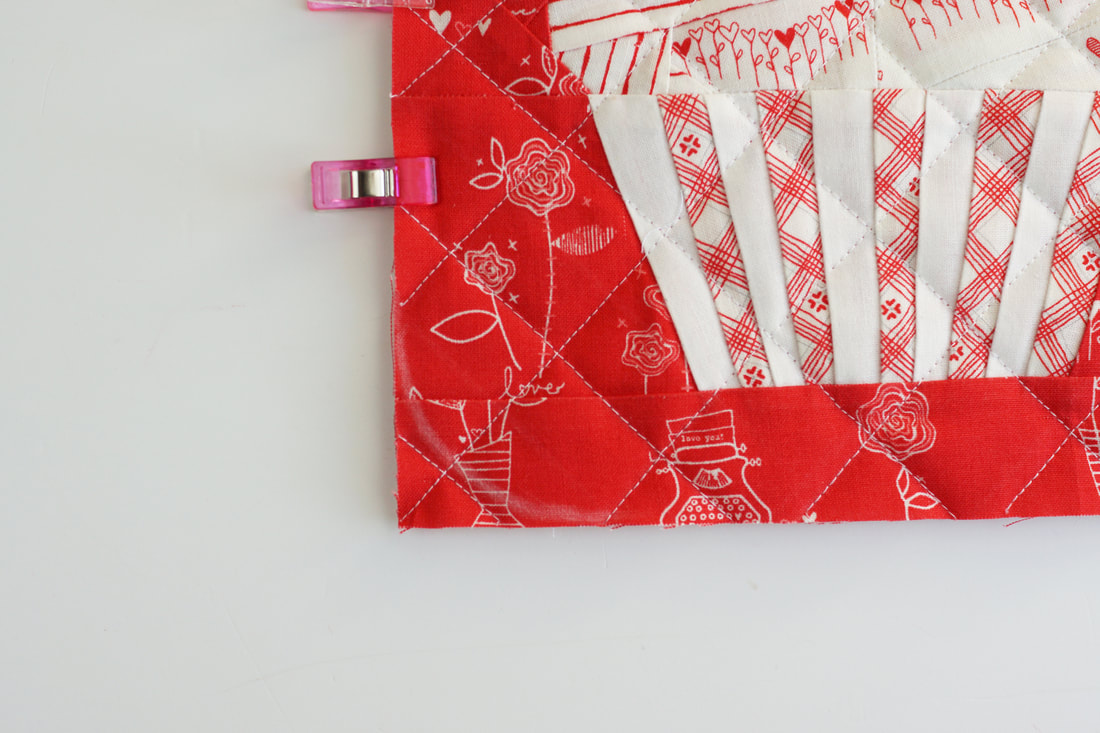
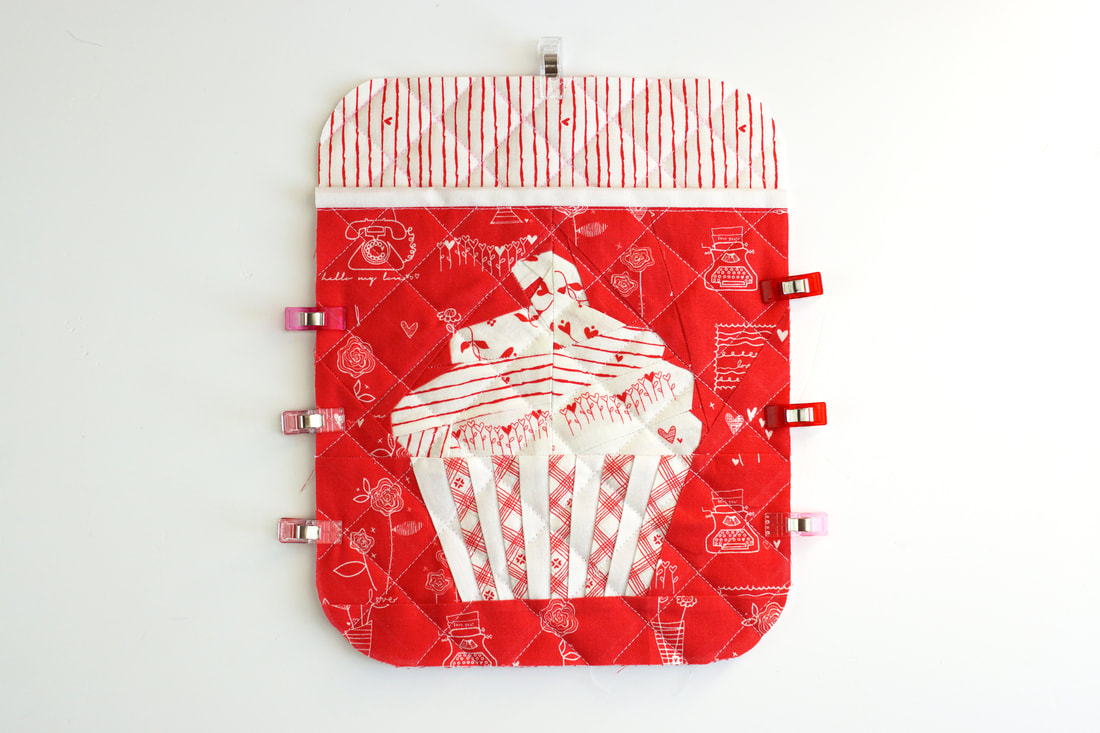
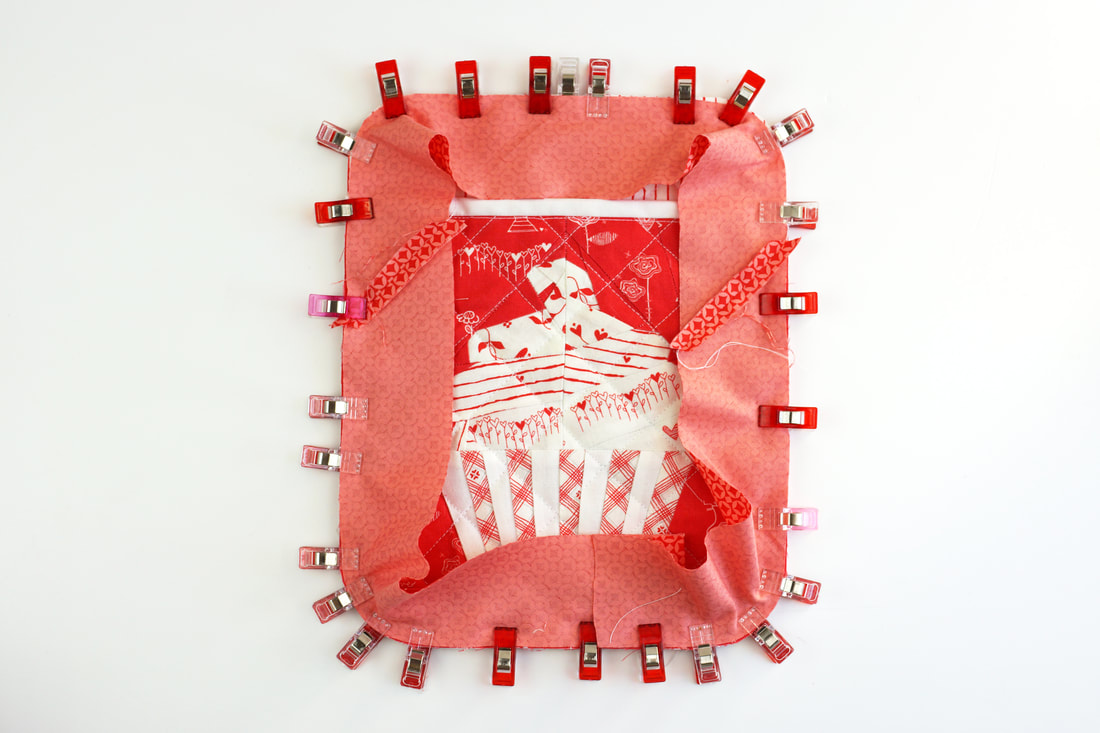
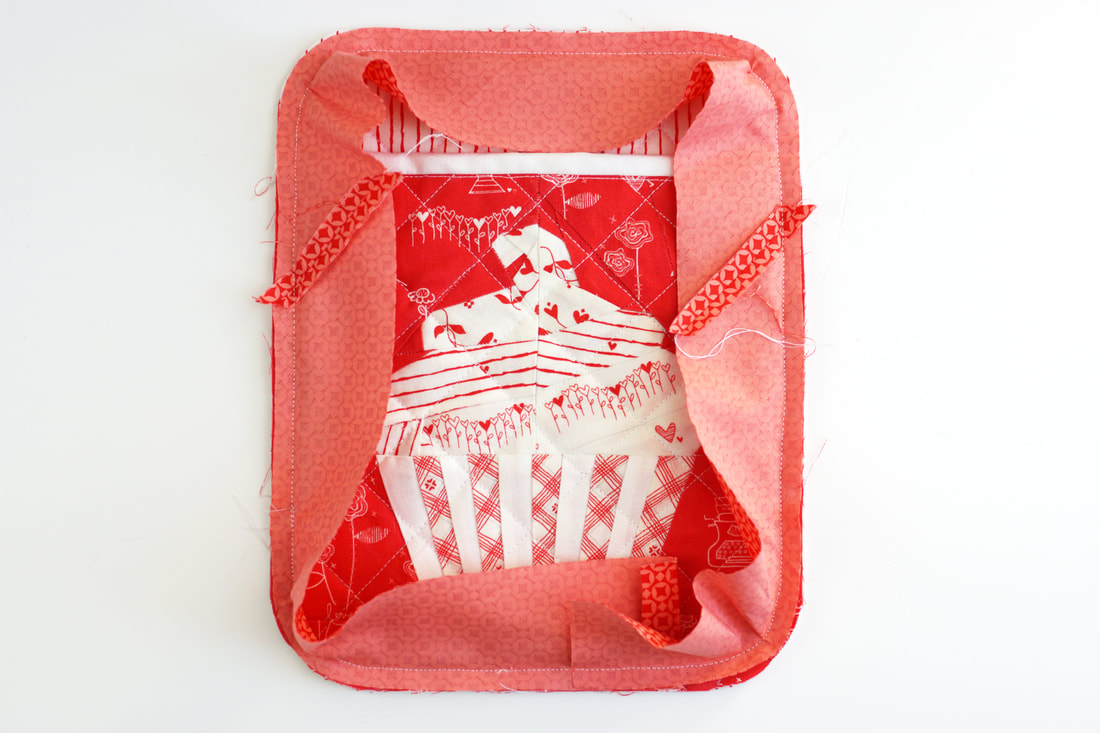
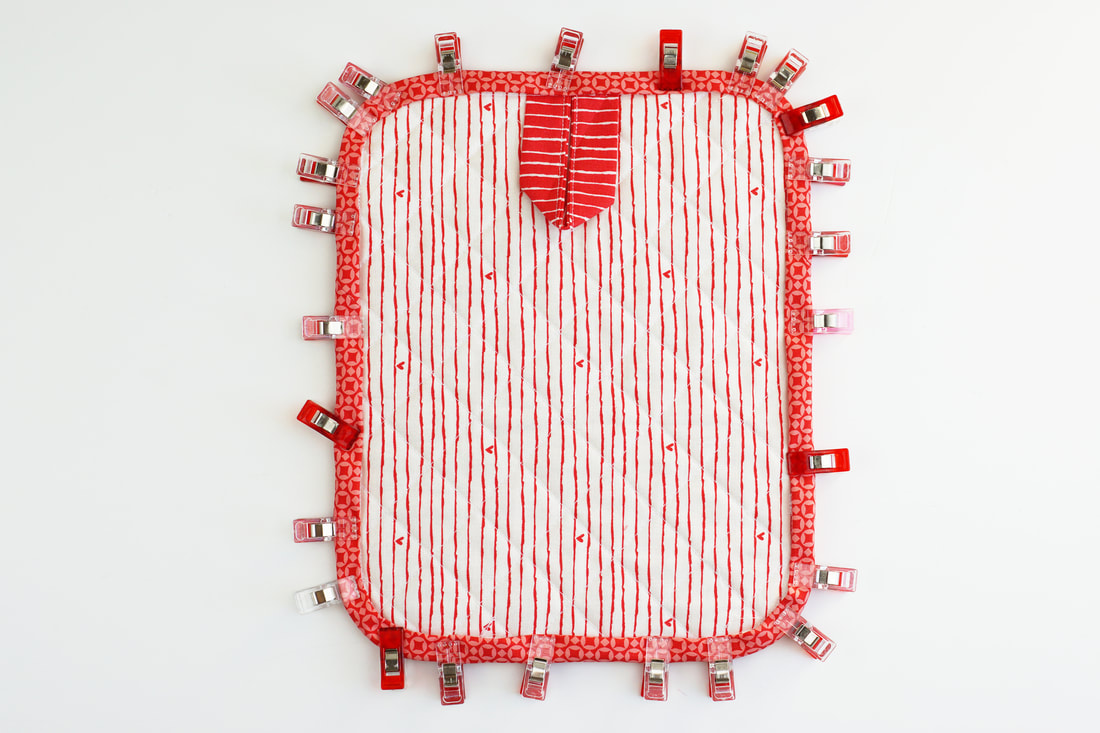
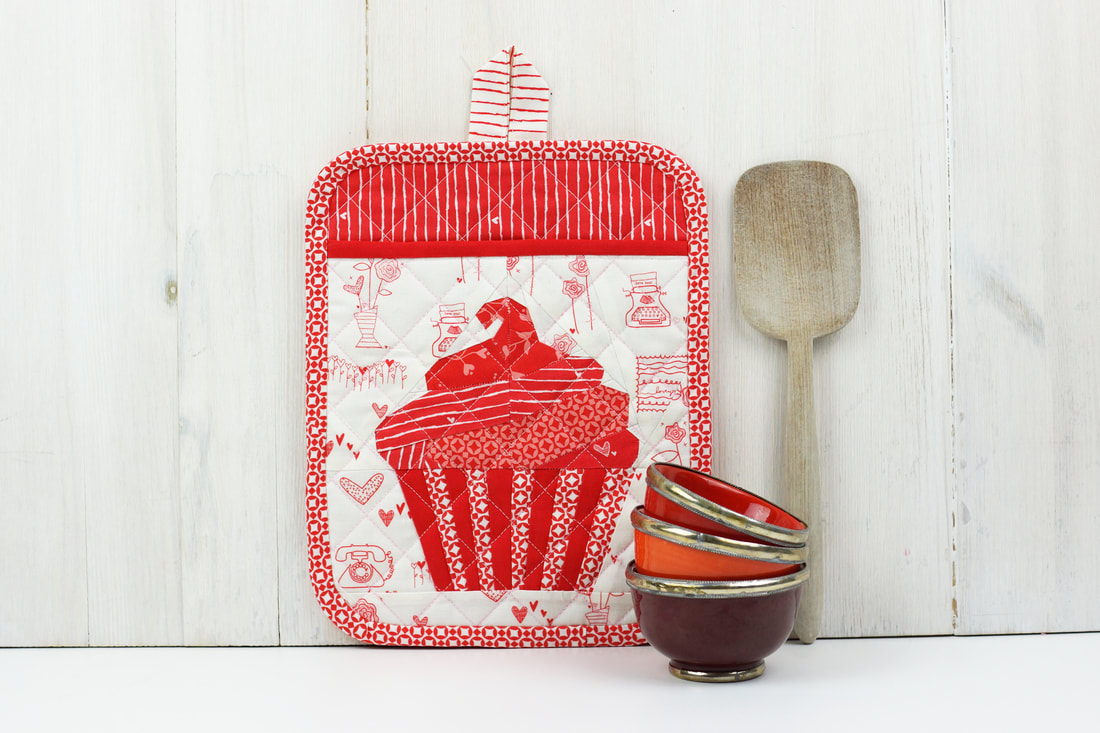
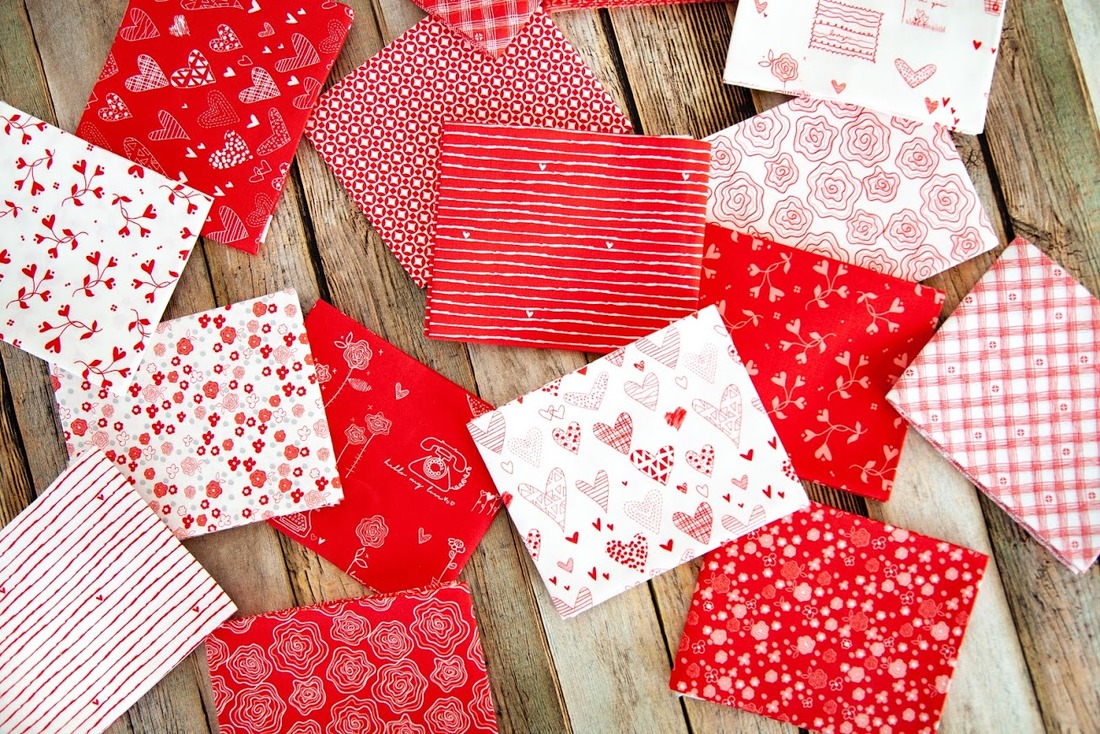
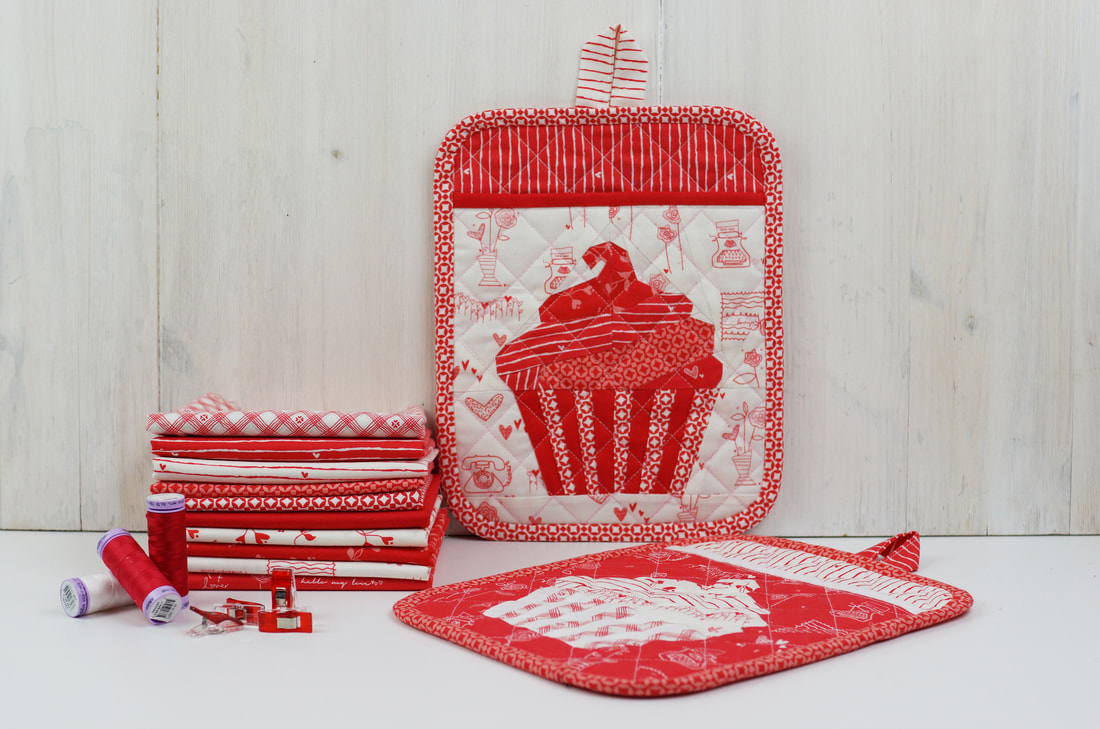
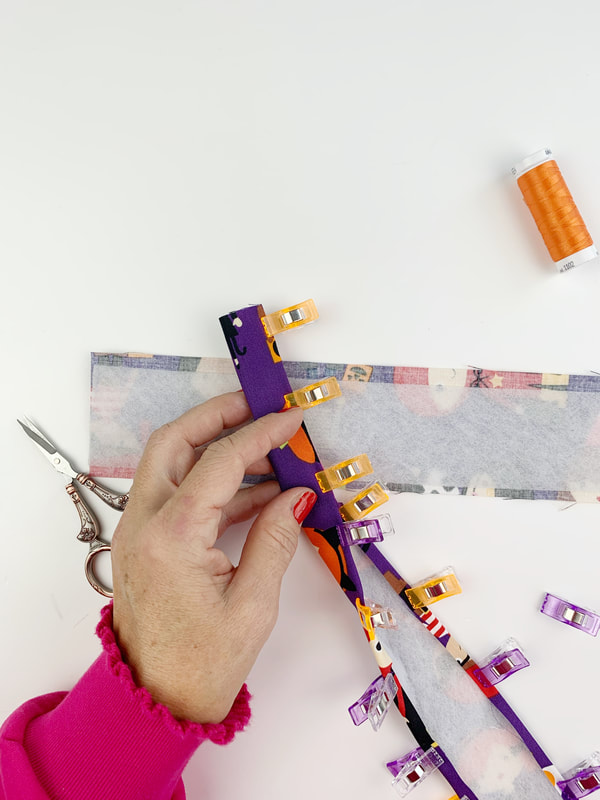
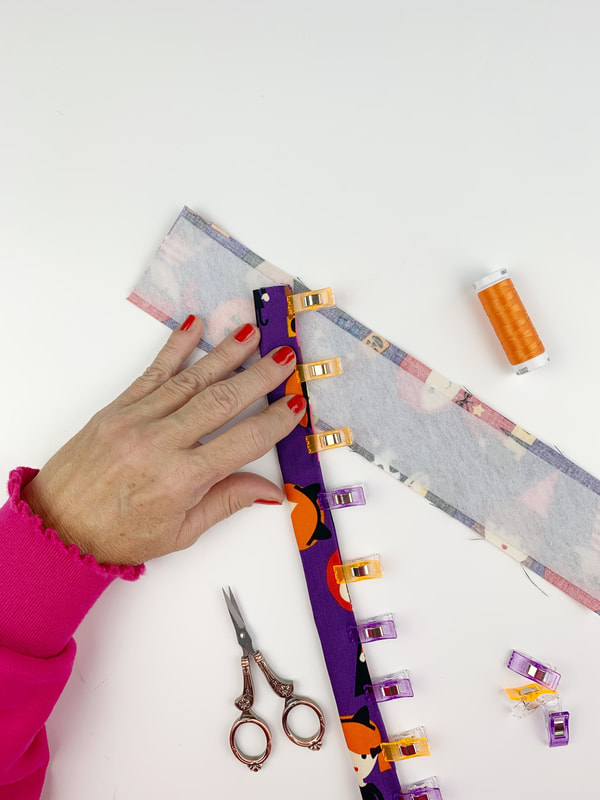
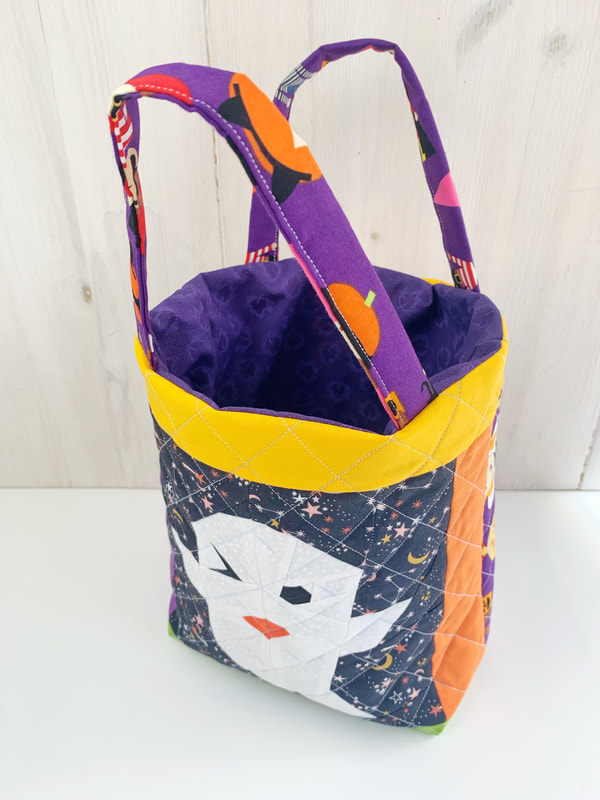
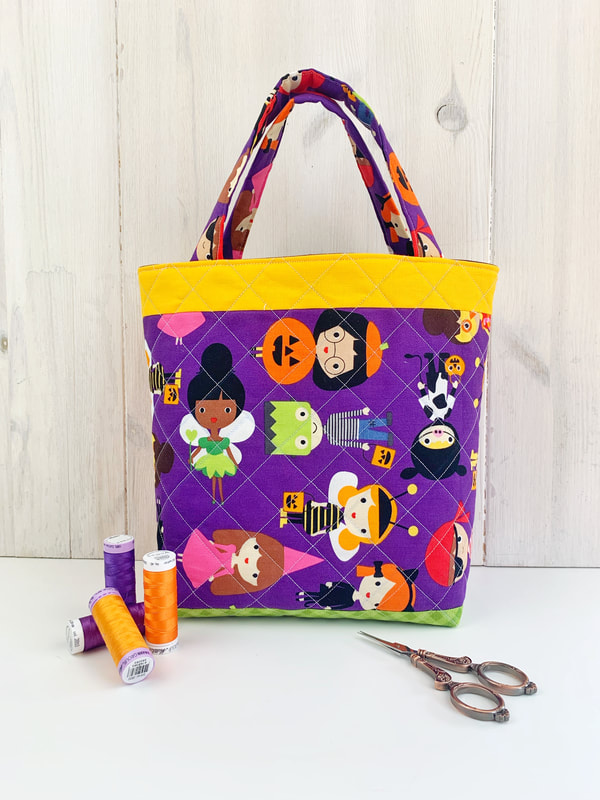
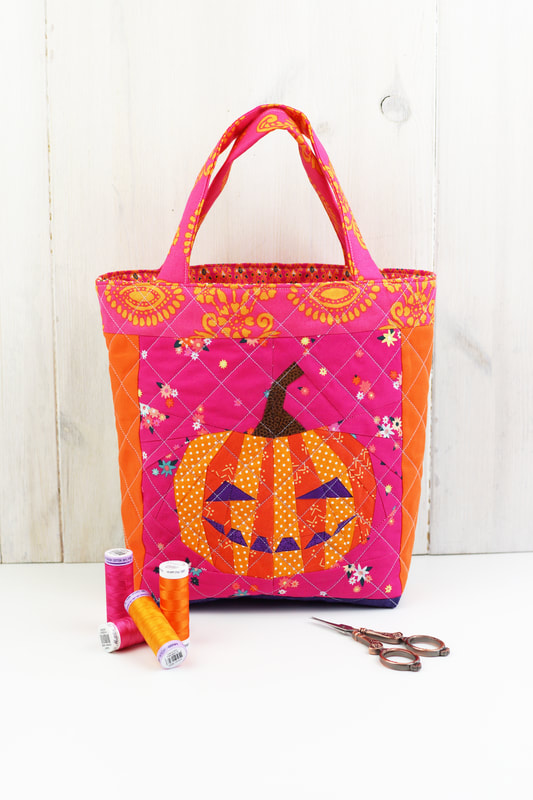
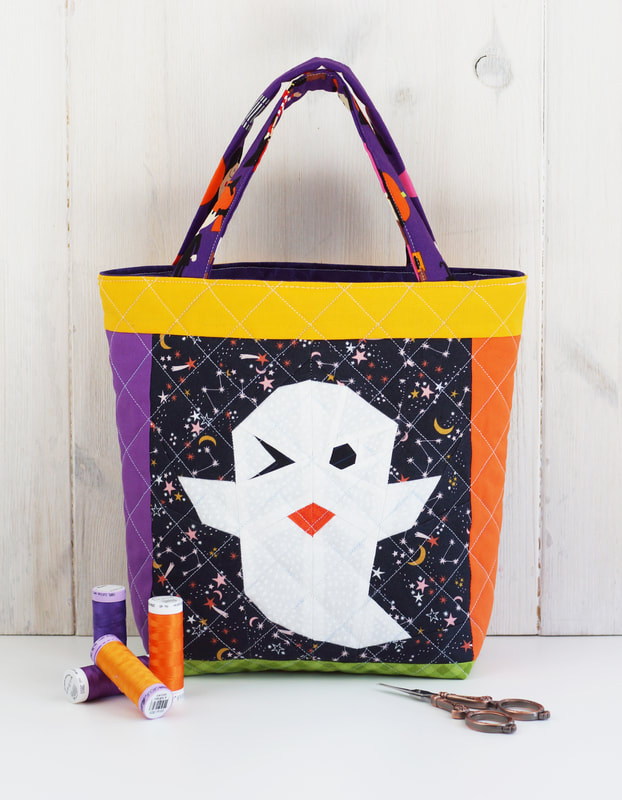
A design collab with Riley Blake Designs - 'From the heart' fabric collection by Sandy Gervais 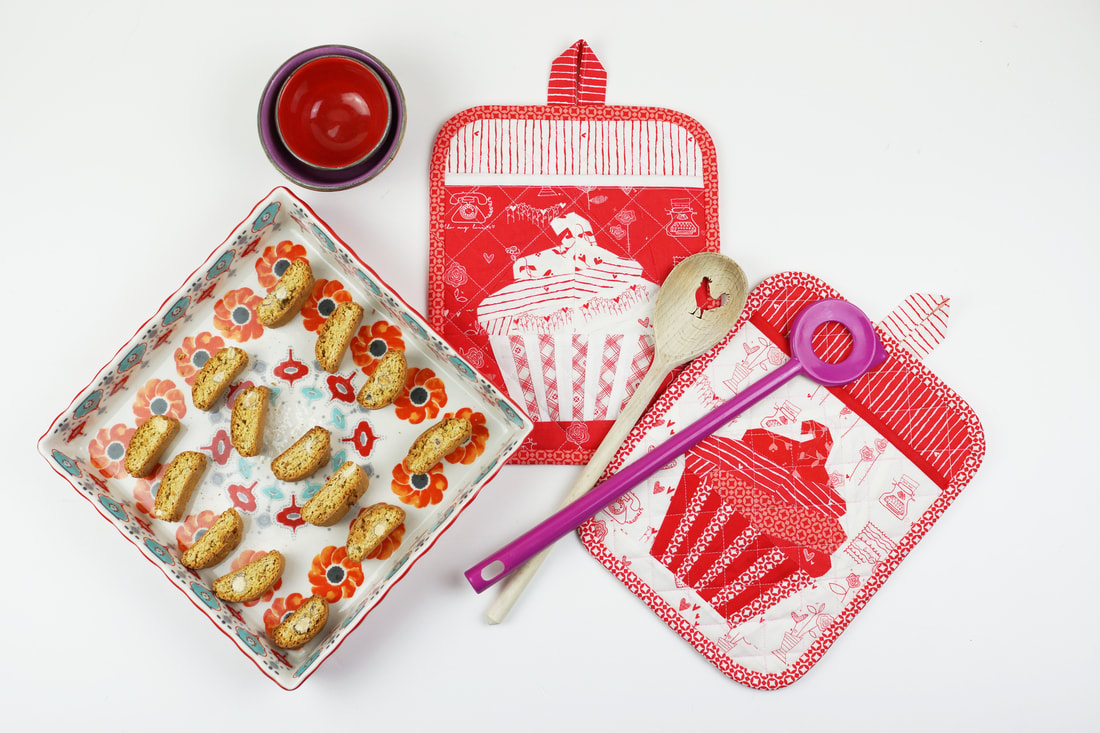 'YOU'RE-MY-CUPCAKE' pot-holders Everybody needs pot-holders in the kitchen, and if they're this cute, even better, right? So how about pulling out some fabric and getting started. These are super easy to make and will be a perfect gift for any passionate cook. 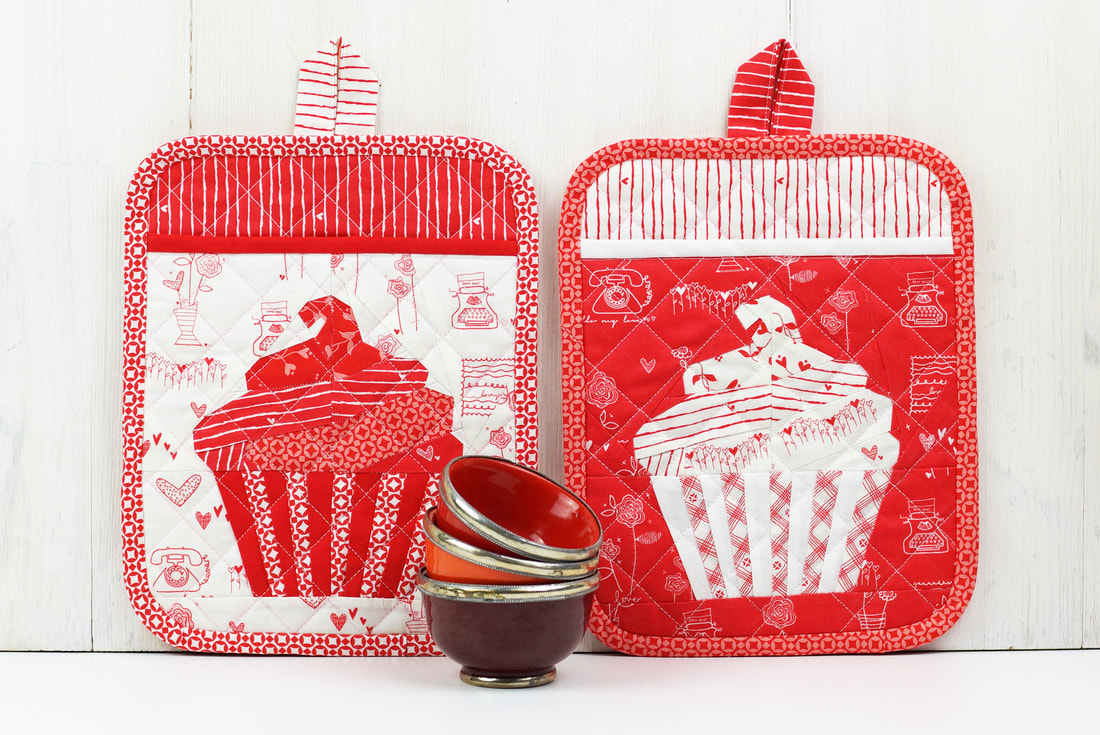 'YOU'RE-MY-CUPCAKE' pot-holders 'You-are-my-cupcake' pot-holders finished size 8"x 10" Fabrics needed per pot-holder: - finished cupcake quilt block 8"x 8" - cut 2 pieces of fabric for backing 8 1/2"x 10 1/2" - cut 1 piece of fabric 8 1/2"x 8 1/2" for pocket lining - 1 piece of fusible interfacing 8 1/2"x 8 1/2" for pocket - 1 piece of fusible interfacing 8 1/2"x 10 1/2" for backing - 1 piece of insul-brite 8 1/2"x 10 1/2" for backing - cut 1 strip of fabric 1 1/2"x 10" as binding for pocket - cut 1 strip of fabric 2"x 6" or use ribbon for hanging tab - bias tape 2"x 40" for pot-holder binding Sewing the potholder: 1. Finish the cup cake quilt block ( shop pattern here ) in size 8"x 8" 2. Cut all of your fabric pieces as mentioned above. 3. Iron on fusible interfacing to your quilt block . Then lay pocket lining piece of fabric face down on flat surface and lay quilt block face up on top of it. Clip or pin in place. 4. Quilt as desired, to hold these layers together. I did 1" diagonal squares. I used my acrylic ruler and a fabric chalk pen to draw the lines. 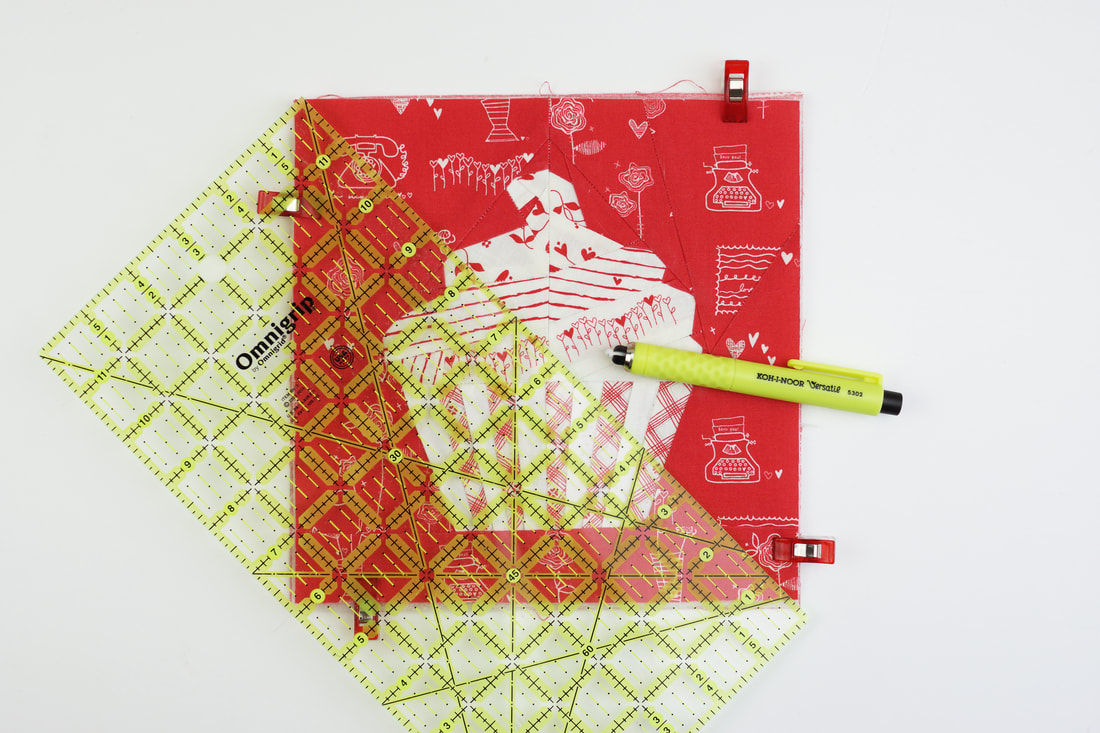 Drawing the lines with a fabric chalk pen 5. Trim to 8"x 8" size. 6. Iron on the fusible interfacing to one of the backing fabrics. Place the other backing fabric face down on a flat surface. Position the insul-brite on top of it and finish off with the backing/fusable interfacing piece, face up. Pin or clip all three layers in place. Quilt as desired, I did 1" diagonal squares again, as with the pocket piece. Make the hanging tab: ( or use a strip of ribbon) - Fold the 2"x 6" strip in half lengthwise and press. Fold in 1/4" seam allowance on each long raw edge and press again. - Stitch with small seam allowance. - Fold the tab in half and clip in place at the center of the back of your pot-holder. 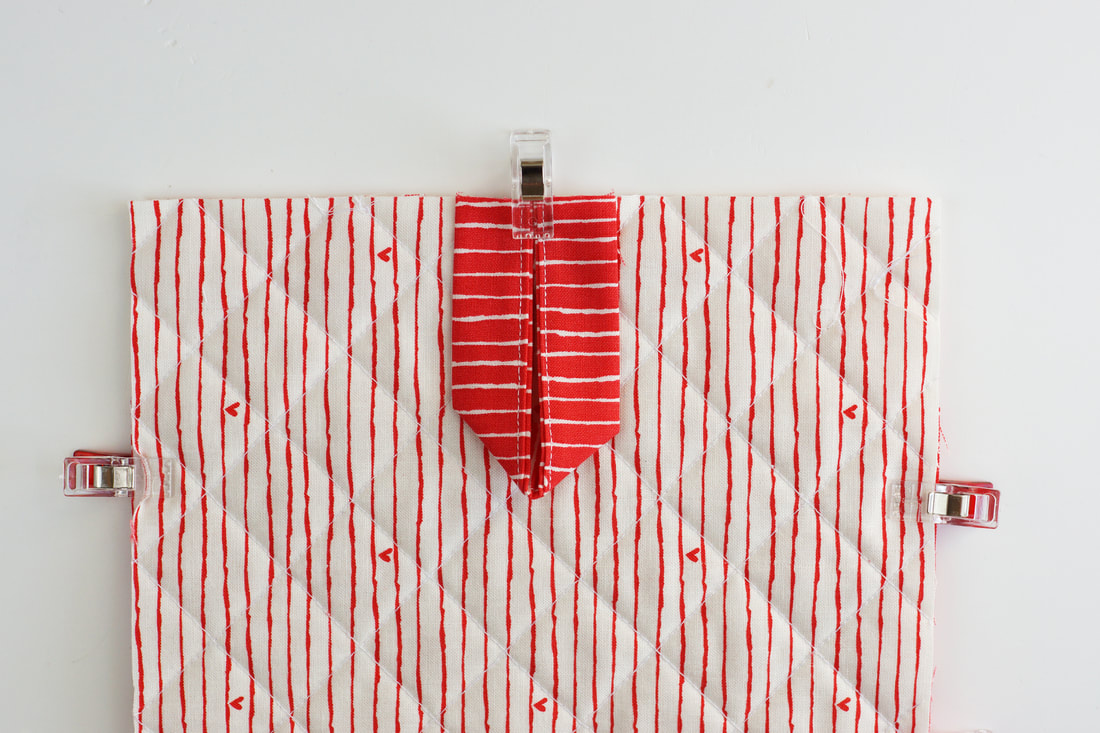 attach hanging tab at the center 7. Binding for the pocket: Take the strip of fabric 1 1/2"x 10" and pin it to the top of the cupcake pocket with the raw edges aligned and stitch in place with 1/4" seam allowance. ( photo 1) Fold the binding over to the back ( photo 2) and stitch in place ( photo 3) Finished binding seen from the front ( photo 4) Trim the ends. 8. Place the quilted pocket piece on top of the backing , aligning the side and the bottom raw edges. Clip or pin in place. 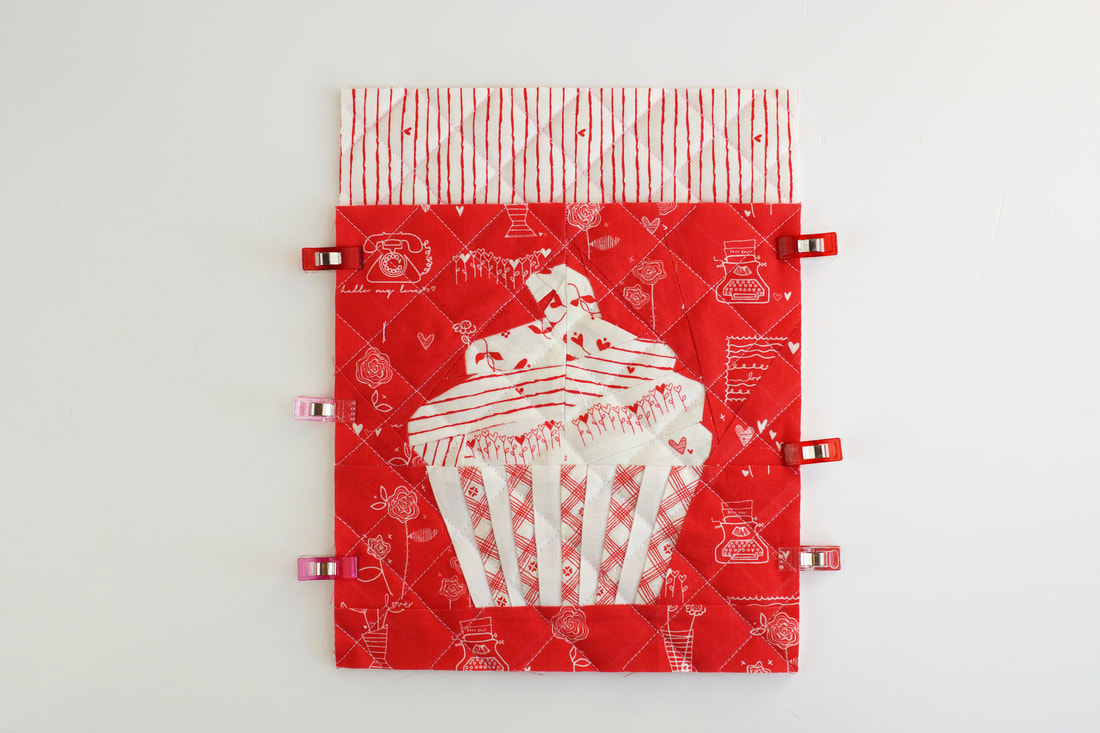 9. Round the corners of your pot-holder. I drew a 1/4 circle at the corners first and then cut it. here's a template for the corners, cut it along the black line. 10. Fold the bias tape over 1/4" at one end of the binding strip and clip or pin in place around the pot-holder with the end overlapping about 1/2" ( photo 1 ) . Stitch in place. ( photo 2 ). Fold the binding over to the backof the pot-holder and then hand stitch in place. Et voila .... all done. Thank you so much to Riley Blake Designs for supplying the absolutely adorable 'From the Heart' fabric series designed by Sandy Gervais that I used in this super cute project. This pattern is perfect for any 8"x 8" quilt block. I can't wait to see your makes. How do you like these pot-holders? Happy sewing Ingrid x follow me on Halloween is approaching and I want to show you how to sew a stunning little Trick-or-Treat bag with one of my quilt blocks... and best of all its really easy. 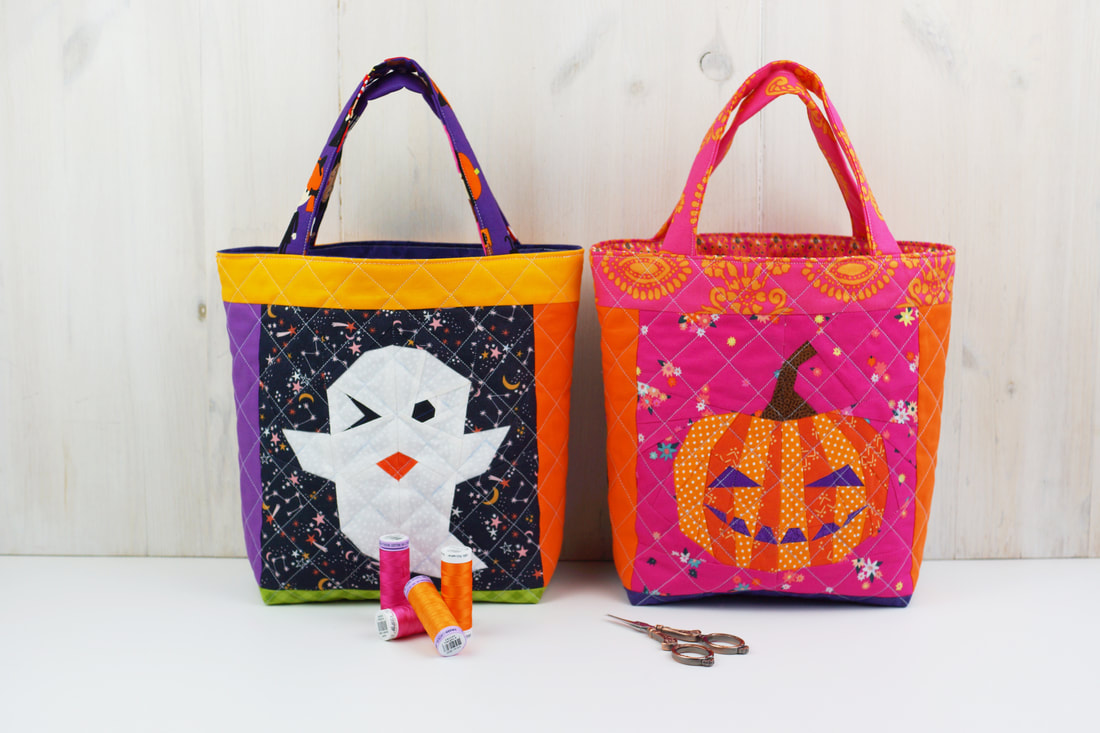 cutest ever trick-or-treat bags Finished bag size : 8.5" wide, 9.5" high and 4" deep at the bottom Fabric/ Materials needed: (all measurements are width x height) > 1 FPP quilt block 8.5" x 8.5" (ghost pattern shop here) > 2 strips of fabric on each side of the FPP block 2.5"x 8.5" > 2 strips of fabric for bottom panel 12.5"x 3" > 2 strips of fabric for top panel 12.5"x 2" > 1 piece of fabric for back 12.5"x 8.5" > 2 pieces of fabric for lining 12.5"x 12" > Fusible interfacing 2 pieces 12.5"x 12" > 2 strips of fabric for handles 2,5"x 12" > 2 strips of fusible interfacing 2"x 12" 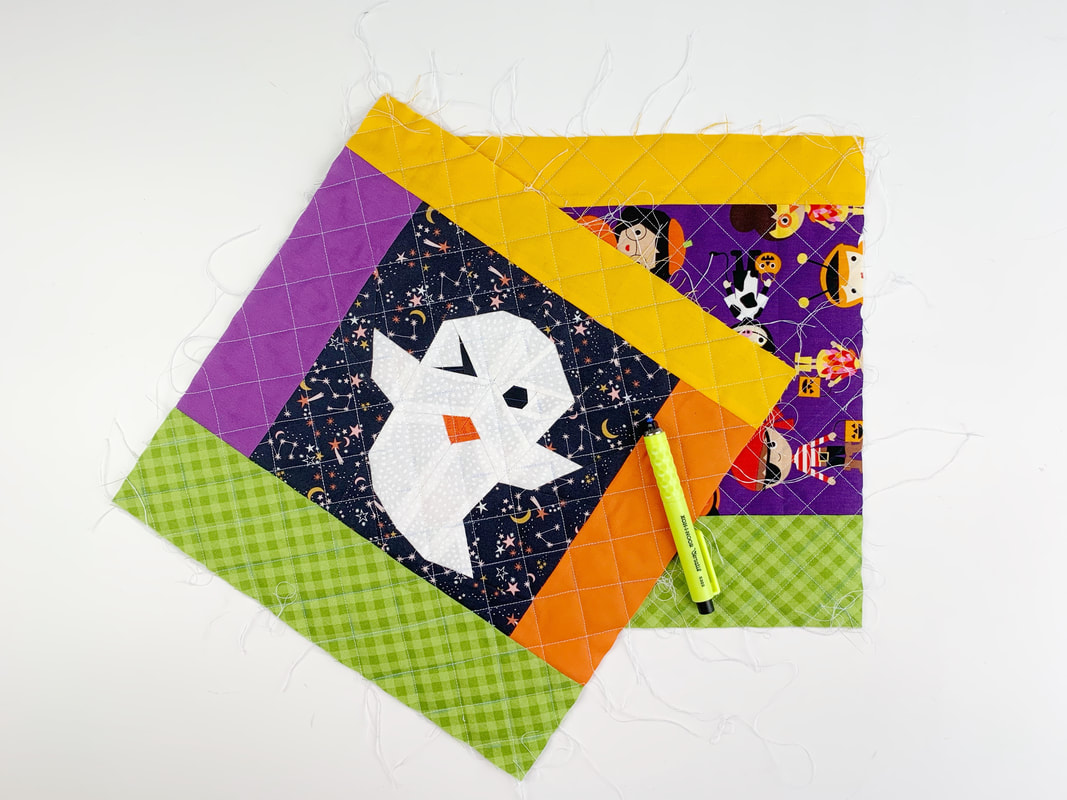 Front and back exterior fabric pieces of bag Instructions: -Sew your Foundation paper pieced quilt block - I chose the little ghost . ( shop Halloween patterns here ) the block will measure 8.5"x 8.5" when sewn together (unfinished- meaning not sewn into a project yet). -Cut out all the fabric, lining and fusible interfacing pieces. -Attach the side strips to the quilt block. Then attach the bottom and top panel to the quilt block and fabric for the back ( see picture above). Interfacing gives your bag more structure and stand. Iron on the fusible interfacing to your front and back exterior main pieces of your bag. 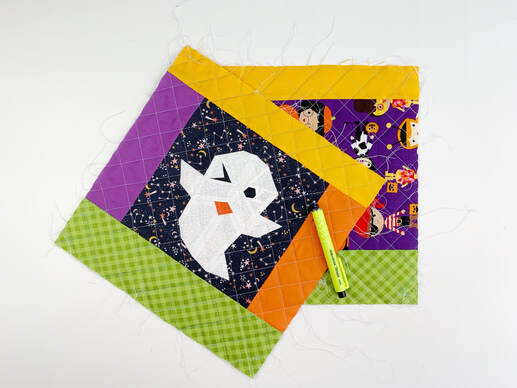 Trick or Treat bag exterior pieces quilted - Quilt your exterior pieces to your liking. - I did some diagonal straight line machine quilting. - I drew the lines with a washable fabric marker ( this one can actually just be dusted off, it's a dressmaking chalk pen, that comes with several different color refills) - Then I machine quilted the front and back exterior fabric pieces with diagonal 1" squares. Sewing the handles: - iron on fusible interfacing on fabric strips of handles, center to width of fabric, leaving 1/4" seam allowance on both long sides of the fabric strips. - Fold over 1/4" seam allowance on each side of the fabric strips and clip in place - (I use only orange and purple clips, to stay in the Halloween spirit :-) - Now fold the strip in half and clip in place again. Then sew along the clipped edge with a small seam allowance to finish off the handle strip. - Repeat for second handle. - Attach the handles at 3" from the outer edge to the top of exterior front and back fabric pieces. And clip in place. - Lay lining fabric right sides together on top of outer bag pieces and clip in place at top edge. Handles are now sandwiched between lining and outer piece. - stitch along top edge with 1/4" seam allowance. - fold exterior and lining pieces open. - lay both trick-or-treat bag pieces on top of each other, right sides together - Clip or pin the raw edges in place, matching up each seam and clipping or pinning the matched up seams. - Leave a 4" space at the center of the bottom end of the lining, this is your opening for turning the bag later. - Then sew along the four open sides. Do not sew the 4" opening at the end of the lining pieces. - For a flat bottom of your bag, you need to box all four corners. Two corners of the lining and two corners of the exterior fabric. Starting with flattening the corner, the seams, bottom seam and side seam should be on top of each other. Then measure 2" from the top corner with an acrylic ruler and draw a line across with your fabric marker or a water soluble pen. Stitch along that line and trim off the corner, leaving a 1/4" seam allowance. (Repeat this for all four corners) 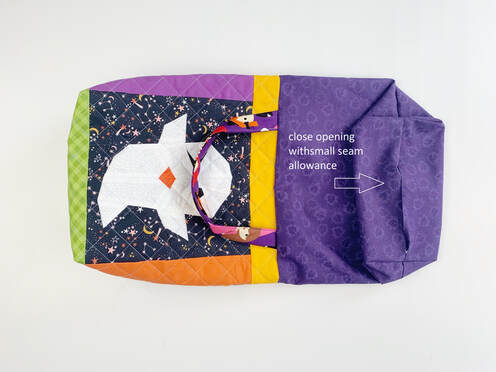 - Turn your bag by turning the pieces right sides out, pulling through the opening in the lining. Push out the corners nicely. Press the lining opening under 1/4" and stitch closed with a small 1/8" seam allowance. - Fold lining into bag and stitch along top edge of bag to secure handles and lining. Et Voila.... your cutest ever quilted Halloween TRICK-OR-TREAT bag is all done. How are you all celebrating Halloween this year? Let me know ....
Ingrid xo  Halloween quilt block pattern BOO HOO This year Hallooween will be very special. A full moon, a blue moon, daylight saving time, Saturday celebrations plus the unprecedented events of this year will make Halloween 2020 one day/night to remeber. So much has changed, but the love for spooky, scary and fun delight is as strong as ever. So lets see how we can celebrate this Halloween in a safe, fun and special way. 1. Small group Party Invite a small group of your closest friends or family and have an unforgettable get together under the light of the blue moon. How about a Halloween picnic or a Halloween hide and seek? 2. Zoom Party Why not coordinate a neighborhood Zoom Party with a costume contest, games and scary stories? Everyone can plan goody bags ahead of time and they can be dropped off on doorsteps in advance. 3. Candy games with your kids Use your imagination and hide candy all over the house, maybe even inside and out. Kids can win prizes for finding the candy. How about you create different theme rooms in your house and organize a Halloween scavenger hunt? Make a gift certificate to stay up late and watch a movie. 4. Fun and memorable photos This year will be a very special Halloween. Don't forget to take 'once in a blue moon Halloween' photos. Make sure you show off all your fantastic Halloween decorations. Now is the perfect time to sew some of your favorites. Use these photos to mail out some fun Halloween cards. Anyone will be happy to receive a spooky card at any time. 5. Scary memory videos How about some fun, spooky and scary Tik Tok videos. Show off your fantastic costumes. Maybe dress the family as a theme or all members the same? Let your imagination run wild! 6.Halloween Karaoke We all have those Halloween hit lists with Thriller or Monster Mash. Organize a Karaoke night with your family inside or with a small group of your closest friends in the backyard. Your neighbors might enjoy to cheer you on. 7. Pumpkin carving Party Every family member or friend carves his won special pumpkin. Organize a contest with prizes, photos and videos. May the best carver win. 8. Halloween Pinata Pinatas are always a fun way to entertain children. Fill your favorite Halloween Pinata with tons of candy. Organize a game night for your kids and the pinata will be the final prize of the night! 9. Cook a bloody Dinner Don't just cook the Halloween dinner beforehand, but make it a dinner cooking Halloween night. Your could make feet loaf, hot dog mummies a pumpkin puking guaamole or a berry eye ball punch. Dress up and cook together, celebrate the cooking and stay in your character, with the language, accent and more. Take tons of photos to remeber this special night. 10. Online murder mystery Party Invite your friends and family to dress up in their costume and join the mystery fun. Design your own murder mystery party or sign up for one online.  Halloween quilt block pattern Do you have any more ideas for a 'once in a blue moon Halloween night' ?
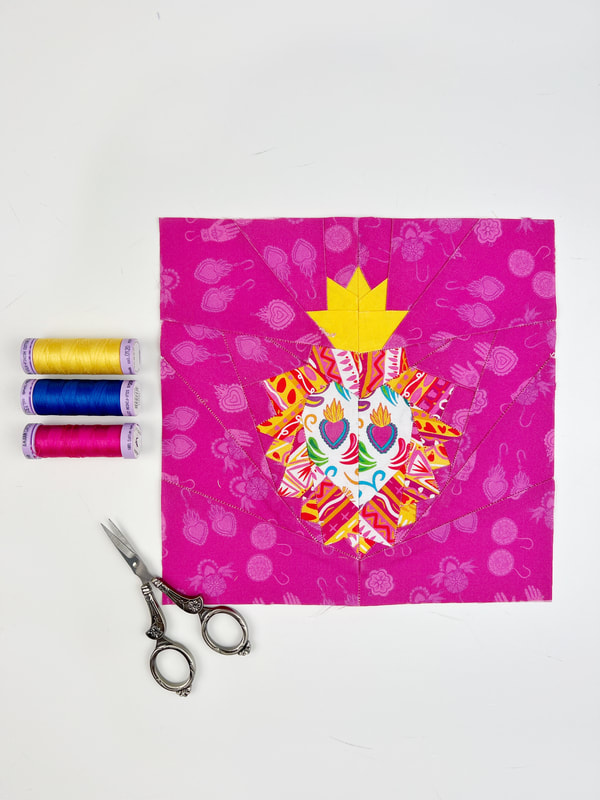
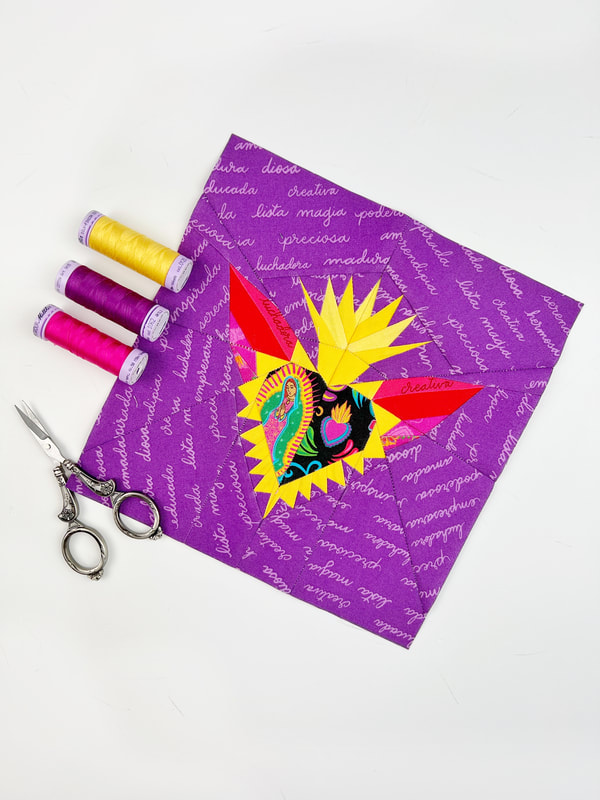
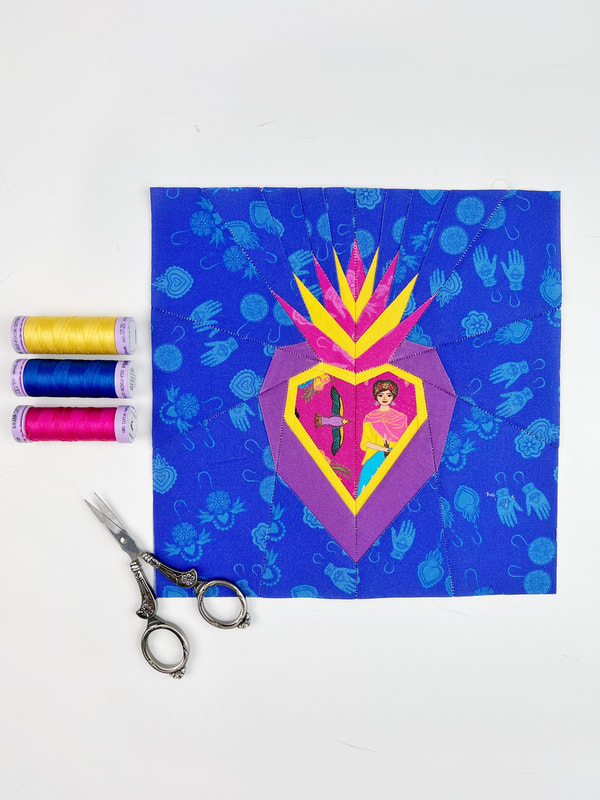
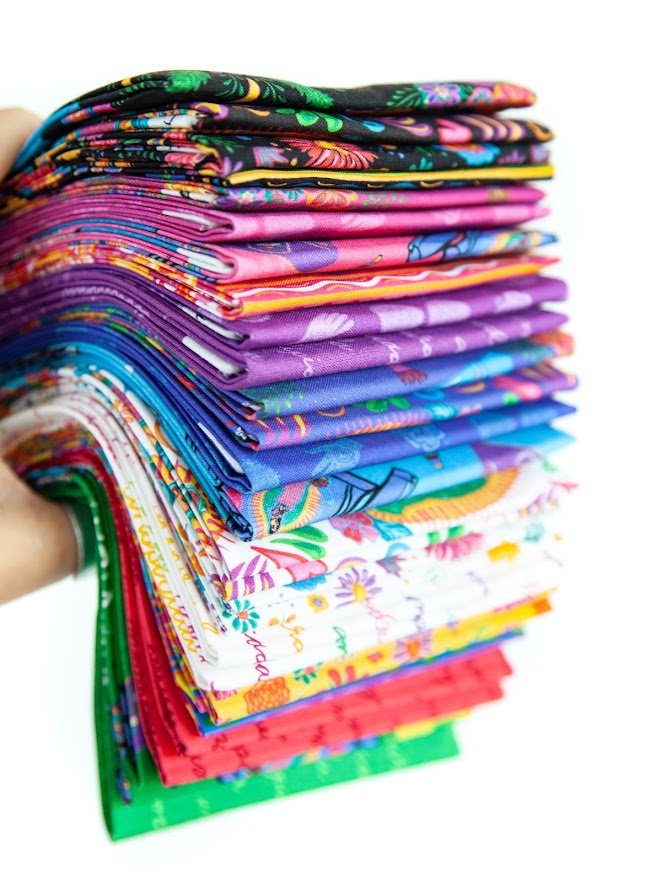
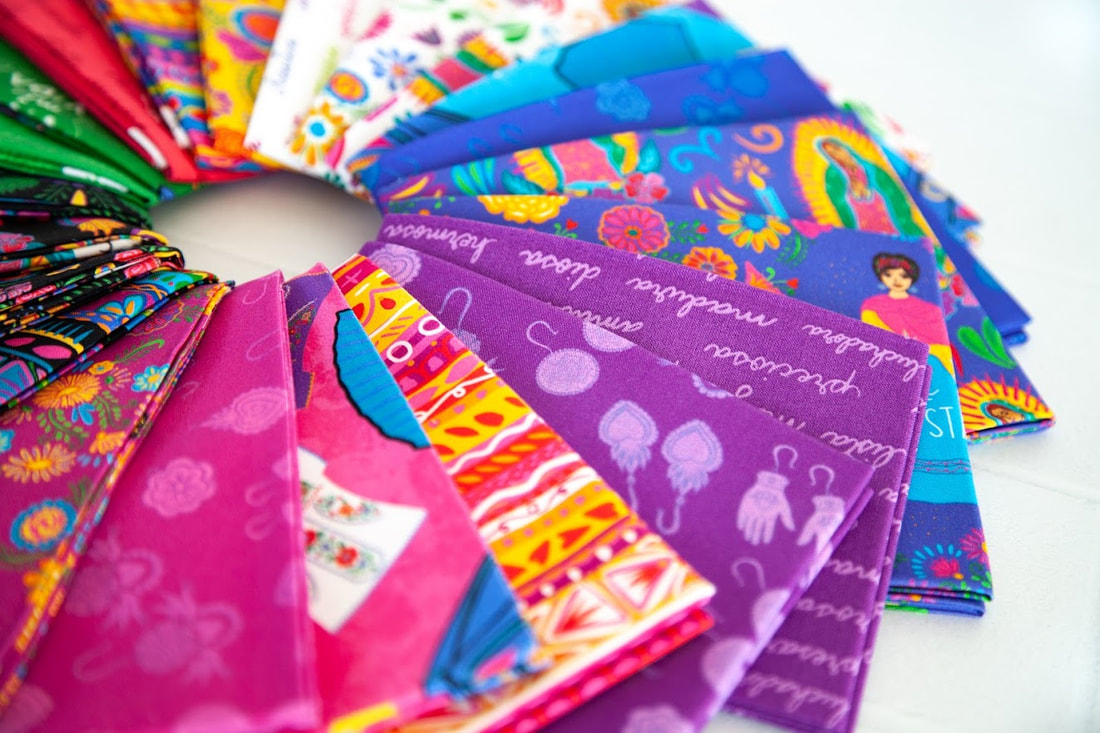
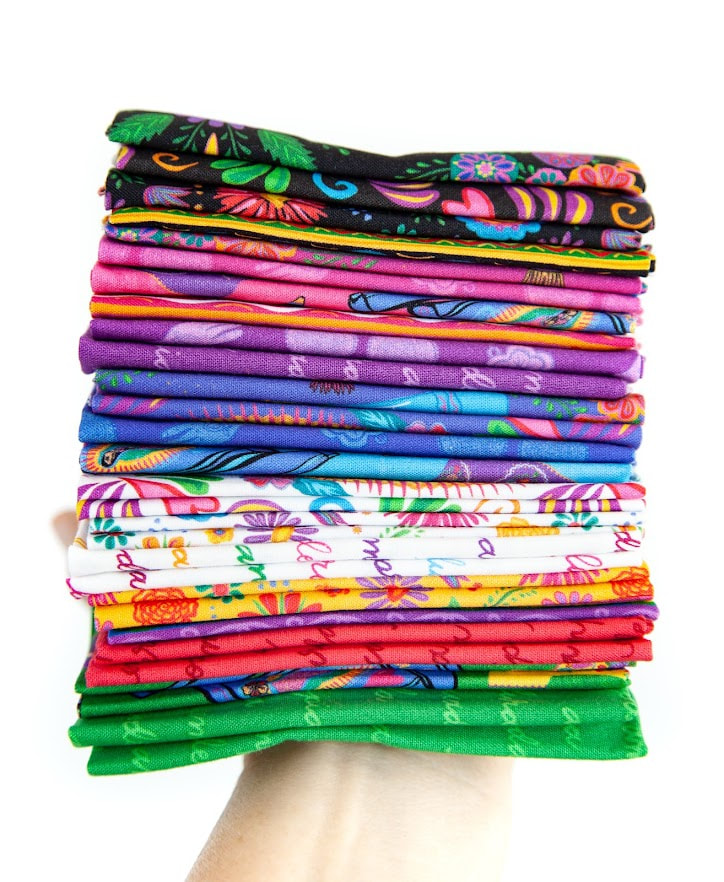
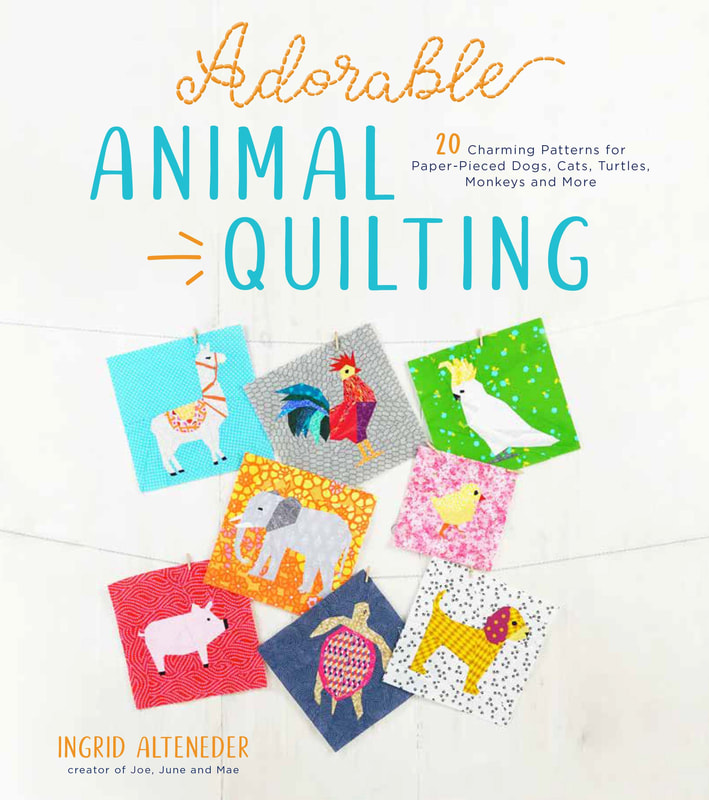
Let me know your suggestions.... Shop all the HALLOWEEN patterns here. And show me your makes with #jjmhalloween Most of all have tons of fun this year Ingrid xoxo What's the difference between Halloween and Dia de los Muertos? The two are related somewhat, but Dia de los Muertos and Halloween differ greatly in traditions and tone. Whereas Halloween is a dark night of horror and mischief, Dia de los muertos festivities unfold over two days in an explosion of color and life affirming joy. The theme for the annual event is death that's true, but the point is to demonstrate love and respect for the deceased family members. And isn't that beautiful? 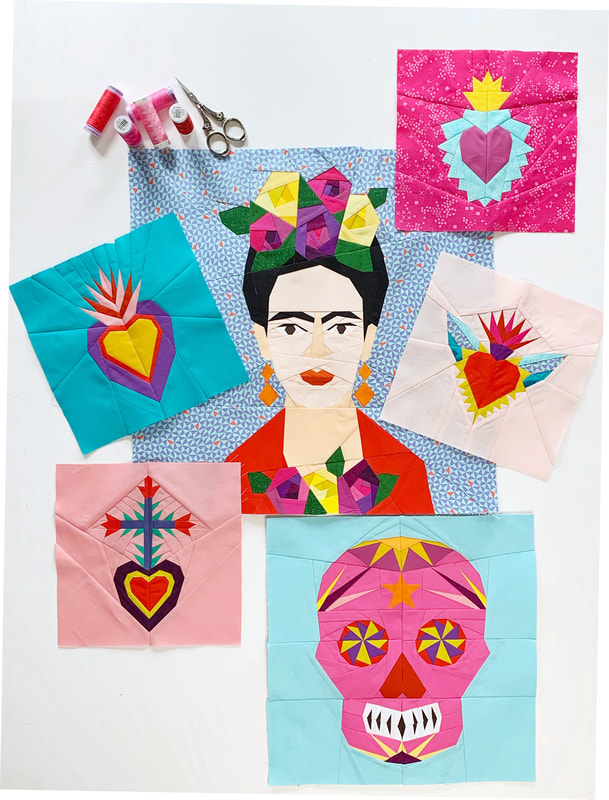 Viva la Frida/ Dia de los Muertos quilt block pattern These sacred heart quilt blocks were made with Riley Blake Designs Fabric line Eleanor by Kathy Cano-Murillo. This fabric line is absolutely perfect for these Dia de los Muertos quilt block patterns. The festivities of Dia de los Muertos are full with symbolic meaning. The more you know and understand about this feast for the senses, the more you will love it too. Here are 3 essential things about Mexico's most colorful annual event. 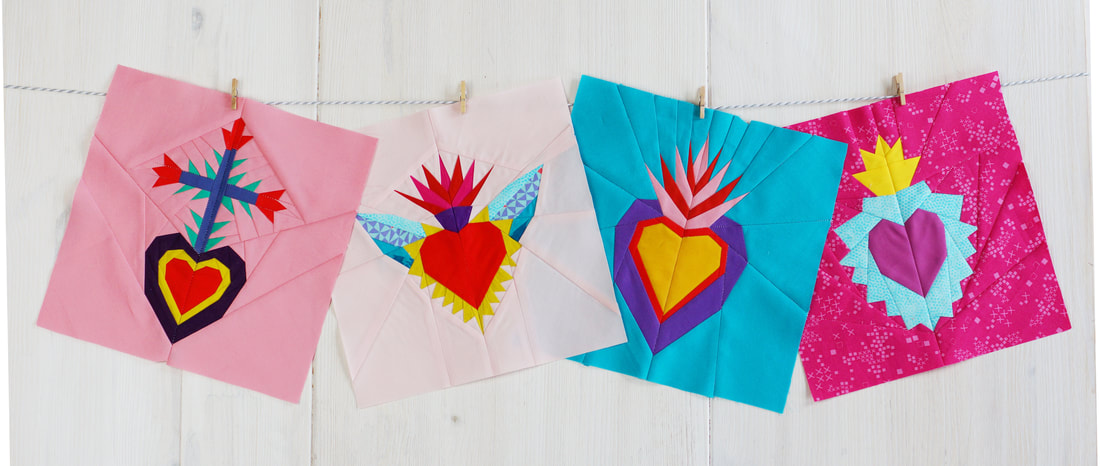 Sacred hearts quilt block pattern History Several thousand years ago , Dia de los Muertos originated with the Aztec, Toltec and other Nahua people, who considered mourning the dead disrespectful. Death was a natural phase in life's long continuum, for theses pre-Hispanic cutures. I find this way of honoring the dead both reassuring and beautiful. The dead were still members of the community. They were kept alive in memory and spirit and during Dia de los Muertos ,they temporarily returned to Earth. Today's Dia de los Muertos celebration is a fusion of pre-Hispanic religious rites and Christian feasts. It takes place on November 1 and 2, which is also All Saint's Day and All Soul's Day on our Christian calendar. 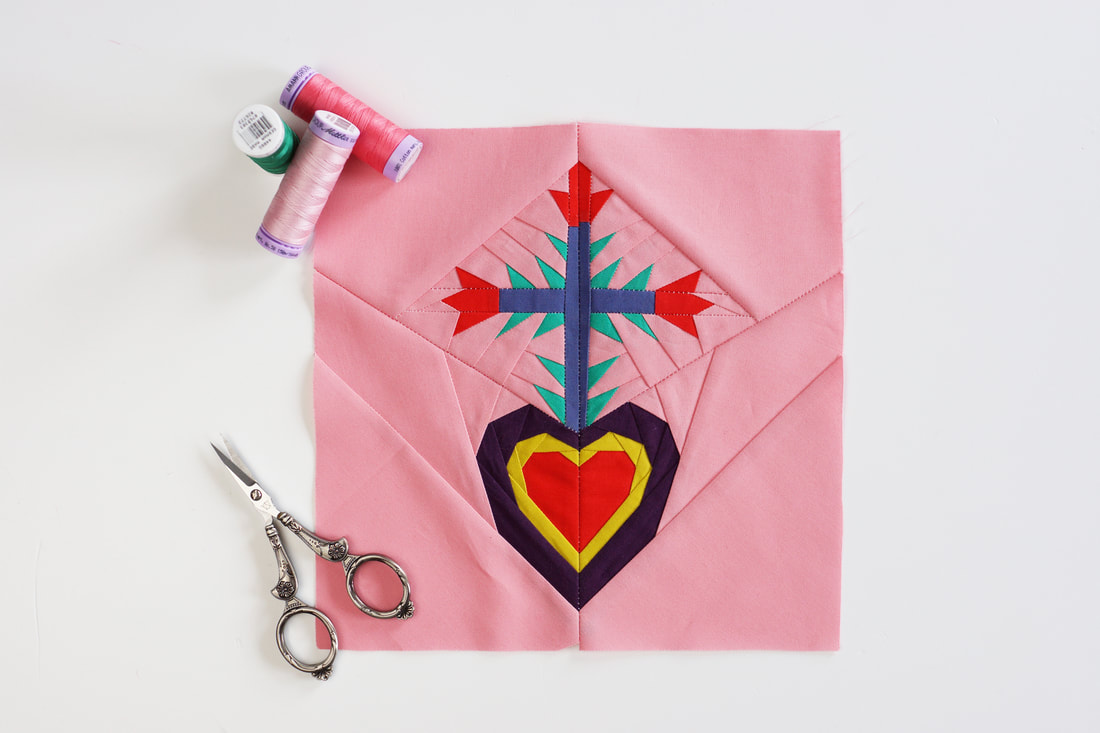 sacred heart with cross quilt block pattern Altars Built in private homes and cemeteries the altar is the centerpiece of the celebration. These aren't altars for worshipping the way we know altars, they're meant to welcome spirits back to the living. Therefore they're loaded with offerings, water and food for hunger and thirst after the long journey, family photos and a candle for each dead relative. The sacred mexican heart is one of the most common motifs in religious folk art created in Mexico. The idea is that the physical heart of Jesus is a symbol of his devine love for humanity. The Mexican sacred heart comes in various forms. It comes with flames around it, with a crown and sometimes with a crown of thorns. They and all represent the same thing, Jesus' compassion for humanity. And of course, you know that almost everyone in Mexico is Catholic so these images are commonly seen throughout the country. Again you can see the blend of pre-Hispanic tradition and Christian beliefs. 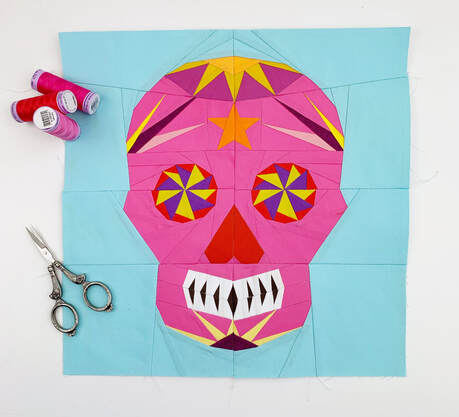 Sugar Skull quilt block pattern Calaveras/ Sugar Skulls Skulls go all the way back to pre-historic times, where the skull was a predominant figure in Mesoamerican ( todays central America )societies and cultures. These civilizations believed in a spiritual life after death so the skulls were offerings to the god of the underworld, Mictlantecuhtli -don't ask me how to pronounce this :-)-. He would then assure a safe passage into the underworld whee he ruled. With the arrival of the Spanish conquerors and Christianity, these traditions were lost in it's original form, and yet a part of them was kept alive by maintaining the figure of the skull in a sweet confection that can be placed on altars as part of the offerings to the deceased. Calavera means 'skull'. During the late 18th and early 19th centuries, calavera was used to describe short, humorous poems, which were often sarcastic tombstones epitaphs published in newspapers that made fun of the living. These were called literary calaveras. In the early 20th century, Mexican political cartoonist and lithographer José G. Posada created an etching to go with his literary calavera. Posada dressed his personification of death in fancy French clothes. In 1947 artist Diego Rivera ( Fried Kahlos husband) featured Posada’s stylized skeleton in his masterpiece mural “Dream of a Sunday Afternoon in Alameda Park.” Posada’s skeletal bust was dressed in a large feminine hat, and Rivera made his female and named her Catrina, slang for “the rich.” Today, the calavera Catrina, or elegant skull, is the Day of the Dead’s most prominent symbol.  a Frida Kahlo inspired quilt block pattern Frida Kahlo Who do we all associate with Mexico? Exactly, Frida Kahlo... the great mexican painter or better yet great Mexican artist. She's known for her many portraits and self-portraits. Her paintings often have strong autobiographical elements mixed with realism and fantasy. She was born in 1907 to a German father and a Mestizia Mother and spent most of her childhood and adult life in her family home in Coyoacan 'La Casa Azul' the blue house. Although the was disabled by polio as a young child Kahlo had been a great and promising student headed for medical school until she suffered a bus accident at the age of 18 which left her lifelong suffering and medical problems. In 1927 she met Mexican artist Diego Rivera, whom she married in 1929 and spent the next 20 years painting and travelling in Mexico and the United States together. Throughout the 1940s, Kahlo participated in many exhibitions in Mexico and the United States and worked as an art teacher. Her always fragile health began to decline in the late 1940s. She had her first solo exhibition in Mexico in 1953 shortly before her death in 1954 at the age of only 47. So what better way than to combine the two .... Dia de los Muertos and a Frida Kahlo inspired quilt block pattern .... in a stunning quilt, that features not only the bright colors of Mexico but also Frida and all the amazing Mexican symbols..... I am still working on mine, it might take a little while until I'm all finished, so stay tuned on news of this fun project..... Let me know what you would make with these patterns? I can't wait to see all of your fantastic creations. I made several sacred heart quilt blocks with Riley Blake Designs new fabric line Eleanor, its absolutely perfect for these patterns. Ingrid xx This is still very unreal for me, my first book. ADORABLE ANIMAL QUILTING a very fitting title for this fun quilting book. I was approached by Page Street Publishing last spring. Caitlin Dow and Sarah Monroe, my editors, had seen my Instagram account and fell in love with my animal quilt blocks. So they sent me an e-mail asking me whether I would be interested in publishing a book. I read the e-mail, but did not take it seriously. My insecurities got the better of me, and thoughts like: me a book, no way.... they probably just want to sell something... it would be cool, but I am not good enough for a book... entered my mind, and so I didn't answer the e-mail and forgot about it. But Caitlin was persistent and inquired again two weeks later, and suggested that we have a conference call to discuss details. I was still hesitant because I did not know what to expect, but my first phonecall with Page Street Publishing was absolutly fun and to make a long story short.... I signed my first book deal a few weeks later. We agreed on 20 patterns for the book, so I went ahead and spent last summer drawing, designing and sewing my adorable animal quilt blocks. I needed to get the patterns tested , so I asked my pattern testers if they would be willing to help, and they were all absolutely fantastic and super excited to be part of this. Thanx you guys for all your support and great work. My son, Jonas took all the photos in the book, I am so proud of the work he did. It was not always easy to work with me, I am a virgo after all, and I drove him crazy at times. But I think the result is fantastic and I want to say a huge THANK YOU JONAS for your patience with me. My editor Caitlin and Sarah were fantastic to work with as well as the rest of the Page Street team, thank you so much you guys for making a dream come true. So here it is, let me take you on a journey around the world with these adorable animal quilt blocks. Check out the pre-order links here on my website.... and best yet, you'll get Hilda the hippo pattern for free with each pre-order of the book. 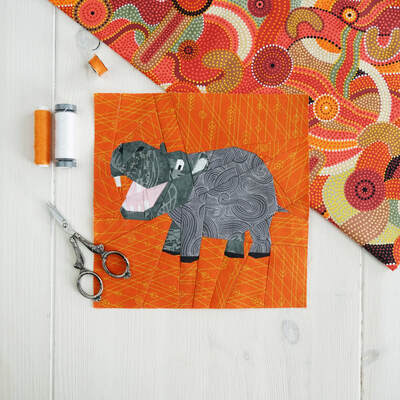 Hilda the hippo quilt block August 18th can't come soon enough.
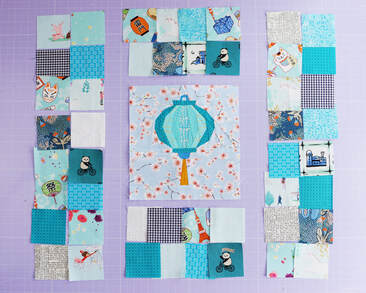
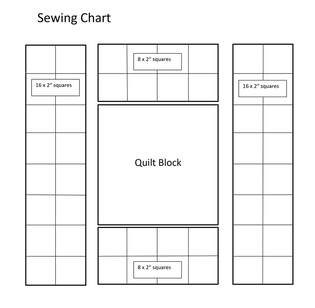
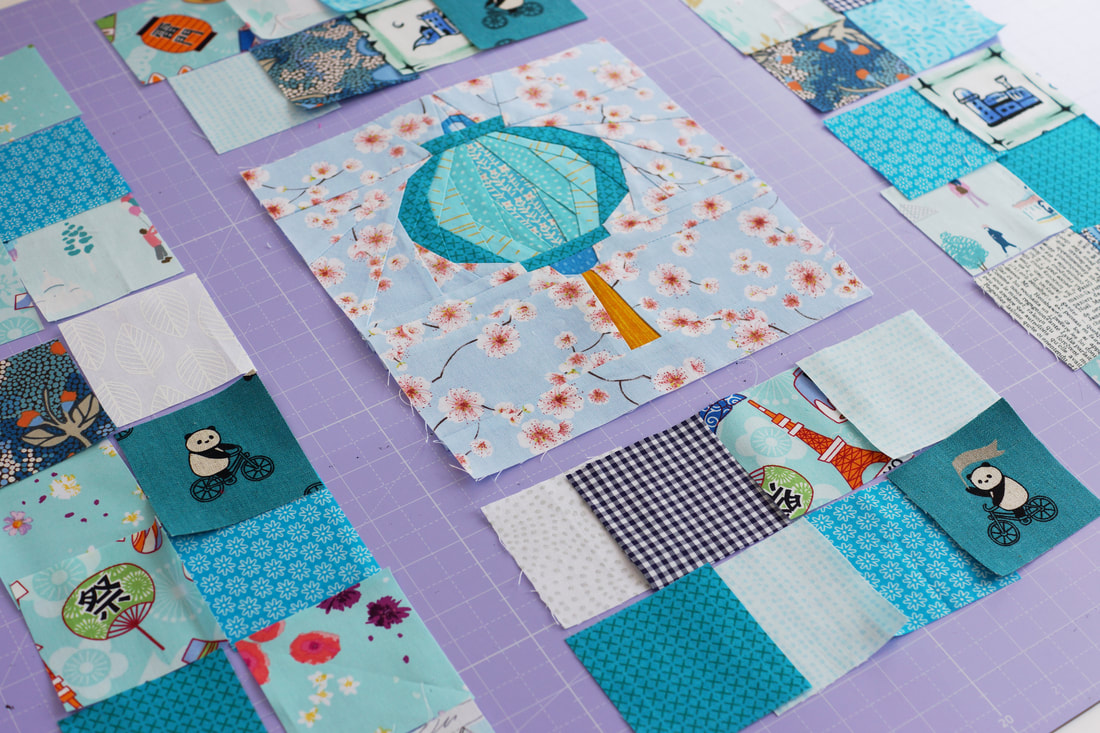
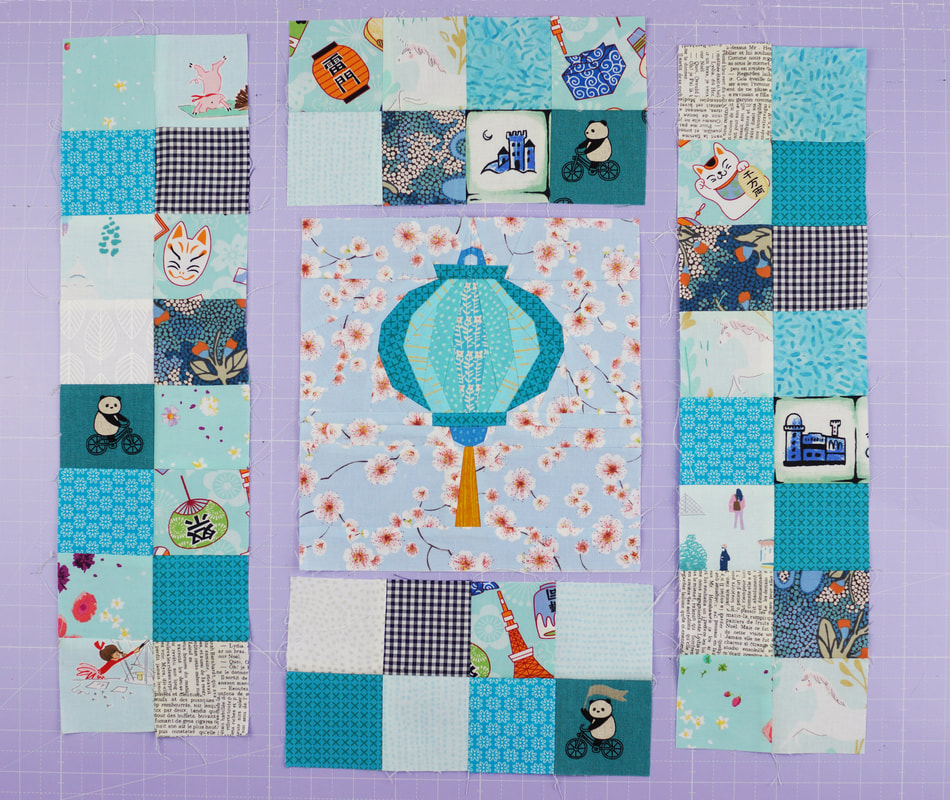
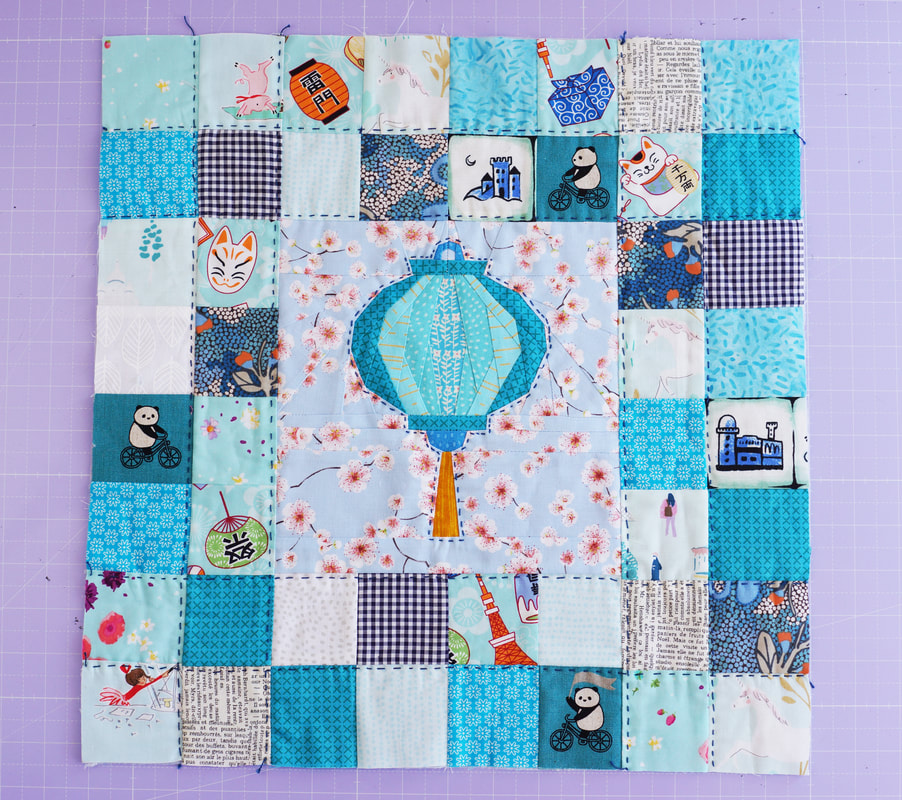
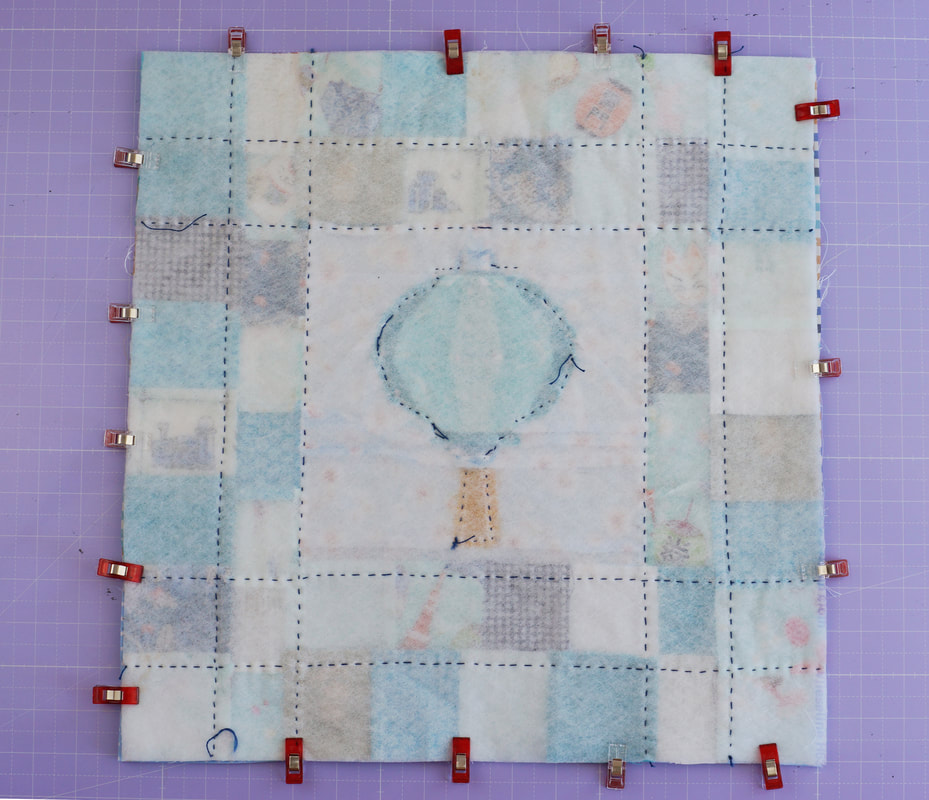
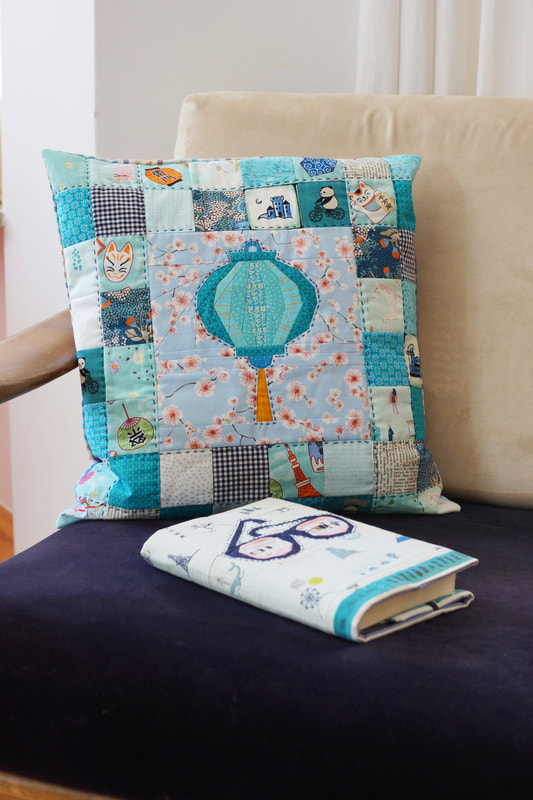
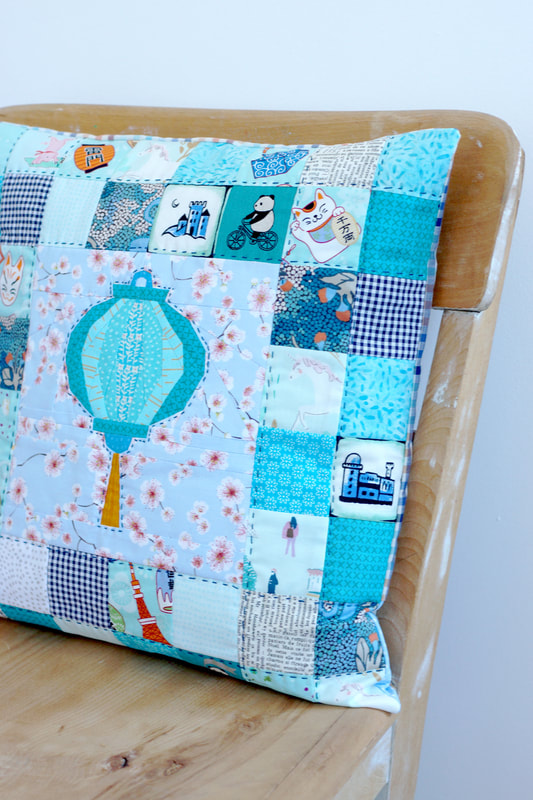
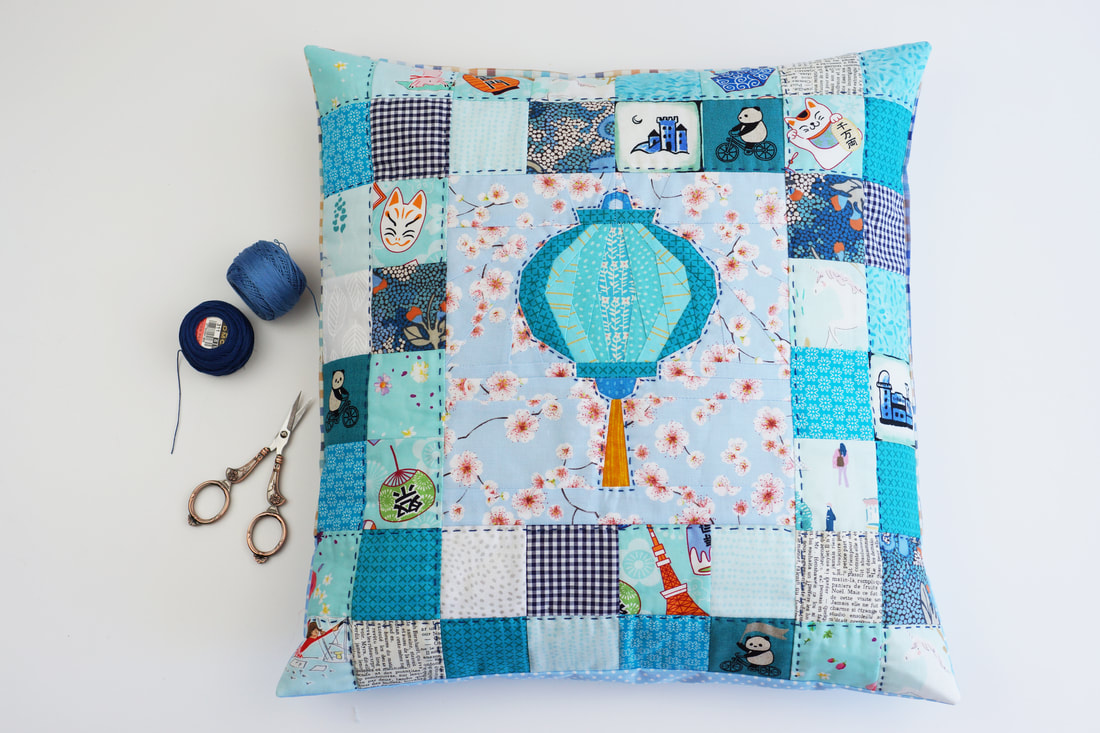
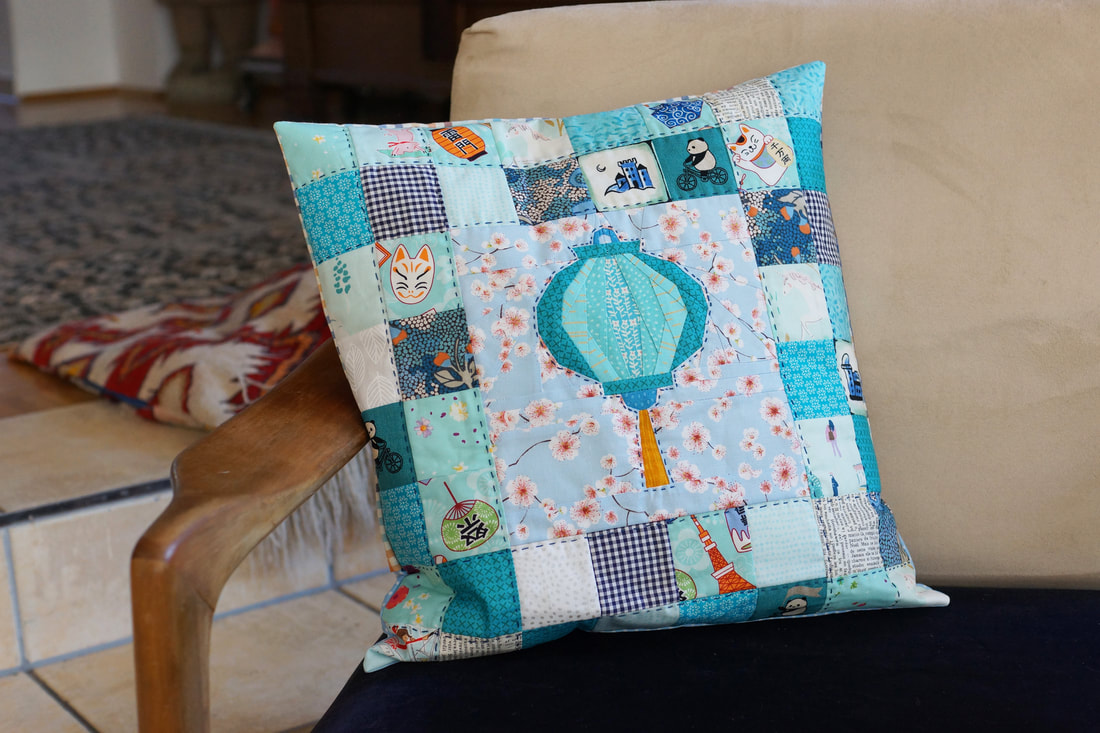
I can't wait to see all your makes.... use #adorableanimalquilting so I can find your makes on social media..... Happy sewing Ingrid x Pillowcases are easy and fun, and the perfect way to redecorate your home without having to invest a lot of money. Everybody that knows me personally, has seen, that I am a tiny bit of a color freak and also like to rearrange and redecorate things in my home. Especially seasonal changes, from spring to summer, fall and winter/ christmas. My patio and garden get a makeover every year. I love different 'looks' and love to play with fabrics and colors. 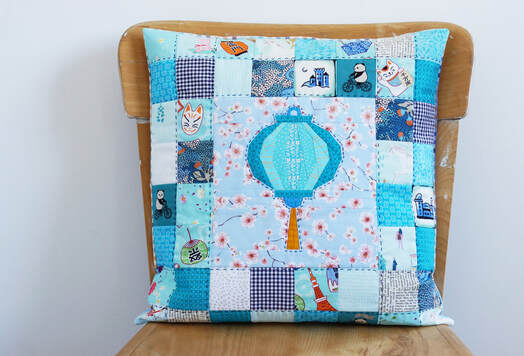 stunning quilted pillowcase I designed my Chinese Lunar New Year pattern series back in January but I think this series works all year around. Especially the lantern patterns are perfect for any patio decor. These are extremly easy and quick to make. And yes, the paper lantern pattern is easy to follow as well. Materials needed: - a 8" x 8" quilt block , paper lantern or any other ( 8 1/2" unfinished) - 48 2 1/2" squares ( the squares you cut will be 2 1/2" so they are 2" finished) - two pieces of fabric for the back 13" x 17" - low volume fusable batting 17" x 17" - thread and needle for handquilting if you decide to do that. Seam allowances are 1/4" unless mentioned otherwise. 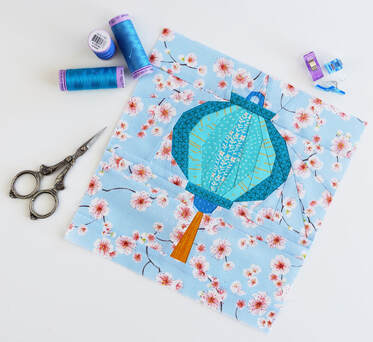 This is the quilt block that I will use for this pillowcase it's the 8" x 8" version of the balloon paper lantern pattern.
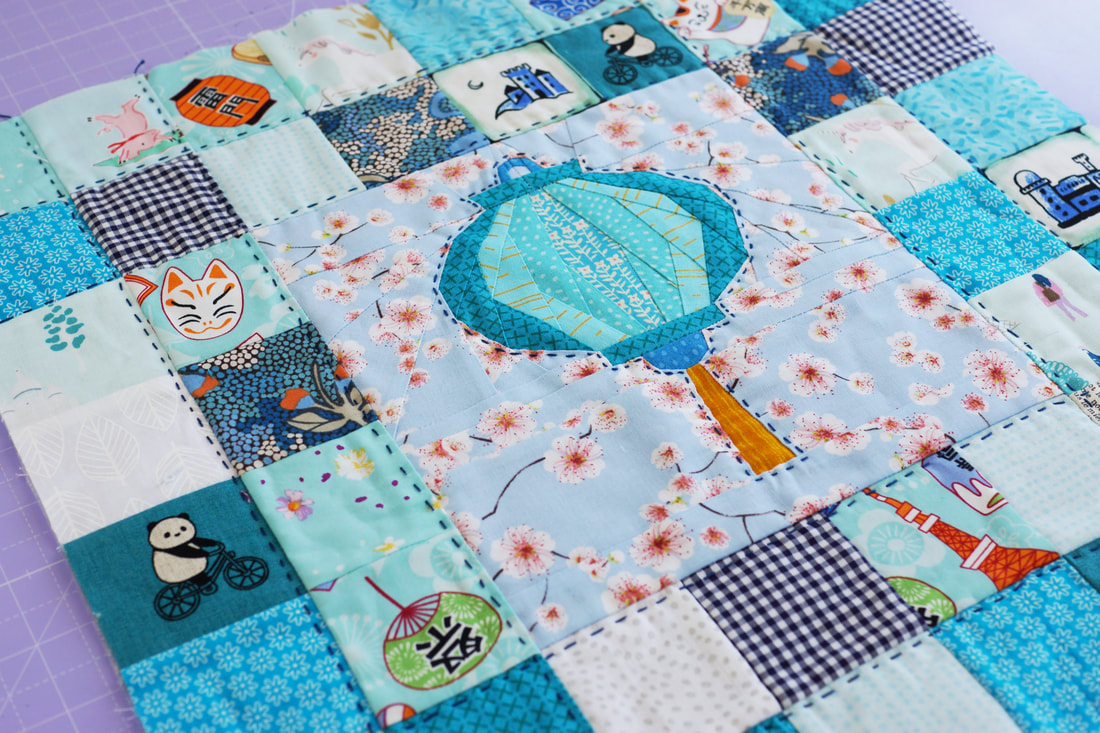
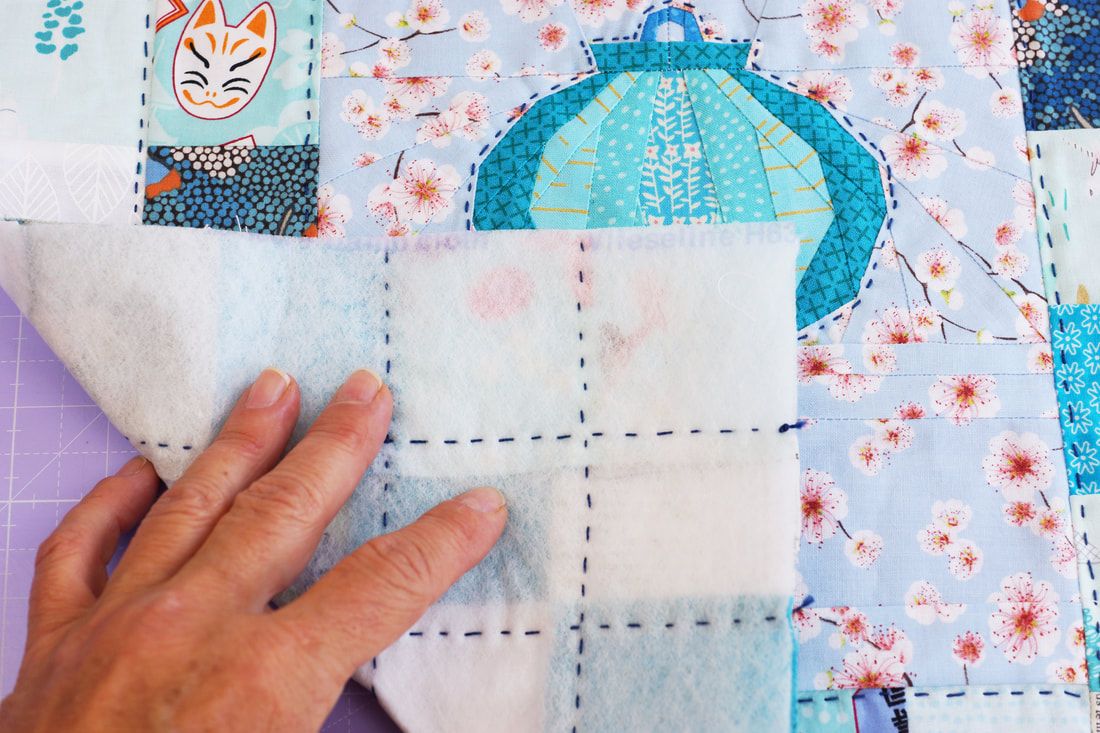
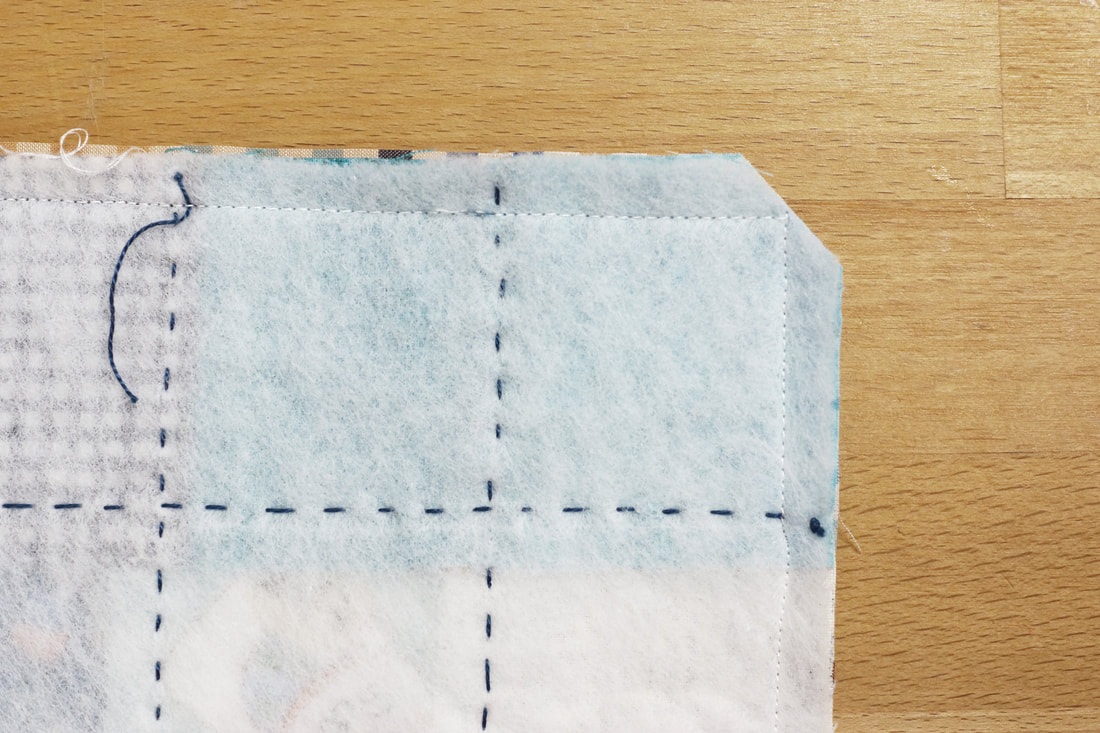
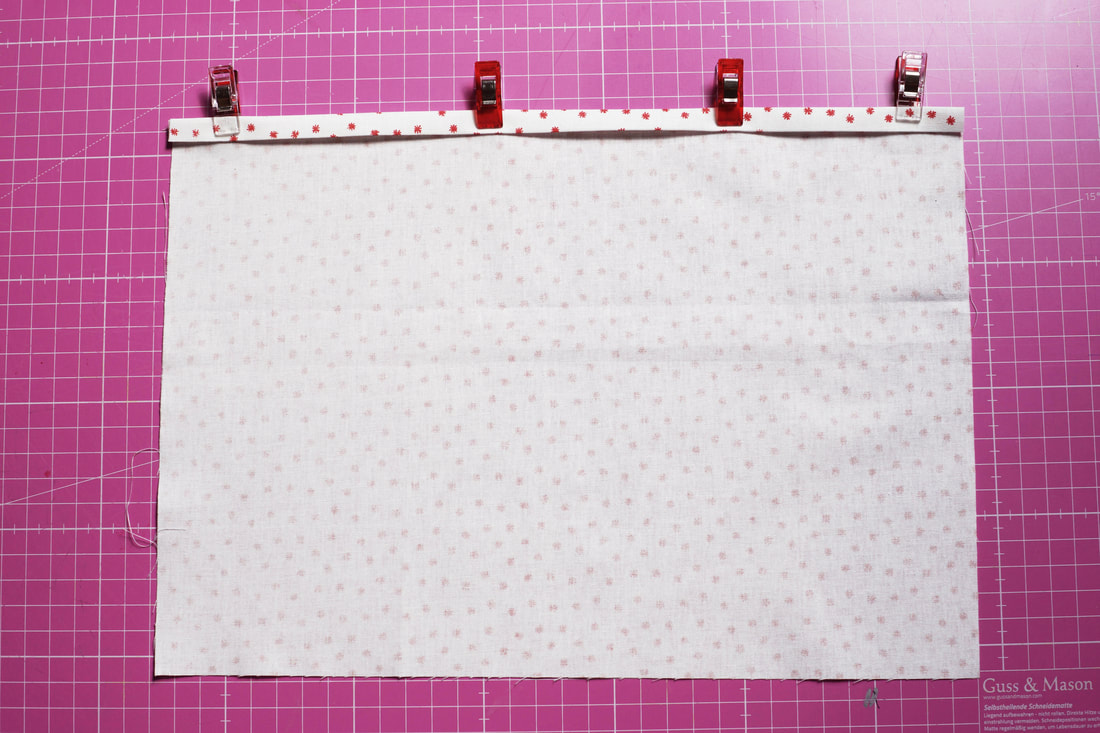
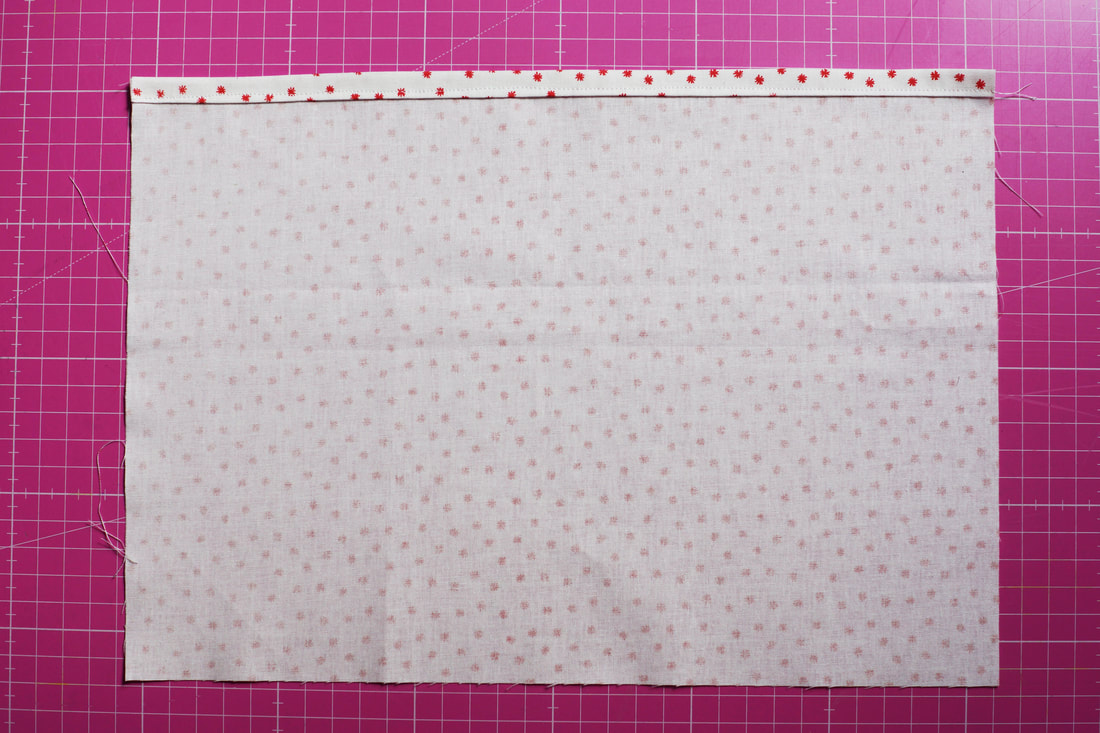
1> Place your squares around your quilt block the way you feel they will look good ( photo 1) This is a fab way to use up your fabric scraps and do some cute fussy cutting. Then sew together those squares. 2> I usually sew them into strips first and then join the strips.( photo 2 ) 3> Your can either seperate your seam allowances and press them each seperatly, or press the seam allowances in opposite directions before joining your fabric square strips. This is really easy and quick. (photo 3) You press one strip in one direction and the other in the opposite direction, this will help with nesting your seams and having accurate corners and matching points. 4> Nesting your seams is the easyest way to get accurate matching seams. if you pressed your seam allowances into opposite directions, this is quite easy. The seams sort of fit together automatically ( photo 4) 5> Sew the fabric strips together into four blocks . 16 x 2" squares sewn into two blocks to the left and to the right of the FPP quilt block. And 8 x 2" squares sewn into two blocks to the top and bottom of the paper lantern quilt block. 6> Join the 2" squares blocks with the foundation paper piecing quilt block. First attach the top and bottom 8 x 2" blocks to the paper lantern quilt block . Then you add the side panels of 16 x 2" squares to either side of the FPP quilt block. Press the seam allowances and iron on the fusable batting. Now is the perfect time to do some hand quilting if you want. You could also quilt some straight lines with your sewing machine, or machine quilt the entire pillowcase top. This is how I hand quilted this top, some 'straightish' lines and just one line of stitching around the paper lantern. 7> To make the back of the pillow, place one of the 13"x 17" fabric rectangles wrong side up, fold over the long edge ½” twice, press, clip and stitch in place. Repeat this to make the second one. Align the backing pieces, right sides up and raw edges aligned. The hemmed edges should overlap aprox 6". Trim to 16 1/2 " x 16 1/2" same size as pillowcase top. Clip the backing in place and machine baste ⅛″ from the edge on both sides. Have I mentioned, I like to recycle fabric? There are soo many beautiful fabrics out there and they do not belong in the garbage. Especially cotton woven fabrics such as shirts, sheets, douvet covers etc. My husband used to work in the fashion industry as well and still has tons of awesome shirts that are of great quality, so I use them as backings or linings for all sorts of sewing projects. ( here as well) 8> To finish the pillowcase place front and back right sides together and stitch these two together along the outer edges. Cut off the corners as shown in Photo 3 at a 45° angle. this gives you nice and crisp corners for your pillow. Turn inside out and VOILA..... Here it is all done and pretty :-)
What do you think? Especially pretty with the quilted book cover right?
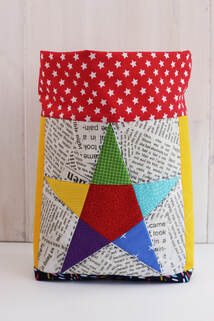
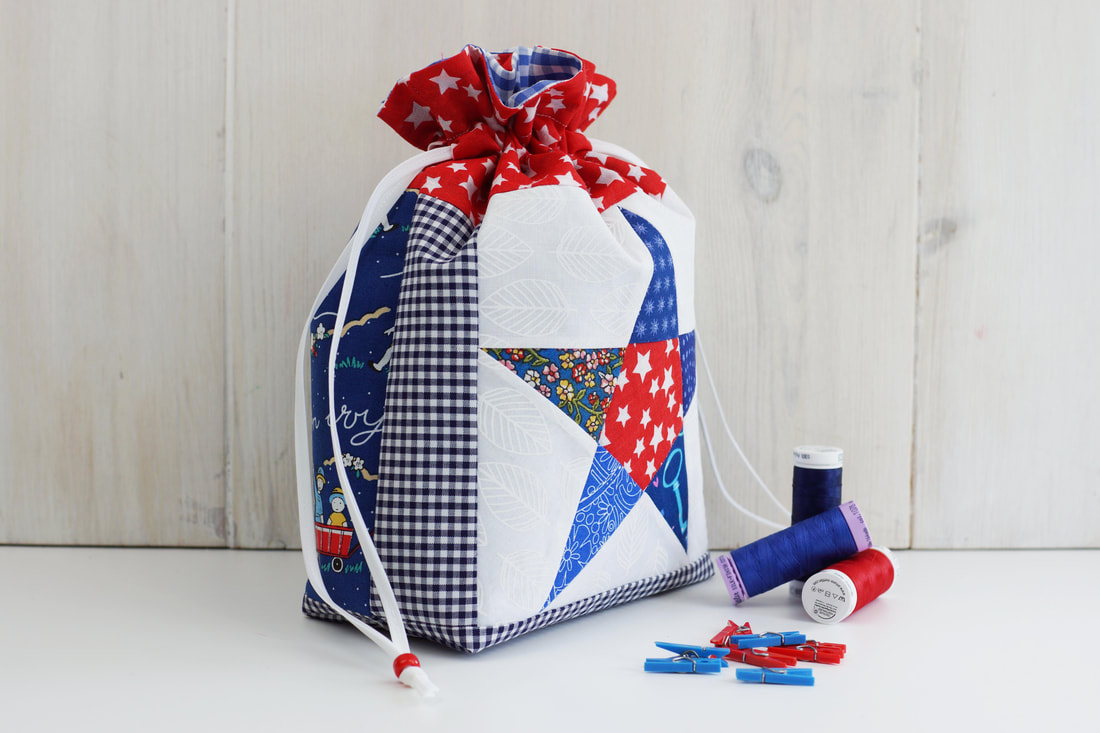
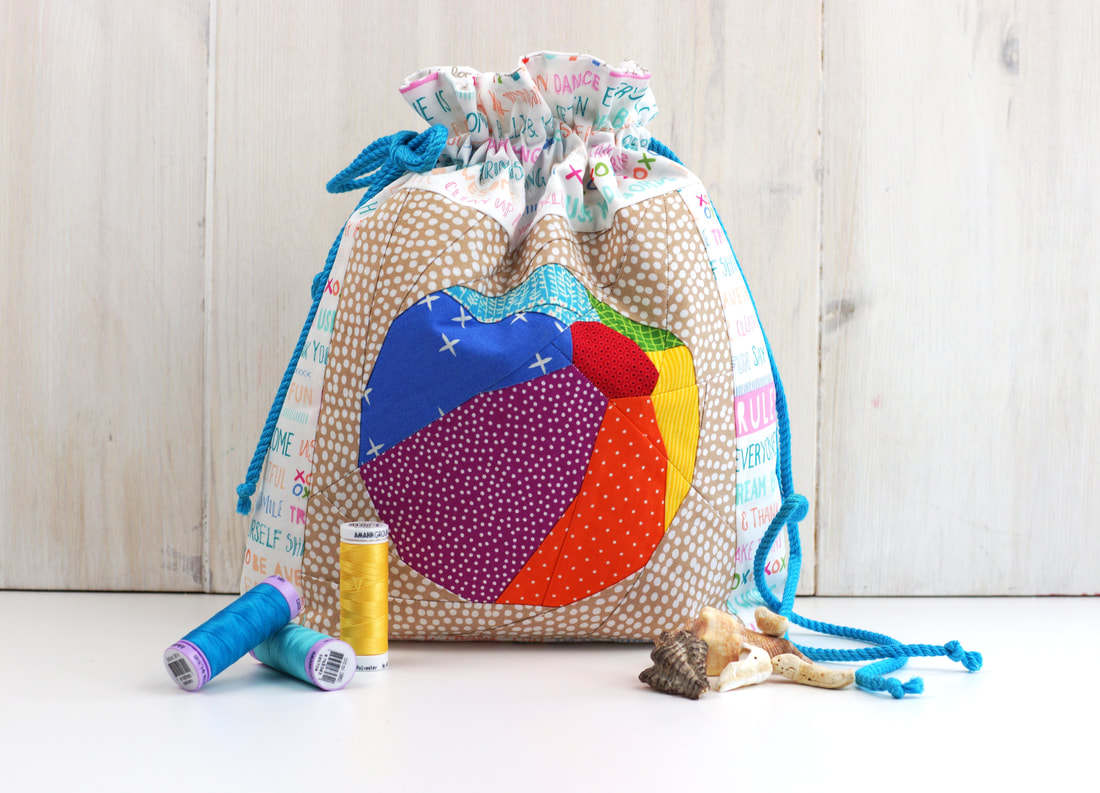
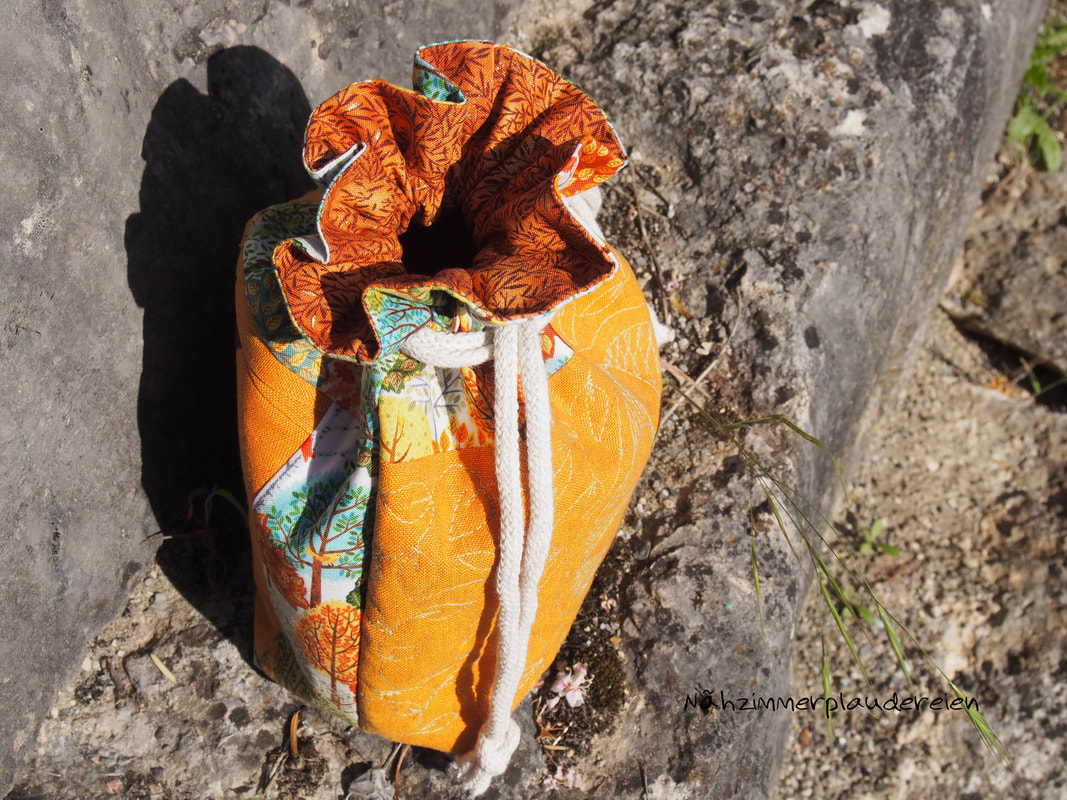
How to easily sew a simple, quilted drawstring bag with a paper pieced quilt block?
And there's a bonus: it's lined and with inside pockets. 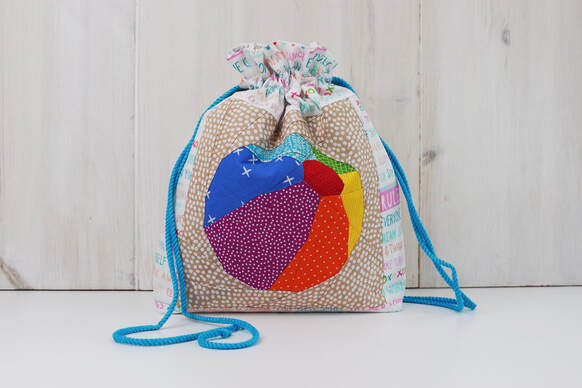
beachy summer drawstring bag
I mean seriously is there such a thing as too many drawstring bags?
I am sure we all agree ............ ABSOLUTLY NOT :-) You can use them for everything and everywhere. Use them for gifts or as storage, as a cute little decor, you name it. So let me show you how to sew a drawstring bag with any one of my quilt block patterns. 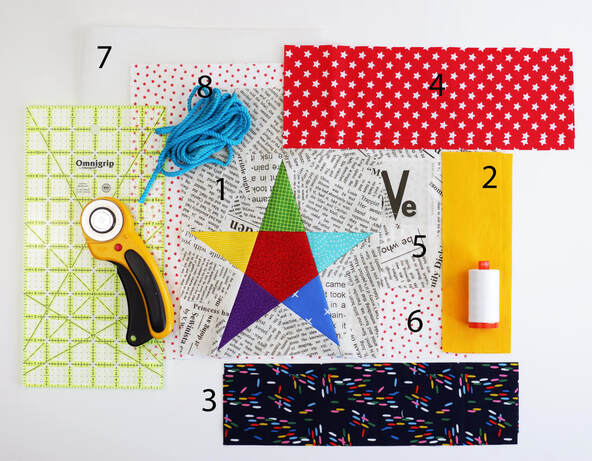
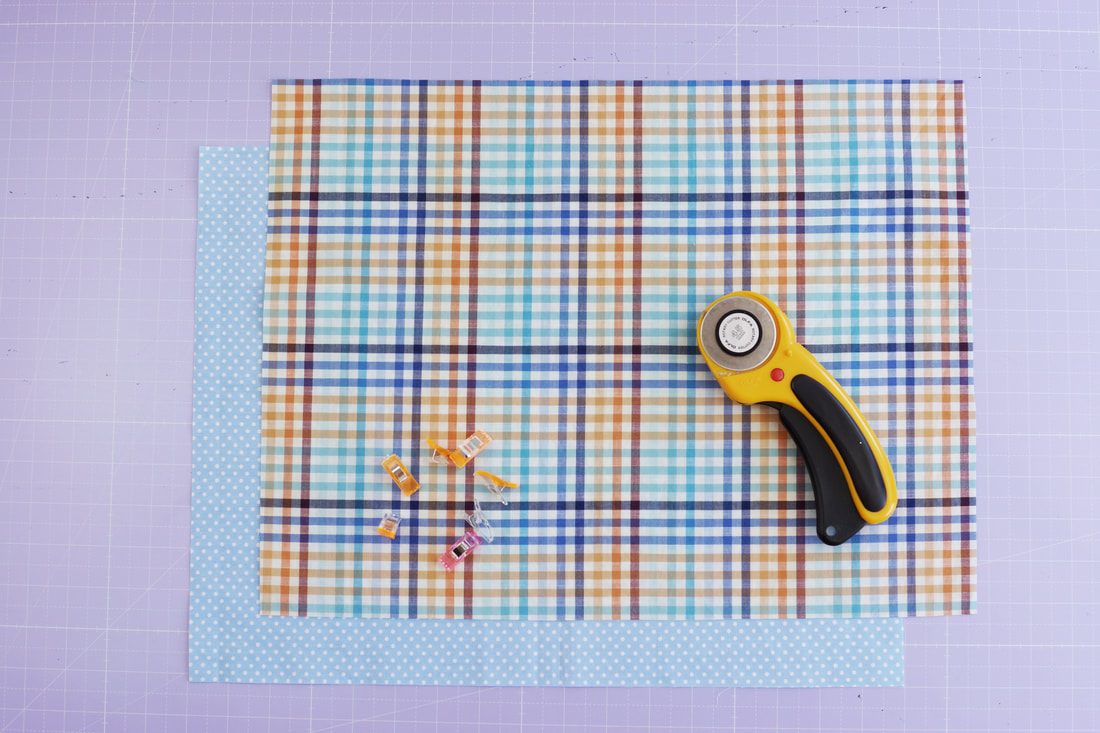
Fabrics and materials for a drawstring bag
Finished bag size : 9.5" wide, 11" high and 4" deep at the bottom
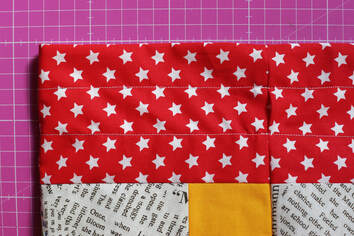
(Size small if you’re using a 6"x 6" quilt block: 7" wide, 8" high and 3" deep at bottom) Fabric/ Materials needed: (all measurements are width x height) > 1 1 FPP quilt block 8.5" x 8.5" (beach ball) (6.5"x 6.5") > 2 2 strips of fabric on each side of the FPP block 2.5"x 8.5" (2 1/4"x 6.5") > 3 2 strips of fabric for bottom panel 12.5"x 3" (10"x 2.5") > 4 2 strips of fabric for top panel 12.5"x 4"(10"x 4") > 5. 1 piece of fabric for back 12.5"x 8.5" (10"x6.5") > 6 2 pieces of fabric for lining 12.5"x 14.5" (10"x11.5") > 7 Fusible interfacing 1 piece 12.5"x 22" (10"x 17") > 8 2 pieces of rope, ½" twill, or ½" fabric tie (I used blue rope) 40" each. (30") > Optional: Inside pocket 1 piece of fabric 12.5"x 10" (10"x 7.5") Before you start: Read through the instructions, thats always best so you get a feel of the sewing beforehand. Seam allowance is always ¼" unless mentioned otherwise. One more note: The quilt block sizes are 8"x 8" ( 6"x 6") finished, they are 8.5"x 8.5" ( 6.5"x 6.5") unfinished. 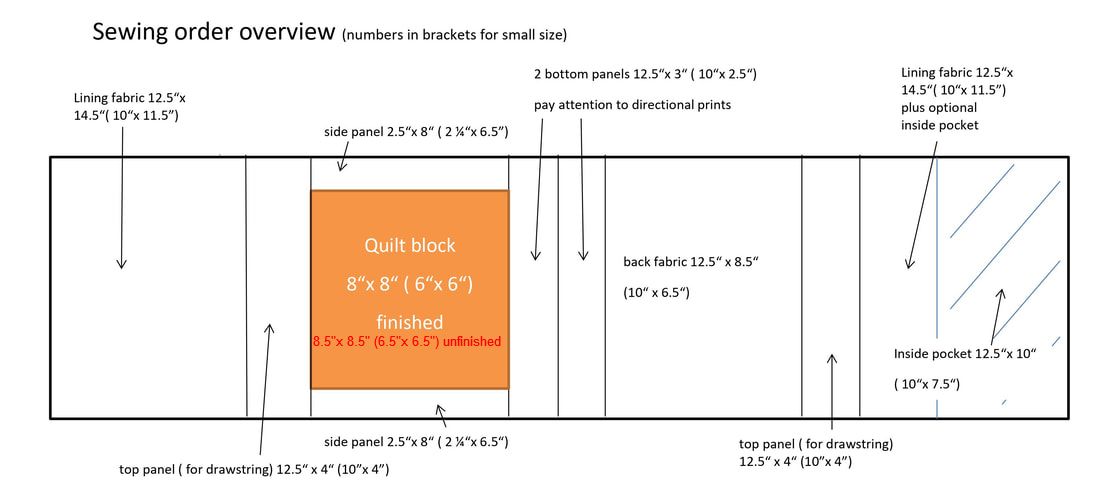
INSTRUCTIONS:
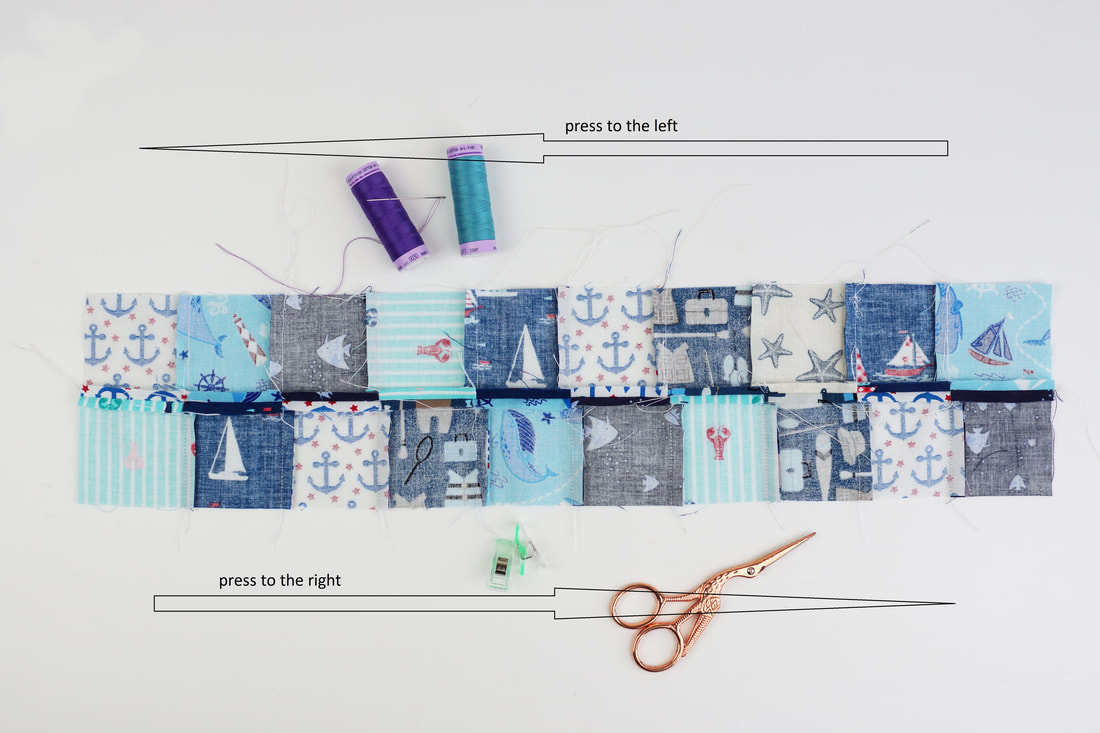
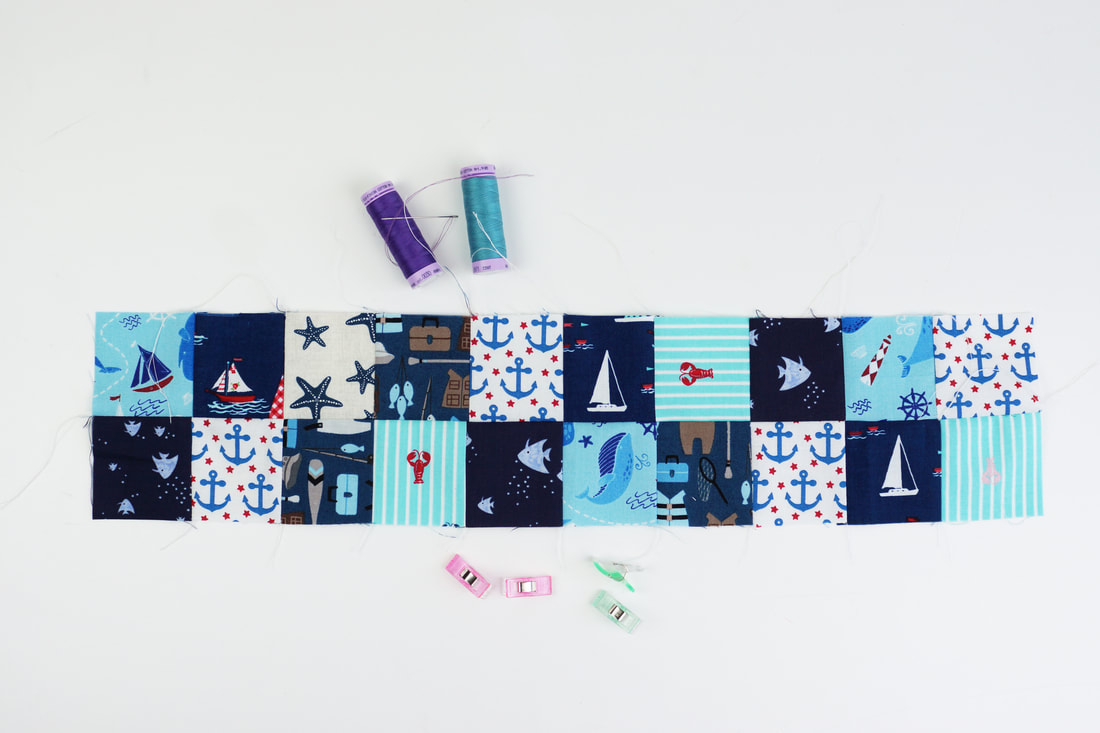
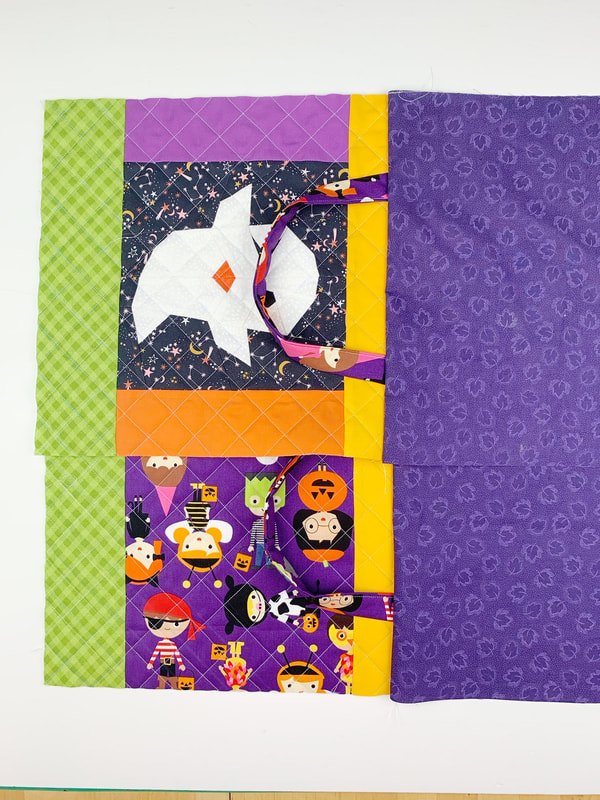
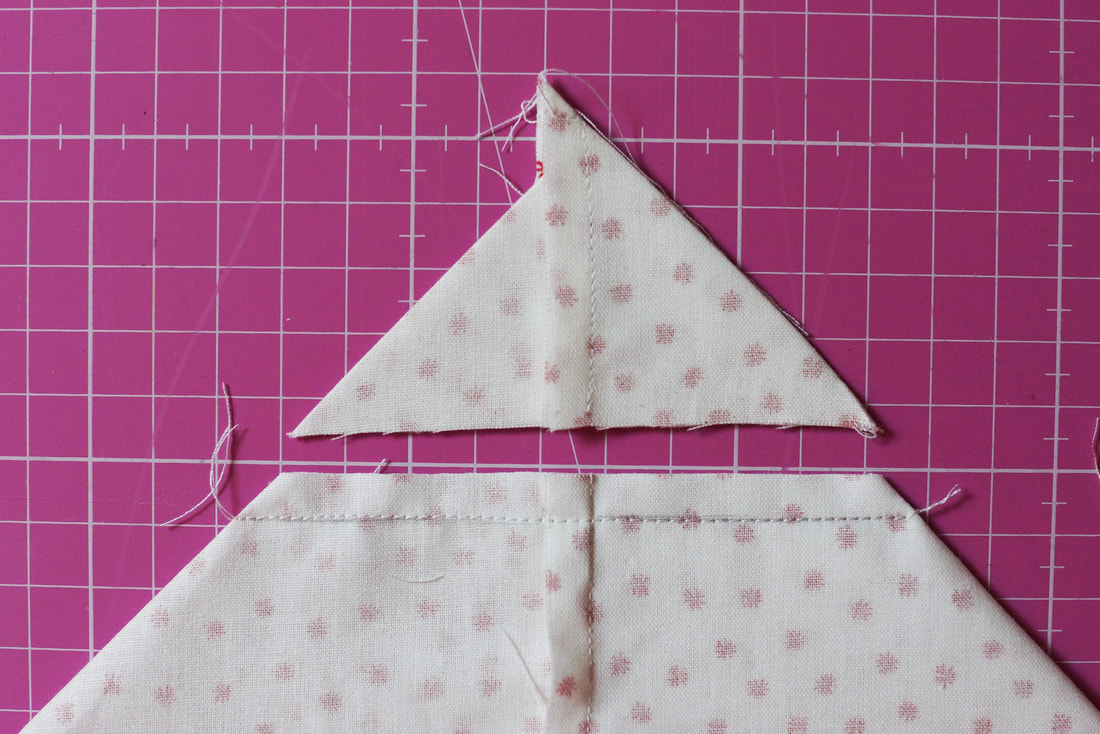
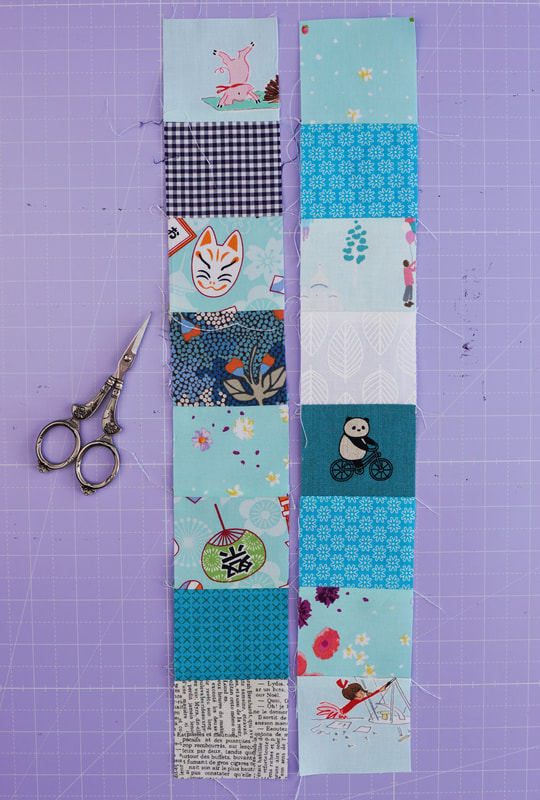
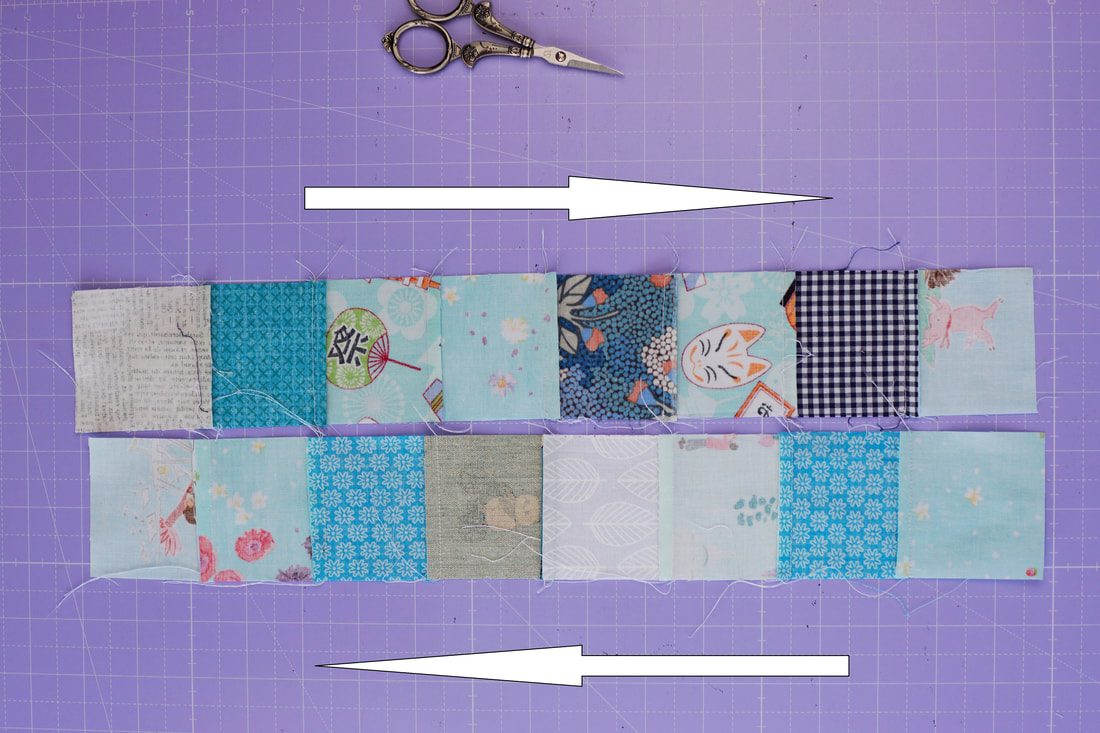
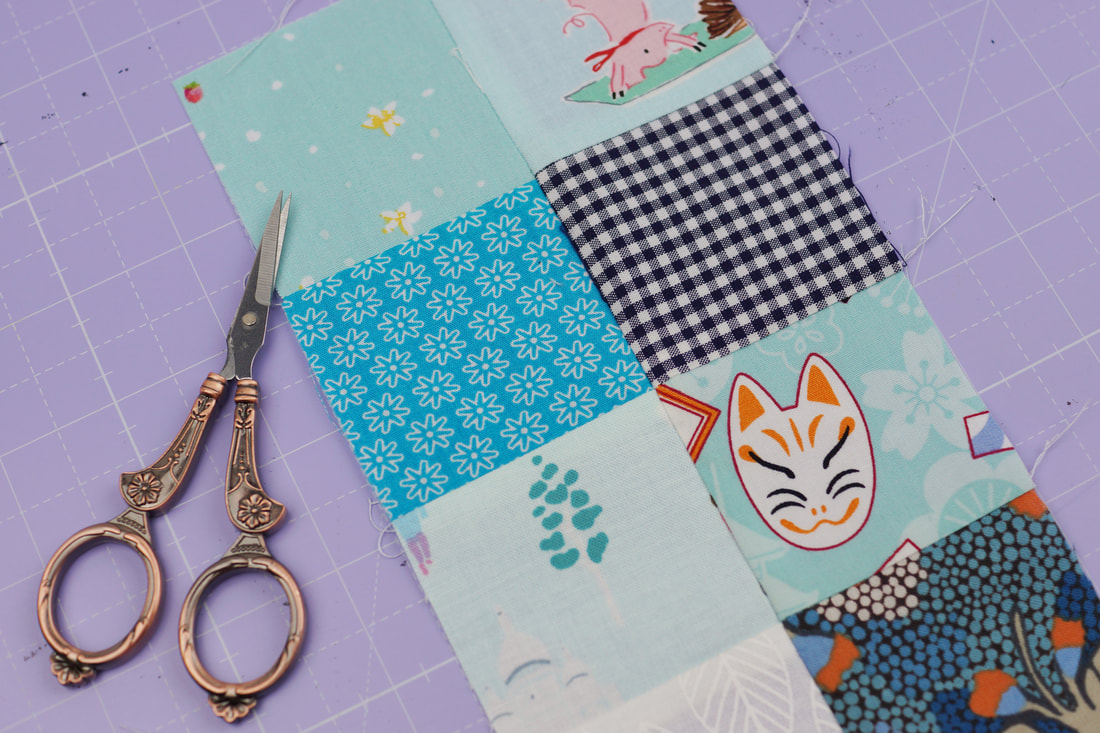
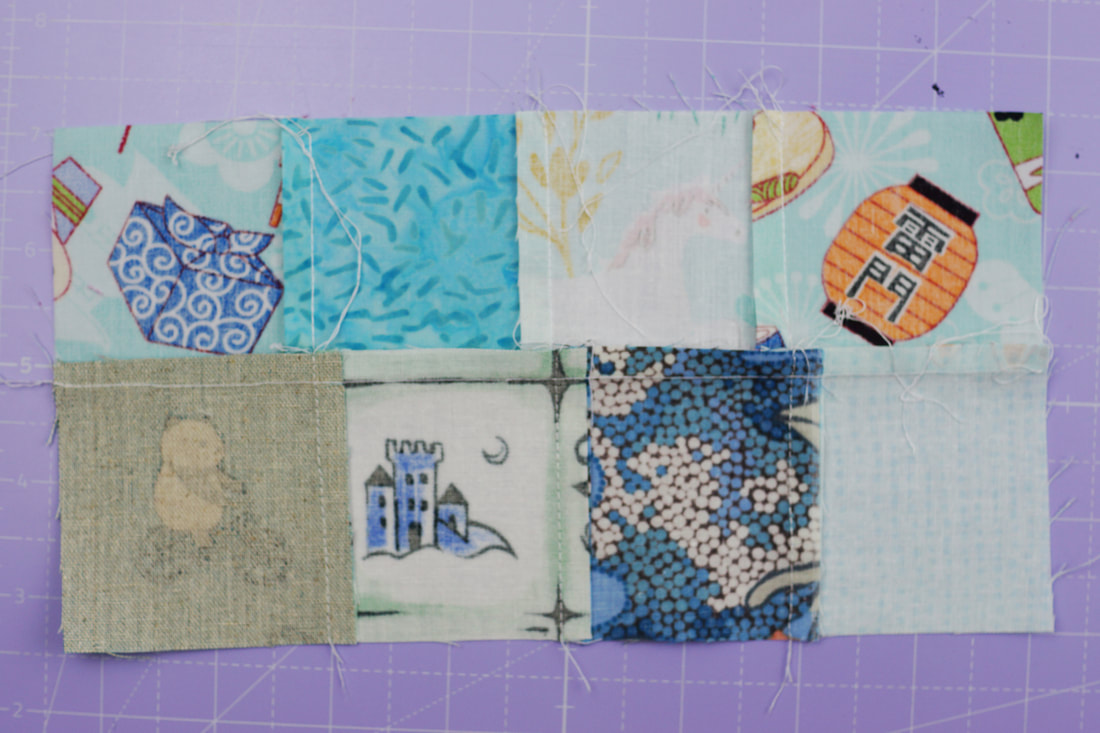
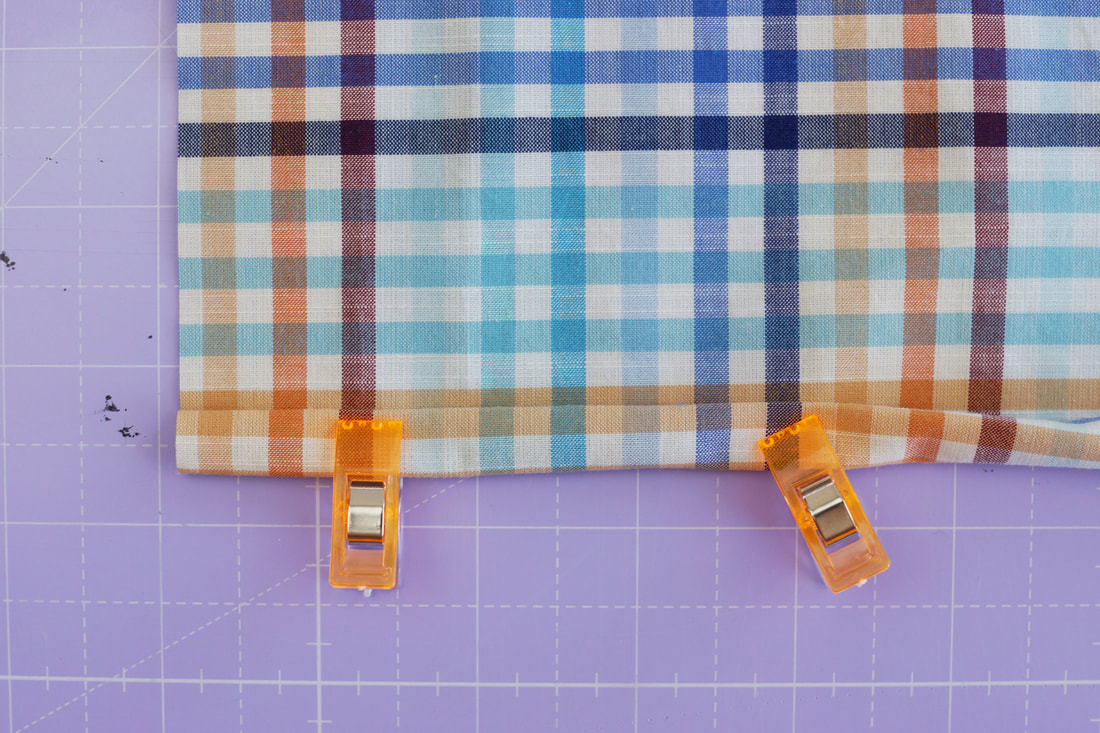
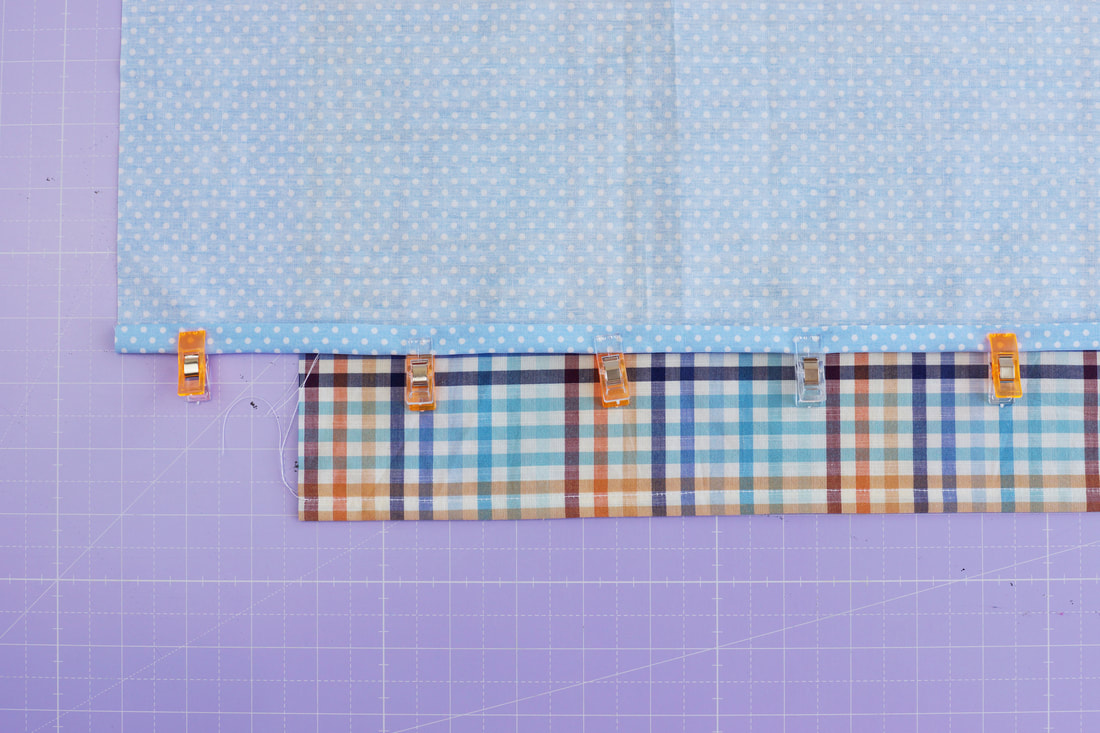
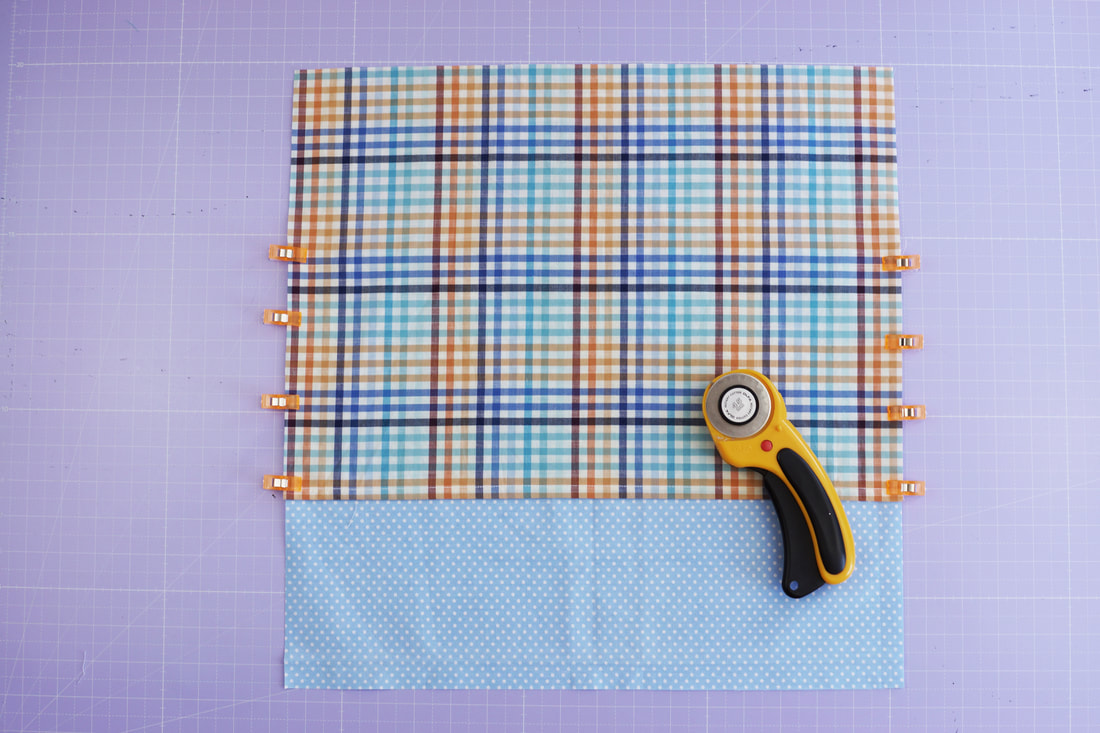
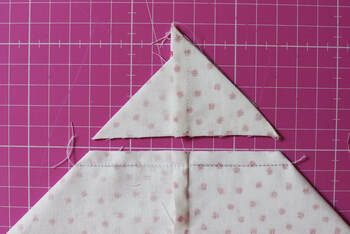
1. Lay out your pieces of fabric as shown in the chart above, and sew them together into one long piece. Start with sewing the two side strips (2.5"x 8.5") to the quilt block, then add the other pieces of fabric in the order above. Order from left to right: Lining, top panel, quilt block with 2 side panels, bottom panel, bottom panel, back (exterior), top panel and finally lining again. Press seam allowances open. 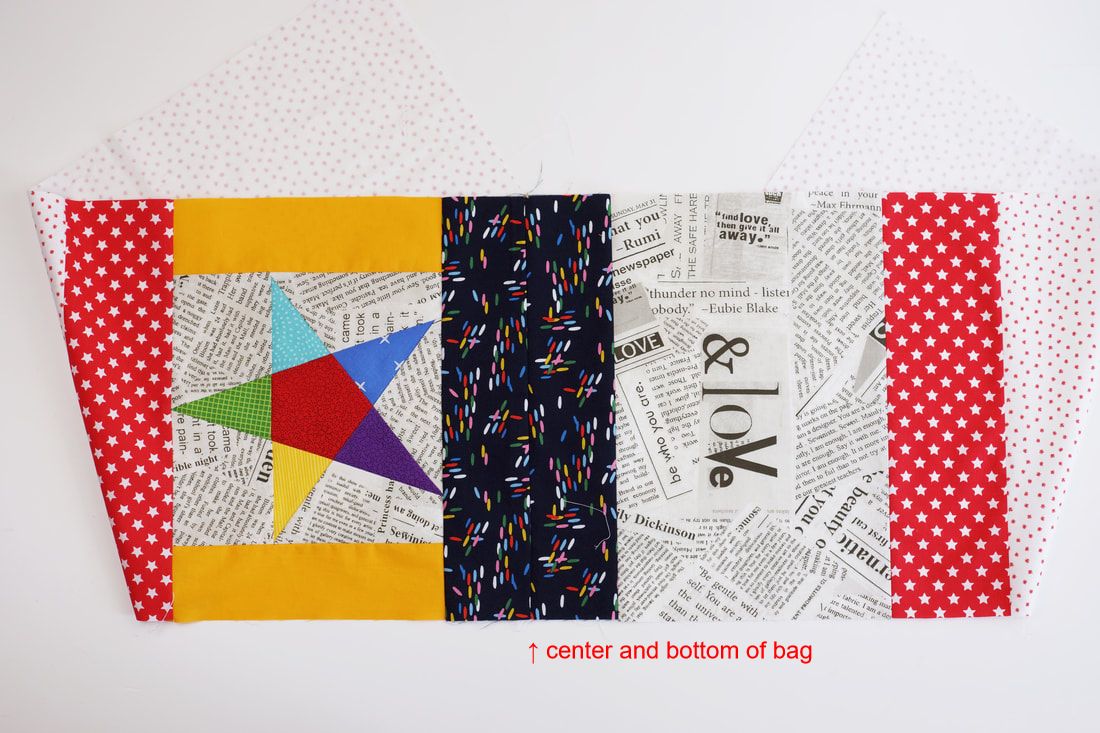
all the pieces sewn into one long strip of fabric
Here you see the whole long piece sewn together.
(I folded the lining pieces under for the photo.) Make sure you place directional prints with the 'top' of the print facing towards the top of the bag ,towards the drawsting- and lining pieces. The bottom of the drawstring bag is at the center of the bottom panels. 
fusable interfacing ironed onto the outer fabric of the bag
Interfacing gives your bag more structure and stand.
Iron on the fusable interfacing. Use interfacing only on the exterior main pieces. If you’re using it on the 4" drawstring panel, your drawstring might get caught in the material and it will not let you tie your bag as nicely. I measured the interfacing a little bit generous, so trim it down to where the drawstring panel starts. 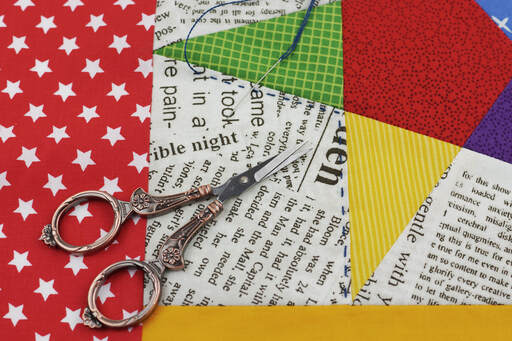
hand quilting the quilt block
Now you can quilt the front and/ or back outer fabric panel to your liking.
I would recommend to only quilt the paper pieced block and/ or the back fabric block. Not the bottom part or the drawstring panels. The bottom will have boxed corners anyways. And it’s best to leave the drawstring panel plain, as any stitching might interfere with the drawstring. I love hand quilting, so I decided to just stitch around the star. I will leave the back without Quilting, since the fabric with the letters is pretty busy as it is. But in general straight line machine quilting would look really nice on a less busy pattern. Plain lines, squares or diamonds always enhance solid fabrics.
If you’re adding an inside pocket fold over the 12.5" ( 10") side of the inside pocket
fabric ¾" twice and clip or pin in place. And sew along the clipped edge. 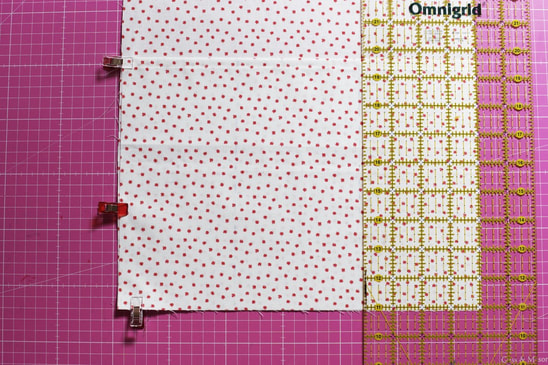
Place the pocket fabric panel onto the backside lining panel. Wrong side of pocket fabric
against right side of lining panel, matching the raw outside edges . Clip or pin in place. Draw two vertical lines 4"(3" for the small bag) from the outer edge with a water soluble pen or fabric marker. Then sew along those lines, backstitch at the beginning and at the end. These will be your three inside pockets. If you’d prefer two inside pockets, draw just one line in the middle and sew along that line. This gives you two inside pockets. 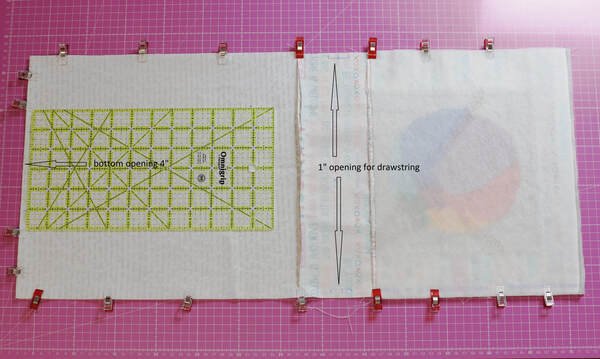
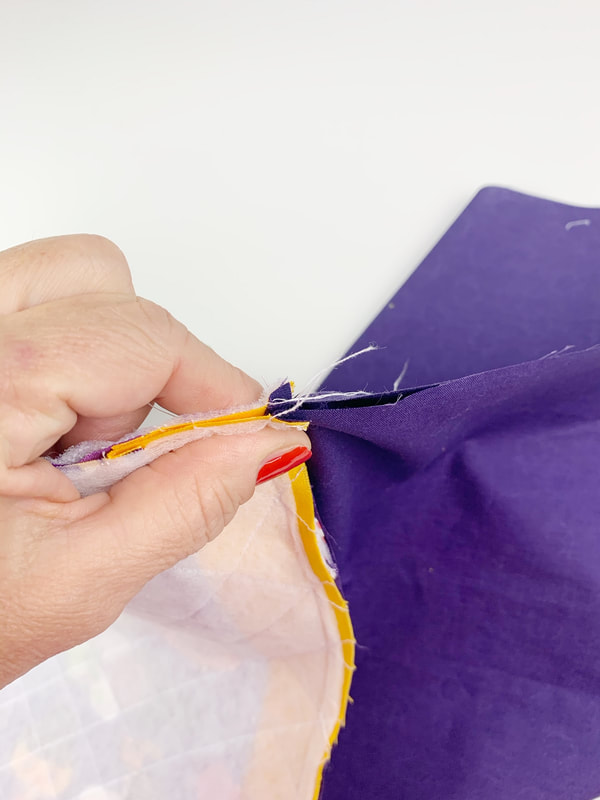
Fold your sewn strip in half, right sides together, matching the lining ends.
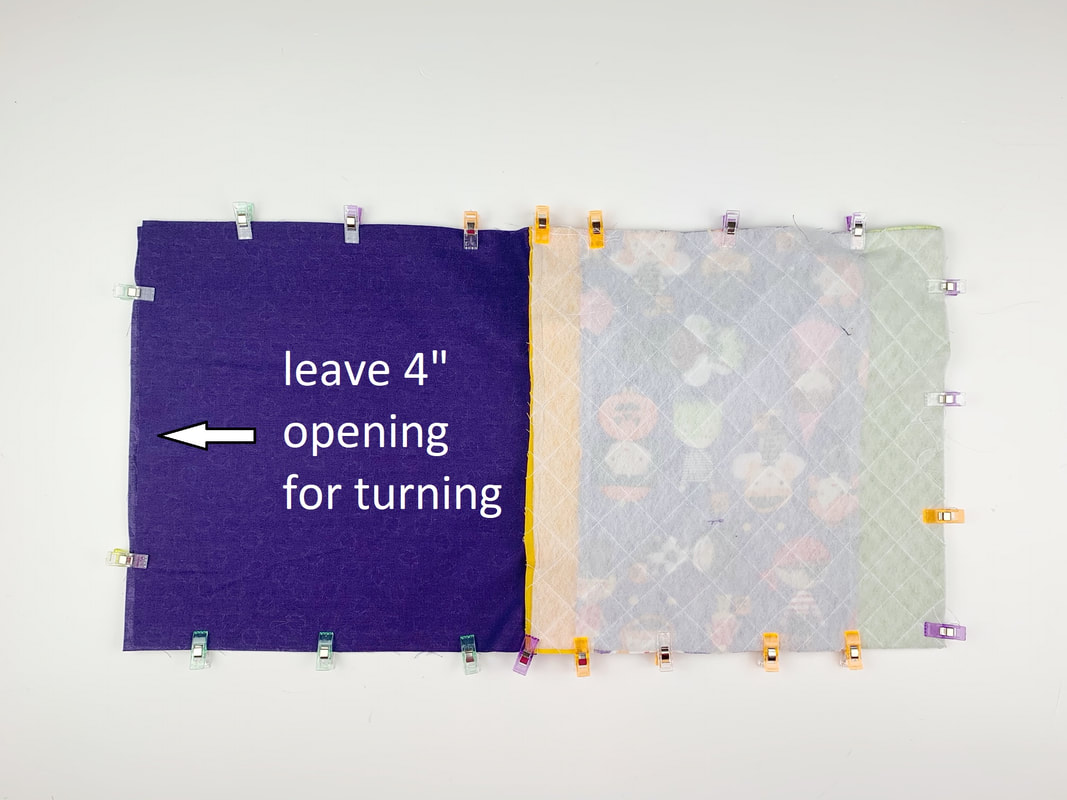
Clip or pin along the raw edges in place, matching up each seam and clipping or pinning the matched up seams. Leave a 4" space at the center of the bottom end of the lining, this is your opening for turning the bag later. 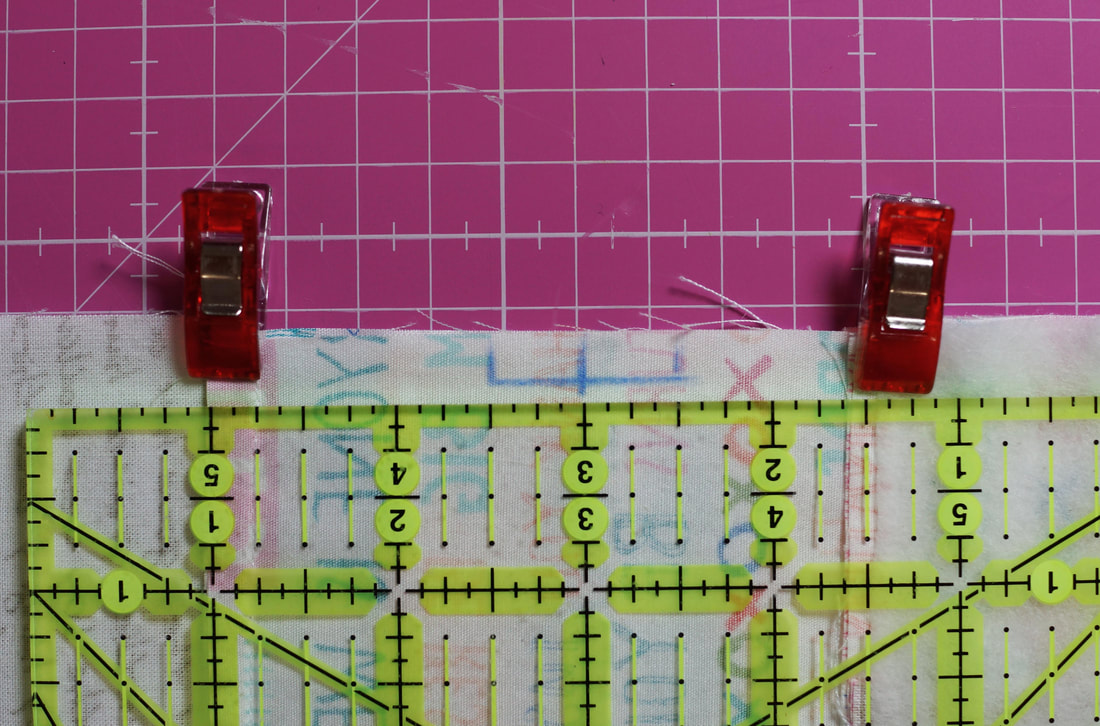
mark the center of the panel for the drawstring opening
On both sides, of the drawstring panel mark a 1" opening in the center of the panel.
First mark the center of the panel and then mark ½" to both sides. This gives you small 1" opening sections on both sides, these will be left unsewn, creating the opening for the drawstrings. Then sew along the three open sides. Do not sew between the 1" opening you marked on both sides or the drawstring panel or the 4" opening at the end of the lining pieces.
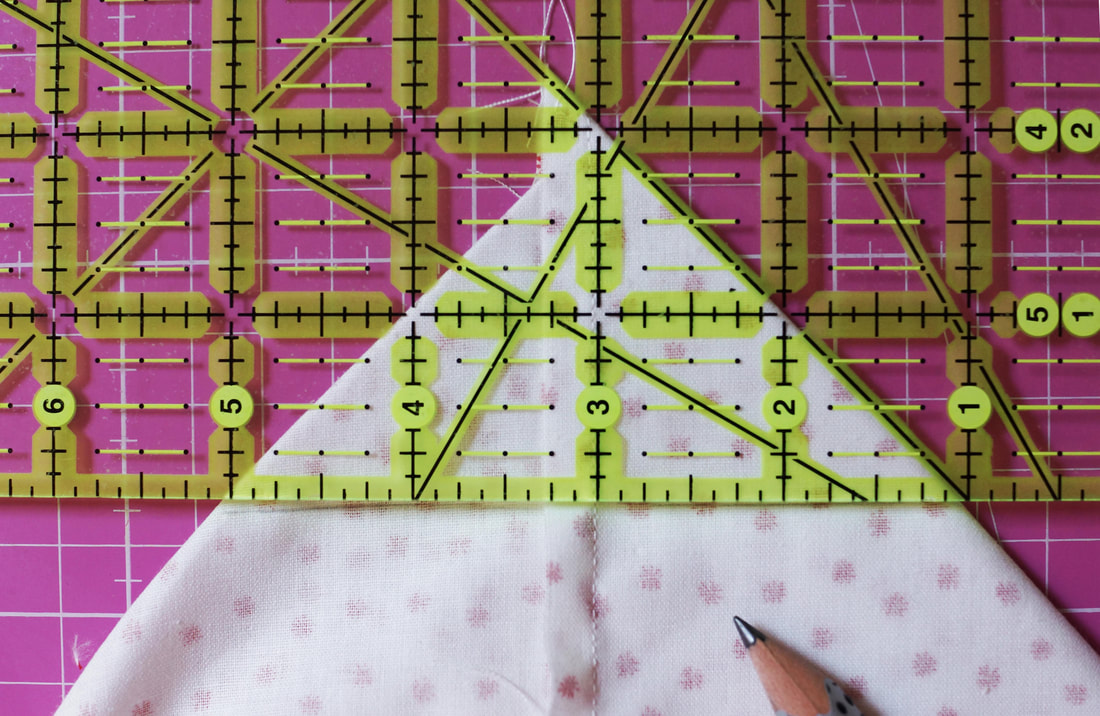
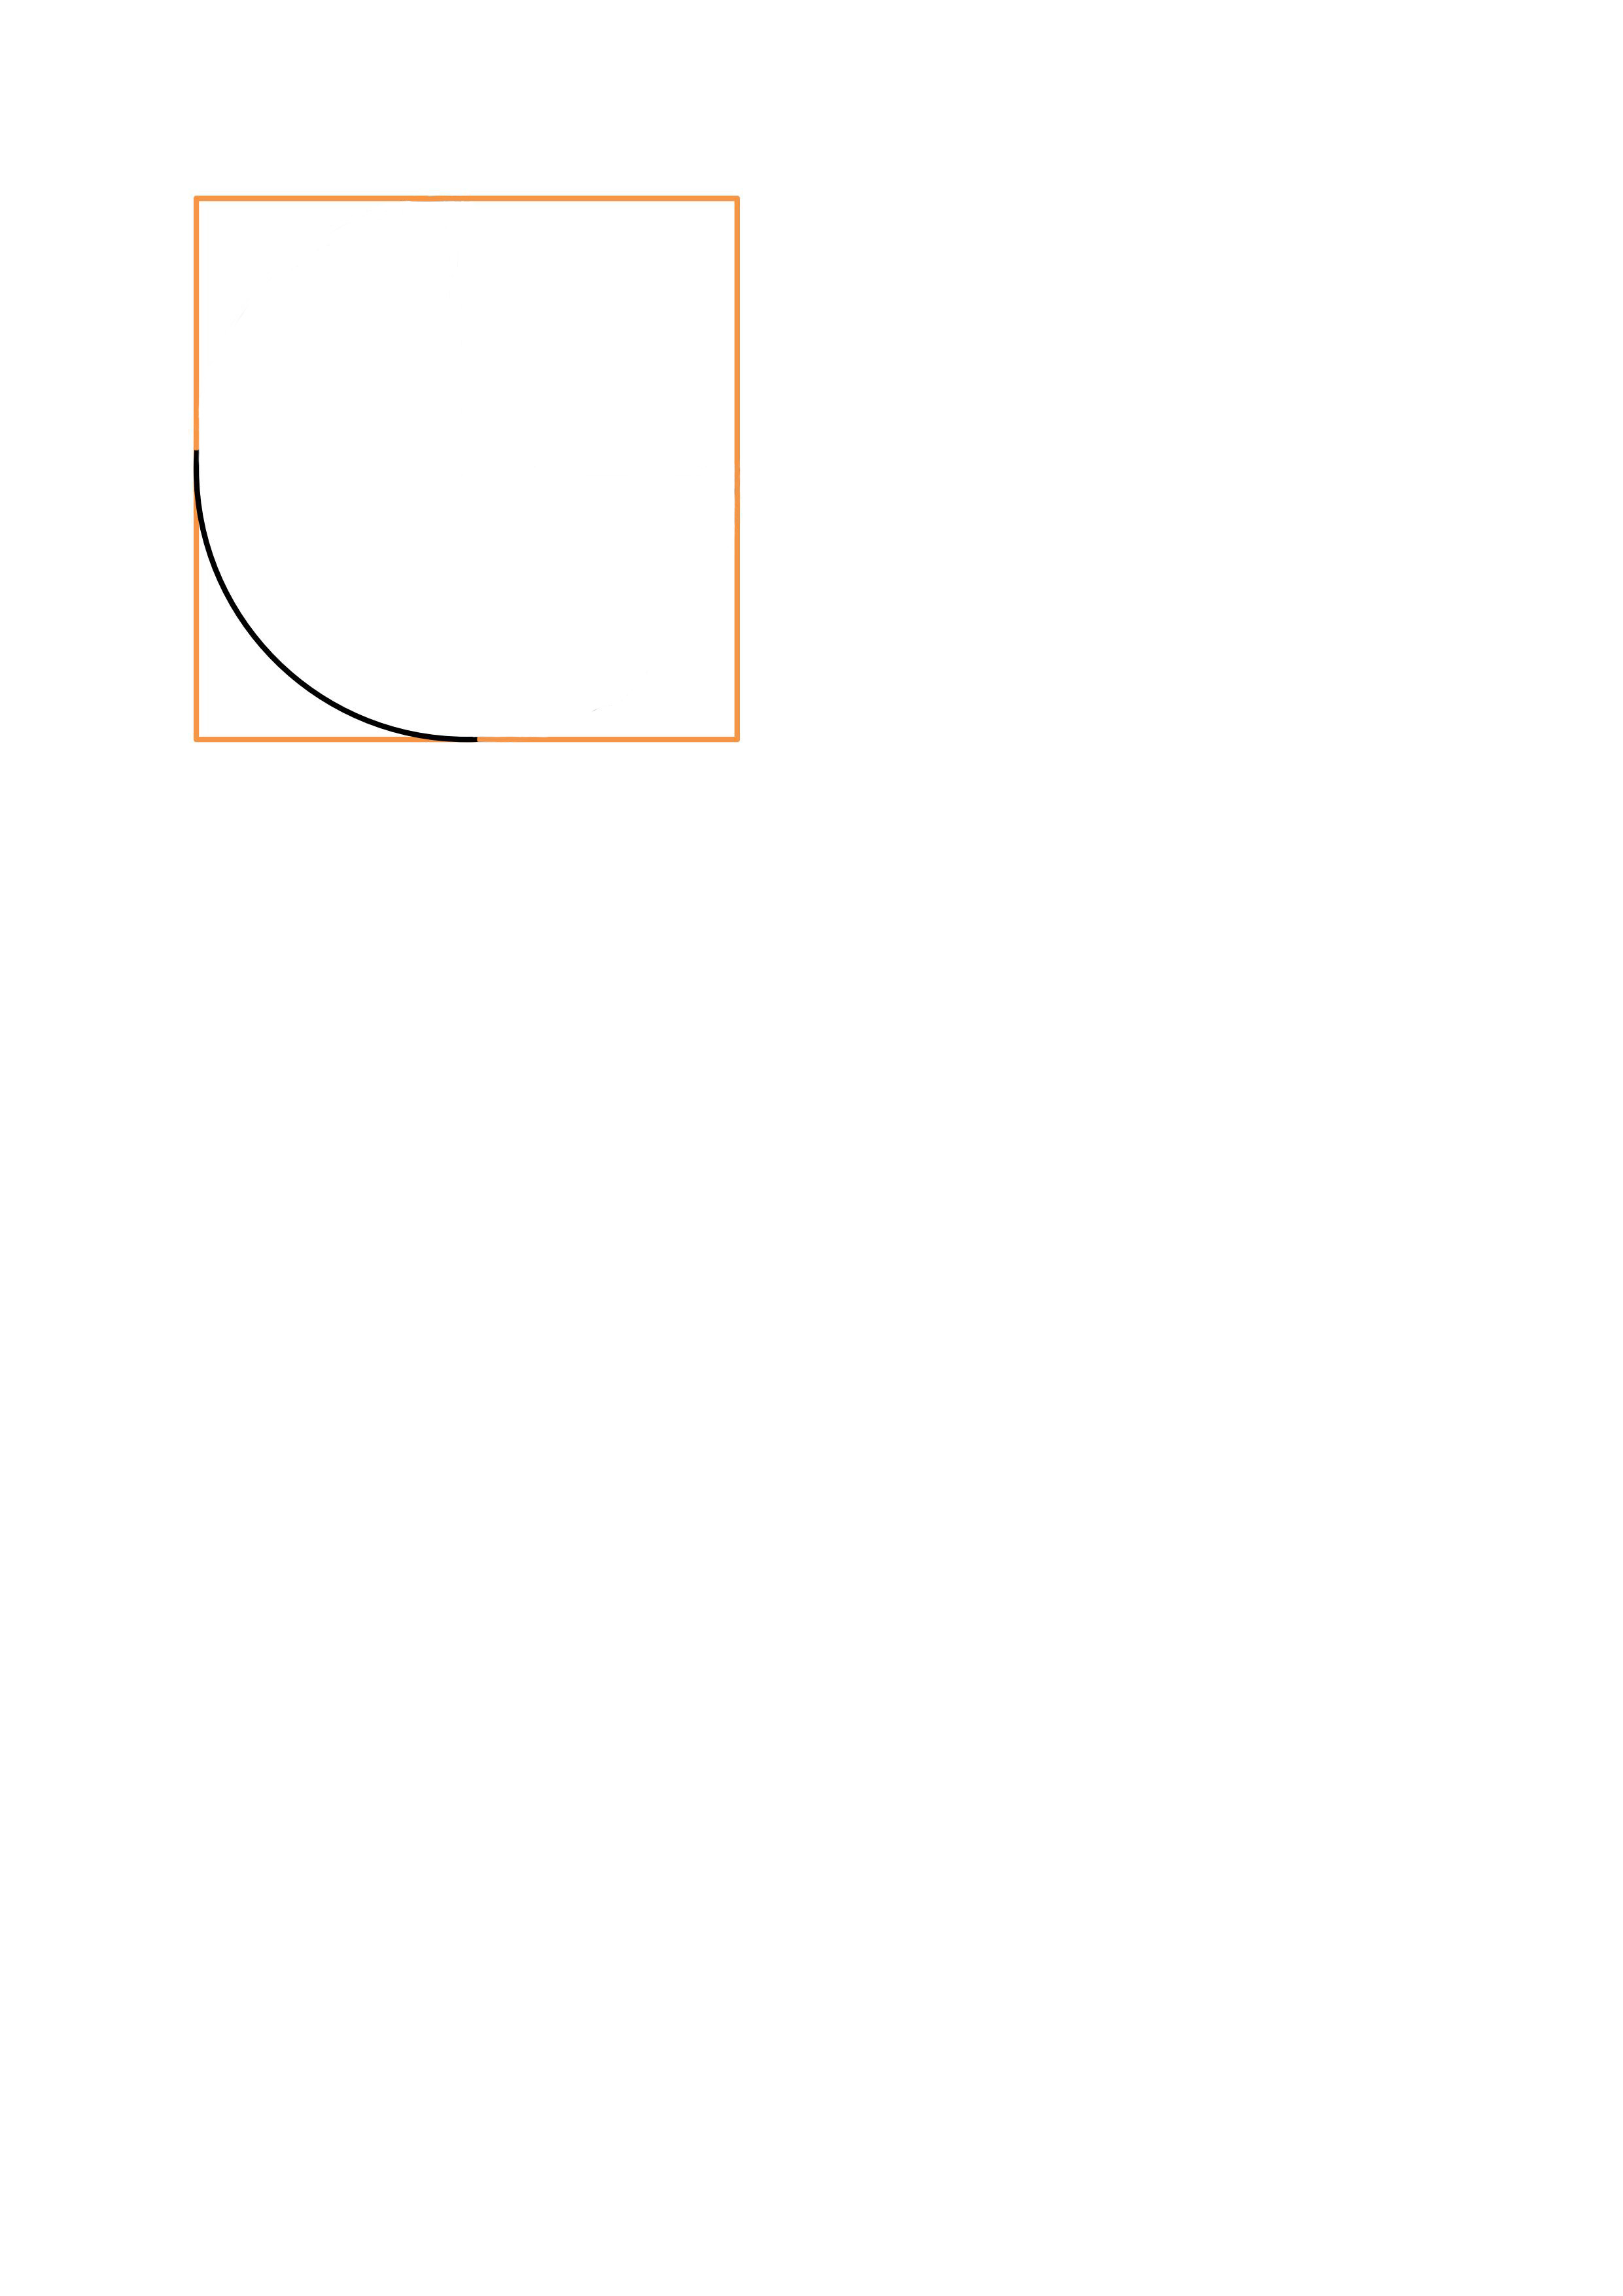
For a flat bottom of your bag, you need to box all four corners of the drawstring bag.
Two corners of the lining and two corners of the exterior fabric. Starting with flattening the corner, the seams, bottom seam and side seam should be on top of each other. Then measure 2" (1.5"for the small bag) from the top corner with an acrylic ruler and draw a line across with your fabric marker or a water soluble pen. Stitch along that line and trim off the corner, leaving a 1/4" seam allowance. (Repeat this for all four corners) 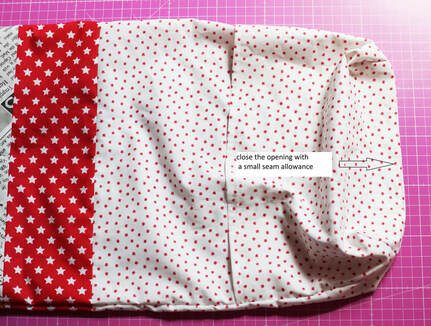
close the opening with a small seam allowance
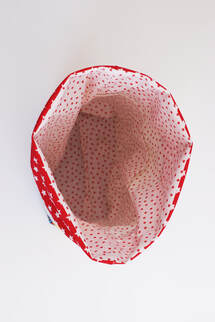
Turn your bag by turning the pieces right sides out, pulling through the opening in the
lining. Push out the corners nicely. Press the lining opening under 1/4"and stitch closed with a small 1/8" seam allowance.
Fold the lining into the exterior of the bag. Press along the top edge.
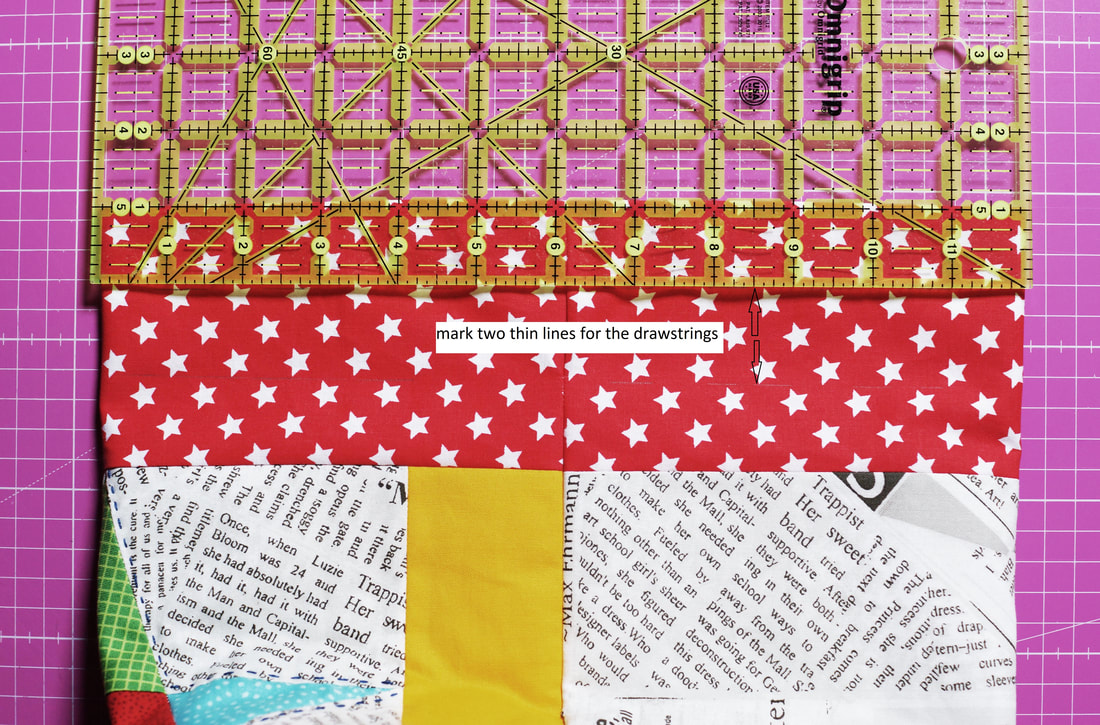
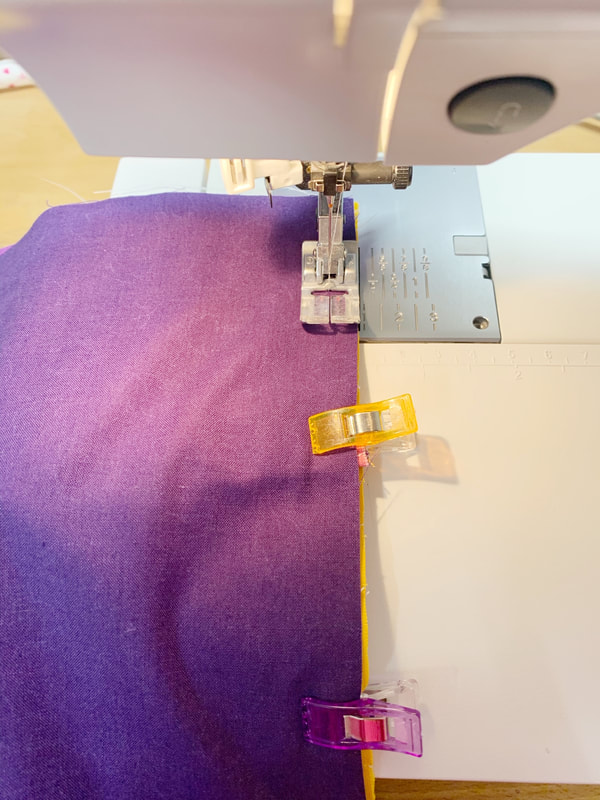
Mark two thin lines onto the drawstring panel with a fabric marker or a water soluble pen.
One line at the top of the 1" opening for the drawstrings, and a second line at the bottom of the 1" opening for the drawstings. Mark those line all the way around the top of the bag. This will be your drawstring casing. Sew along those two lines all the way around the bag.
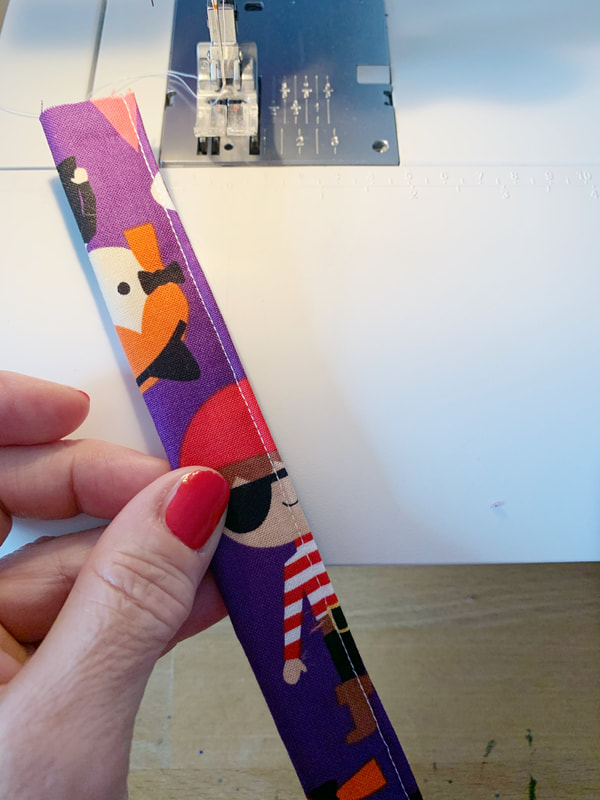
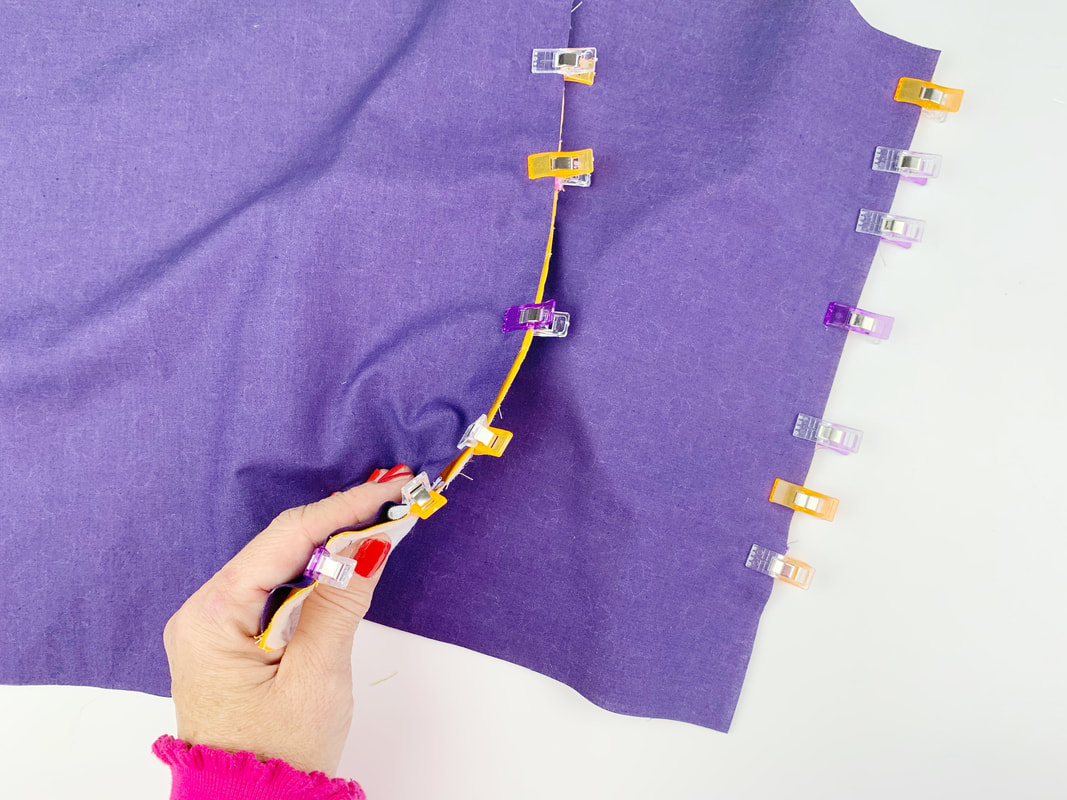
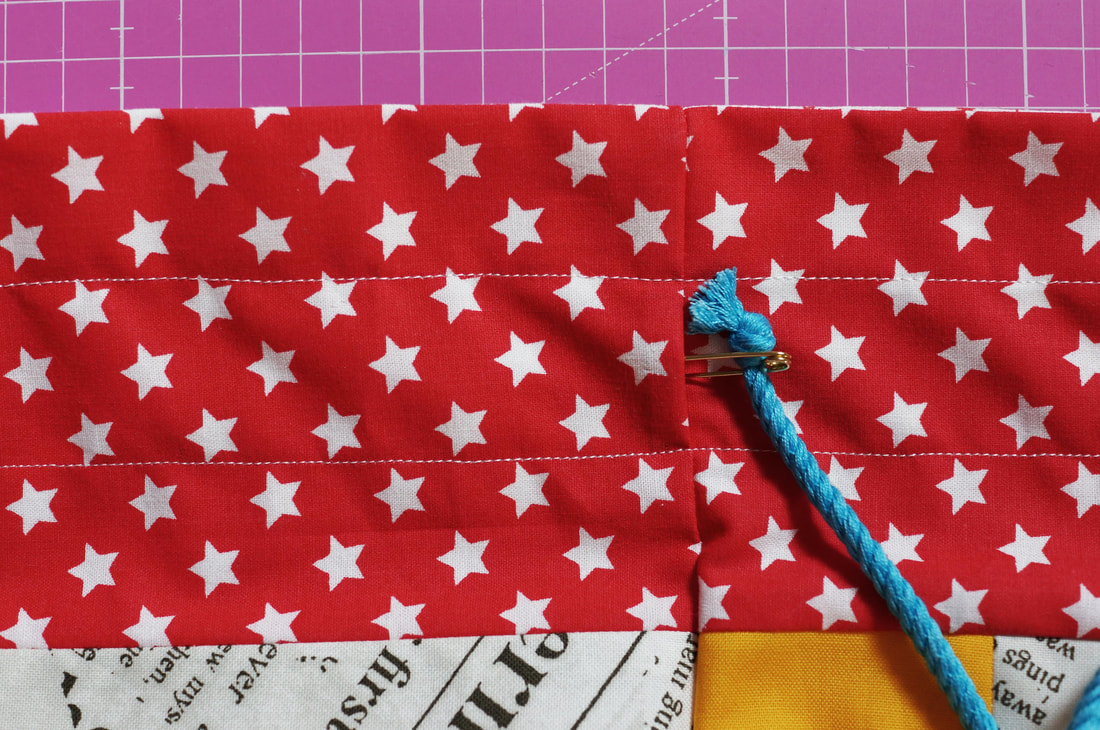
Attach a safety pin to one end of your rope, ribbon or fabric tie.
Insert the safety pin into one of the side openings. Work it through, pulling it all the way back around the whole bag and out the opening where you started. Even out your the ends and tie them into knots seperatly or together. Repeat with the other tie, starting at the opposite side opening. 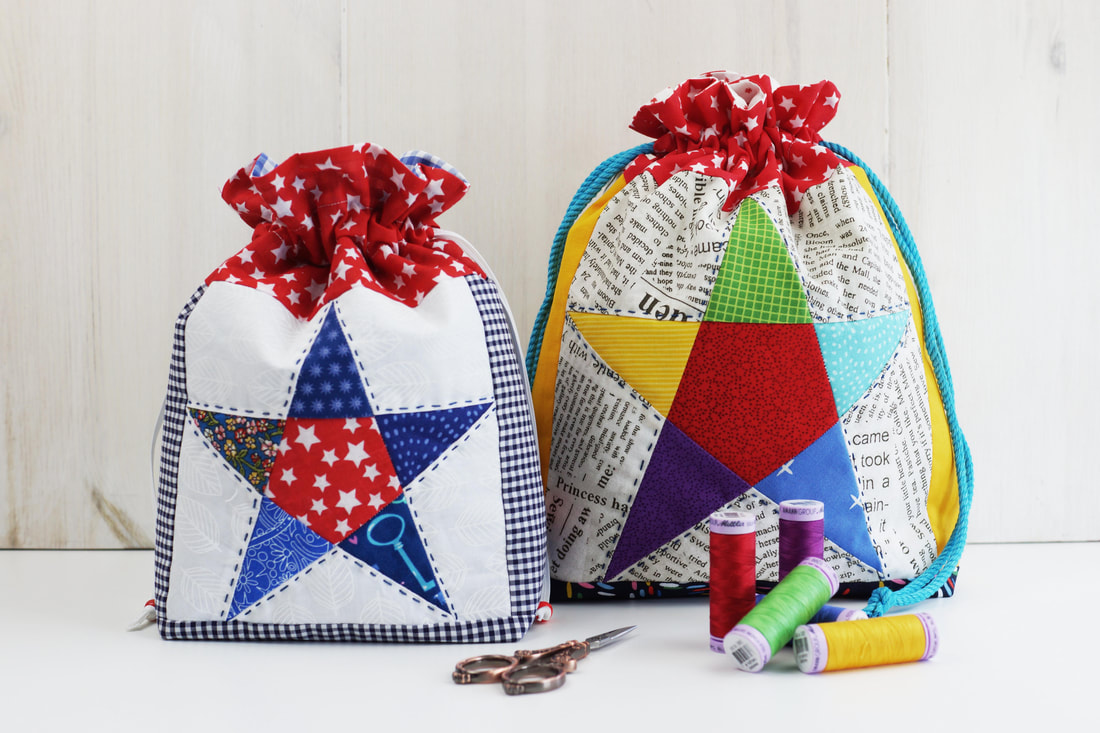
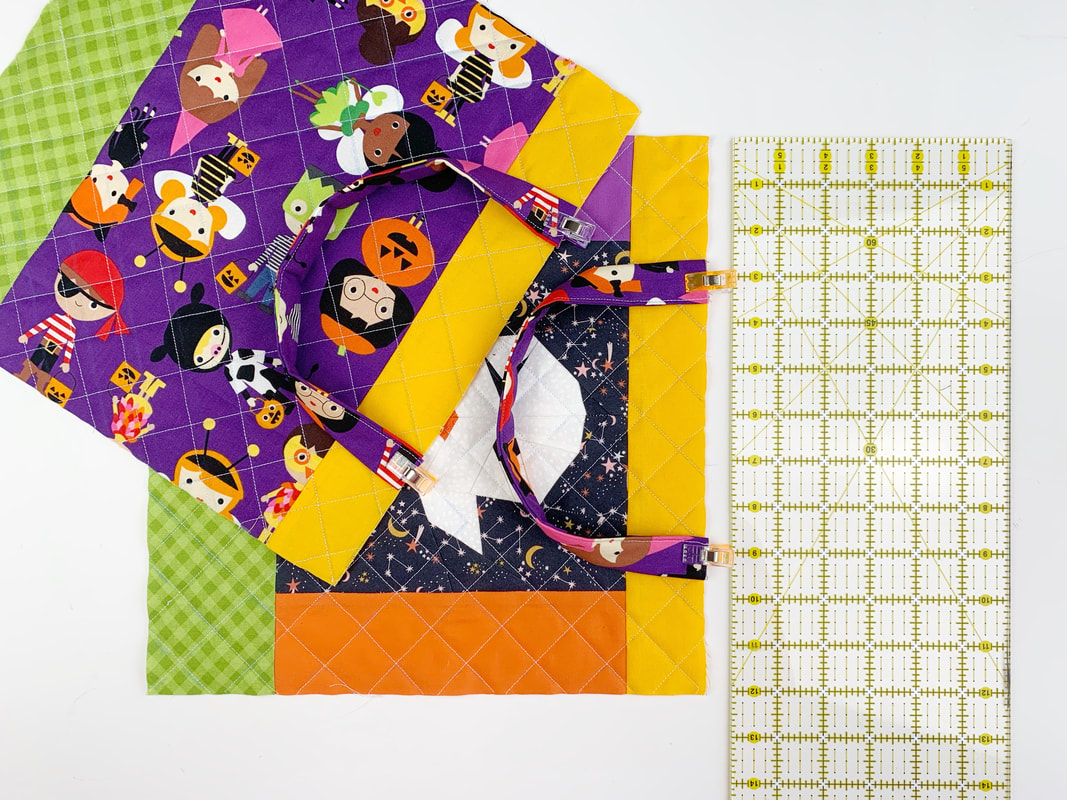
Aaaaaand YAAAAAY..... all done.

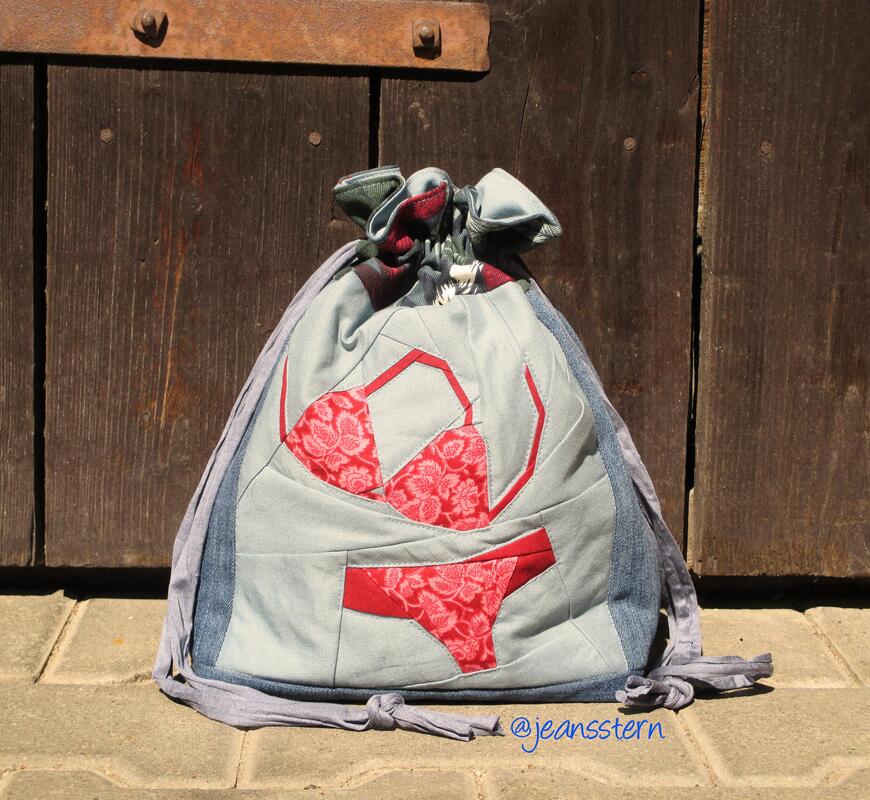
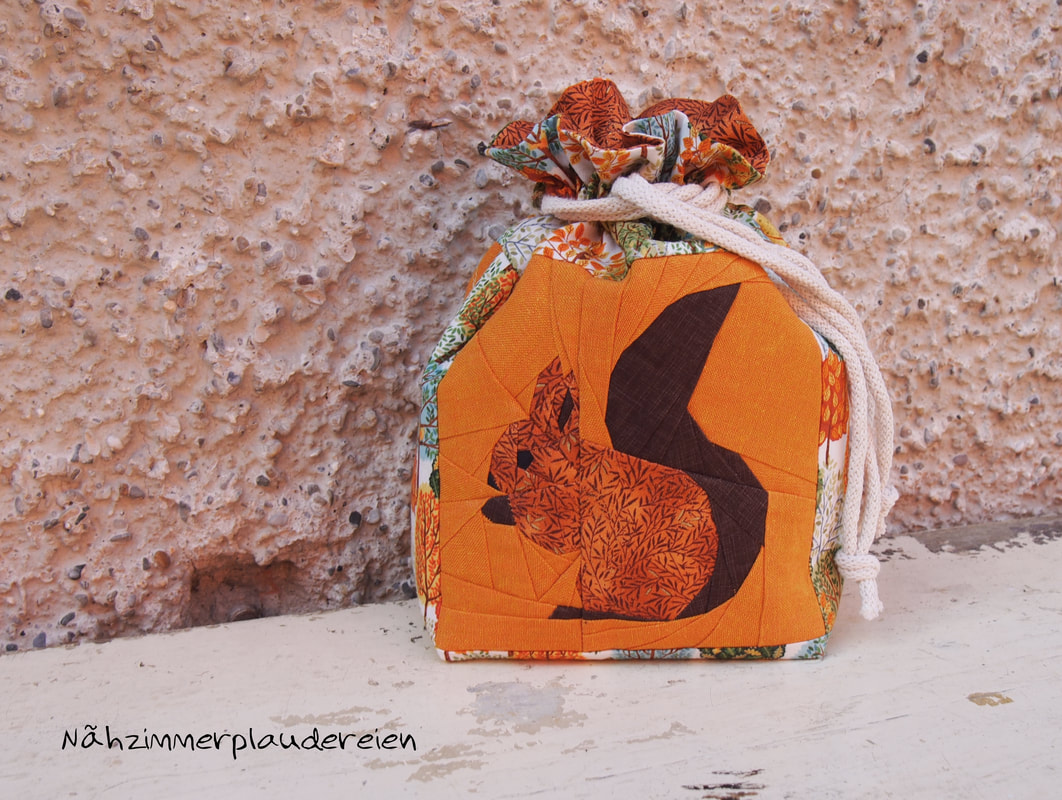
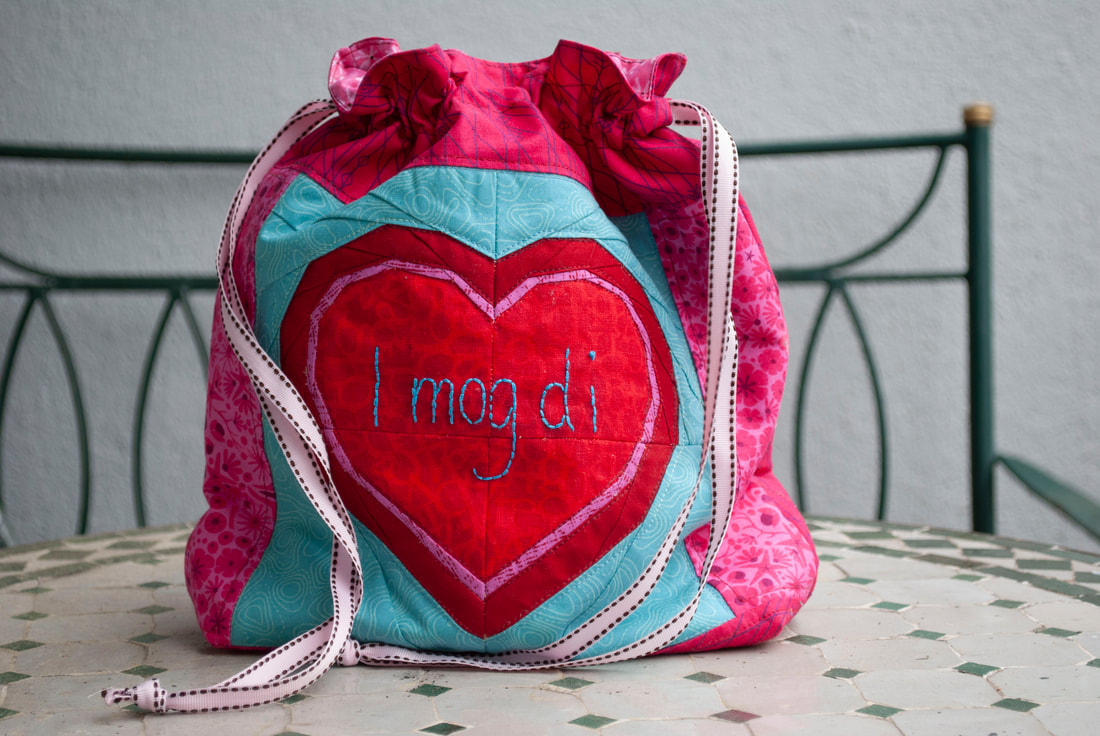
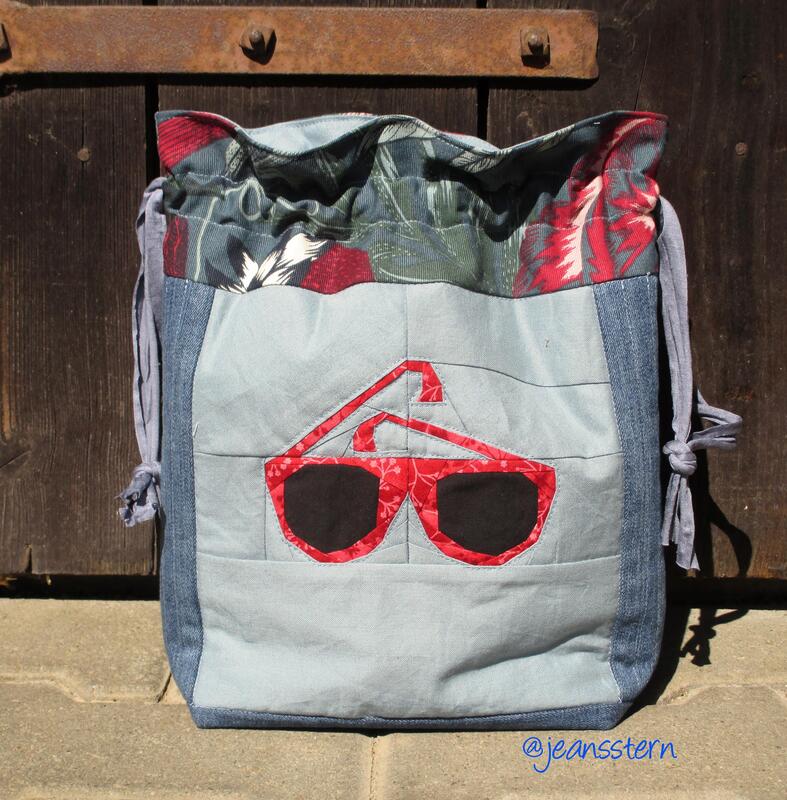
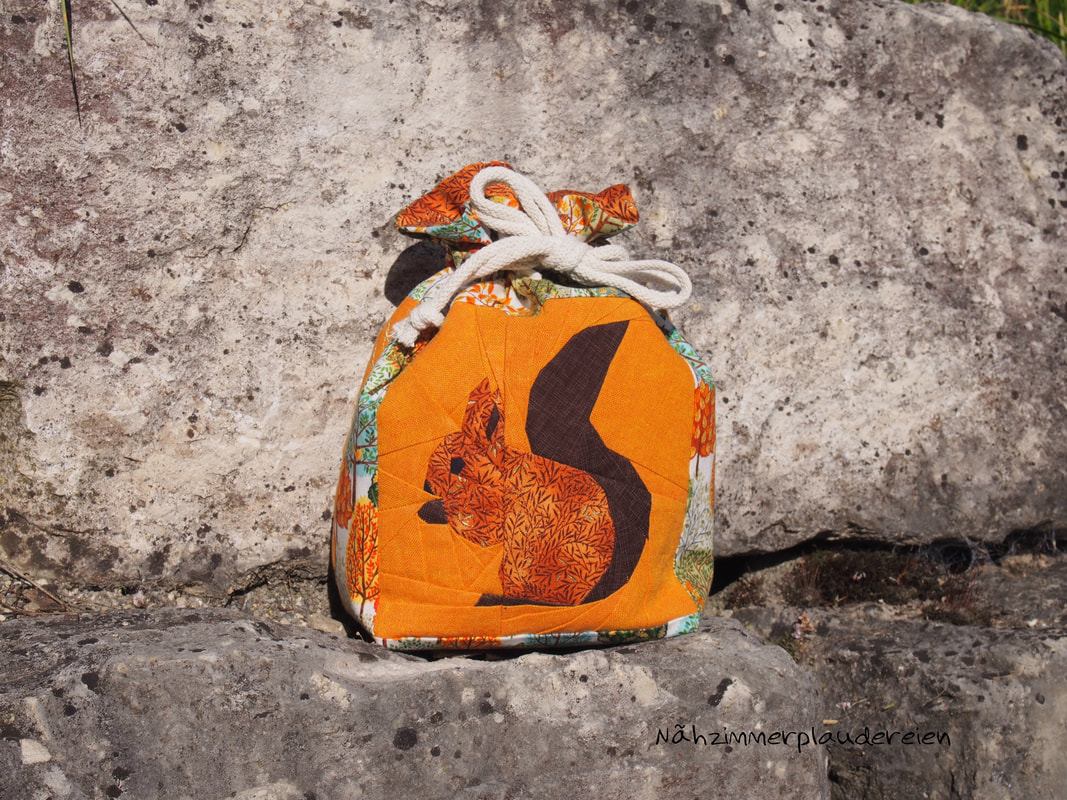
And here are some more inspirations on this bag, with all sorts of blocks from my small collection of quilt blocks ....
Share your makes on social media ... use #quilteddrawstringbag so I can cheer your creations, and if you want I can share them here on my blog. |

Author
Ingrid Alteneder Archive
March 2022
Categories
All
|


 RSS Feed

|
Visit us at
|